
Teammate groups [new]
⚠️ This article references the new permissions system. Front companies using legacy permissions can view the instructions here.
Overview
Teammate groups allow you to create centralized lists of users that can be used to:
Grant workspace access and permissions to teammates
Manage shared inbox and contacts access
Route conversations in rules
Use teammate groups to simplify onboarding, define permissions across multiple workspaces, or quickly reference a list of teammates in rules or other resources. For example, to notify everyone in a particular time zone, or grant inbox or contact access to a specific group of teammates.
Keeping these lists accurate and up to date can be tedious and error-prone as you create new rules/inboxes or as teammates come and go. Teammate groups make the process cleaner and quicker.
Create or edit teammate groups
Step 1
Click the gear icon, navigate to company settings, then select Teammate groups.
Step 2
Click Create teammate group, or select an existing one to edit it. In this example, we’ll create a new teammate group.
Step 3
Enter a name, description, and add teammates to the group.
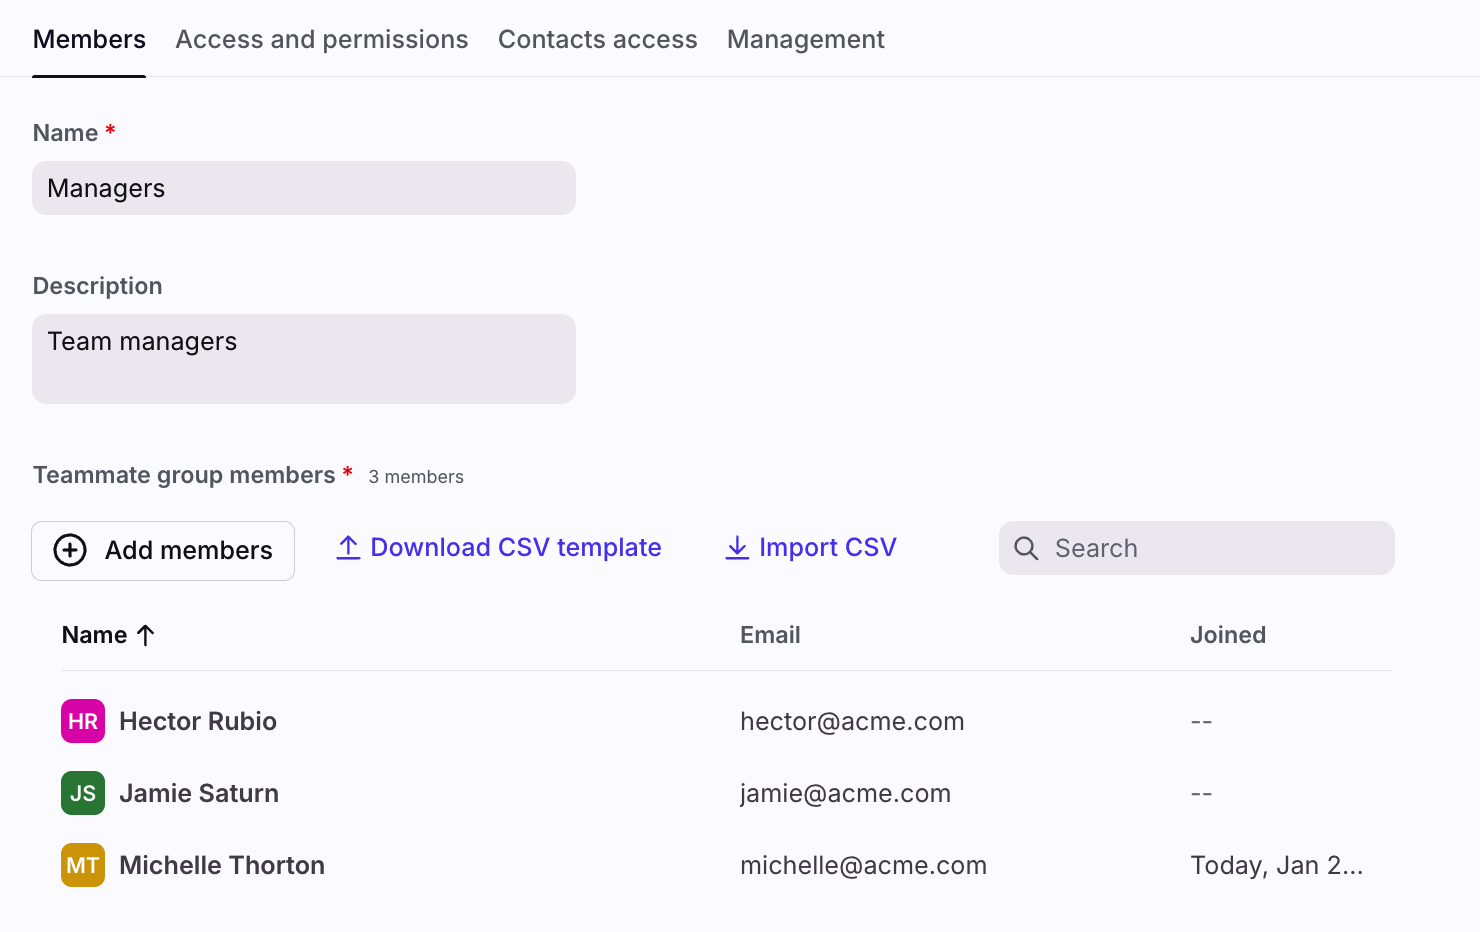
Step 4
Click Create.
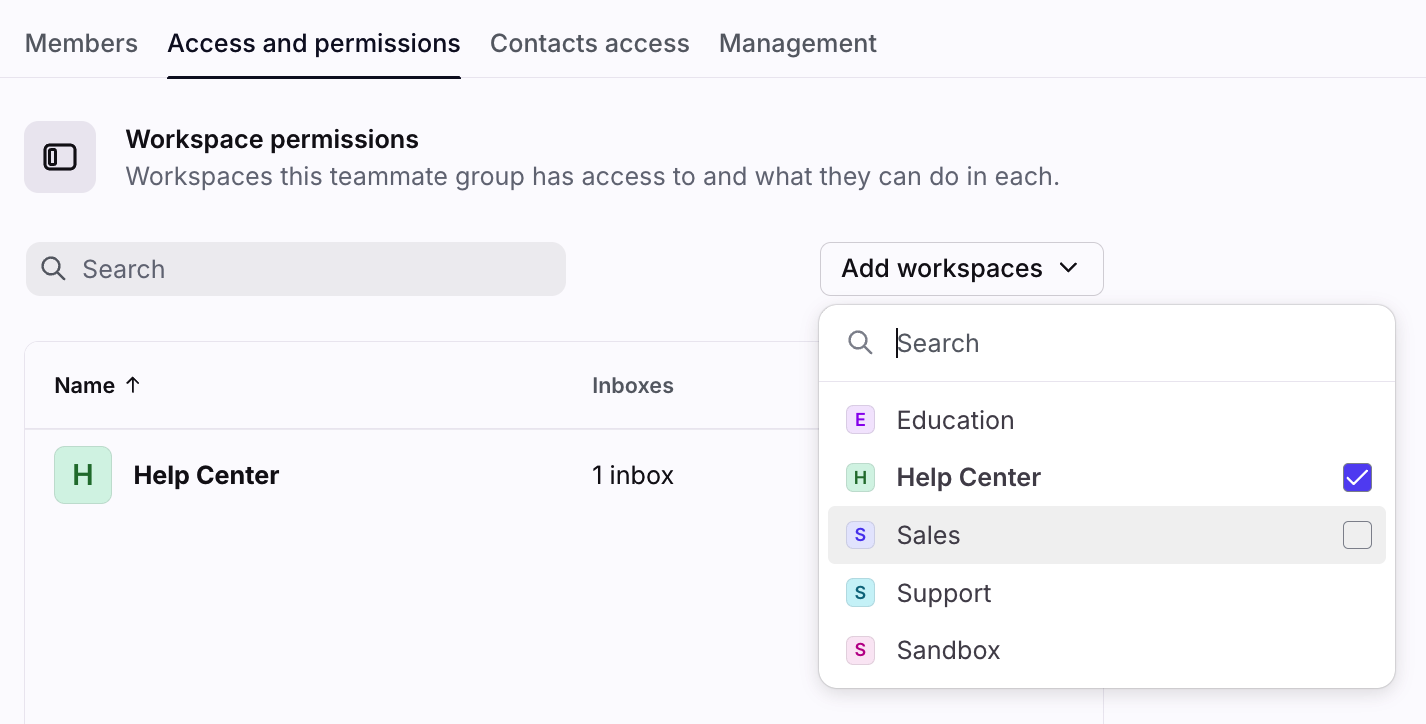
Step 5
In the Access and permissions tab, click Add workspaces. Select the workspace(s) that teammates in this group should have access to, then click Save.
Step 6
Select the workspace from the list to navigate to the Shared inboxes tab. In the Access column, toggle on the inboxes you would like all teammates in the group to have access to. Public inbox access is automatically granted.
Click Save.
Step 7
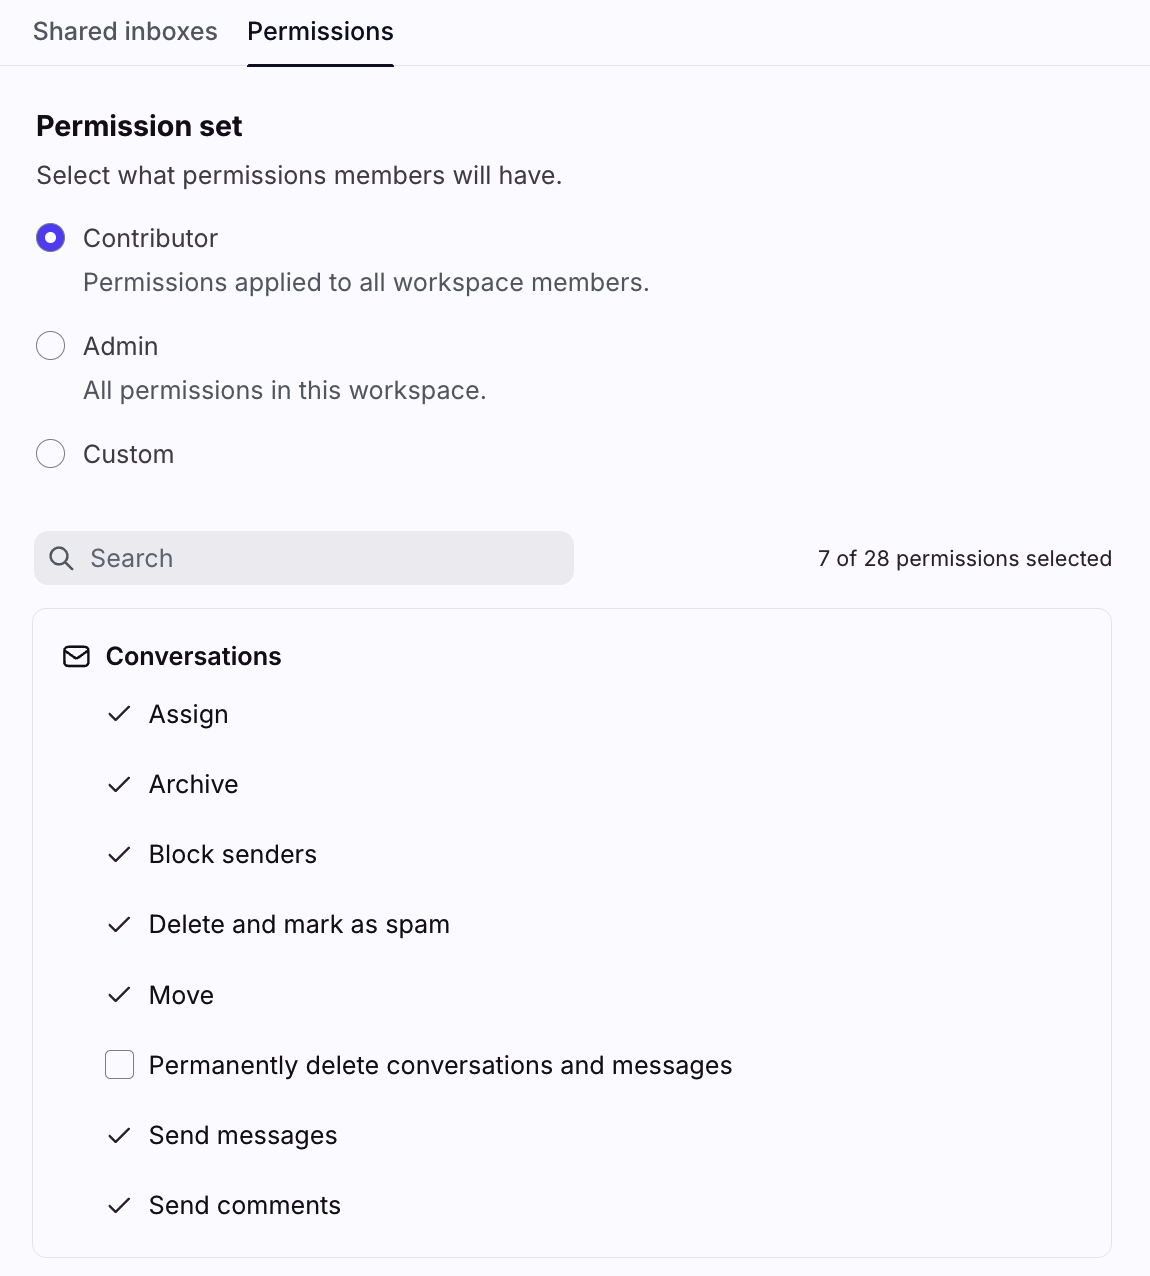
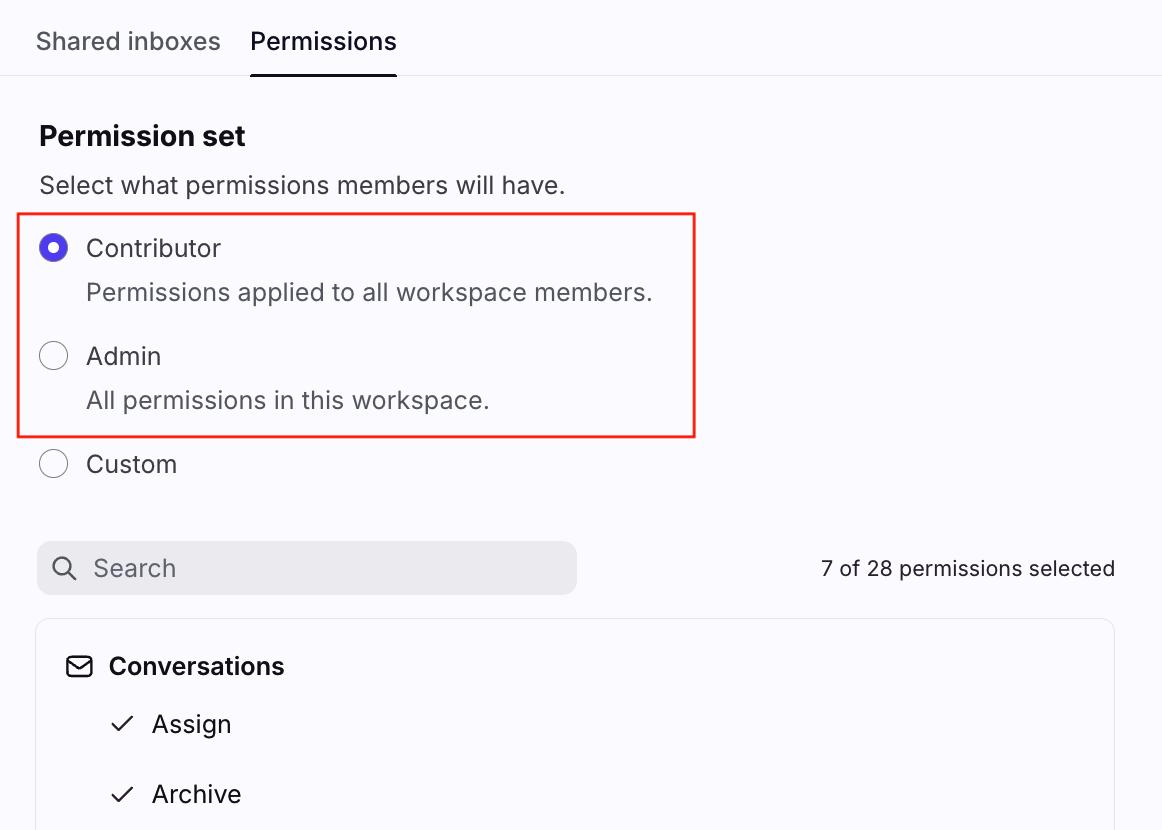
In the Permissions tab, select which permissions members of this teammate group will have in this workspace.
Permission set options:
Contributor: Members of the group will be granted the permissions set to Everyone in the Permissions page in workspace settings.
Admin: Members of the group will be granted all permissions in the workspace.
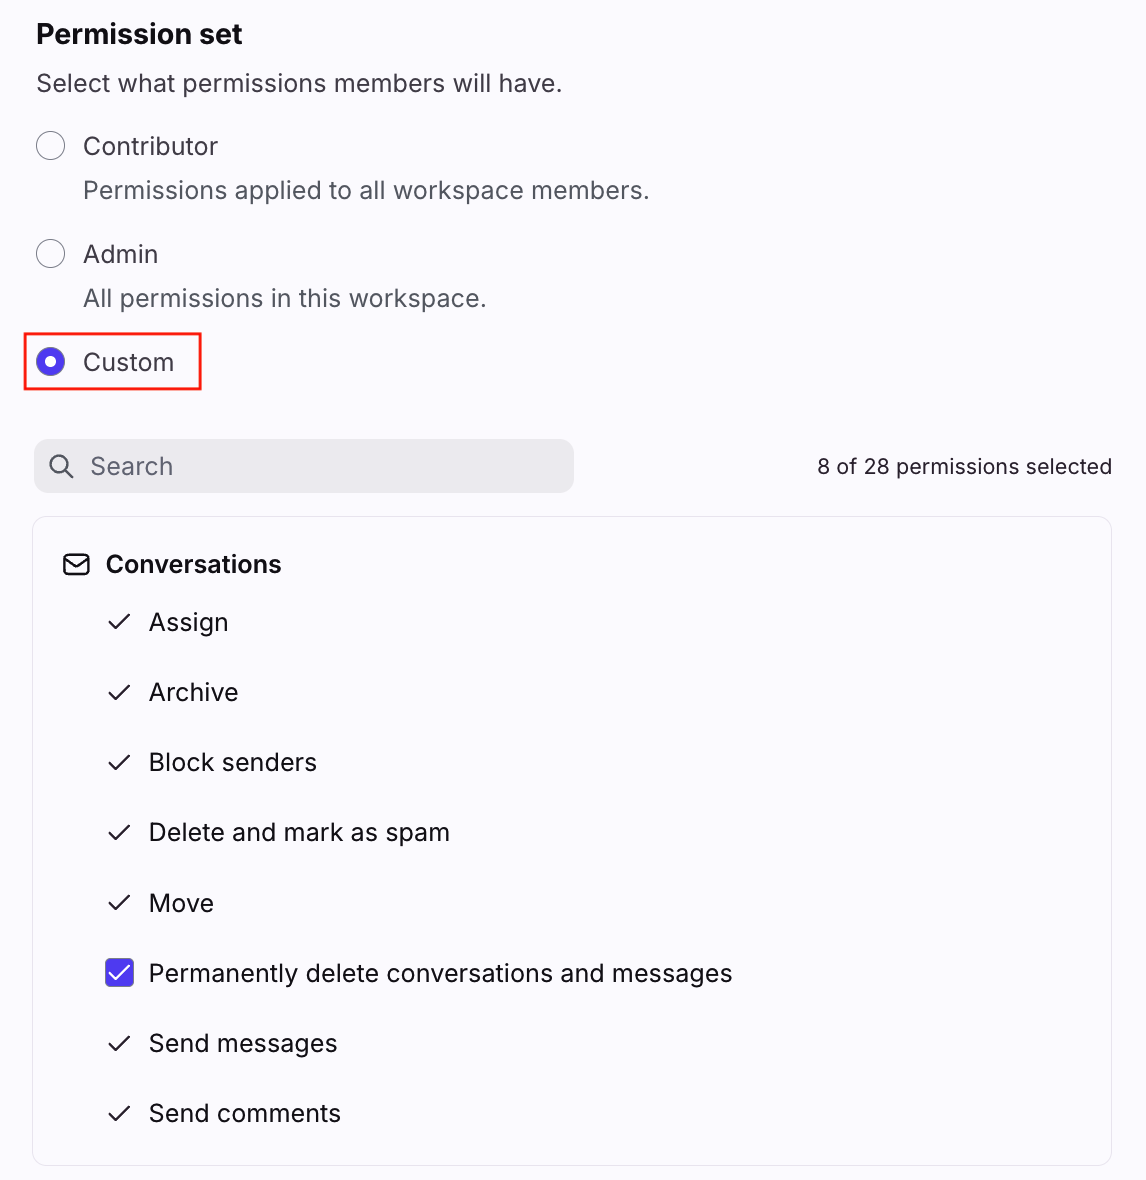
Custom (Enterprise and legacy Scale plans only): Members of the group will be granted permissions selected in the teammate group.
To learn more about permissions, see the section below.
Step 8
Click Save to finish. The members in the teammate group will now be granted permissions to the selected workspaces and shared inboxes.
Step 9 (optional)
Navigate to the following tabs to manage additional features:
Contacts access tab: Restrict or grant access to shared contacts. See this section to learn more.
Management tab: Allow non-company admin teammates to manage teammate groups. See this section to learn more.
Resource permissions
Permissions listed in teammate group and workspace settings will allow teammates to take these actions in shared inboxes and other workspace resources. They will still have full access to take actions in their individual inboxes.
Permission sets
Permission sets are predefined bundles of workspace permissions that can quickly be applied to a teammate group. There are two permission sets: Contributor or Admin.
Contributor: Grants the permissions set to Everyone in the Permissions page in workspace settings. See this article to learn more.
Admin: Grants all permissions in the workspace. Use this permission set to give workspace admin-level access to the group. This does not grant company admin permissions.
Important to know: The Admin preset will grant access to the following features that are not available as standalone permissions:
Bots and engagement settings
Front AI settings
Custom permissions
Enterprise and legacy Scale plans only: Select Custom in a teammate group’s Permissions setting to grant specific permissions in a workspace, listed in the Admin section below. This is useful when different roles within your company require a specific set of permissions.
Default permissions configured in the Permissions page in workspace settings are automatically selected.
Example use cases:
Use case | Permissions |
Your Operations team consists of roles like City Manager or Team Lead | Set up “City Manager” and “Team Lead” teammate groups with custom permissions between the Contributor and Admin permission sets |
You want managers to create tags to help enforce workflows and keep your setup clean | Set up a “Managers” teammate group and enable the Tags - Create, edit and nest permission |
You want team leads to create and edit signatures and message templates to build consistent messaging for your support team. | Set up a “Team Leads” teammate group and enable the following permissions:
|
When onboarding and training new teammates, you want to grant them access to shared inboxes to collaborate internally such as on drafts, but limit their ability to send outbound messages until they are fully trained | Set up an “Onboarding” teammate group and disable the Conversations - Send messages permission |
You want to limit assignment responsibility to a manager, so agents can focus on the messages being assigned to them | Set up a “Managers” teammate group and enable the Conversations - Assign permission |
All permissions
See below for a list of all permissions available in teammate groups and workspace settings.
* Asterisks denote permissions initially included in the “Contributor” permission preset.
Category | Permission | Notes |
Conversations | Assign* | Allows users to manually assign conversations. |
Archive* | Allow users to archive conversations. | |
Block senders* | Allows users to block senders in conversations. Contact access is also controlled by teammate groups. Enabling Block senders also enables the Delete and mark as spam permission. | |
Delete and mark as spam* | Allows users to soft delete entire conversations or mark them as spam. Conversations are moved to the Trash or Spam folder. | |
Move* | Allows users to move conversations to other inboxes. | |
Permanently delete conversations and messages | Allows users to:
| |
Send messages* | Allows users to send messages in conversations. Only restricts sending from shared channels. Users can still send from their own personal channels. | |
Send comments* | Allows users to add comments to conversations. | |
Teammates | Manage | Allows users to manage teammate settings. Users must have company admin permissions to invite new teammates. |
Permissions | Manage | Allows users to access the Permissions page in workspace settings. See this article to learn more. |
Shifts | Create and edit | Allows users to manage shifts and workspace business hours. |
Delete | ||
Shared inboxes | Create, edit and delete | Allows users to manage shared inboxes. |
Tags* | Create, edit and nest | Allows users to manage workspace tags. |
Delete | ||
Archive and restore | ||
Apply and remove tags to conversations | Allows users to add or remove tags from conversations. | |
Views | Create and edit | Allows users to manage shared views for a workspace. |
Delete | ||
Templates* | Create and edit | Allows users to manage shared message templates and task templates for a workspace. |
Delete | ||
Signatures | Create and edit | Allows users to manage shared signatures for a workspace. |
Delete | ||
Rules and macros | Create and edit | |
Delete | ||
Analytics | Access | Allows users to view workspace analytics reports. |
Edit | Allows users to manage analytics views. | |
Sequences* | Access | Allows users to send workspace sequences. |
Manage contact access
Use the Contacts access tab in teammate groups to manage access to shared contacts based on group membership. Once enabled:
Teammates can only browse shared contacts if they belong to a group that was granted access.
Teammates who are not in teammate groups, or are in teammate groups set to Restrict to contact lists or No access will not see the Contacts icon in the top toolbar.
Teammates can always see contacts when browsing conversations they have access to.
Company admins can always see all contacts.
Step 1
Click the gear icon, then navigate to company settings.
Step 2
Click Teammate groups in the left menu, then select the teammate group you want to edit.
Step 3
Select the Contacts access tab, then click Enable contacts permissions.

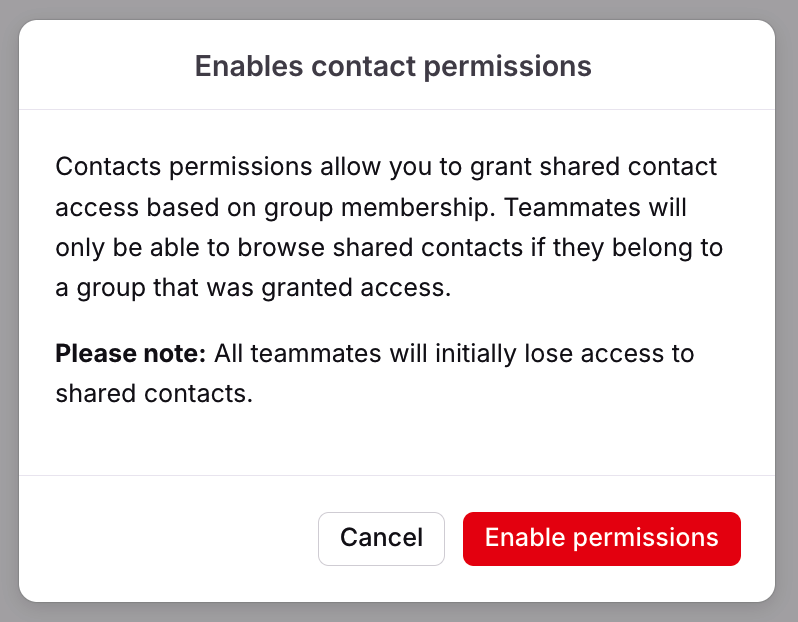
Step 4
A pop-up will appear. Click Enable permissions to confirm.
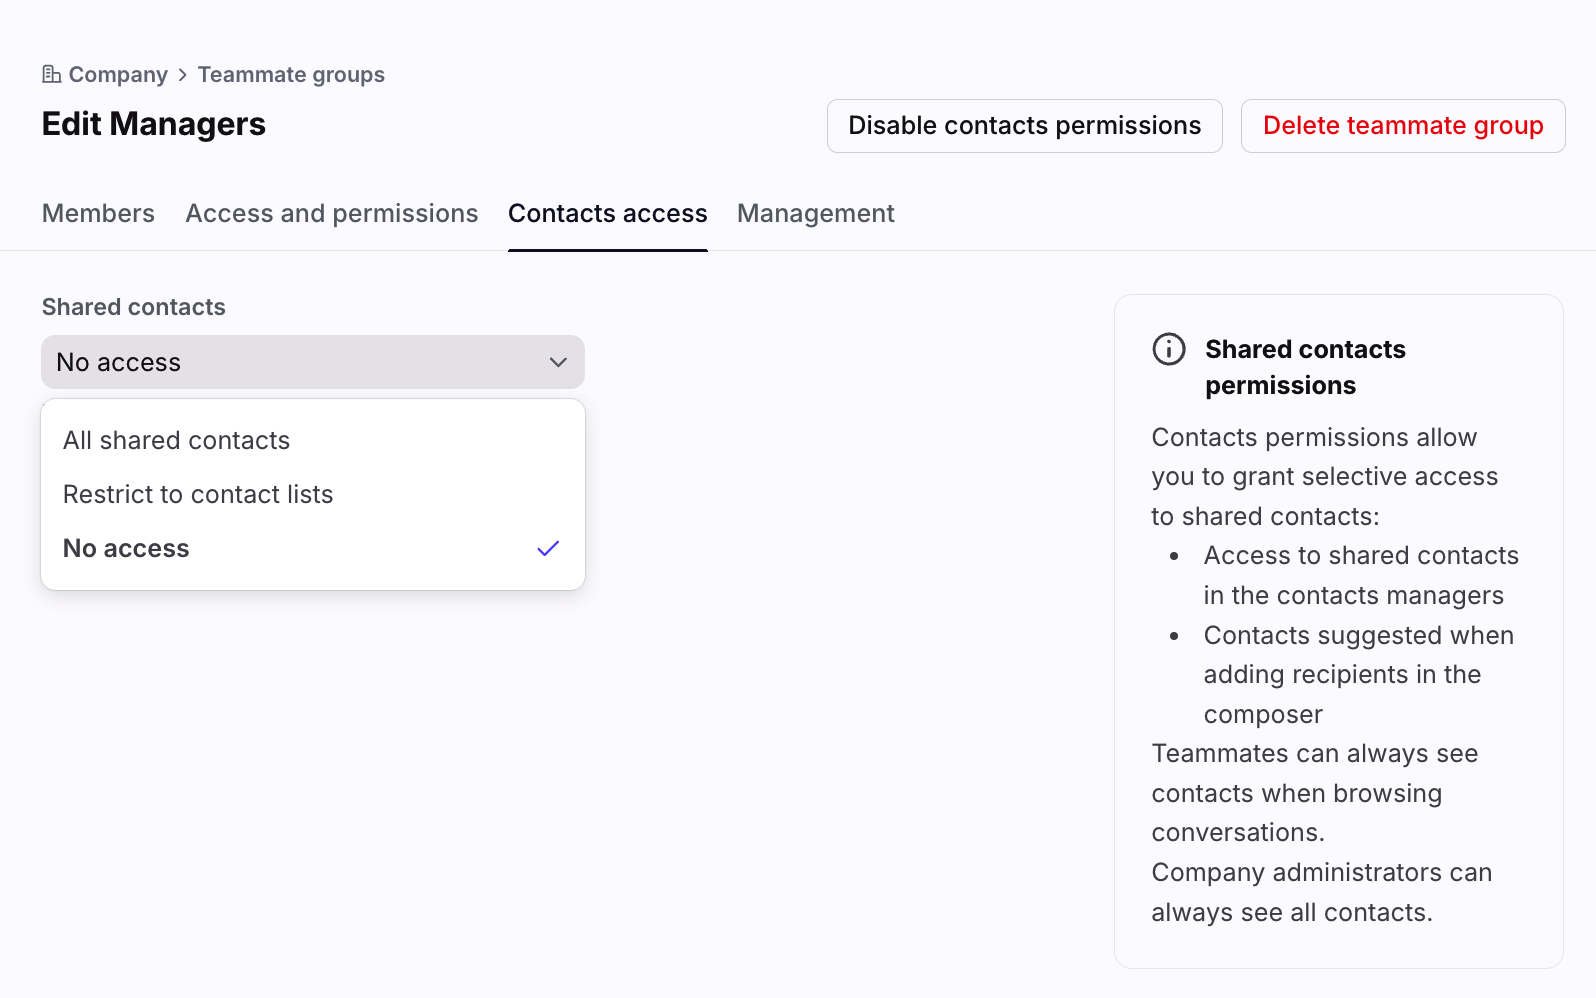
Step 5
Select the level of access your teammate group should have:
All shared contacts: Group members can browse and edit all shared contacts.
Restrict to contact lists: Group members can't access the Contact Manager in the top toolbar, but will receive recipient suggestions in the composer from the selected contact lists. They can see contact information in the Contact Details plugin, but can't edit any contact/account fields.
No access: Group members can't access the Contact Manager in the top toolbar, and can't see shared contacts when adding recipients to the composer. They can't see contact information in the Contact Details plugin, and can't edit any contact/account fields.
Step 6
Click Save to finish. If you have multiple teammate groups, navigate to the Contacts access tab to repeat Step 5 for each group.
Delegate teammate group management
Initially, all company admins can create, edit, or delete teammate groups. When a company admin creates a teammate group, they can delegate these permissions to other users.
Permissions by role:
Company admins: Have full control over all teammate groups. They can create, edit, delete, and manage permissions for all groups. Company admins always retain these permissions and their access cannot be removed.
Delegated teammates/groups: Users can be granted specific permissions (Create, Edit, Delete) individually or through teammate groups. These permissions can be granted company-wide (applying to all groups) or on a per-group basis.
Types of permissions
Create: Allows the assigned teammate/group to create new teammate groups. This permission is granted at the company level only.
Edit: Allows the assigned teammate/group to modify existing groups. This includes:
Adding/removing teammates from the group.
Editing the group's name and description.
Enabling/disabling access to specific shared inboxes and workspaces for the group (subject to limitations described in the FAQ). This permission can be granted at the company level (applying to all groups) or for specific teammate groups.
Delete: Allows the assigned teammate/group to delete existing groups. This permission can be granted at the company level (applying to all groups) or for specific teammate groups.
Company-level delegation
Step 1
Click the gear icon, then navigate to company settings.
Step 2
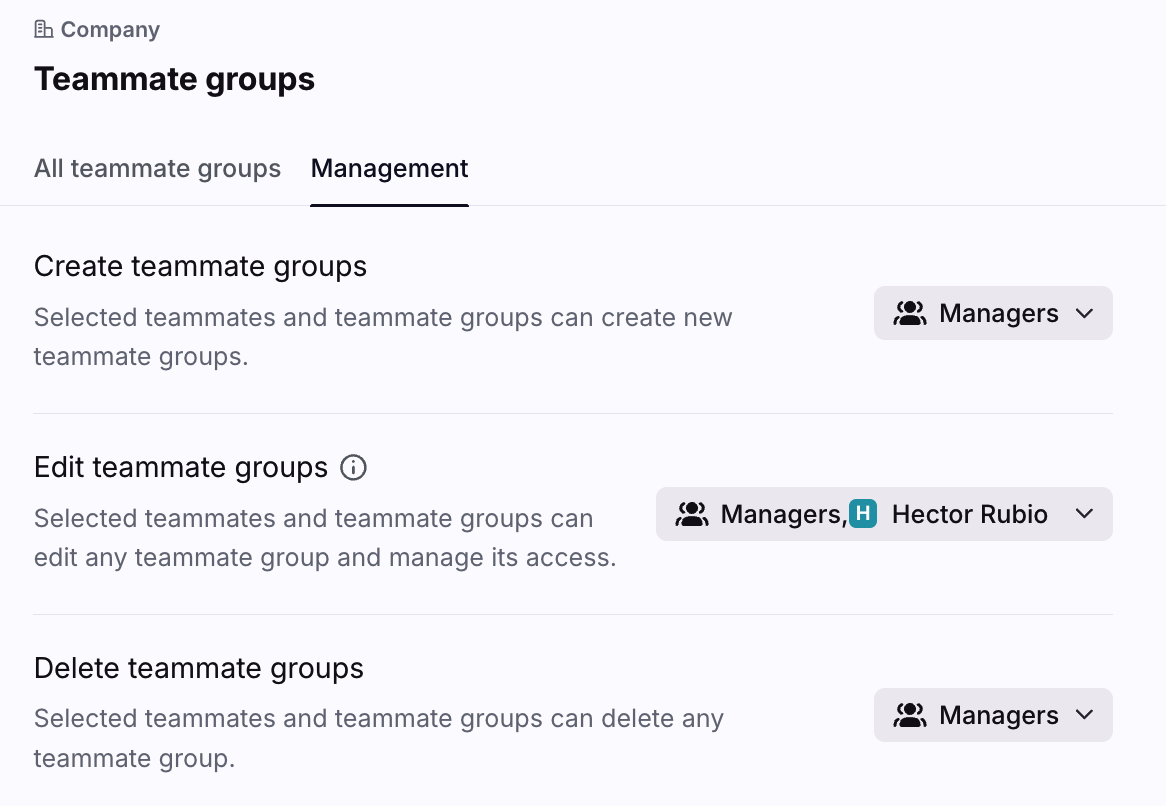
Click Teammate groups in the left menu, then select the Management tab.
Step 3
Select the teammates or teammate groups who should have permissions to create, edit, or delete any teammate group.
Step 4
Click Save.
Teammate group-level delegation
Step 1
Click the gear icon, then navigate to company settings.
Step 2
Click Teammate groups in the left menu, then select the teammate group you want to edit.
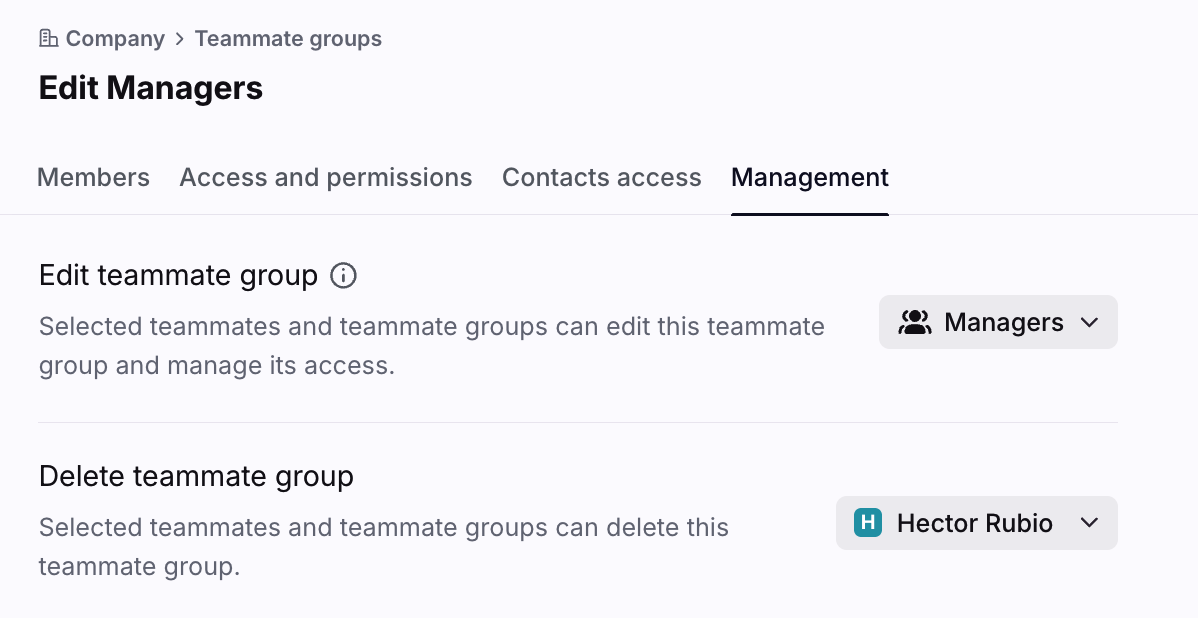
Step 3
Select the Management tab, then select the teammates or teammate groups who should have permissions to edit or delete the selected teammate group.
Step 4
Click Save.
Use teammate groups in rules
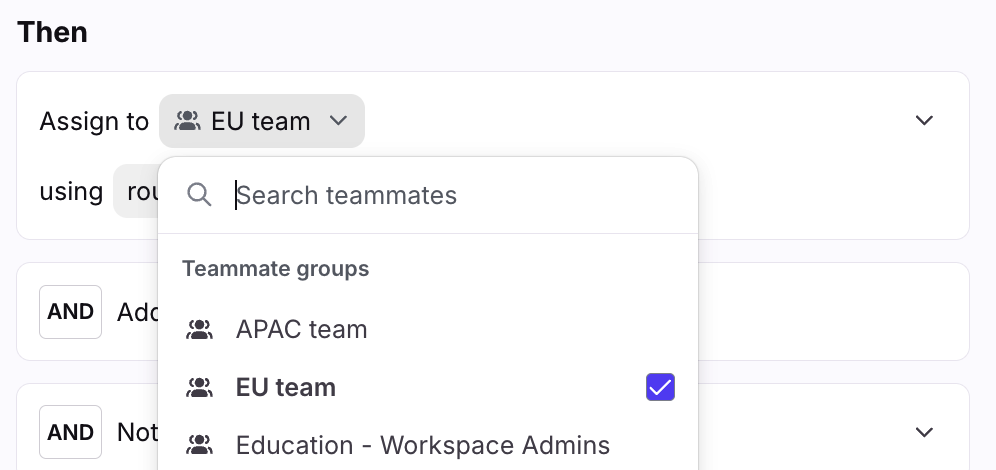
Teammate groups can be used as part of a rule in any place where it is possible to select multiple teammates. For example, this includes the rule triggers, conditions, actions:
Assignee changes
Assignee is
Assign to teammates (using round-robin or load balancing)
You can select multiple teammate groups, or a combination of teammate groups and individual teammates.
Import teammate group members
Group members can be added in bulk via CSV import. Many employee directories, such as Microsoft Entra ID, Okta, and Google Workspace, allow you to export users/user groups to CSV, which can be used to populate your teammate groups in Front.
File formatting
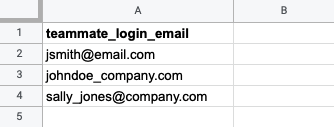
Column headings and naming conventions are critical for a successful import. The file must only contain one column described below:
Column heading | Teammate field | Example value |
teammate_login_email | Login email of the user | teammate@acme.com |
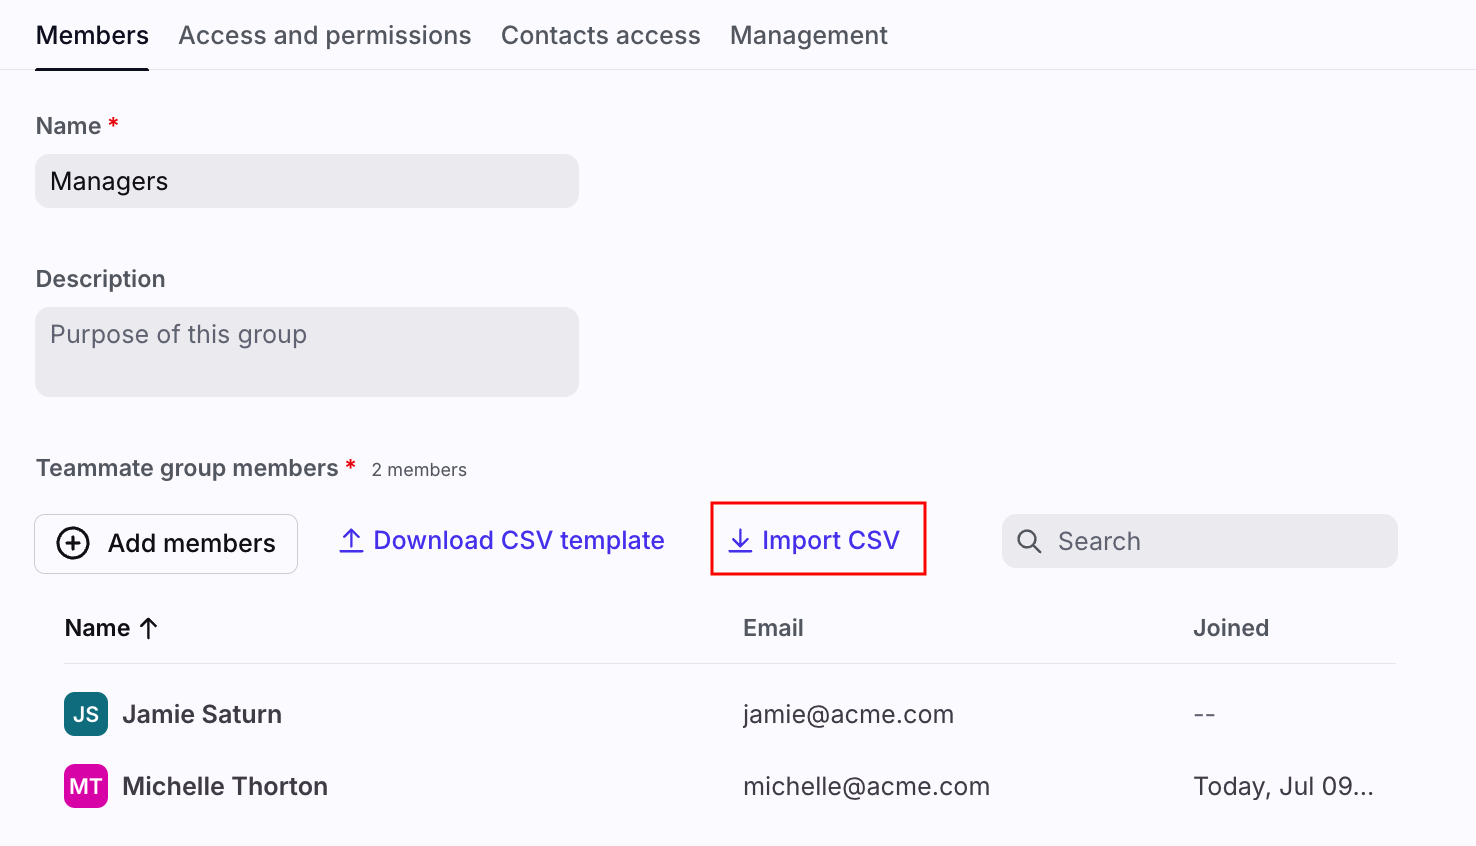
You can download a template file with this format by clicking Export CSV Template in your teammate group.
Example CSV file:
Important to know
You can upload up to 1000 rows in a single upload.
If the email does not correspond to an existing user, then they will be skipped. The remaining users will still be imported successfully.
Pending teammates (those who have been invited to Front, but have not yet logged in) can be imported to the teammate group.
If the teammate is already a member of the teammate group, then they will be skipped without error. The remaining users will still be imported successfully.
Import instructions
Step 1
In your teammate group, click Import CSV.
Step 2
Click Choose file and select your file. You can also drag and drop your file from your computer into this section.
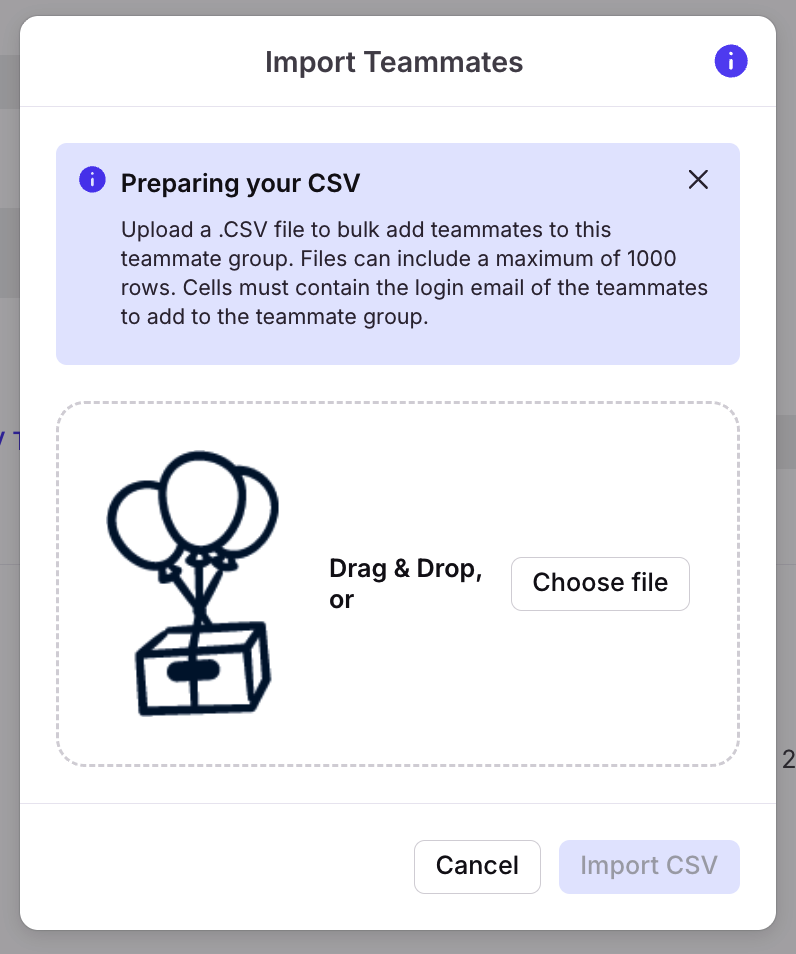
Step 3
Click Import CSV.
Step 4
Click Create when finished, or click Save if you’re editing an existing one.
Sync teammate groups from an Identity Provider (IdP)
Front can integrate with Identity Providers (IdPs), such as Microsoft Entra ID and Okta, to automatically provision user access. These integrations can also be used to push groups from the Identity Provider to Front, and automatically sync group membership. See this article to learn more about integrating with an Identity Provider.
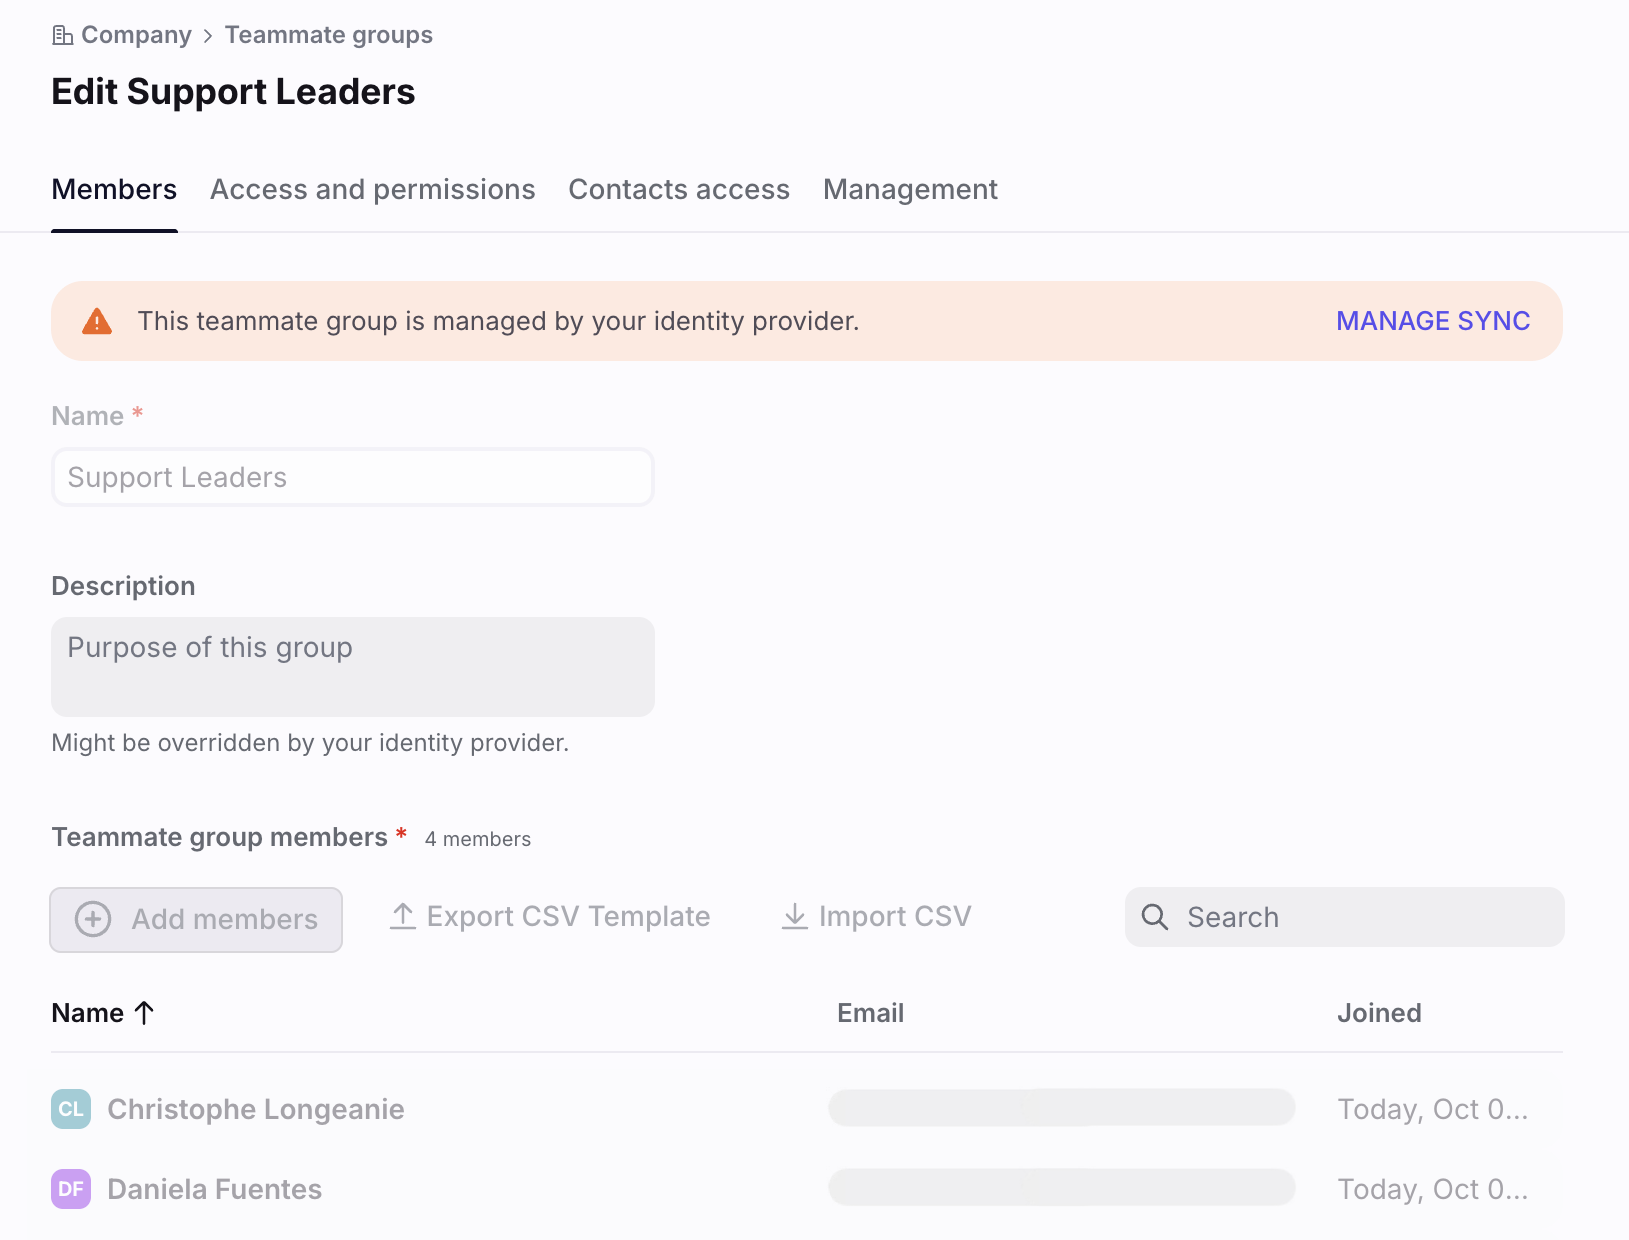
You cannot edit the name or membership of a teammate group that is managed by an Identity Provider. You can see if a teammate group is IdP managed, by clicking on the teammate group and checking for a banner at the top of the page.
FAQ
Are there limits?
Each teammate group has the following limits for optimal performance:
A teammate can be part of up to 70 teammate groups
A teammate group can contain up to 1000 teammates
An inbox can link up to 50 teammate groups
A teammate group can link up to 500 inboxes
A macro can link up to 50 teammate groups
A teammate group can link up to 500 macros
A workspace can link up to 500 teammate groups
A teammate group can link up to 75 workspaces
Can I create an empty teammate group?
Yes. An empty teammate group can be created, allowing you to add teammates at a later time.
Who can use teammate groups in rules?
Any teammate can select teammate groups in personal, shared, or company rules after the groups have been created by a company admin or delegated user.
Are there limits to how many teammates I can delegate permissions to?
Yes. When delegating teammate group management permissions, there’s a limit of 3 teammates and 50 teammate groups you can grant permission to.
Can I delegate management of IdP (SCIM) synced groups?
No. You cannot delegate permission to change the name, manage members, or delete these groups, as these actions are controlled by your Identity Provider (IdP). You can potentially delegate Edit permission for other attributes (like description or associated resources, subject to limitations) and use these groups when assigning permissions for other items.
If I'm granted permission to edit a group, can I also manage its contact access level?
No. This can only be done by a company admin.
What happens if I have Edit permission but try to grant a group access to an inbox/workspace I don't have edit permission to?
You cannot grant access or permissions to resources you don't have access to. To grant access to an inbox you must have the Shared inboxes - Create, edit and delete permission, and for workspaces you must have the Teammates - Manage permission.
Options like the Enable button or checkbox will be disabled for those specific inboxes/workspaces within the group's settings.
What if I only have the Delete permission for a group?
You can delete the group, but you may not be able to see its details (like members or associated resources) if you don't also have Edit permission.
What if I’m using custom permissions, then switch to a plan that doesn’t include them?
Teammate groups with custom permissions will be set to the Contributor permission set.
Why are some inboxes automatically toggled on in the Access column?
Inboxes that are automatically toggled on indicate that the inbox has been configured as public, meaning that all teammates with access to the workspace also have access to the inbox by default. See this article for more information on public inboxes.
I gave a teammate access to an inbox via a teammate group. Why doesn’t it appear in their sidebar?
When you assign inbox access to a teammate group, the inboxes will not be displayed on the users’ sidebars by default- they must choose which inboxes they want to be displayed in their sidebar.
Regardless of whether it is visible in their sidebar, the users have full access to the inbox and the conversations inside. This keeps sidebars clean and clutter-free.
Pricing
Teammate groups are available on all plans. Custom permissions are available on the Enterprise plan and legacy Scale plans.