
How to add a Gmail account
Overview
Follow these instructions to add your Gmail account to either an individual or shared inbox in Front. A Gmail account is an email account that you or your team can log into using a password.
How it works
Front will give you the option to import 50k of your most recent email messages if you choose to. See Step 5 of the instructions below for this option. You can find more details on Gmail import behavior here.
Front has two-way sync with Gmail accounts. Learn more about Gmail sync behavior here and exceptions here.
If you choose to import Gmail labels, they will be converted into tags and applied to your conversations. The tags will be private or shared depending on if you added your Gmail account to an individual inbox or a shared inbox.
By default, any Gmail account that is added to Front will have the threading mode set to Gmail threading. For more information on Gmail threading and other threading options, see here.
How to prepare your inbox before adding it to Front
To ensure your transition to Front goes smoothly, prepare your inbox using the following best practices. Use the method below to differentiate the historical emails that still require your action, so that you'll know which conversations to work on after adding your inbox to Front.
Before adding your inbox to Front, create a unique Gmail label and apply it to the relevant conversations.
Follow the steps from the Instructions section below to add your inbox to Front.
After you've successfully added your Gmail account and imported your history, follow these next steps. The steps will differ based on if you added an individual inbox or a shared inbox.
If you added a Gmail account to an individual inbox:
Mass archive all conversations before the current date by following the steps here.
Once you’ve archived your entire inbox, navigate back to your inbox. Click into the search bar and use the tag: search modifier to search for all email conversations that have your unique Gmail label.
Mass select the conversations, tag them with the private Inbox tag, then unarchive them.
If you added a Gmail account to a shared inbox:
All emails will be automatically archived by default.
Navigate back to your inbox. Click into the search bar and use the tag: search modifier to search for all email conversations that have your unique Gmail label.
Mass select the conversations and unarchive them.
Instructions
Step 1
Click the gear icon and navigate to your workspace or personal settings, depending on which space you are working with. Admins can also access user settings by following these steps.
Step 2
Click on Inboxes on the left menu and create a new shared inbox or individual inbox.
Step 3
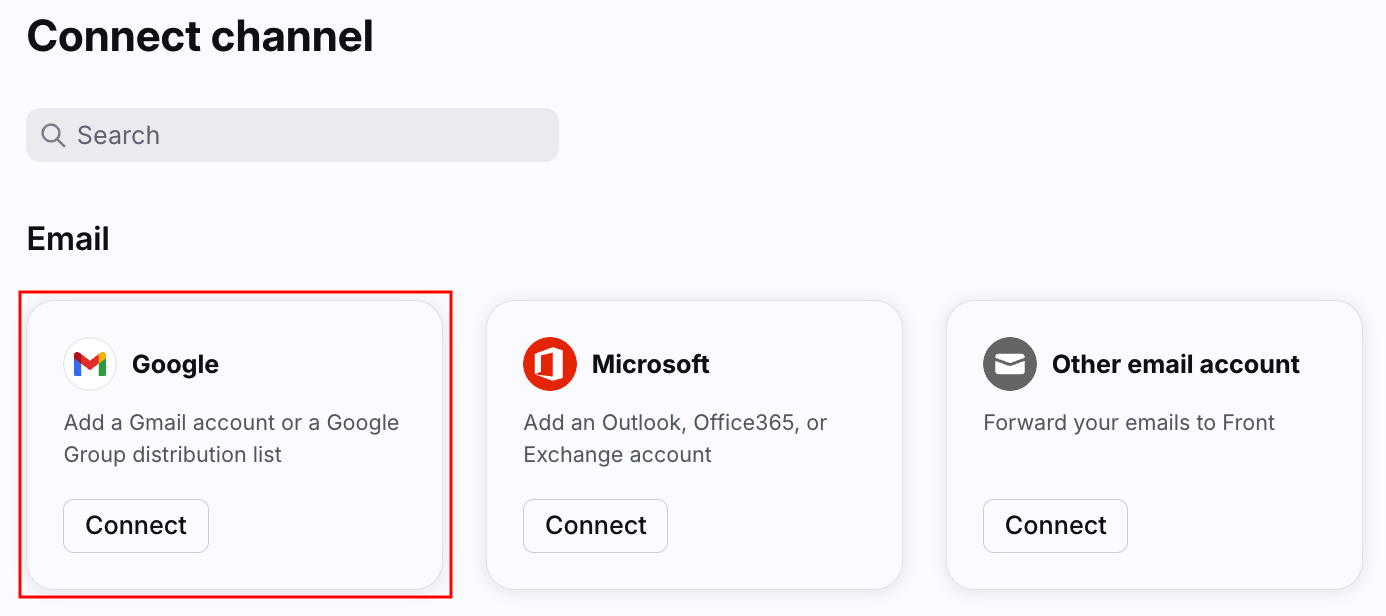
Click Channels on the left menu, then click the Connect channel button. Choose Google from the channel menu, then select Gmail Account. Click Continue.
Step 4
Click the Sign in with Google button to authenticate with your credentials. Front requires full Read and Write access to Gmail accounts. Click Allow to grant Front these permissions. For reference, these are the permissions that Gmail lists:
Read, compose, send, and permanently delete all your email in Gmail
View and manage the provisioning of calendar resources on your domain
See, edit, share, and permanently delete all the calendars you can access using Google Calendar
Note: Though the first permission states that Front needs permission to permanently delete your email in Gmail, Front actually does not have access to and will not permanently delete your emails in Gmail. Front is only able to permanently delete from our own servers. Learn more about how Front permanently deletes here.
Step 5
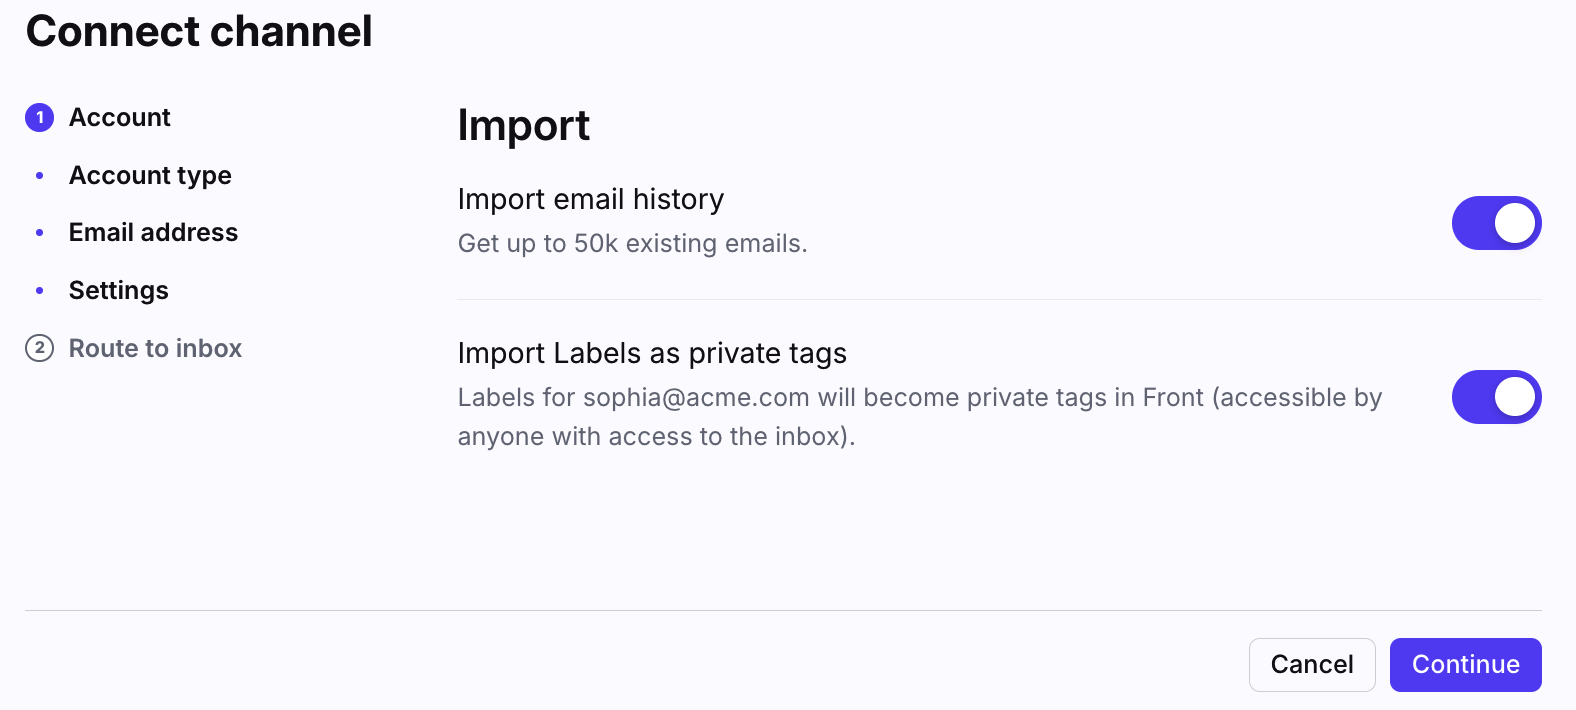
On the Import page:
Choose whether or not to import all historical conversations
Choose whether or not to import all labels
If you do not wish to import these items, turn the toggles off so they appear greyed out. See here for additional details regarding the email history import.
Click Continue.
Step 6
Select the inbox to connect to your channel. All messages from your channel will route to this inbox by default.
Step 7
Click Continue. You’ll automatically be taken back to your channel list.
Step 8 (optional)
Click on the name of the channel to configure additional channel settings.
Start your individual inbox with a clean slate [optional]
While adding your individual inbox, if you choose to import your email history and Front detects more than 50 conversations in the import, you will receive a Start with a clean slate pop-up that will ask if you'd like to archive all emails received before a specified timeframe:
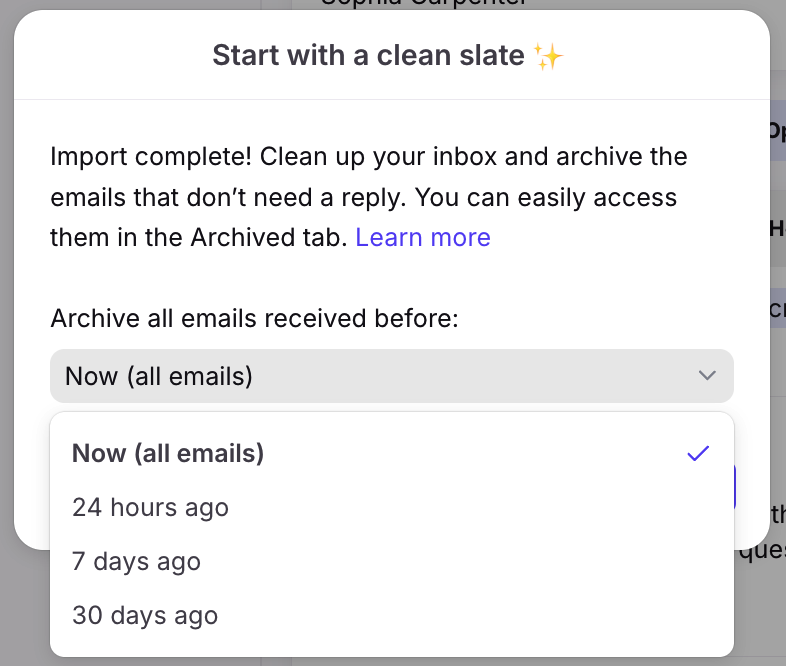
Conversations will automatically import in the open state if your individual inbox's import contains less than 50 conversations.
FAQ
How will Front sync with Gmail?
Check out the full breakdown here.
How many emails get imported into Front?
Once you connect your Gmail account, Front will automatically import 50K of your most recent emails from the inbox.
Where are my labeled emails?
For Gmail accounts connected to individual inboxes, emails labeled in Gmail and imported into Front via the Gmail history import will not be visible in your Inbox tab. You can find these emails by viewing the corresponding Front tag.
To make these emails visible in your Inbox tab, add the private Inbox tag to the Front conversations.
I'm receiving an "admin_policy_enforced" error, what do I do?
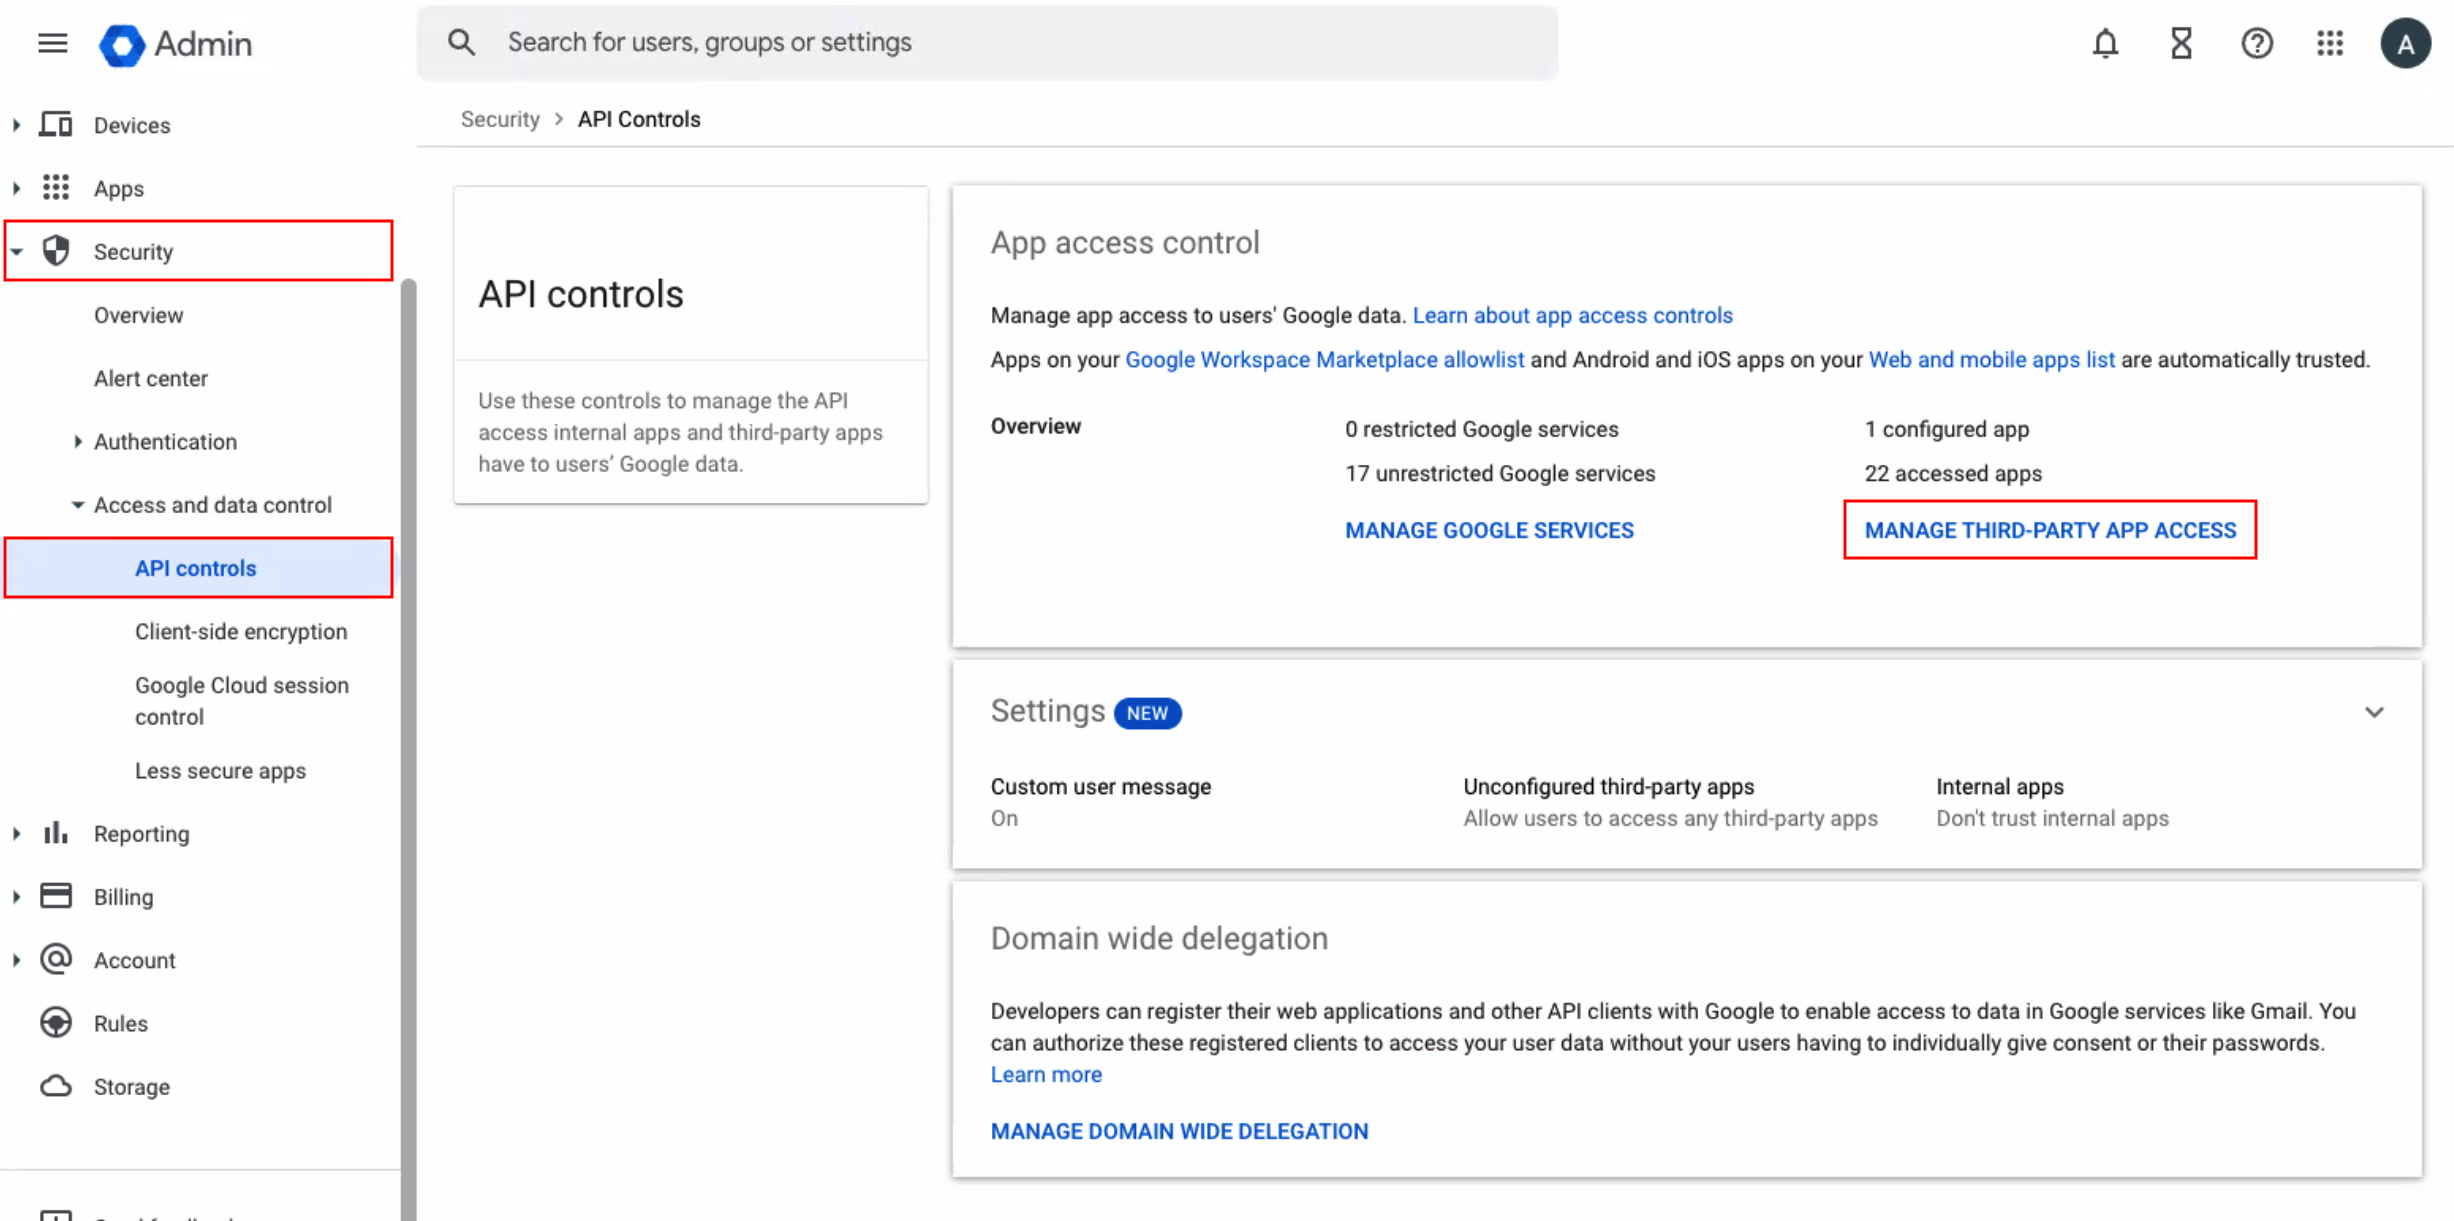
This means that your Google Workspace App Access Control settings are restricted in a way that prevents Front from properly accessing your accounts. Google documents these settings here.
There are two primary ways to fix this error which require access to your Google Workspace Admin Console. Start by going to your Admin settings. In the left sidebar, select Security then API controls. Click Manage third-party app access.
Then navigate to Option 1 or Option 2 below.
Option 1: Remove restrictions on all Google Services.
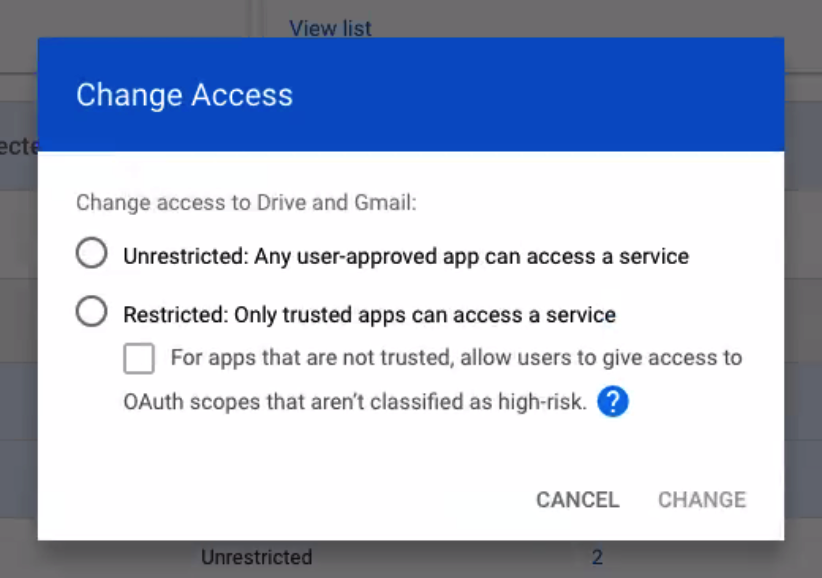
Under Google services, click View list. Select all services and then click Change access.

Select Unrestricted and then click Change to confirm.
Option 2: Add Front as a Trusted app, granting access to all services.
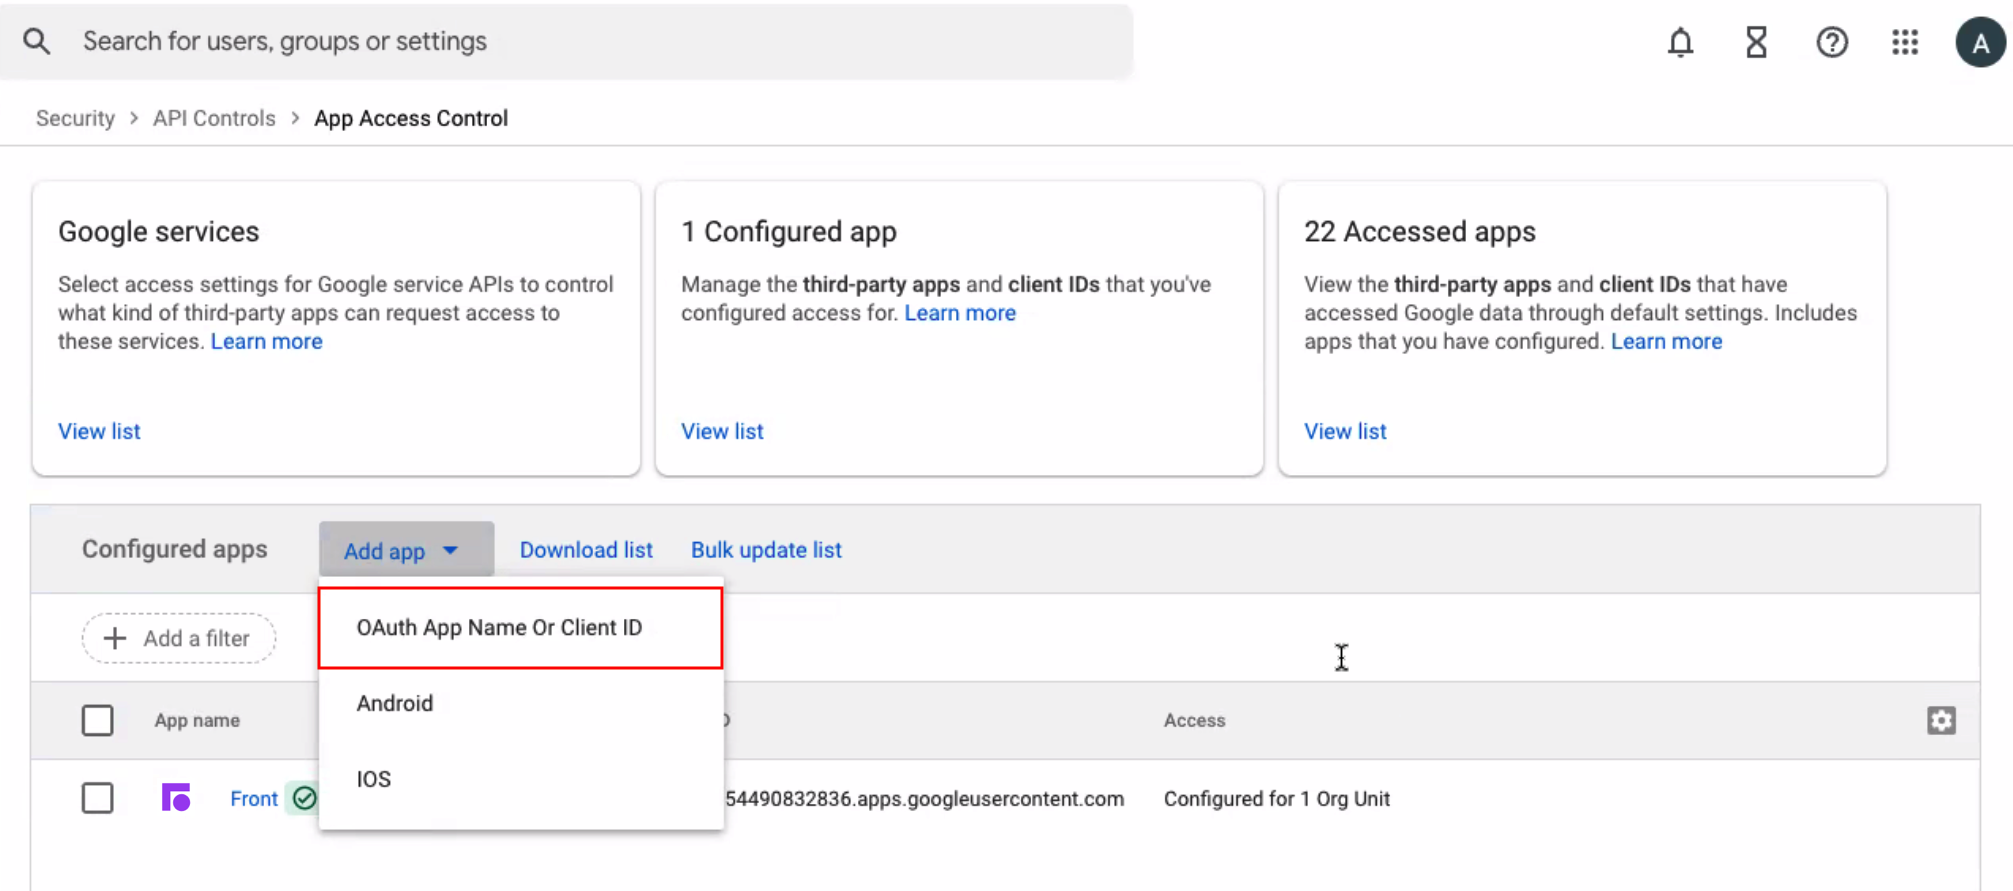
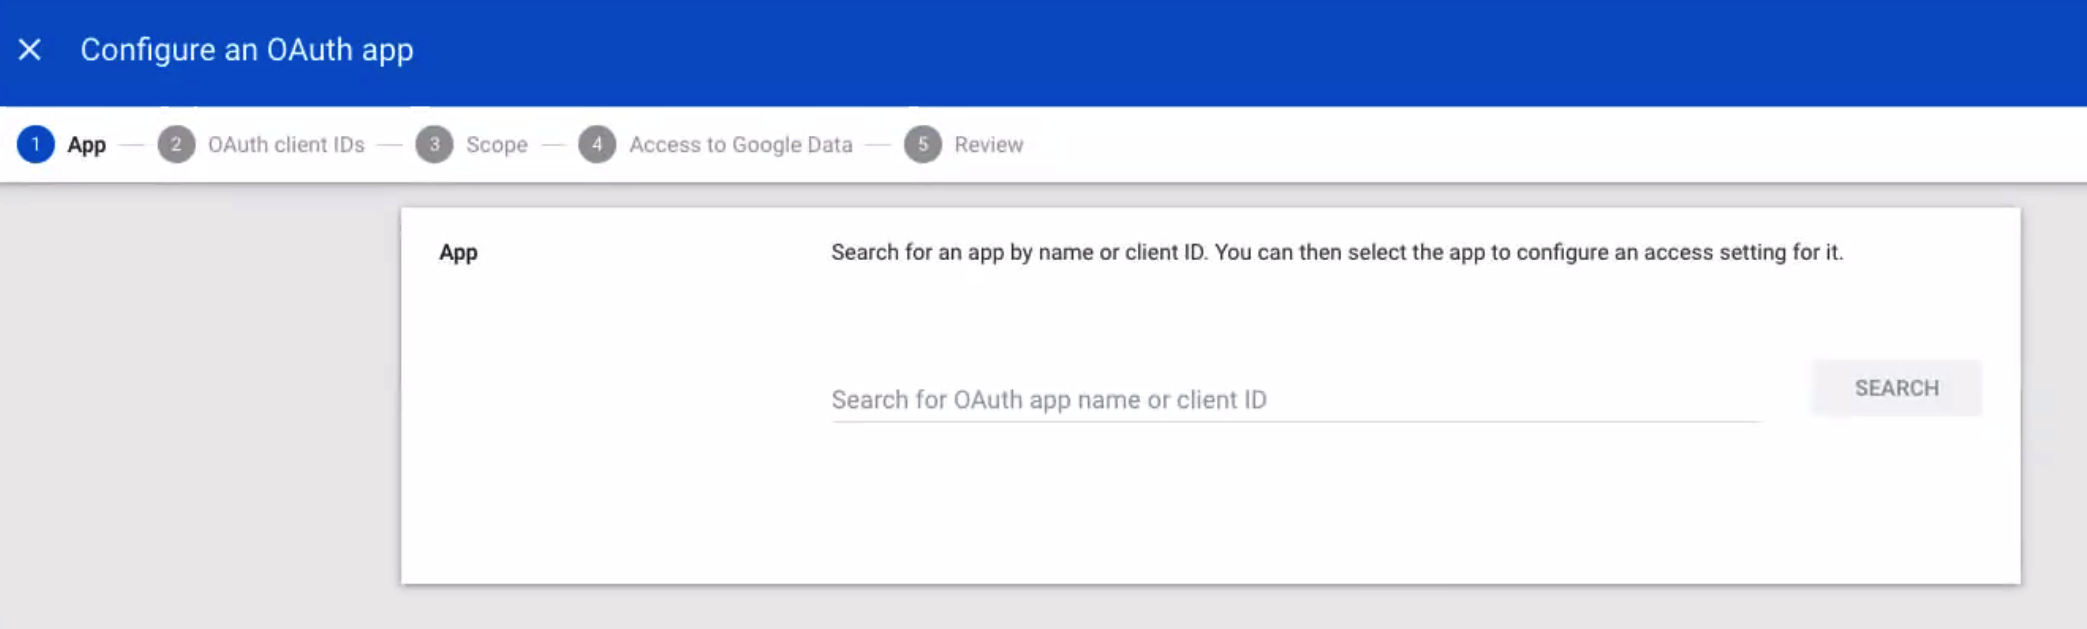
Under Configured apps, click View list. Click Add app, then select OAuth App Name or Client ID.
Search for Front or the ID 754490832836, then select the Front app from the list.
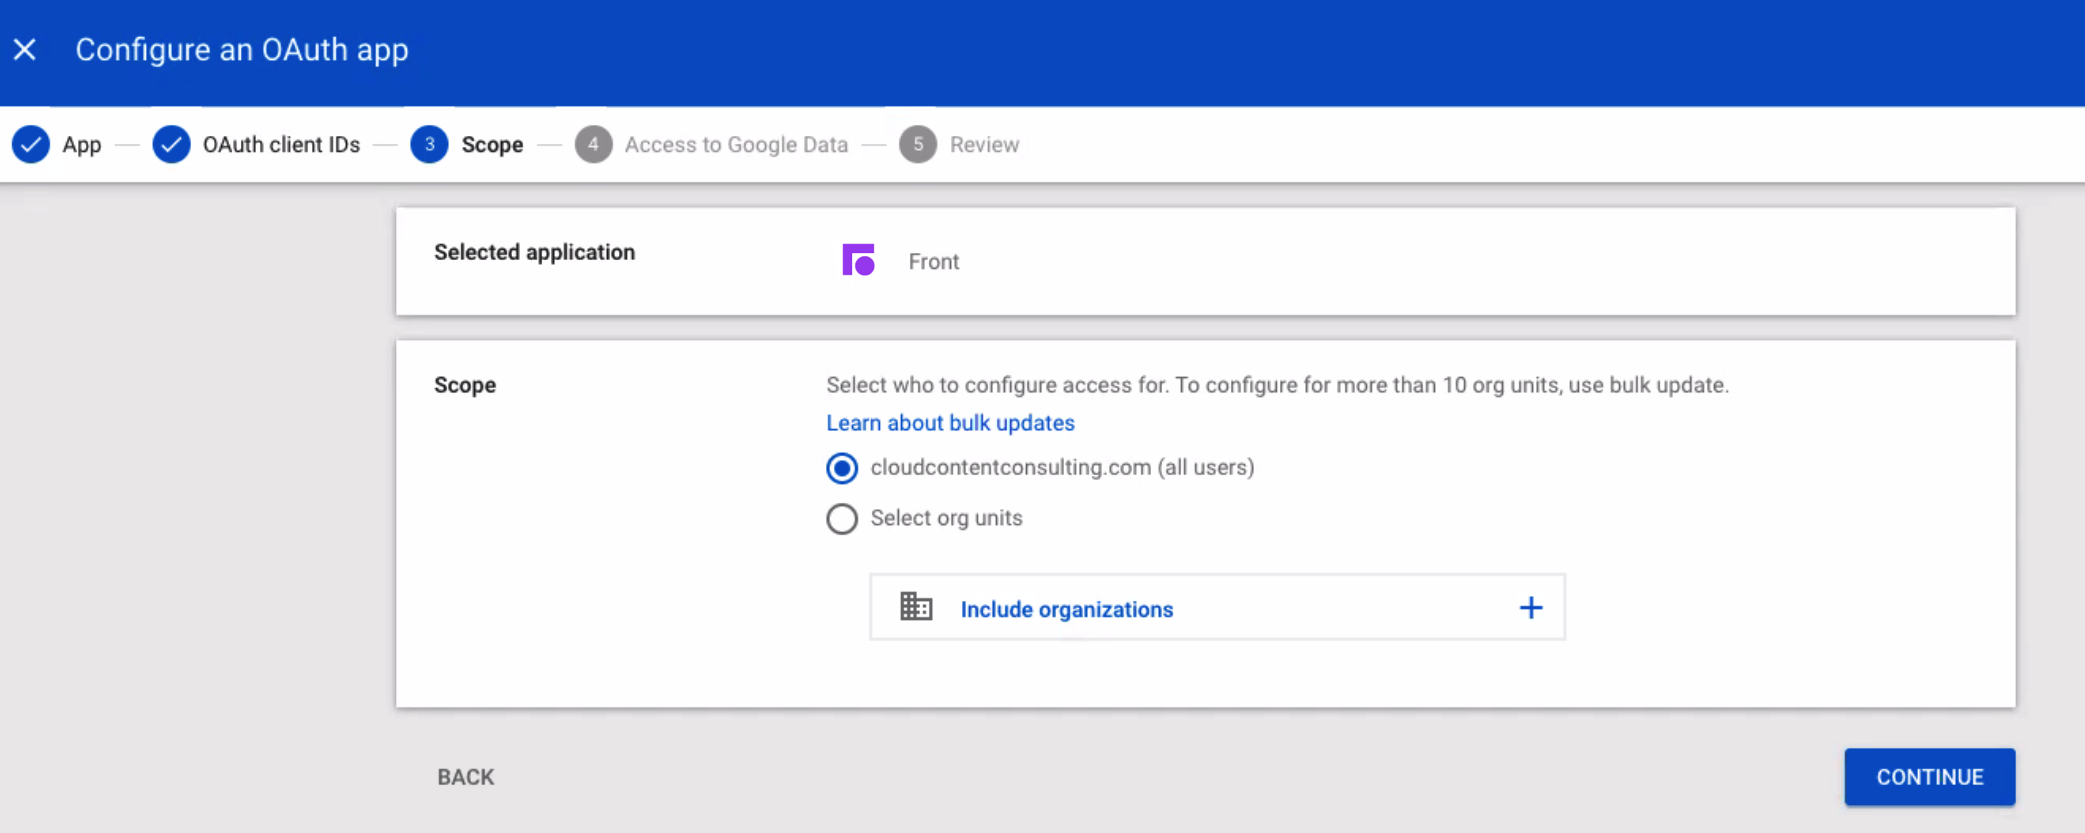
Select your organization, then click Continue.
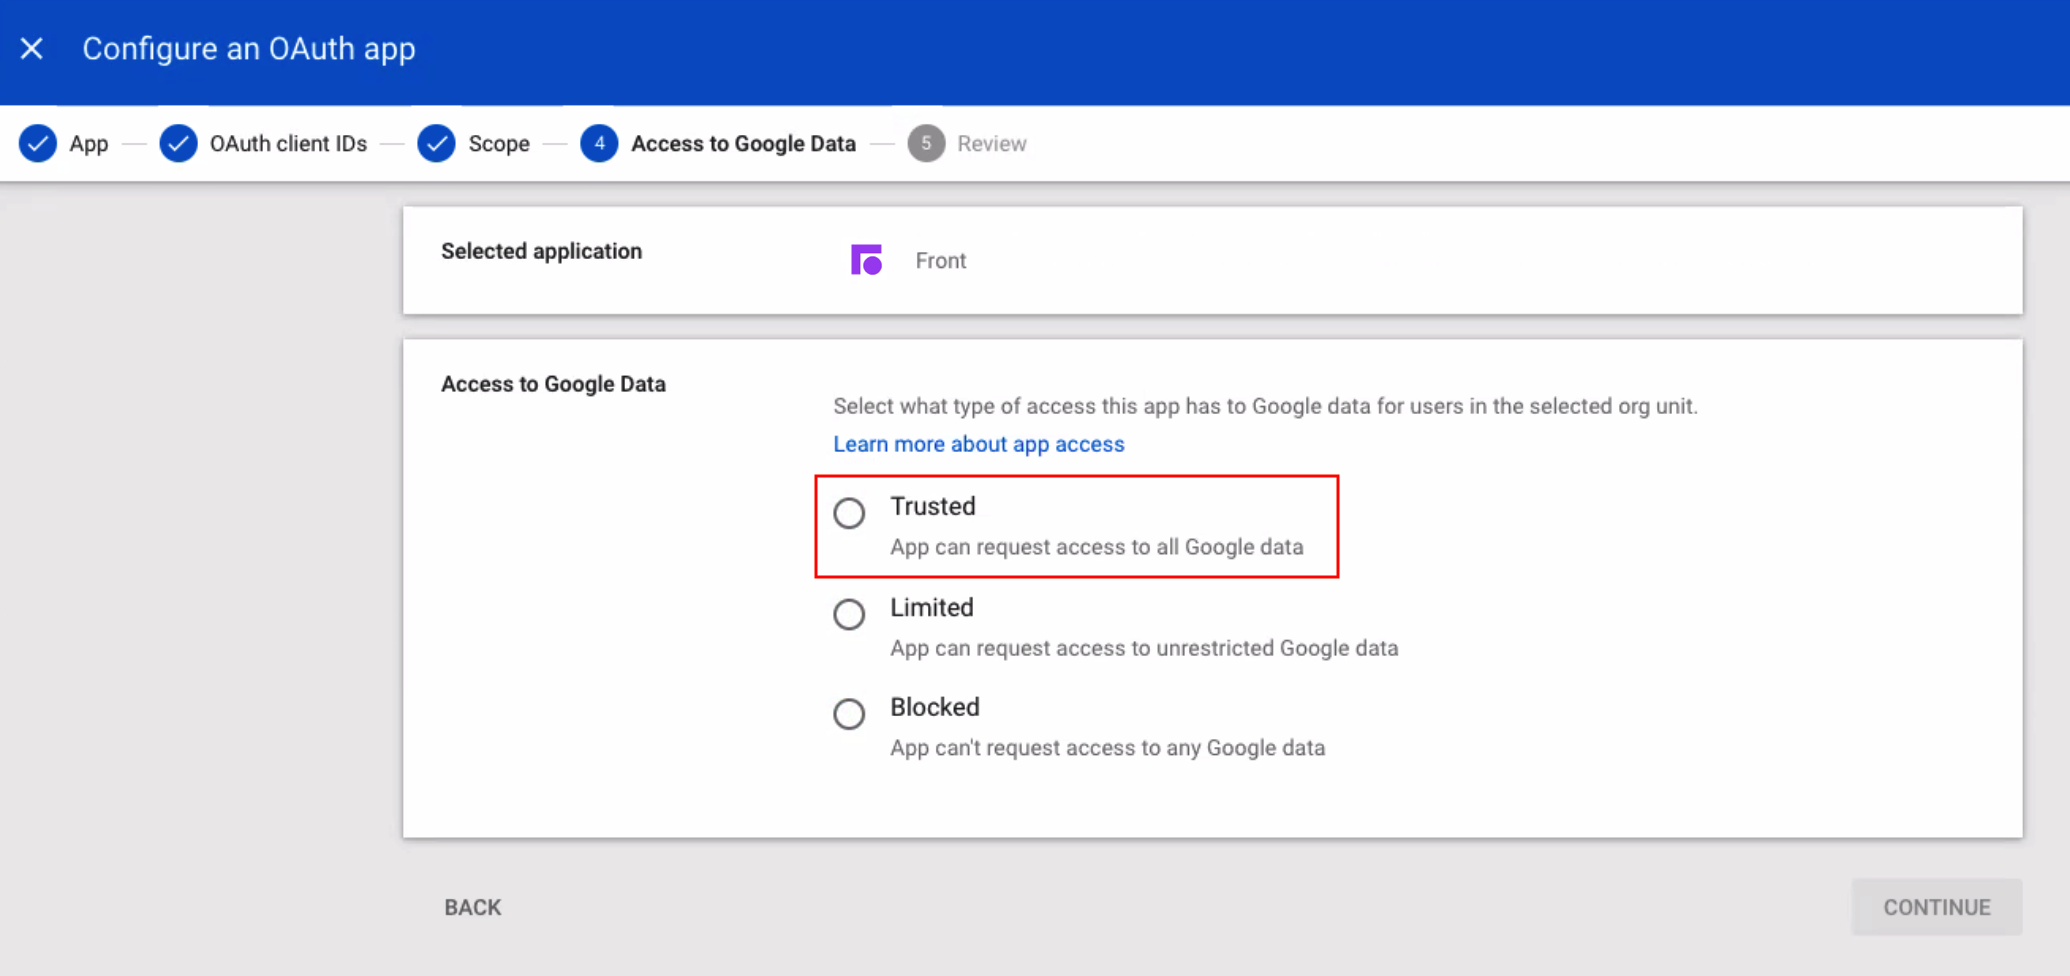
For app access, select Trusted: App can request access to all Google data. Click Continue.
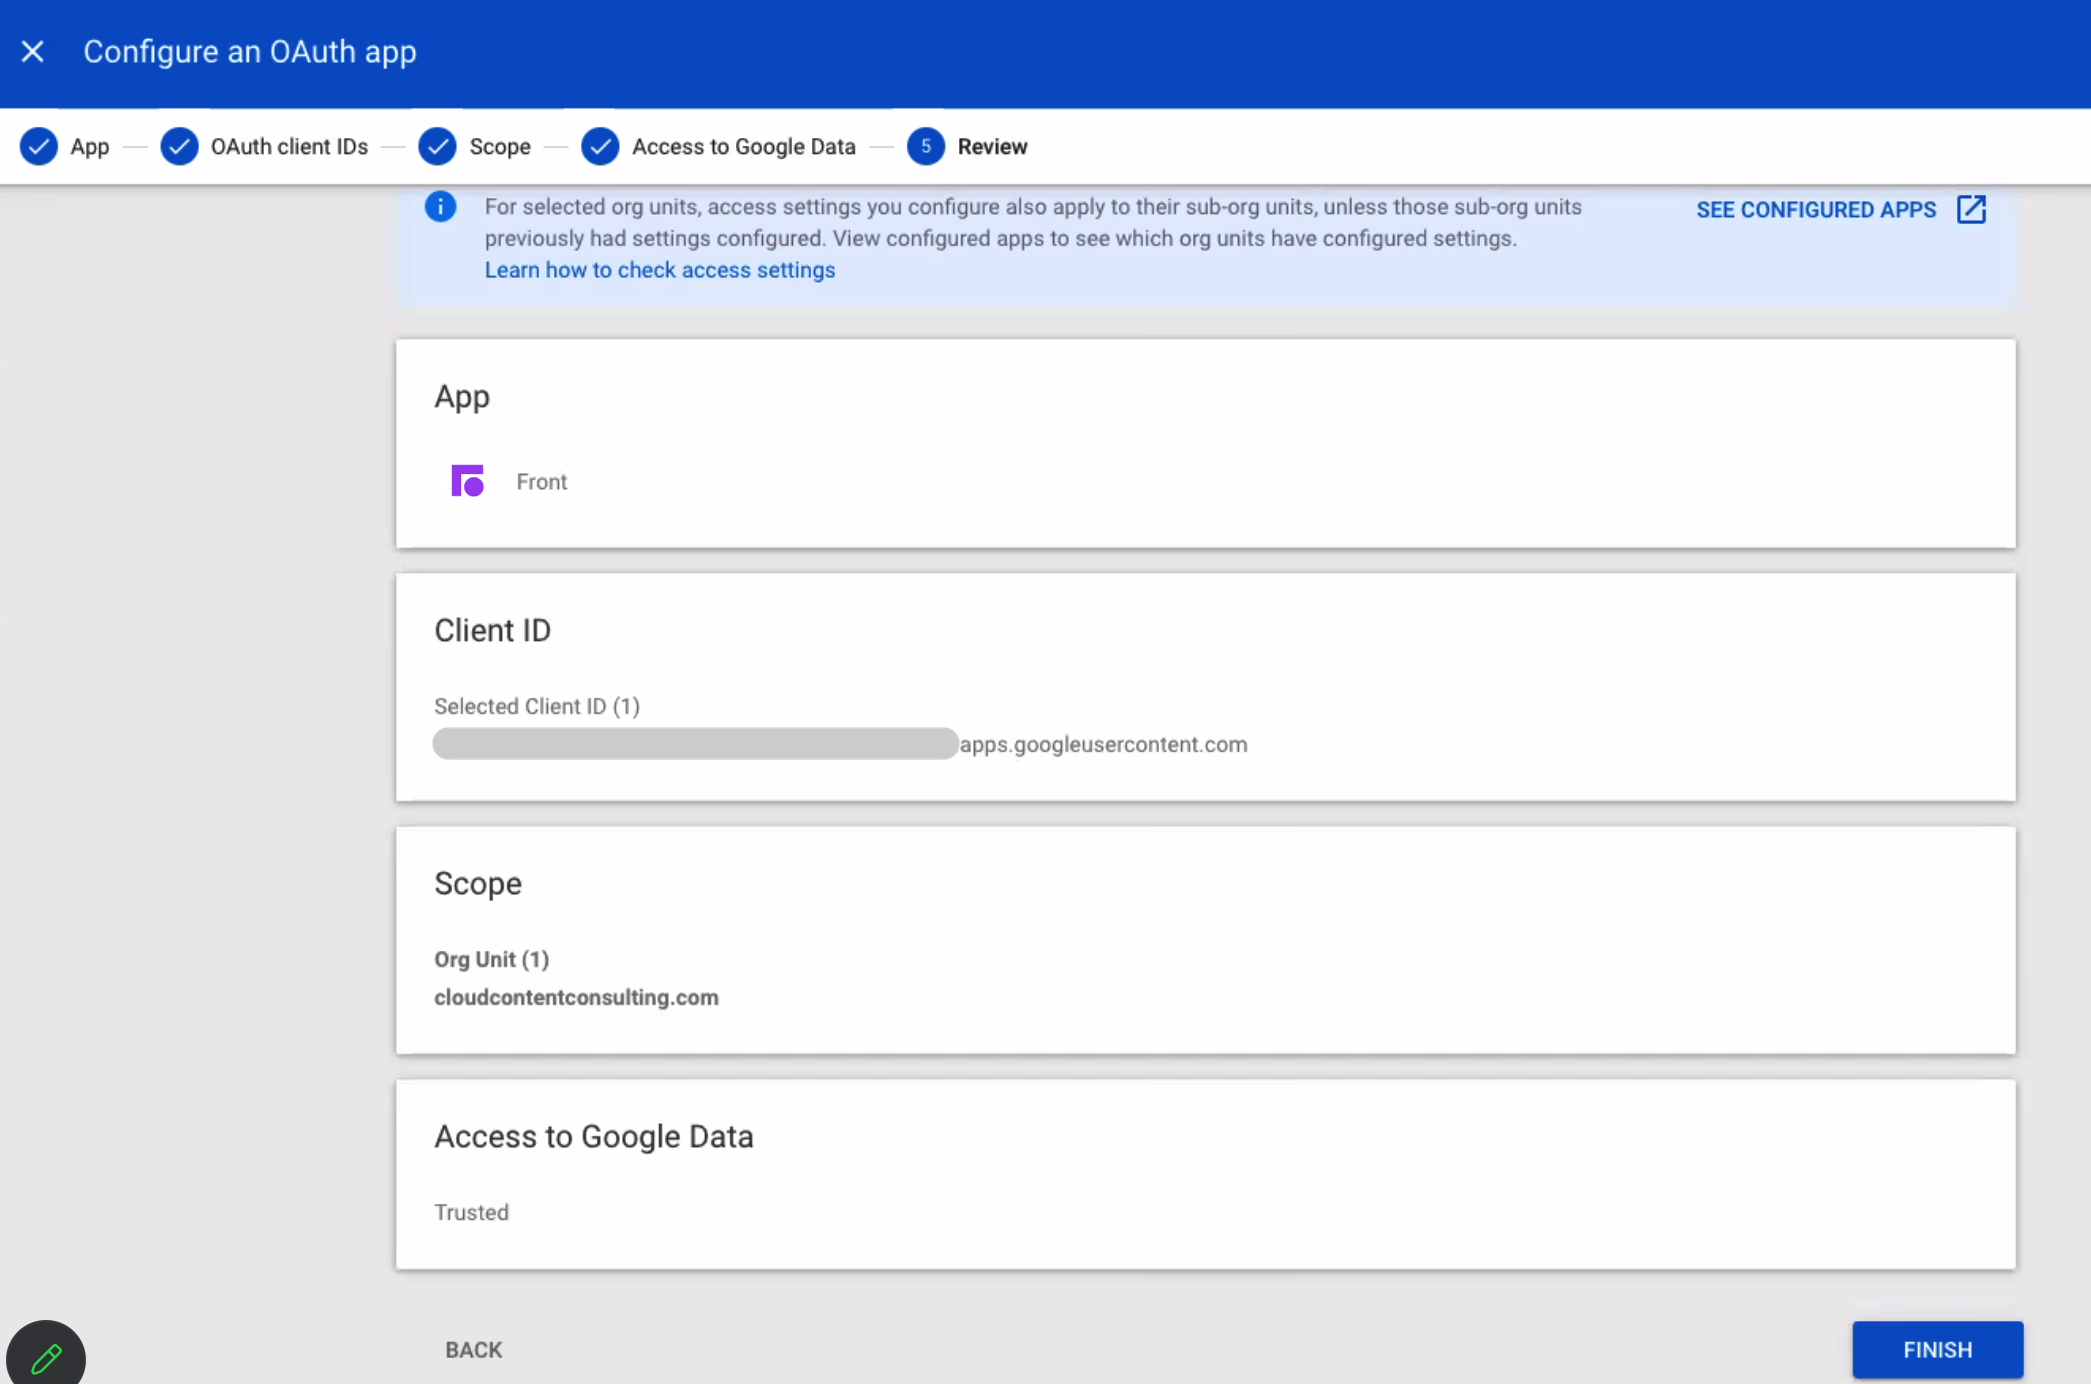
Review the information, then click Finish.
Pricing
This feature is available on all plans. For the latest Starter plan, you must have email set as your company's channel type.
Related Gmail articles
How to add a Google Group
How to add a Gmail Alias