
Using Front Chat
Overview
Front Chat is the simplest way for teams to manage live chat in Front. With the Front Chat application installed on your website, messages from your site visitors appear instantly in Front for follow up from your team. This article will walk through Front Chat customization options and internal workflows your team can implement.
Check out this article once you're ready to create your Front Chat inbox.
Appearance tab
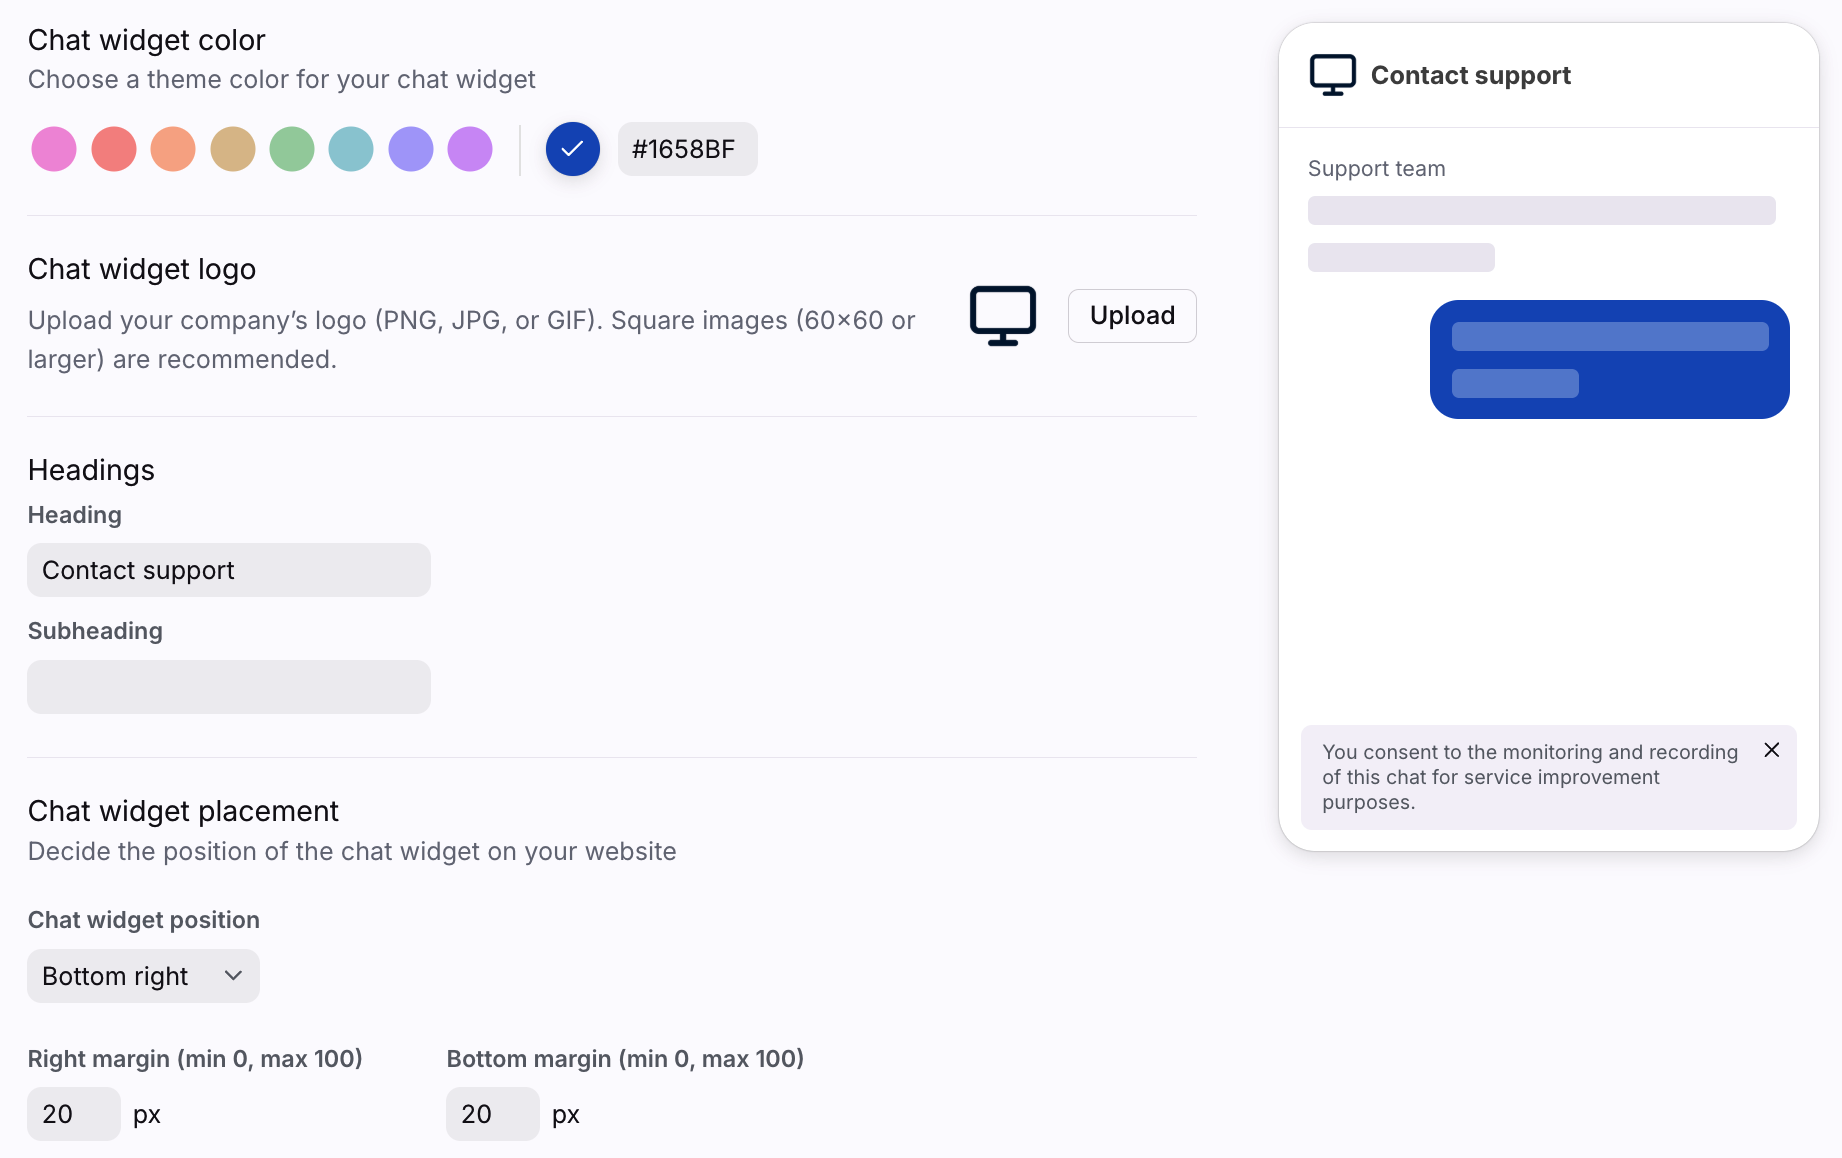
Use the Appearance tab to personalize your chat widget design. You’ll see some of your changes in the preview on the right.
Customize your chat widget
Adjust your widget with custom colors, logos, header greetings, and widget placement.
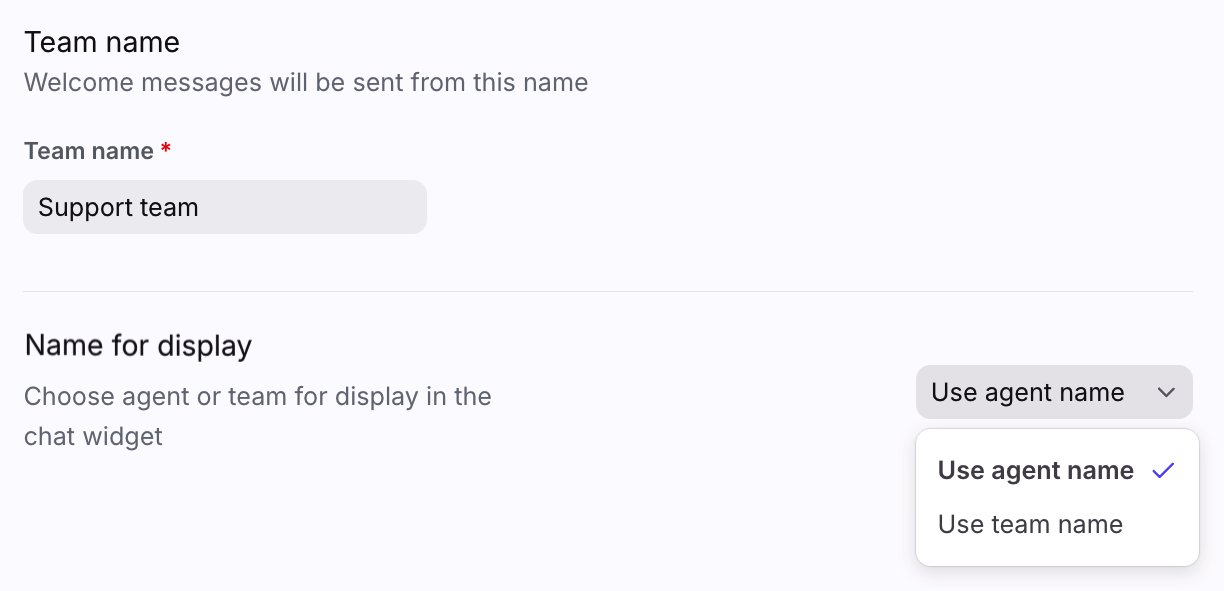
Manage display name
Set a team name, and choose whether the teammate or team name will display in the chat widget. By default, each teammate’s name set in Front will be displayed in chat conversations with customers.
Enterprise plan only: Select Use team name in the Name for display setting if you’d like to chat visitors to see your team name instead of agent names. This change will be applied for all Front Chat teammates.
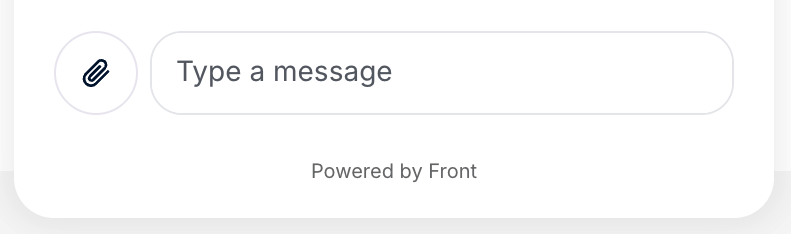
Display "Powered by Front"
Professional plan or above: Choose if you want to display "Powered by Front" in your chat widget footer.
Consent banner
Toggle to show a consent banner in the chat widget.
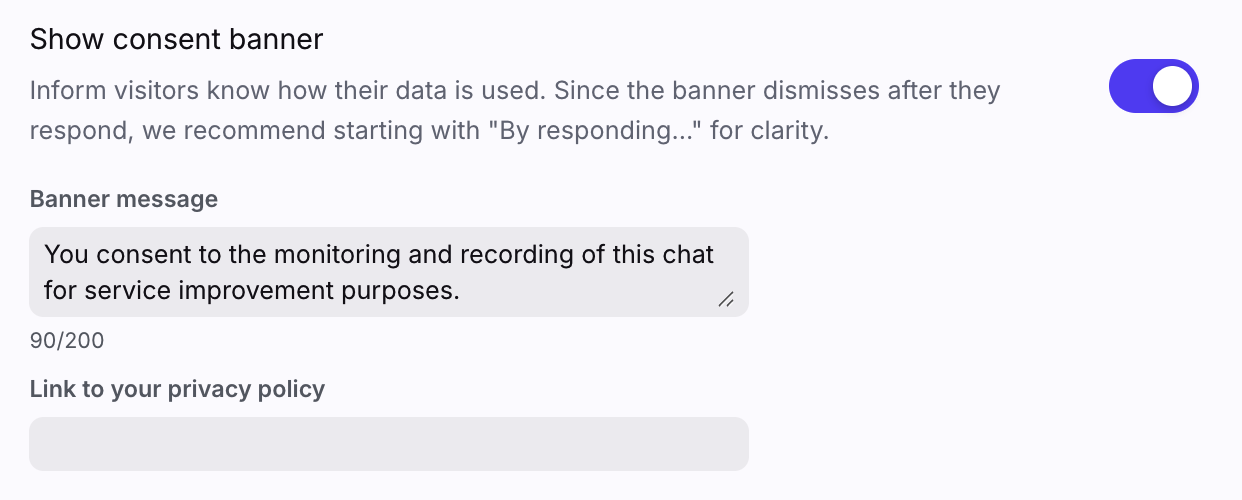
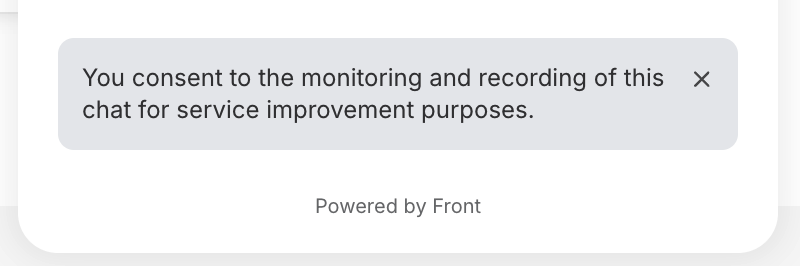
Chat visitor experience:
Automation tab
Use the Automation tab to access your chatbot settings for your Front Chat channel.
Chatbot settings
Chatbot
Set up a chatbot to help you set a welcome message, triage inquiries, collect customer information, and deflect common questions. Learn more here.

Visitor follow-up
If you configure email as an optional contact field you collect in your chatbot, you’ll also have the ability to prompt visitors to provide their email 10 seconds after a chat is initiated via a banner within the widget. You can customize the message visitors see on this email collection banner.
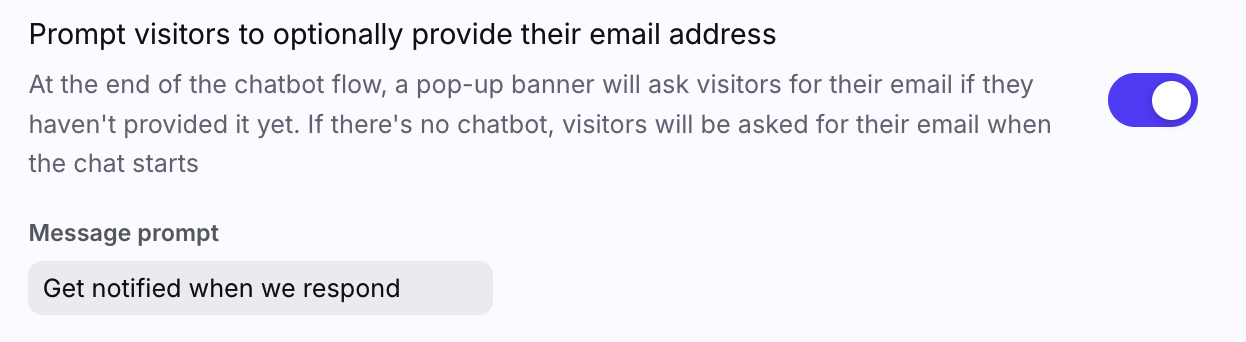
Chat visitor experience:
AI knowledge source
Select a Front knowledge base or external knowledge source to power AI Answers in your chatbot. See this article to learn more.
Proactive messages tab
See this article to learn more about setting up proactive messages in your widget to automatically start conversations with your visitors.
Installation tab
See this article to learn more about installing the chat widget on your webpage.
Settings tab
Use the Settings tab to manage refresh time thresholds, attachment permissions, widget language, online hours, transcripts, user verification, and knowledge base settings.
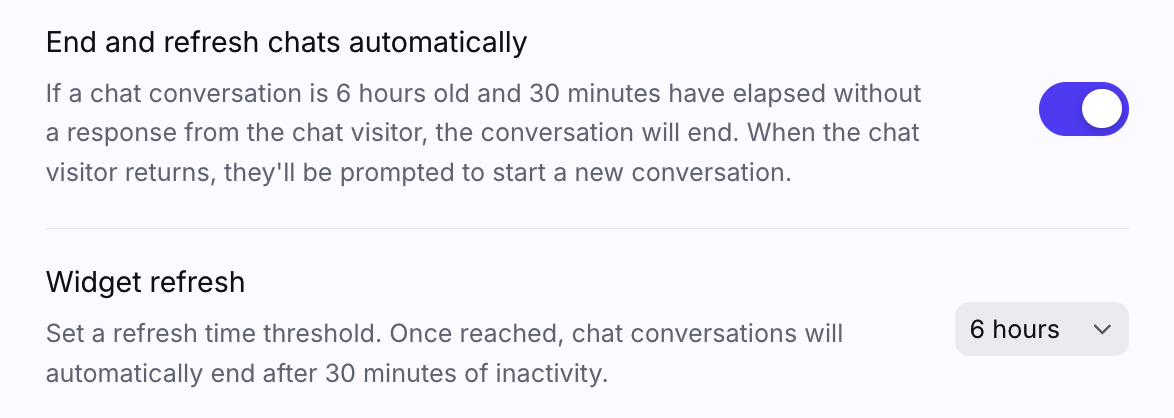
End and refresh chats automatically
Set a refresh time threshold for your chat widget. By default, the chat widget will refresh once 6 hours have passed since a chat conversation began, as long as 30 minutes have elapsed without a reply from the chat visitor.
When your chat visitor returns, they will be prompted to start a new conversation in the chat widget. This helps ensure that a new conversation is created each time customers write in for a different inquiry.
If the chat visitor is actively responding to the conversation after 6 hours, the chat widget will not refresh until there is a 30-minute window without a response.
If you would like your chat message history to persist in the chat widget (until your chat visitor clears their cookies), you can choose to disable this setting.
Attachments in the chat widget
By default, visitors are allowed to send all supported attachment types in the widget. You can restrict certain file types or prevent visitors from sending attachments altogether.

Chat transcripts
When a visitor enters their email address in the chatbot form or Notify Me flow, or has their verified identity set, Front can easily transition the conversation to email if they leave your site without following up.
When a Front user replies to a chat message and the visitor does not respond within 5 minutes, Front will automatically send an email transcript of the last 10 messages to the address the visitor submitted.
You can choose the email address your transcripts are sent from in your channel settings in the Chat transcript section.
It must be sent from a shared email channel that you have connected to Front.
You will need to have the Prompt visitors to optionally provide their email address setting (in the Automation tab) enabled in order for the transcripts to send automatically. After setting up email capture in your Front settings, any new visitors to your site or a refresh of your site will get the email option.
You can disable the email transcript option at any time by unselecting the email address in the dropdown.

When a transcript is emailed to a site visitor, you will see it recorded as an activity within that conversation. The chat transcript email will also be linked to the original chat conversation (and vice versa) so you can easily navigate between the two.
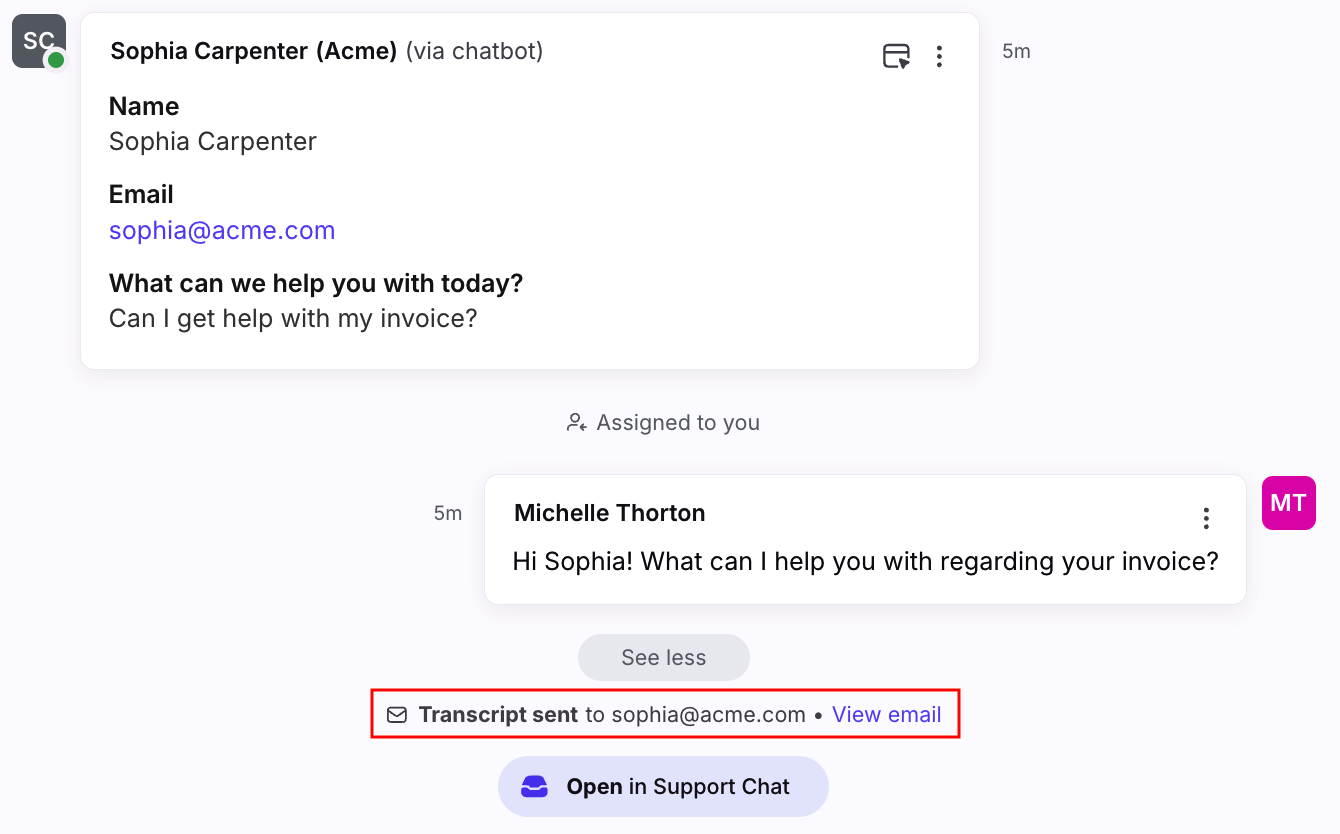
When a site visitor replies to the email transcript, the message will arrive in your chosen shared email inbox in Front. It will not be assigned to anyone, but you can use rules to assign conversations automatically (see below).
Widget language
Choose between English or French for your chat widget.
Knowledge base
Display knowledge base in the chat widget
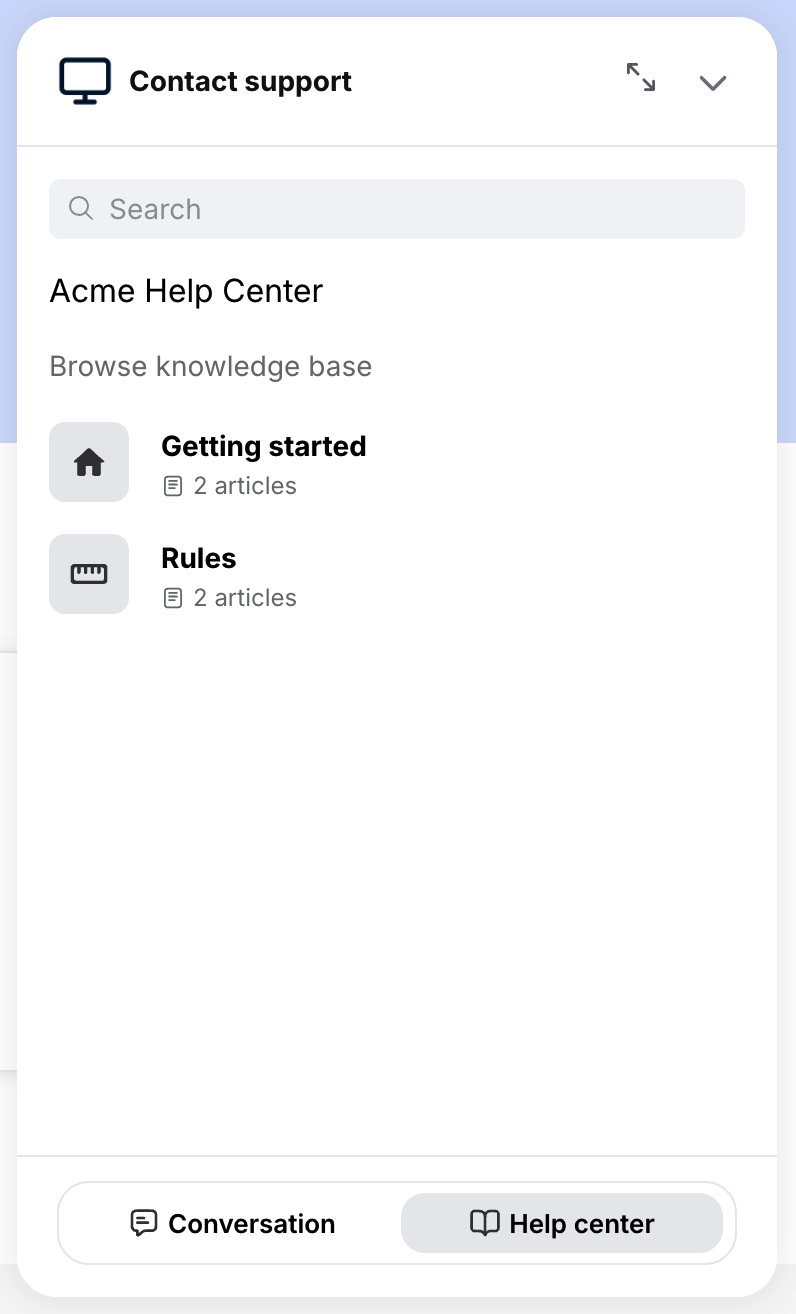
If you’re using Front’s knowledge base feature, you can embed your knowledge base content directly inside your chat widget using the Display knowledge base in the chat widget setting.

You can choose to display any of your published, public knowledge bases. Chat visitors will be able to search articles and navigate your article categories directly within your chat widget.
Any knowledge base article links sent through a chat conversation will automatically open in the Help Center tab within the chat widget. From there, chat visitors can easily view the article or navigate to your main knowledge base.
Display Front Chat widget on help center website
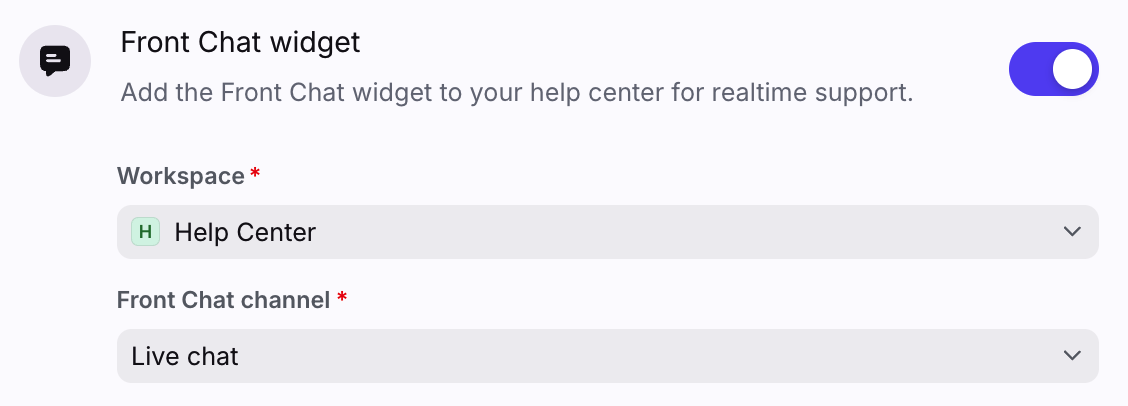
If you’re using Front’s help center feature, you can display your Front Chat widget on your help center.
In the help center admin portal, select the Settings tab, then navigate to the Configuration tab. Scroll to the Features section, enable the Front Chat widget, then select the workspace for your Front Chat channel and which Front Chat channel you’d like to add to your help center.
Any chat messages you get from your help center will be routed into the same inbox as other Front Chat messages for that channel.
Notification sounds
Use the Play notification sound for new messages setting to control whether chat visitors hear a sound when they receive replies.

Set online hours
Front Chat will be always be visible on your website by default. If you'd like to hide your chat application when your team isn't available (such as at night), set your online hours and toggle on the Hide chat widget outside of online hours setting.
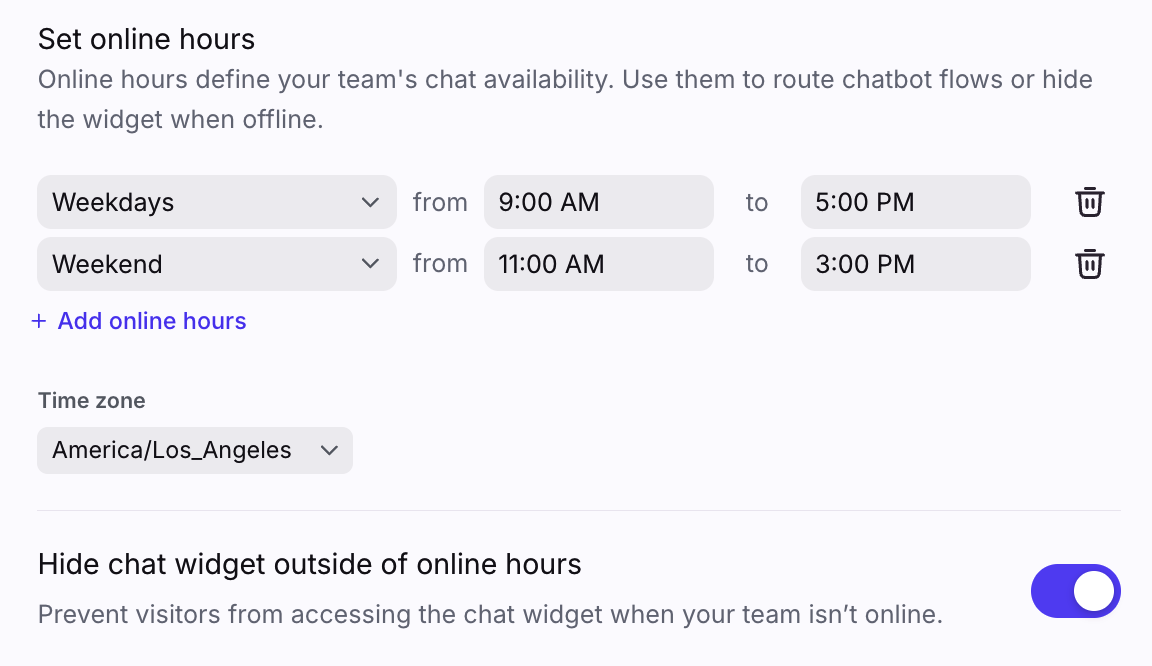
⚠️ Important to know: This setting hides the widget from view, but does not turn off chat if a customer already has the widget open before your offline hours started, and have not refreshed the page. Customers will still be able to send you messages in the open widget, so best practice is to use an auto-response during your offline hours to set the expectation for when they will receive a response.
Recognize logged in users
See this article to learn more about recognizing and verifying logged in users in your chat widget.
Workflows
Once you set up a Front Chat channel, your team can chat with your website visitors in real-time directly from Front. Use the same rules, analytics, tags, and workflows for Front Chat that you use for your other channels (email, SMS, etc.) in Front.
Manage chat conversations across multiple websites
Your Front Chat widget can be installed on as many pages as you wish, on the same domain or across different domains. All messages for that chat widget will flow into a single chat inbox. A chat session will be maintained if a conversation moves across webpages within the same domain.
Here are examples of what is supported:
Setting up the same Front Chat widget across multiple webpages with the same domain (example.com, example.com/about, example.com/shop)
The chat session would persist across these different webpages since they share the same domain
Setting up the Front Chat widget only on certain webpages within the same domain (e.g., show the chat widget on example.com and example.com/about but NOT example.com/shop)
The chat session would persist across the webpages with the same domain
You can configure the Front Chat widget to not show on certain webpages within the same domain by using the show/hide Front Chat SDK commands depending on the current webpage, or by only choosing to call the init Front Chat SDK command on certain webpages
Setting up the same Front Chat widget on multiple webpages across different domains (example.com, shop.example.com, app.example.com)
The chat session would not persist if moving from example.com to shop.example.com or app.example.com
If you are managing multiple domains or subdomains, you can handle chat conversations separately for each site by creating a separate chat channel for each site.
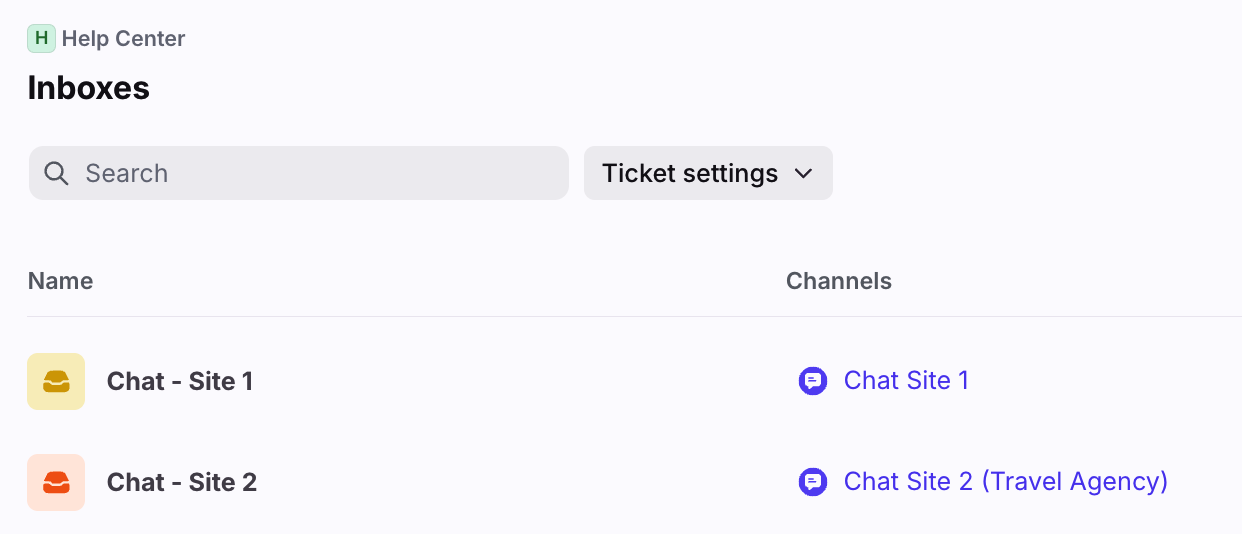
Customize each application to match each site's branding, install the appropriate scripts, and the chat conversations for each website can be handled in separate inboxes in Front.
Match visitors with your Front contacts or CRM integrations
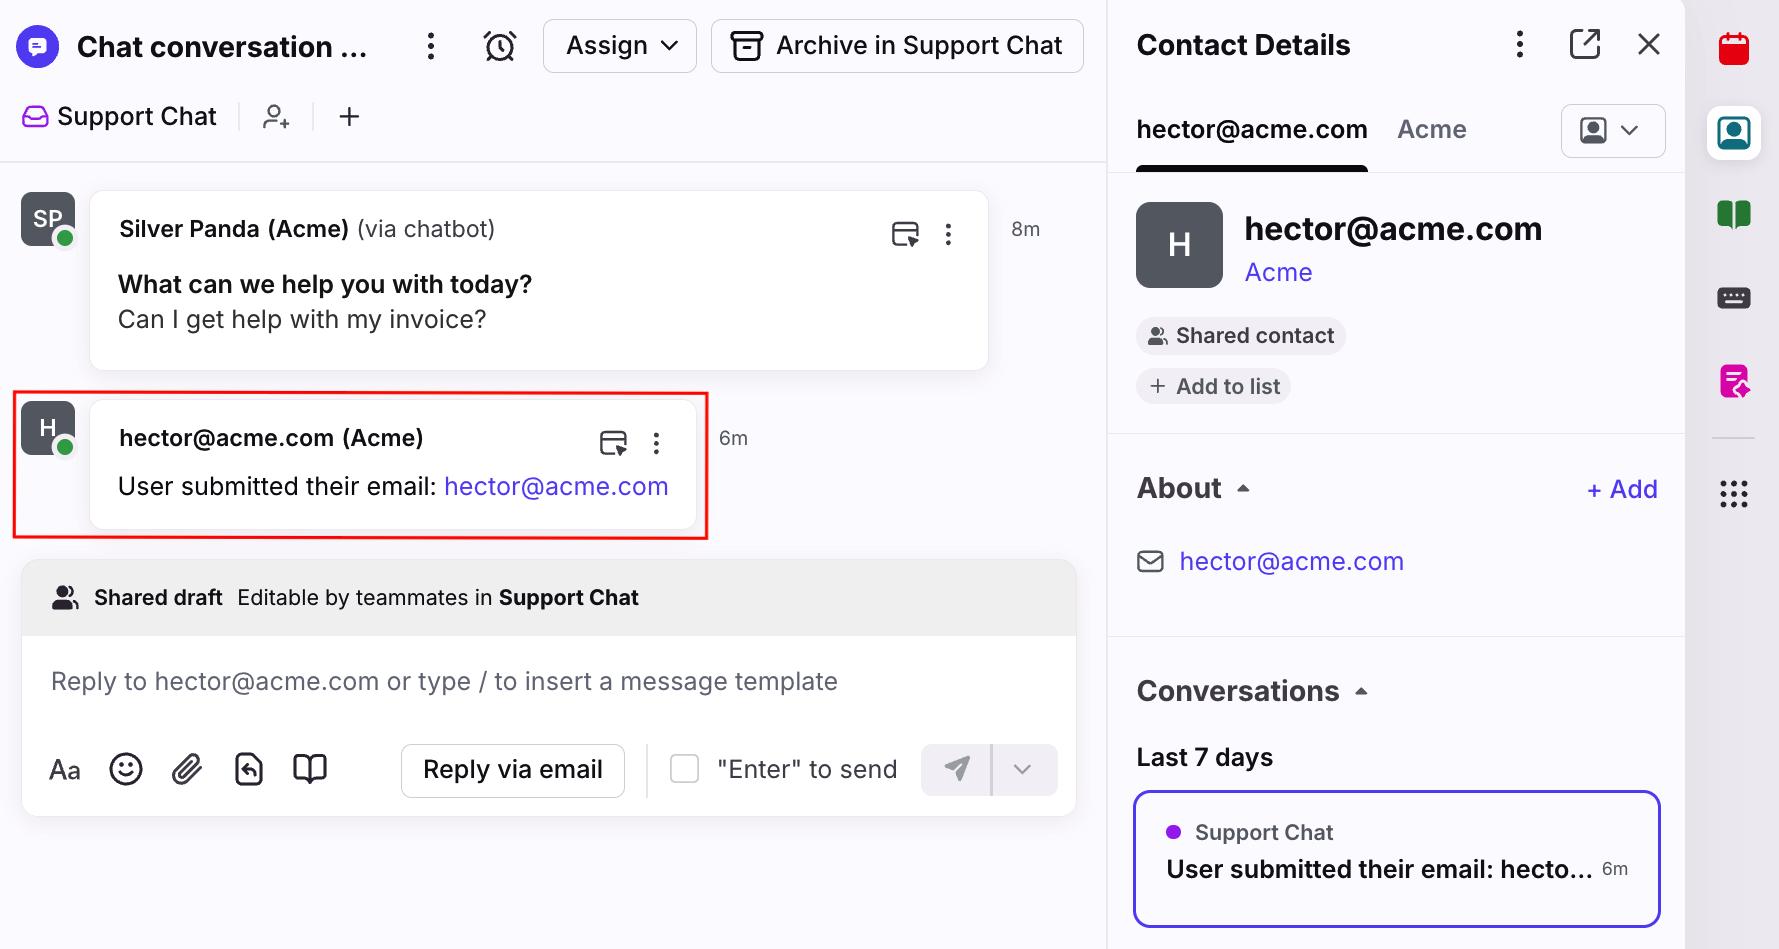
If a visitor enters their email address in the chatbot flow or with the Prompt visitors to optionally provide their email address feature, or has their verified identity set, Front will search for that email address in your contacts.
You can tell if a visitor has submitted their email with the Prompt visitors to optionally provide their email address feature if this message appears: "User submitted their email: [email address]".
If the email address doesn't match an existing contact, a new contact may be created in Front, depending on your company settings. If the address matches an existing contact, the chat message will be linked to that contact's details.
You can view all of their past conversations by viewing the Contact details plugin in your sidebar.
If you have any integrations enabled that use an email address to identify records, those details will be displayed on the conversation. This applies to Front's CRM integrations: Salesforce, HubSpot, Pipedrive, and Zoho.
If a site visitor does not enter their email address in the chatbot flow or with the Prompt visitors to optionally provide their email address feature, the visitor will be anonymous unless you are using identity verification to pass user names and email addresses.
Transition conversations from chat to email
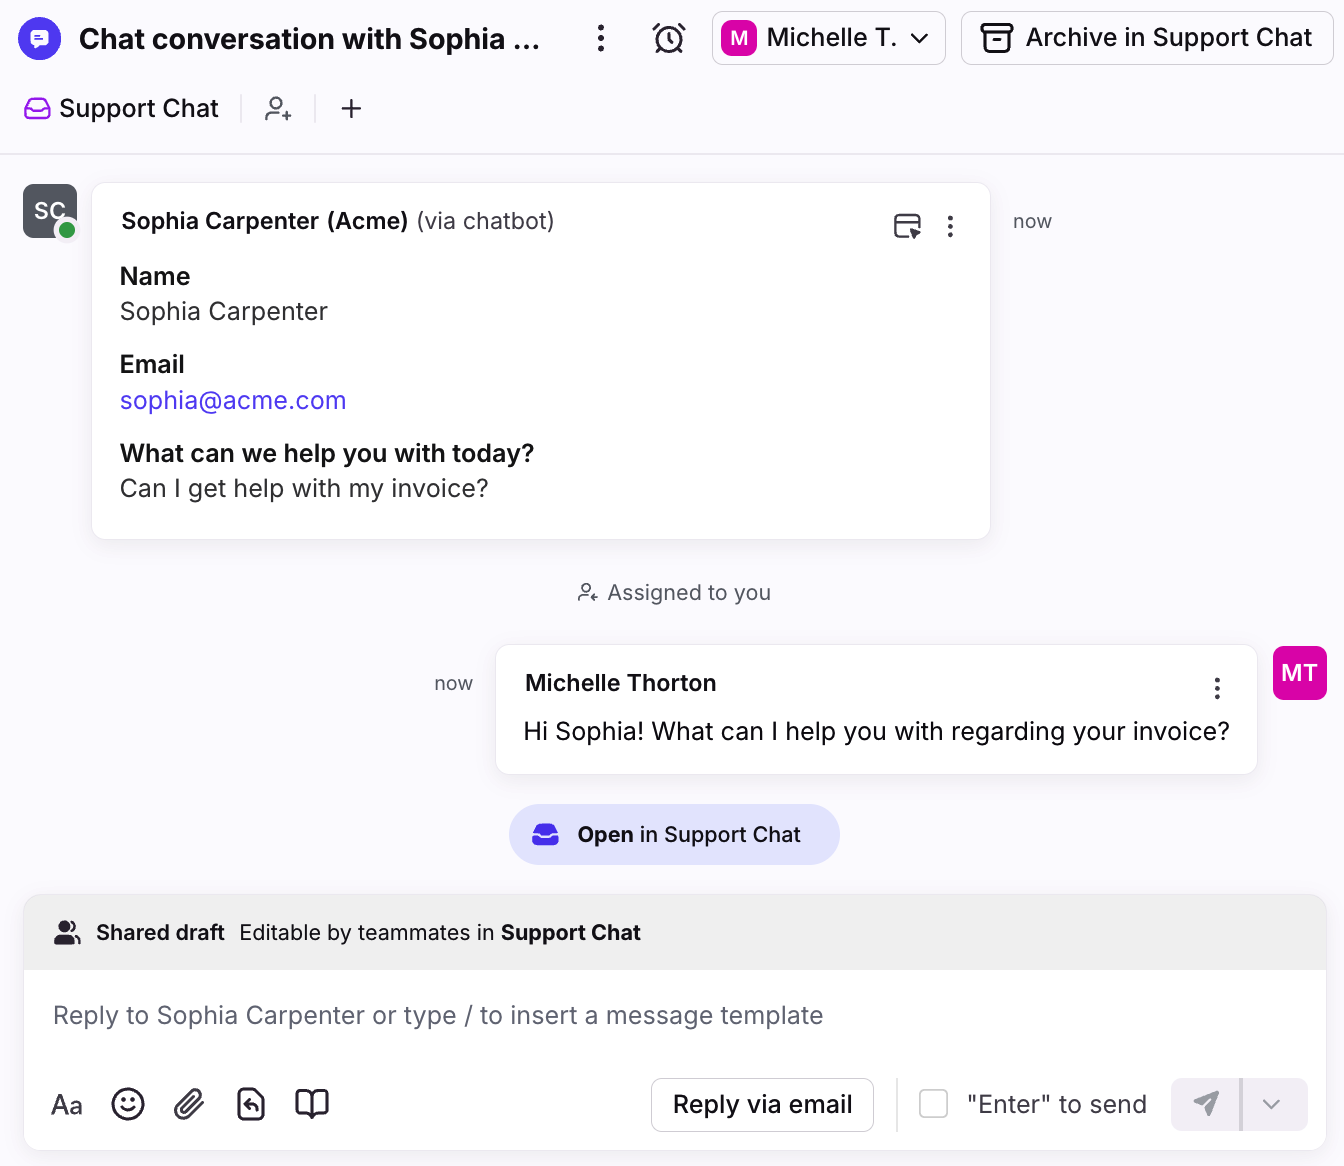
If a Front user is handling a chat conversation and needs to follow up over email, they can use the Reply via email button in the composer.
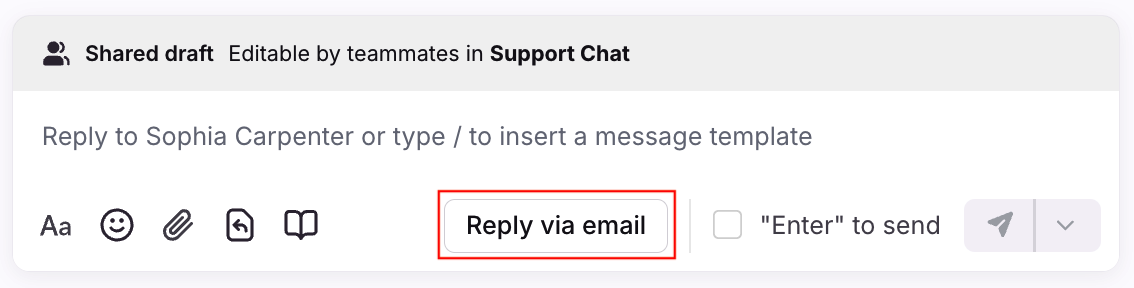
This automatically generates an email draft with the chat visitor contact details pre-populated (if known).
The follow-up email is automatically linked and pinned in the comments of the original chat conversation. The original chat conversation is automatically linked and pinned in the comments of the follow-up chat conversation.
This makes it easy to switch between the two conversations to gather relevant context.
Use rules and analytics
You can use rules and run analytics reports for your Front Chat channel the same way you use them for email, SMS, or other channels in Front.
Here are some example rules for Front Chat to help you get started:
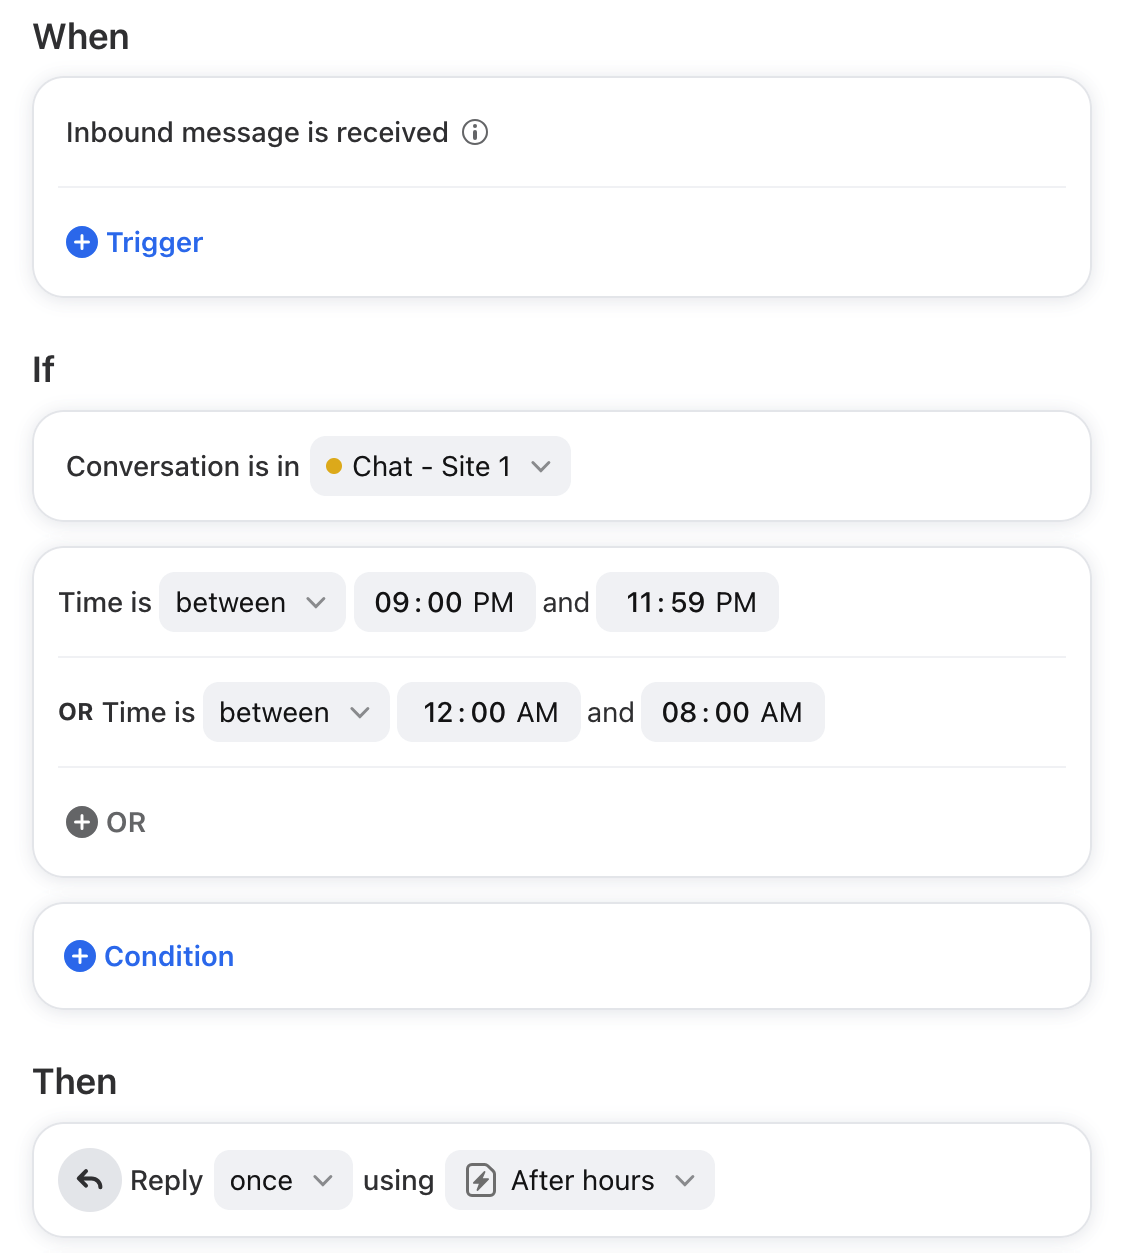
Example 1: Respond to messages automatically during offline-hours
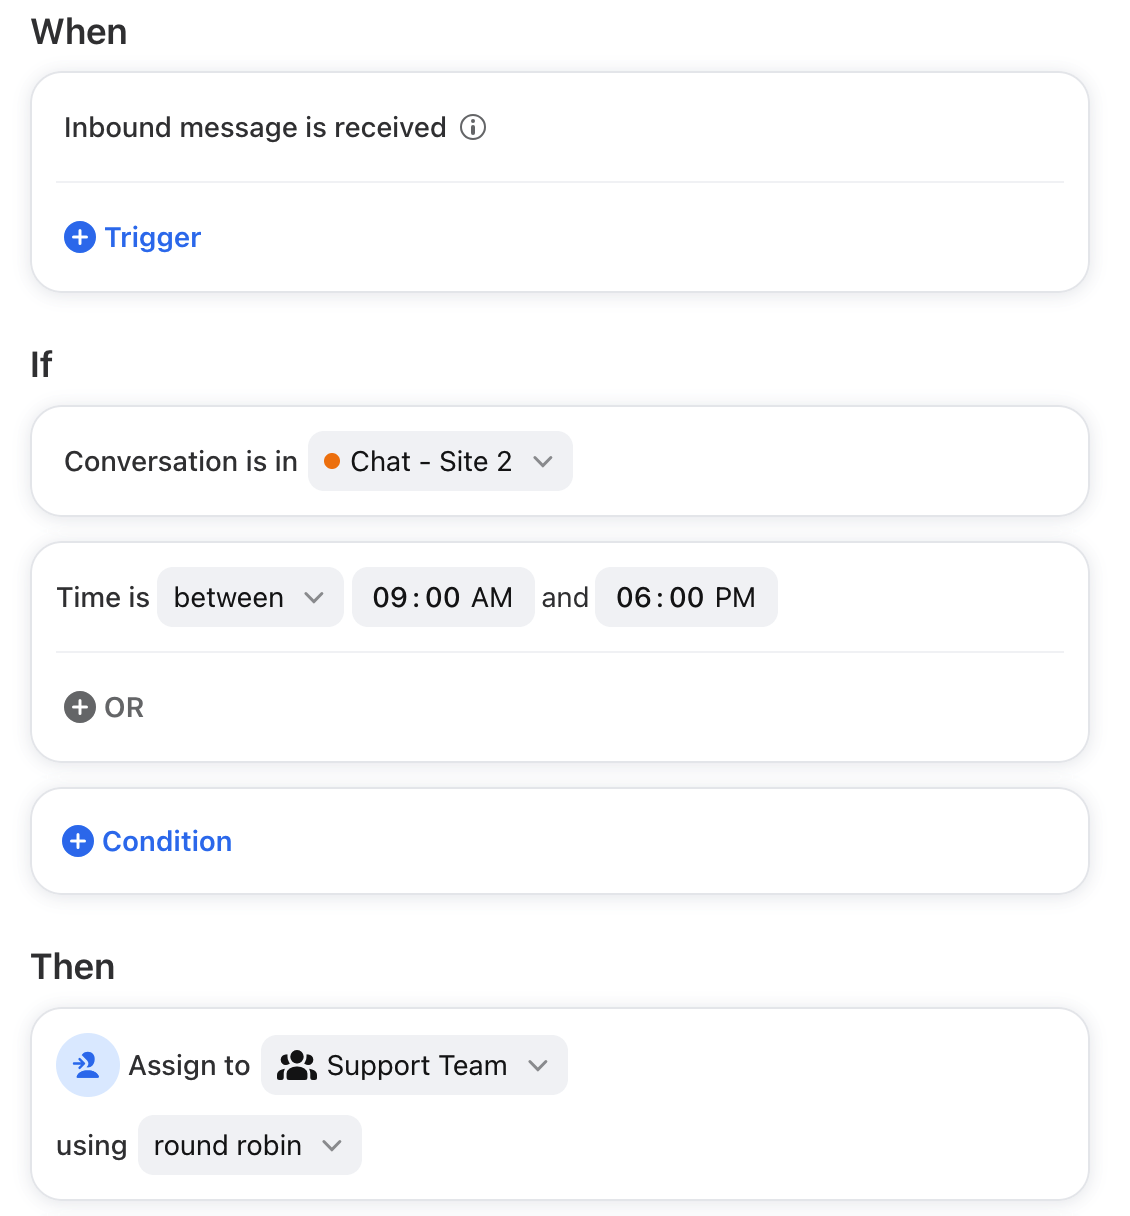
Example 2: Assign chats in a round-robin
Example 3: Assign email follow-ups to the user who replied to the chat
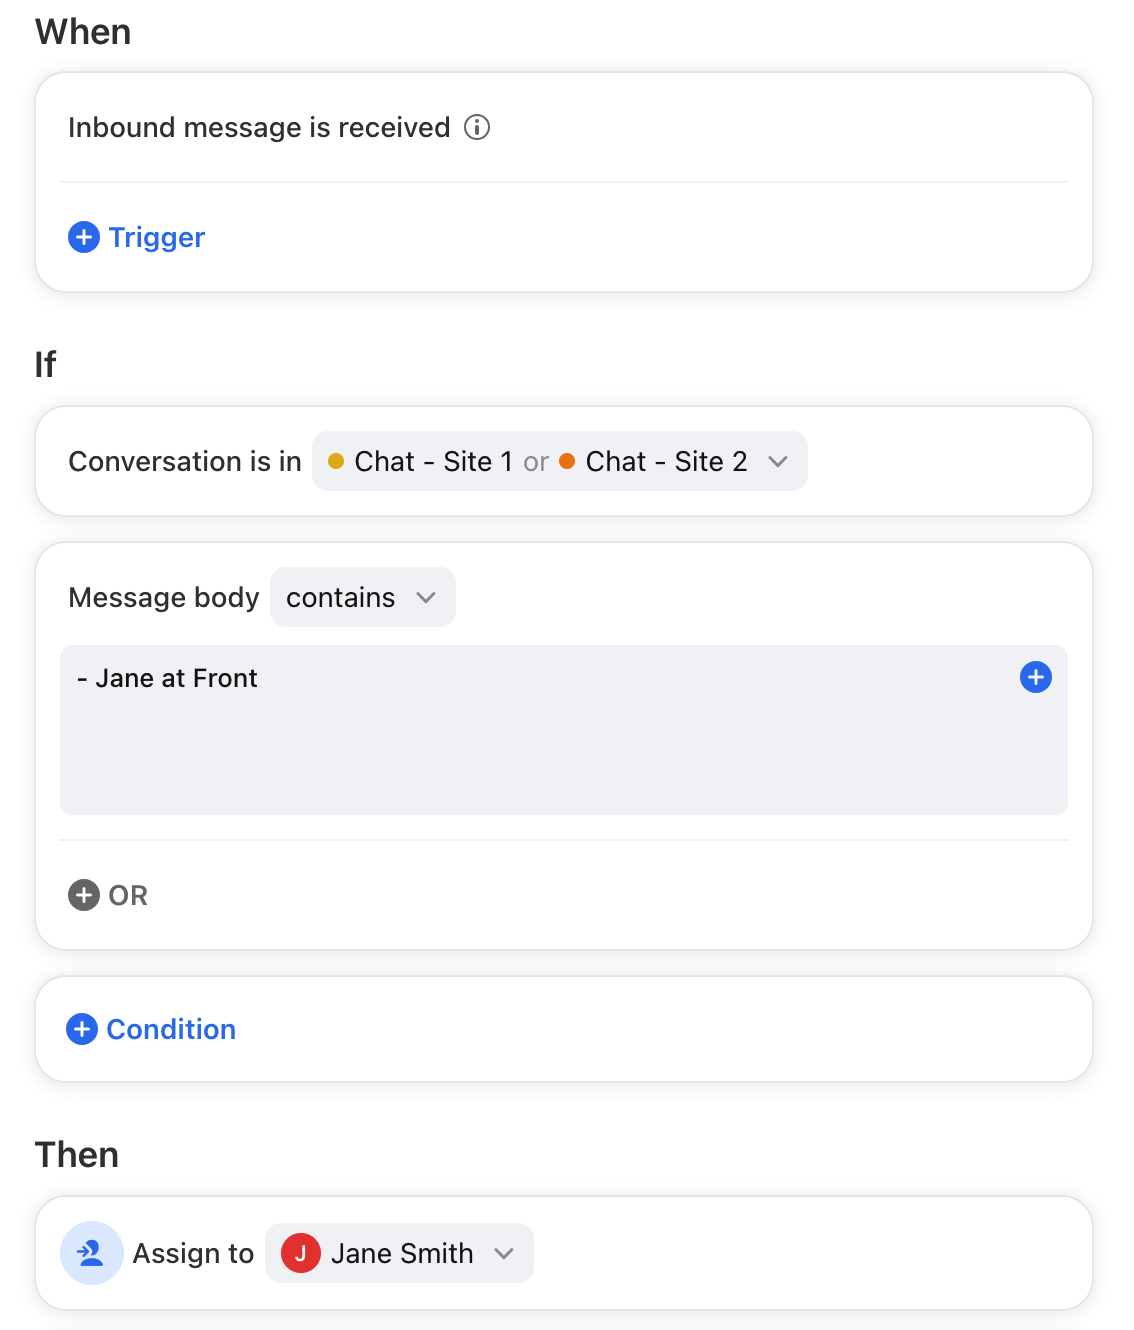
For Conversation is in, choose the email inbox that your chat transcripts are sent from. For Message body contains, enter the teammate's chat transcript signature. Chat transcript signatures are always "- [User] at Front."
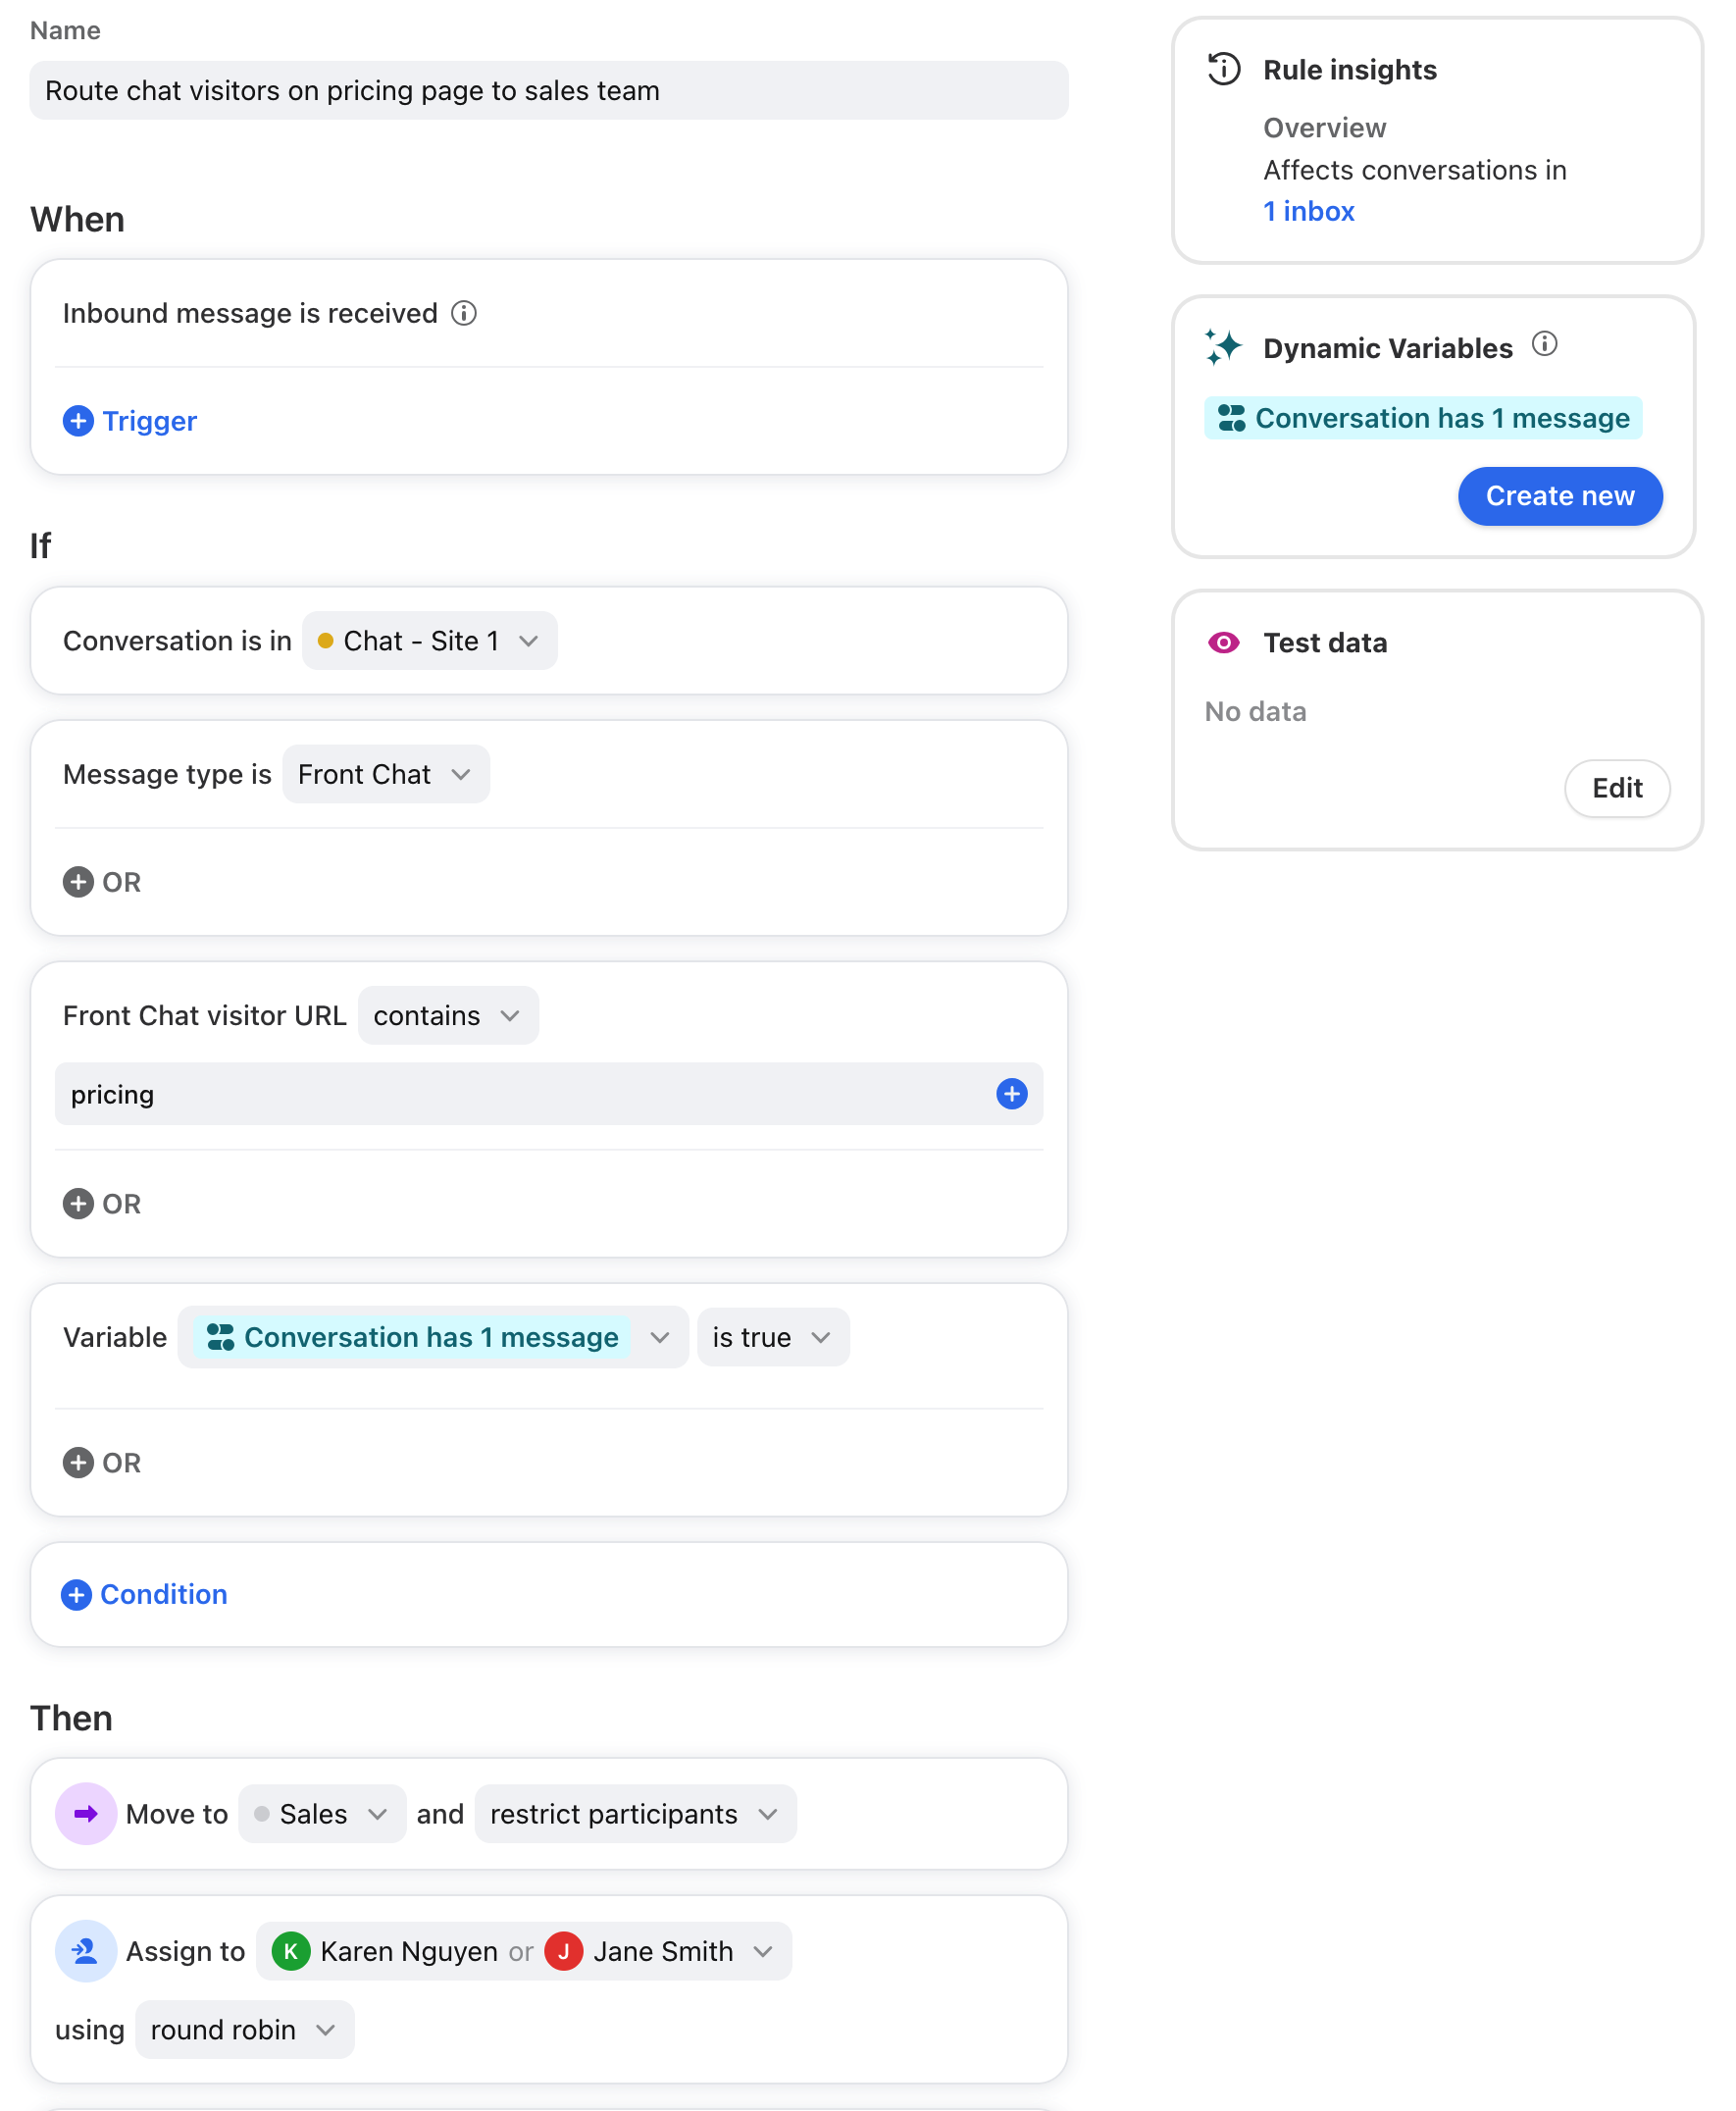
Example 4: Route chats based on Front Chat visitor URL
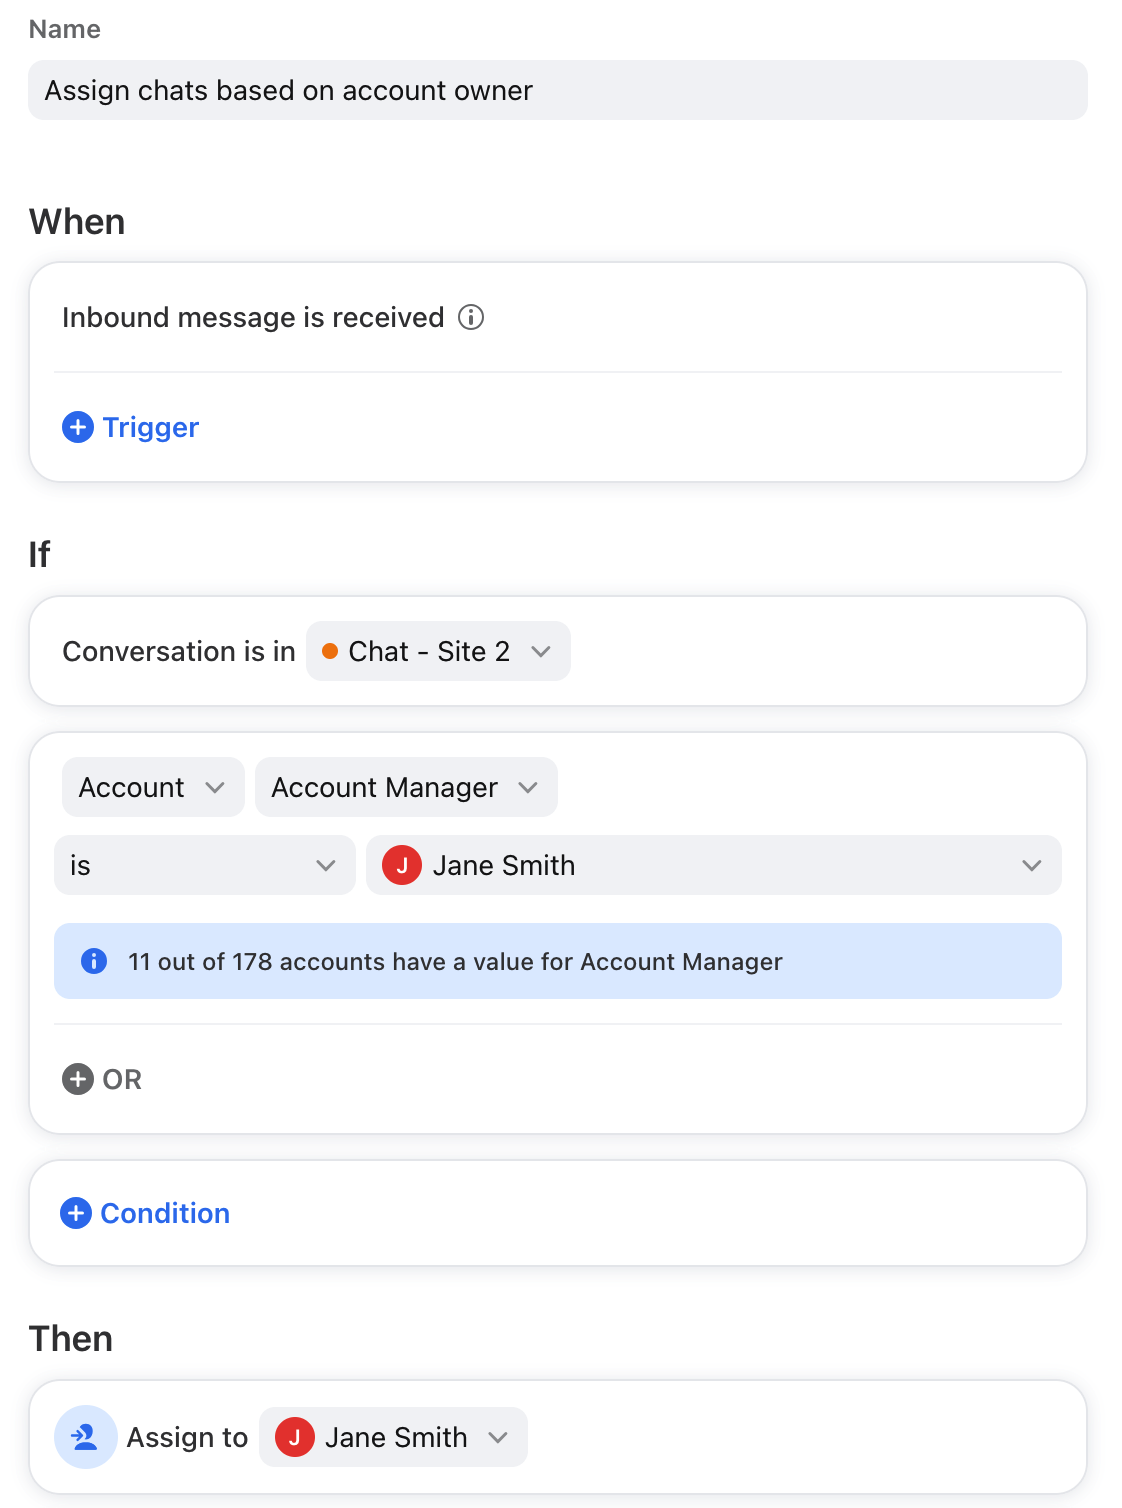
Build rules based on contact details supplied in chatbot
Please see here to learn more about configuring a chatbot.
Once you’ve set up a chatbot that collects contact details from chat visitors, you can build rules to automatically route, tag, and assign these conversations leveraging the custom contact fields you collect. For example, a popular workflow you can create is assigning a chat conversation based on the chat visitor’s account owner.
If a contact exists that matches the contact information the chat visitor supplies, and that contact has an account owner, you can set up an assignment rule so that account owner will be responsible for resolving the conversation.
Share content
Customize the feel of your conversations by sharing GIFs, using emojis, or sending files. Both Front users and website visitors can:
Send and receive plain text messages and click full URLs
Choose attachments (files up to 25 MB) and preview images and GIFs. The supported attachment types are .png, .jpg, .gif, .txt, .mp4, .mov., .pdf, .txt, .csv, .xlsx, .wav, .mp3
Send shared links to Google Docs or Dropbox files for other content types
Front users have additional formatting options:
Bold, italics, and strikethrough
Bulleted and numbered lists
Embedded hyperlinks
Quotes
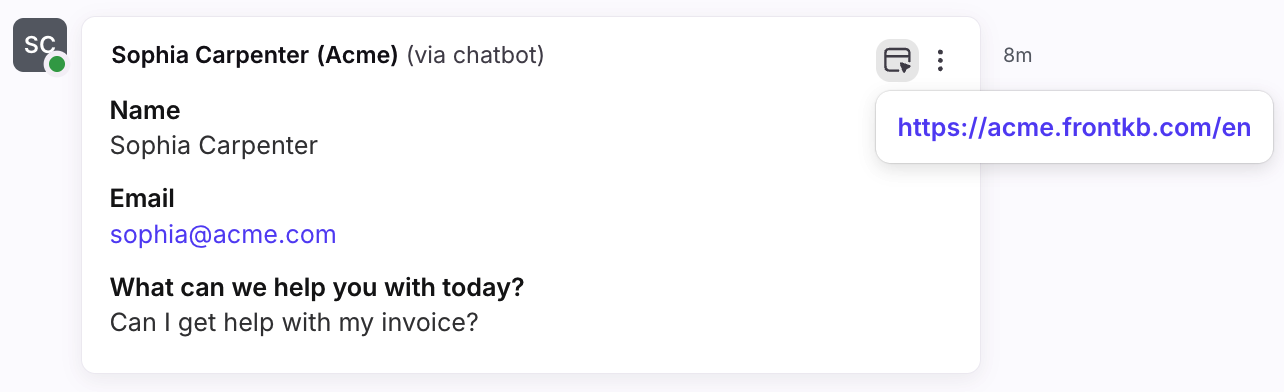
See what page your visitor is on
Understand where your visitor is on your website. Click the Visitor URL icon on the right side of any message view it. You can also click the link to navigate to the page.
You can also set up rules that automatically tag or route Front chat conversations to specific inboxes based on the URL a Front Chat visitor is initiating a conversation from.
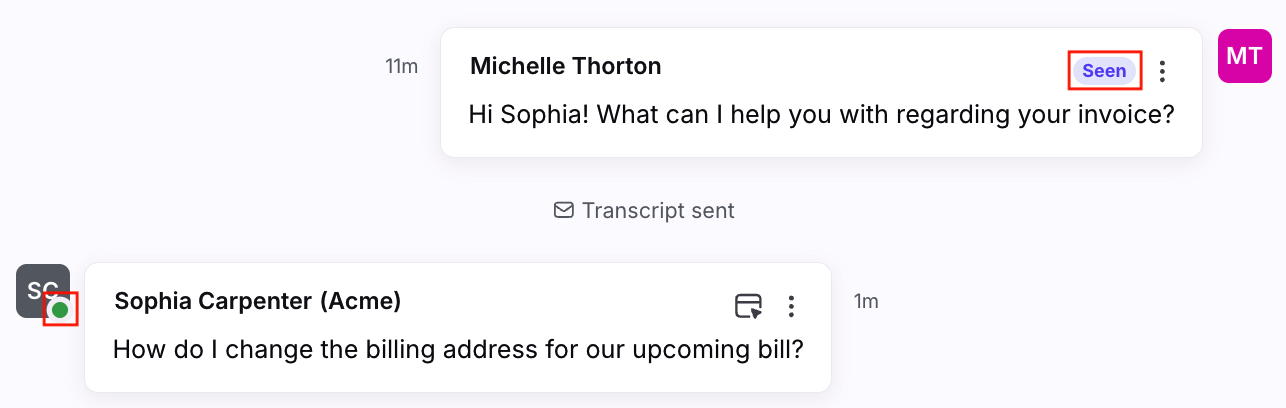
Online and seen indicators
When a visitor has read your message, a Seen indicator will appear. You will also see a green Online indicator if the visitor is currently active.
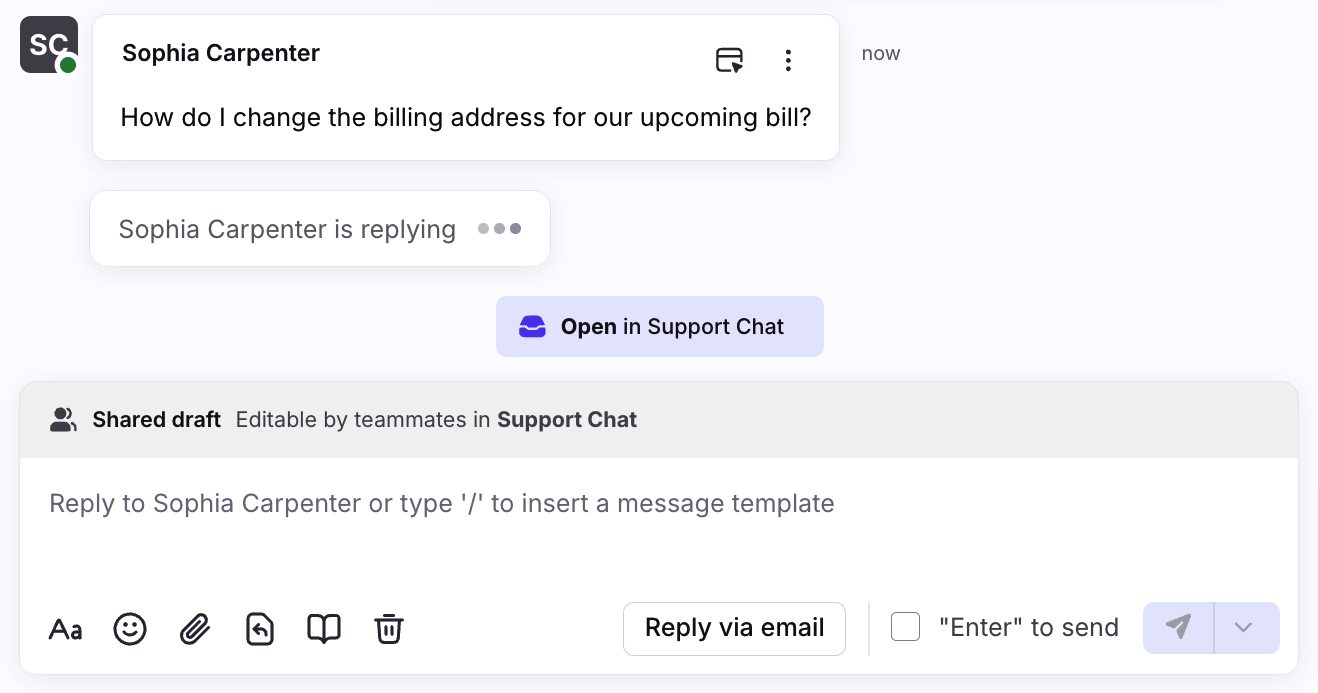
Typing indicator
You can see when a visitor is typing in the chatbox in real-time. This is what the visitor sees when you add Front Chat to your website:

This is what you'll see when replying to the visitor in Front:
Front Chat notifications
By default, Front Chat notification sounds are distinct from other channel notification sounds to make it easier for your team to identify and prioritize responding to chat messages quickly. You can reference this article to ensure your sound notifications are configured correctly.
The Front Chat sound cannot be customized.
Front CSAT
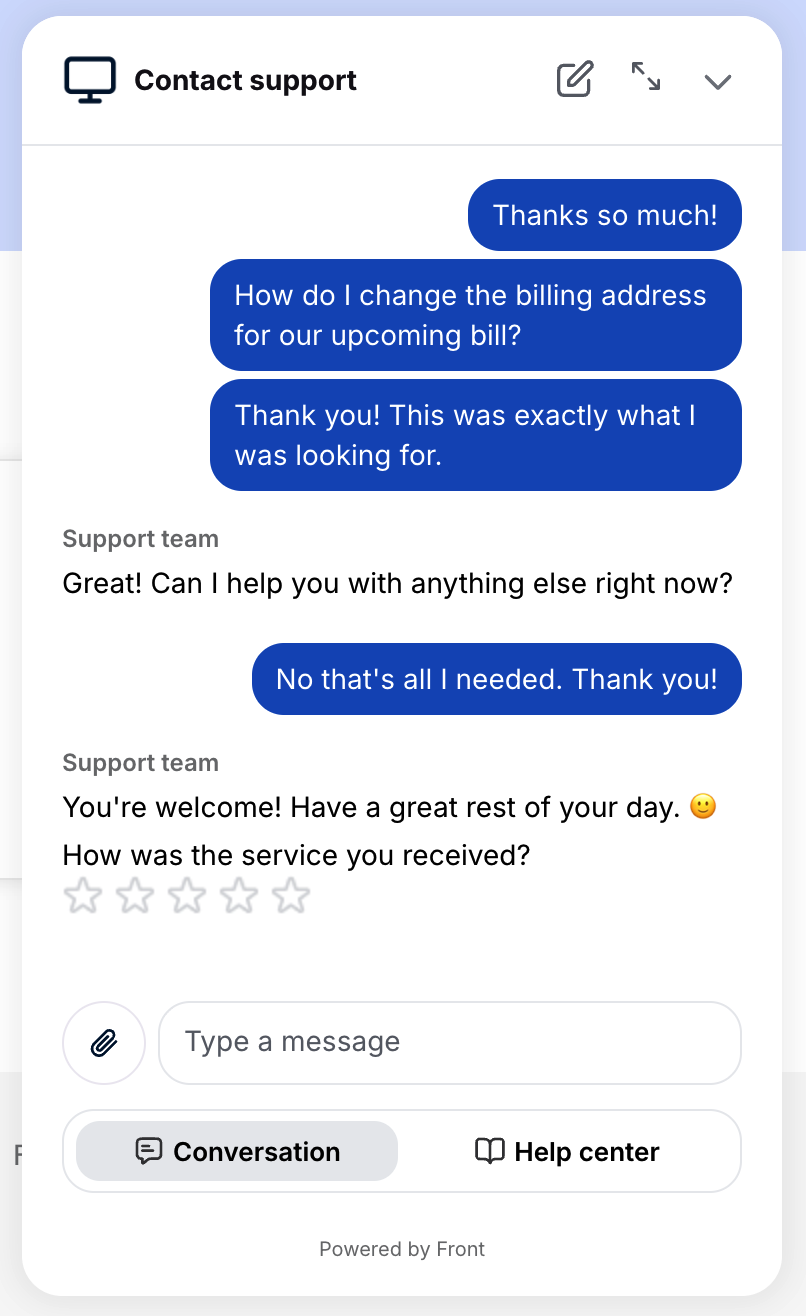
At the end of a conversation, chat agents can add the {{survey}} variable to a message to prompt visitors to rate their experience using Front's CSAT feature.
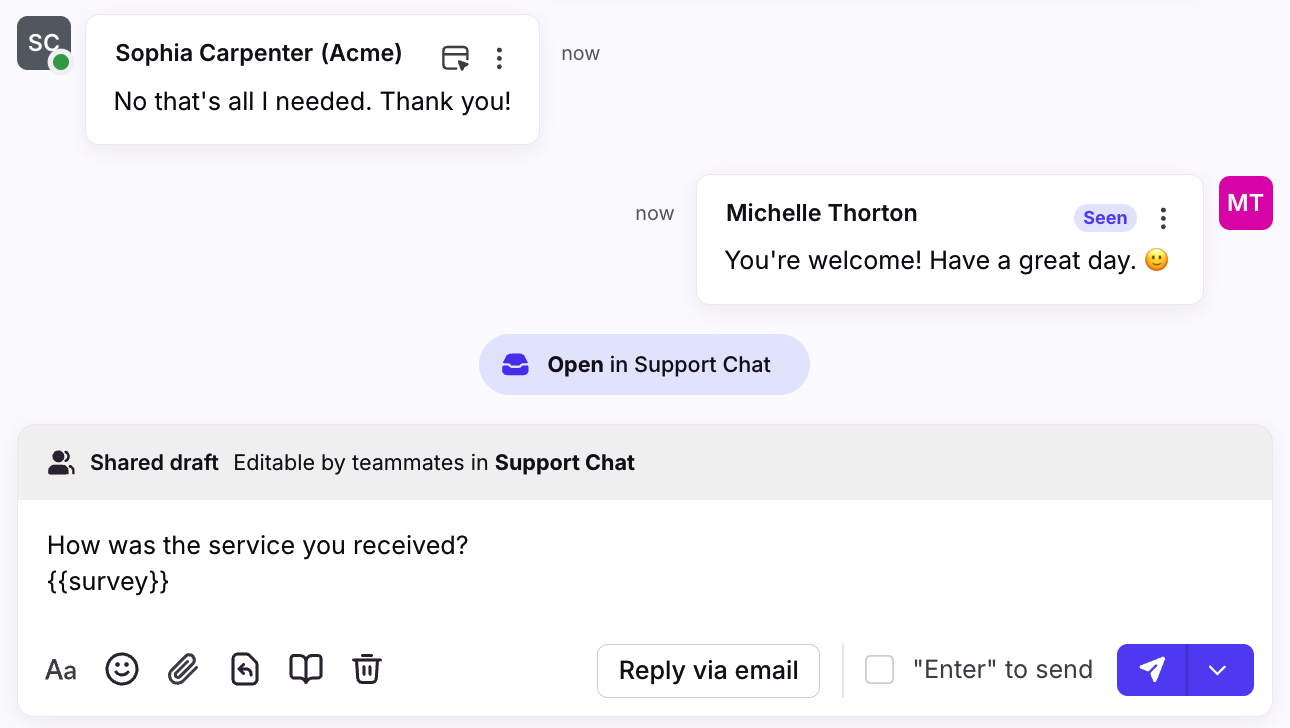
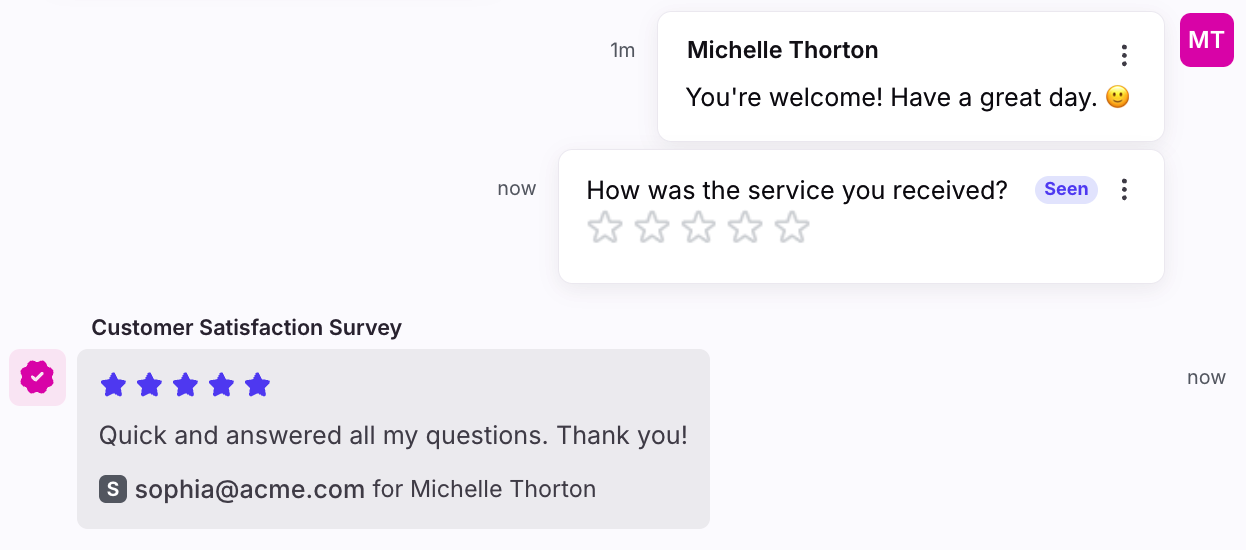
Chat visitors will see a 5-star CSAT image in the message.
After selecting a star rating, they’ll be navigated to a new web page to add an optional comment and submit. The rating is added a comment in the conversation.
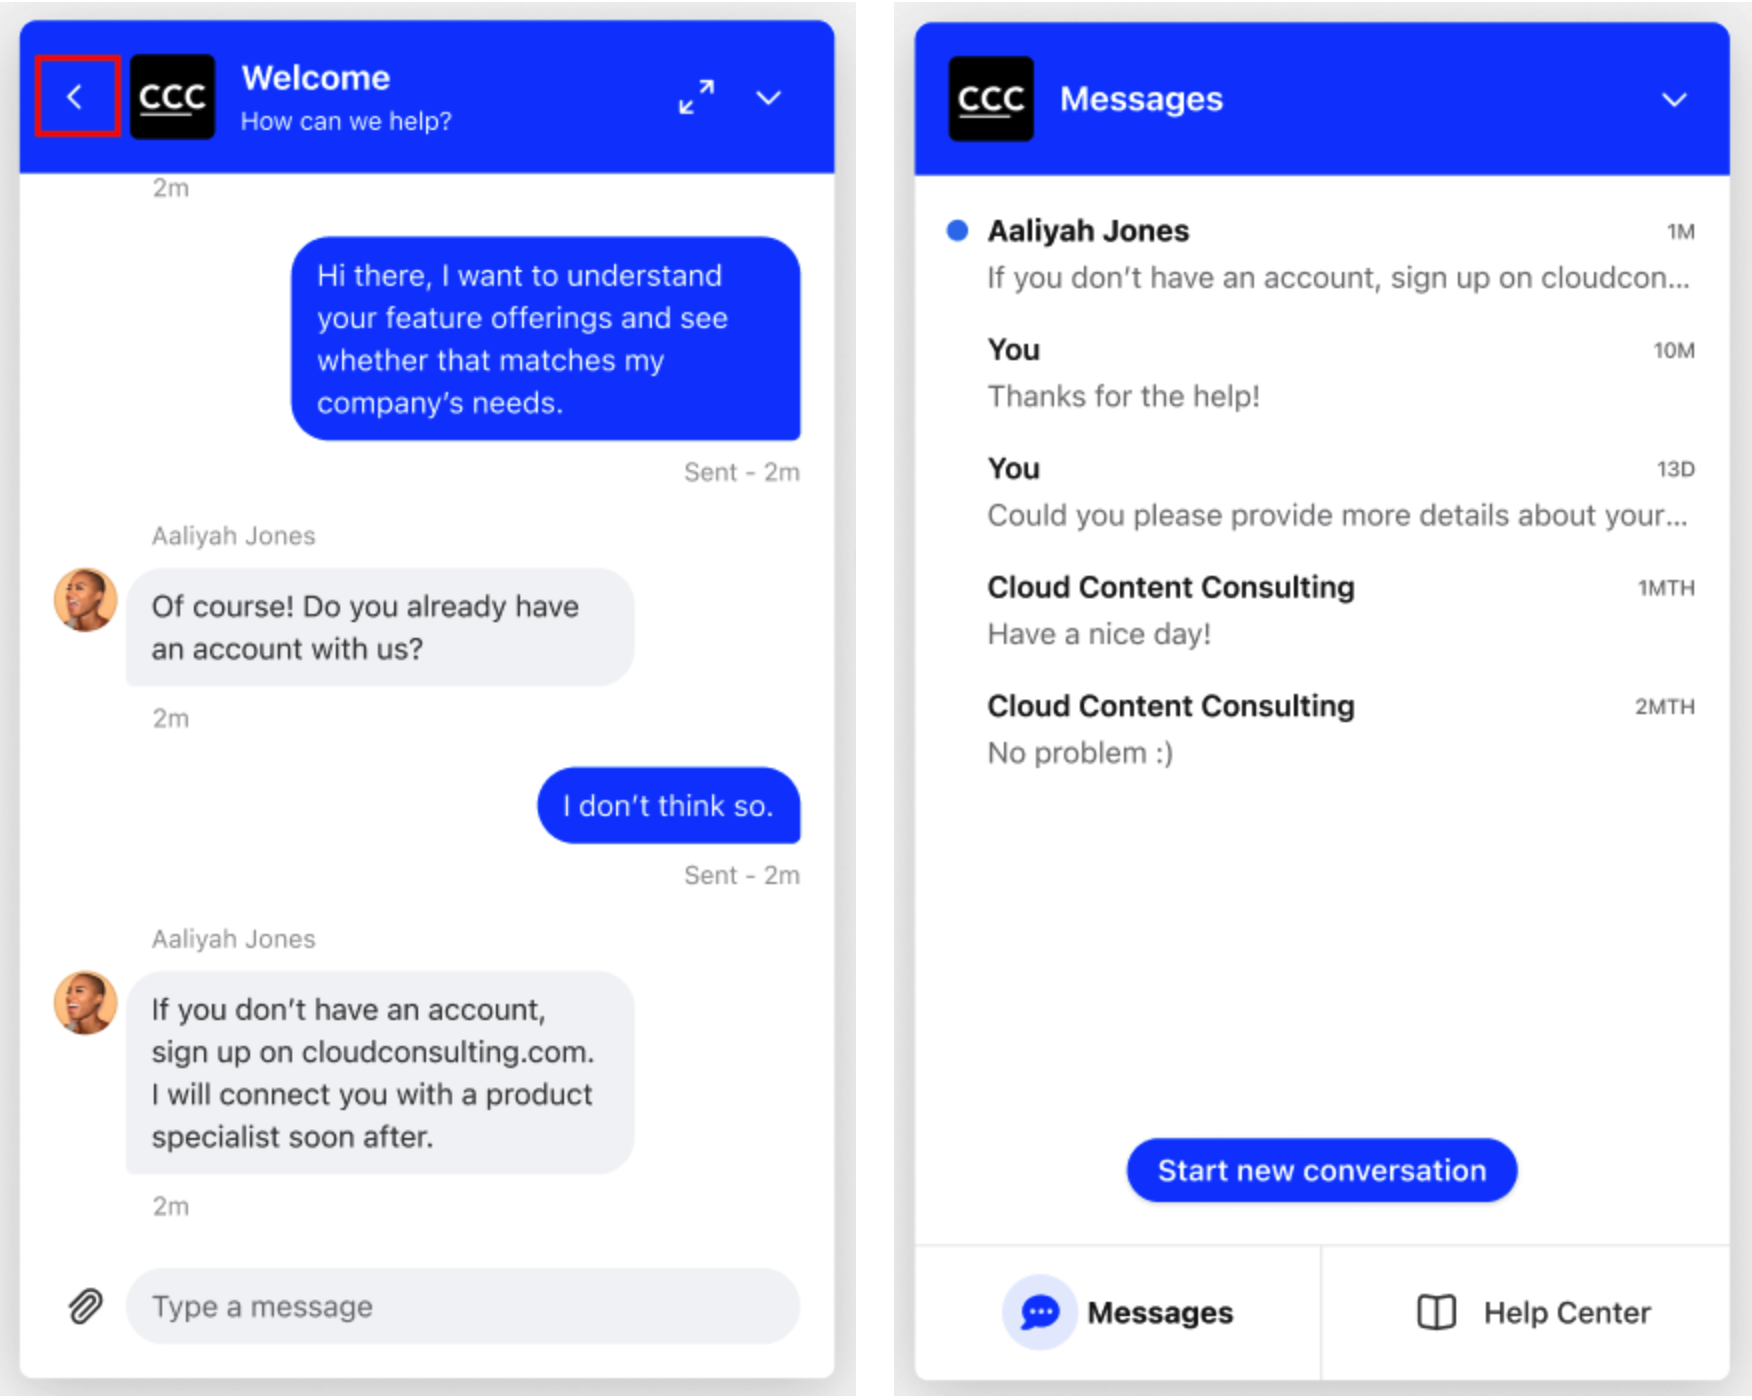
Conversation history
If your widget is set up to recognize and verify logged in users, chat visitors can access past conversations using the arrow at the top left.
Important to know:
Past conversations are listed in view-only mode and cannot be reopened.
Visitors can view up to 100 of their most recent conversations.
Conversation history cannot be cleared or removed.
Conversation history is not supported for anonymous users.
FAQ
Are there character limits for Front Chat messages?
Yes. Each message has a 2000 character limit.
Is Front Chat supported on mobile applications?
Yes. You can use a webview to implement Front Chat on mobile applications. You can find more information on this here.
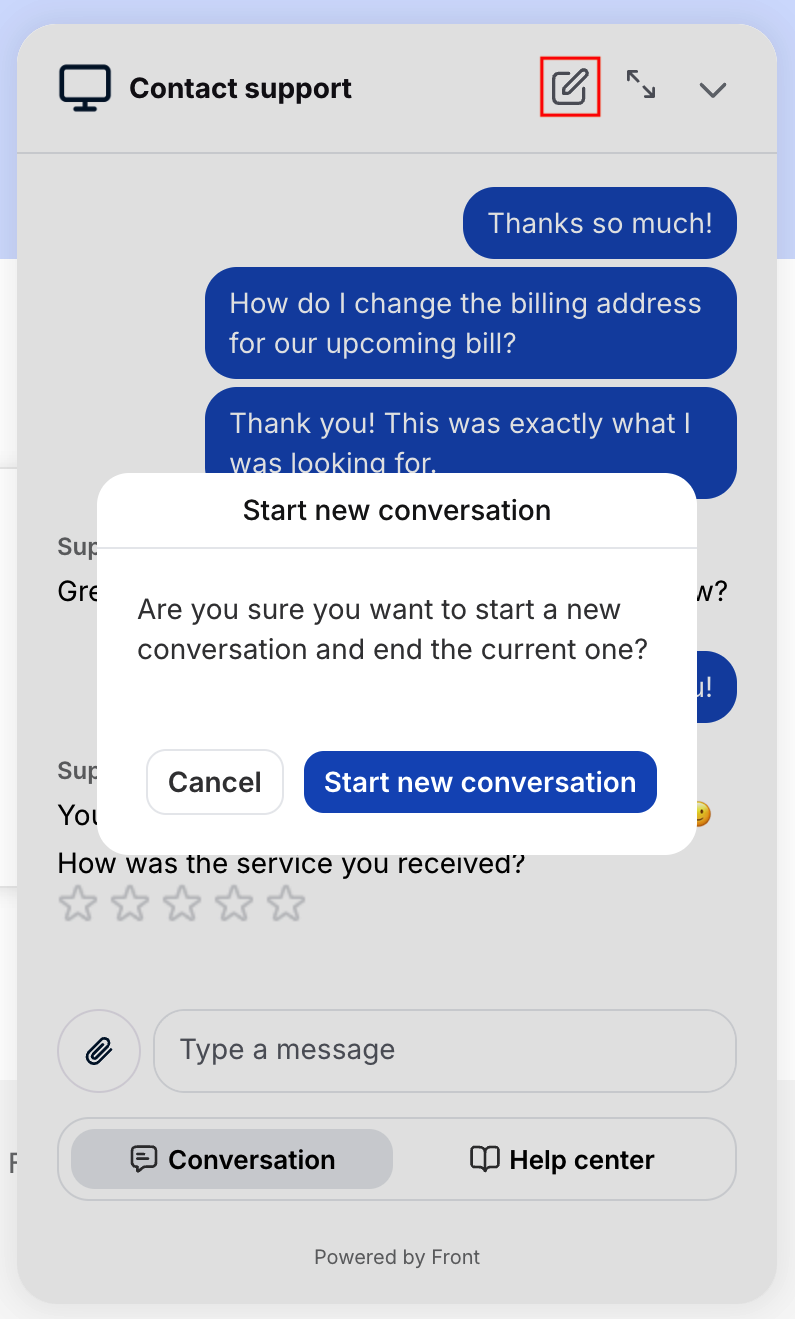
How can visitors start a new chat conversation?
Chat visitors can click the pencil icon, then Start new conversation to end the current chat and start a new one.
Otherwise, visitors will see a Start new conversation button if the widget is set to automatically refresh after a selected period of time. See setting here.
If you are using the chatbot feature, see the following FAQs:
How are anonymous chat visitor names generated?
When chatting with an anonymous chat visitor, Front will auto-generate a name using a random color and animal string. e.g. Purple panda.
To disable the ability for anonymous users to chat in, see this article.
Can I log Front Chat messages into Salesforce?
Yes. You can use Front's rule engine to sync every inbound and outbound chat to Salesforce. The rule would look something like this: WHEN Inbound messages, IF Inbox is [chat inbox], THEN Send as task to Salesforce. In order for this to work, you will need to first have the Salesforce integration enabled in your settings. Salesforce will log the chat messages to the contact with a matching email address, similar to the logging email functionality Salesforce provides.
What happened to my Welcome Message and Pre-Chat Form?
Any previous Welcome Message and Pre-Chat Forms you’ve configured have been automatically migrated to the chatbot experience. You can continue to make changes to these from within the chatbot builder.
Pricing
Front Chat is available on all plans. For the latest Starter plan, you must have Front Chat set as your company's channel type.
See additional details about pricing of certain Front Chat features below:
Feature | Starter plan | Professional plan | Enterprise plan |
Rules for Front Chat inboxes | ✅ | ✅ | ✅ |
Analytics for Front Chat | ✅ | ✅ | ✅ |
CSAT in Front Chat | ✅ | ✅ | |
Pre-chat form customization beyond name & email fields |
| ✅ | ✅ |
Knowledge base integration | ✅ | ✅ | |
Display "Powered by Front" customization | ✅ | ✅ | |
Name for display feature |
|
| ✅ |
Some legacy plans may also have these features.