
How to set up a Front Chat inbox
Overview
Set up a Front Chat inbox to live chat with your customers directly from Front, keeping all your customer interactions occur in one place. Front Chat will work for any website, Electron web and desktop applications, and mobile webpages.
See this article to learn more about Front Chat settings and workflows.
Instructions
Step 1
Click the gear icon, then select the workspace you'd like to add a Front Chat inbox to.
Step 2
Click Inboxes in the left menu and create a new shared inbox or individual inbox.
Step 3
Click Channels in the left menu, then click Connect channel.
Step 4
Select Front Chat from the channels menu.
Step 5
Enter a name for the channel, then choose the inbox that conversations will route to. Click Continue.
Step 6
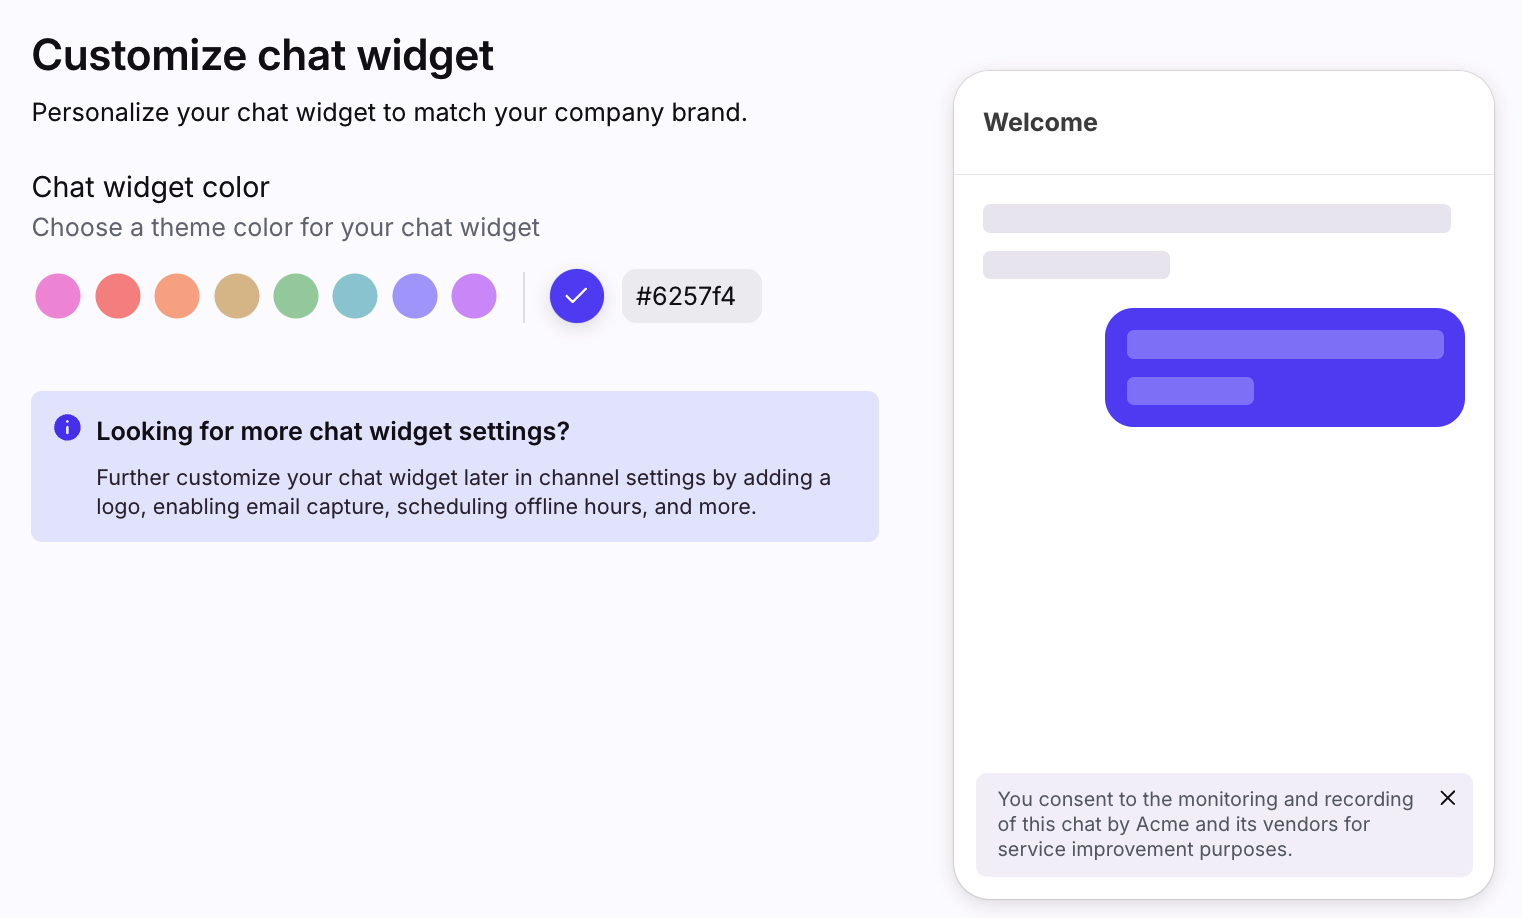
Select the theme color that visitors will see when they view your chat widget. Click Continue.
Step 7
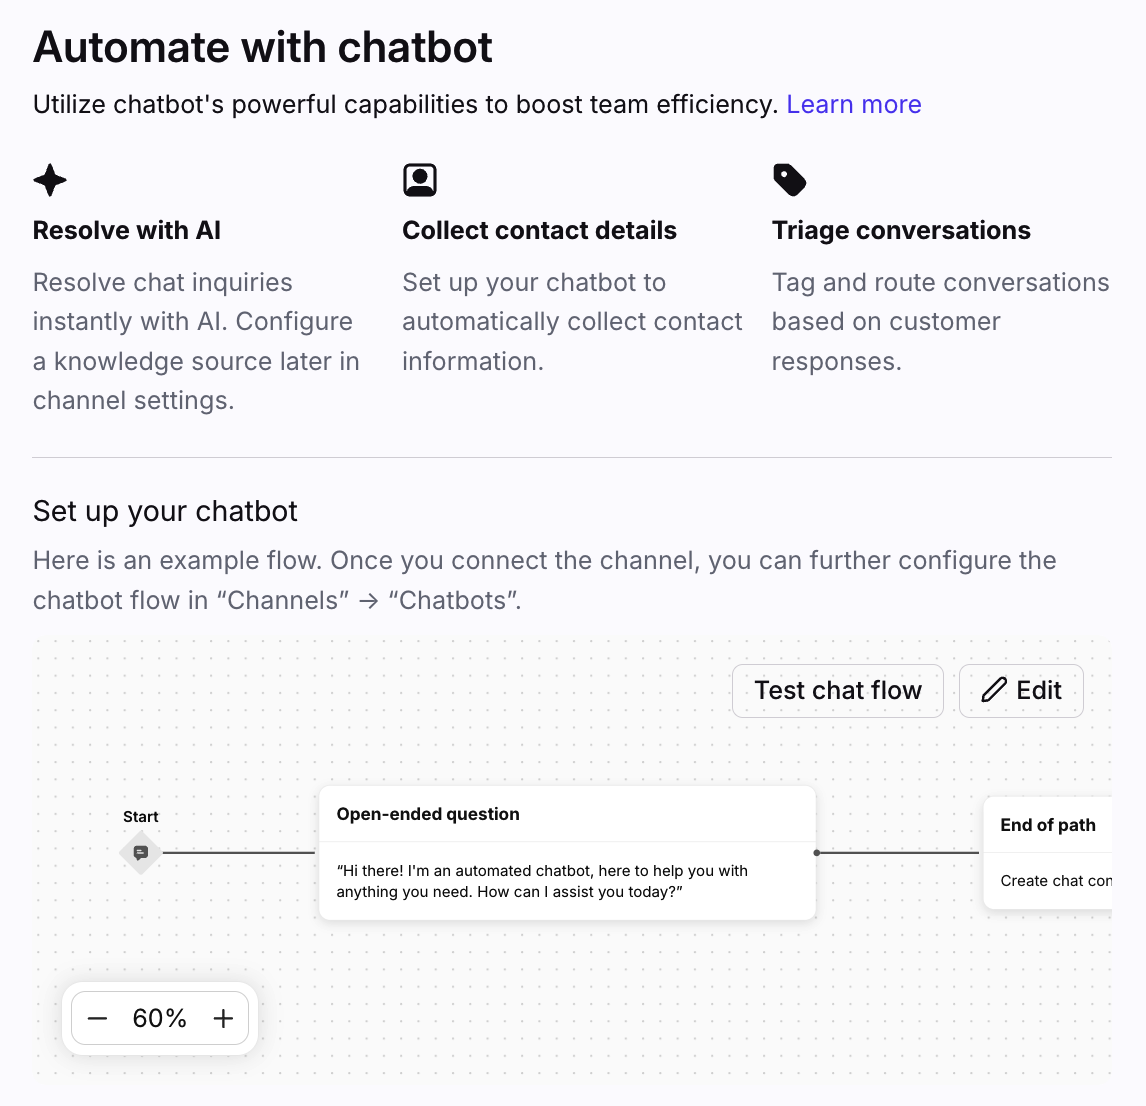
Click Edit to configure the chatbot for your chat channel. Otherwise, click Continue with default flow to continue.
Step 8
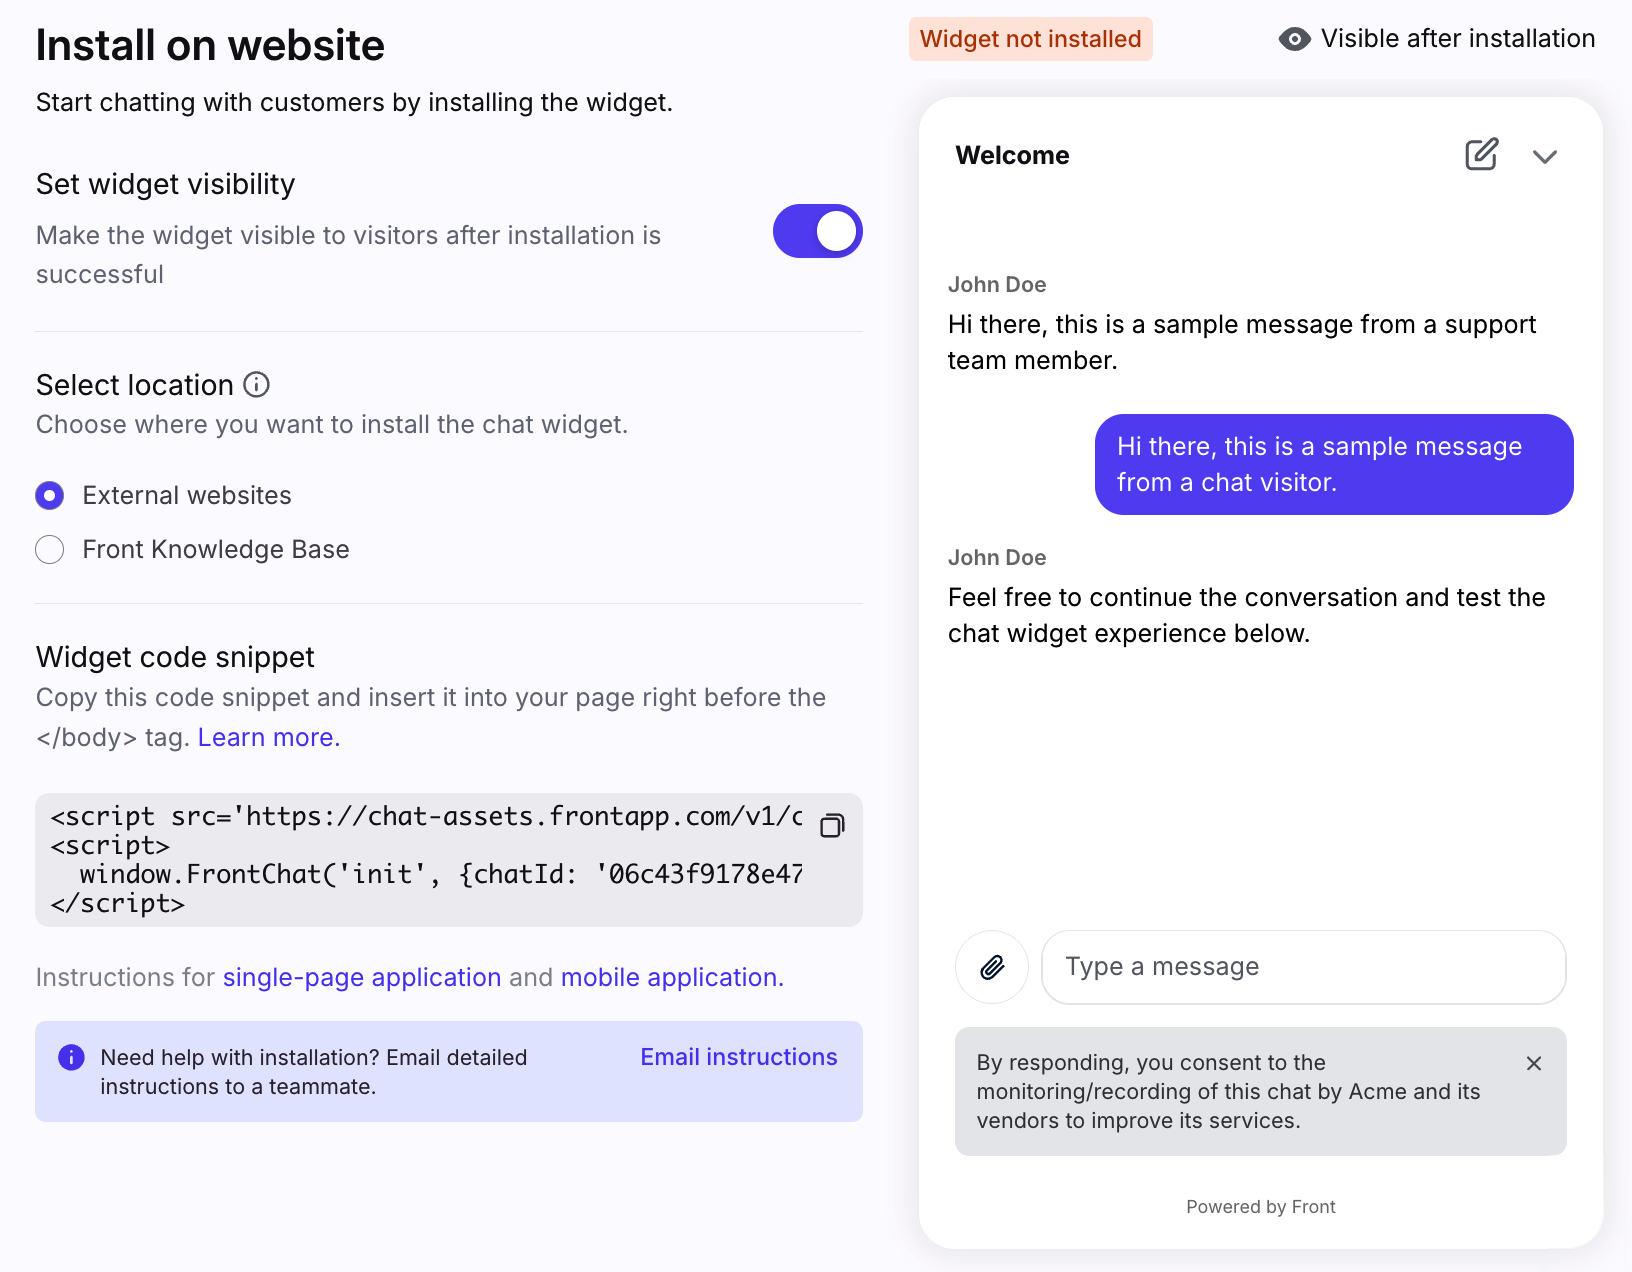
There are two options depending on where you want to install your chat widget:
Option 1: External website - In the Select location setting, select External websites. Copy your widget code snippet to install Front Chat onto your website or app to start receiving and sending messages in Front. See the Install Front Chat on your website section below for detailed instructions.
Option 2: Front knowledge base - In the Select location setting, select Front knowledge base. Select the knowledge base you want to add the chat widget to. Click Done.
Otherwise, select Do it later.
Step 9
You'll be redirected to your Front Chat channel's settings. Configure the remaining settings for your chat channel using the tabs at the top. See this article for more details.
Install Front Chat on your website
If you do not need to recognize logged in users
Grab the code snippet by clicking into the Front Chat channel you just created. Select the Installation tab, then copy the code in the Widget code snippet section.
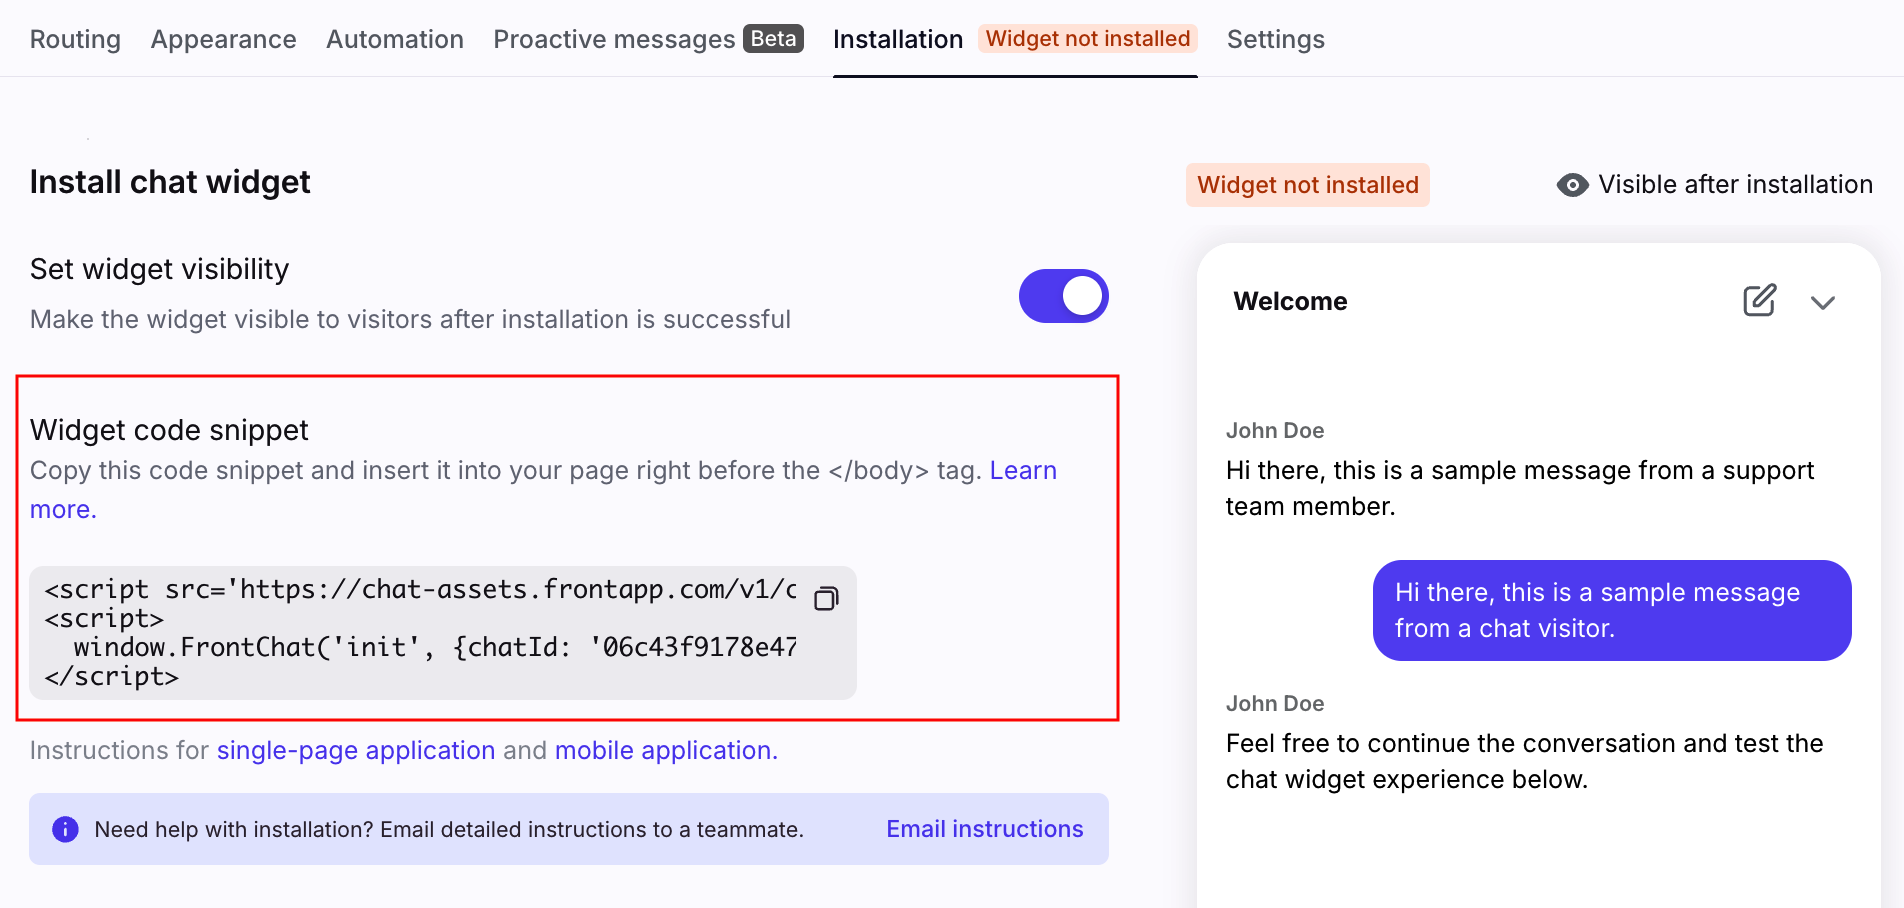
Insert the code snippet before the '</body>' tag on your webpage. You will need to do this before messages will start syncing from your website into your Front Chat inbox in Front.
Here's an example of what that of a code snippet will look like:
<!DOCTYPE html>
<html lang="en">
<head>
    <meta charset="UTF-8">
    <title>Page With Front Chat</title>
</head>
<body>
    <h1>Welcome to My Page with Front Chat!</h1>
    <p>This is a simple HTML page.</p>

    <!-- Your script snippet -->
    <script src="https://chat-assets.frontapp.com/v1/chat.bundle.js"></script>
    <script>
        window.FrontChat('init', {chatId: 'b107a36...', useDefaultLauncher: true});
    </script>
</body>
</html>
Your Front Chat channel is now live. Start chatting with your customers!
If you need to recognize logged in users
If you are using Front Chat in a web or desktop application, you have the option to automatically recognize logged in users via their email address or a user ID so they don’t have to manually provide their contact details. This will either create a new contact in Front or associate them with their existing contact.
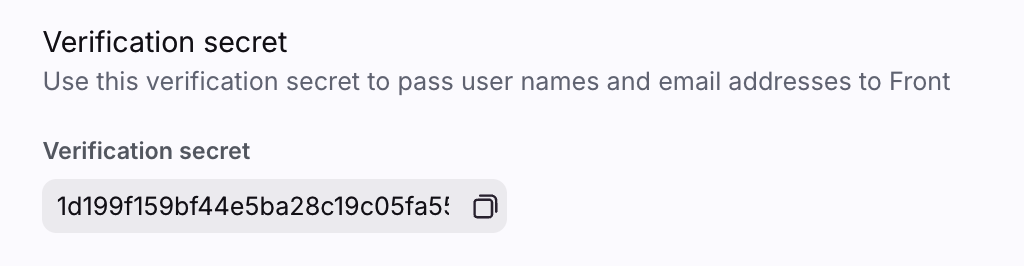
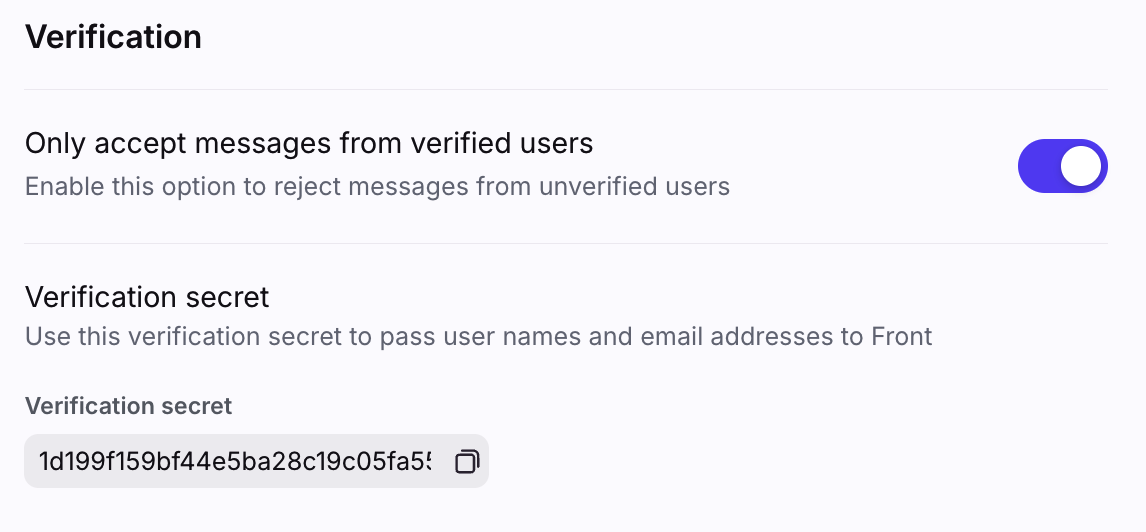
To automatically verify chat visitor identity, you’ll need to compute a user hash from the Verification secret in your Front Chat channel Settings tab. Please reference the instructions in the Front Chat API for more details.
Any chatbots you configure will automatically skip asking for email if the chat visitor is automatically verified through their email.
In the conversation, you’ll also see an indicator next to the email field that it was skipped in the chatbot flow: "This information is automatically collected because the chat visitor is logged in. The chatbot skipped asking this question since it is known."
If you’re verifying a chat visitor via their user ID they will still be asked to provide their contact details.
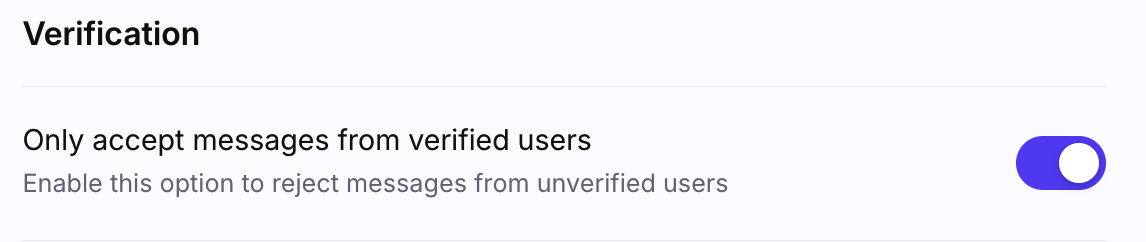
To reject messages from users not logged in to your site or app, toggle on Only accept messages from verified users in your channel Settings tab. If you want to accept messages from anonymous visitors browsing your site, do not enable this toggle.
Using Front Chat with a Content Security Policy
If the site you wish to install Front Chat on a site that has a Content Security Policy, you may need to make some adjustments to the above instructions to allow Front Chat to run properly.
Update Your Site's CSP to Support a Nonce-based script-src
One of the possible ways to specify a CSP script-source is via nonce-<unique val>. This mechanism leverages a nonce that is generated on the server randomly (and used only once!) to inject the proper CSP directive into both the header and content of the response so the browser knows it can securely evaluate the scripts in the page.
To do so, add a line to your CSP that specifies a nonce-based script-source. For example:
Content-Security-Policy:
  script-src 'nonce-2726c7f26c'
The value must begin with nonce and the 2726c7f26c portion must be generated randomly and never used for more than one request.
For more details about using CSP nonces, see Mozilla's MDN documentation.
Adjust the Snippet to Include a Nonce Value
When you generate the page that contains the Front Chat widget, you must inject the nonce value from the your CSP (2726c7f26c in the example above). Updating the example above to use the nonce looks like this:
<script type="text/javascript" src="chat.bundle.js" nonce="2726c7f26c"></script>
<script nonce="2726c7f26c">
  window.FrontChat('init', {chatId: 'b107a36...',
                            useDefaultLauncher: true,
                            nonce: '2726c7f26c'});
</script>
Note: The value must also be injected as a separate parameter when initializing Front Chat because it creates other script tags that need to leverage the same nonce value.
Update CSP for Front Chat Styles
Front Chat allows the chat widget to have a customized style. These styles are applied when the chat widget is initialized. This means that if you're specifying a style-src in your Content Security Policy, you'll need to set it to unsafe-inline to allow Front Chat to apply those styles.
Content-Security-Policy:
  style-src 'unsafe-inline'
Install Front Chat on a single-page application (SPA)
To install Front Chat on a single-page application (SPA) like React, please refer to the front-chat-sdk GitHub package here.
Install Front Chat on a mobile application
To install Front Chat on a mobile application, you can utilize a mobile webview. Follow the instructions here for a step-by-step guide.
Troubleshooting
Common areas to check
If you're experiencing issues with your instance of Front Chat, there are 3 main areas to check:
Check #1: Widget location
The first step to check in the case of a Front Chat instance having trouble showing up is to ensure that it has been installed in the correct place. We recommend locating the widget's code just above the closing </body> tag. You can check the position of the code by right-clicking on your website > View page source, and then performing a search for the code snippet.
If this widget code is not found within in the <body>...</body> HTML element, it may have been compressed into one of your Javascript asset files, and will likely require further investigation. Please contact our Support team with those details.
If you can see the widget appear on the page, but not within the </body>...</body> HTML element, this is likely the cause of the problem.
Check #2: Widget code
If your widget code appears in the right location, ensure that it appears as provided in the channel settings. Common changes / issues with the widget code itself include:
Adding
deferto the script tag. This delays loading the script and can cause the chat initialization to fail.The
chatIdin theinitcall is missing or incorrect.
You can find your chatId in your channel settings.
Check #3: Widget settings
If all of the above checks appeared valid but you're experiencing issues receiving messages from your Front Chat, it could be because your channel is configured to only receive messages from users that had their identities verified.
Here is what this setting looks like:
If this setting is true, it should be expected that you will not receive new inbound messages from unverified visitors.
When I attempt to initialize the widget, I get the error window.FrontChat is not found
If you see the above error, one of the following may be happening:
Scenario #1: The chat.bundle.js script was not properly executed, and so window.FrontChat is not set up.
The chat.bundle.js script may fail to execute for a variety of reasons. Check that:
The script tag correctly has a “src” that is set to https://chat-assets.frontapp.com/v1/chat.bundle.js
There were no network issues with retrieving the chat.bundle.js from https://chat-assets.frontapp.com/v1/chat.bundle.js
Your webpage is not blocking the execution of the script tag due to a security policy (CSP). If you are using a CSP, be sure to check out this document.
If the chat.bundle.js executes as expected, there should be a message in your browser logs indicating that the SDK launched.
Scenario #2: The chat.bundle.js script is not done running, and so window.FrontChat is not yet available.
When using the recommended widget snippet from the Front Chat channel settings, the two script tags provided should run sequentially. The first script tag will finish executing before the second, meaning that that window.FrontChat is available by the time the second script tag attempts to call window.FrontChat.
If you are attempting to programmatically insert the chat.bundle.js and then run window.FrontChat, more precautions may be required to ensure that window.FrontChat is only called after chat.bundle.js is finished booting the chat widget.
To handle this, we recommend taking advantage of the first script tag’s “onload” parameter, to ensure that the second script tag can be declaratively run only once window.FrontChat is available.
An example of how this can be done can be seen here.
When running the chat.bundle.js script or calling window.FrontChat I receive a CSP error
If you receive a CSP error, such as the ones that appear in this article, your web page likely has a CSP policy that is preventing the Front Chat SDK or the app inside the iframe from running.
In that case, we recommend you check out Front’s documentation on setting up your CSP policy to allow the Front Chat widget to run.
Pricing
This feature is available on all plans. See additional details about pricing of certain Front Chat features here.