
Understanding tags
Overview
Tags make it easy to track certain topics in your inboxes, set up rules to sort messages automatically, report on trends in analytics, and use as private folders to file your messages into.
Take a Front Academy course here to learn more about using tags.
How it works
Tag types
There are three kinds of tags: private, shared, and company.
Private tags can be managed by any teammate. Each teammate has their own set of private tags.
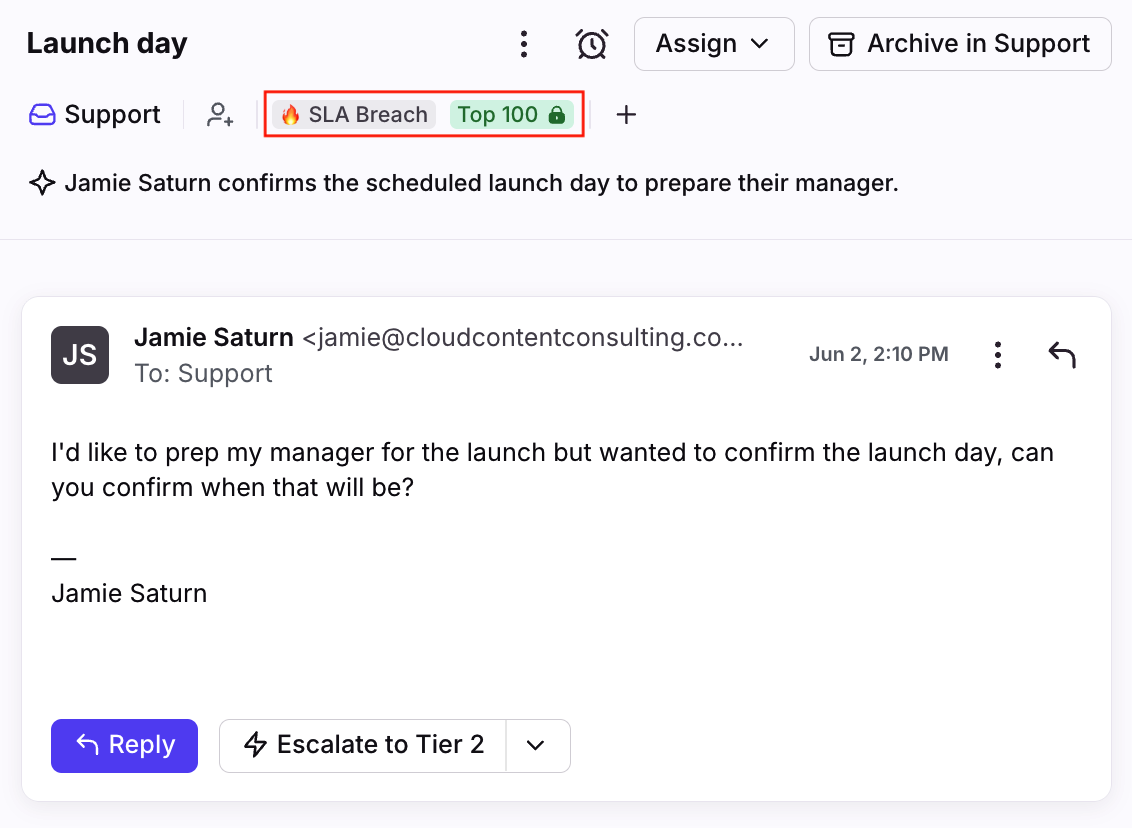
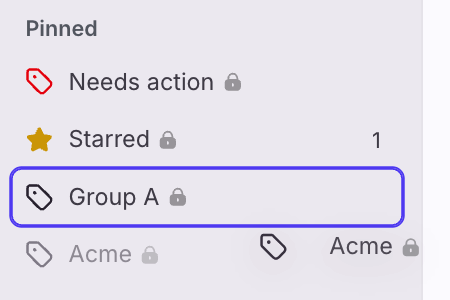
They are displayed with a lock icon in your list of tags.
Teammates cannot see your private tags when you add them to conversations.
All your personal conversations will have the Inbox tag on them by default, which allows you to drag-and-drop conversations out of your inbox and file into a private tag.
Shared tags can be managed by company admins or users with workspace permissions.
They are available to all teammates in your workspace and are visible on any conversations they have access to.
Applying a shared tag to a personal conversation in your own inbox will not automatically share it with your team.
If a private or company tag is created with the same name as a shared tag, an icon with the first letter of the workspace name will appear next to it. This indicates that the tag belongs to the workspace.
⚠️ Adding shared tags to your sidebar is a legacy feature not available for newer accounts. Front companies created after Jan 26, 2023 can use views.
Company tags can only be managed by company admins.
They are available to everyone in your company across all workspaces, and are visible on any conversations they have access to.
Applying a company tag to a personal conversation in your own inbox will not automatically share it with the company.
This feature is available on the Enterprise plan.
Gmail and Office 365 tag sync
When you connect a Gmail or Office 365 account as a channel in Front, your labels in Gmail and folders in Office 365 will sync to Front as tags, including any nesting you’ve set up - granted that those labels or folders were used on the messages that are imported into Front. In other words, if you have Gmail labels or Office 365 folders that were not used on the imported conversations, then Front does not create those matching tags.
If you connect an account as a personal channel, the tags will be private; if you connect an account as a shared channel, the tags will be shared with your team.
After the initial tag sync, any tag changes in Front do not sync back to Gmail or Office 365, and vice versa.
Create tags
From a conversation's tag menu
Step 1
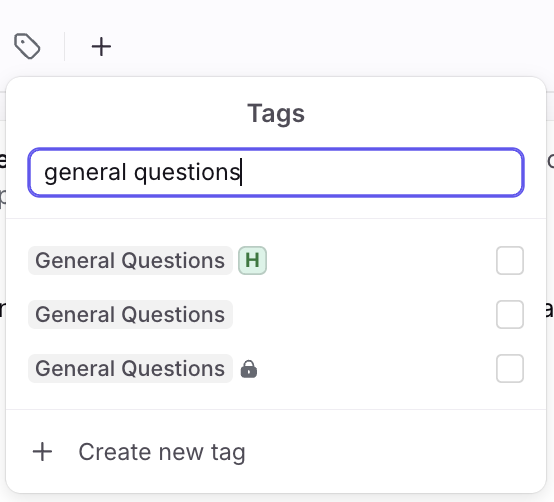
Click the plus icon (+) at the top of any conversation and select the tag option in the dropdown. Then click Create new tag.
Step 2
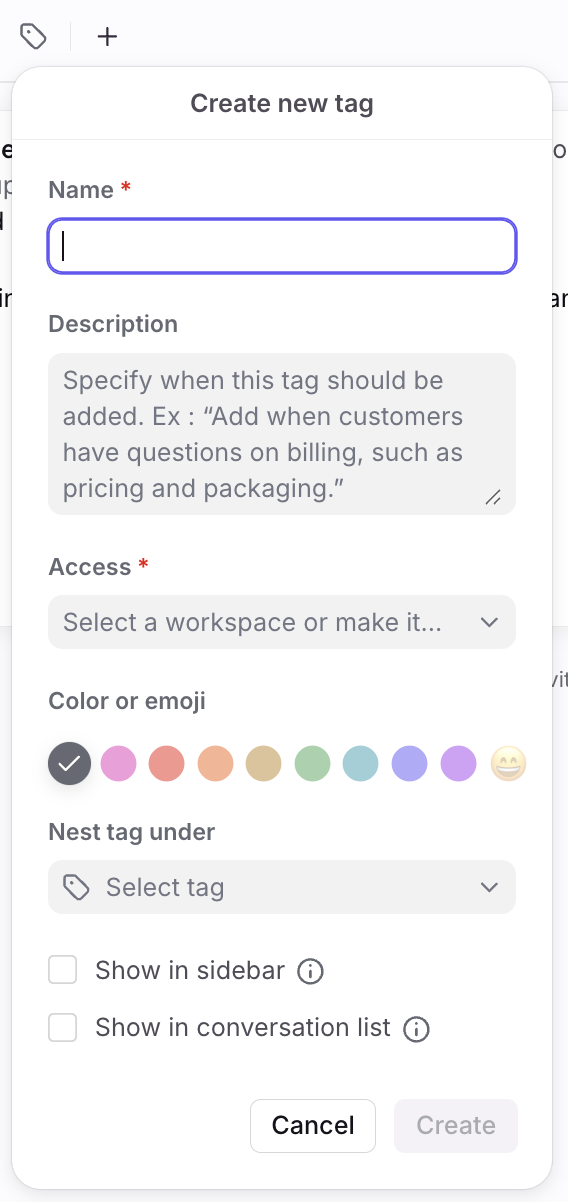
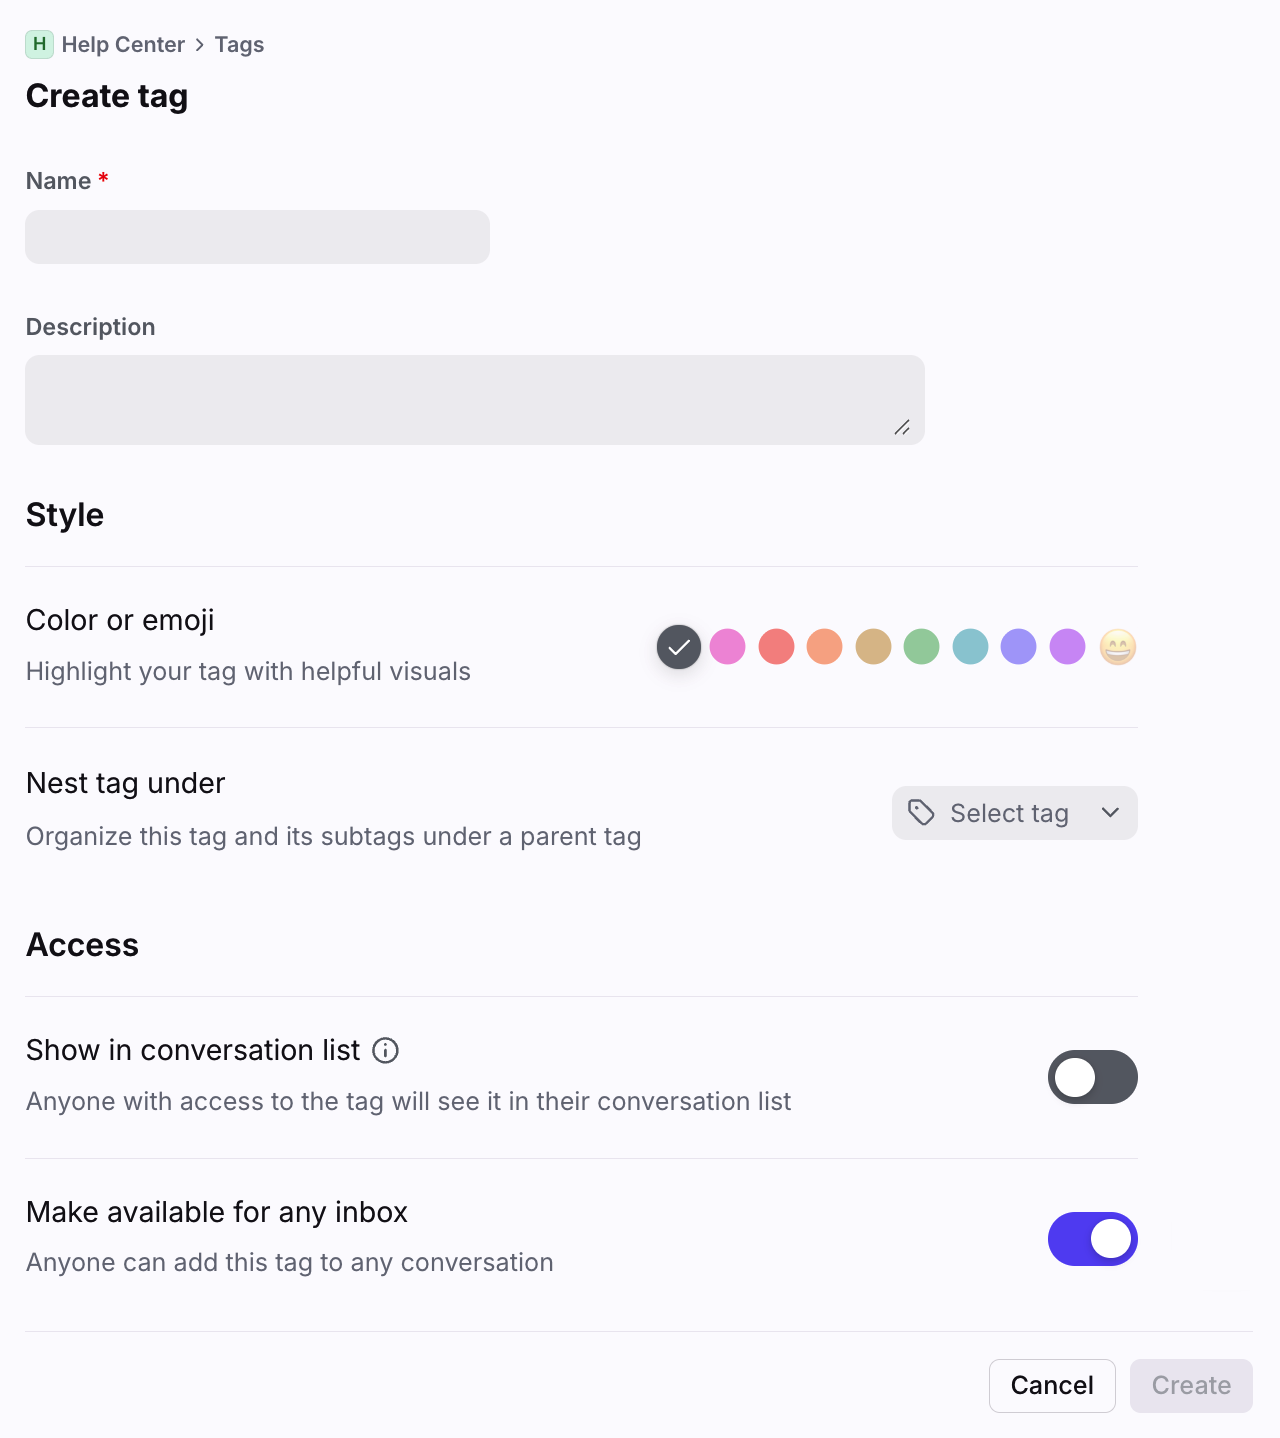
Enter a name for your tag, and select private, shared, or company access for the tag.
Step 3
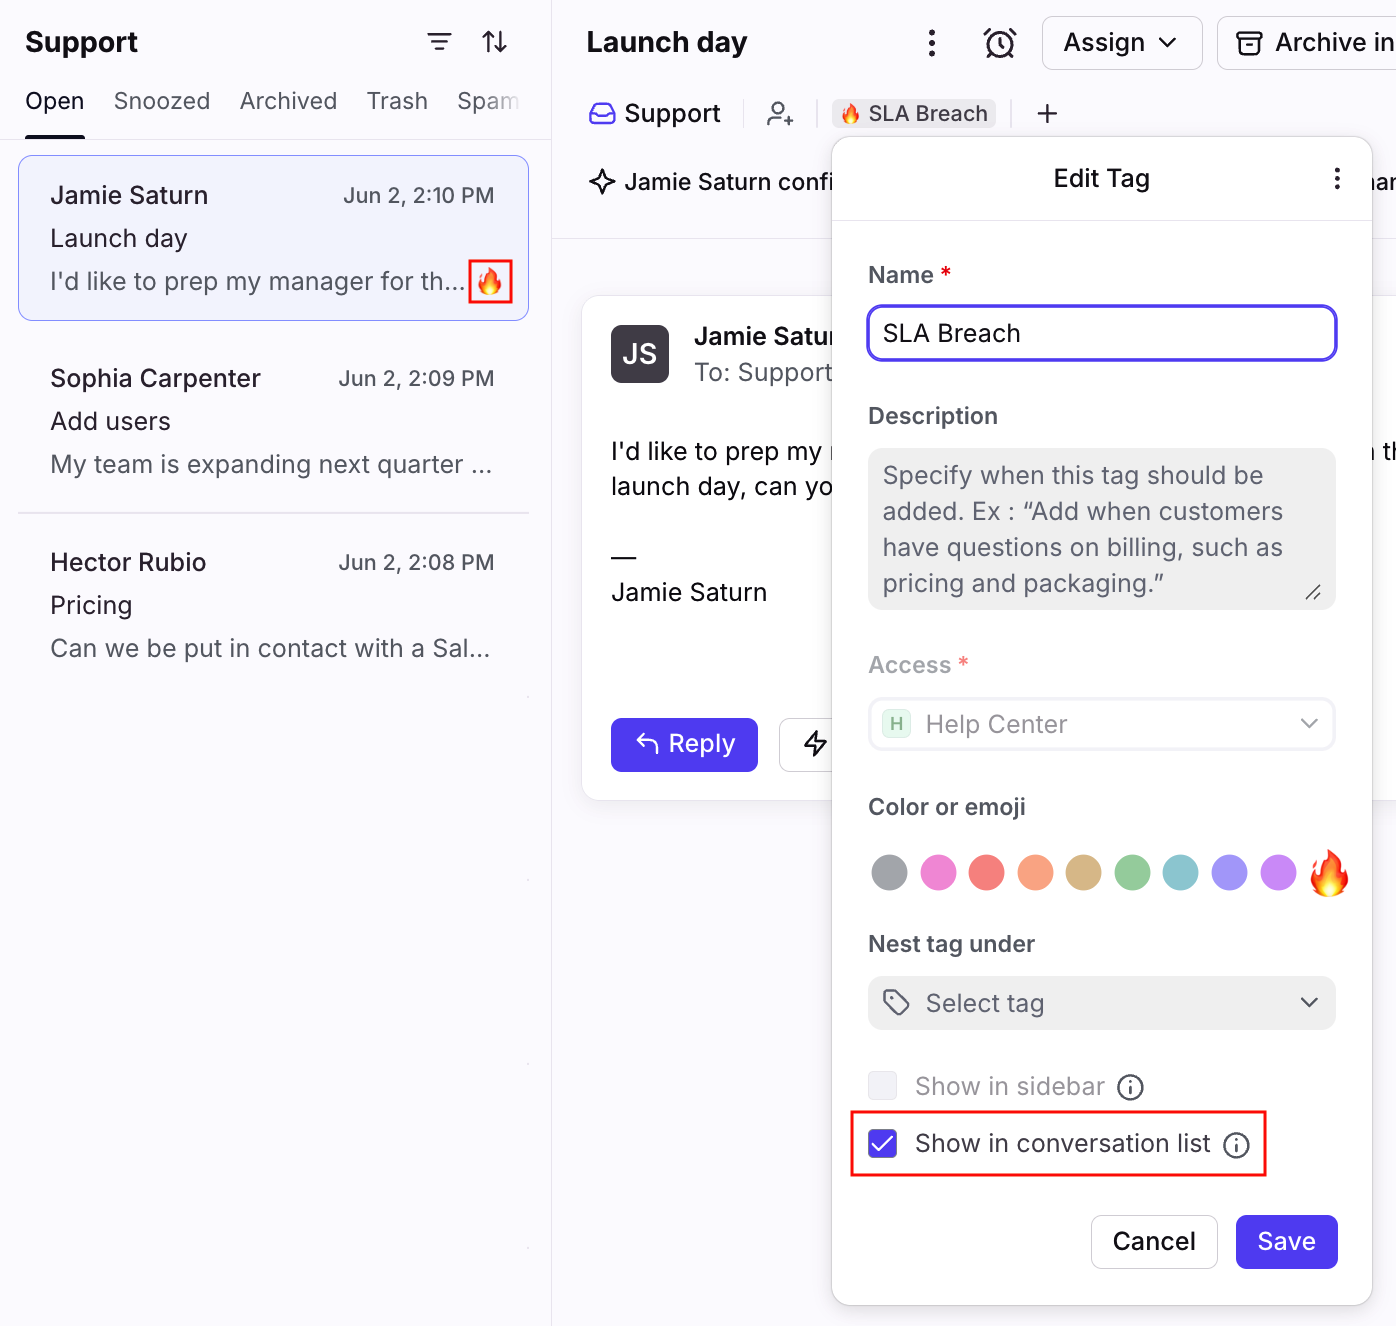
Configure additional settings for your new tag:
Add a description for the tag.
Select a color or emoji to highlight the tag.
Select whether the tag should be nested under another tag.
Add the tag to your sidebar (private tags only).
Select whether you want the tag to display in the list view of conversations.
Step 4
Click Create.
From your settings
Step 1
Click the gear icon, then navigate to company, workspace, or personal settings, depending on which space you are working with. Select Tags from the left menu.
Step 2
Click Create tag.
Step 3
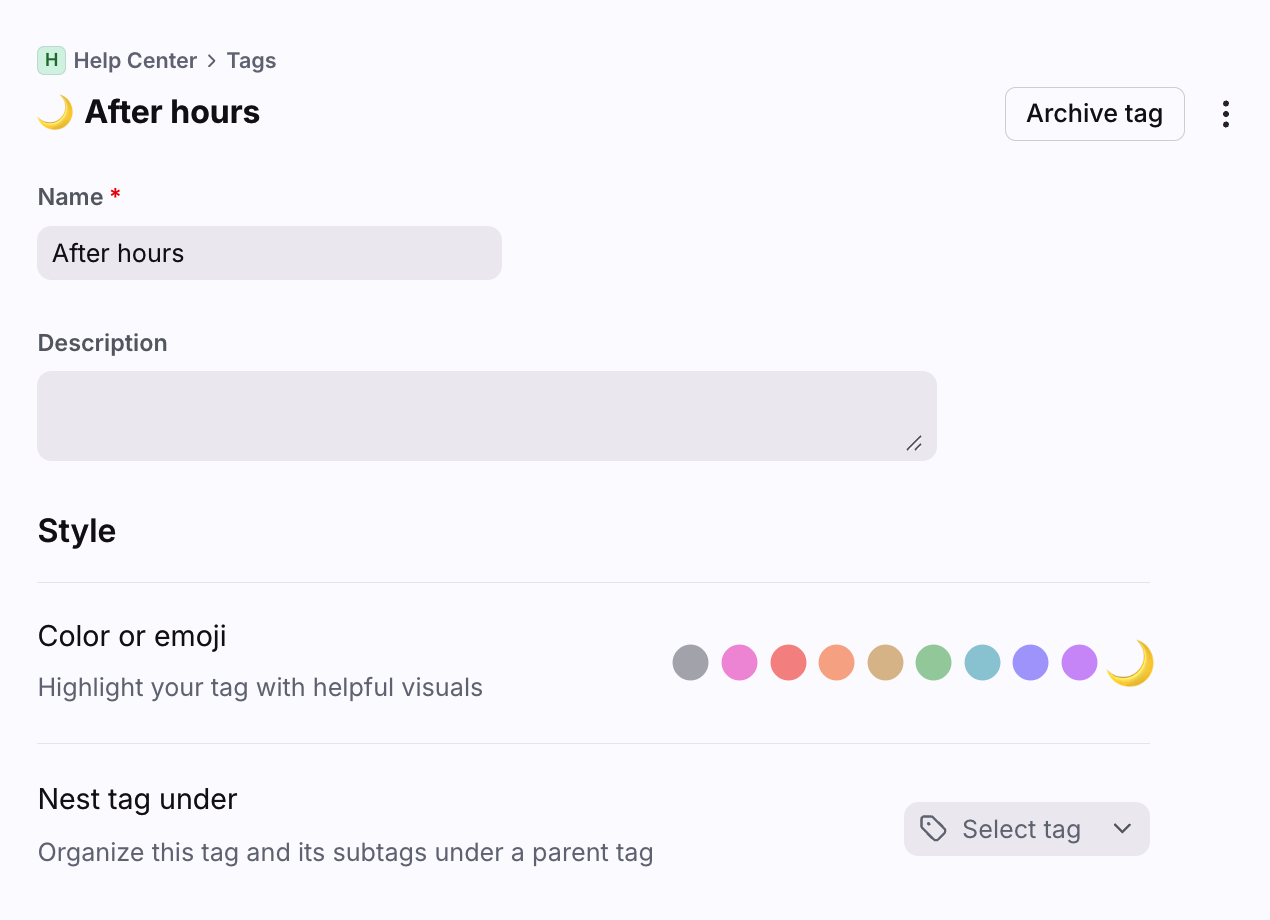
Enter a name for your tag, then configure the Style and Access settings for your tag.
Step 4
Click Create to save your new tag.
From your sidebar
Step 1
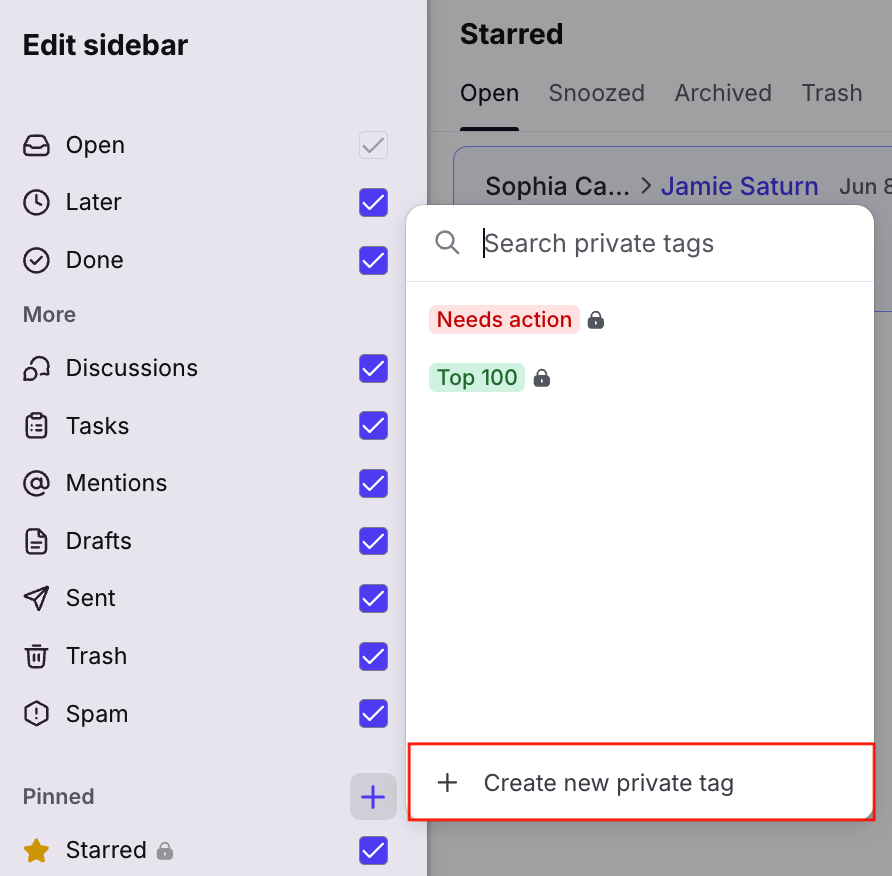
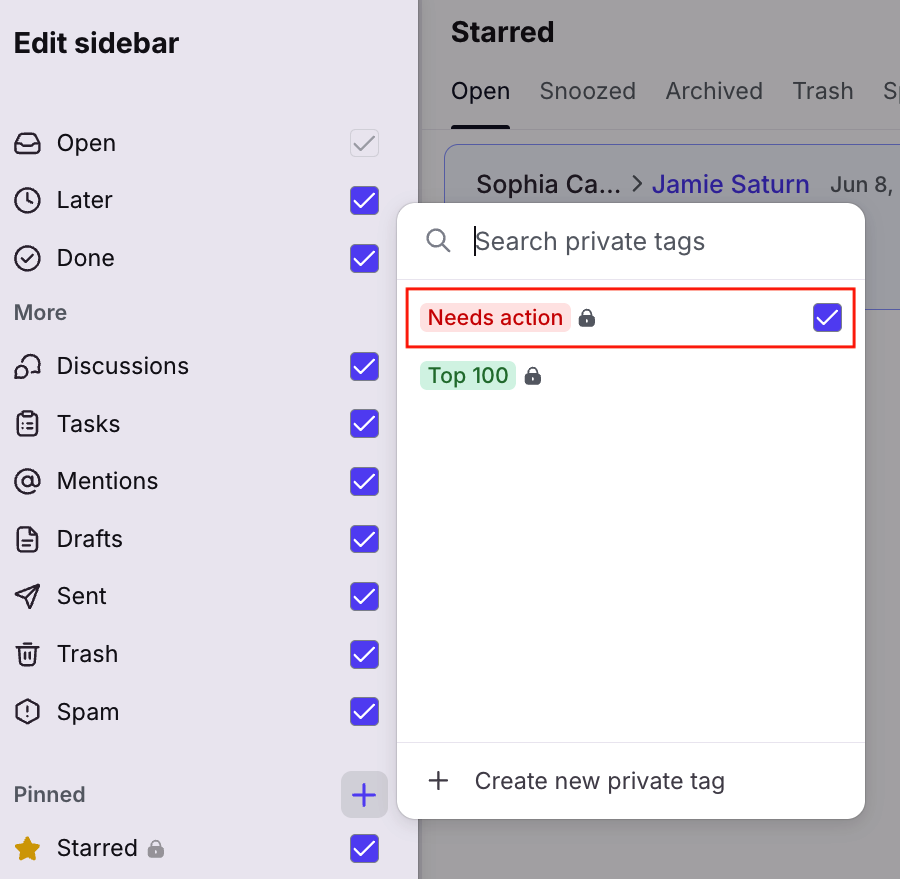
Hover over any item in your sidebar and click the three-dot menu that appears. Select Edit sidebar.
Step 2
In the Pinned section of the sidebar, click the plus icon (+), then select Create new private tag.
Step 3
Configure the settings for your new tag:
Add a description for the tag.
Select a color or emoji to highlight the tag.
Select whether the tag should be nested under another tag.
Add the tag to your sidebar (private tags only).
Select whether you want the tag to display in the list view of conversations.
Step 5
Click Create to create the private tag and add it to your sidebar. Click Save when you're finished editing your sidebar.
Edit tags
From a tagged conversation
Step 1
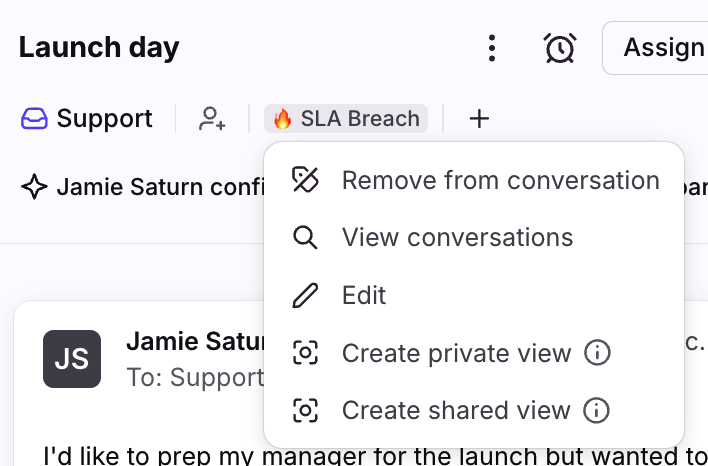
Open a tagged conversation and click on the tag name at the top of the conversation.
Step 2
Click Edit.
Step 3
Make any edits to your tag, and click Save.
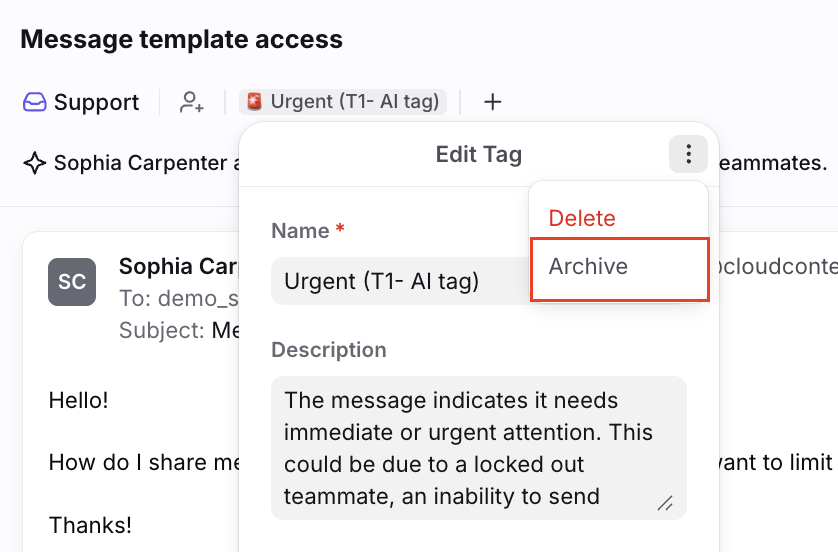
To access the Delete and Archive options, click the three-dot menu at the top of the Edit Tag pop-up.

From your sidebar (edit)
Step 1
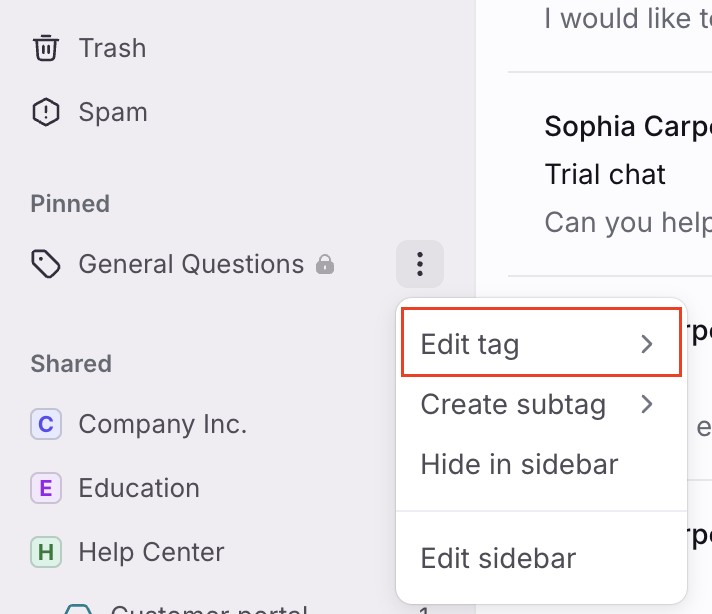
Hover over a tag in your sidebar, then click the three-dot menu that appears.
Step 2
Click Edit tag.
Step 3
Make any edits to your tag. Click the three-dot menu at the top right corner of the edit screen to access the Delete and Archive options. Click Save when done.
From your settings (edit)
Step 1
Click the gear icon, then navigate to company, workspace, or personal settings, depending on which space you are working with. Select Tags from the left menu.
Step 2
Click on a tag’s name from the list to access the settings for that tag.
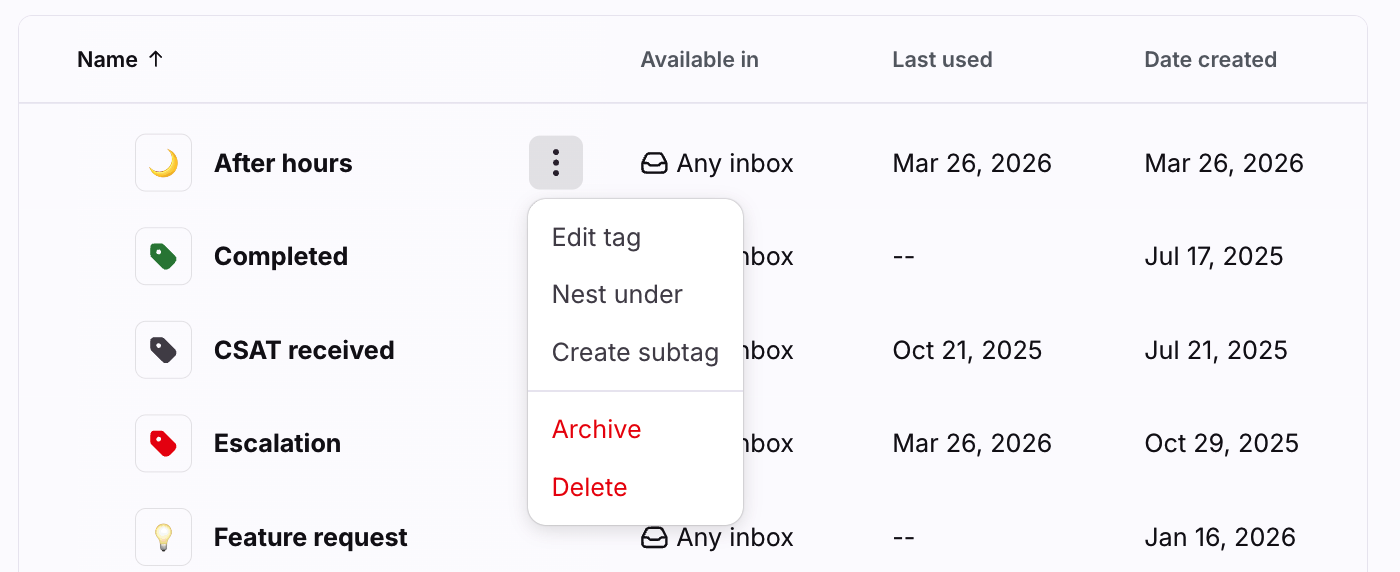
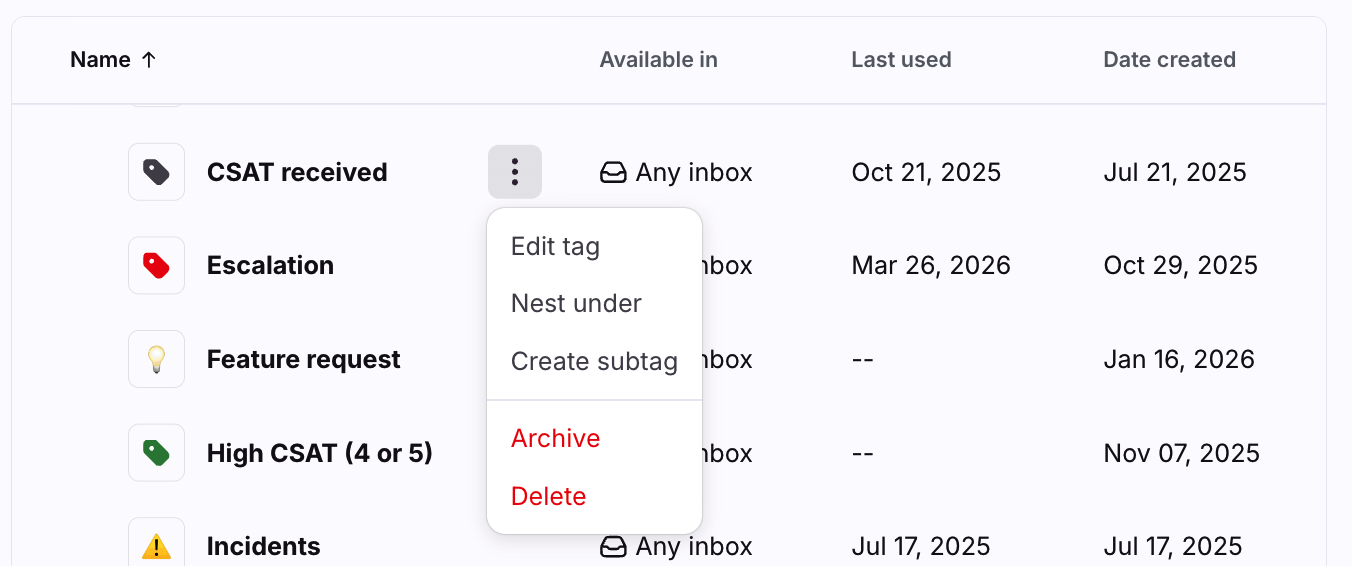
You can also hover over a tag in the tags list, and click the three-dot menu to the right of the tag name to quickly take the following actions:
Edit tag
Nest under
Add a subtag
Archive
Delete

Use tags
Highlight tags
You can highlight tags with colors or emojis to make them more visible on your conversations and inboxes. This helps you visually identify what’s urgent or understand the topic before reading a message.
You can set a color or emoji when you first create the tag, as well as edit it afterwards by clicking the applied tag and selecting Edit. You can use either a highlight color or an emoji.
In addition to being visible on conversations, tags also have the option to Show in conversation lists so that they also appear on your conversation list in the inbox.
Tag a conversation
You can tag a conversation by clicking the plus icon (+), then click the Tag option in the dropdown. You can type the tag name you want to add in the search bar, create a new tag, or scroll through all tags. You can add as many tags as you want, though Front will collapse the tags when there are many tags on a conversation.
Search results that display will be ranked by relevancy rather than by name.
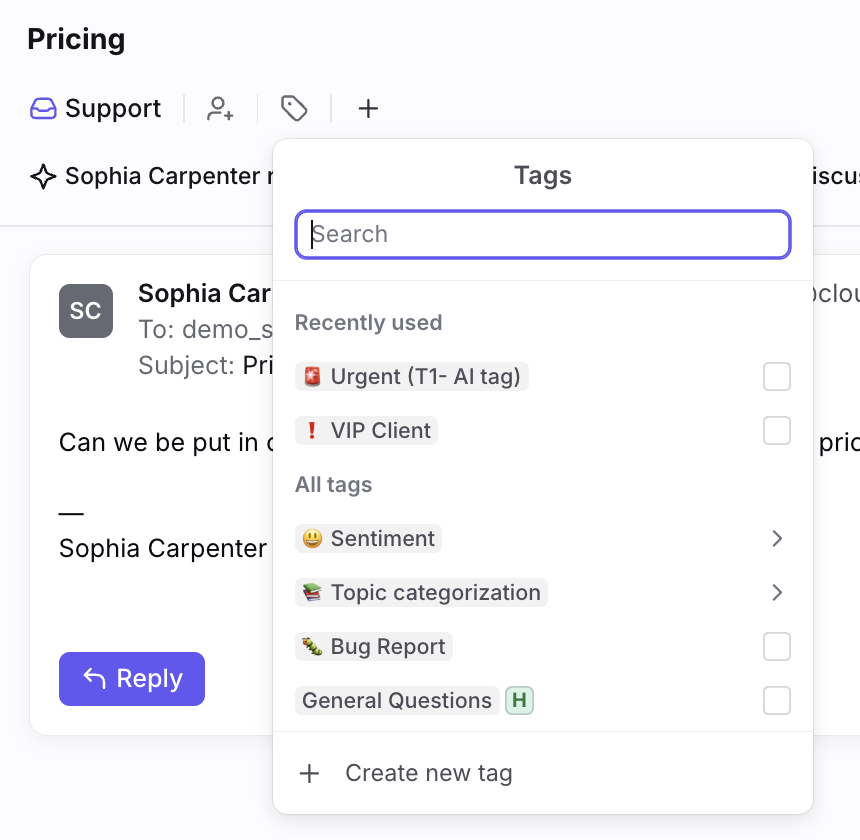
Recently used tags
At the top of the tag menu, you'll see a list of up to five tags that you most recently used in this inbox.
Add tags to your sidebar
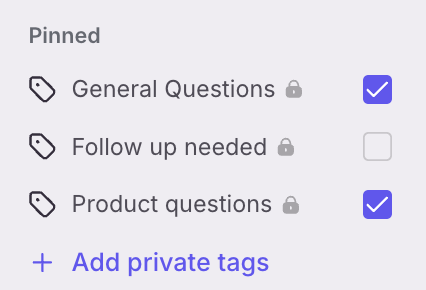
For quick access to any private tags, you can customize your sidebar to show the tags most relevant to you. This applies only to your own sidebar and not the rest of your team. You can display up to 500 tags in your sidebar.
Hover over any item currently in your sidebar, and click the three-dot menu, then Edit sidebar. In the Pinned section of the sidebar, click the plus icon (+), then select the tags you'd like to add to your sidebar. Click Save when finished.
To track shared tags in your sidebar, use the views feature.
Hide tags from your sidebar
To hide a tag from your sidebar, hover over the tag in your sidebar and click the three-dot menu that appears. Select Hide in sidebar.

To hide tags in bulk, hover over any item in your sidebar and click the three-dot menu that appears, then Edit sidebar. Deselect the tags that you'd like to hide from your sidebar, and click Save when finished.
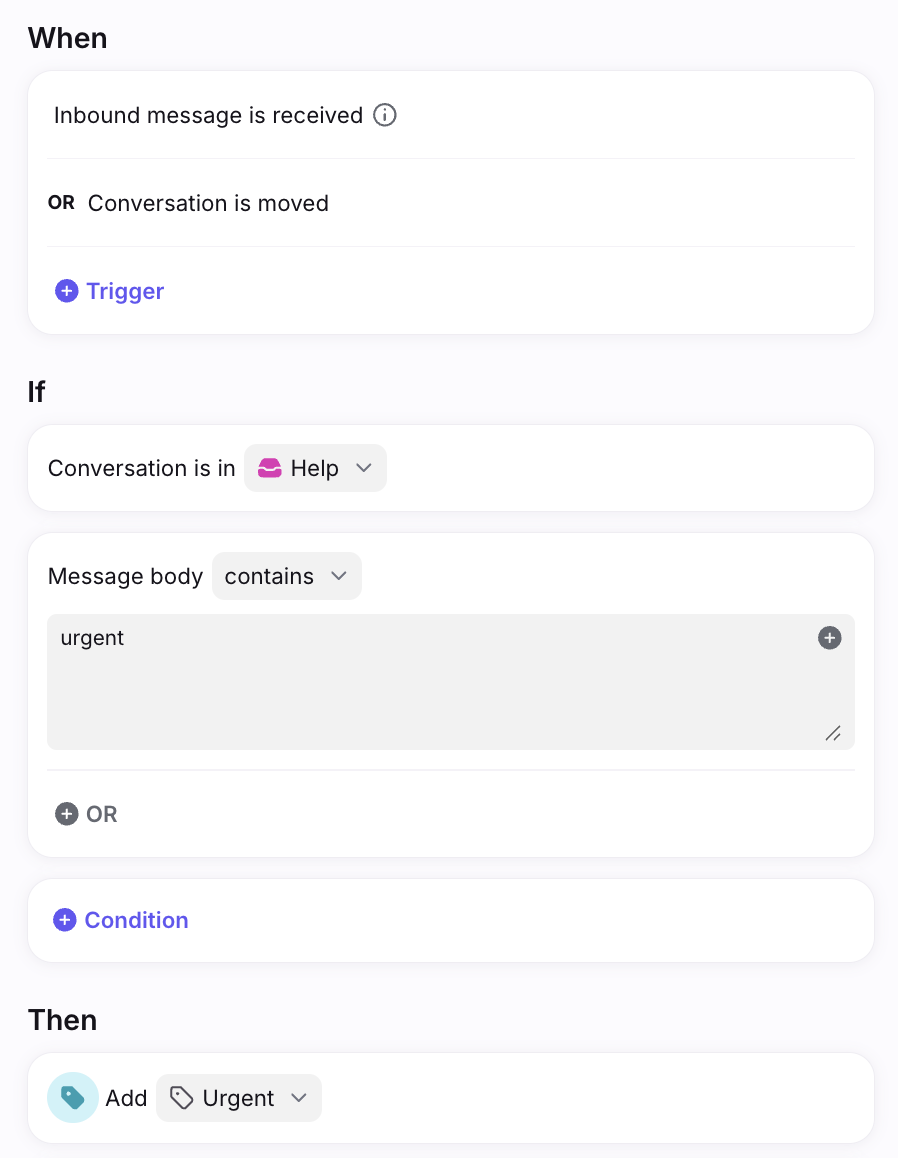
Automate tagging with rules
You can automatically add tags using rules. The example rule below is set up to automatically tag conversations with an "Urgent" tag.
Rules are also a great way to use tags to trigger actions. For example, you can set up a rule that when a conversation is tagged, it’s automatically moved to another inbox.
You can also set up rules so that the rule will trigger if a conversation is tagged with any tag is added, it will run an action:
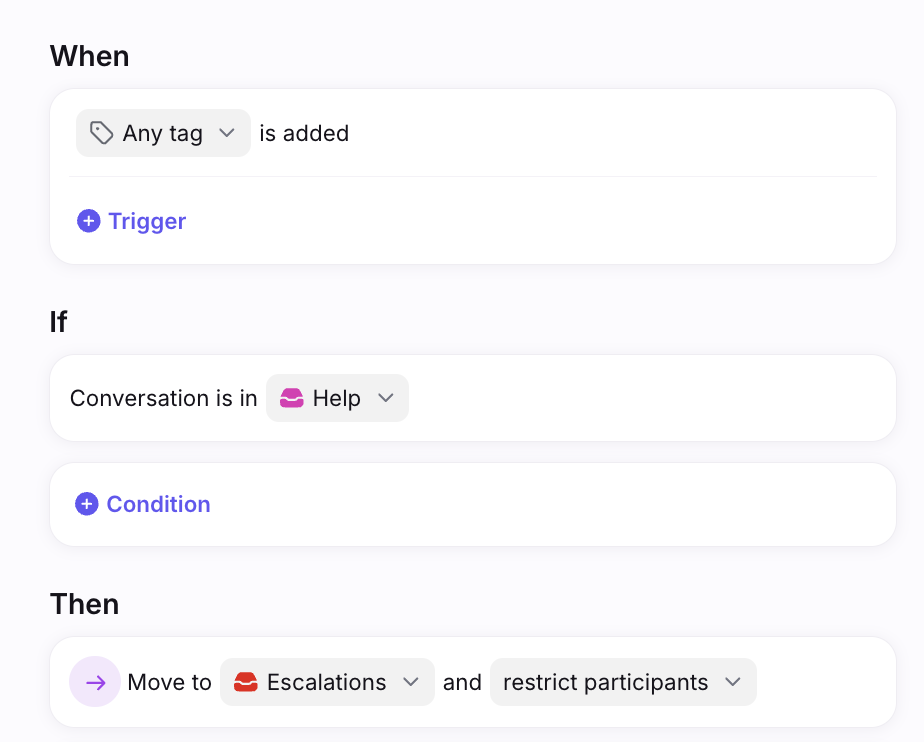
Shared rules with this When trigger will fire whenever a shared tag is added to the conversation. Personal rules with this When trigger will fire whenever a private tag or shared tag is added to the conversation.
Required tagging
To support all the benefits of tagging, Front allows you to set up rules that require certain conversations to be tagged before they can be moved or archived. This way, you can ensure all your messages are categorized correctly; enabling better workflows, automations, and analytics.
See this article to learn more about required tagging.
Use tags as folders for filing
See this article for more details about using tags as private folders.
Archive tags
In addition to deleting a tag, you can also archive a tag. Archived tags will:
Prevent teammates from adding the tag to new or existing conversations moving forward
Remove the tag from the main list of tags in tag settings
Still be visible in Analytics
Remain on historical conversations
Be searchable in inboxes
Instructions
From your settings:
Step 1
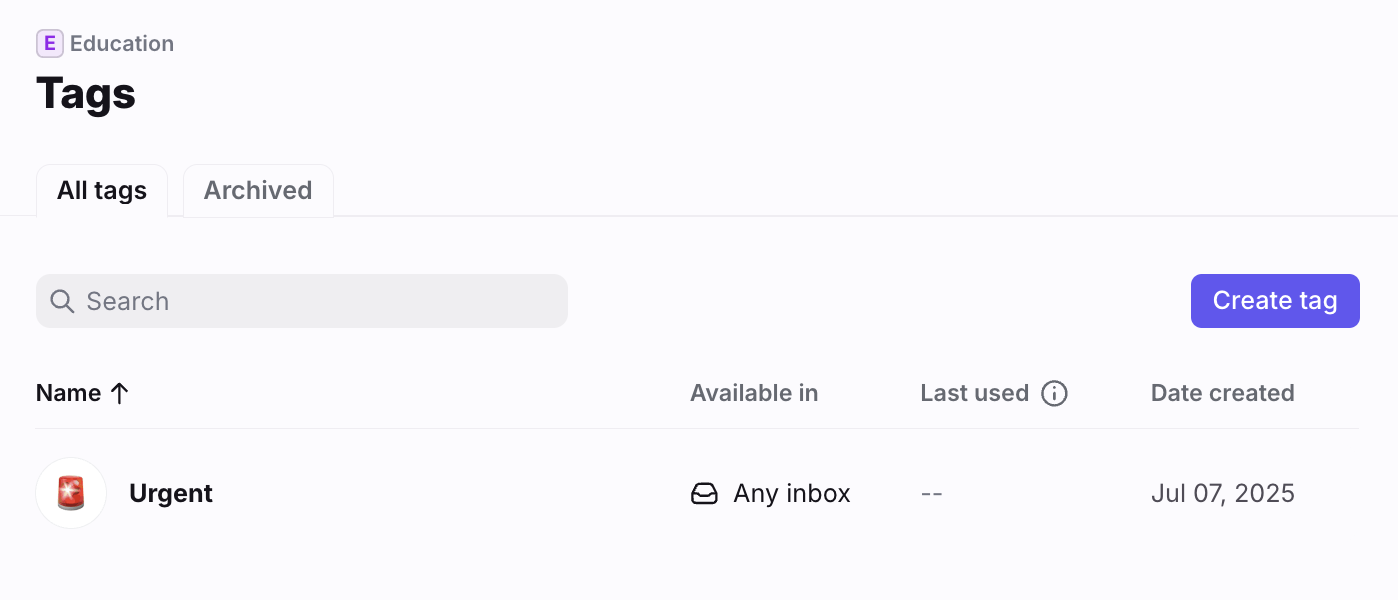
Click the gear icon, then navigate to company, workspace, or personal settings, depending on which space you are working with. Select Tags from the left menu.
Step 2
Hover over the tag in the tag list, click the three-dot menu to bring up the Actions menu, then select Archive.
You can also select a tag from the tags list to open its settings and click Archive tag at the top.
From your inbox:
Step 1
Open a conversation with the tag applied to it.
Step 2
Click the tag at the top of the conversation and click Edit.
Step 3
Click the three-dot menu at the top of the edit pop-up, and click Archive.
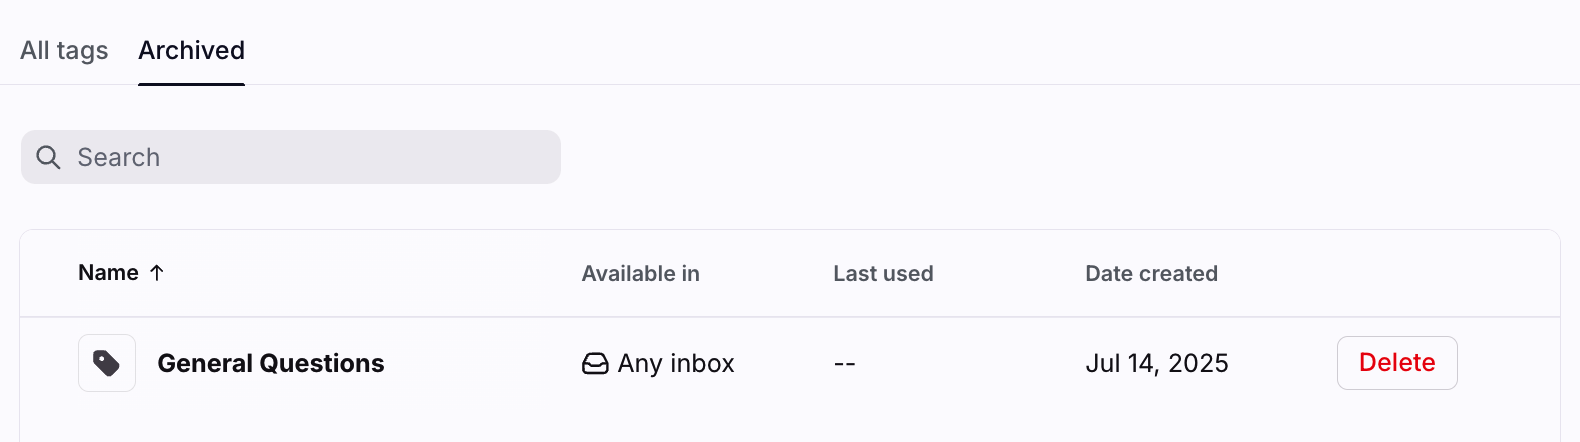
Archived tags settings
You can access your archived tags in the Archived tab of your Tags settings. Bulk actions can be taken on tags in the Archived tags list.
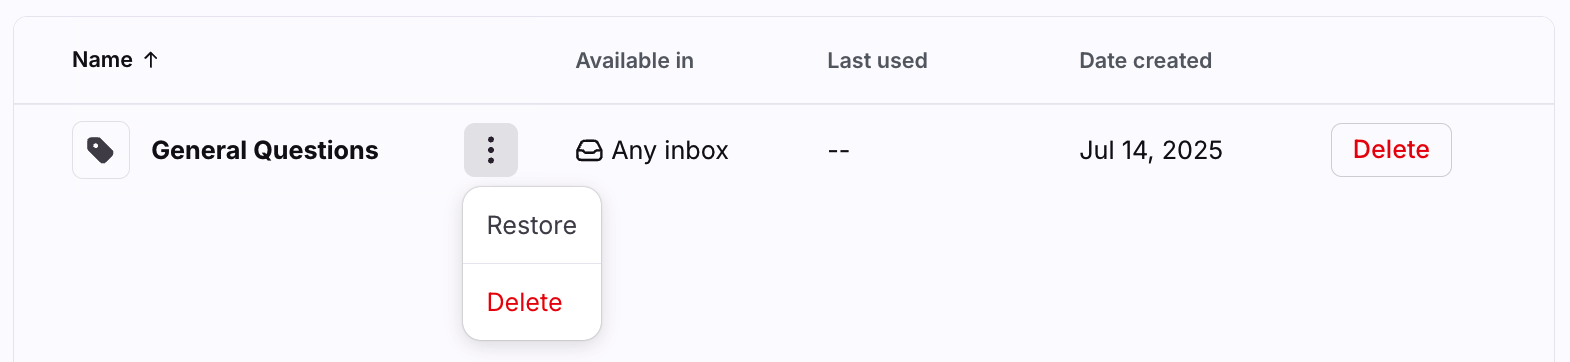
Restore archived tags
To restore a tag, hover over it in the Archived tags tab, click the three-dot menu to open the Actions menu, then click Restore.
Archiving nested tags
Archiving a parent tag archives all of its subtags, and restoring an archived parent tag restores all of its subtags. If you restore one of the subtags of an archived parent tag, it will restore the parent tag and all other subtags.
Archiving a subtag will only archive that specific subtag. If you do not archive the parent tag, then if you restore that subtag, it will not restore any other subtags under that parent tag that were previously archived.
Archived tags in rules
Archived tags will remain on existing rules. They will still be available for use in rule conditions when adding a new rule or editing an existing rule, with the following exceptions:
When Tag is added - an action cannot be triggered by adding an archived tag
Then Add tag - a rule cannot add an archived tag to a conversation
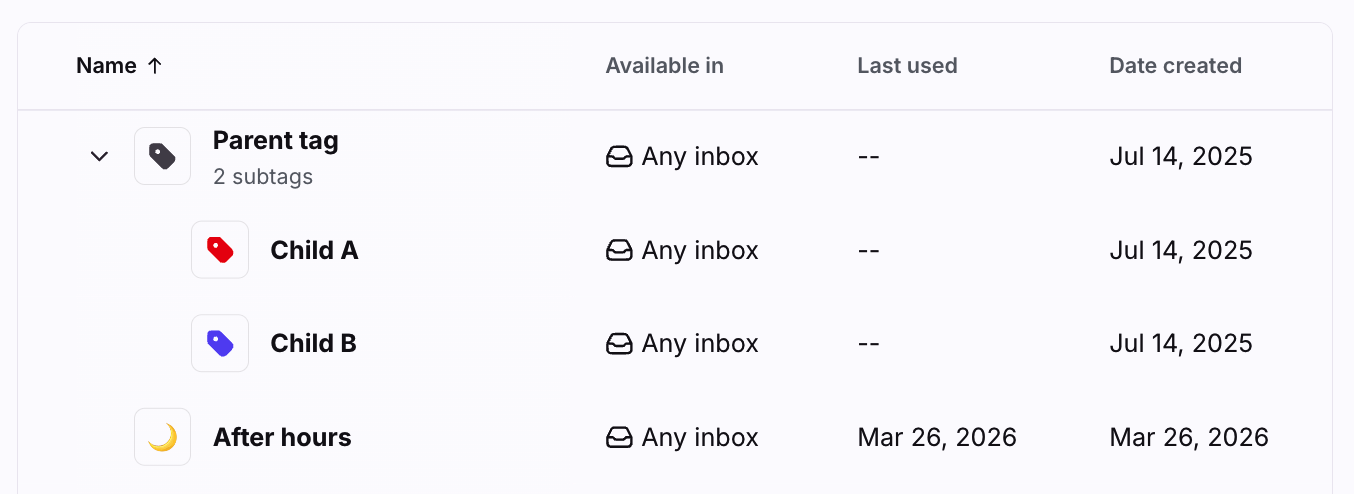
Nest tags
Front allows you to organize your tags by nesting multiple subtags under a parent tag. We support multiple levels of nesting.
Create a new nested tag
When creating a new tag or editing an existing tag, you can nest it under an existing tag. Use the Nest tag under dropdown to select the parent tag for your new subtag.
Nest tags by dragging
You can quickly edit tag nesting right from your sidebar by dragging and dropping— long-click a tag in your sidebar and drag it to the desired location indicated in blue. You can edit 3 types of nesting by dragging:
Drag a nested tag to be nested under a different parent tag
Drag a nested tag to become a parent tag
Drag a parent tag to become a nested tag
Editing tag nesting from your sidebar will affect tag nesting for all teammates.
Nest tags in settings
In your All tags list in settings, hover over a tag, and click the three-dot menu. Select Nest under to nest the selected tag under an existing tag. Click Add a subtag to create a new subtag, and nest it under the selected tag.
Delete or archive nested tags
Deleting a tag with subtags will delete all subtags under that tag.
See the Archiving nested tags section above for details on archiving nested tags.
Nested tags in Analytics
The tag path will be displayed in any tag dropdown menu. However, the tag path will not display in the analytics dashboard itself.
Nested tags limits
Up to 5000 tags can be nested under a parent tag.
Bulk actions
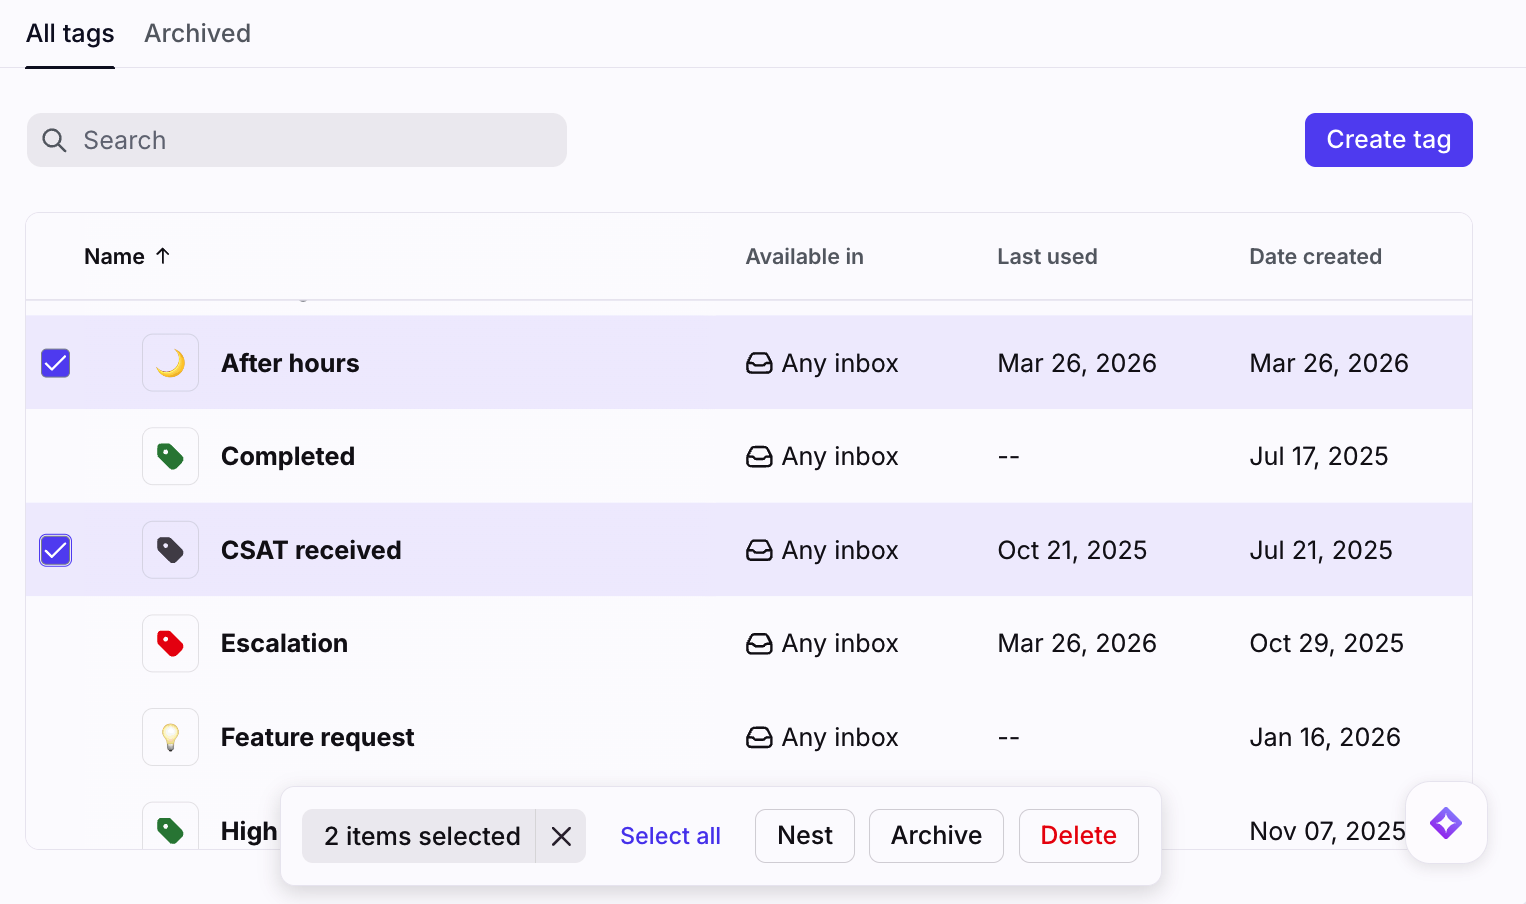
In the All tags tab in your tag settings, hover over a tag and select the checkbox that appears to the left of the tag name. Select additional tags using the checkboxes, or click Select all.
You can take following bulk actions on the selected tags: Nest, Archive, Delete.
When you nest tags in bulk, you'll see an additional pop-up to choose the parent tag that you'd like to nest your tags under.
