
Using private tags to label and file conversations
Overview
Front supports nesting tags to categorize them in groups, and allows you to drag messages from your inbox into a private tag or the Starred section to file them away.
When you connect a Gmail or Office 365 account, you can choose to import Gmail labels and Outlook folders as tags. To learn more about tags, see this article.
Using private tags like folders
How to add a tag to your sidebar
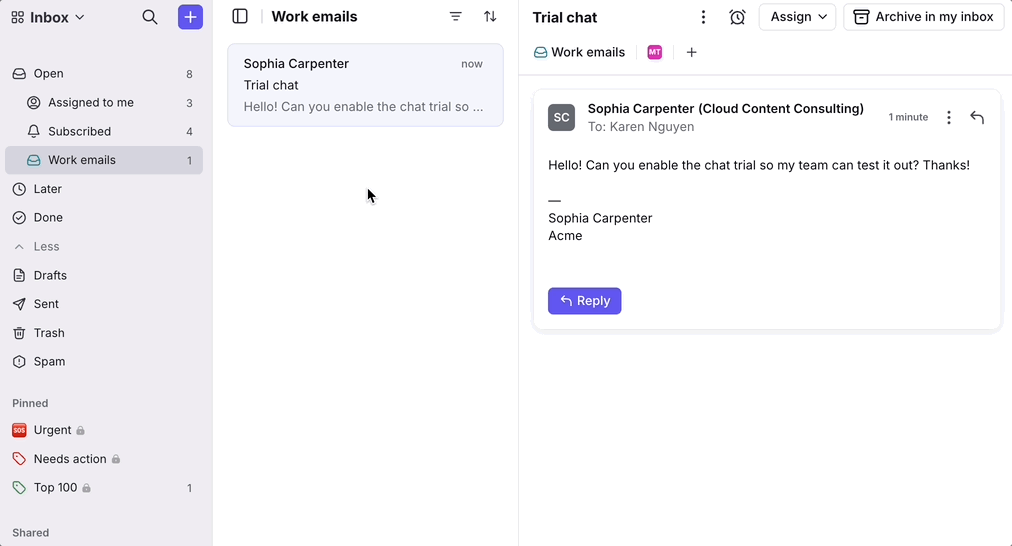
Private tags can be used as your personal folders. For a shortcut to conversations with important tags, add them to your sidebar. You can then drag and drop conversations from your Inbox to your private tags to file them away, or add private tags using the tag icon to mark and categorize them.
Step 1
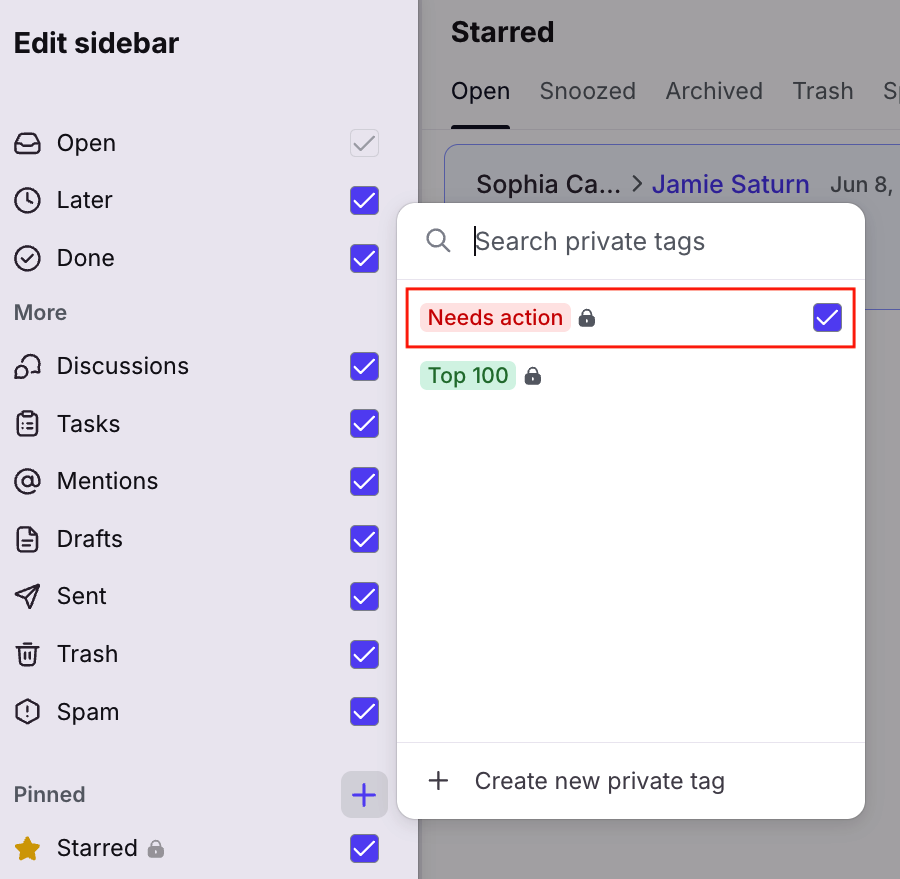
Hover over any item currently in your sidebar, and click the three-dot menu, then select Edit sidebar.
Step 2
In the edit menu, click the plus icon (+). Select any tags you'd like to display in your sidebar.
Step 3
Click Save at the bottom of the Edit sidebar menu.
Once added to your sidebar, you will see the tags in your sidebar with their tag icons. A lock symbol next to the tag name means it's a private tag. You can display up to 500 tags in your sidebar.
Drag messages to private tags like folders
For any private tags shown in your sidebar, you can drag conversations into them like folders.
Filing a conversation in a private tag does not affect other participants in the conversation, so you can organize your personal workflow the way you want.
When you drag and drop conversations into the Starred section of your sidebar, the conversation will also move out of the original inbox and be filed into the Starred section. You can remove the star tag from the conversation to return it to the original inbox.
Step 1
Add a private tag to your sidebar following the instructions above.
Step 2
Click and hold to drag a conversation from your inbox into a private tag in your sidebar. You can only drag conversations into private tags.
Step 3
The conversation will no longer be visible in your inbox. Find the conversation by clicking on your private tag, which acts as your private folder.
Note: Tags will be automatically added or removed from the conversation when you drag a conversation from your inbox into a tag or between tags.
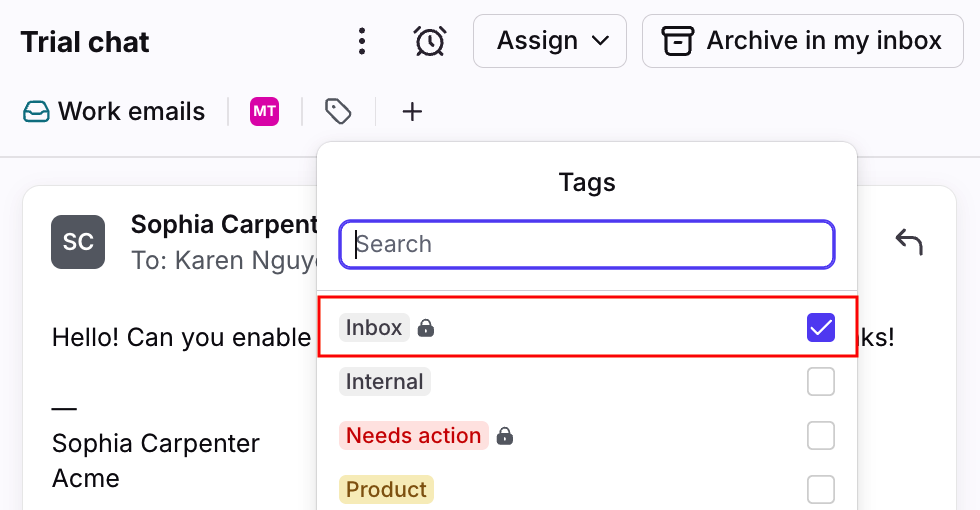
The private Inbox tag
The Inbox tag is a default private tag added to every conversation (open, archived, snoozed, etc.) in your main Inbox section (your individual inboxes, Subscribed, Assigned to me). That way, you know if a conversation lives in your inbox or in a private tag that you're using like a folder.
If the conversation comes into your personal inbox, gets assigned to you, or is shared with you, this tag will be automatically added since all of these are your own copies of the conversation that you can work with.
The Inbox tag allows you to move conversations into a private tag to be used as a private folder. Once you drag-and-drop a conversation from your Inbox into a private tag, it will remove the Inbox tag, and add the private tag.
You can always re-add the Inbox tag to a conversation if you want it to show up in your Inbox again, or drag-and-drop the conversation from your private tag back into your inbox.
Use rules to file messages
You can also use rules to file messages from your inbox into private folders. This example will show how you can use a personal rule to file new inbound messages into a private tag:
Step 1
Click the gear icon and navigate to your personal settings tab.
Step 2
Select Rules in the left menu, then click Create rule.
Step 3
Name your rule, and format the rule like the following:
WHEN:
Inbound message is received
IF:
Conversation is in [selected inbox]
Conversation has tag “Inbox 🔒”
THEN:
Add tag “Folder #1”
Remove tag “Inbox 🔒”
Step 4
Click Create when finished.