
Enable and use Front’s Dialpad integration [new]
Overview
Dialpad is an AI-powered business communications platform delivering future-proof solutions that will drive the next wave of how businesses connect with and serve their customers. With the Dialpad integration, Front users can seamlessly manage SMS and voice channels directly alongside email, live chat, and more in one unified workspace.
Use Front’s Dialpad integration to seamlessly:
Place and receive voice calls directly in your Front inbox
Listen, comment, and tag teammates on voicemails, call recordings, and transcripts
Get up to speed fast with AI summaries of past calls
Keep agents focused with automatic Busy status updates
Select phone number for outgoing SMS
Permissions
You must have both Dialpad company admin permissions AND Front admin permissions to set up Dialpad channels in Front.
Non-personal numbers are supported.
Personal Dialpad phone numbers assigned to specific agents must also be connected by Dialpad company admins. Only Voice by Dialpad channels are supported.
Set up overview
Admin requirements
To set up the Dialpad integration in Front, admins will need to complete most setup steps in both Dialpad and Front.
In Dialpad, company admins need to:
Set up phone numbers and Dialpad users.
If you have call centers/departments set up (optional):
Set up the call center/department with routing logic (e.g. by round robin, area code, etc.), voicemail inboxes, and call hours.
You must assign phone numbers to call centers/departments to see those conversations in Front. Calls routed to call centers/departments without phone numbers are not supported.
If you're using an IVR number (Interactive Voice Response) or similar call routing number, you should also connect the call groups (cell centers/departments) that receive the calls, not just the IVR number itself.
In Front, admins need to:
Log into a Front account using the same email address you use with Dialpad.
Connect phone numbers to the Front inbox you would like the voice call or SMS conversation to be in using the Dialpad channel integration.
Errors: If you're seeing the error "You need to be a company admin in Dialpad to set up the channel":
In Dialpad, check your permissions by accessing My company page, then navigating to the Administrators section. If you don't see the Administrators section, your account doesn't have company admin permissions.
You may need to reach out to Dialpad to check your account permissions, add company admin permissions to your account, or confirm the company admin users for your account.
Agent requirements
Agents need to be signed in with the same email address in Front and Dialpad.
Agents will be prompted to login to Dialpad once a channel they have access to is connected. If they do not log in then, or if their login session expires, they will be prompted to log in before making an outbound or receiving an inbound call.
Agents must enable microphone access for Front.
If logging in to Front via web browser, agents must have third-party cookies enabled in the browser for the call widget to function. Check your web browser's instructions for guidance (e.g., Google Chrome, Mozilla Firefox).
How it works
How calls appear and are assigned in Front
For an agent to be notified or for a call conversation to show up in Front, the number will need to be connected as a channel in Front. SMS and Voice for the same number must be set up separately.
Calls are routed through Dialpad. Front will notify agents based on the Dialpad call assignment. Because of this, an agent must log into Front and the Dialpad integration with the same email address.
The conversation will display in the Front inbox where the channel is connected. For voice calls, once the channel is connected, the conversation will get assigned to the agent that picked up the call.
Each call to or from a customer will create a new conversation. Call threading is not supported.
As long as a Dialpad channel is connected to a Front inbox, admins can leverage Front rules according to their needs.
Contacts
The inbound caller will be mapped to the appropriate Front contact, as long as the number being used to make the call matches a number stored in your Contacts. Front can successfully match to contacts in the Contact Manager or synced from a CRM plugin (Salesforce, HubSpot, Zoho, etc).
Note: The format of the numbers must match exactly, including parentheses, spaces, and the leading country code.
Contact syncing
If a contact already exists in Front with a matching phone number, then the message will display their name as the sender. If the contact does not already exist in Front, a new contact will be created for that phone number. Contact information like first and last names will not sync from Dialpad to Front.
Enabling the integration
These instructions assume you’ve already set up a call center in Dialpad, and are applicable for both Dialpad voice call and SMS channels.
Enable company-wide settings
Step 1
Click the gear icon, navigate to company settings, then select App store.
Step 2
Select Dialpad from the list of integrations.
Step 3
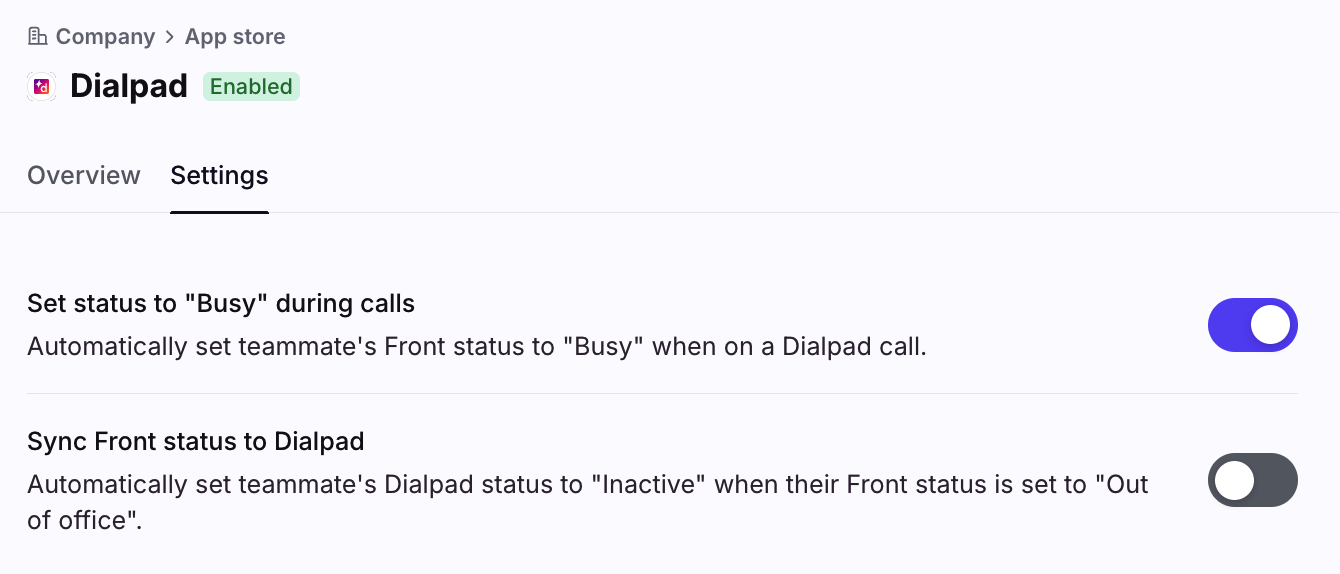
Select the Settings tab, then adjust the toggles for the following company-wide settings:
Set status to “Busy” during calls:
Toggle on if you want to automatically set agent statuses to “Busy” when they’re on calls.
If toggled off, agents will stay “Available” in Front during calls.
Sync Front status to Dialpad:
Toggle on if you want to automatically sync Front status changes to Dialpad. e.g. “Available” in Front to “Available” in Dialpad, “Out of office” in Front to “Off duty” and “Do not disturb” in Dialpad.
If toggled off, Front status changes will not affect Dialpad statuses. e.g. Agent can be “Available” in Front and “Off duty” in Dialpad.
Step 4
Your changes will automatically save.
Connecting channels
Step 1
In Front, click the gear icon, then select workspace or personal settings in the left sidebar, depending on the space you’re working with.
Step 2
Click Inboxes in the left menu and create a new inbox, or select an existing inbox you would like to connect your Dialpad number(s) to.
Step 3
Select Channels in the left menu, then click the Connect channel button.
Step 4
Navigate to the Voice by Dialpad option or SMS by Dialpad option, then click the Connect to Dialpad button on the next screen.
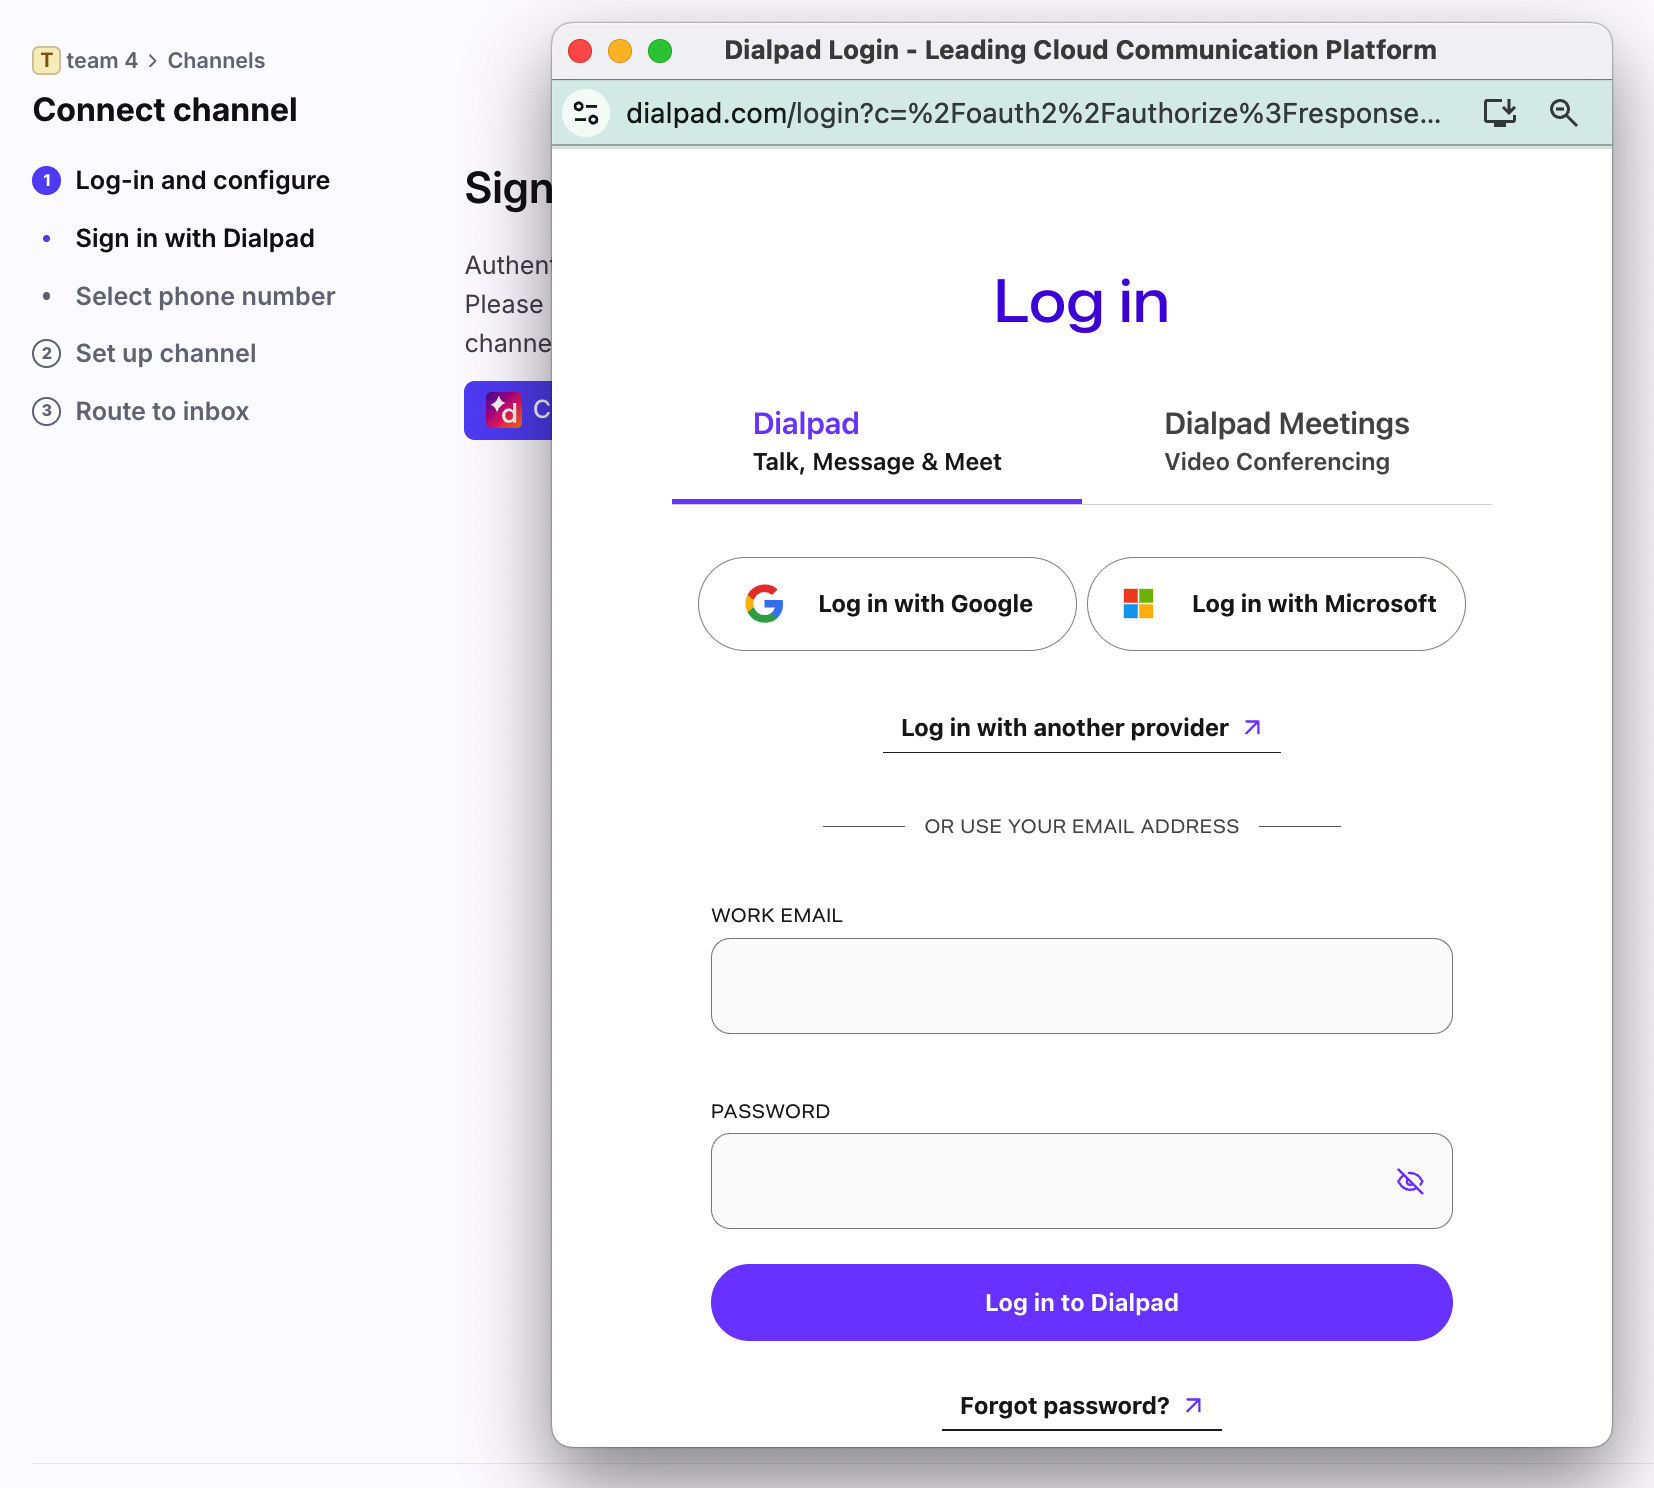
Step 5
A pop-up will open prompting you to sign in with your Dialpad account. Make sure the email address in the Work email field matches the email address you use to log into Front.
Click Log in to Dialpad to continue.
Step 6
Click Allow on the Access Approval page. The pop-up will automatically close.

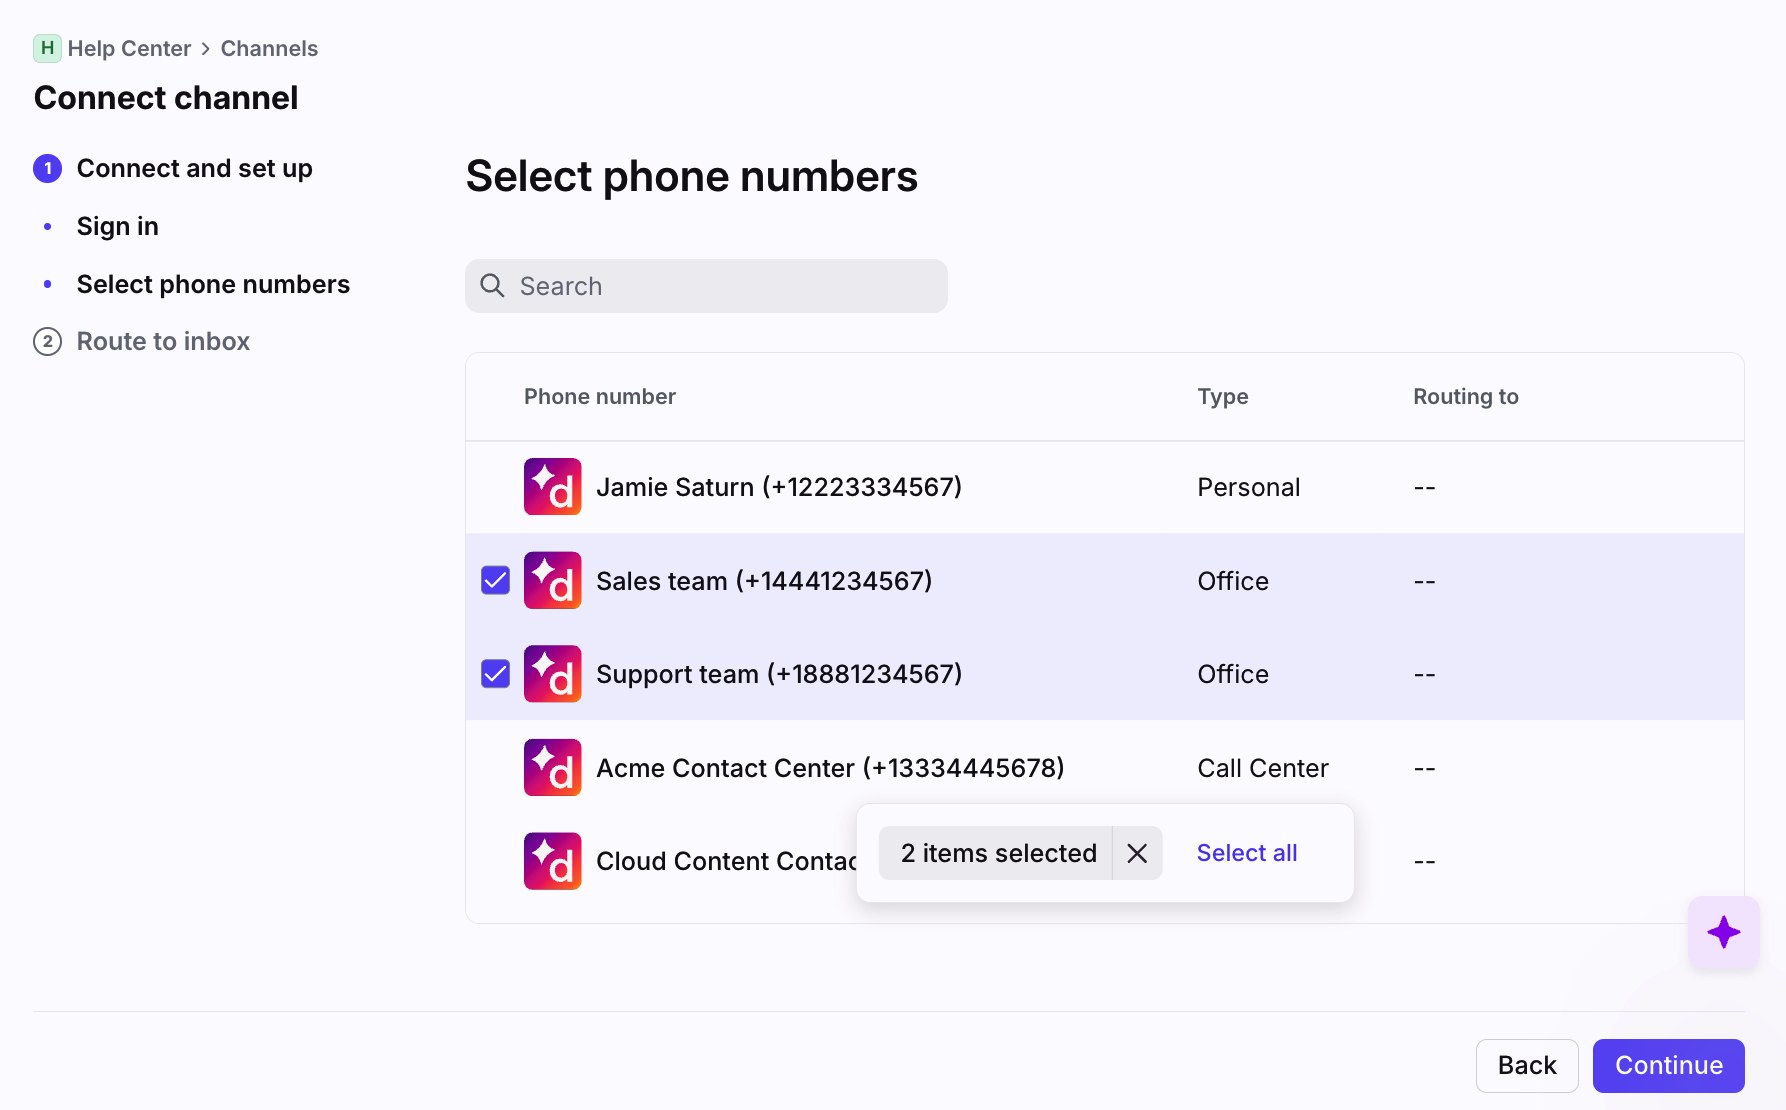
Step 7
Select the phone number you want to connect to Front. Select multiple channels to connect them in bulk.
Click Continue.
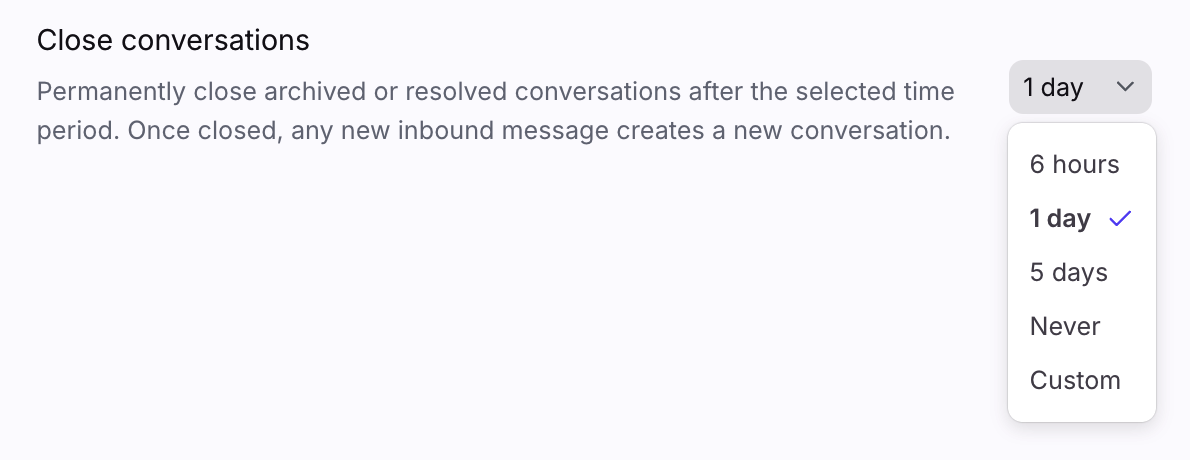
Step 8 (for SMS channels)
Select when you want conversations to automatically close using the Close conversations setting.
If you plan to use AI features with your inbox, we do not recommend selecting Never. See this article to learn how the Close conversations setting affects AI features.
Step 9
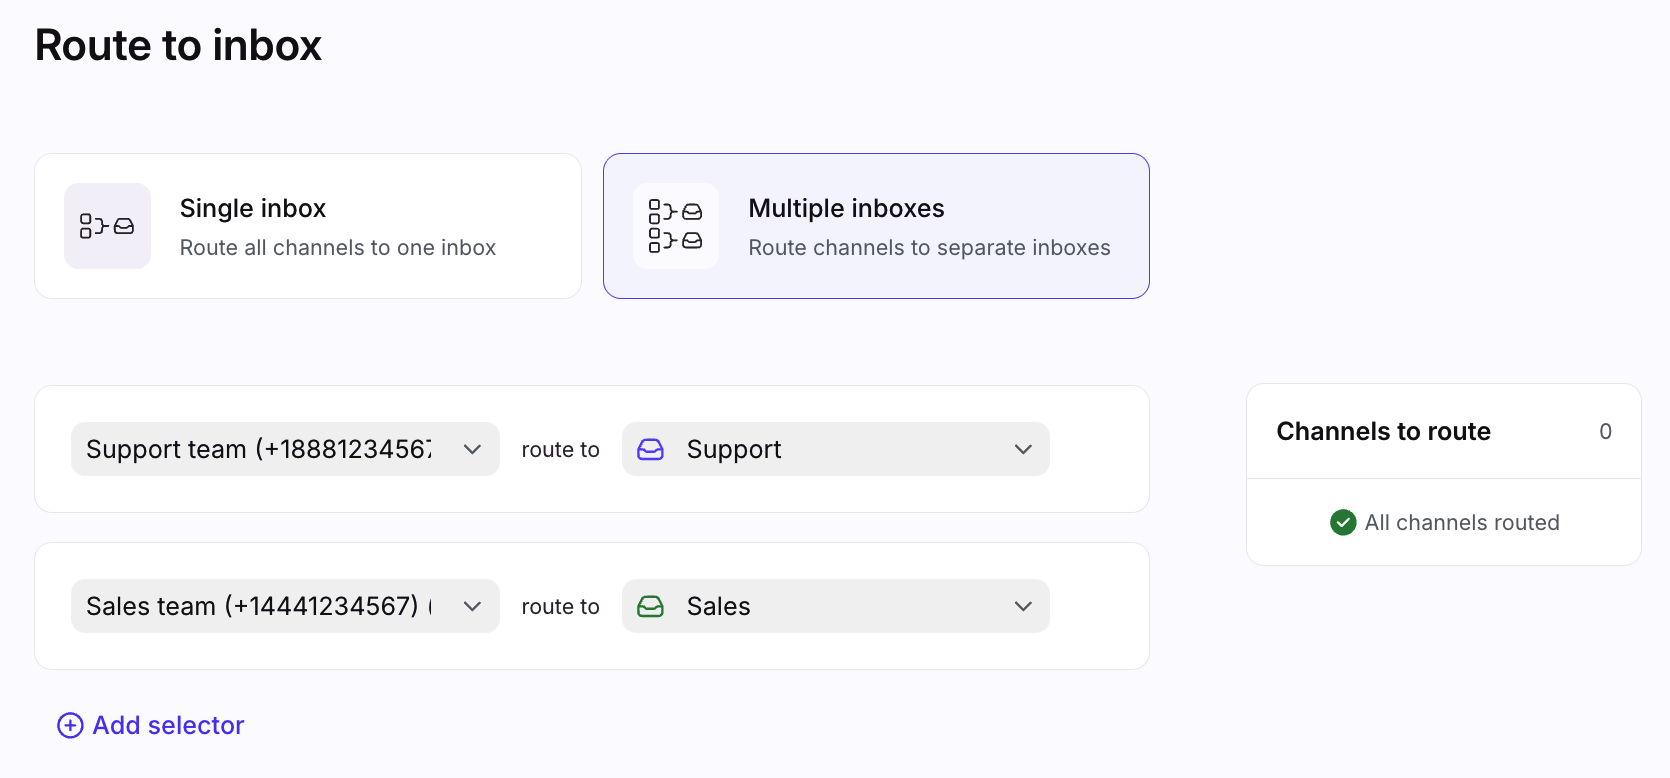
In the Route to inbox page, select whether you want to route the channel(s) to a single inbox, or multiple inboxes.
Option 1: If routing to a single inbox, use the dropdown to select the inbox.
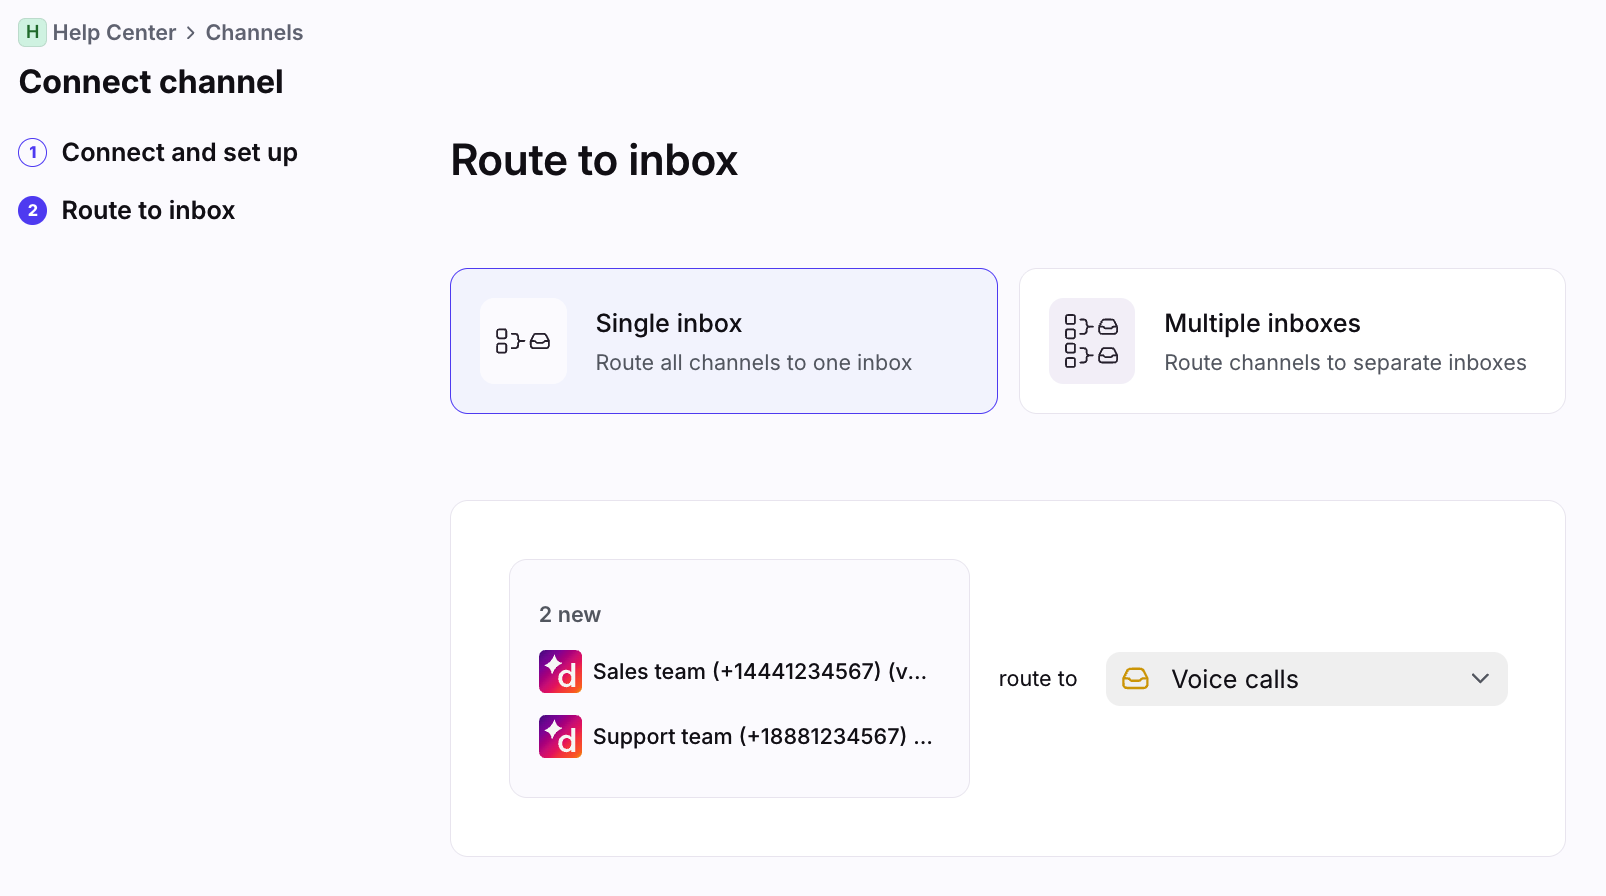
Option 2: If routing to multiple inboxes, use the dropdowns to select the Dialpad channels, then select the corresponding inboxes in the other dropdowns.
Step 10
Click Continue to finish. All calls and messages from your channels will route to the selected inboxes by default.
Your team can now use these Dialpad numbers with Front to make and receive calls, access call recordings, etc. if you connected voice channels, or send and receive messages if you connected SMS channels.
Using the integration
Once a Front admin has enabled the integration, agents can use Dialpad inside Front.
Status updates
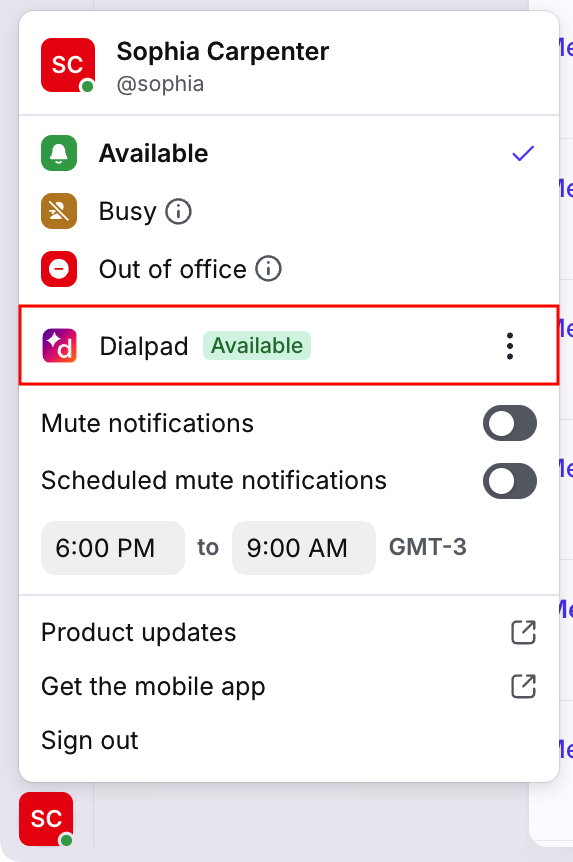
In Front, you can see your Dialpad status in your account menu.
If your Front admin has enabled automatic status updates between Front and Dialpad:
“Available” indicator: This means either the “Do not disturb” setting is toggled off and/or you are “Available” in one or more of the contact centers you belong to.
“Unavailable” indicator: This means both the “Do not disturb” setting is toggled on AND you are “Off duty” for all contact centers they belong to
Example: If you’re “Available” in one contact center, but “Do not disturb” is toggled on, you’ll display as “Available” in Front.
Status sync logic:
Your Front status will switch to “Busy” when you’re on a call, then switch back to “Available” when you’re ready to take your next call.
If you change your Front status between “Available” and “Out of office” in Front, your global availability in Dialpad will automatically update to match.
Available in Front: Changes your Dialpad status to “Available” in all contact centers you belong to, and toggles off the “Do not disturb” setting in your profile.
Out of office in Front: Changes your Dialpad status to “Off Duty” in all contact centers you belong to, and toggles on the “Do not disturb” setting in your profile.
If you change your status to “Busy” in Front, this will not be synced to Dialpad.
If you change your status in Dialpad, your status in Front will not change. You will see your Dialpad availability next to the Dialpad section in your user information. For example, if you switch your status to “Off Duty” in Dialpad, you can still be “Available” in Front.
Making calls
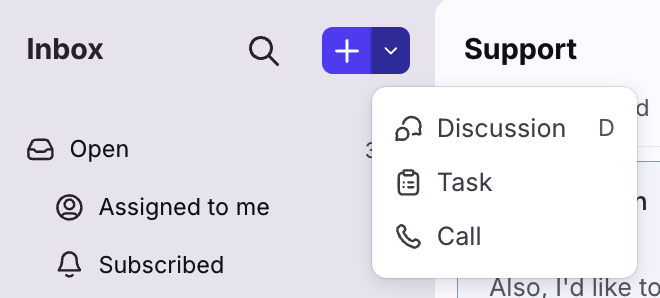
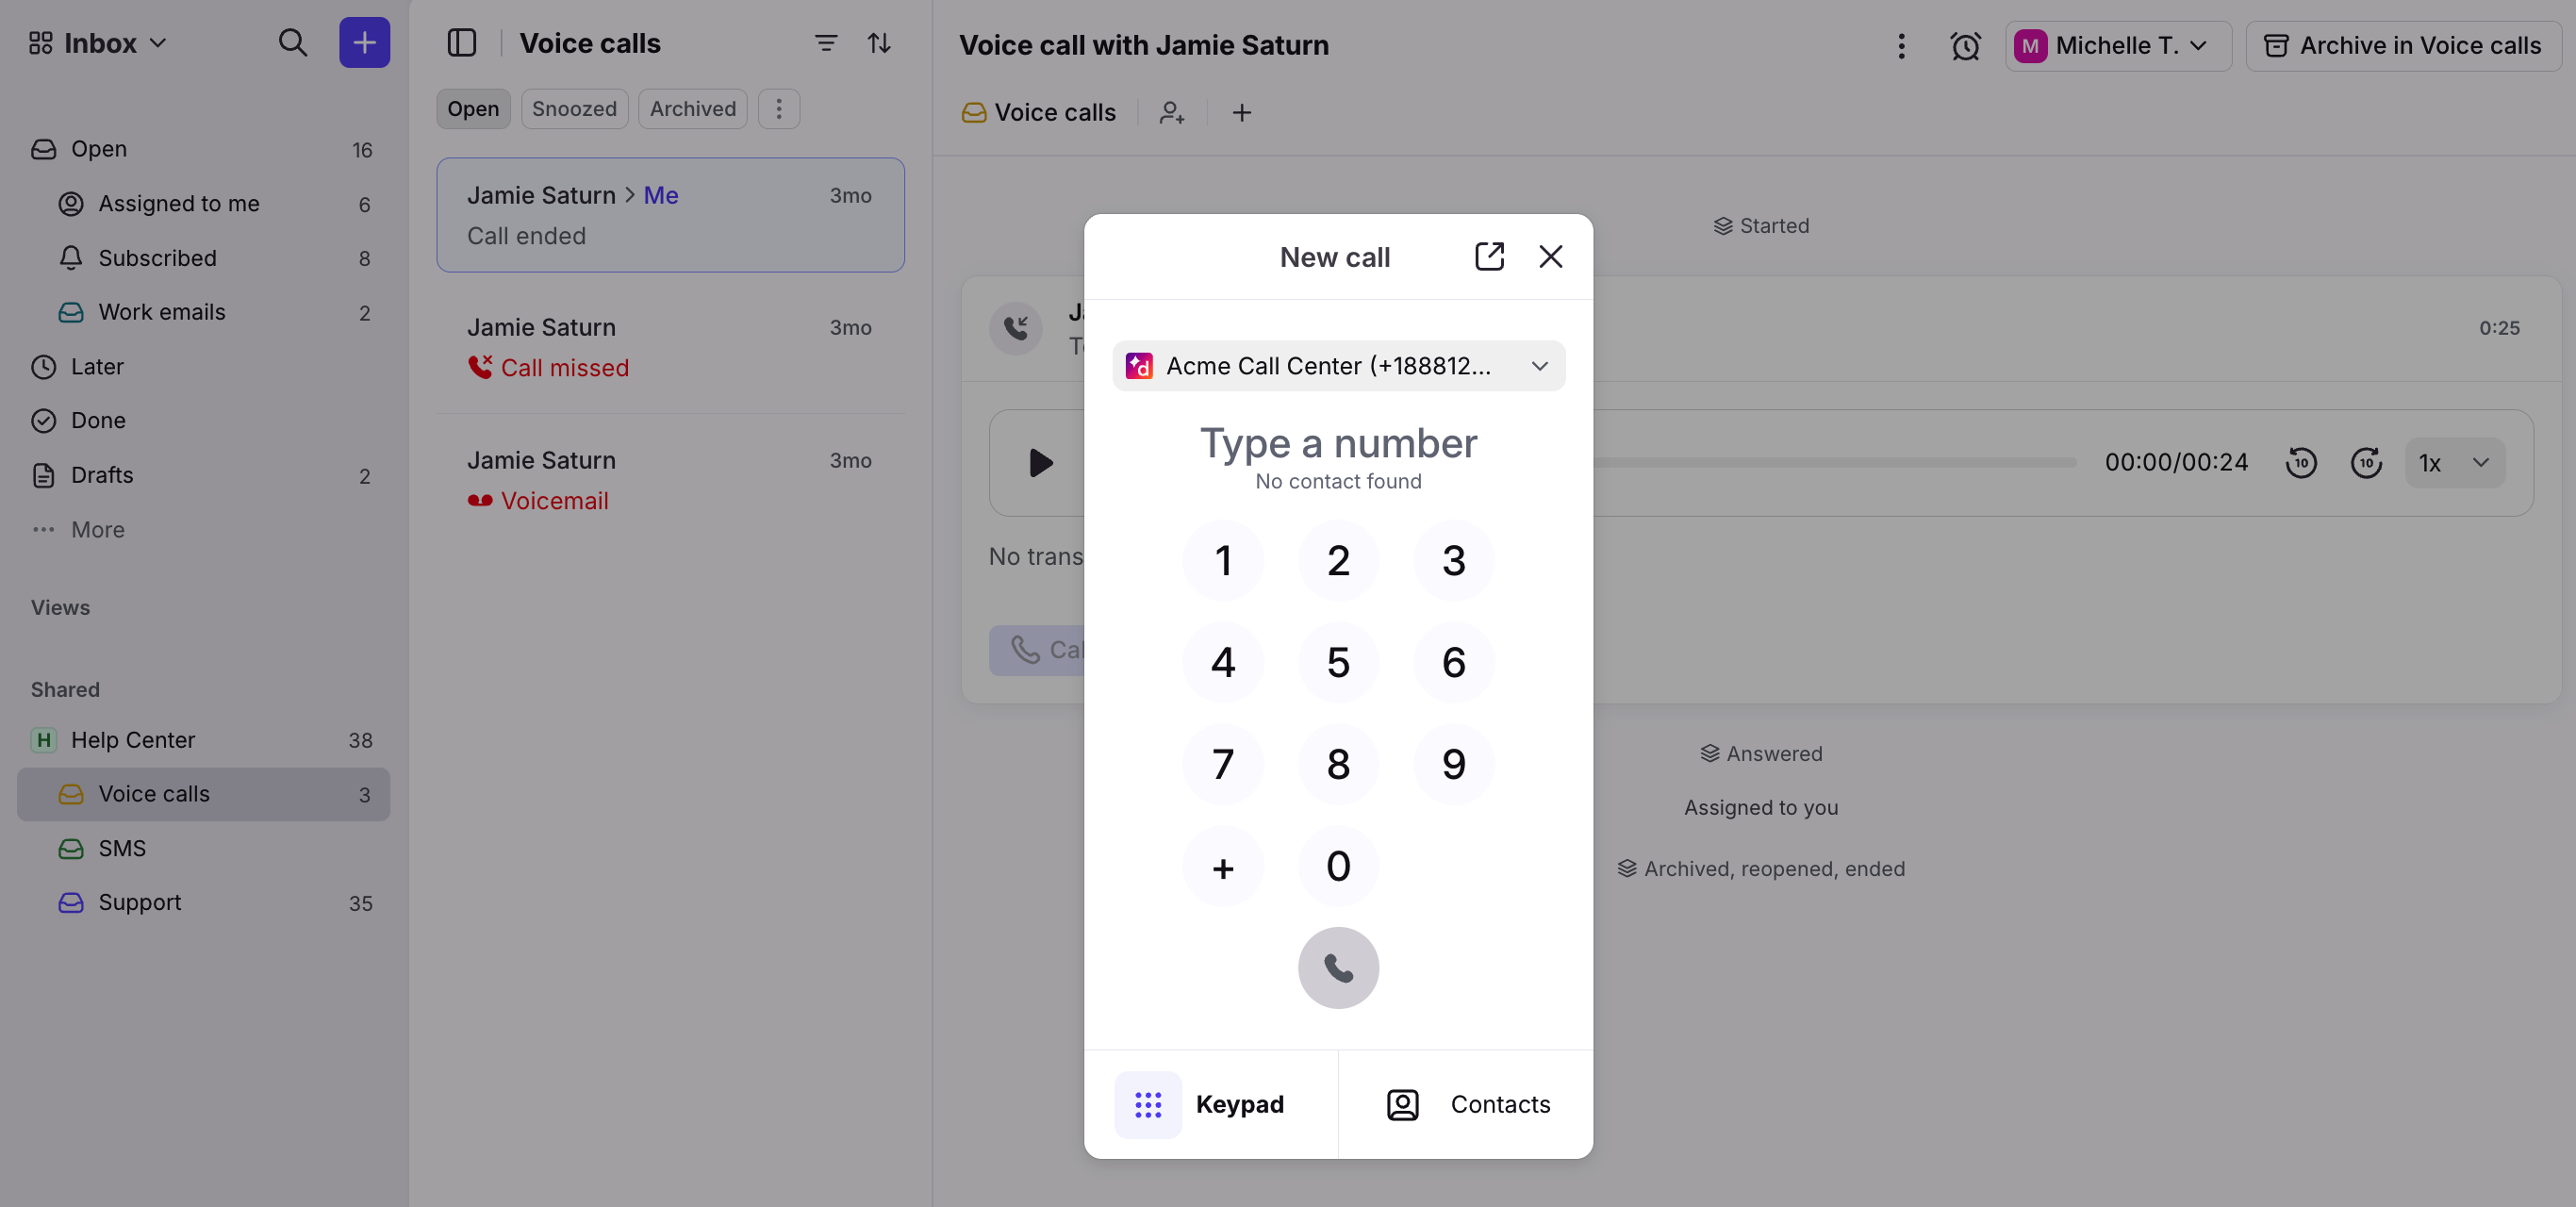
To make an outbound call, click the down arrow next to the plus icon, then select Call.
Enter a phone number in the Keypad tab or select a contact in the Contacts tab, then click the call (phone) button.
Navigate to the conversation using the call widget or using the Open section in your sidebar.
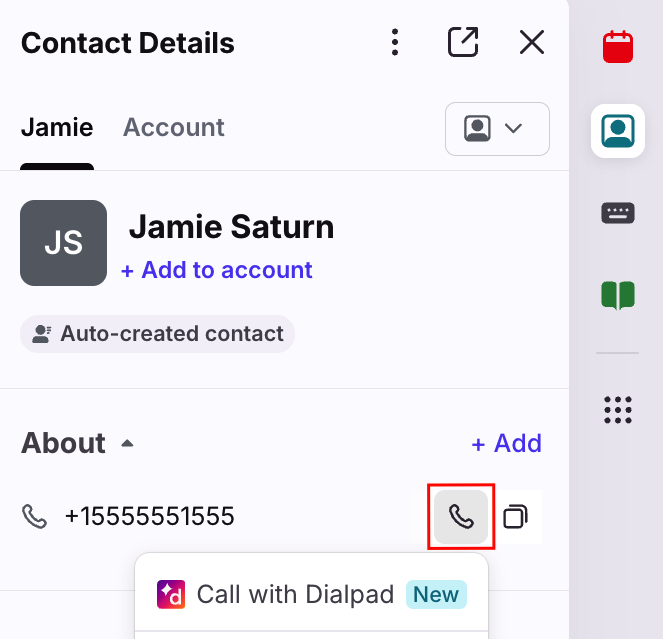
You can also make outbound calls from your Front Contacts plugin.
Receiving calls
When there’s an incoming call, you’ll hear a ringtone and see a call widget pop-up at the bottom left. To answer the call, you can either:
Click Answer via Dialpad in the call widget
Click Answer in the conversation
The call will automatically assign to you when you answer it.
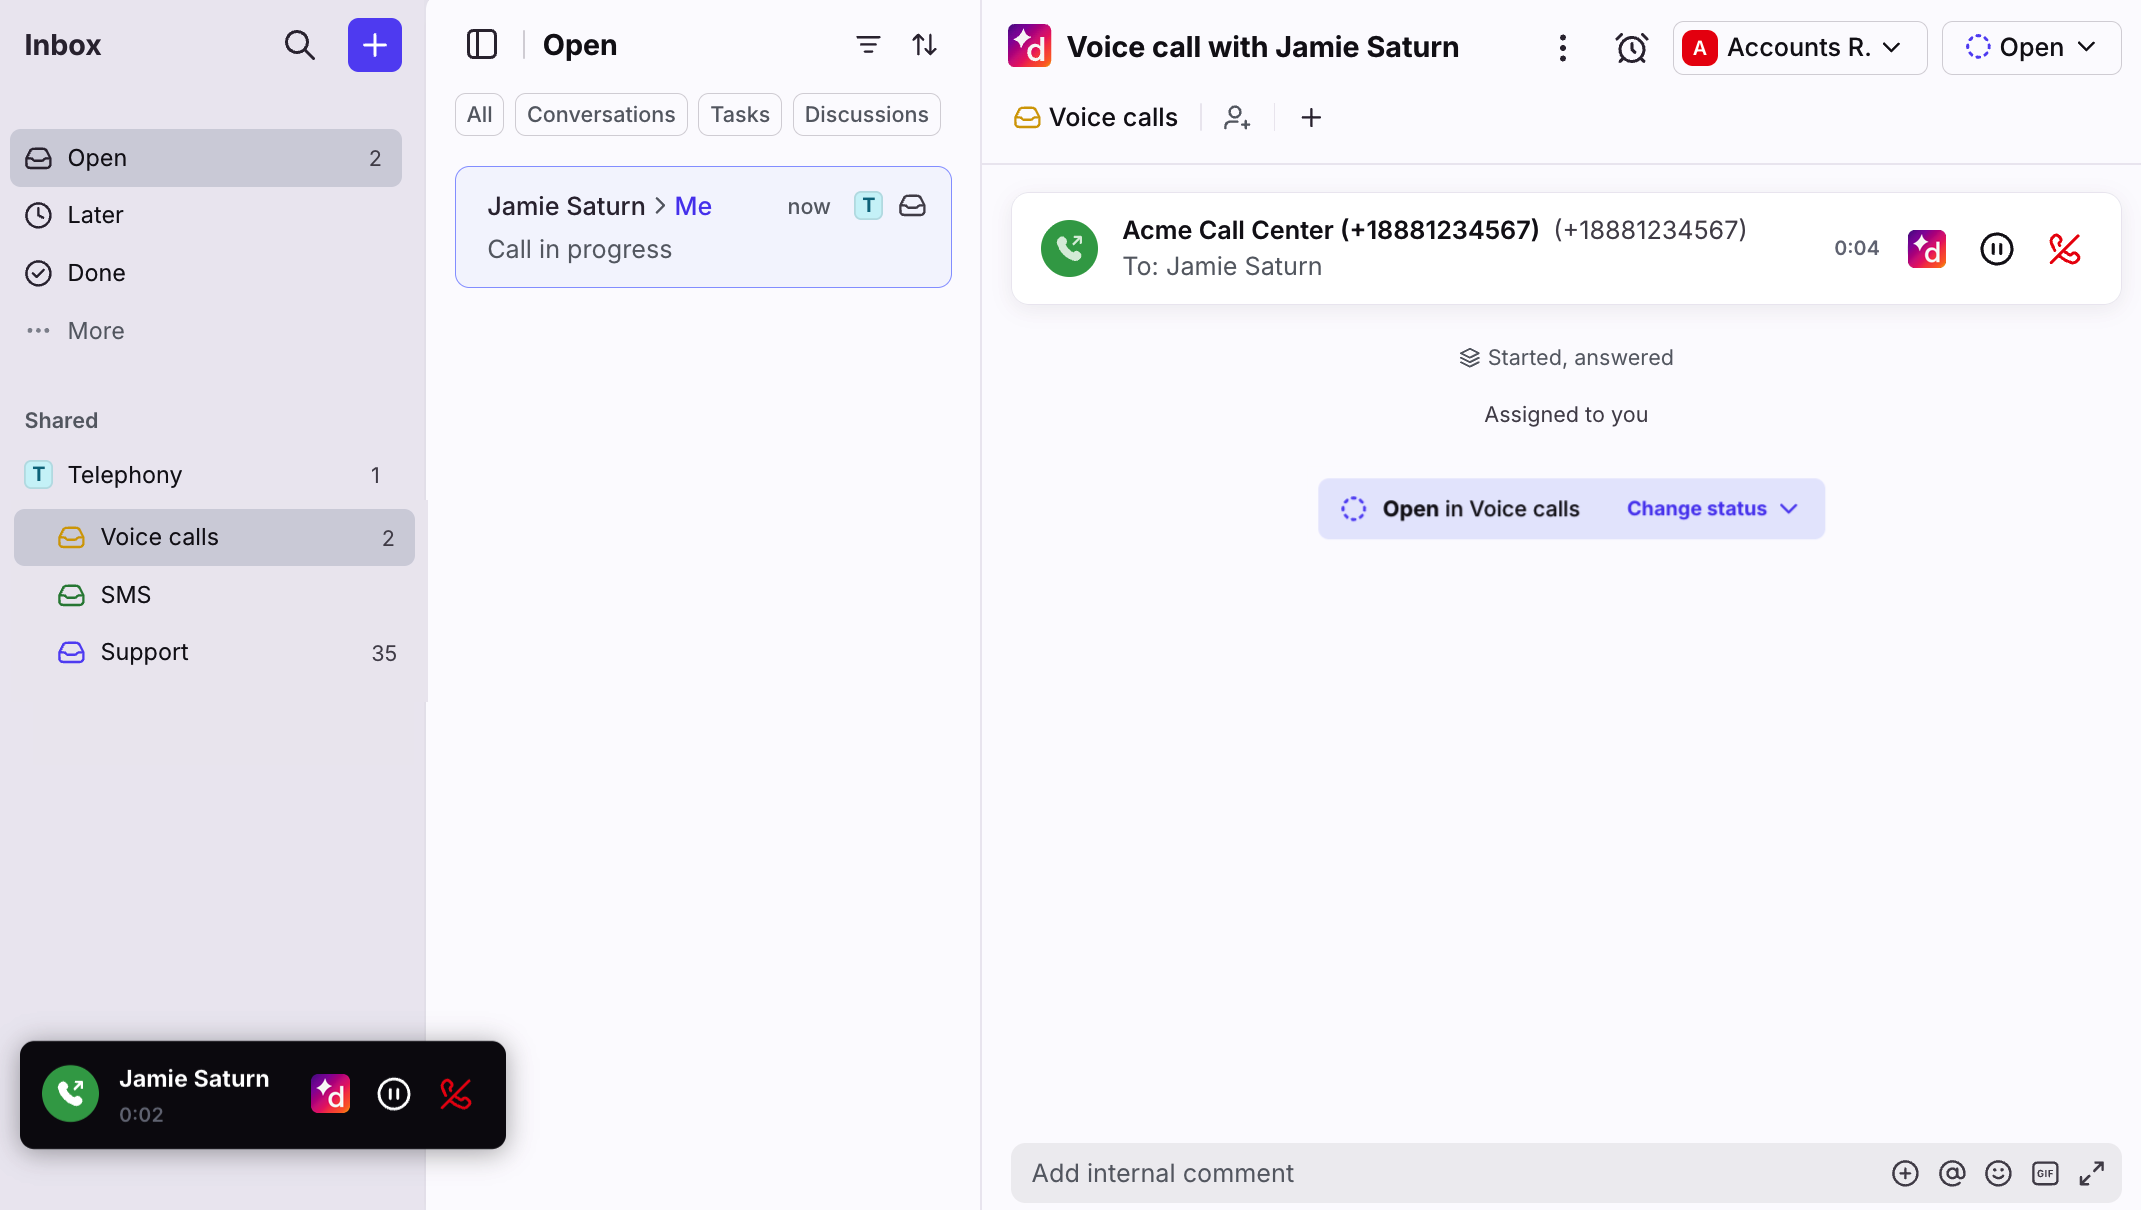
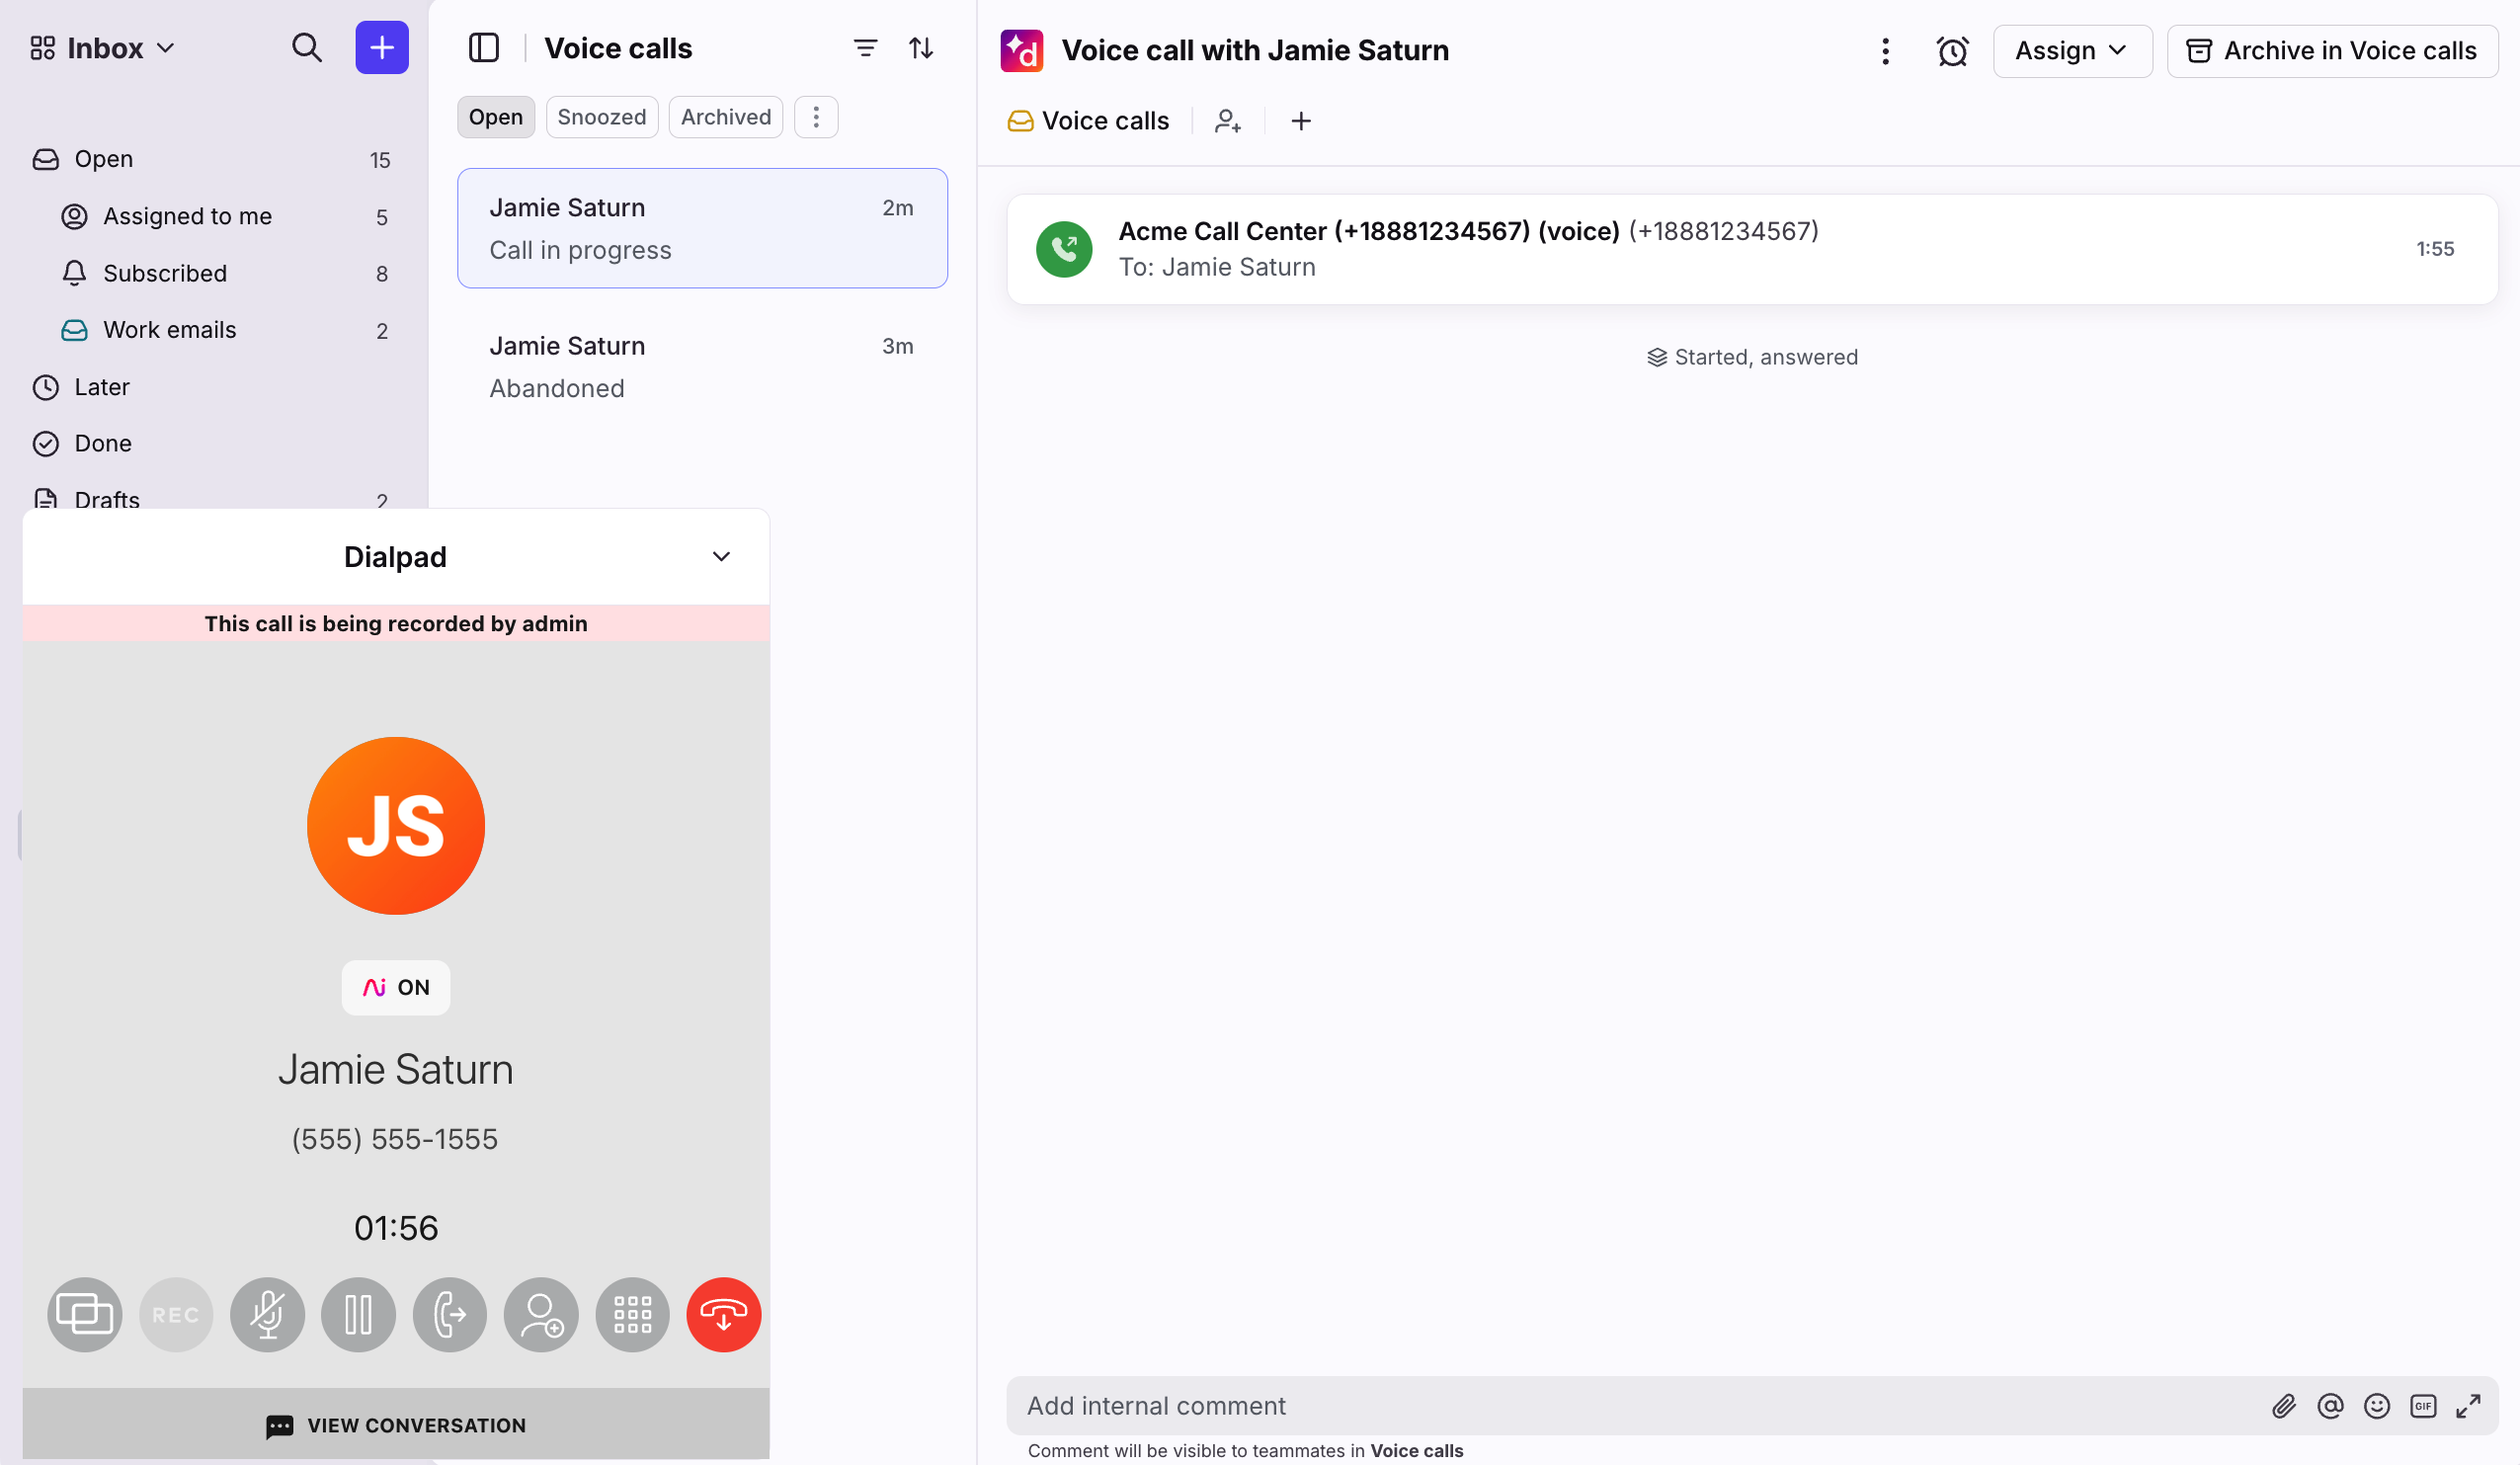
Click the Dialpad icon to expand the widget to take additional actions (mute, transfer, etc.) using the toolbar icons. Use the caret (^) icon to minimize the widget. You can always re-open it using the Dialpad icon in the conversation.
Wrapping up calls
After you end a call, you’ll see a Call ended activity update in the conversation and conversation list.

Call summaries, transcripts, and call recordings are available for applicable conversations.
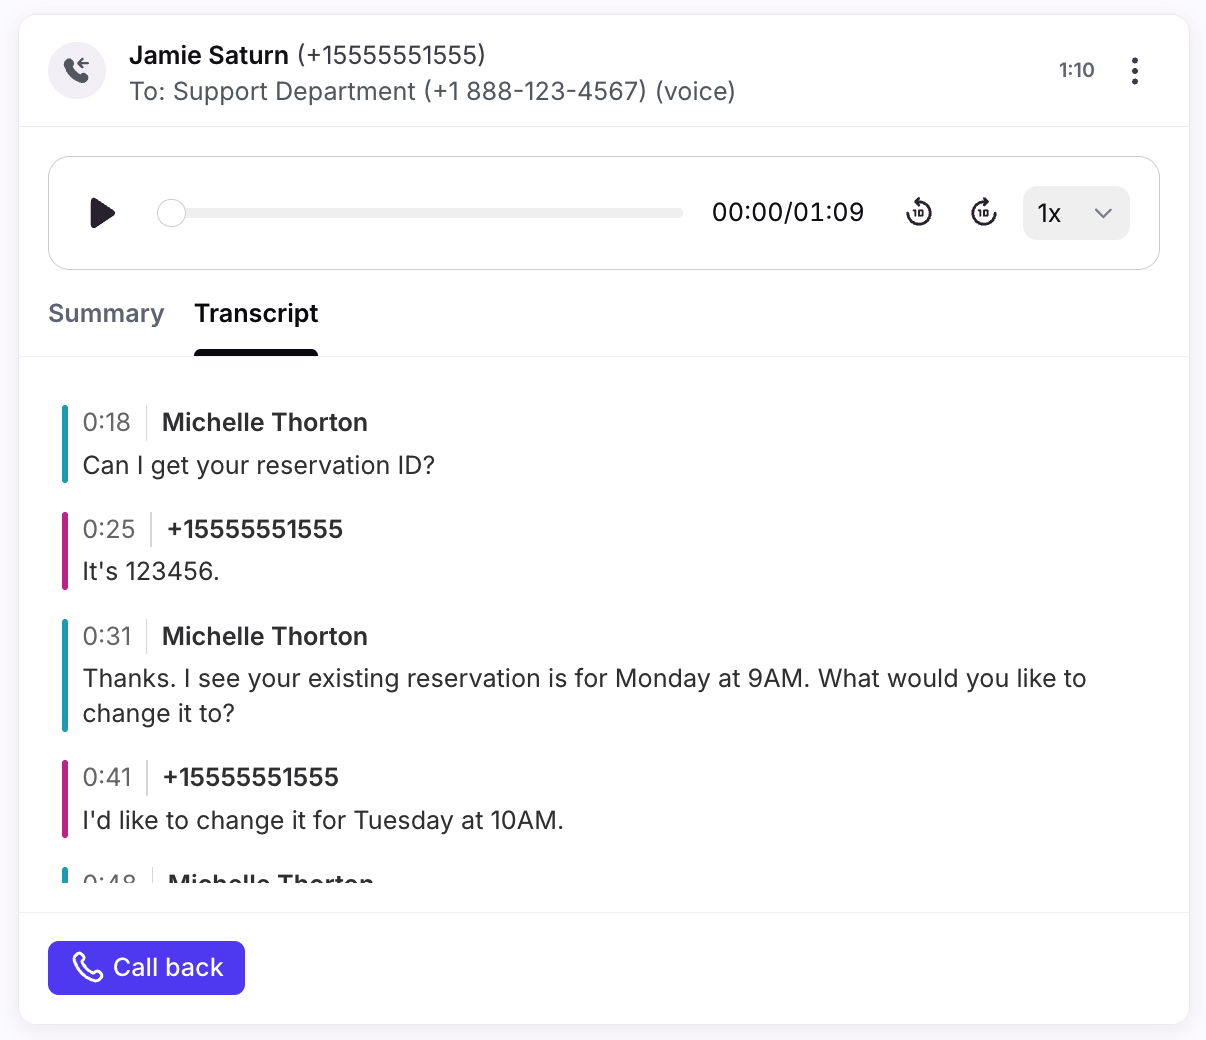
Use Front’s comment feature to take notes during or after the call. This is useful for adding call summaries, action items, and more. You can also add contextual comments on the call transcript.
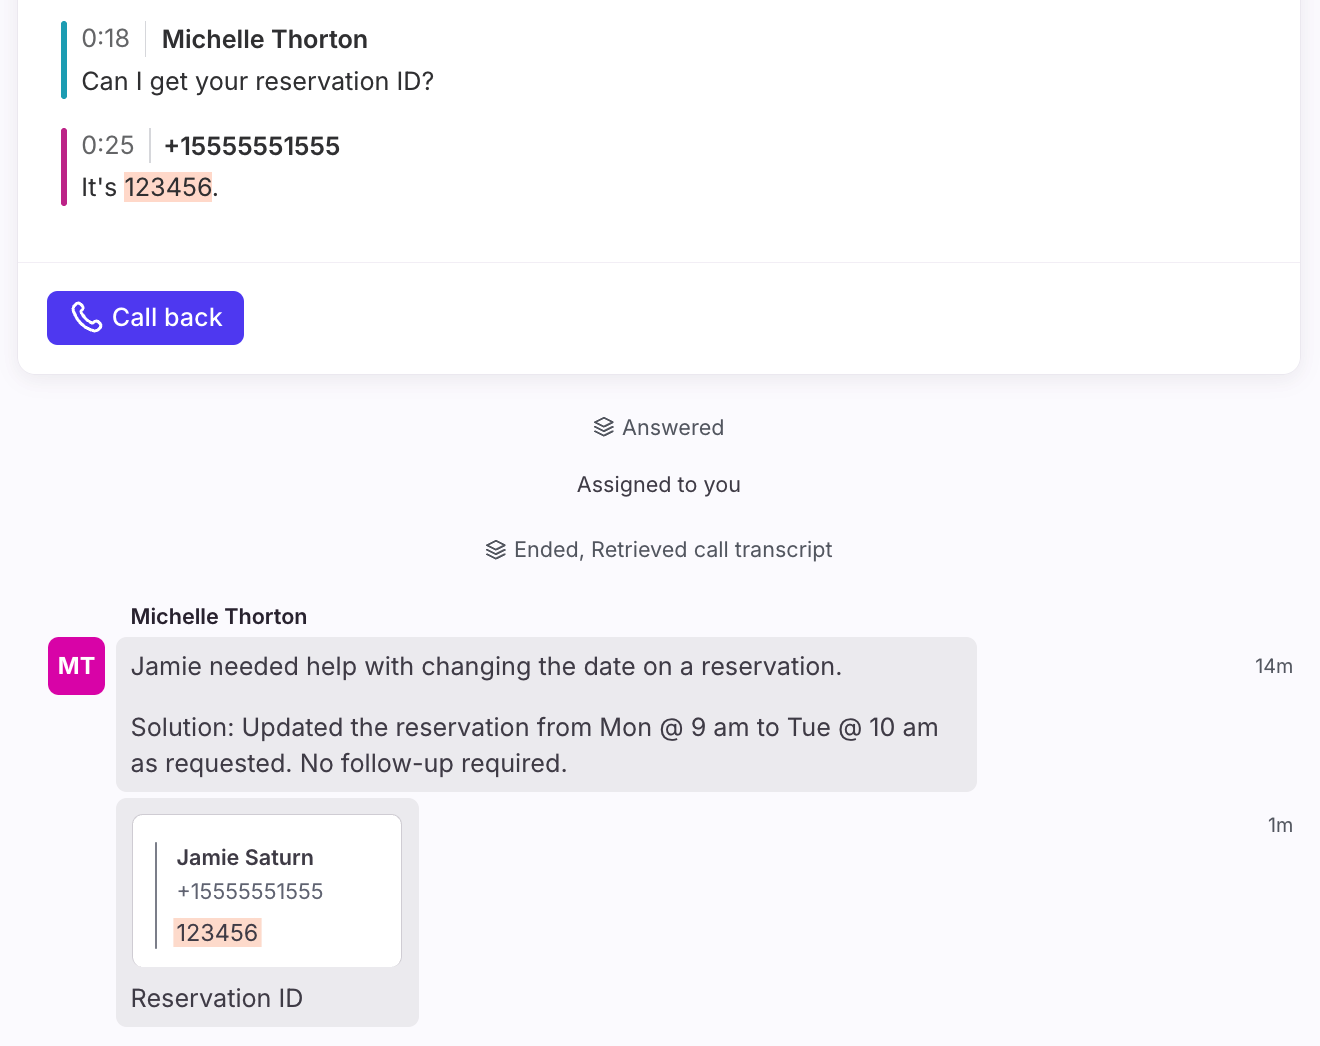
When you’re done with the conversation, follow your team’s specific workflows that may include archiving or tagging the conversation.
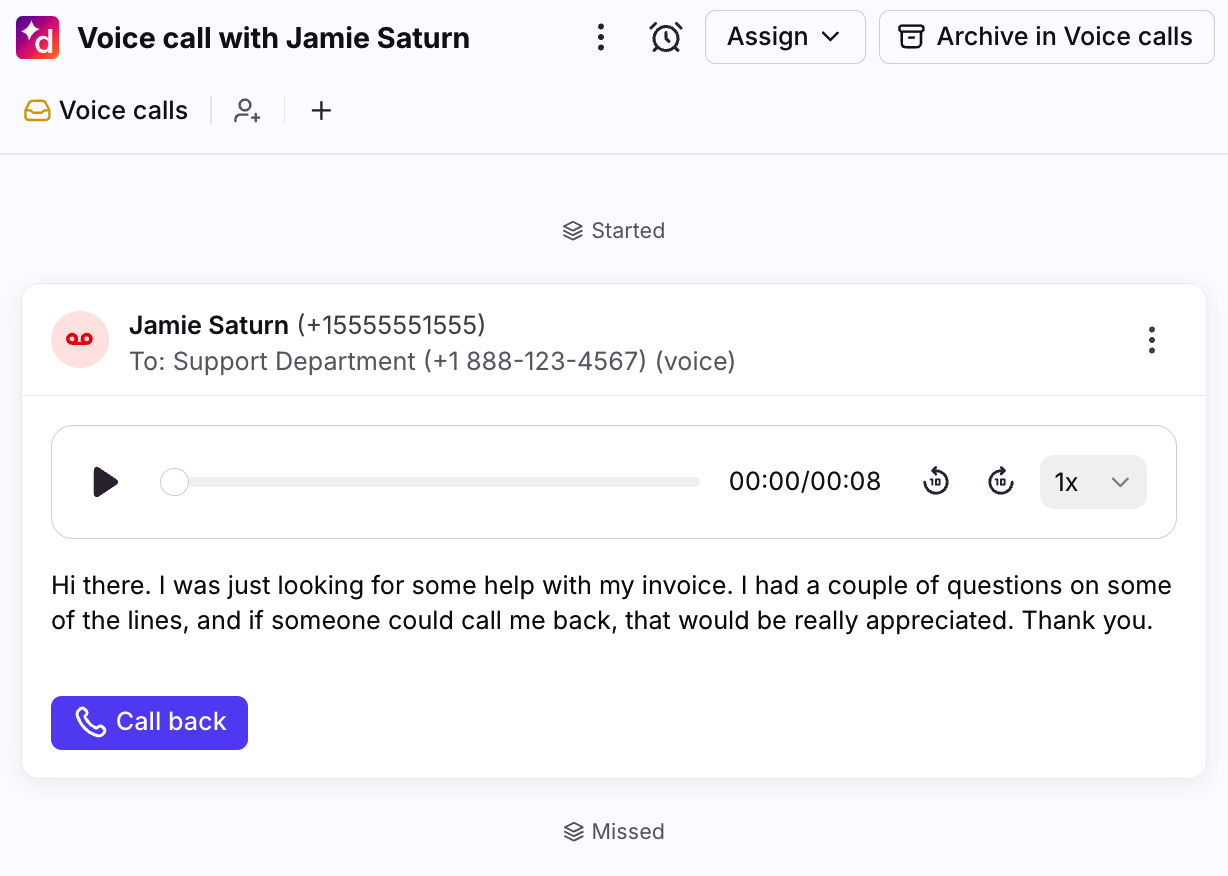
Missed calls & voicemails
If no one is available to answer a call, a conversation will be created and marked as Call missed or Voicemail in the conversation list.
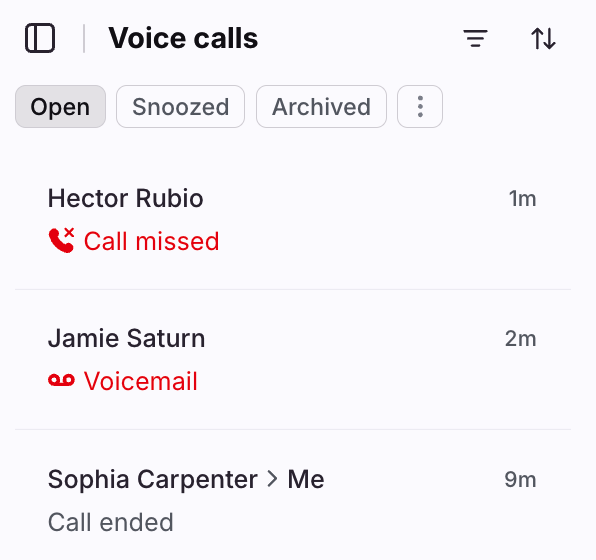
For voicemails, Front will display call recordings and transcripts generated by Dialpad.
Queued calls
If you have call queues set up, you'll see a Queued indicator in the conversation and conversation list, along with the customer's wait time. The next queued call will be assigned once an agent is available.
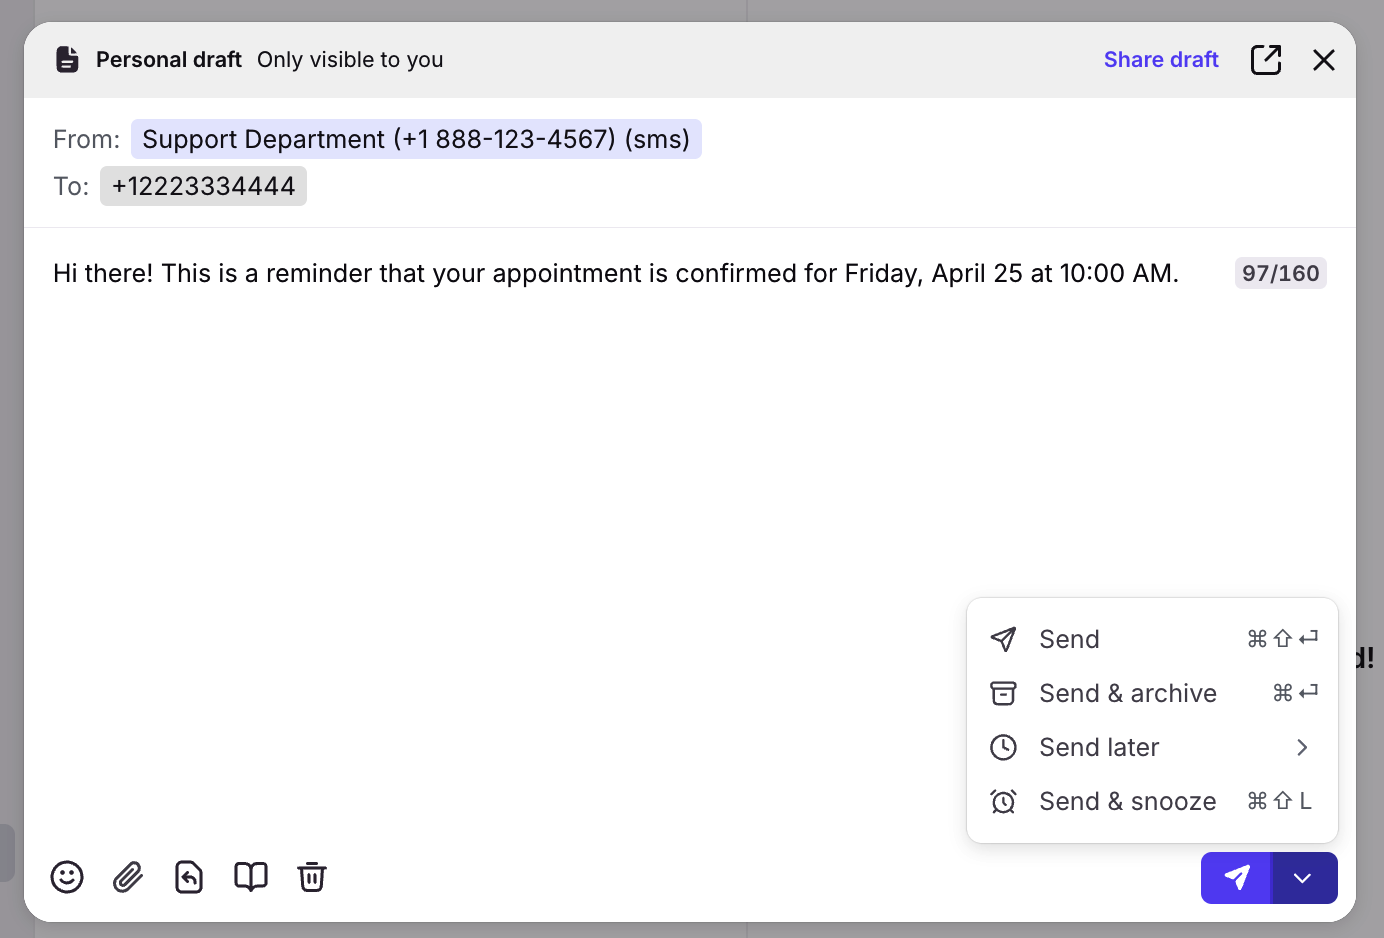
Sending SMS messages
To send an SMS message, click the Compose button. In the From field, select the phone number you want to send from. In the To field, enter the phone number(s) you want to send a message to. Group messaging is supported.
Enter your message in the composer and add emojis, attachments, message templates, or knowledge base article links as needed. Once finished, send the message using one of Front’s sending options.
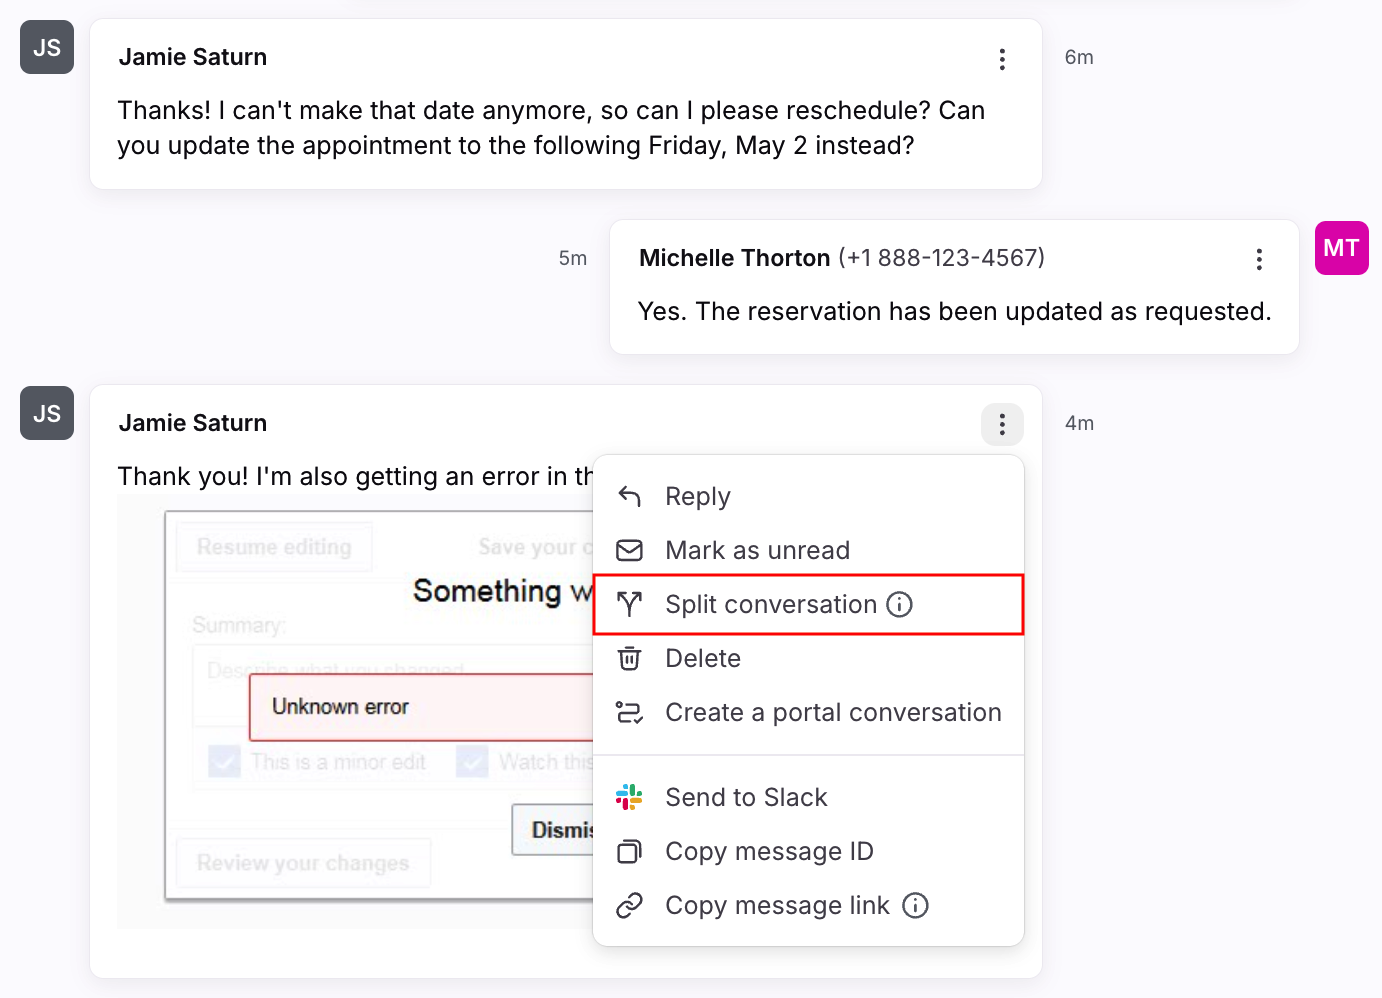
Messages from the same customer will thread together into the same conversation. To separate topics into new conversations, use the Split conversation feature in the message’s three-dot menu.
Workflows
Use Front rules to automate team processes to help your team work more efficiently. See this article to learn more.
FAQ
What if I’m using Front’s legacy Dialpad integrations?
See this article for more instructions on how to update your Dialpad channels and unpin your Dialpad plugin.
How do calls get assigned to agents?
Assignment logic differs between calls and conversations:
Calls: Front uses the routing logic set up in Dialpad. When a customer calls a phone number, the call is routed to an agent in Dialpad, then Front will notify (or “ring”) that agent in Front if they are logged into Front with the same email address.
Conversations: Front assigns the conversation to the agent that answers the call. If an agent does not answer a call, or the agent that answers the call isn’t a Front user, then Front will not assign the conversation.
Why don’t I see a call summary, transcript, or recording?
Call summaries, transcripts, and recordings won’t be available in Front if Dialpad doesn’t generate them. Dialpad may not generate these resources if the agent doesn’t have access to the feature, doesn’t turn on the feature, or the call does not meet length requirements. See this Dialpad article for more information.
Other reasons you may not see a summary, transcript, or recording:
Call summaries and transcripts are not currently supported on the mobile app.
Voicemails, recordings, and transcripts are not currently supported for the Executive Assistant feature.
The call was transferred (such as from an IVR flow) to a call group or number that is not connected to Front. If the call group does not have a number, you should add a number to it in Dialpad and then connect the new number to Front.
Are user extensions supported?
Yes. The integration supports user extensions. To receive Interactive Voice Responses (IVR) with extensions, you must connect the phone number tied to the extension to receive those calls in Front.
Are images and videos supported for SMS messages?
Yes. Images and videos will be visible inline when viewing the message.
Can I send MMS messages?
Yes. You can use MMS messages to send outbound replies with media files up to 500 KB.
Front follows Dialpad's file size, carrier, or geolocation limitations. See Dialpad's documentation for more information.
Are there call and SMS-specific analytics?
Customer satisfaction (CSAT) scores collected in Dialpad will be imported into Front and visible as a comment in the conversation. These scores are accessible in Front Analytics.
You can access voice metrics in the Key metrics chart of the Workload report or custom report. SMS analytics are included in any text-based metrics like reply time.
Will I still see calls and SMS messages in Dialpad?
Yes. All calls and SMS messages will be visible in both Front and Dialpad for each phone number connected to Front.
Can I silence Dialpad calls?
Yes. Toggle on the Mute and hide incoming call banner setting in your notification preferences.
Pricing
This feature is available on the latest Professional plan or above. Some legacy plans may have access.