Teammate custom fields
Overview
Front allows you to add custom fields for existing teammates to designate fields like Manager, Role, or Workspace. After the custom fields are set, they can then be used in Smart Rules to automate many of your workflows. They will also be available for use as custom variables in message templates and signatures.
You must be a company admin to create new custom fields. Users will need workspace admin access to update existing custom field data.
Create custom fields
Step 1
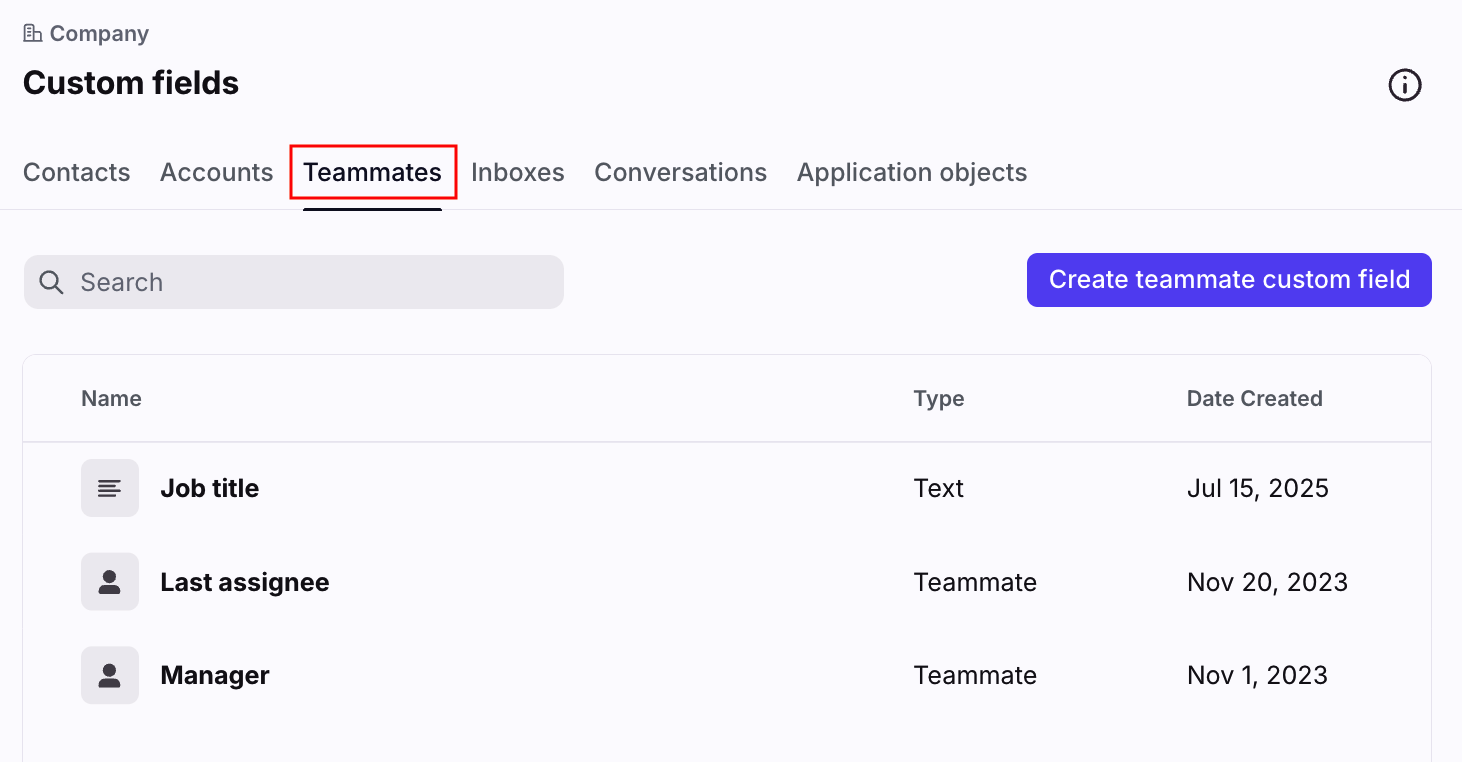
Click the gear icon, navigate to company settings, then select Custom fields from the left sidebar menu.
Step 2
Select the Teammates tab, then click Create teammate custom field.
Step 3
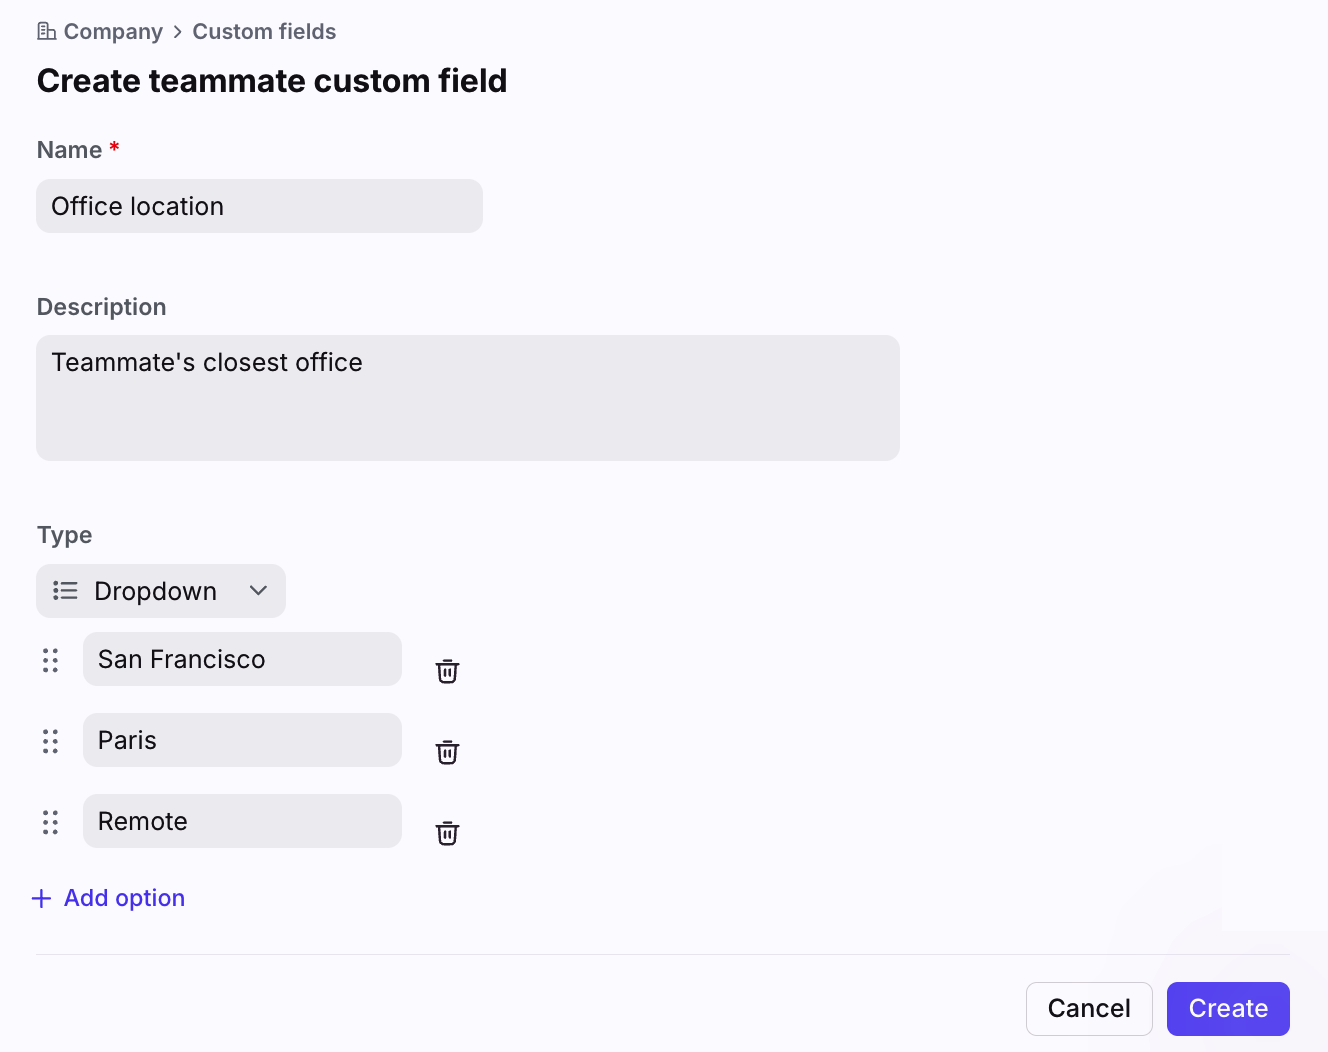
Enter a Name and Description for your custom field, then select a data Type. See this article to learn more about custom field data types.
Step 4
Click Create.
Manually enter custom field data
Step 1
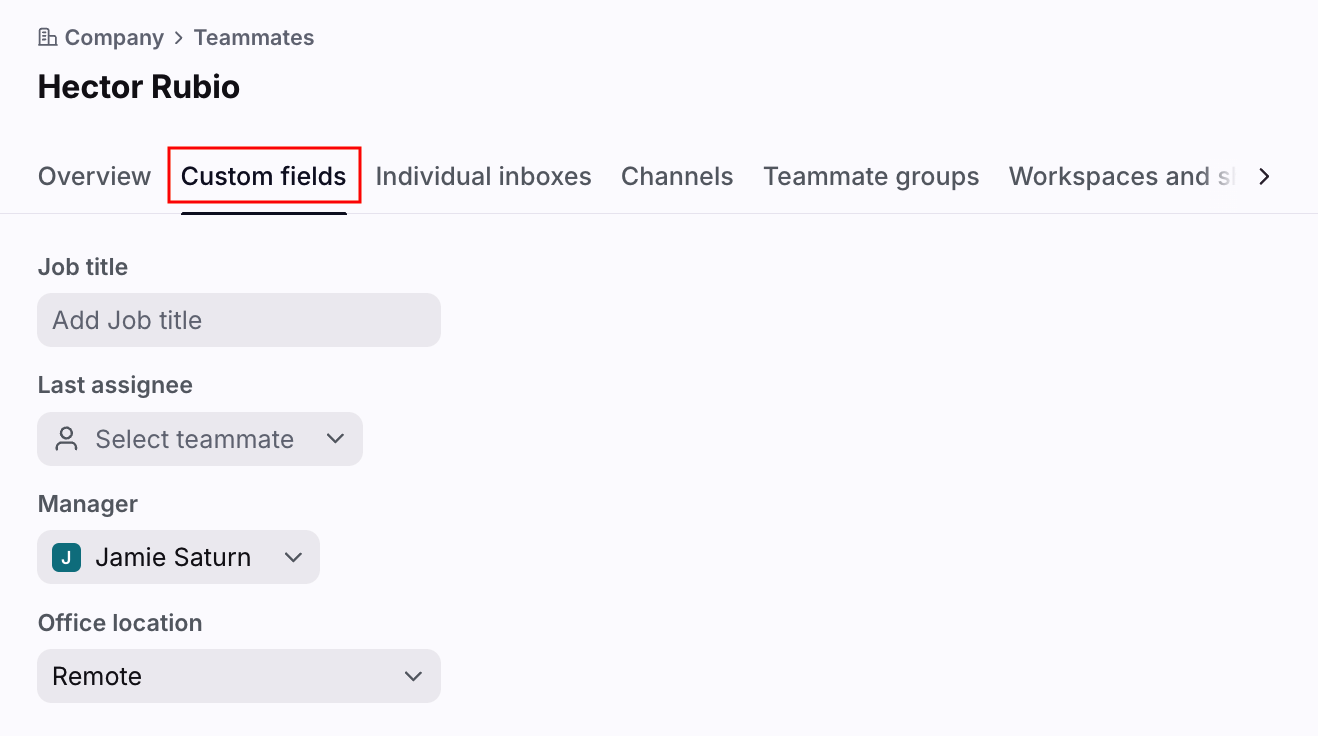
Click the Teammates tab in your left sidebar menu, then select the teammate you’d like to enter data for.
Step 2
Click Custom fields, then fill in any of the custom fields for the teammate.
Import custom field data
Template
You can export a template containing your list of teammates and any existing teammate custom fields using the export instructions below.
File formatting
Column headings and naming conventions are critical for a successful import. The file may only contain the exact fields listed below, in any order:
Column heading | Teammate field | Example value | Description |
teammate_login_email | jsmith@front.com | Include the login email address associated with the Front teammate. | |
name of your teammate custom field, e.g. Manager | Custom fields | Depending on the type of custom field, this could be a string, number, boolean, date time, or teammate email | You can add columns for any of the teammate custom fields you’ve set up. |
Here are the valid values that can be supplied for each type of custom field column:
Custom field type | Valid CSV values |
Date and time | A date and time in ISO format. e.g. 2020-07-10T15:00:00.000 for July 10 at 3 pm |
Inbox | Provide the inbox ID (e.g. inb_12345), not the inbox name (e.g. Marketing Shared Inbox). The inbox ID can be obtained via the API or through the downloadable template. |
Number | A number |
Teammate | The login email address of a user within your company in Front (user names are not accepted) |
Text | Any text |
Dropdown | Text must match one of the dropdown values listed in the custom field |
Yes or no | Valid values include “True”, “False”, “Yes”, or “No” (case insensitive) |
Important to know
The import will only update existing custom fields. This process will not create brand new custom fields, nor update default fields like teammate_login_email and teammate_display_name.
If you delete a row from the spreadsheet, then the corresponding teammate's data will not be modified. However, deleting a column will update the values for that custom field with blank data.
Extra columns and rows must be deleted, including blank columns and rows.
You can upload up to 3000 rows (not including headers) in a single upload.
Up to five upload jobs can be running simultaneously. For large batches of contacts, you can break up your job into five groups of 3000 at a time.
Example

Import instructions
Step 1
Click the gear icon, then select company or workspace settings in the left sidebar.
Step 2
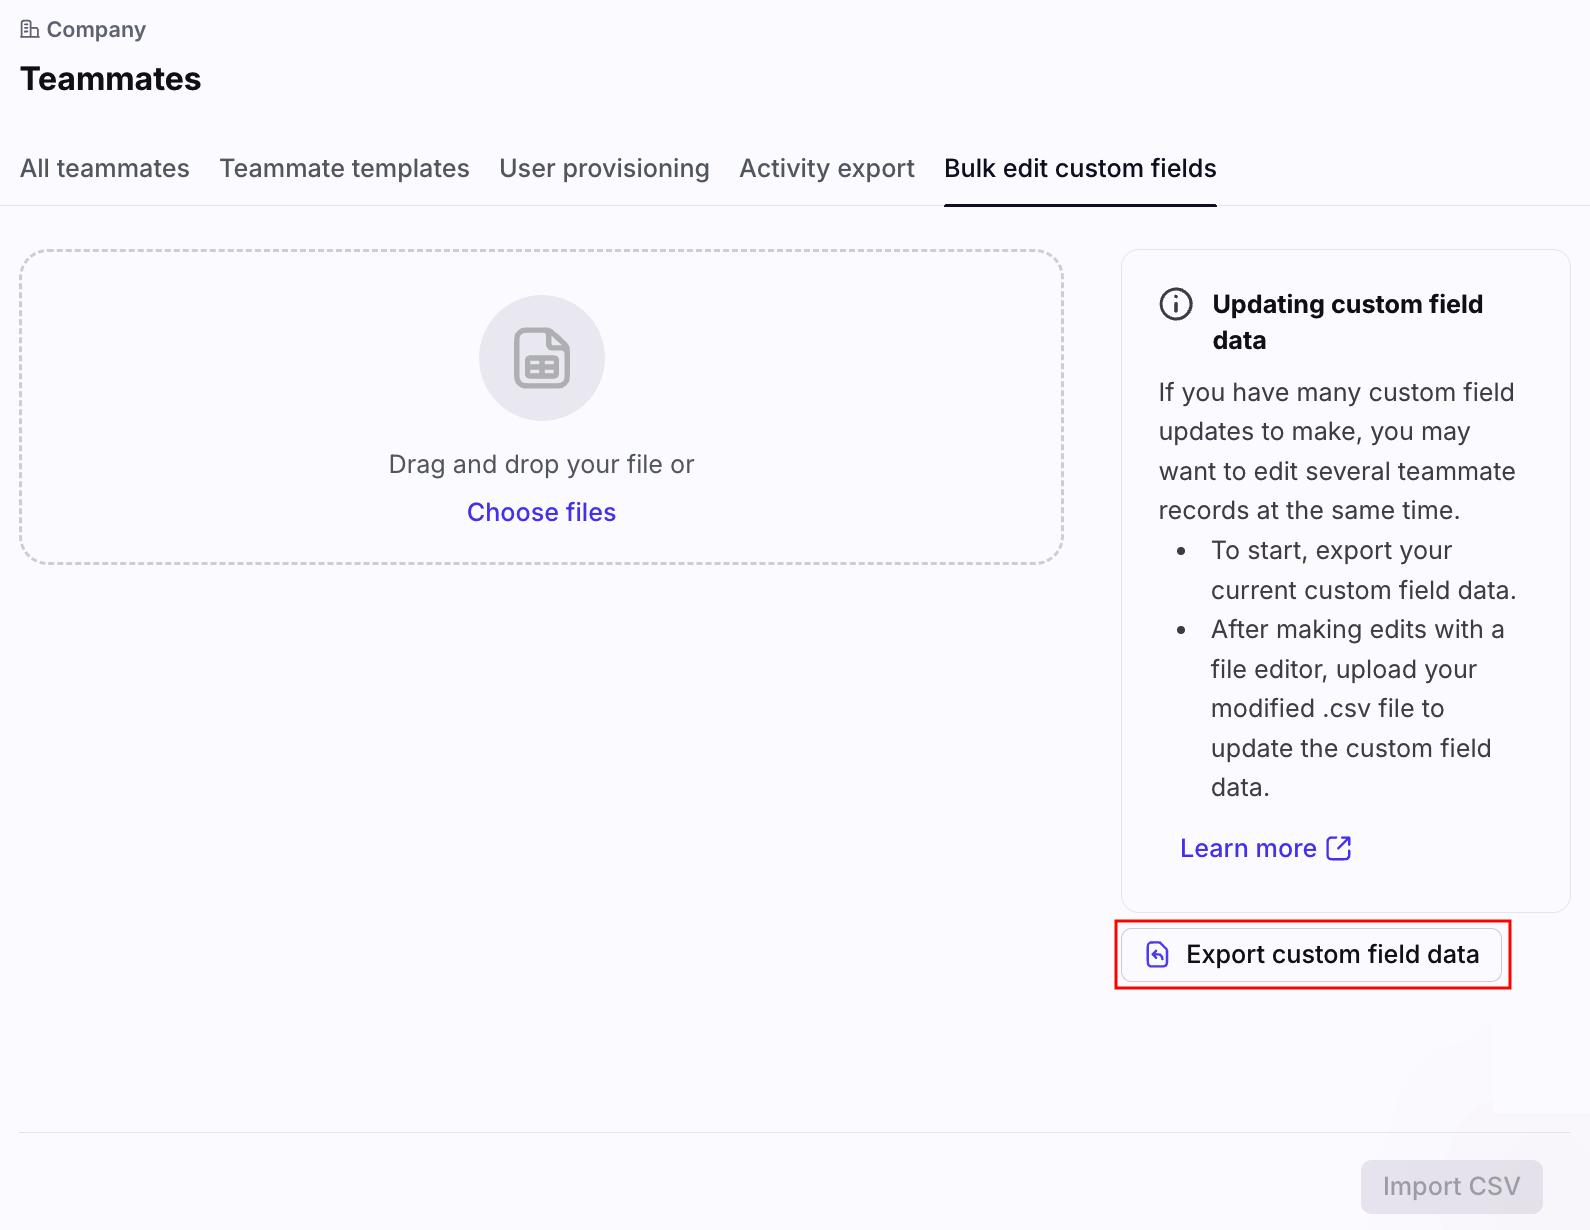
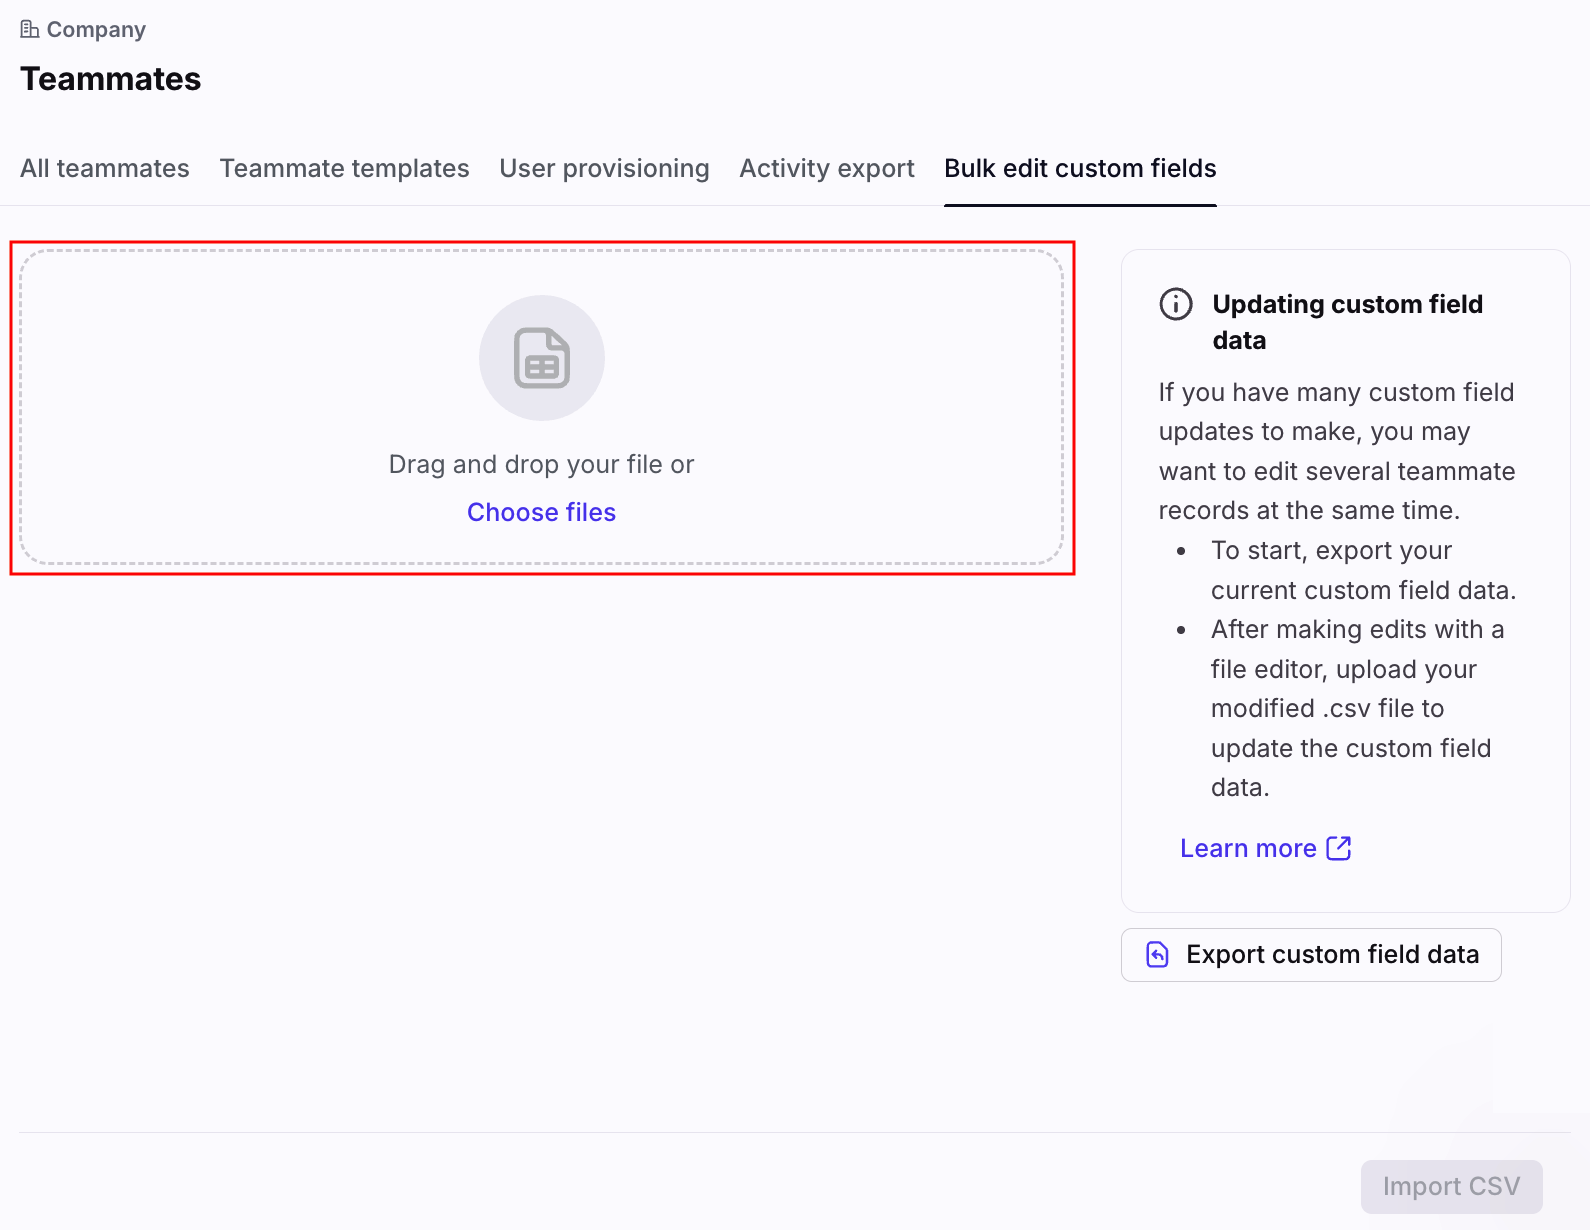
Click the Teammates tab in your left sidebar menu, then Bulk edit custom fields.
You must be a workspace admin for the selected workspace to see the Bulk edit custom fields tab.
Step 3
Click Choose files in the Bulk edit custom fields tab and select your file. You can also drag and drop your file from your computer into this section.
Step 4
Click Import CSV.
Export custom field data
Step 1
Click the gear icon, then select company or workspace settings in the left sidebar.
Step 2
Click the Teammates tab in your left sidebar menu, then Bulk edit custom fields.
You must be a workspace admin for the selected workspace to see the Bulk edit custom fields tab.
Step 3
Click Export custom field data to download a list of all teammates. The file will contain a list of all teammate email addresses and all existing teammate custom fields.