
How to use Google Workspace advanced mail routing with Front
Overview
Google Workspace advanced mail routing can be used to redirect messages received by your organization's email addresses to Front's forwarding (SMTP) inboxes. This uses steps found in the Google Workspace support article here. This setup helps organizations manage a large number of forwarding addresses from a single location.
Prerequisites
You will need administrative access to your organization's Google Admin console.
You will need an existing email address in your organization that will have messages routed to Front.
Instructions
Part 1: Create a forwarding address inbox in Front
Step 1
Click the gear icon and navigate to your workspace or personal settings in the left sidebar, depending on the space you’re working with.
Step 2
Click Inboxes in the left menu and create a new shared inbox or individual inbox.
Step 3
Click Channels in the left menu, then click the Connect channel button.
Step 4
Select Other email account from the channels menu, and enter your email address.
Step 5
Choose the inbox that conversations will route to and click Save.
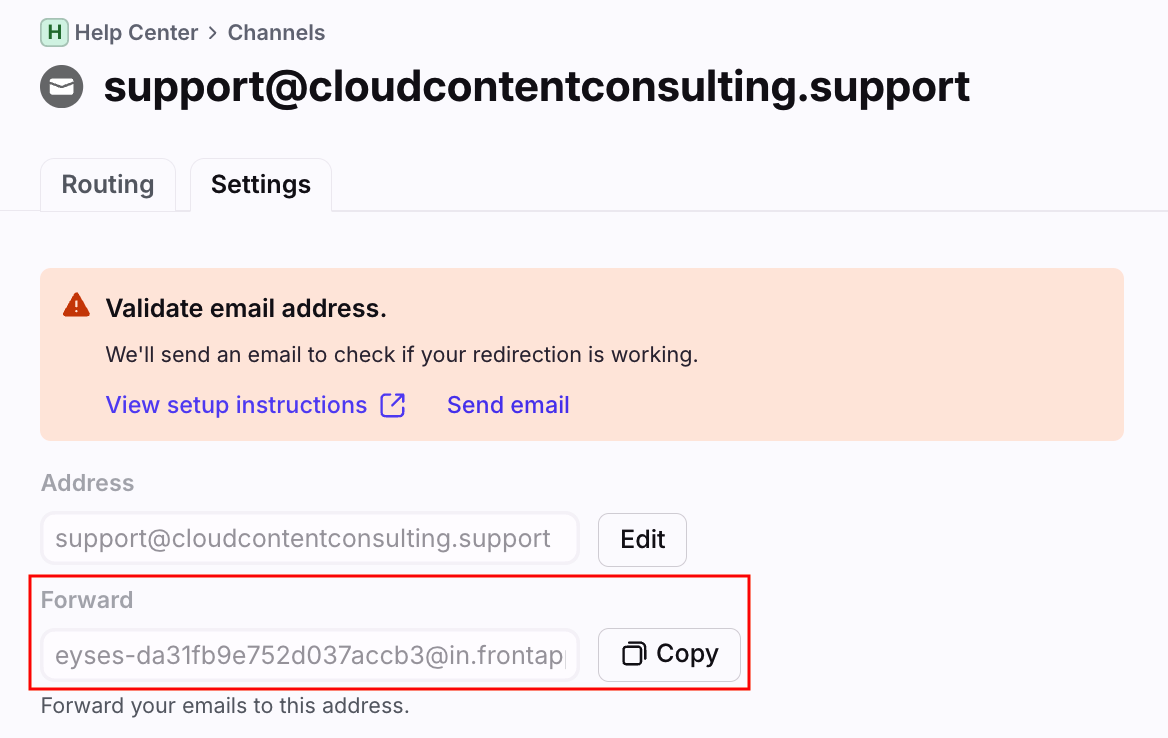
Step 6
In your channel settings, copy the Front forwarding address that's generated.
Part 2: Configure advanced mail routing in Google Workspace
Step 7
From the Google Admin console home page, go to Apps and select Google Workspace. Select Gmail, then scroll down to Routing.
Step 8
Locate the Recipient address map table. Click Add Another Rule.
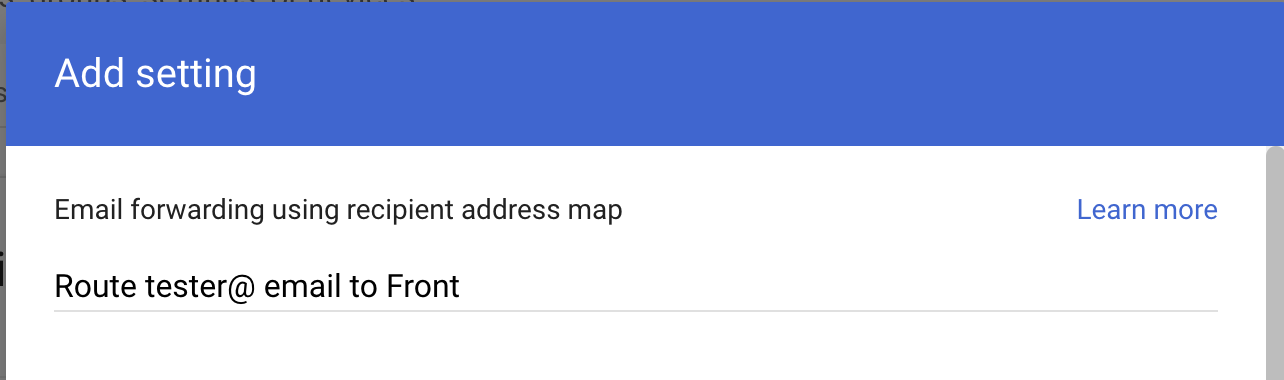
Step 9
At the top of the window that opens, under the Recipient address map heading, enter a description (e.g. Route tester@ email to Front).
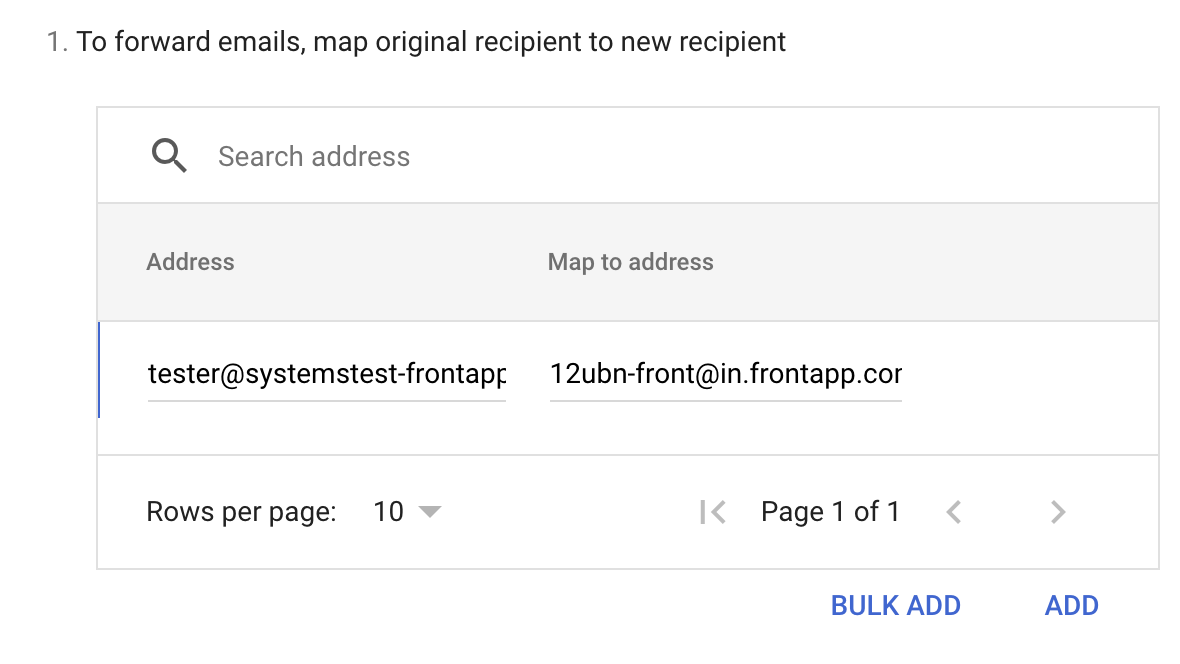
Step 10
In the box, click Add, enter the original address followed by the address that you want to map to. e.g. tester@systemstest-frontapp.com, 12ubn-front@in.frontapp.com
Step 11
Under Messages to affect, choose an option:
All incoming messages: Apply the setting to all received messages.
Only external incoming messages: Apply the setting to messages coming from outside of your organization.
Optional: Also route to original destination box, under Routing options: Send the message to the original recipient as well as the new address.
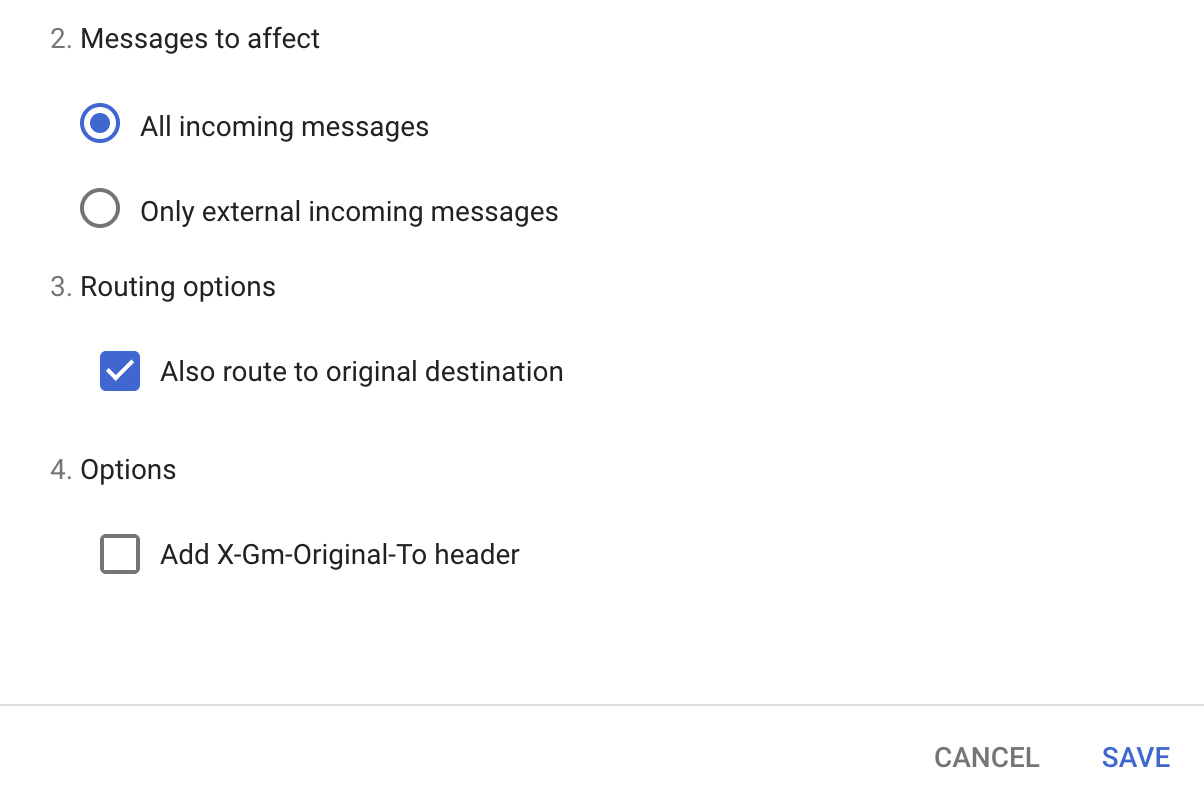
Step 12
Click Save to finish.