
How to enable and use the Salesforce integration
Overview
The Salesforce plugin lets you access and manage Salesforce records directly from your inbox in Front. You can view and update Contact, Lead, Account, Opportunity, Task, Case, and Note records, as well as custom objects linked to these standard types. You can also log full conversation threads, sync data on demand, and trigger automated actions using Front rules.
This integration helps teams stay aligned by keeping Salesforce updated with the latest customer interactions and making key CRM data instantly accessible while working in Front.
If you are on the Professional plan or above:
You can also enable the Salesforce contacts or accounts syncs during the setup process, which allows you to use Salesforce data in Front rules, analytics, and search to power workflows and get insights. See these articles to learn more:
This integration also includes a library of prebuilt Connectors that give you access to every action available in the Salesforce API. Use them in rules, macros, or chatbots to easily automate Salesforce actions directly from Front, supercharging your workflows without having to write any code.
Instructions
Admin steps
You must have Front company admin permissions to set up the integration.
Step 1
Click the gear icon, navigate to company settings, and select App store from the left menu.
Step 2
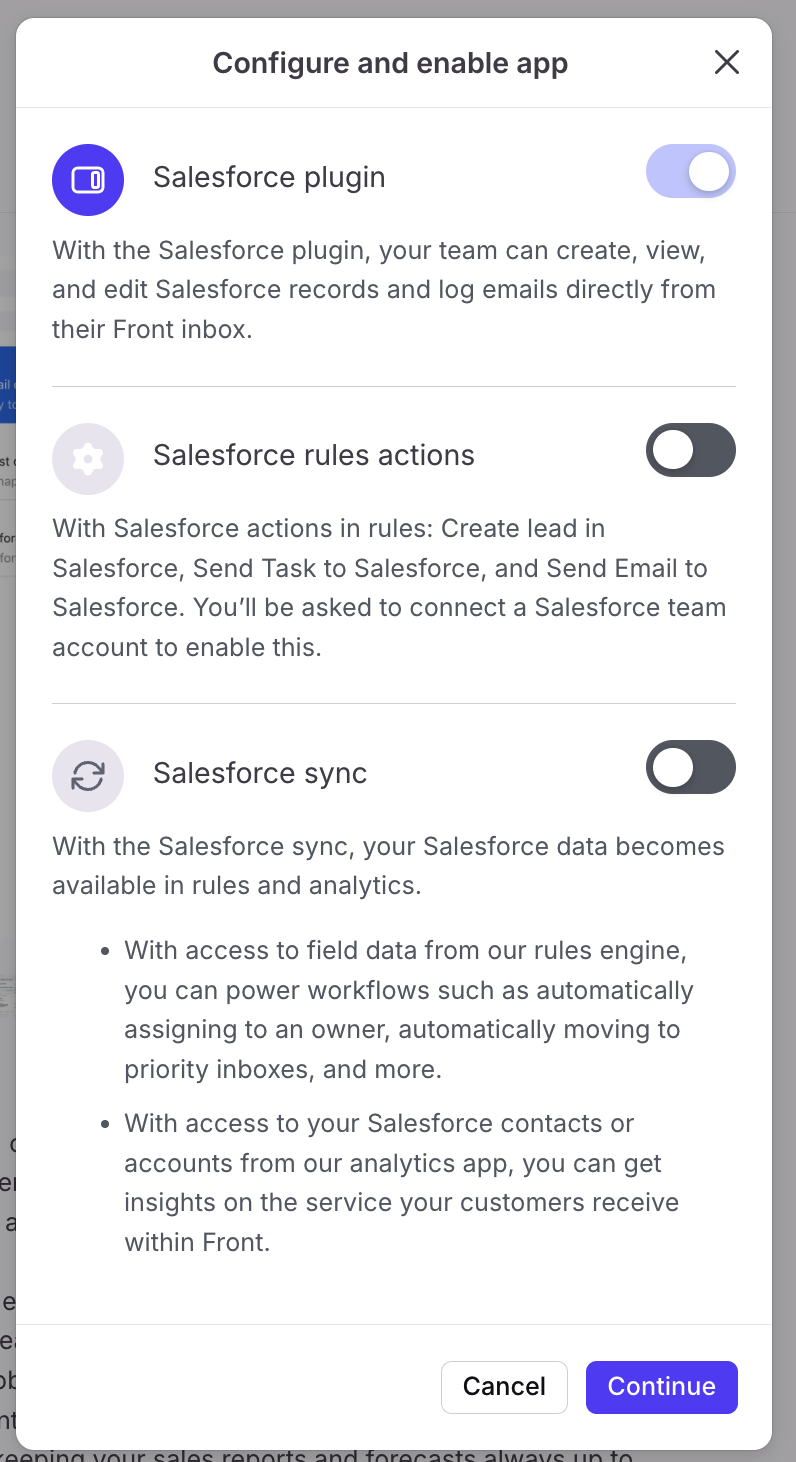
Select Salesforce from the list of integrations. Click See details, then click Enable app.
Step 3
The Salesforce plugin feature is automatically toggled on. If you’d like to also enable and set up the Salesforce rule actions or Salesforce contacts/accounts sync, you can toggle those features on.
Step 4
Click Continue to finish enabling the Salesforce integration.
If you choose to set up the Salesforce contacts/accounts sync in Step 3, you’ll be directed to the sync setup page. You can find detailed instructions in the Salesforce contacts sync and Salesforce accounts sync articles.
End-user steps
Step 1
In your inbox view, select the Salesforce icon in the app switcher located in the sidebar on the right of the Front interface.

Step 2
In the plugin, click the Sign in button. A pop-up will appear for you to enter your Salesforce login credentials.
If you'd like to log in with a sandbox (developer) account, see this FAQ for more details.
Step 3
Navigate to the Settings tab to choose which fields you want to be shown for standard objects.
To display custom objects, you will need to follow a few additional steps.
How it works
Viewing and editing records
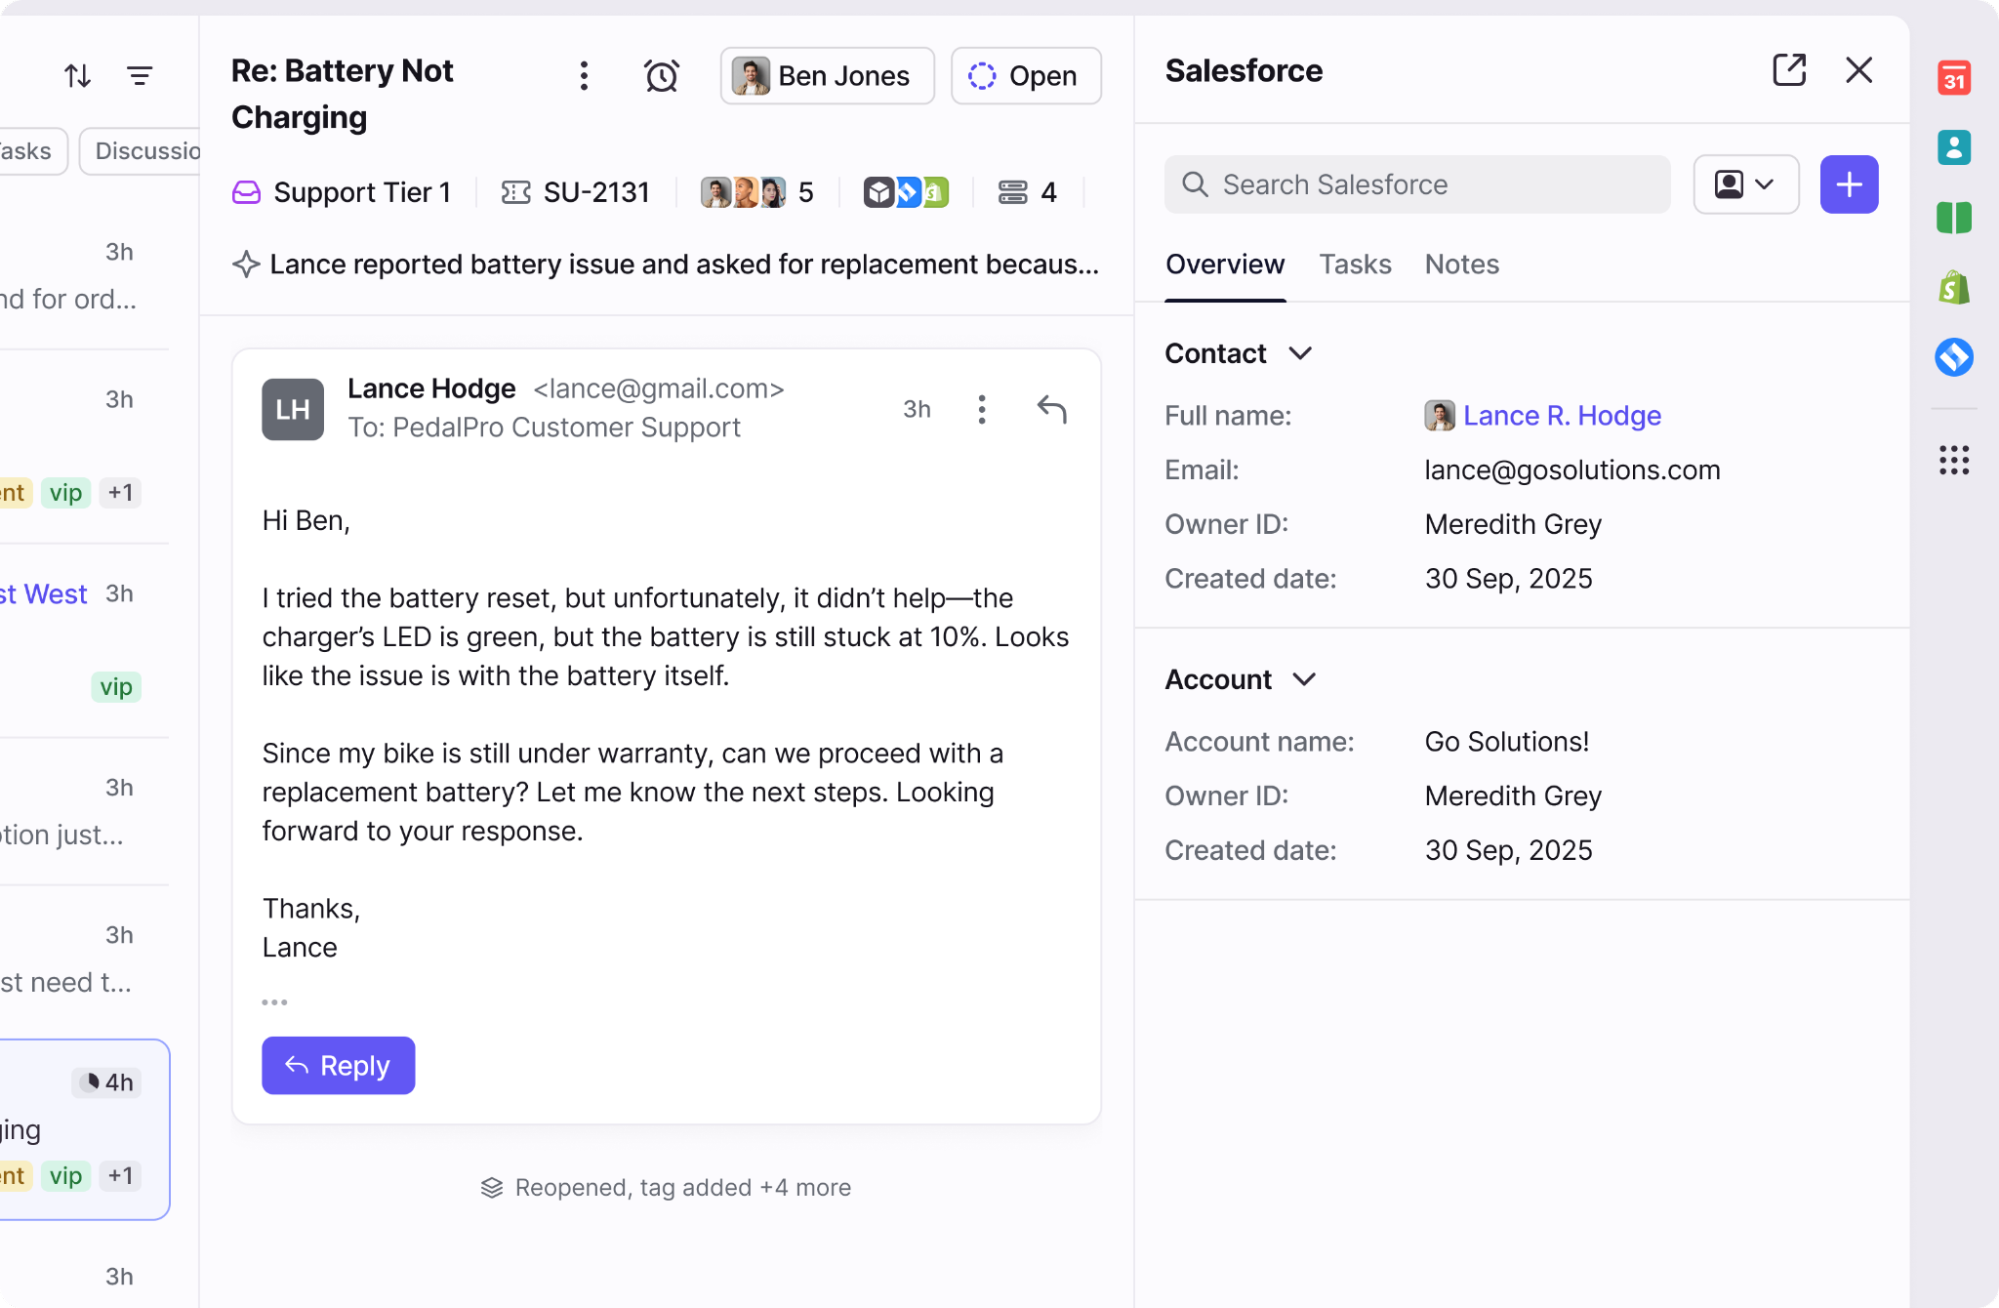
When you open a conversation, the plugin automatically finds related Salesforce records by matching the sender's email or name.
You can view and update information from Contacts, Accounts, Opportunities, and related custom objects.
All data is fetched live from Salesforce, and supported fields are editable within Front based on your permissions.
Field customization
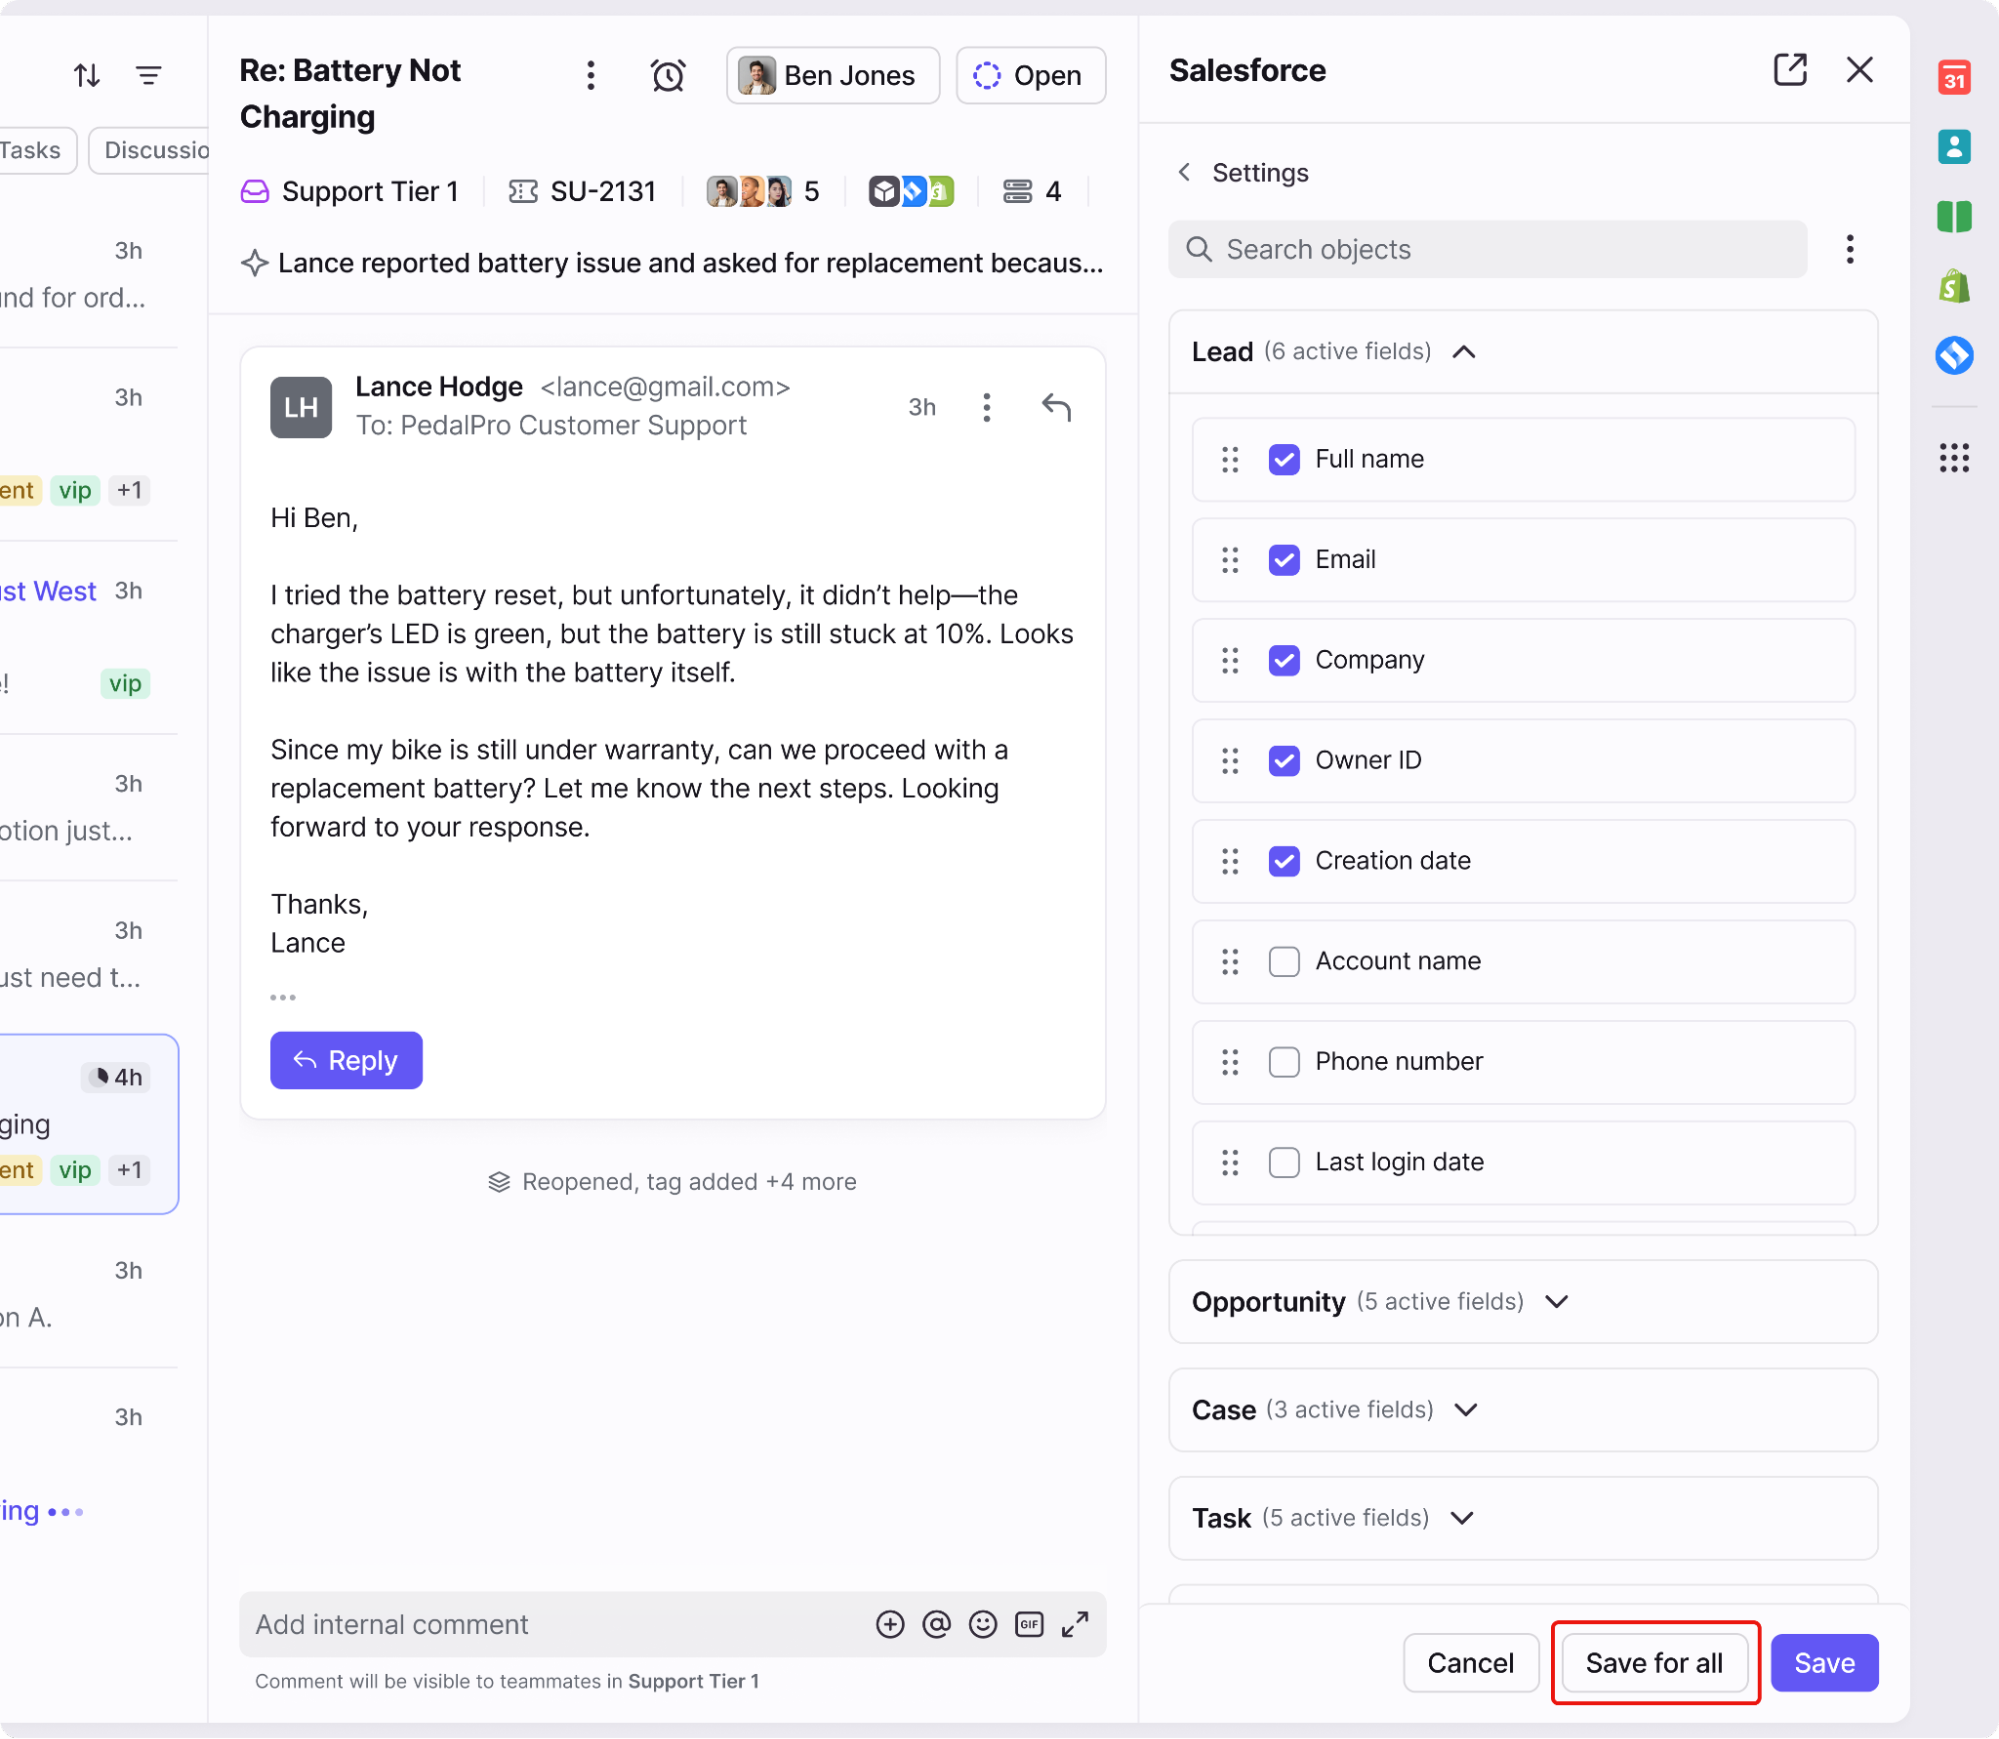
Click the gear icon in the plugin to access the Settings tab, then select which fields are shown for each object.
Standard and custom objects will appear if they’re linked to standard records.
Admins can lock fields across the company by selecting them and clicking Save for all. Users can still add more fields for their personal view.
For example, to show a clickable link to a lead or contact, click the gear icon, check the box for Full name in the plugin settings, then click Save.
Logging conversations
Use the plugin to log emails directly to Salesforce:
Select which contacts, accounts, opportunities, or custom objects to log the conversation to.
Choose to log either the most recent message or the full conversation thread.
Optionally assign a Salesforce user as the activity owner.
The plugin will auto-detect all known Salesforce contacts in the conversation and pre-select them for quick logging.
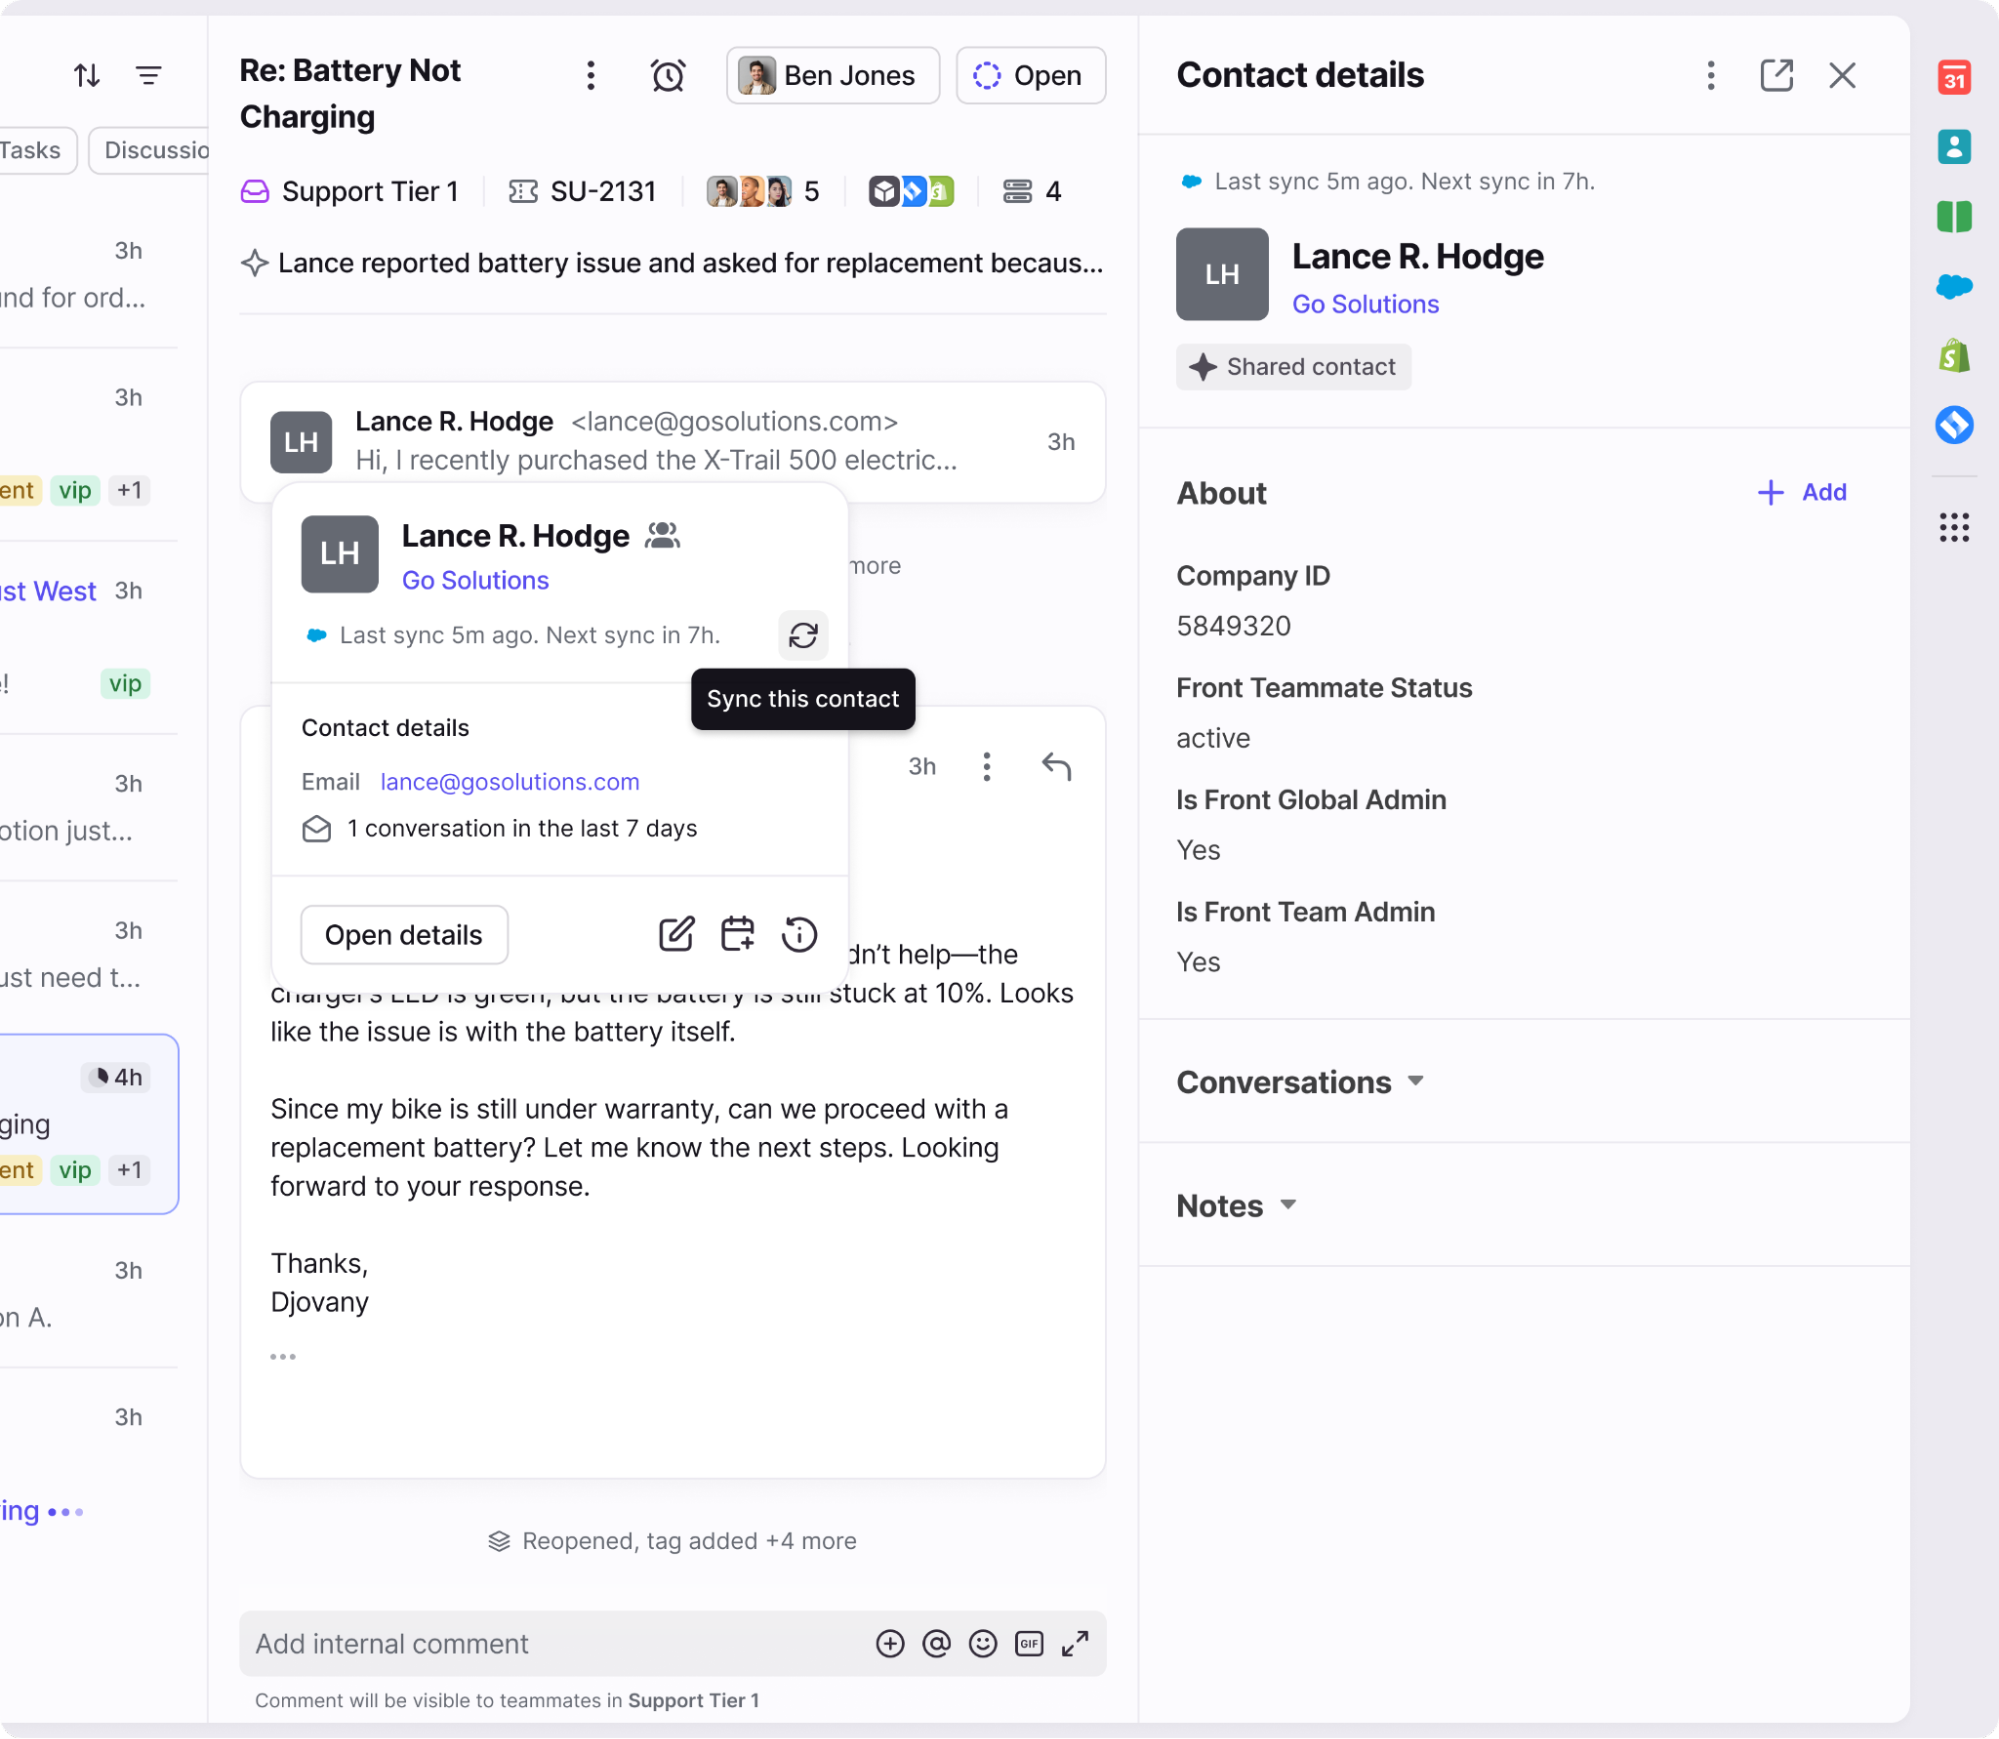
Syncing contact data
Click the Sync with Salesforce button in either the plugin or contact details panel to manually refresh data.
This immediately pulls the latest Salesforce information into Front.
You'll see a confirmation message with the timestamp of the last update.
This is especially useful when records have been updated in Salesforce and need to reflect in Front right away.
Tasks, Notes, and Cases
Tasks: Create new tasks, mark them complete, and view open to-dos related to the contact or account.
Notes: Add or edit internal notes linked to the contact for team context. These notes sync to Salesforce.
Cases: View and create active customer support cases associated with the contact.
All updates made in Front are synced back to Salesforce in real-time.
Rules and automation
Front rules can trigger Salesforce actions to streamline workflows:
Create lead in Salesforce: Automatically create new leads when a message meets certain criteria. Will create a lead in Salesforce if it does not exist already. Only works with channels that use email or phone contacts. No owner is assigned to the lead.
Send Task to Salesforce: Generate follow-up tasks from key messages. If no contact or lead can be found in Salesforce, no activity will be logged.
Send Email to Salesforce: Send the message content to Salesforce as a completed activity.
If the message was sent by a Front teammate that is a Salesforce user, they will become the owner of the activity.
In a case where Front cannot attribute an outbound message to a teammate with a Salesforce account, Front will default to the admin who enabled the Salesforce integration.
If no contact or lead can be found in Salesforce, no activity will be logged.
Using Bcc to log emails
Another related way to log emails to Salesforce is not using the integration itself, but with an automatic Bcc to your Salesforce account. See here for steps.
Custom objects
Custom objects must be related to standard objects (e.g., linked to a Contact or Account) to appear in Front.
You’ll need to configure these relationships in Salesforce and ensure the API user has access.
Once set up, they will show in the plugin and can be used for viewing, editing, or logging.
To refresh schema and display new objects or fields, go to plugin Settings and select Reload custom fields.
Custom object setup in Salesforce
Before Front can display your custom object, you need to make sure the object is set up correctly within Salesforce. Note that at this time Front does not support custom objects managed by packages. The example below uses the standard object Account, but the same applies to any Standard Salesforce object. The custom object for this example is called Account Service Request.
For the custom object:
In Salesforce, navigate to your custom object and create a new relationship to the parent object, if it doesn't exist already. If the relationship already exists, make sure it is a lookup.
The lookup field should resemble this:
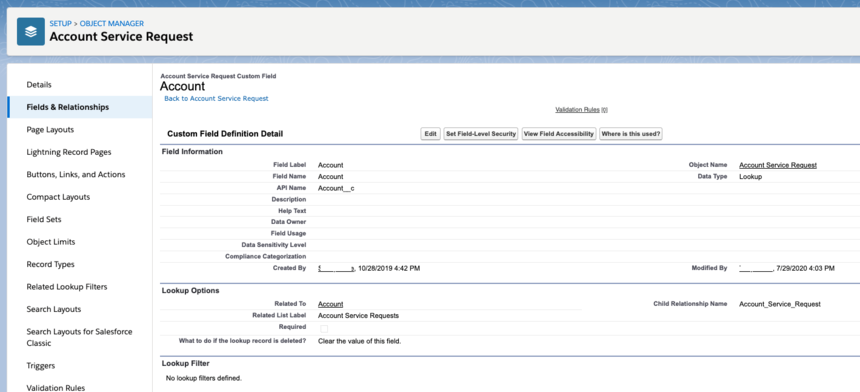
Click on the custom object and copy the API name without the '__c'.
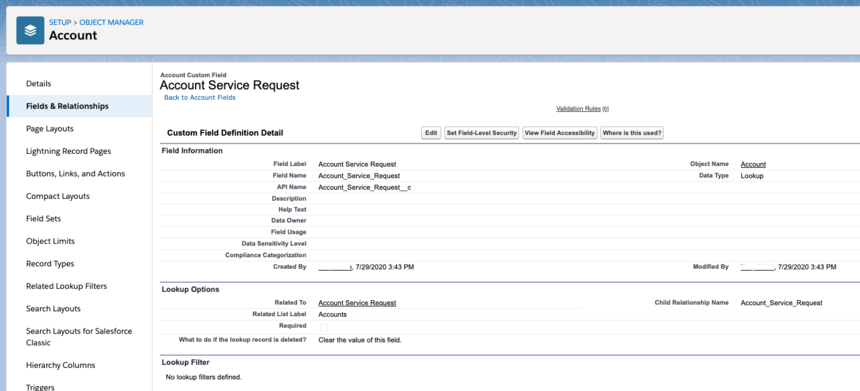
For the parent object:
In Salesforce, navigate to the parent object Setup > Build > Customize > Account > Fields) and create a new relationship to the custom object, if it doesn't exist. You can create a new relationship under the section titled Account Custom Fields & Relationships.
The relationship you create has to be either a Master-Detail or a Lookup. A master-detail relationship has a cascading effect such that if you delete the parent object, the custom object will be deleted. In a lookup relationship, if the parent object is deleted, the custom object will remain.
When you get to the step where you have to fill out the Field name, give it the same name as the API Name from your custom object. Additionally, make sure the Child Relationship Name on the Parent object matches the API name of the custom object EXACTLY, but without the __c.
The lookup field should resemble this:
Role access and custom object visibility
In order to see the custom object in your Front Salesforce settings, your user role will need Read, Create and Edit permissions for the custom object. A Salesforce admin will be able to make these changes by following the below steps.
Additionally, a user with the standard Salesforce profile will not be able to view the custom object. You will instead, need to create a custom profile and assign your user to this profile. If your users are already using a custom profile, just edit that profile's permissions.
Follow these steps in Salesforce:
Navigate to Setup > Administration Setup > Manage Users > Profiles, click on Clone next to the standard user profile. Enter a profile name and click Save. It will open a profile overview of this newly created profile. If you are using a custom profile, just click Edit.
Select Object Settings and the required object from the list.
Then click on Edit, and assign view or modify all data permissions to this custom object (enable Read, Create, and Edit).
Once this is done, go to your Salesforce setting in Front and hit refresh custom fields.
If the custom object still does not appear, sign out of your account and sign back in.
Implement mandatory fields
You can require certain fields to be filled out for your custom objects, which will be done in Salesforce settings.
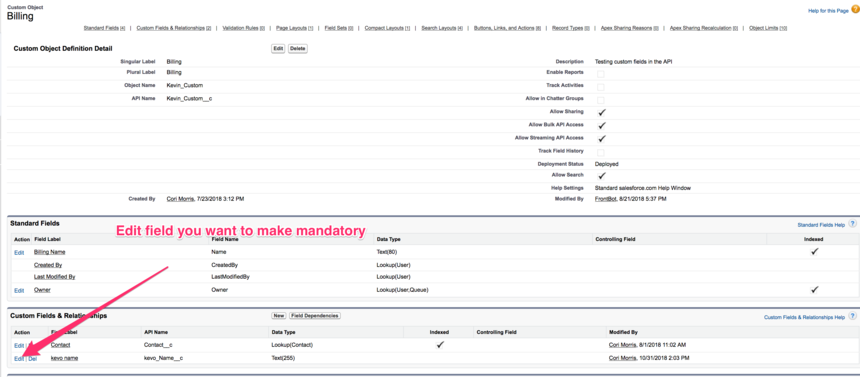
Step 1
In your object configuration, select the field you wish to make required.
Step 2
Click Edit for that field.
Step 3
On the edit page for the field, check the box next to "Always require a value in this field in order to save a record" and click Save.

Step 4
Back in Front, click the gear icon in the Salesforce plugin.
Step 5
Scroll to the bottom and click Reload custom fields to get the latest settings from Salesforce.
Common errors and troubleshooting
Please see our Salesforce Troubleshooting article for assistance with common issues encountered in setting up the Salesforce integration.
If your integration credentials are rejected by Salesforce, or if your company hits the API request limit you have for Salesforce, your rules will fail. When this happens, you will see errors in Front. Example error: Some rules are failing because your Salesforce login is invalid. Update your credentials and test the rules again.
To fix the credentials errors, a company admin will need to update the integration credentials used in your Salesforce integration settings in Front. For the request limit errors, you will need to either increase your request limit with Salesforce or wait until your request limit cycle starts over.
If you continue to encounter errors, please contact us so that we can assist.
FAQ
Which licenses work with the Salesforce integration?
To use the Salesforce integration, you must use a license type that has API access enabled. Additionally, because Front interacts with specific standard objects, your license must have permission to access those objects.
We currently support two main license types, but their level of access differs:
Feature/Object | Salesforce License | Platform License |
API Access | Required | Required |
Accounts & Contacts | ✅ Supported | ✅ Supported |
Tasks | ✅ Supported | ✅ Supported |
Leads | ✅ Supported | ❌ Not Available |
Opportunities | ✅ Supported | ❌ Not Available |
Cases | ✅ Supported | ❌ Not Available |
Choosing the right license
Salesforce License: Provides full access to all integrated objects (Leads, Opportunities, Cases, etc.). This is required if your team needs to manage sales pipelines or support tickets within Front.
Salesforce Platform License: Ideal for users who only need to sync and view Accounts, Contacts, and Tasks. Users with this license will not be able to view or interact with Leads, Opportunities, or Cases.
Please check Salesforce's documentation to see which specific editions include API access by default.
Which channels work with Salesforce?
Salesforce only matches records for email, SMS, and voice channels. It shows related records for the:
Email address of the sender of an open conversation
Phone number of the sender of an open conversation
If we cannot find an exact match for the email, we will try to find an Account that matches that domain. E.g. If mary@acme.com doesn’t exist in Salesforce, Front will then show records tied to @acme.com email addresses.
When a conversation is between multiple senders or CC’ed recipients, Salesforce will only show related records for the first address or number in the list. You can look up records for other contacts with the Search field.
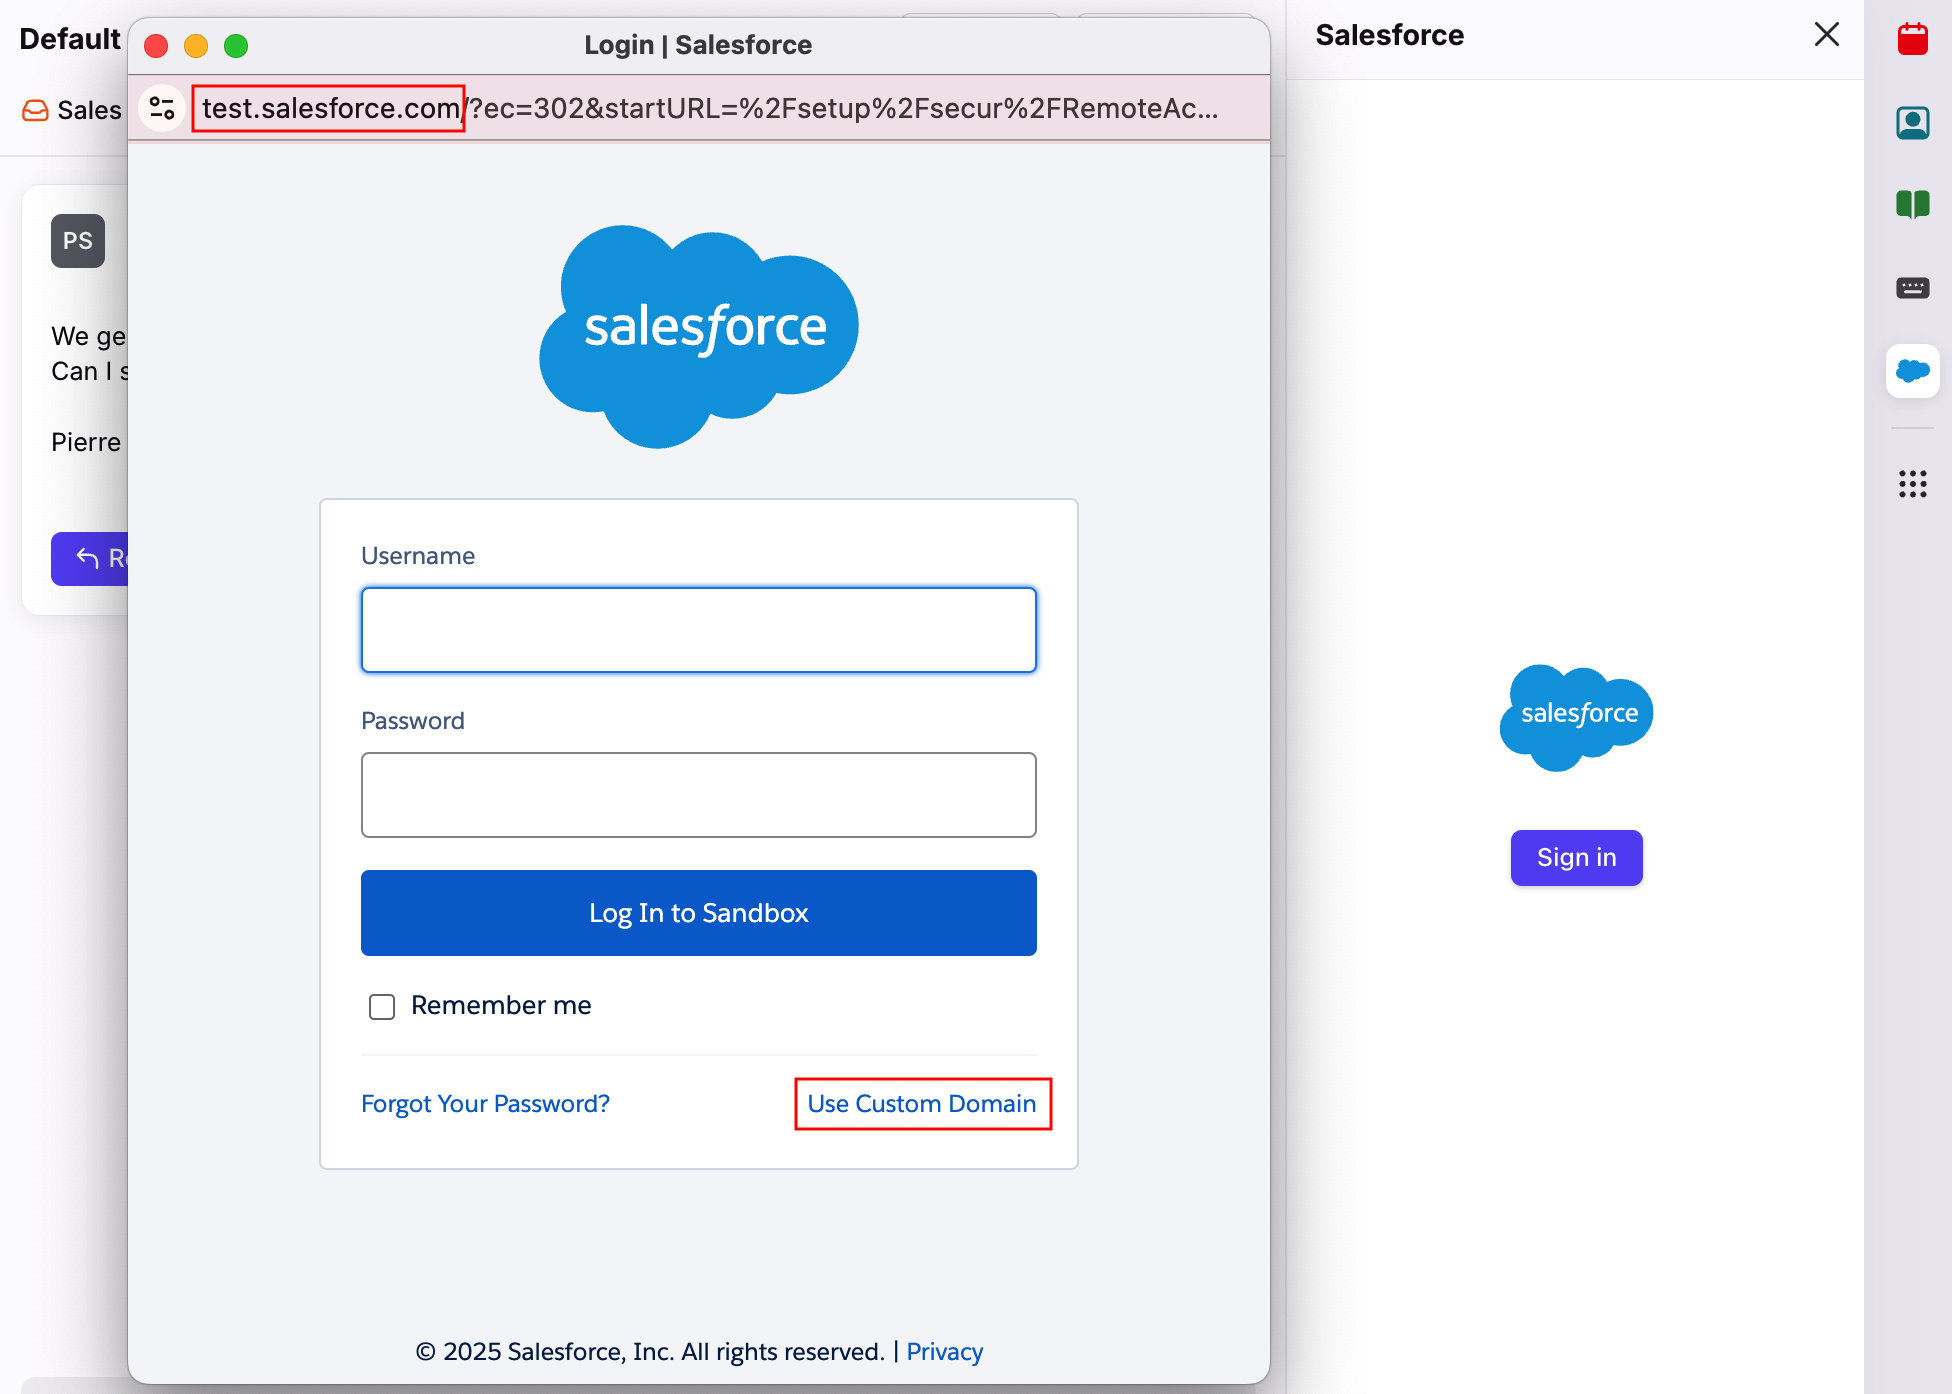
Can I log in with a sandbox account?
Yes. To sign in to a sandbox (developer) account, hold the Shift key on your keyboard and click the Sign in button in the Salesforce plugin. This will open the authentication window pointing at test.salesforce.com. Enter your sandbox login credentials.
If you prevent user logins from https://login.salesforce.com in production through My Domain settings, the sandbox prevents user logins from https://test.salesforce.com by default. In this case, select Use Custom Domain in the authentication window and enter your domain.
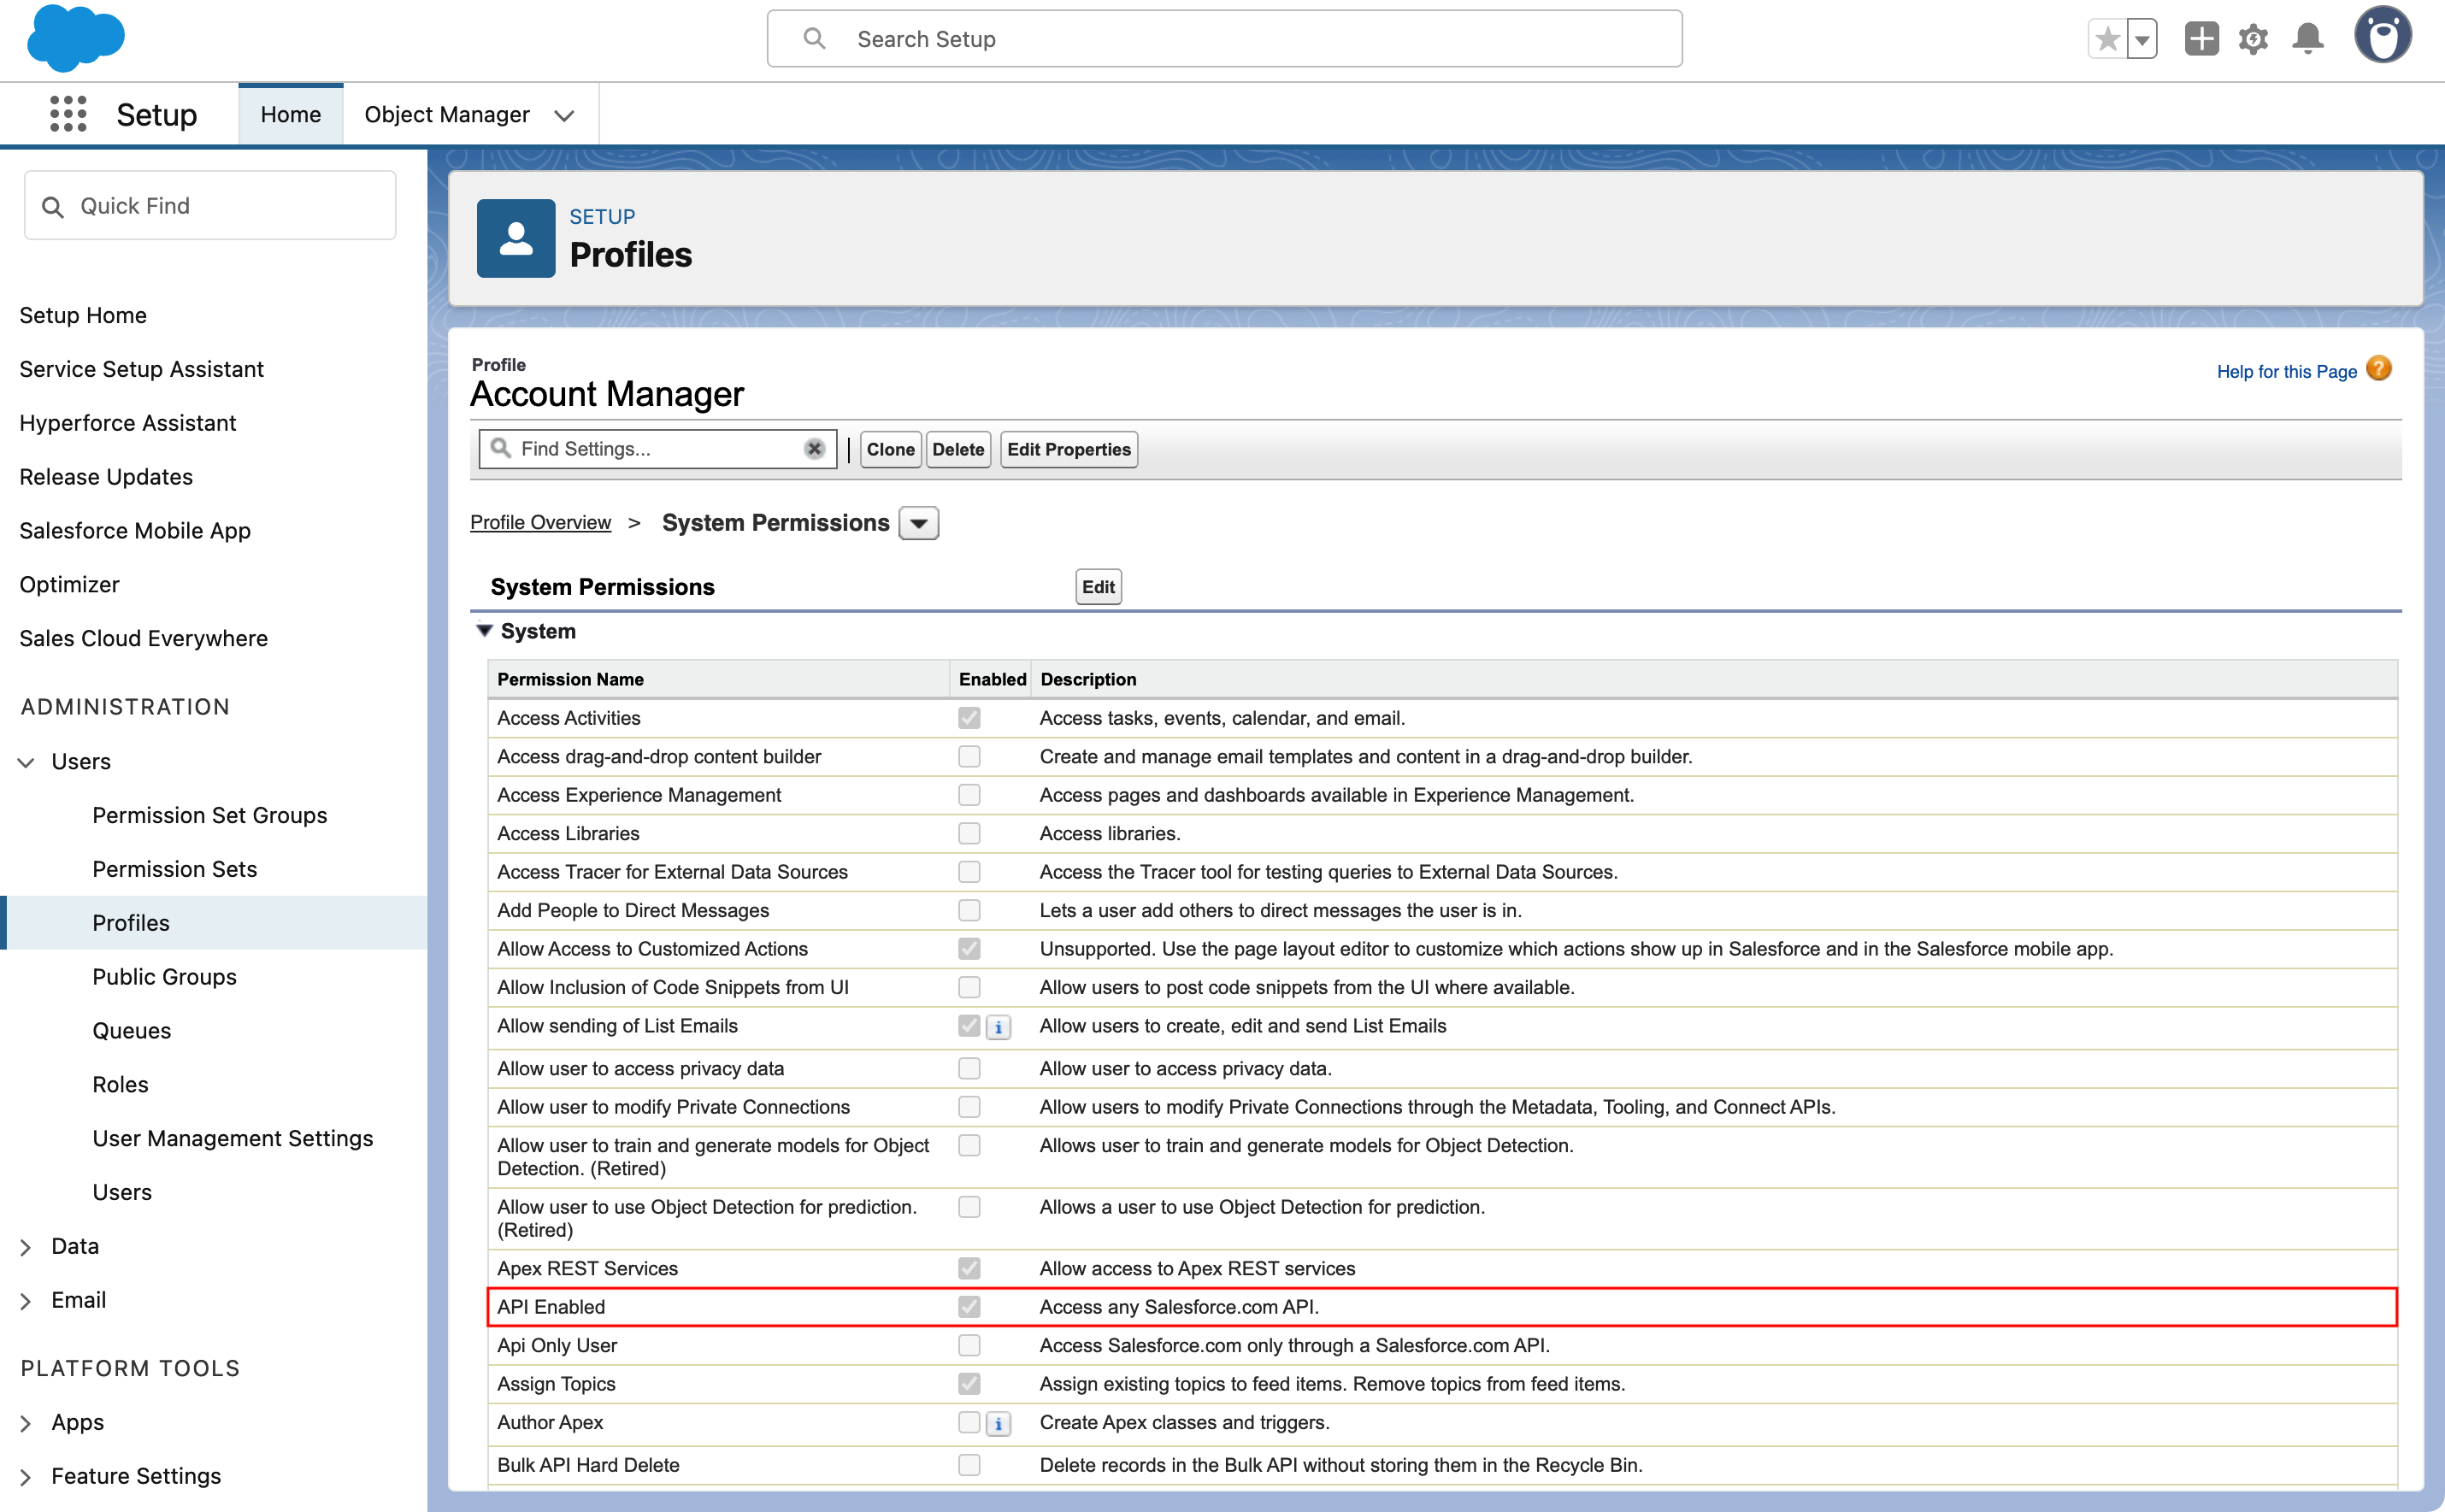
Do I need special API Permissions?
All Front teammates that use the Salesforce integration will require the "API Enabled" permission on their Salesforce user. That permission will give your user access to the Salesforce API, which the Front integration uses.
To enable, as a Salesforce admin:
Click the gear icon at the top, then select Setup.
Under the Administration section in the left sidebar, expand the Users section, then select Profiles.
Click the profile name you want to edit.
Select System Permissions.
Click Edit, then check the box next to the API Enabled setting.
Click Save.
Does the Salesforce API quota impact my integration?
To use this integration, you will also need to be on a Salesforce plan with API access and sufficient API request quota.
Every time Front surfaces information from Salesforce or performs an action on your behalf, it makes API requests to Salesforce. Depending on your Salesforce plan, you might be subjected to an API quota: your organization is only allowed to make a certain number of API requests every day.
Our implementation tries to limit the number of Salesforce requests as much as possible. For example, the plugin panel will only make requests if it is actually visible: if another integration is selected or if the panel is closed, Salesforce will become inactive. However, know that Salesforce rules will generate at least one request every time the rule triggers.
You can review the limitations on the Salesforce documentation.
What if I have someone saved as both a Lead and a Contact?
Front will prioritize the Contact record over the Lead, so the person will appear in the integration as a Contact. If you want to ensure they appear as a Lead, they should only be saved to your Salesforce as a Lead and not a Contact.
Why are all Salesforce Lead fields editable?
The Salesforce Lead section may contain fields like “Created by” or “Created date" that are shown in the integration as editable even though they may seem like values set by the system. The reason we show these as editable is that the permission Create Audit Fields is enabled within your Salesforce settings. This permission grants API editing access to these and other fields and means that Front also formats these as editable within the integration.
If you’d like to change this, you’ll need to reach out internally to your IT or Salesforce admin team to take a look at the permissions in your business settings.
How do I log out of the Salesforce plugin?
Open the plugin in the app switcher, click the gear icon at the bottom right corner, then click Sign out.
Pricing
The Salesforce plugin integration is available on all plans. The Salesforce Connector, contacts sync, and accounts sync are available on the Professional plan or above.