
Add an individual inbox
Overview
You likely started using Front to manage shared inboxes more effectively, such as support@acme.com; and now you may find it convenient to add your individual inbox (sophia@acme.com) to Front as well. This way, you can check all of your emails in one place and work in Front full time.
Take a Front Academy course here to learn more about leveraging Front inboxes to achieve your goals.
Instructions
Add a new inbox
Step 1
Click the gear icon and navigate to your personal settings tab. Select Inboxes in the sidebar, then click the Create individual inbox button.
Step 2
Fill in the following inbox fields:
Inbox name: Enter the name of the inbox, which displays in your sidebar and menus.
Description (optional): Enter a description for the inbox.
Color: Select a color for the inbox, which displays in your sidebar and menus.
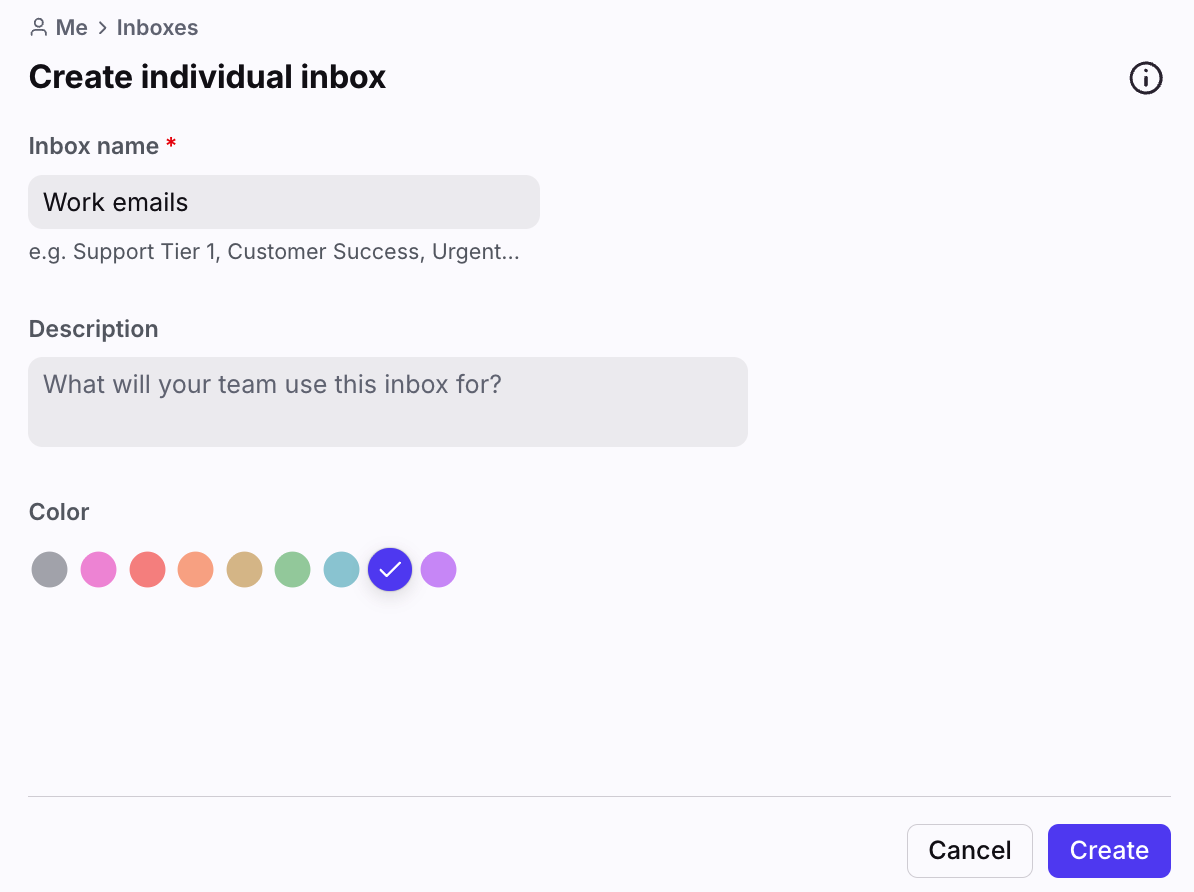
Step 3
Click Create.
Step 4 (optional)
Configure any additional inbox settings or custom fields.
Now you’re ready to connect channels to route messages to this inbox! Otherwise, you can use your new inbox as an empty inbox.
Add a new channel
Step 1
Click Channels in the sidebar, then Connect channel.
Step 2
Choose a channel type.
Step 3
Follow the steps on screen to configure the channel type you've chosen. See here for specific setup guides for all supported channel types.
Step 4
Select the inbox to connect to your channel. All messages from your channel will route to this inbox by default. If you need a new inbox, you can also create it directly from the dropdown menu here.
Click Continue.
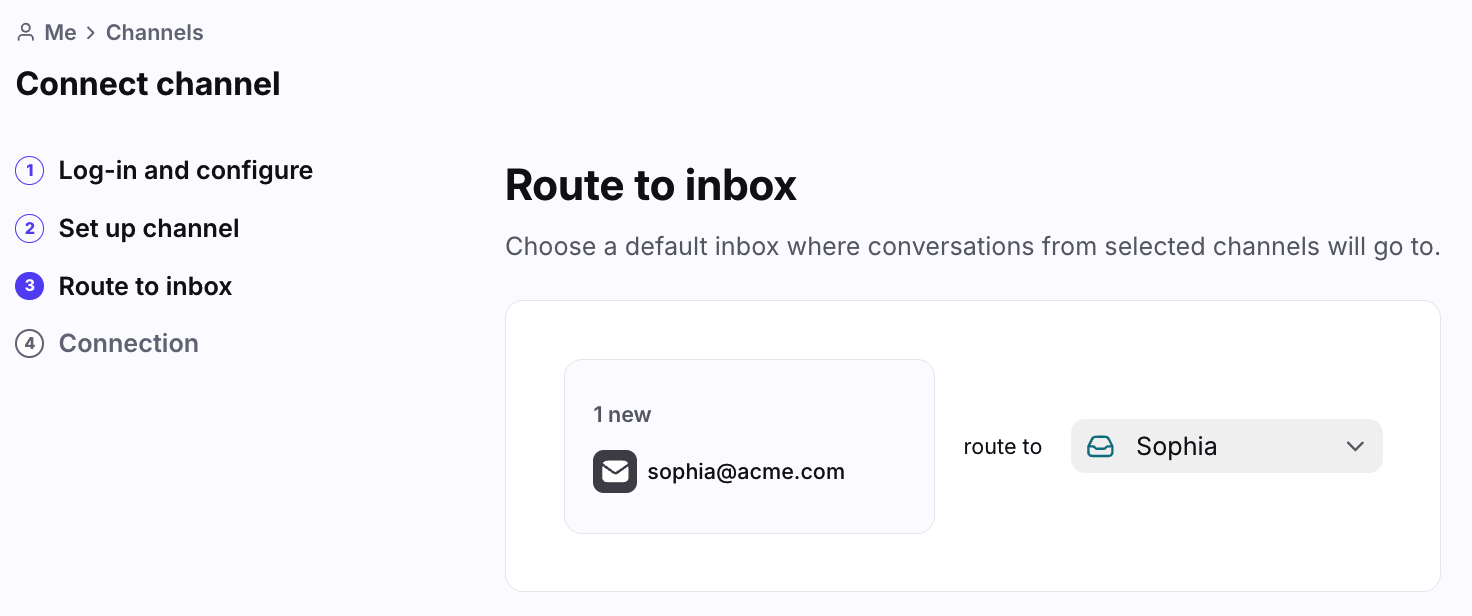
Step 5 (optional)
Configure any additional channel settings. Once finished, you can now send and receive messages in your individual inbox.
Privacy and sharing
By default, emails arriving in your individual inbox will stay unshared unless you choose to share them with another team member.
Share specific conversations
To share specific conversations from your individual inbox, you can take any of the following actions:
Assign the conversation to another team member
Mention a team member in a comment on the conversation
Add a team member as a participant in the conversation
Share entire individual inbox
You can share your entire individual inbox with a teammate by delegating your inbox. Delegation keeps you as the inbox owner while giving the delegate access to work in it alongside you.
A few things to know before you delegate:
Only the inbox owner can delegate their own individual inbox. An admin cannot set up or change delegation on another person's individual inbox on their behalf — including while the owner is out of office. If access is needed urgently and the owner is unavailable, an admin can transfer the inbox.
Delegating is not the same as transferring. Delegation shares access to an inbox that stays individual and stays owned by you. Transferring gives ownership to another teammate or converts the inbox into a shared inbox.
Transferring an individual inbox to a workspace can't be undone by non-admins. After an individual inbox is converted into a shared inbox using the Transfer inbox to workspace setting, only an admin can transfer it back to a teammate. If you only need a teammate to help temporarily, delegation is usually the better fit.
FAQ
How many channels can I connect?
A teammate can connect up to 10 individual channels to their Front account.
When should I create an individual inbox or shared inbox?
Use an individual inbox for an address only you work from. If an address needs to be worked by more than one person — for example, an executive's inbox that an assistant also manages — connect it as a shared inbox instead of an individual one and restrict inbox access. If you already created an individual inbox and need to share it short-term, delegation may be the simpler option.
Important: Your Gmail/Office 365 email channel must be connected to an individual inbox to sync your calendar with Front.
Can admins create individual inboxes on behalf of teammates?
Yes. Admins can create inboxes on behalf of teammates by navigating to company/workspace settings, selecting Teammates in the sidebar, selecting the teammate, then clicking the Individual inboxes tab.