
User provisioning with Okta
Overview
The Okta SCIM integration provides fine-tuned control of your Okta users in Front.
You can:
Automatically create users in Front.
Automatically block users when the Okta profile is suspended.
Automatically map a new user to a Front teammate template, based on Okta roles.
Sync Okta Groups to teammate groups in Front.
Update user attributes.
To set up user provisioning with Okta, you must be a Front company admin.
Instructions
Part 1: Enable SAML in Front settings
An API key is necessary for Okta and Front to communicate. This API key can be configured in your Front settings. You will then use this token in the Okta configuration to enable SCIM provisioning.
Step 1
Click the gear icon, navigate to company settings, and select Developers from the left menu.
Step 2
Follow the steps on this article to create an API token. In the Feature access page, select Auto-provisioning. Click Create to finish creating the API token.
Step 3
Select the newly created token from the list, then click Copy next to the API token field.
Part 2: Configure provisioning in Okta
Next, you will configure provisioning in Okta in order to start creating and blocking users in Front.
Step 4
In Okta, expand the Applications menu in the sidebar. Select Applications, then search for "Front" in the app catalog. Click Add integration to add the Front app.
You will be prompted to enter a label for the app (e.g. "Front") and your Front subdomain.
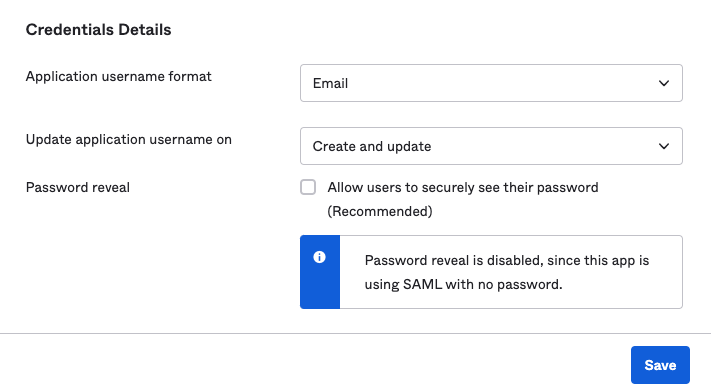
Step 5
From the Sign On tab, select Email for the Application username format field, then click Save.
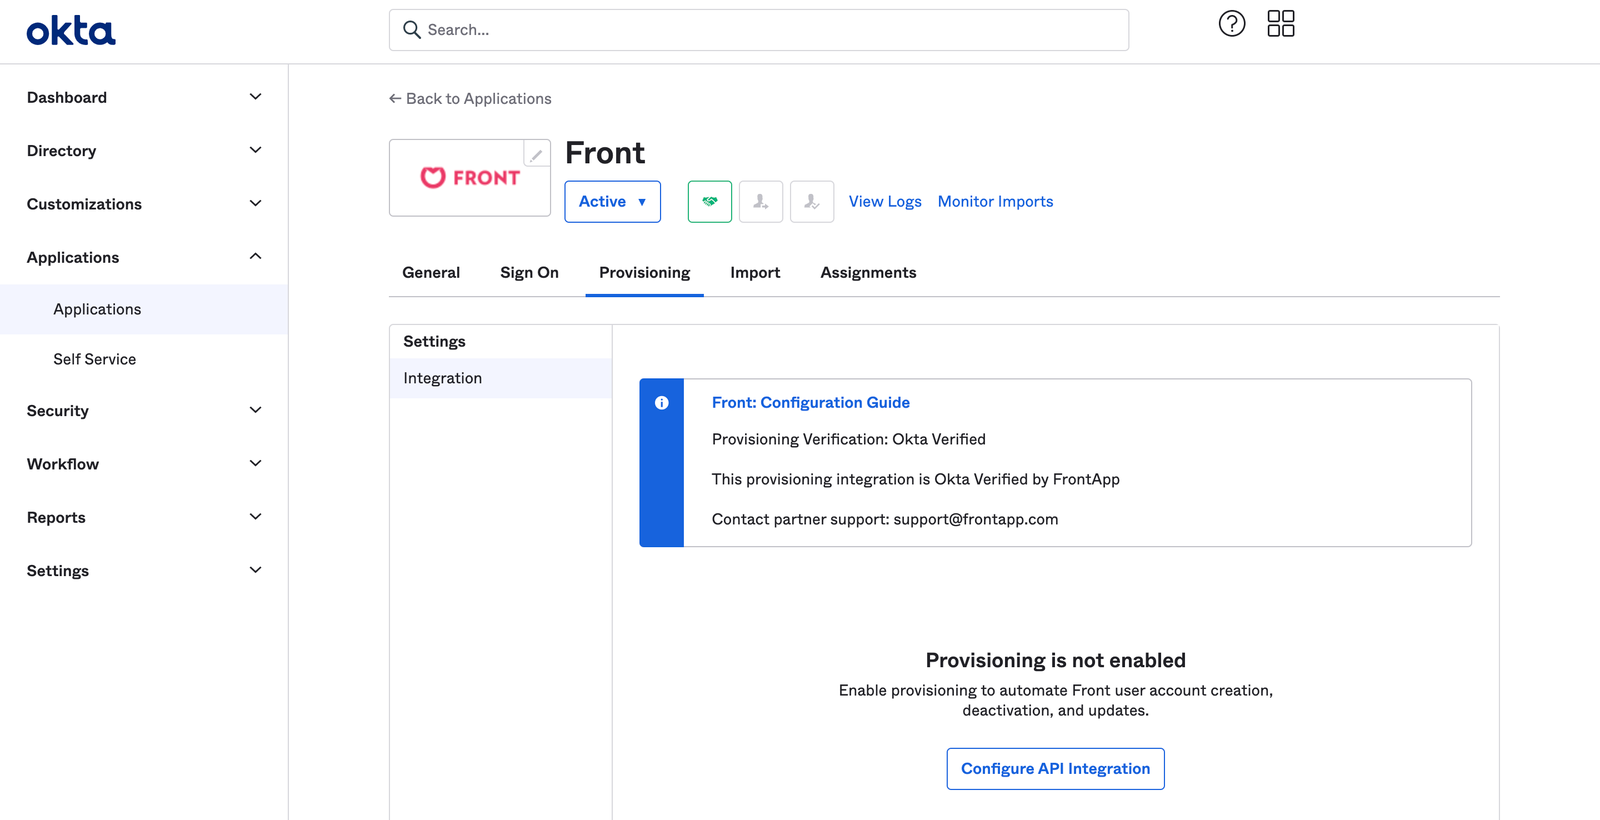
Step 6
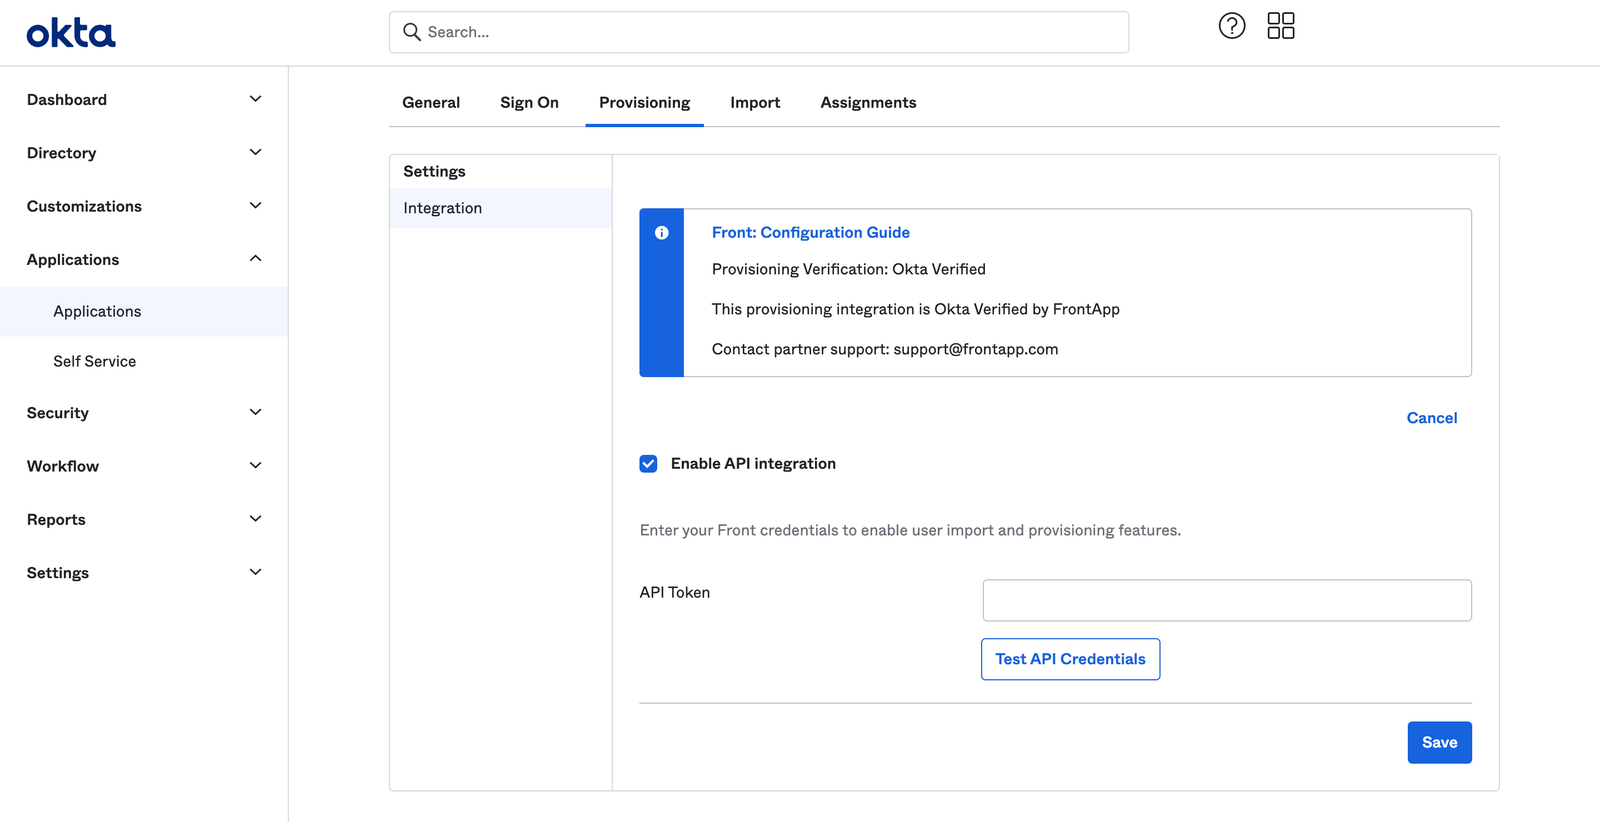
From the Provisioning tab, select Integration, and click Configure API integration. Check the box next to Enable API integration.
Step 7
In the API Token field, enter the Front API token you created in Steps 1-3.
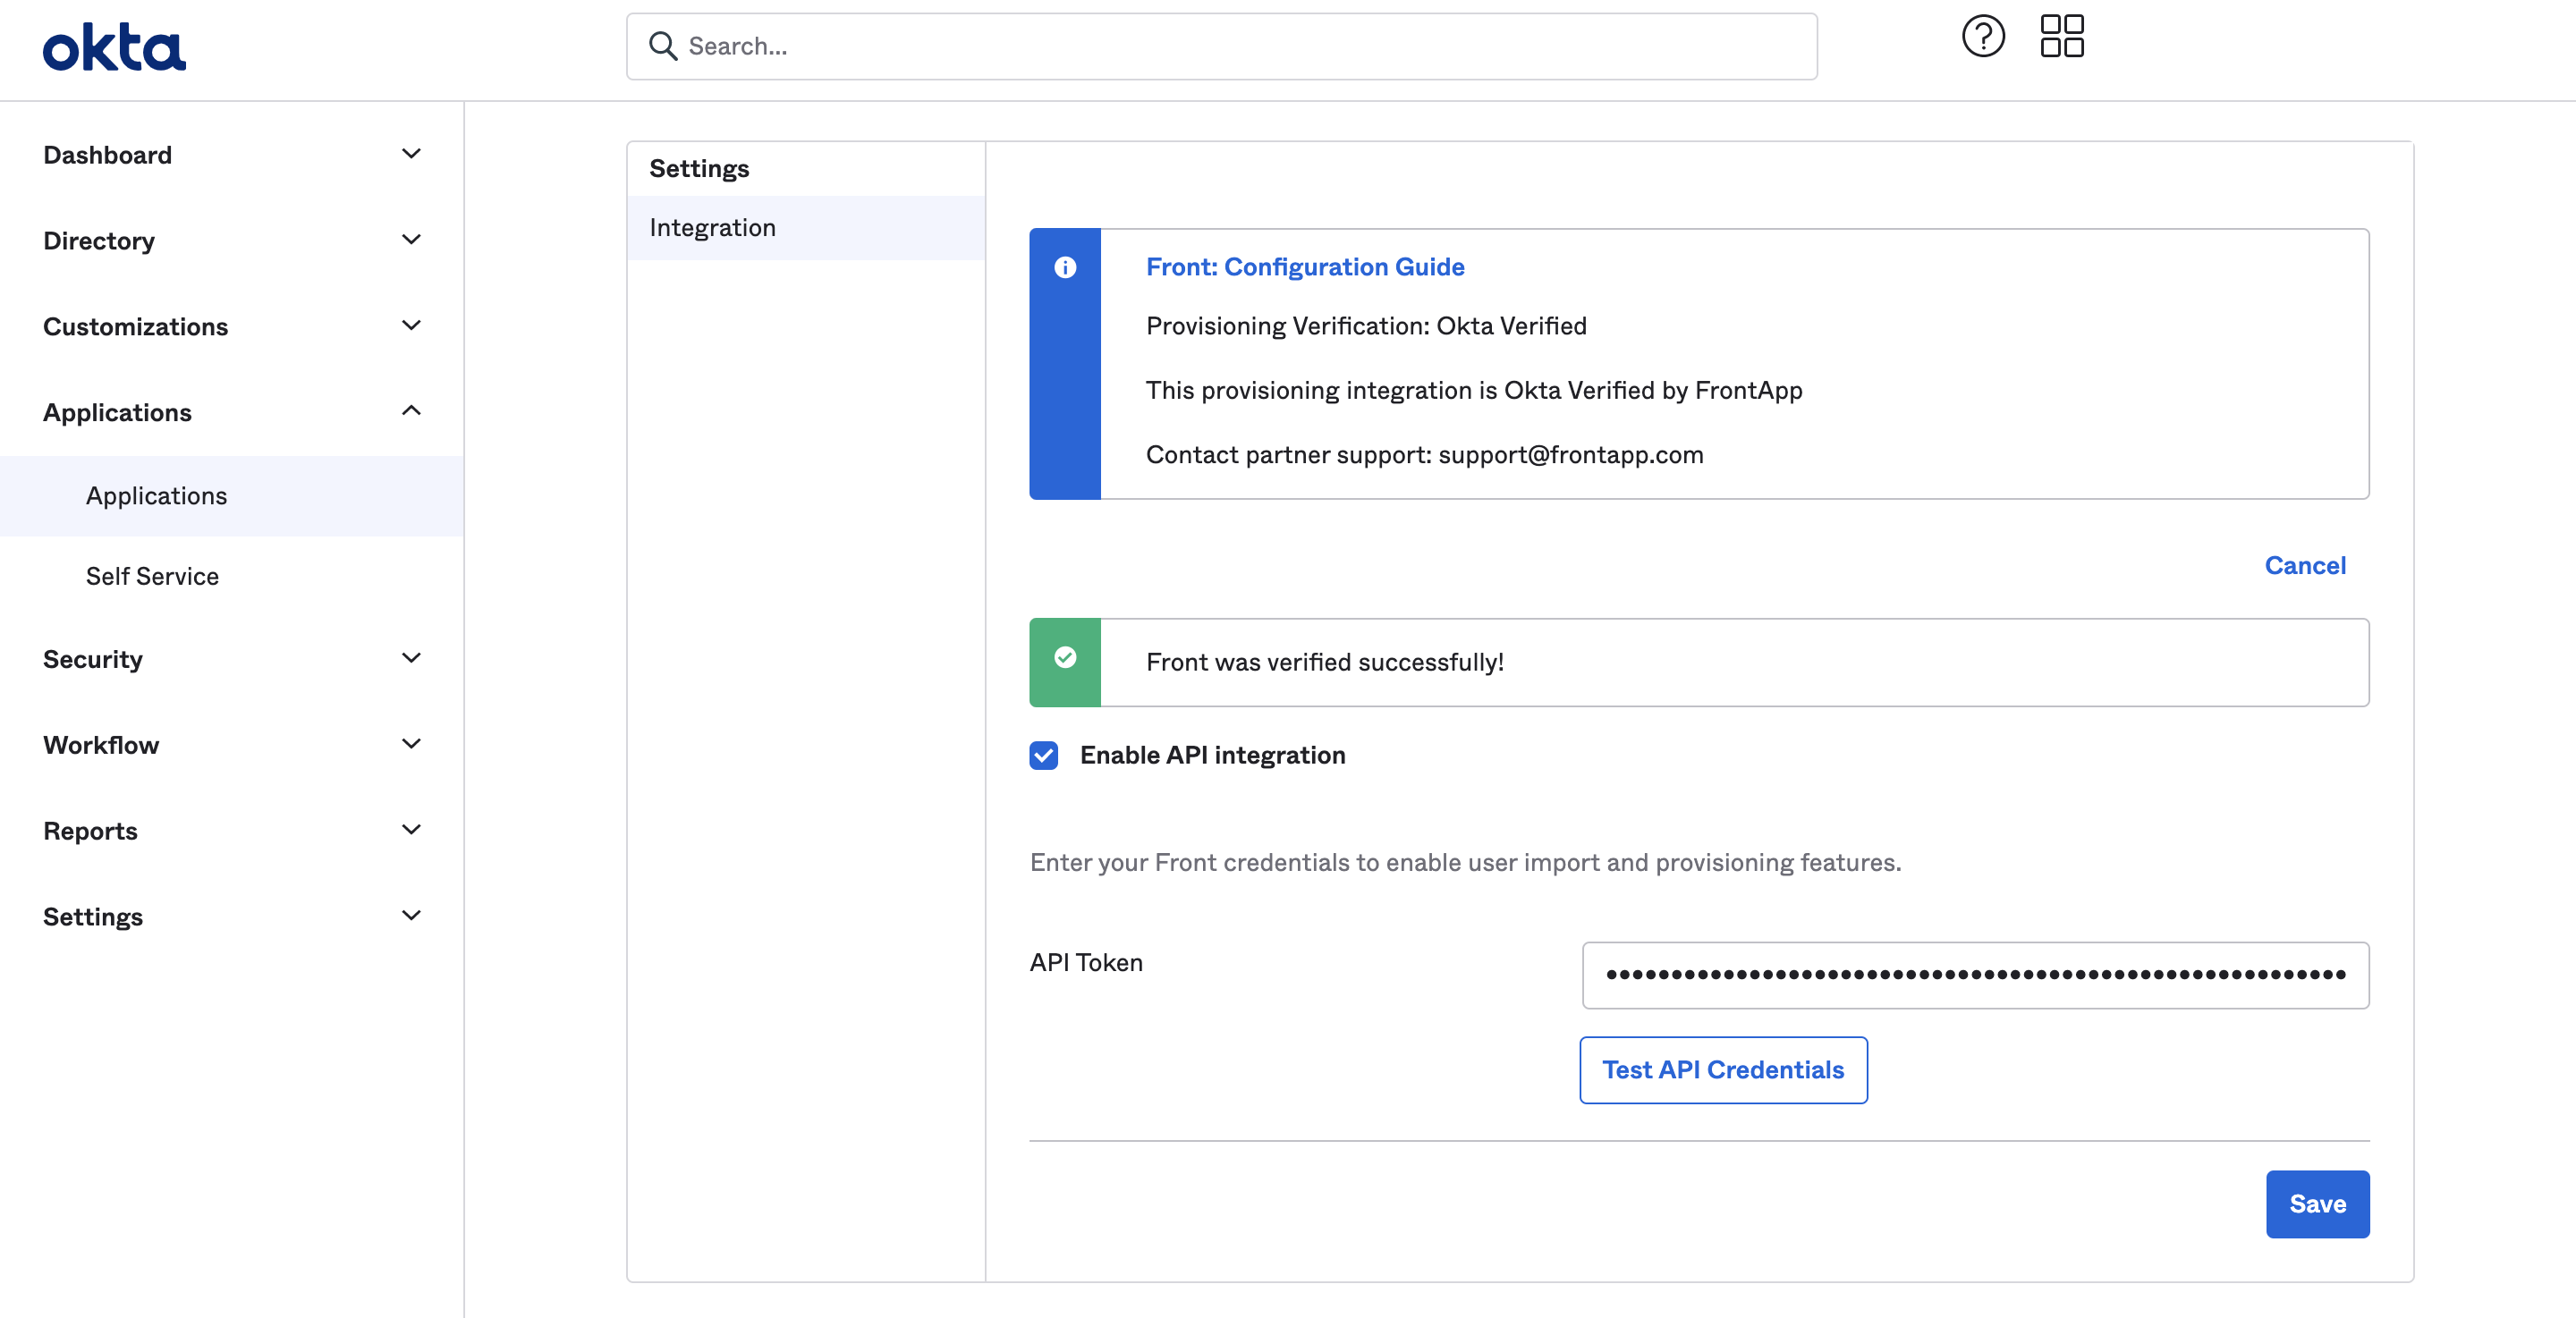
Step 8
Click Test API credentials to verify the credentials, then click Save.
Step 9
Navigate back to the Provisioning tab, then click Edit. Ensure the following options are enabled:
Create Users
Update User Attributes
Deactivate Users

Part 3: Provisioning with templates (optional)
If you want to automatically create your teammates with the correct access, you will use specific Front teammate templates. This requires a little more configuration.
Step 10
Click the gear icon, navigate to company settings, and select Teammates from the left menu.
Step 11
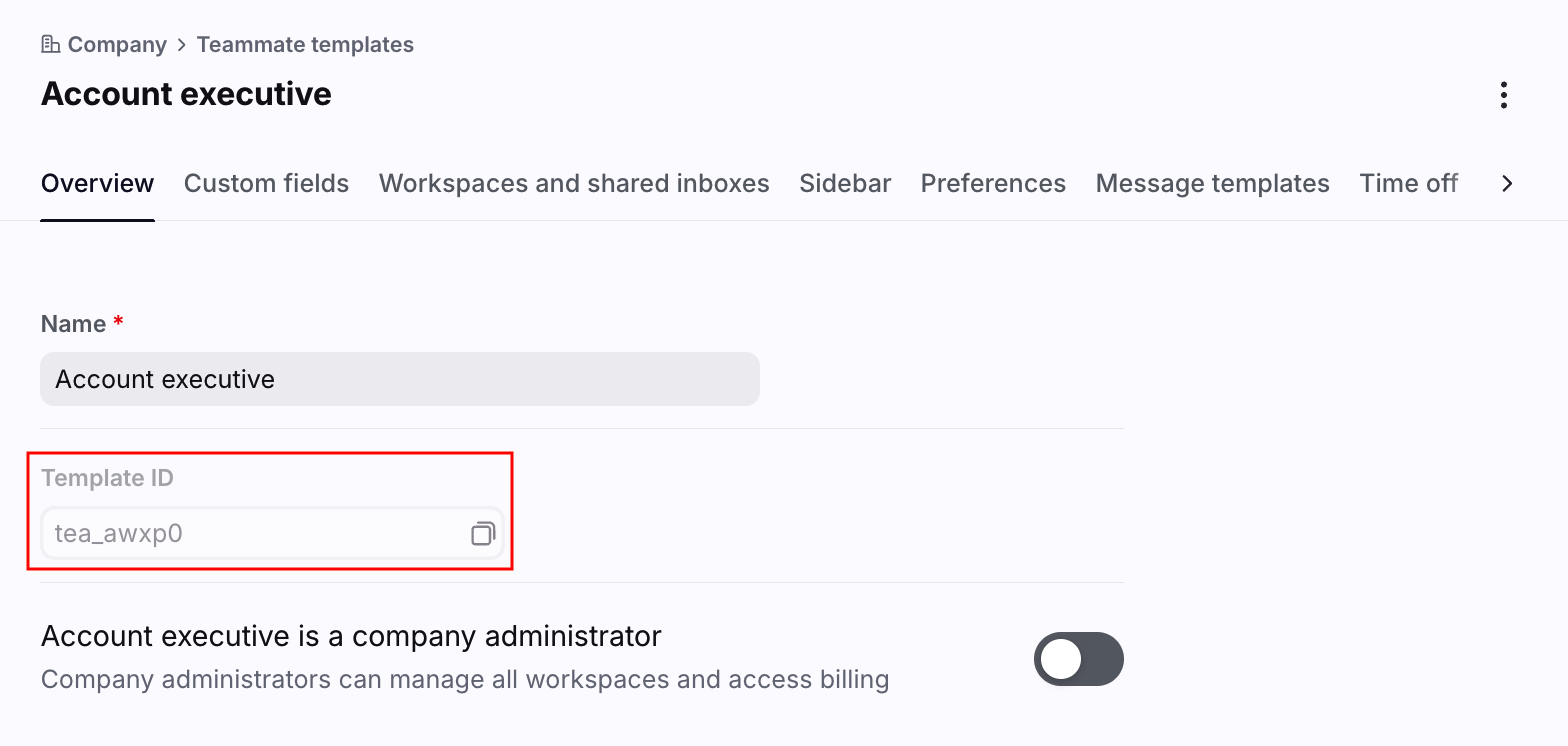
Create a new teammate template.
Step 12
Copy the Front template ID.
Step 13
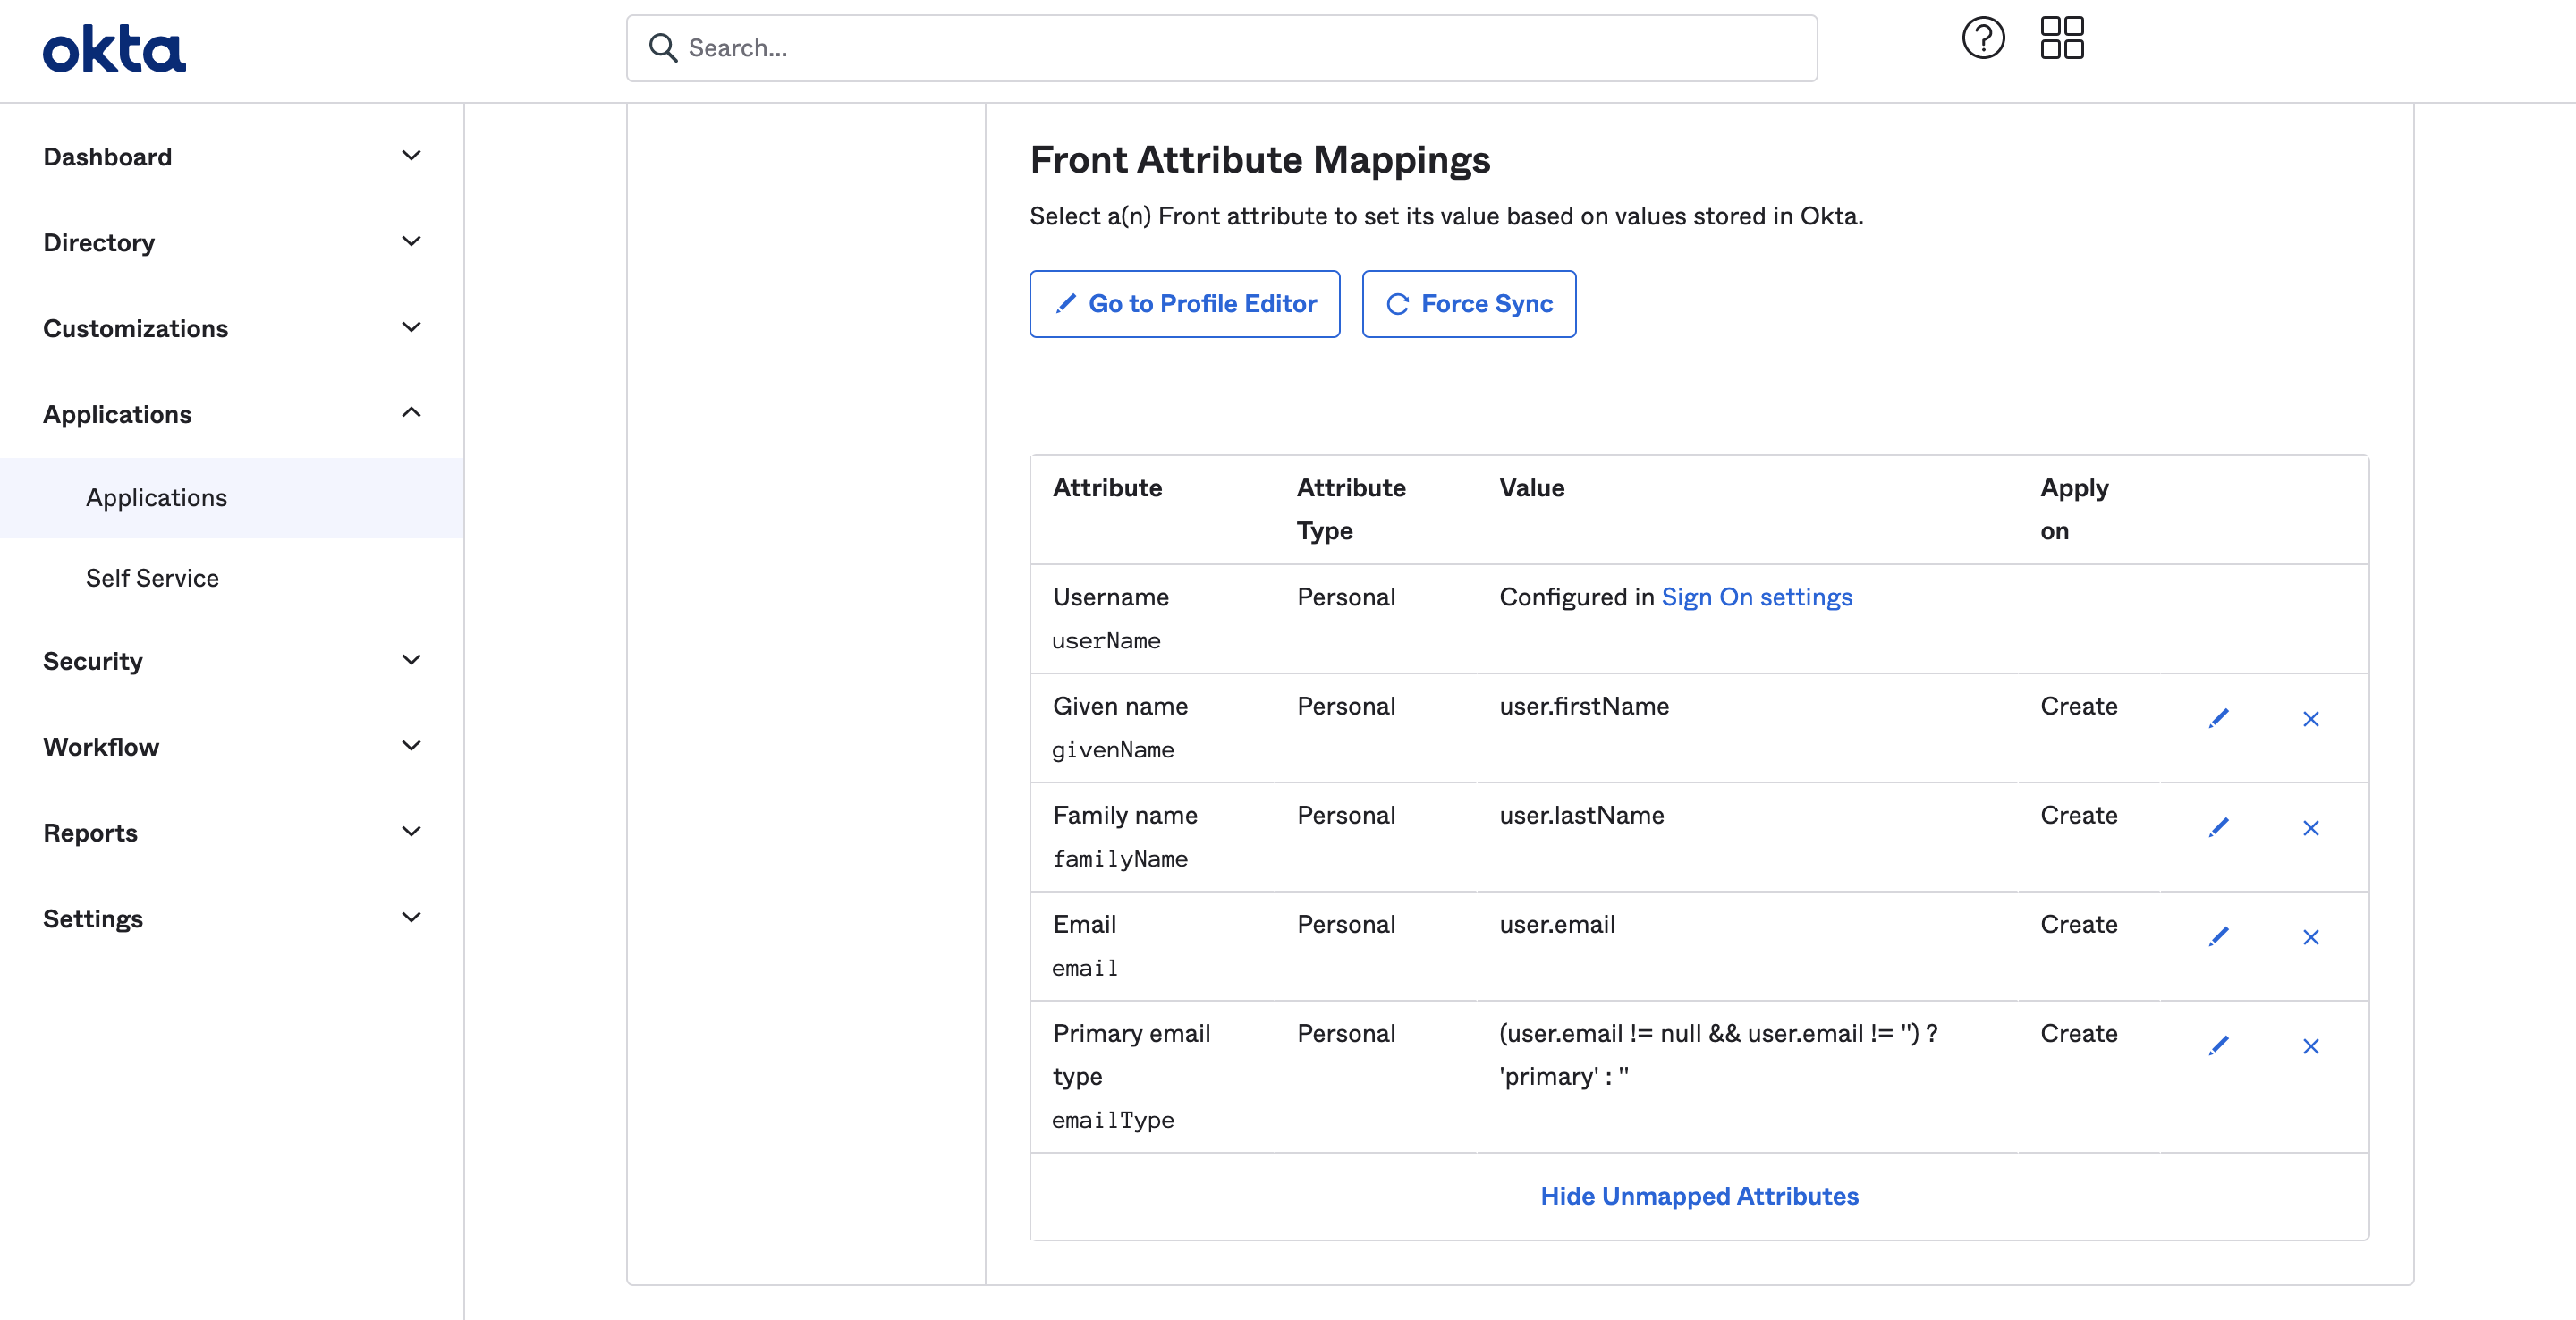
Next you will need to configure Okta to use this template. You will need to configure the application User Profile in order for Okta to send this new attribute to Front.
From the Provisioning tab, scroll to the attribute mappings.
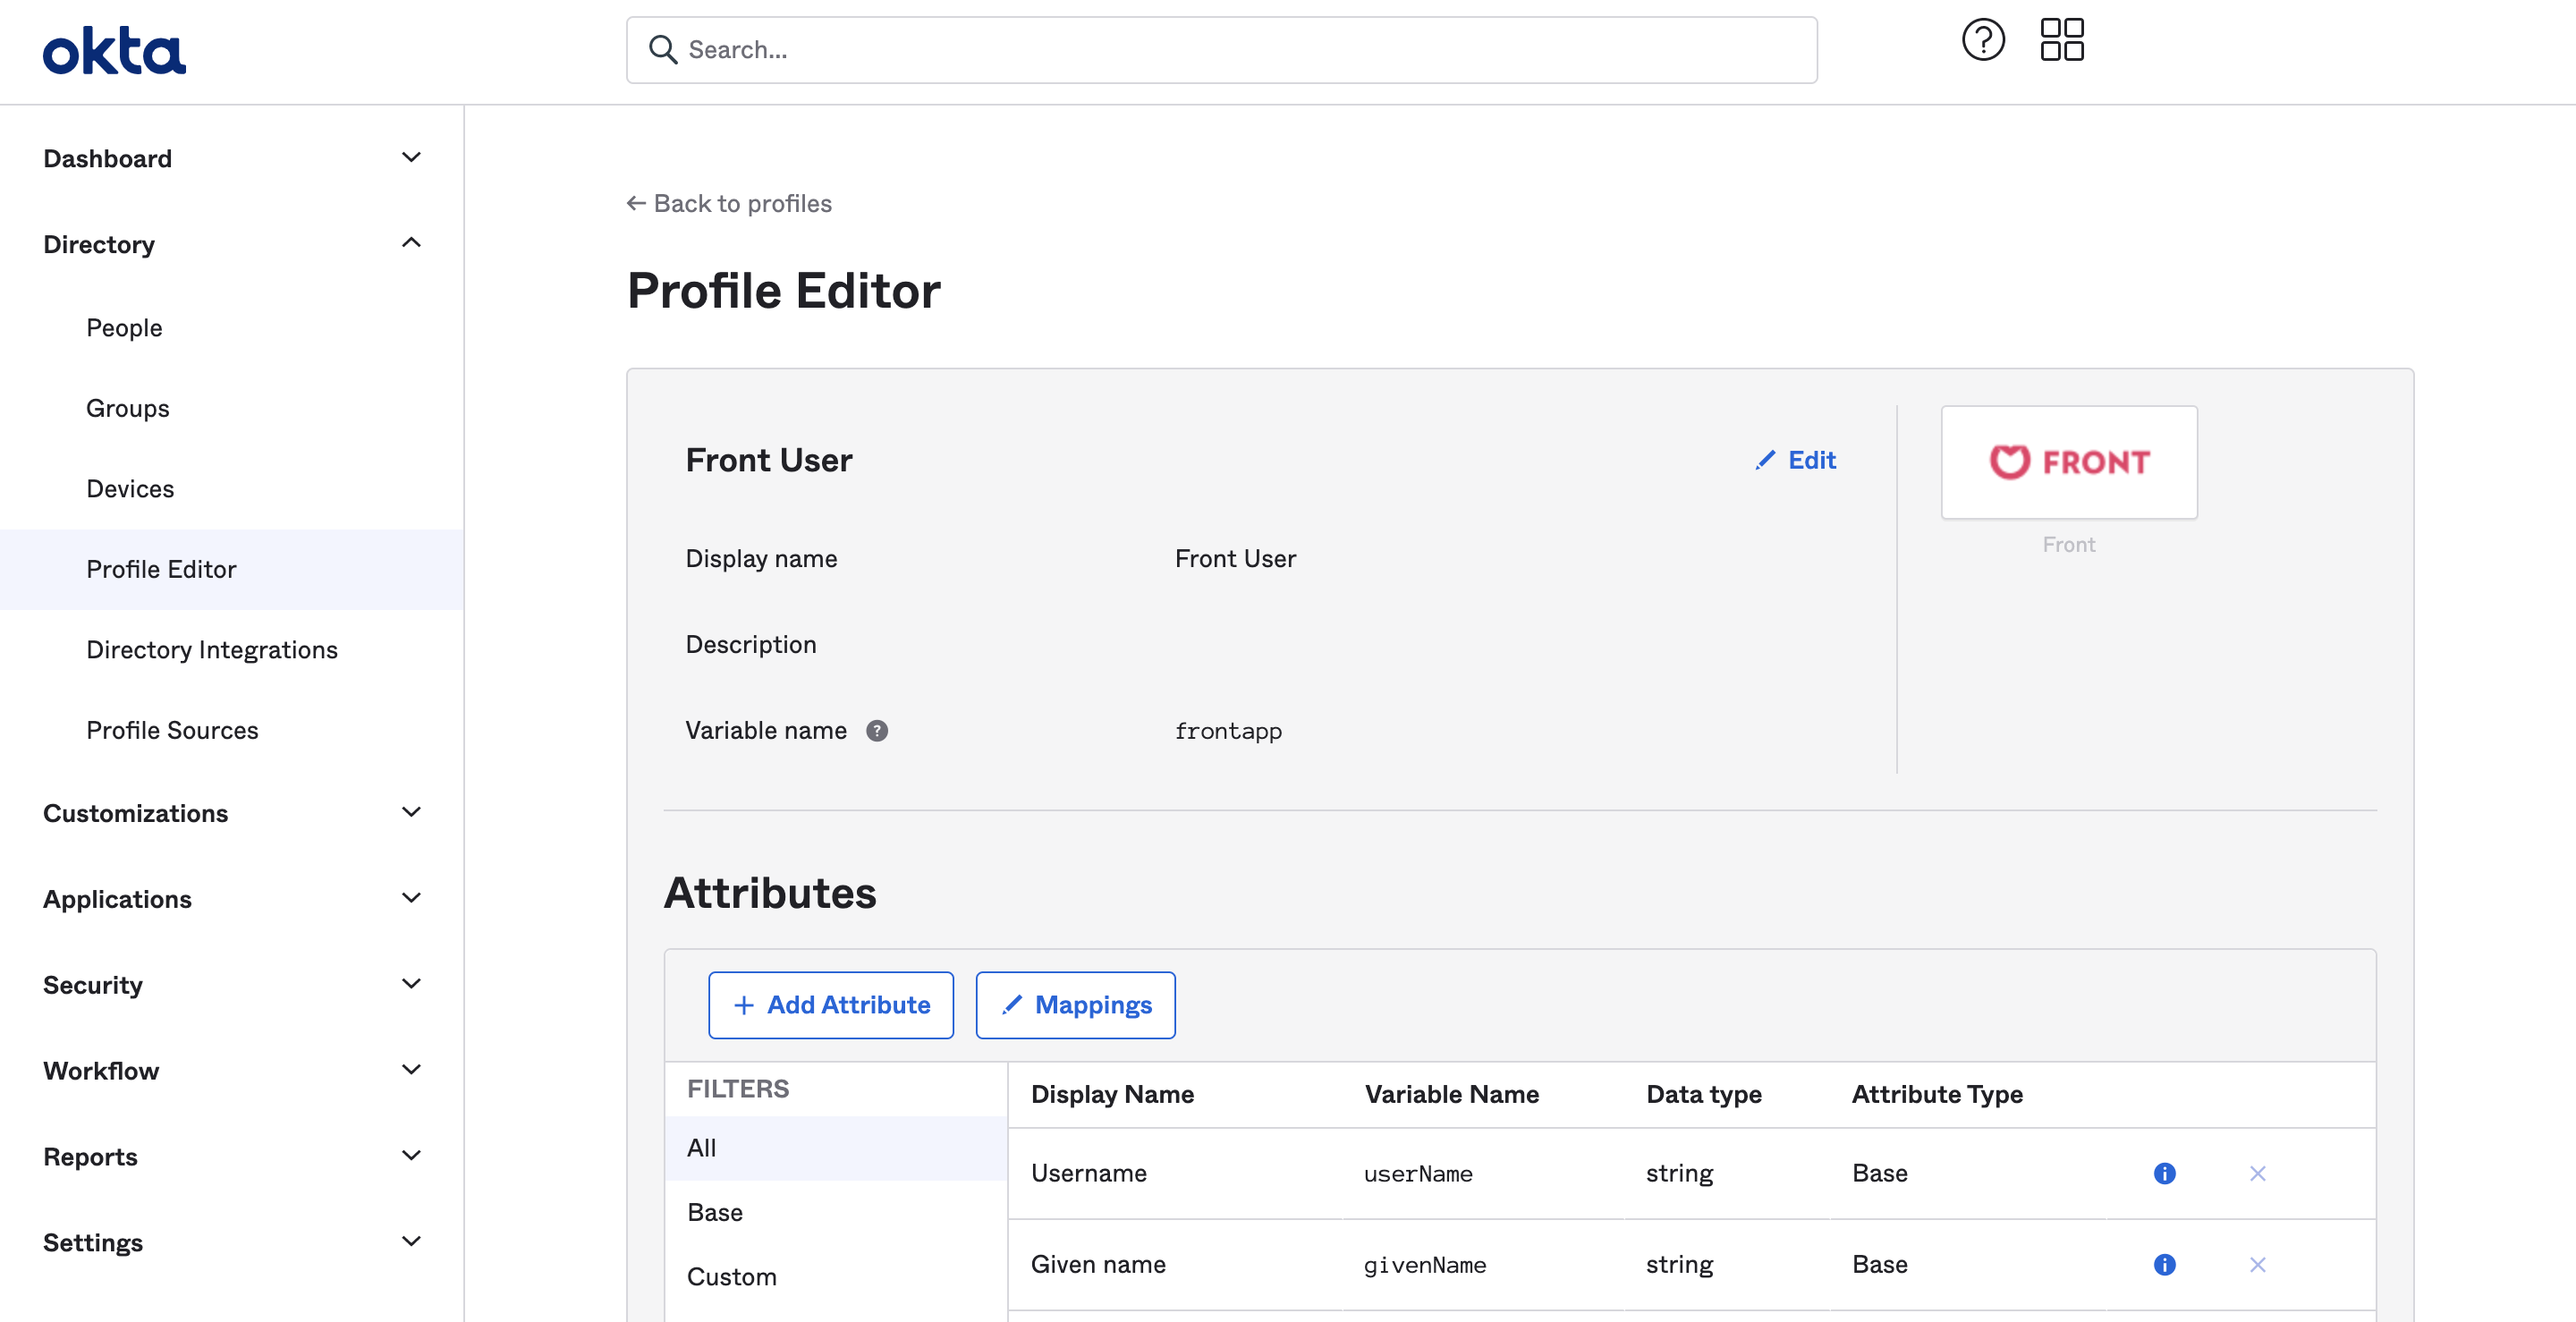
Step 14
Go to the Profile Editor to add this new attribute. In the profile editor, click on Add Attribute.
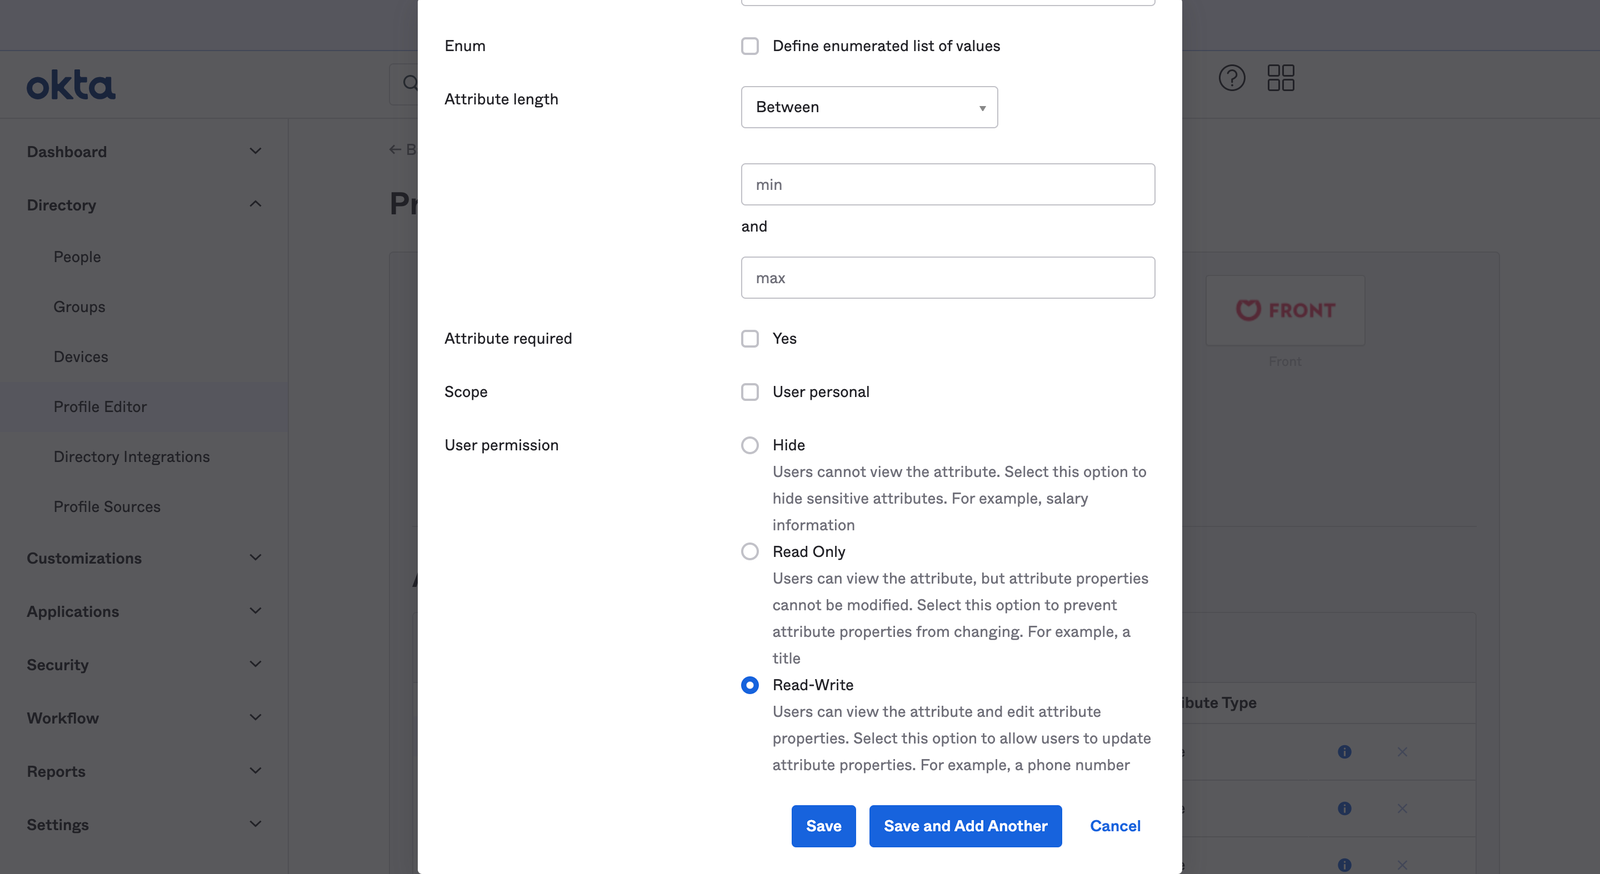
Step 15
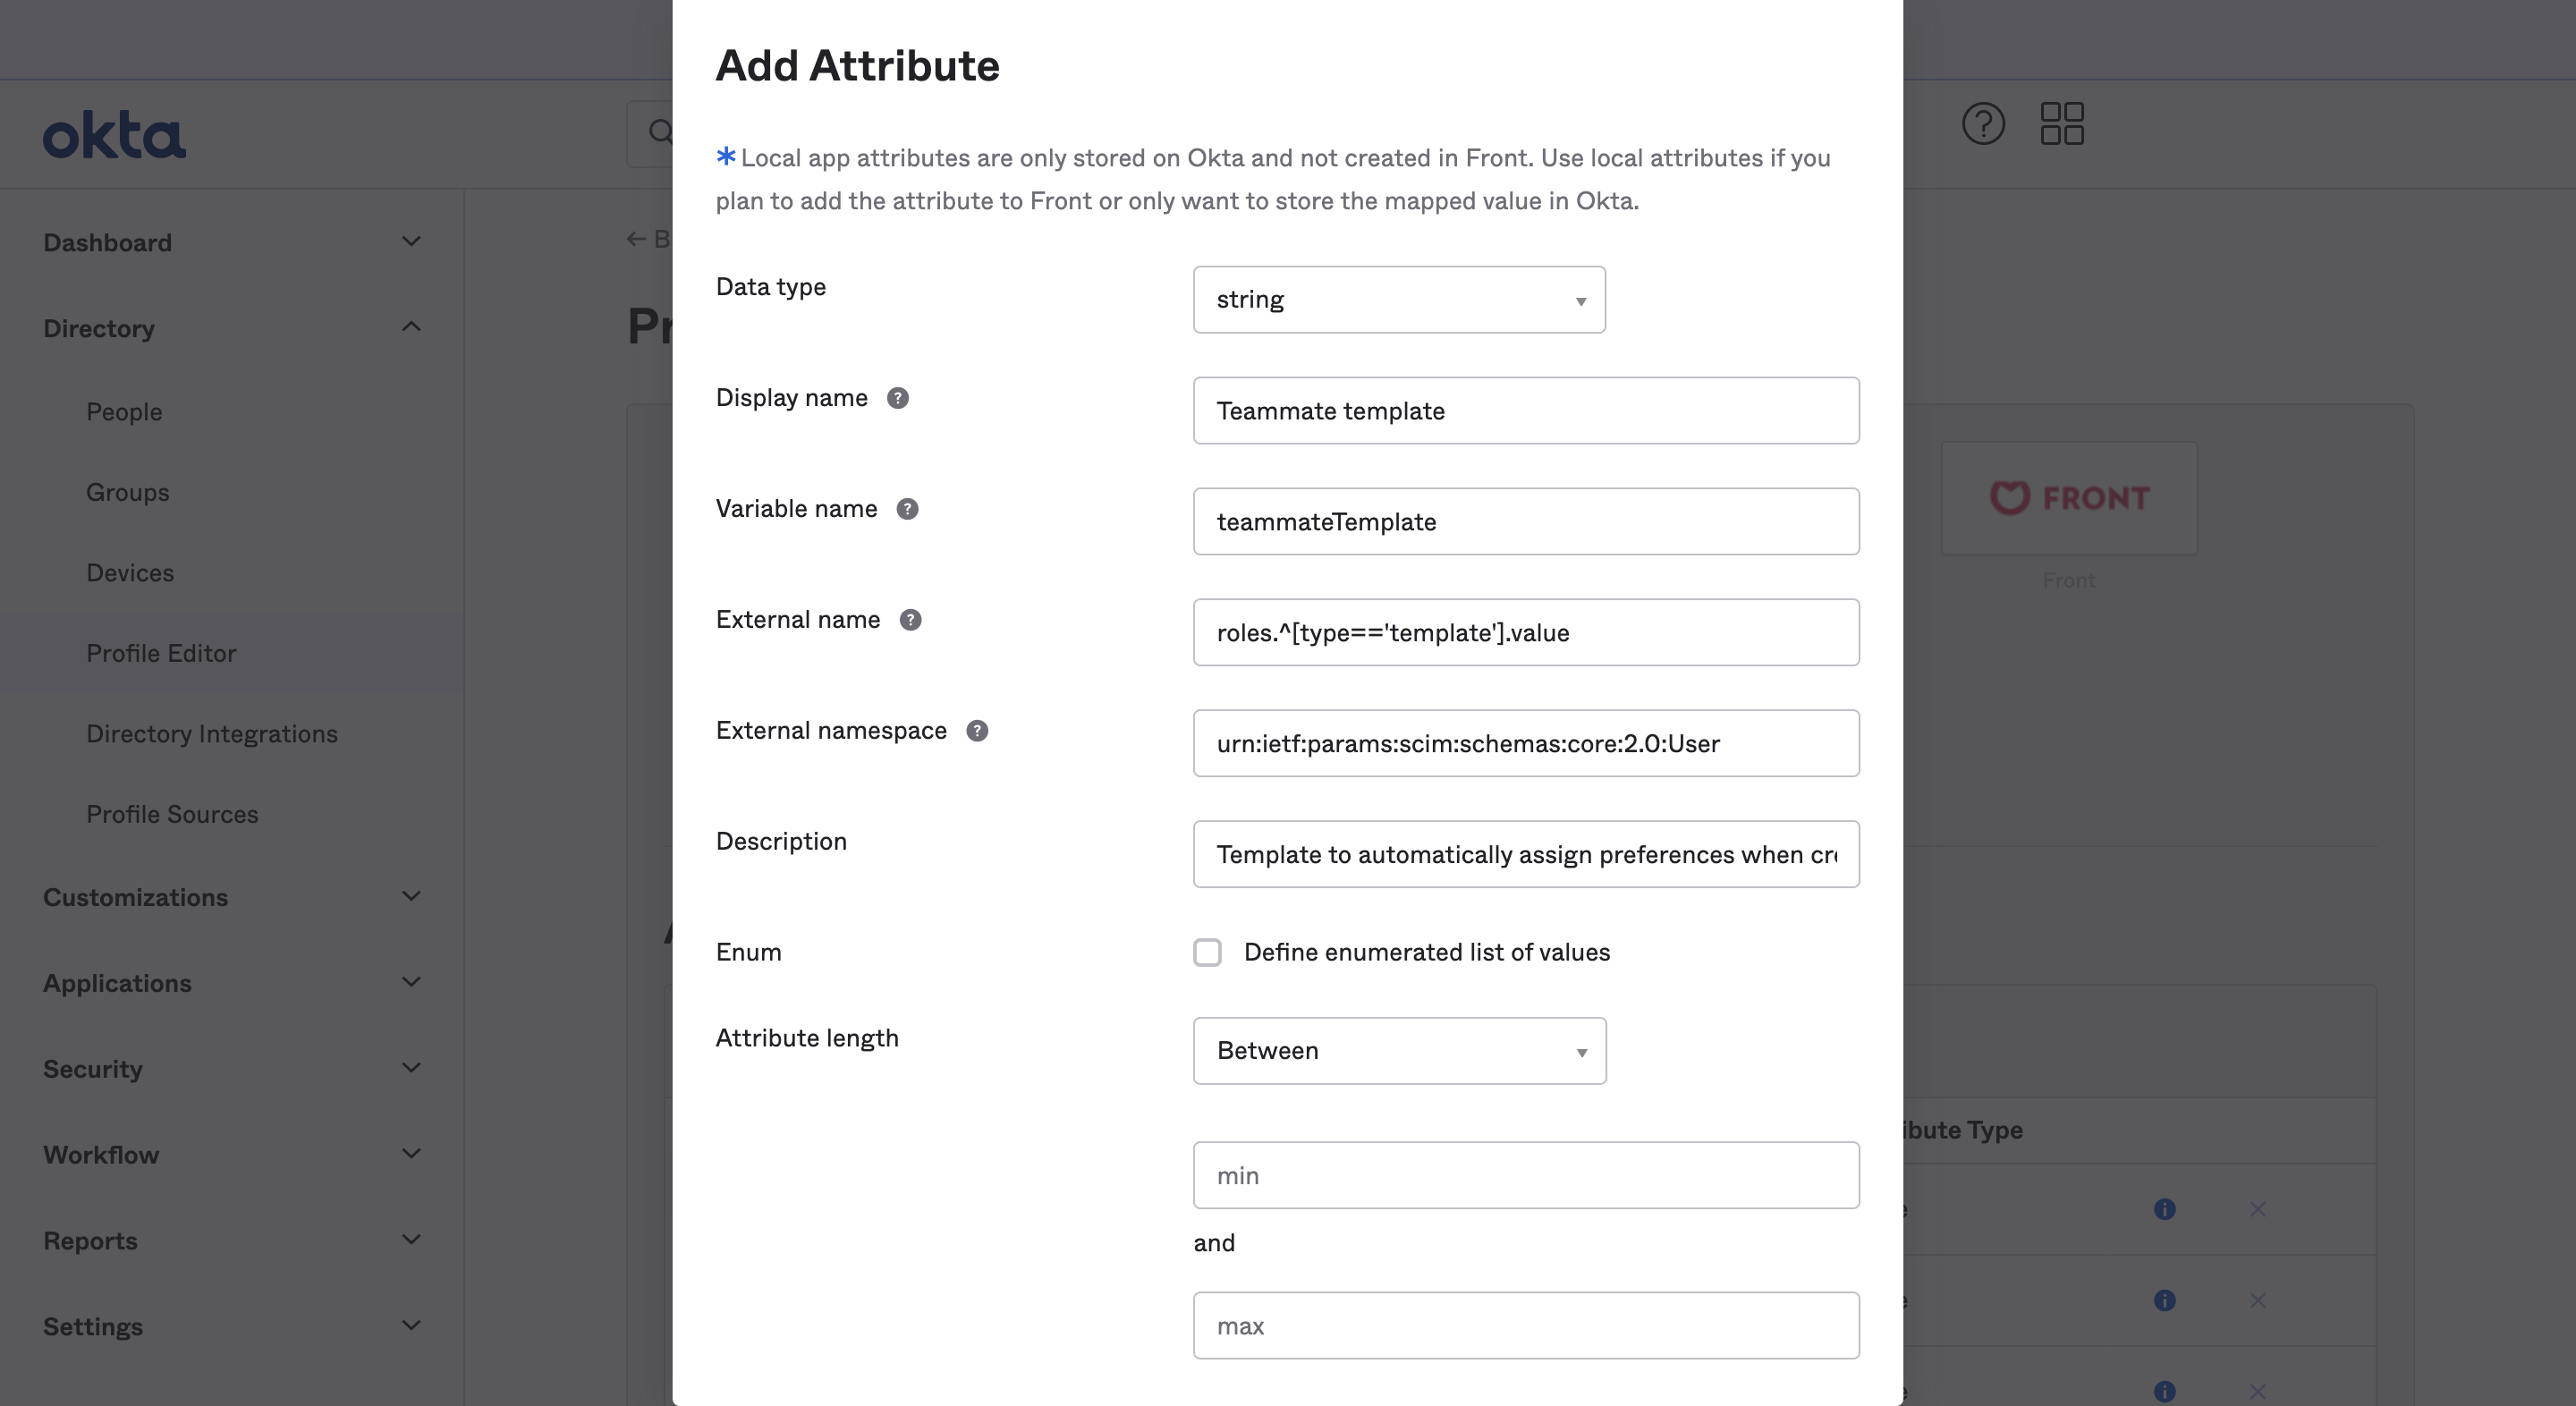
Ensure the fields are set up like the following:
Data type: string
Display name: Teammate Template
Variable name: teammateTemplate
External name: roles.^[type=='template'].value
External namespace: urn:ietf:params:scim:schemas:core:2.0:User
Description: Template to automatically assign preferences when creating a user
User permission: Read-Write
Step 16
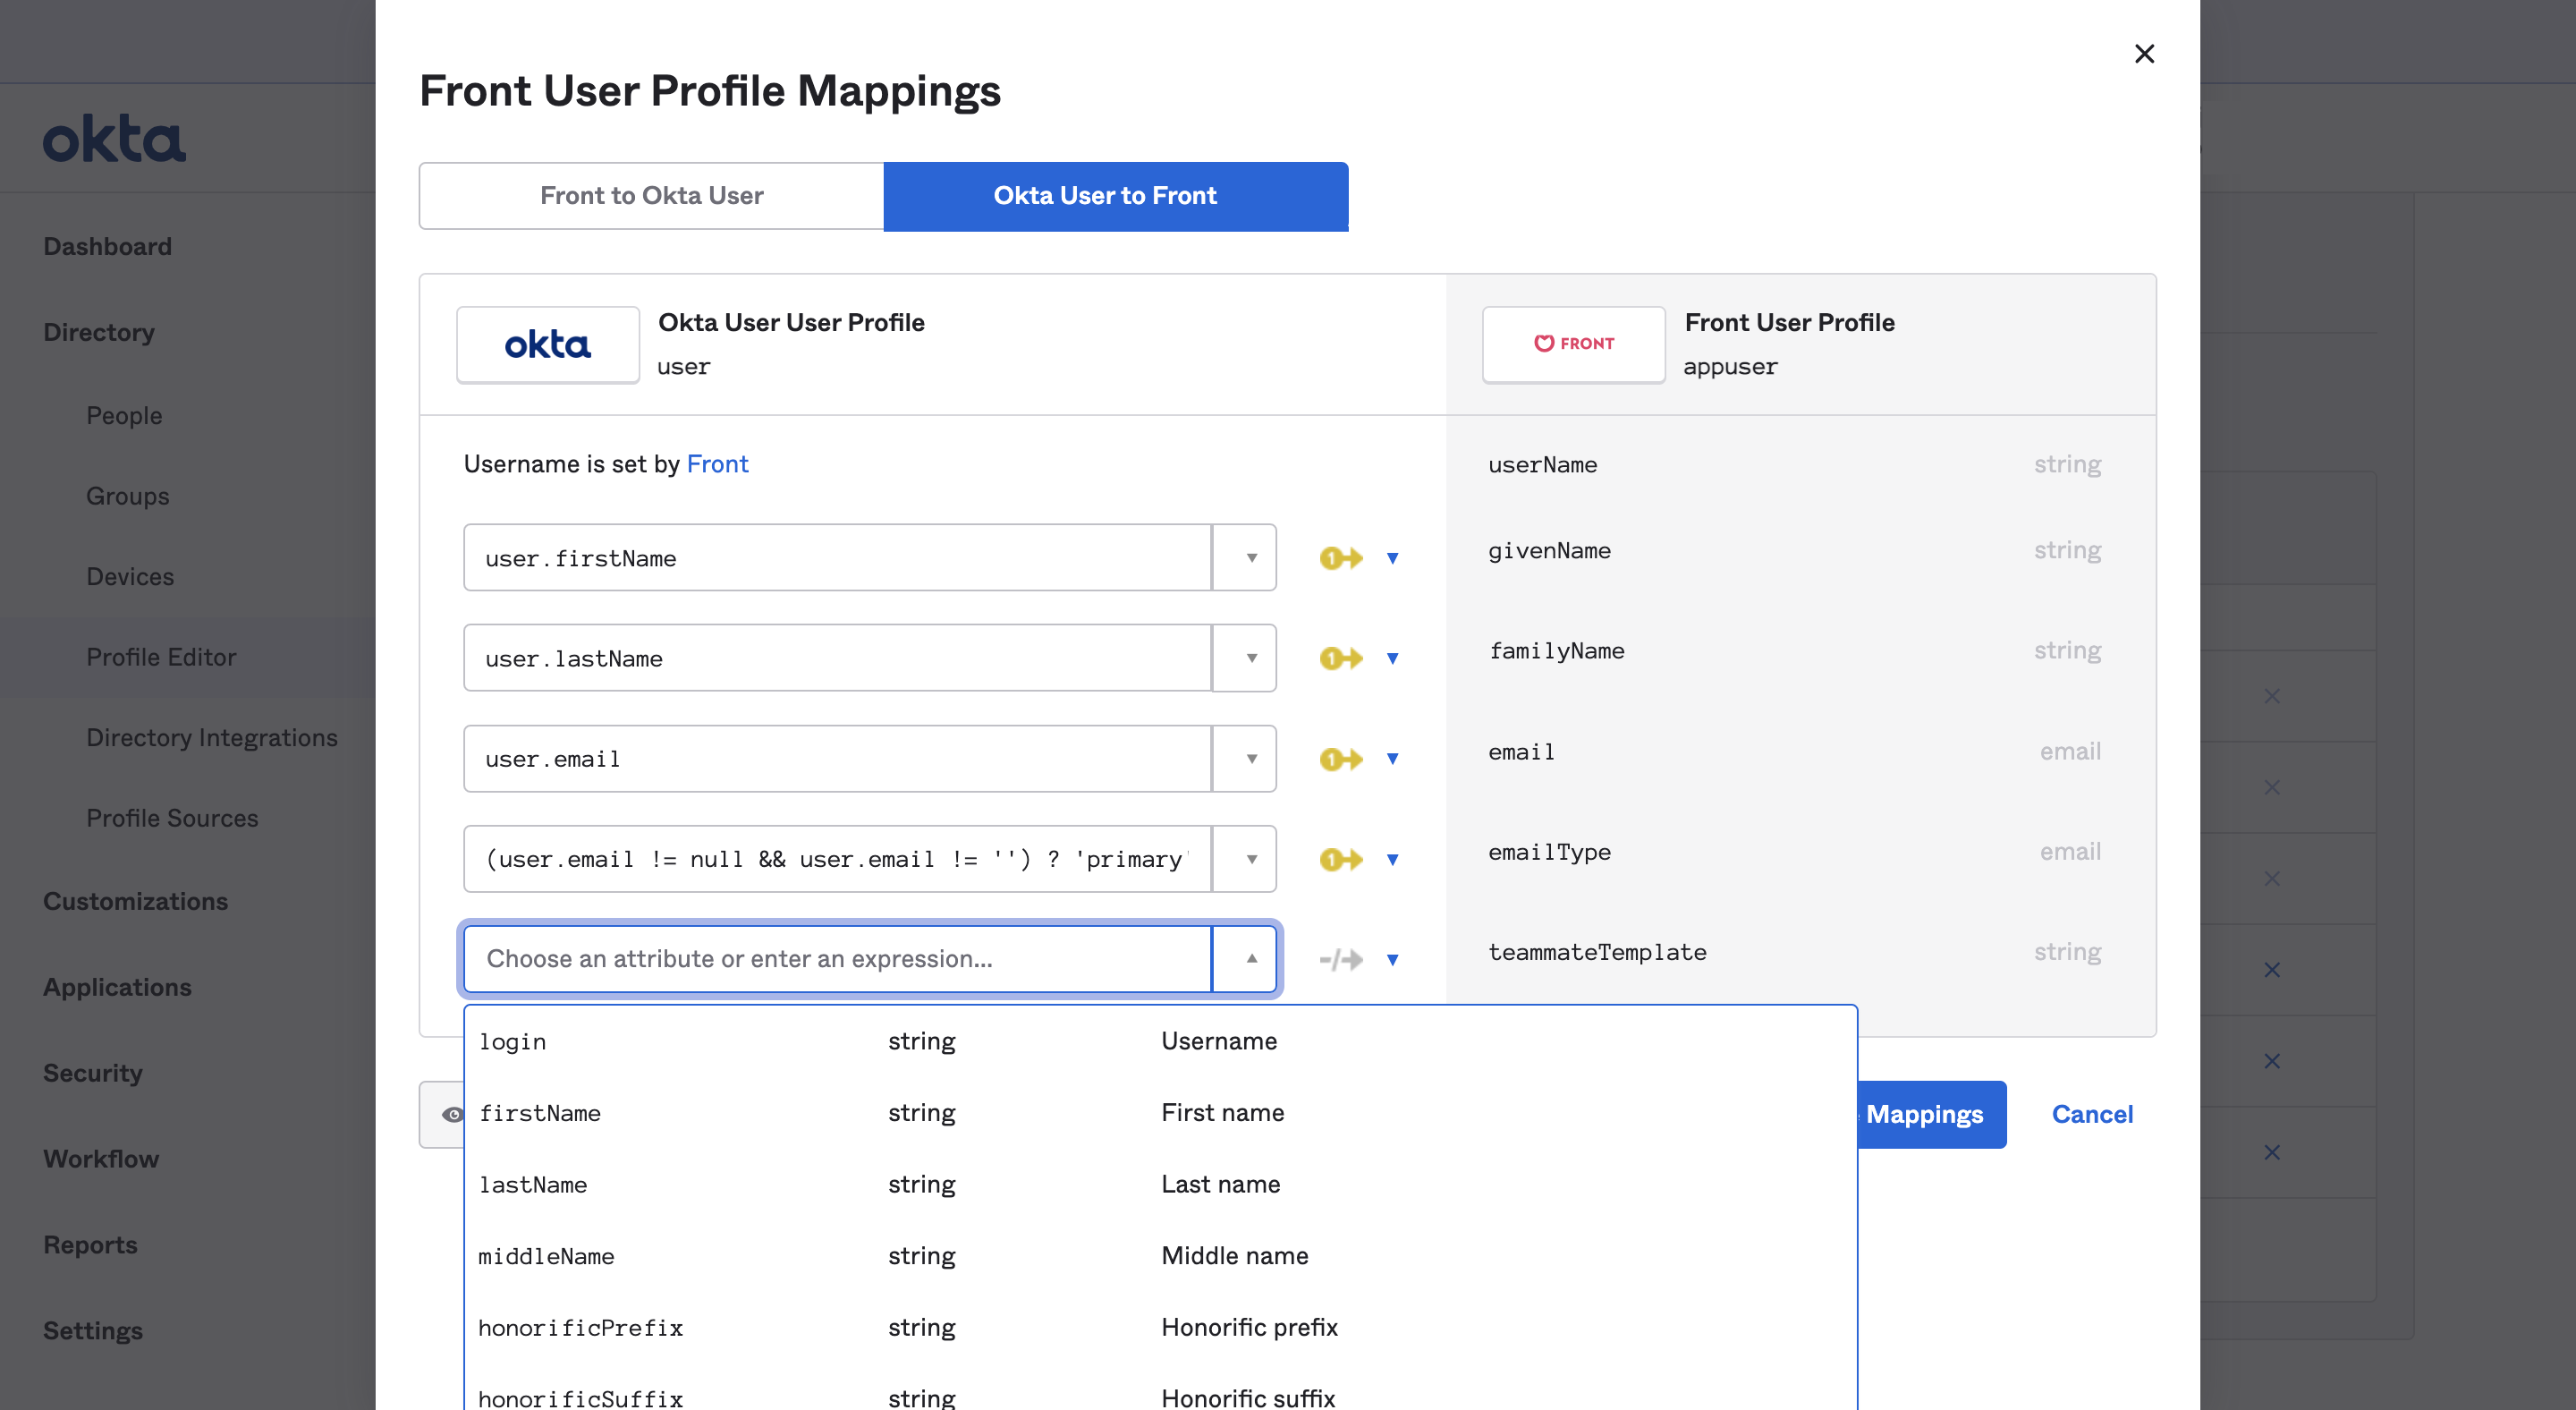
From there, you can go back to the profile editor displayed in Step 12. You should see the teammate template, but it is not mapped to any attribute.
Click Mappings, then select the tab Okta users to Front in the popup to choose how you want to map this attribute
In this example, we use Okta groups to map to the template ID you created in Front
Okta provides more information about their expression framework here

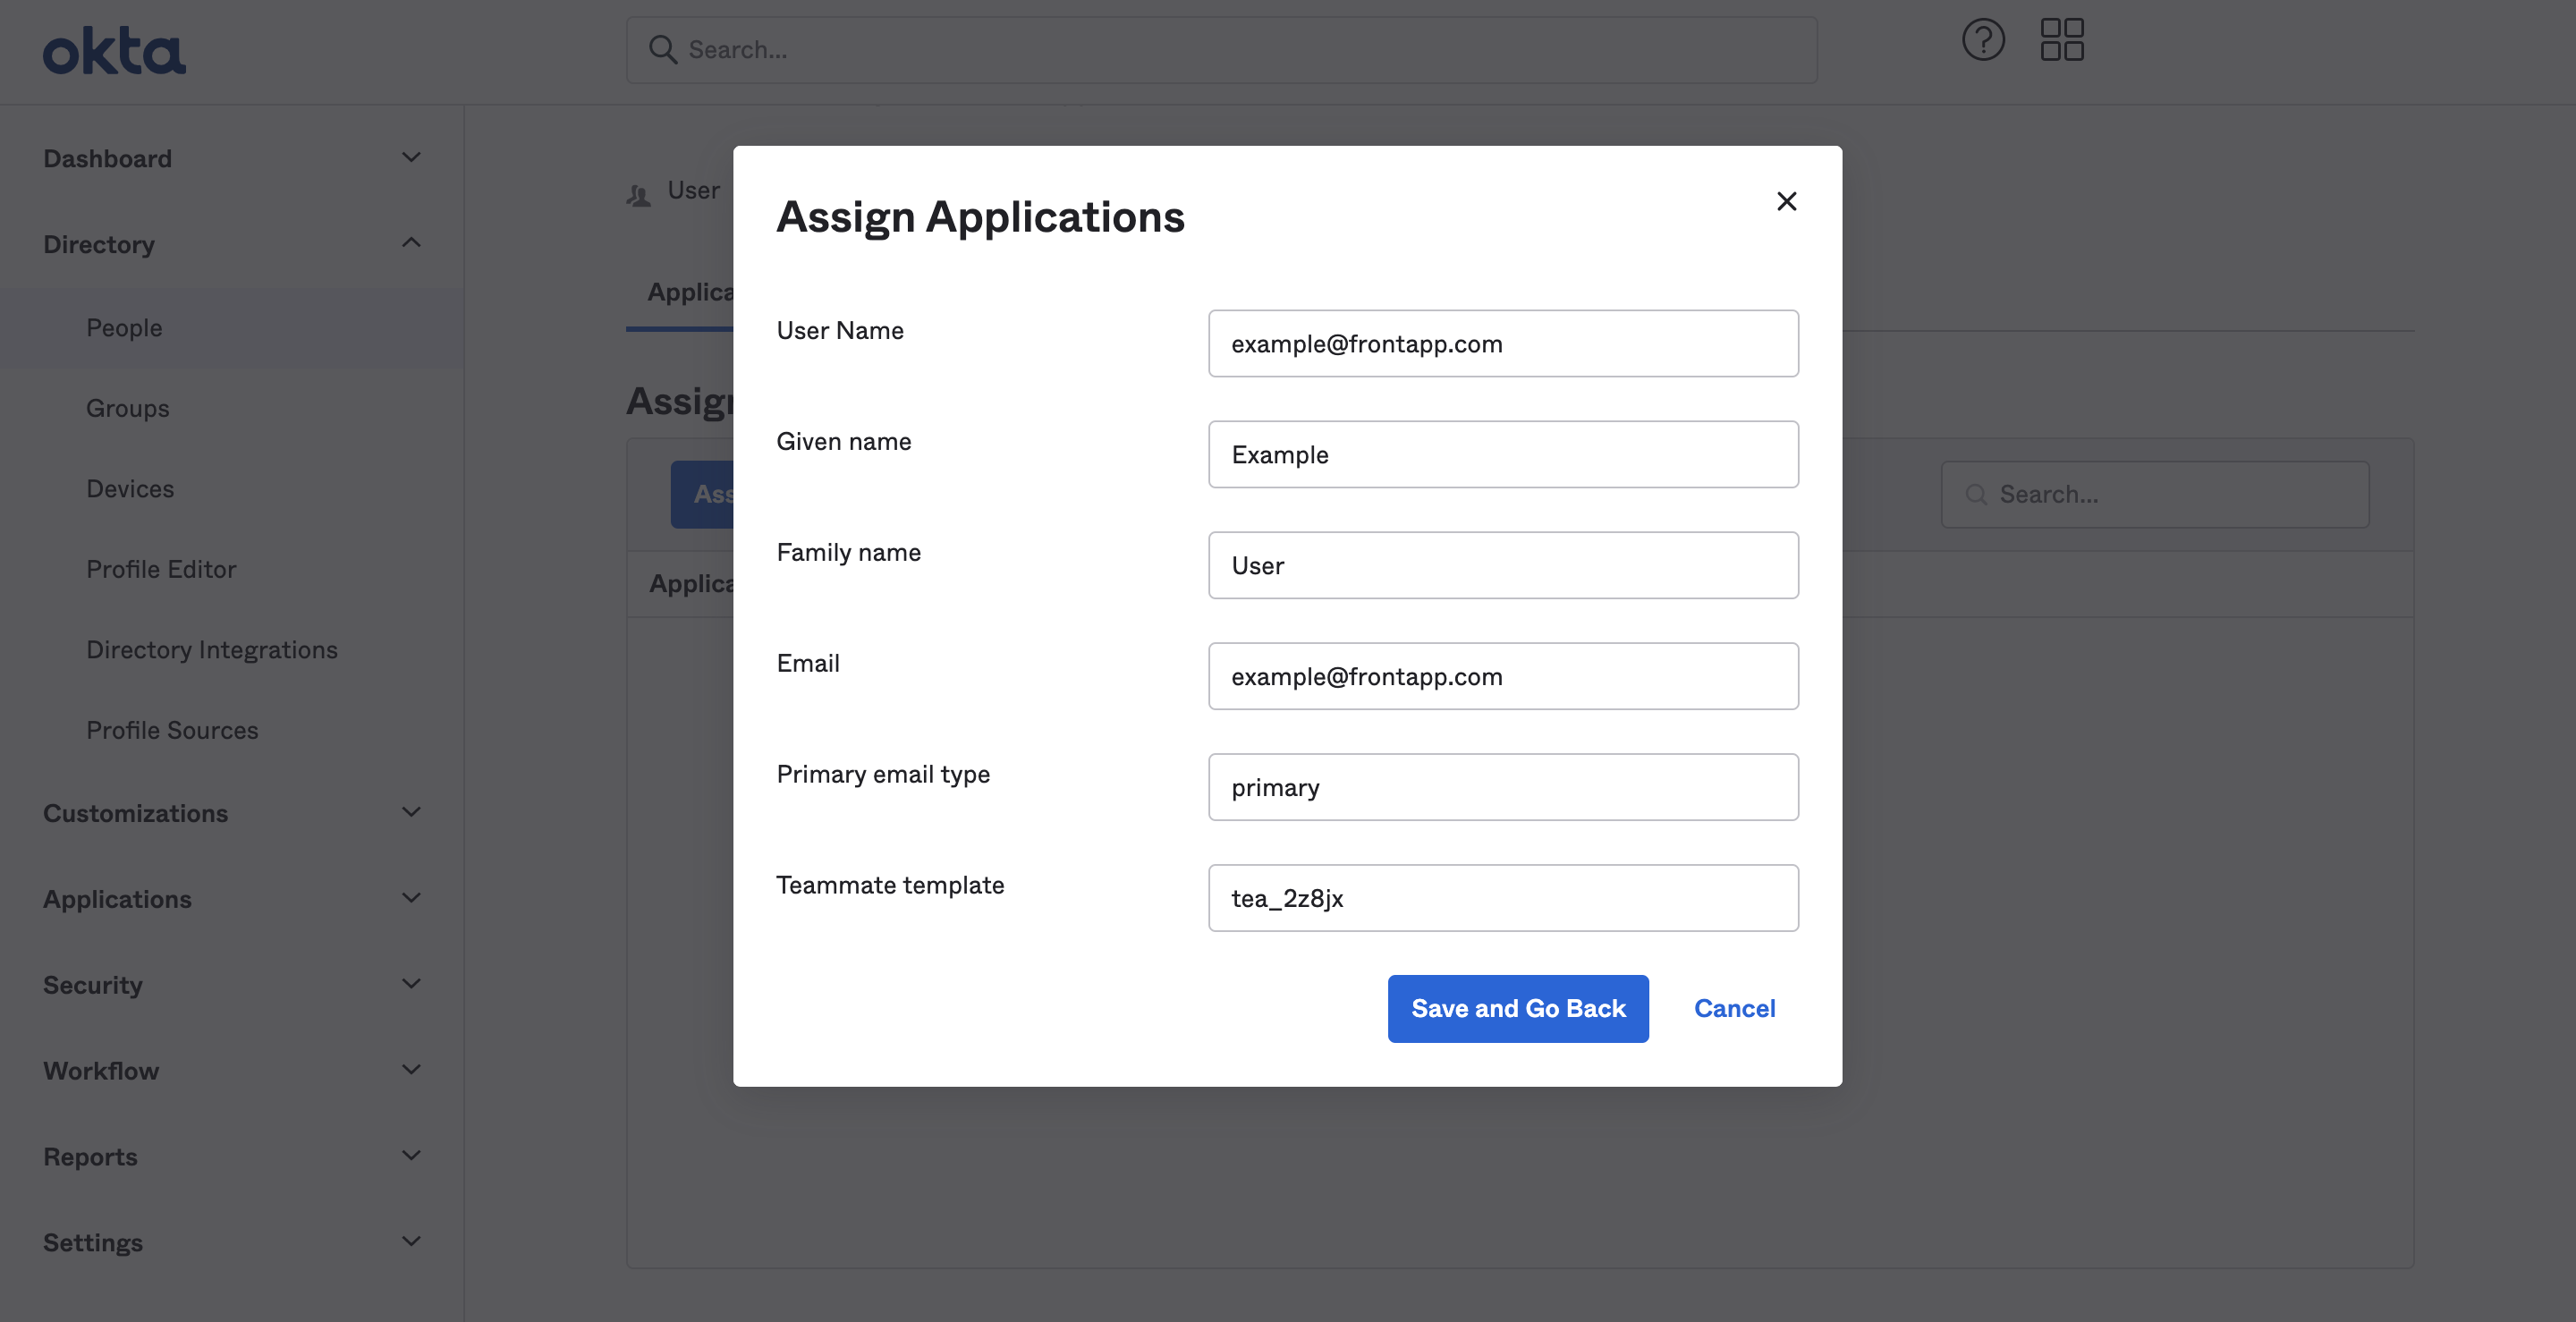
Step 17
When you assign a user to this application, it should show you the right template applied.
Part 4: Syncing Groups to teammate groups (optional)
See this article for more information about syncing groups from an Identity Provider, like Okta, to Front.
Step 1
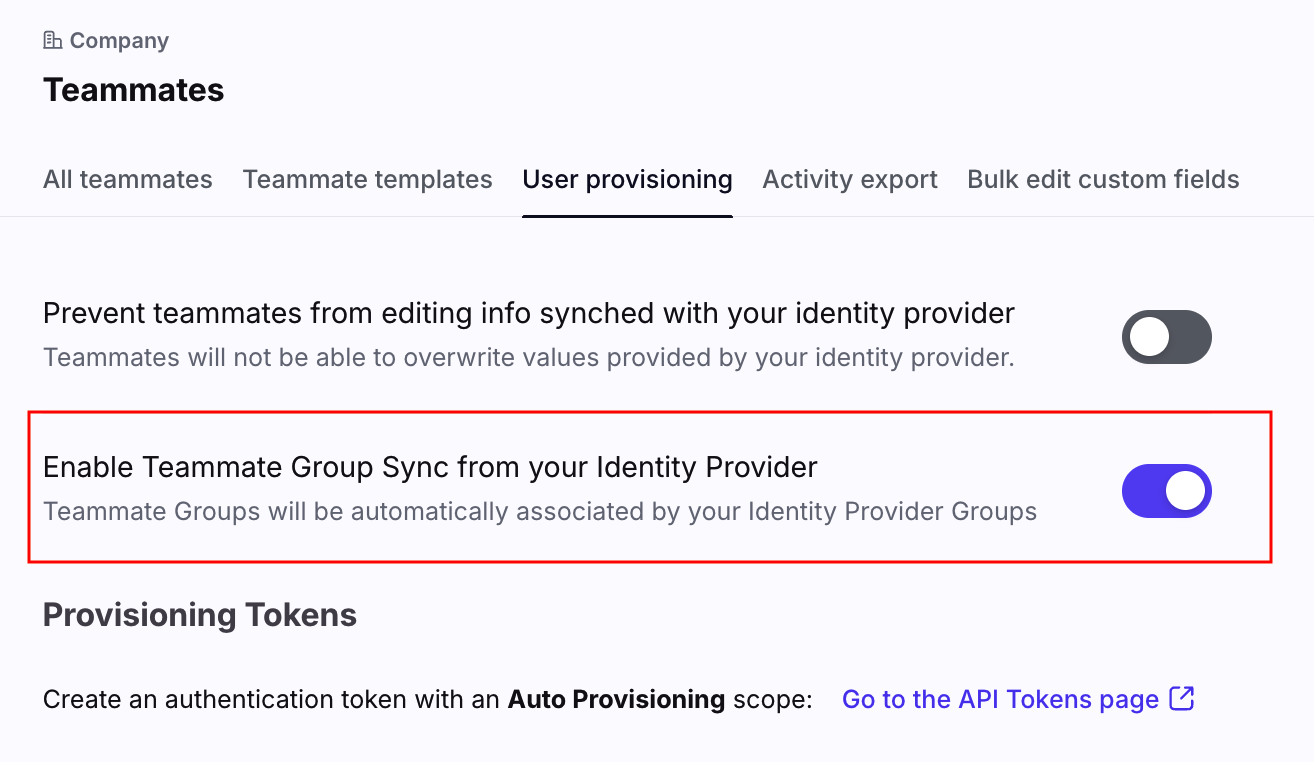
In Front, click the gear icon to navigate to company settings. Click on Teammates, then go to the User provisioning tab.
Step 2
Toggle on Enable Teammate Group Sync from your Identity Provider, then click Save.
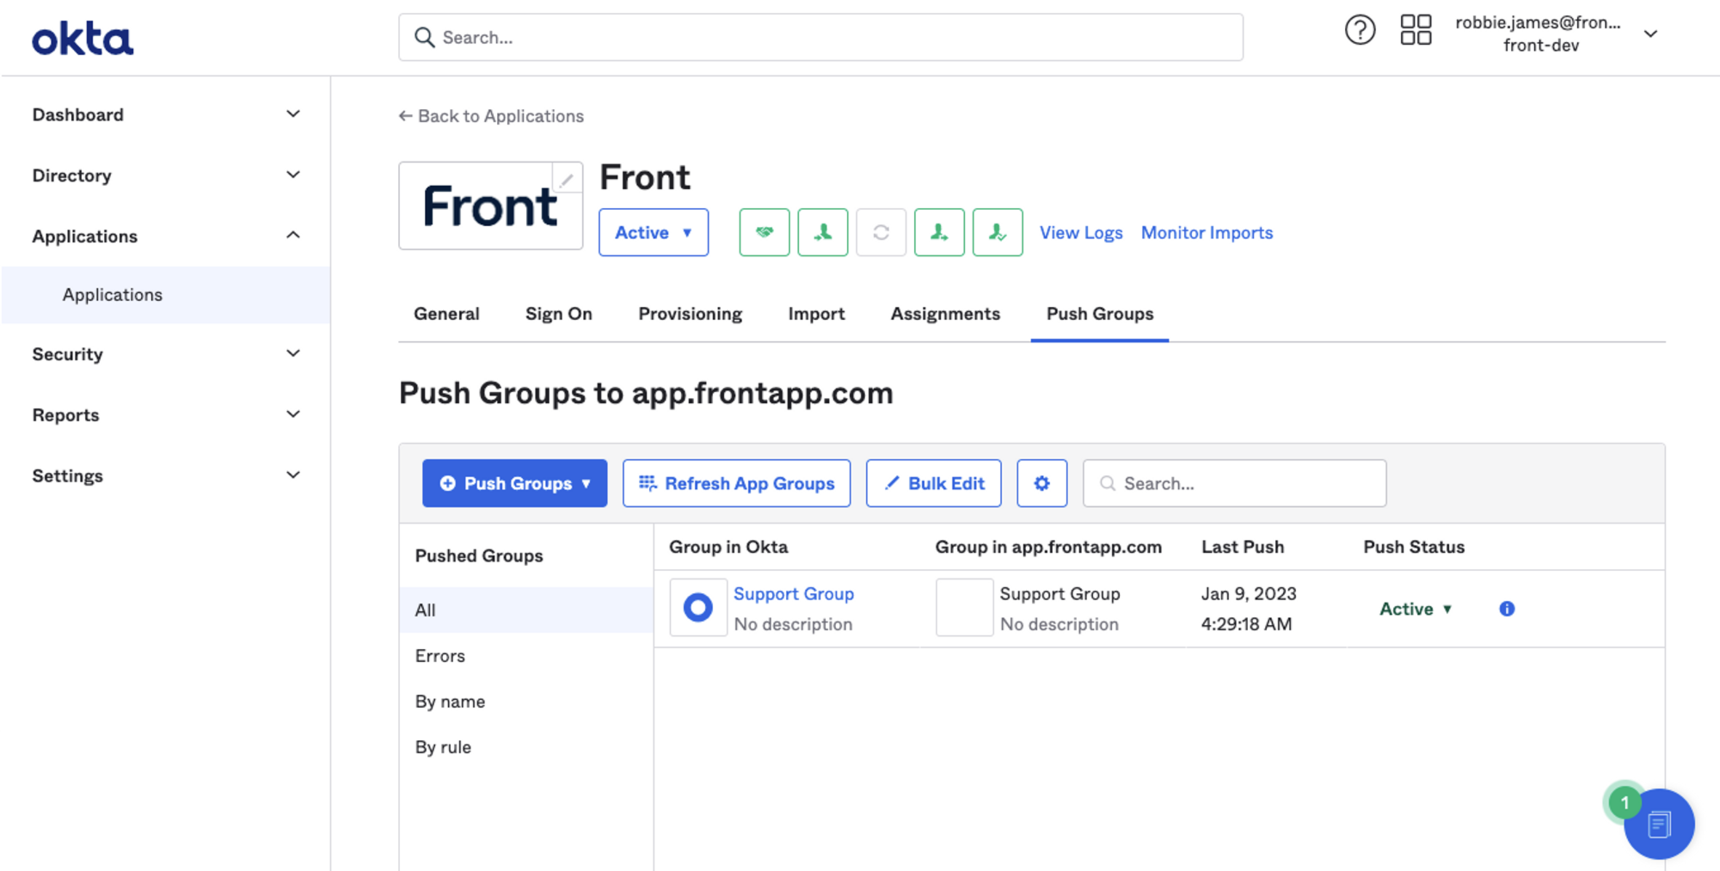
Step 3
It is now possible to push Groups from Okta to Front. This is done from your Okta portal by navigating to your Front application and clicking on the Push Groups tab. For more information on managing Group push, see Okta’s Help Center article.
Okta user groups and Front teammate templates
The best way to scale creating new users is to link Front teammate template to Okta's user groups. When giving access to Front to an Okta user group, you can map templates to groups. Any Okta user added to this group will then be invited to Front with the right permissions based on the teammate template mapped to the group.
FAQ
What happens when I remove access to Front from Okta?
When you remove access to Front from Okta for a specific teammate, that teammate will be blocked. Should you re-authorize access to Front, the teammate will be unblocked automatically. Okta does not allow deleting via the integration, so users in Front are blocked, even if they are deleted in Okta.
What happens when someone is deleted from Okta?
Okta does not allow deleting via the integration, so users in Front are blocked, even if they are deleted in Okta.
Will a teammate's template be updated if user attributes are changed in Okta?
No, a new template cannot be applied after a teammate has been created. Teammate templates can only apply at the time a teammate is invited.
Does my username have to match Okta primary email?
When setting up your SCIM integration, UserName cannot be different from your Okta primary email. This field is used to match your existing Okta users to the corresponding Front teammates.
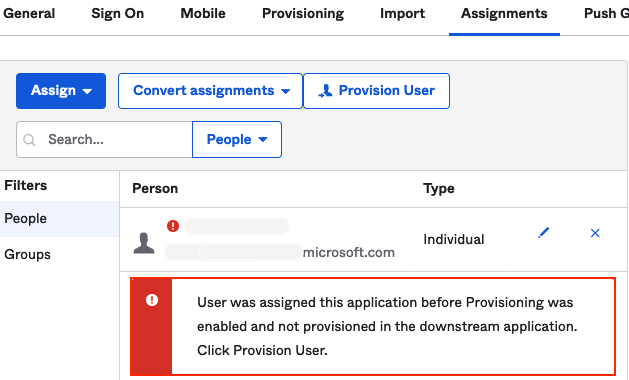
Can I see sync errors in Okta?
Yes. If you notice sync issues, we recommend checking Okta for any user assignment errors. Okta will show error messages for relevant teammates.
Pricing
SCIM provisioning is available on the latest Professional plan or above. Some legacy plans may also have this feature.