
Set up a Resolve portal in your Front help center
Overview
Connect a Resolve channel to your Front help center so visitors can log in to submit new requests and check the status of existing ones. This dedicated portal allows your customers to self-serve simple tasks, giving your team more time to focus on answering more complex inquiries.
How it works
Visitor experience
After a Front admin connects a Resolve channel to a Front help center, visitors can review and submit requests to your company all in one place.
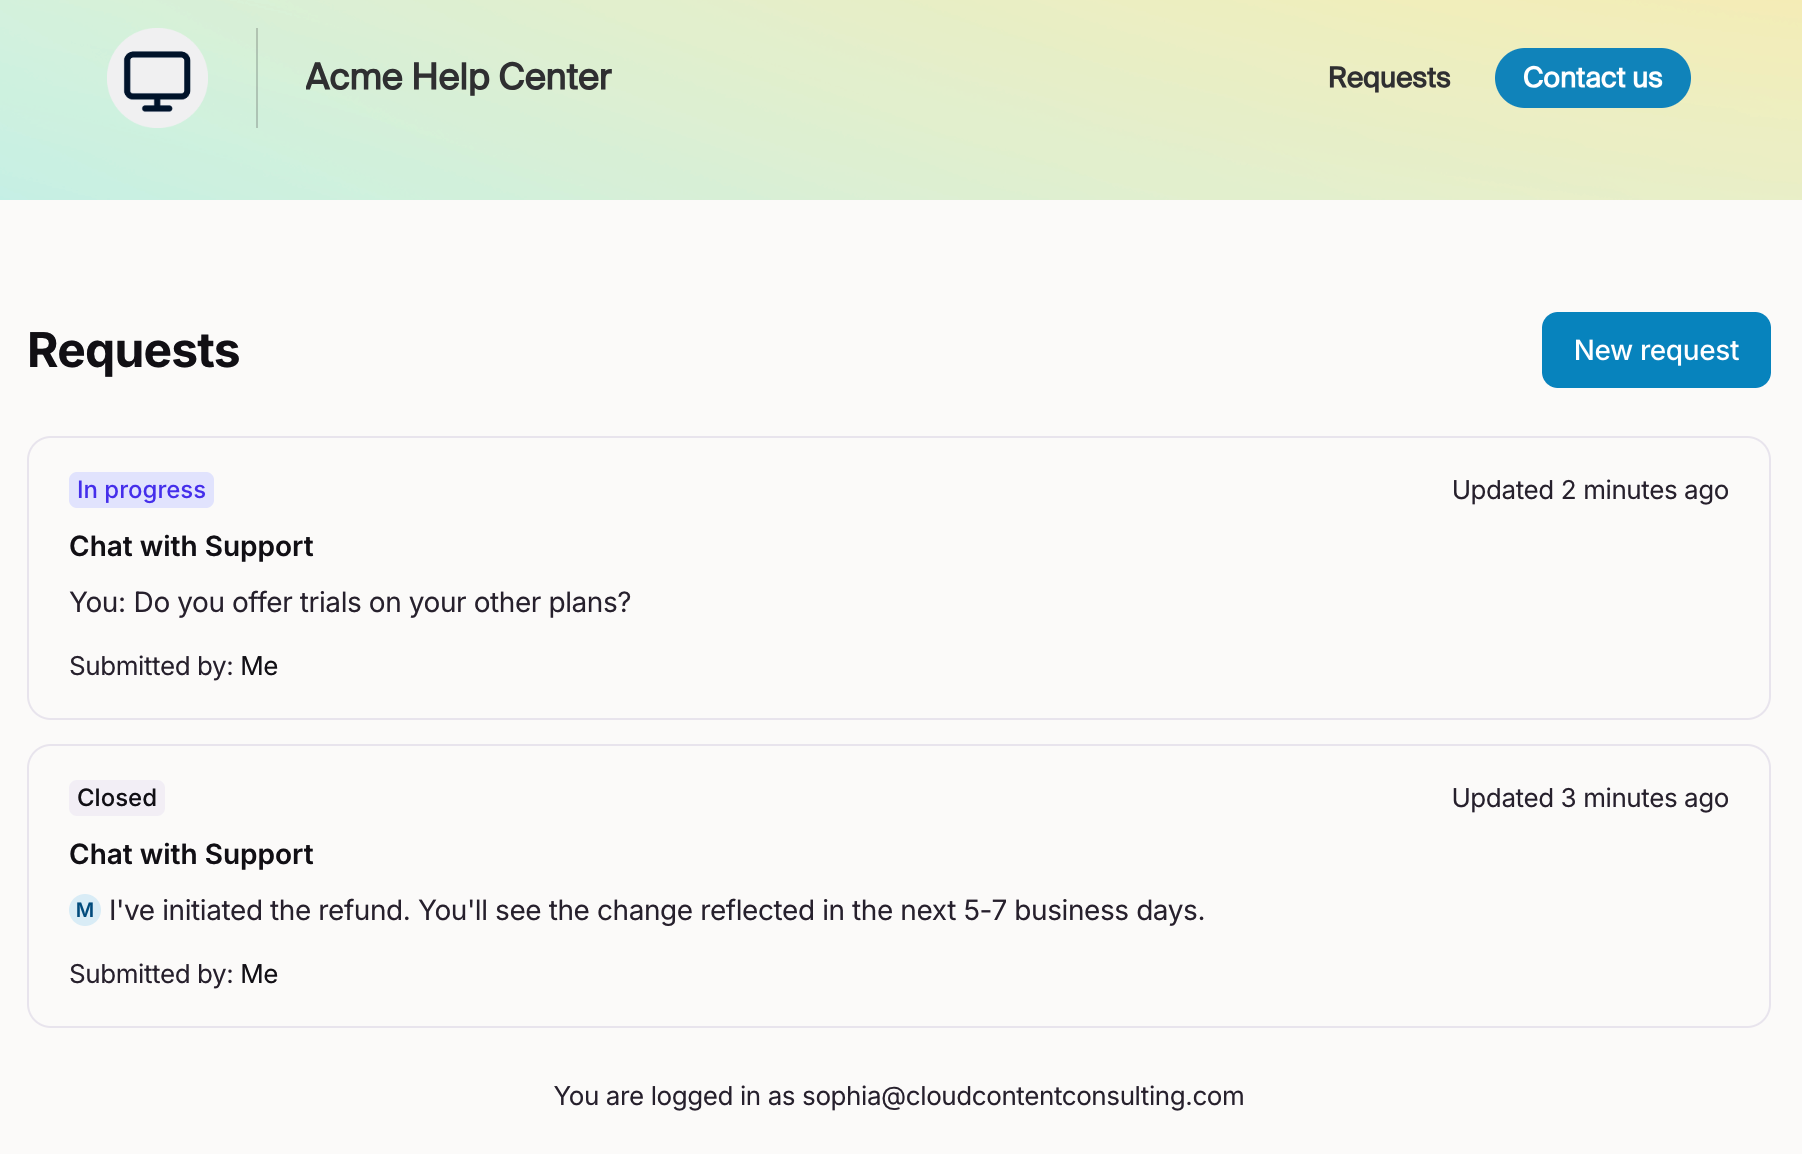
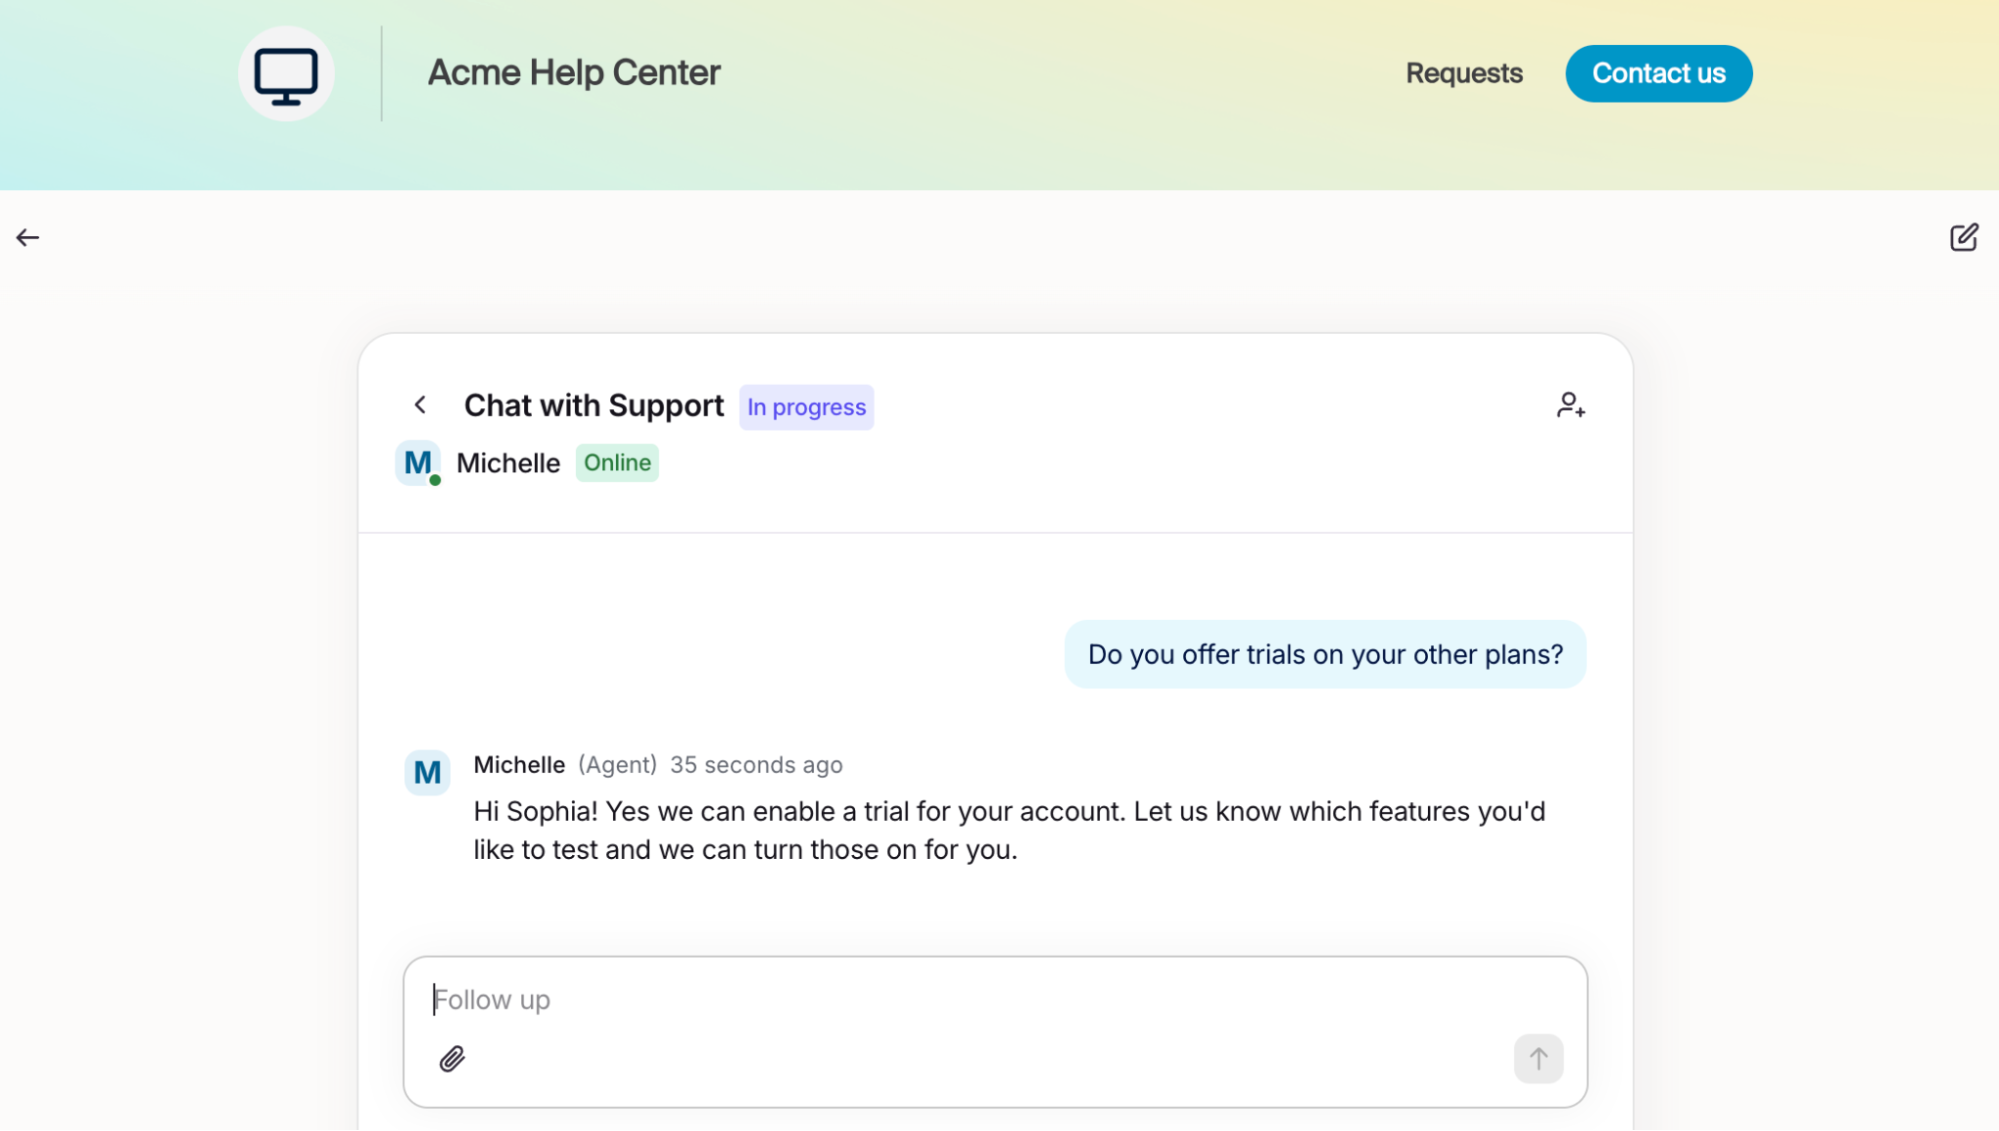
When your team responds to a visitor’s request they’ll receive an email notification. Visitors will be directed to the Resolve portal where they can reply to the conversation.
Visitors will see your sent messages and the status of the conversation in the portal.
When using ticket statuses: Visitors will see the name in the Customer label field in your ticket status settings in company preferences
When using traditional statuses:
Open/Snoozed conversations will display in the portal as 🔵 In progress
Archived/Spam conversations will display in the portal as ⚪ Closed
Front teammate experience
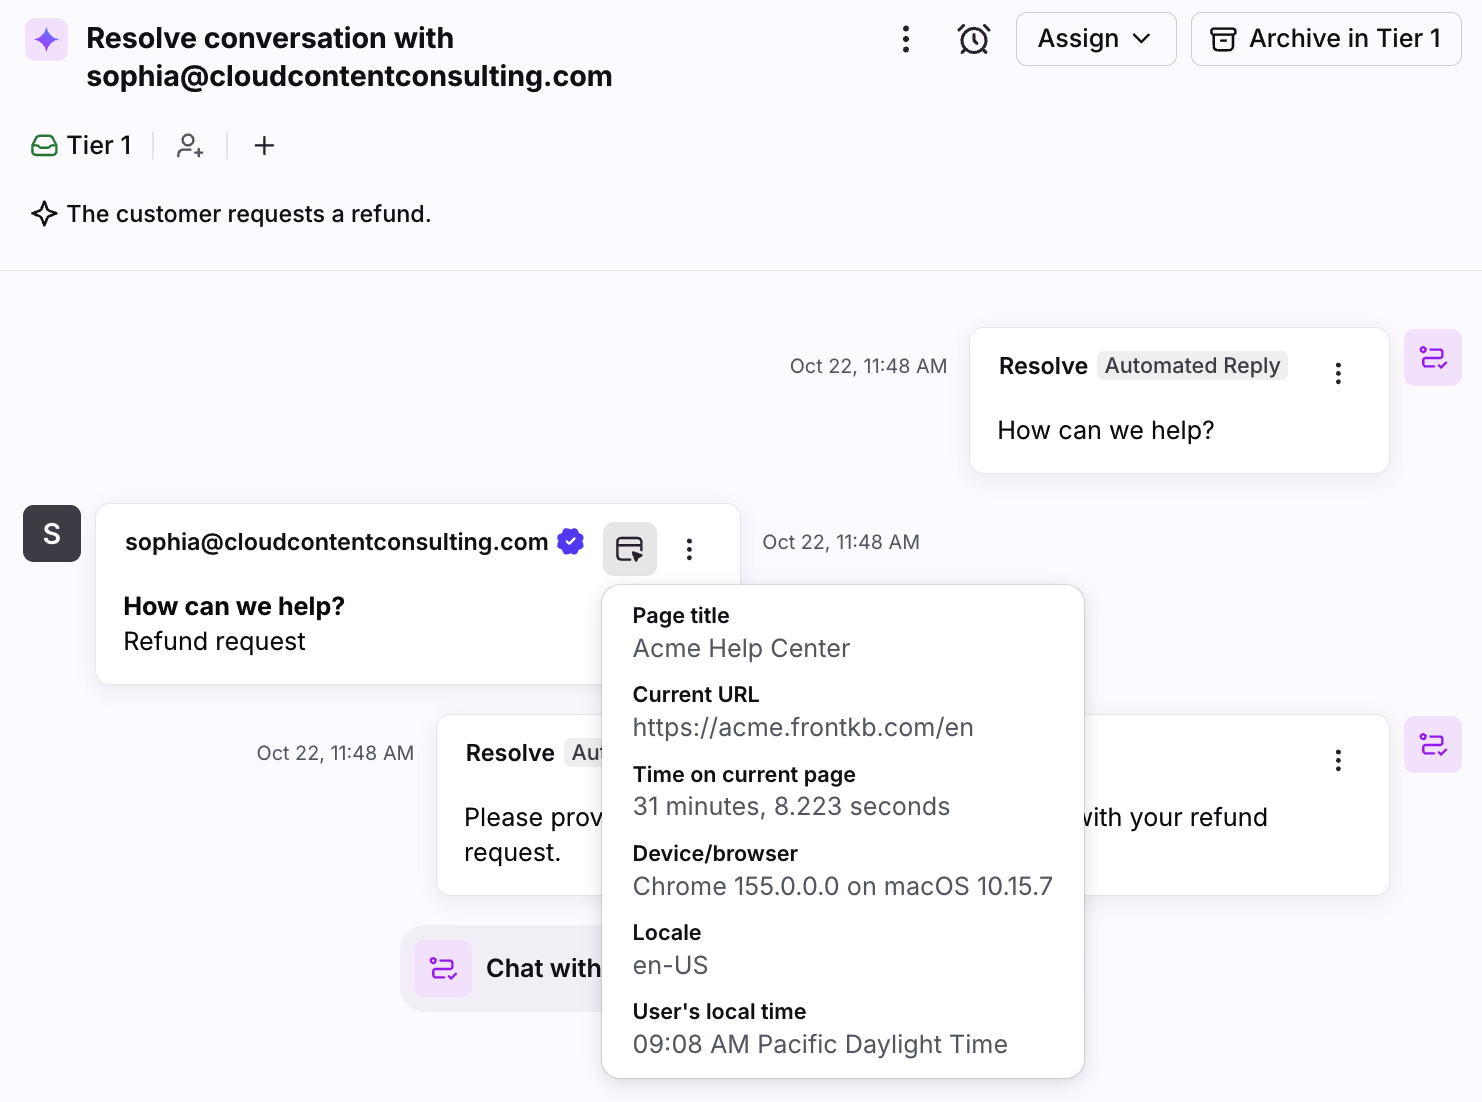
When a visitor submits a request, you’ll receive a new conversation in your shared inbox. Teammates can click the context icon to see additional details collected by the Resolve channel to assist with troubleshooting.
Prerequisites
To set up a portal-style embedding, you must have the following:
A Front help center (Public or Login controlled visibility and published)
Have Front company admin or help center admin permissions
Admin instructions
Part 1: Create a Resolve channel
You must have a Resolve channel set up in order to set up portal-style embedding in your help center. See this article to review how to configure a Resolve channel and its settings.
Part 2: Configure help center settings
Step 1
In the navigation menu, select Help center. In the help center, use the dropdown to select the help center you’d like to use with your Resolve channel.
Step 2
Under the Site management section in the sidebar, select Settings then navigate to the Features section.
Step 3
Toggle on the Resolve setting, then click Save.
Step 4
Under the new Resolve section in the sidebar, select Settings.
Step 5
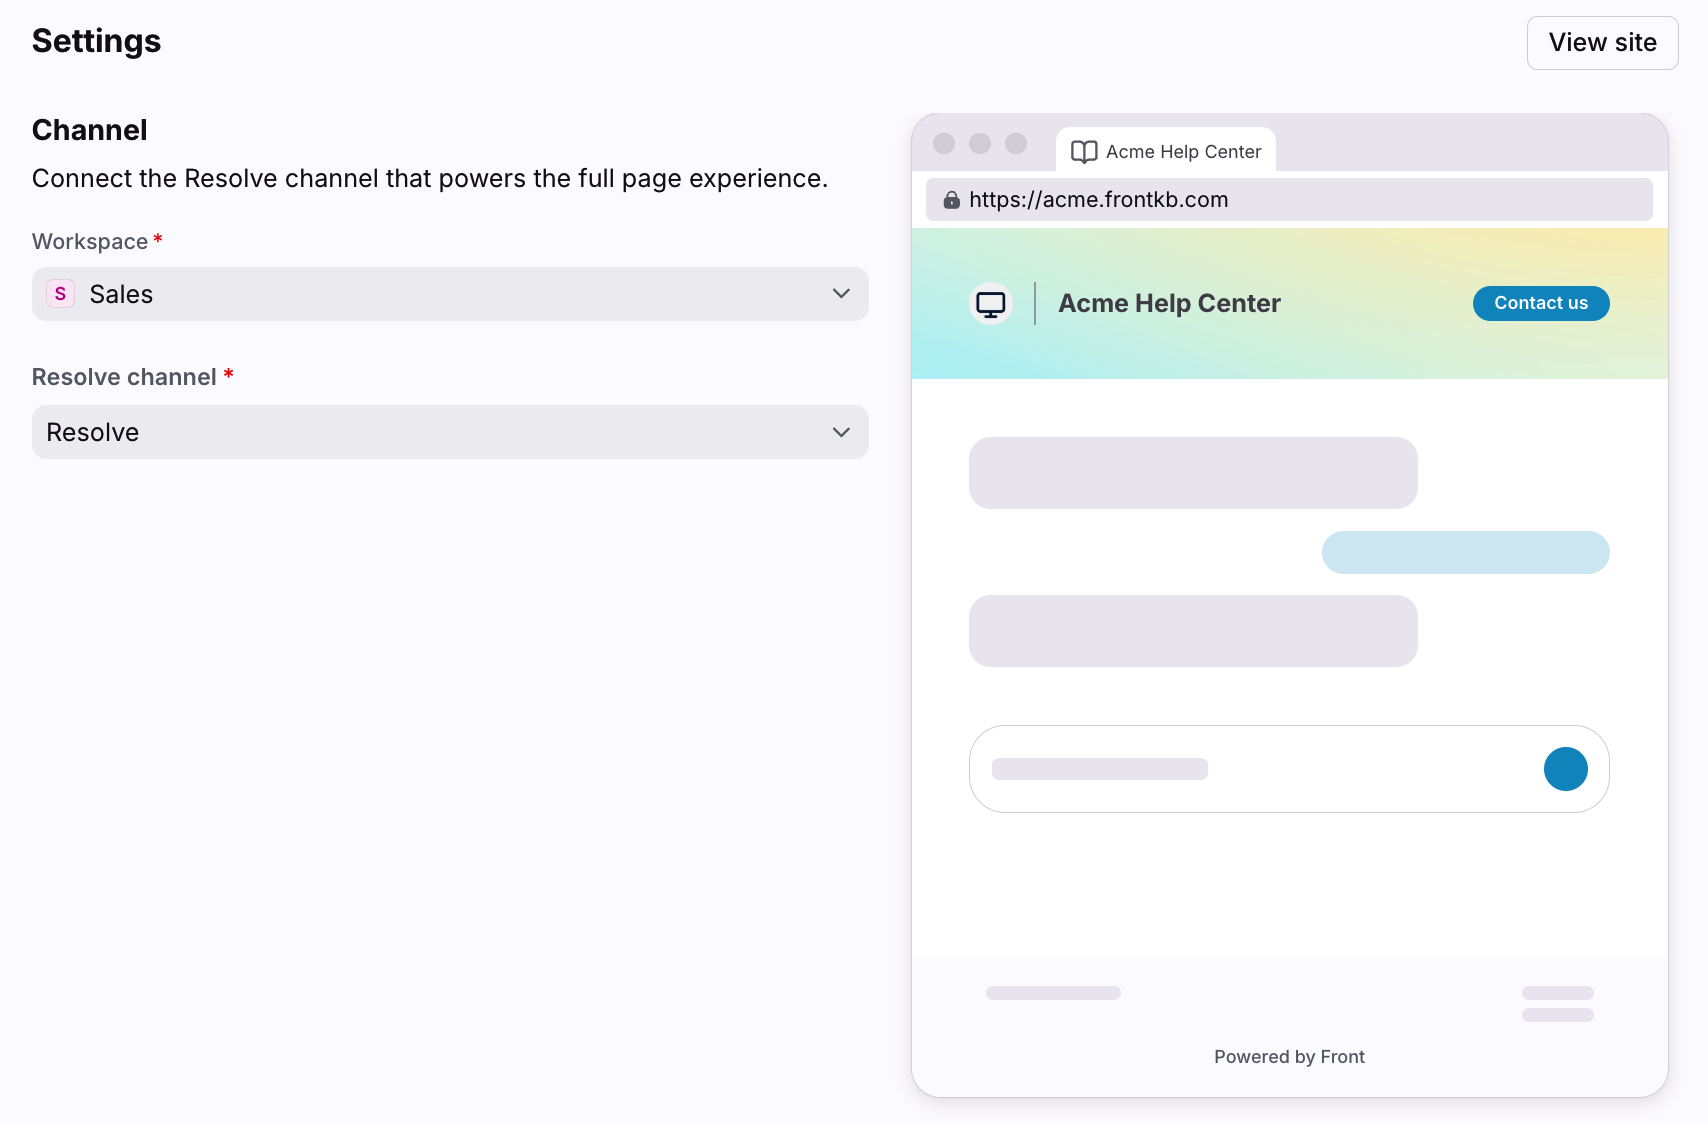
Configure the following fields:
Workspace: Select the workspace you want to route requests to.
Resolve channel: Select the Resolve channel you’d like to embed in your help center. In this example, we’ll select the channel we created in Part 1 of the instructions.
Step 6
Click Save. Your Resolve channel is now accessible in the Requests section of your help center.
Visitor instructions
Logging in to the portal
Step 1
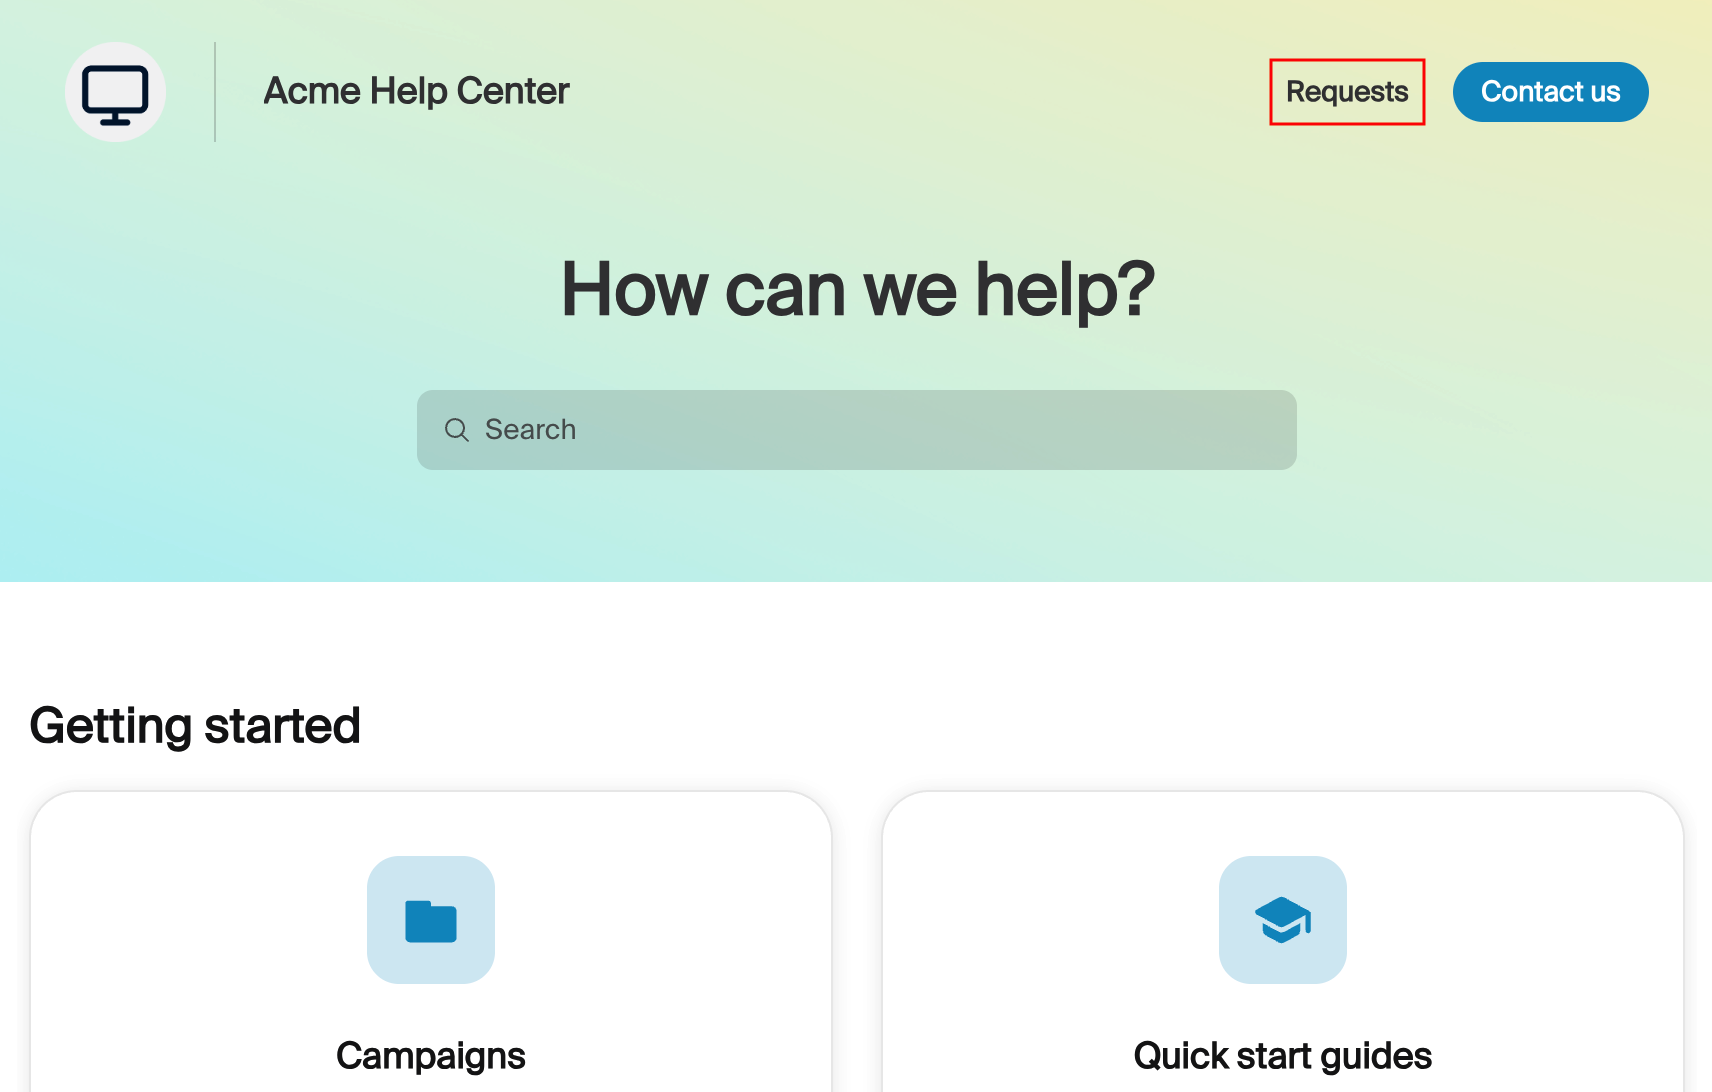
Navigate to the company’s help center, then click Requests at the top.
Step 2
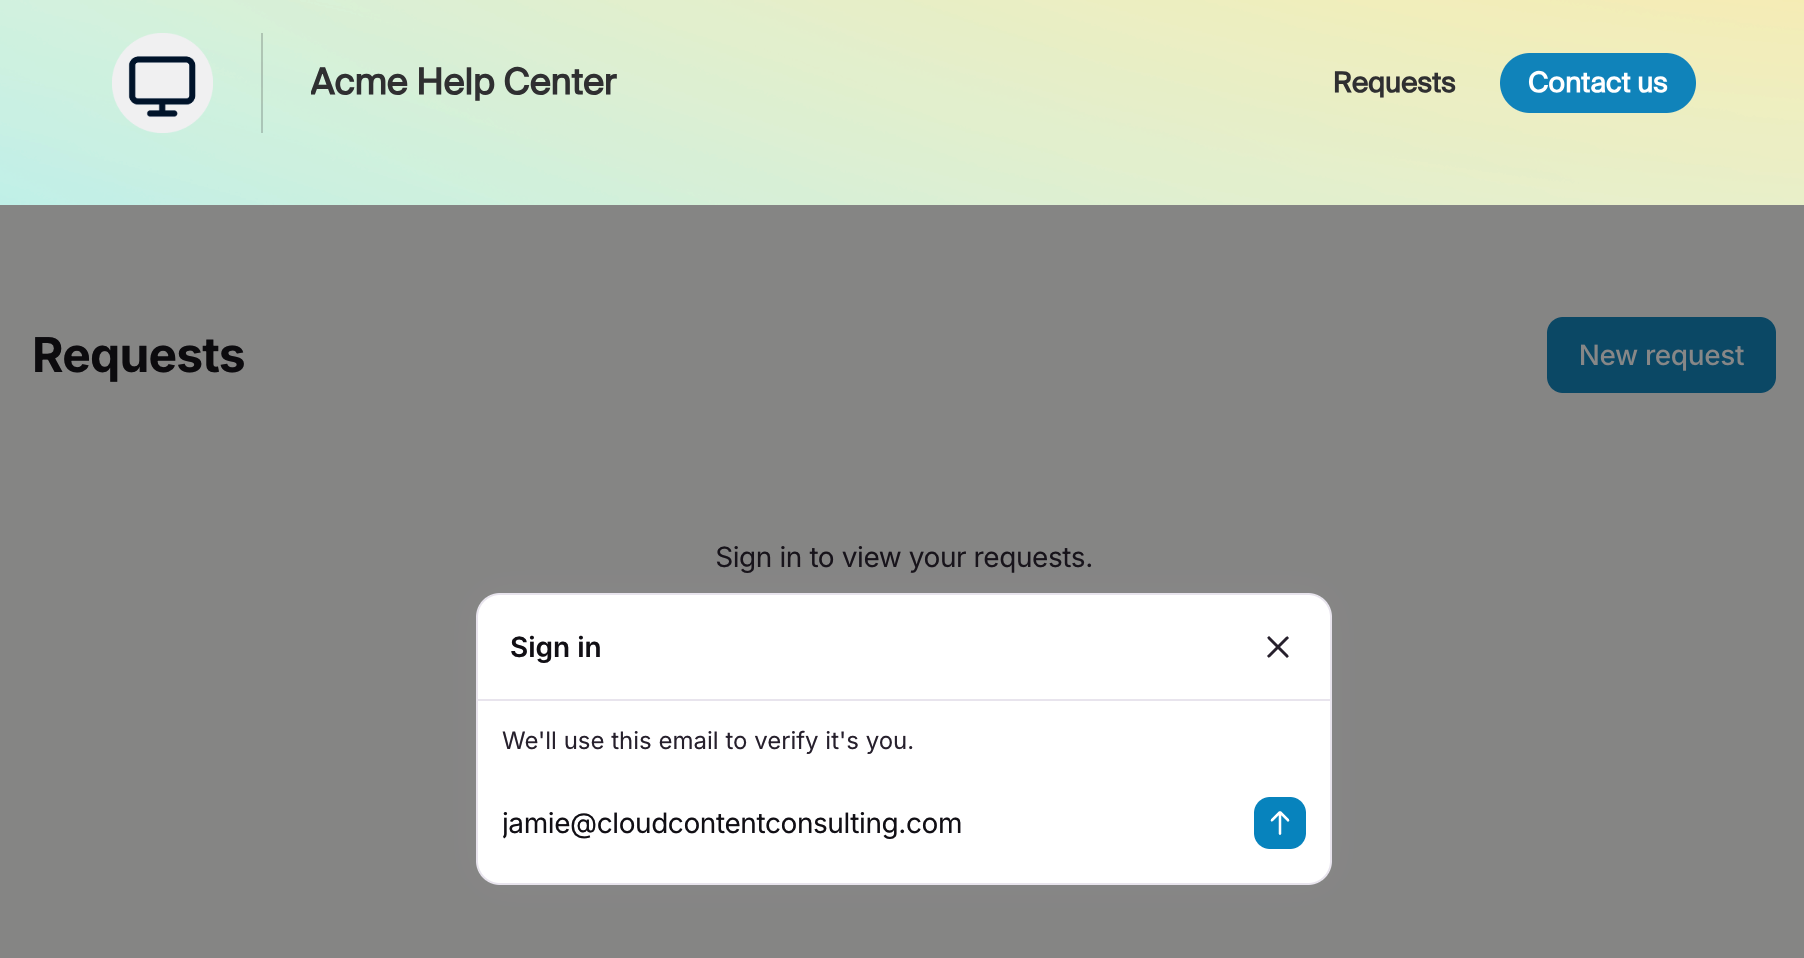
To access the Resolve portal for the first time, click Sign in and enter your email address in the pop-up.
Step 3
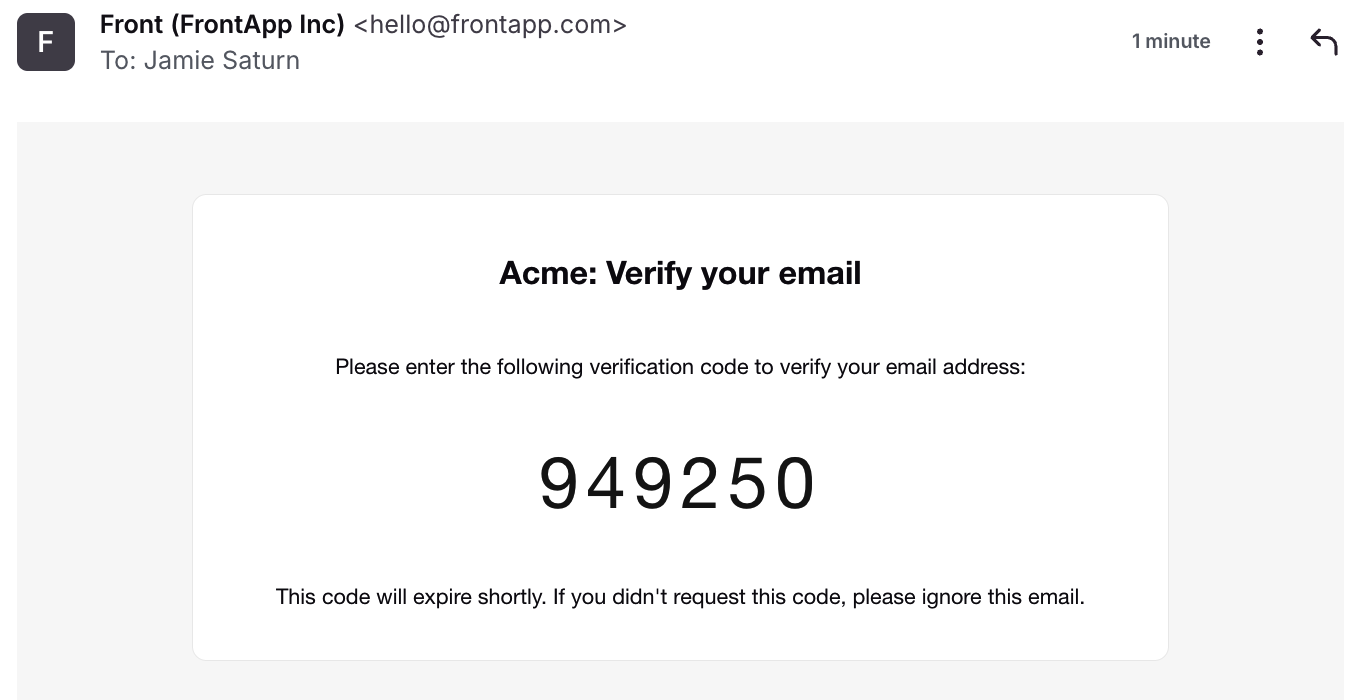
Navigate to your email, then copy the verification code to paste into the portal.
Step 4
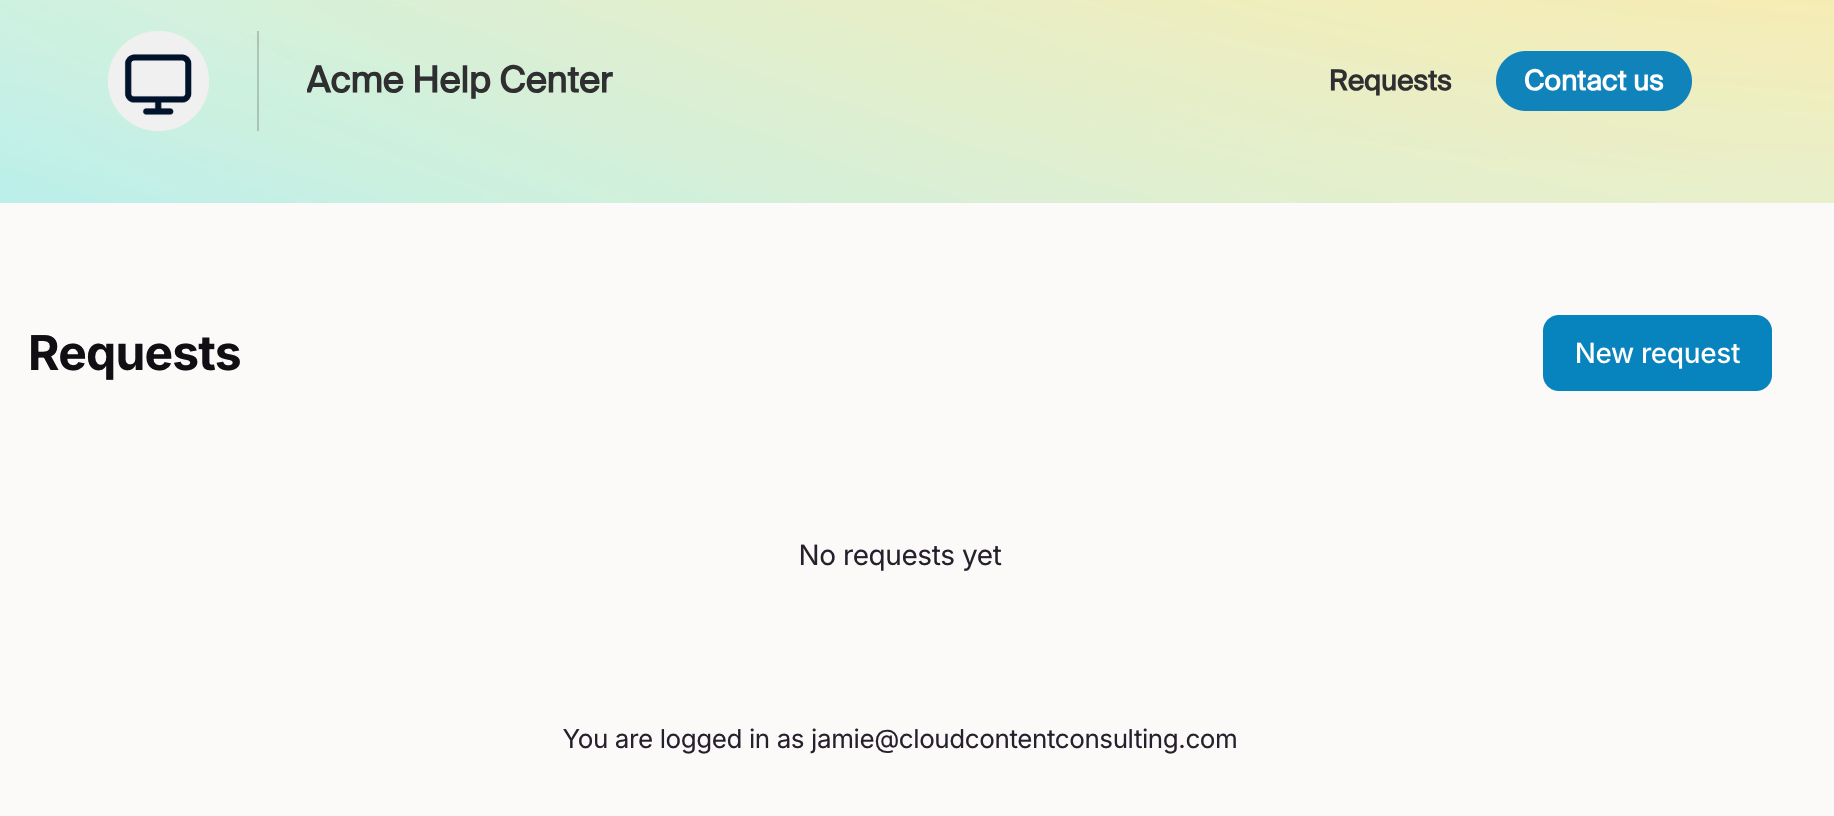
Once logged in, you can submit new requests or check on existing ones.
Access sharing
Once you submit a request, you can share it with other users who need access.
Step 1
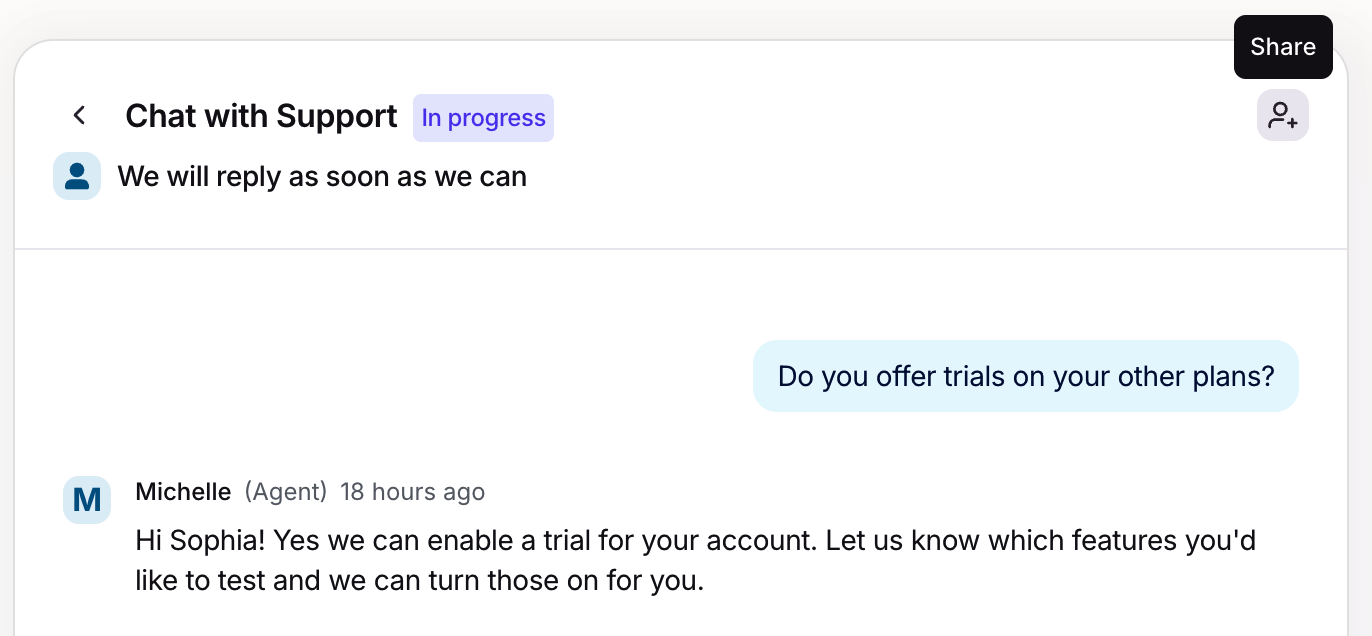
Navigate to the request you want to share, then click Share.
Step 2
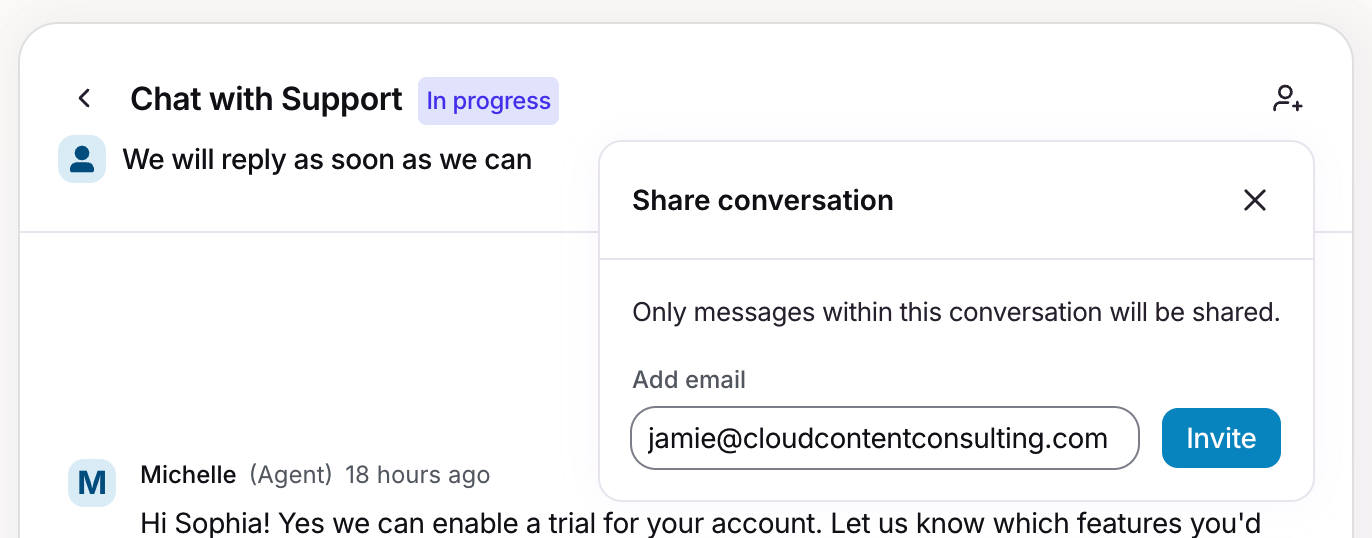
To share the conversation with a specific user, enter their email address in the pop-up, then click Invite. Repeat this step for every user you want to share the conversation with.
Step 3
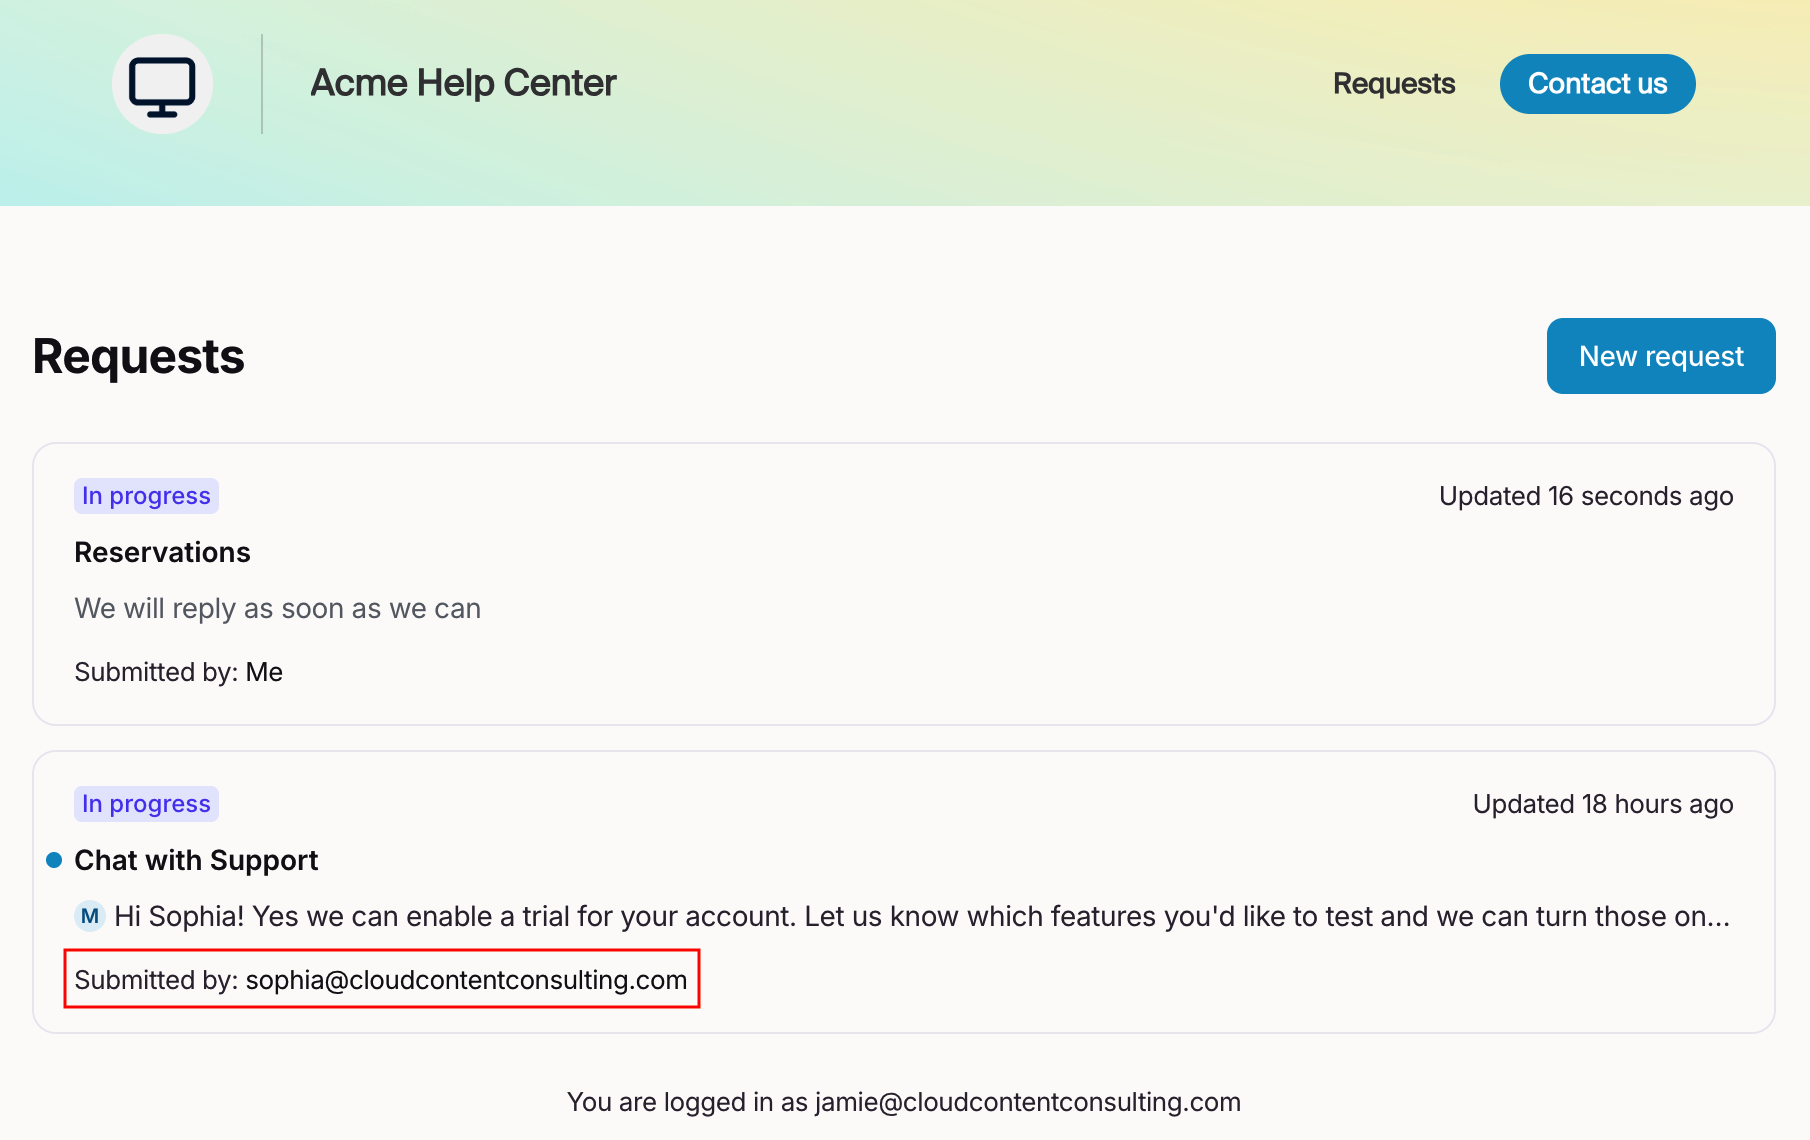
The conversation will be visible to other users when they log in to their portal accounts. You’ll also see their email address in the “Submitted by” field under the conversation.
Step 4
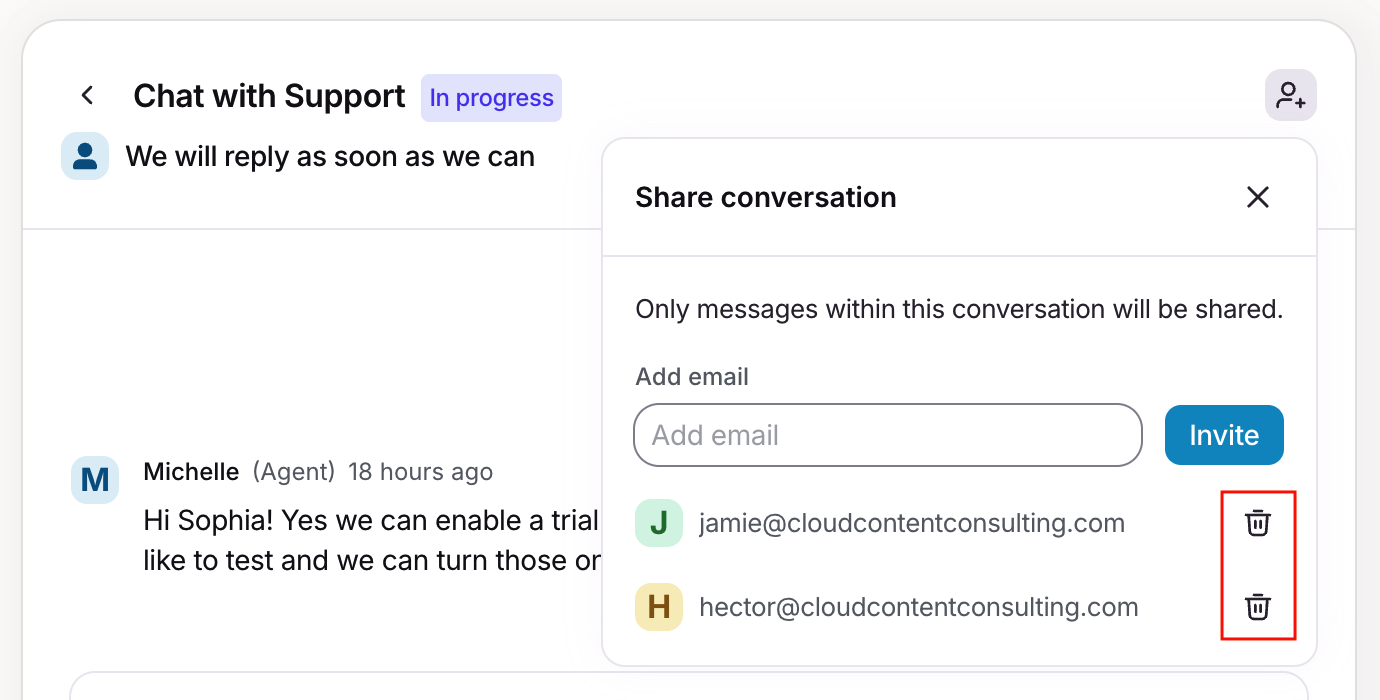
To remove access to a request you’ve submitted, click the Share icon in the conversation, then click the trash can icon next to the user you’d like to remove.
FAQ
How many Resolve channels can I set up in my help center?
You can set up one Resolve channel per help center.
What if a conversation is trashed?
The conversation is moved to the Trash tab in Front, and will no longer be displayed in the portal. A Front teammate can restore the conversation if needed.
Can visitors see requests from other people in their organization?
Unless a user from the same organization shares their conversation with you, visitors will only be able to see requests they personally submitted, or that a Front teammate submitted on their behalf.
Can visitors choose a default setting for access sharing across all conversations?
Not at this time. Access sharing is managed on a per-conversation basis.
Can teammates see access sharing permissions on conversations?
Not at this time. Front teammates only see the information from the visitor who submitted the request.
What happens if I delete my Resolve channel?
Customers will see an error when they visit the Requests page in your help center.
Any existing Resolve conversations are still accessible internally in your Front inbox.
If you connect a new Resolve channel, old Resolve conversations will not automatically be associated with the new channel.
Pricing
See the Resolve article for more information.