
Custom ticket statuses and ticket status groups
Overview
Set up custom ticket statuses to tailor Front’s ticketing experience to match your team’s specific business processes. Use statuses like “Waiting for Approval” or “Waiting for Finance” for more granular tracking within the default Open, Waiting, and Resolved statuses. You can also set up ticket status groups like “Support team statuses” or “Sales team statuses” to control and bulk modify which statuses agents can use in different inboxes.
This article assumes you are familiar with using ticket statuses.
You must be a Front company admin to manage ticket statuses in company preferences. Both company admins and workspace admins can manage ticket statuses in inbox settings.
How it works
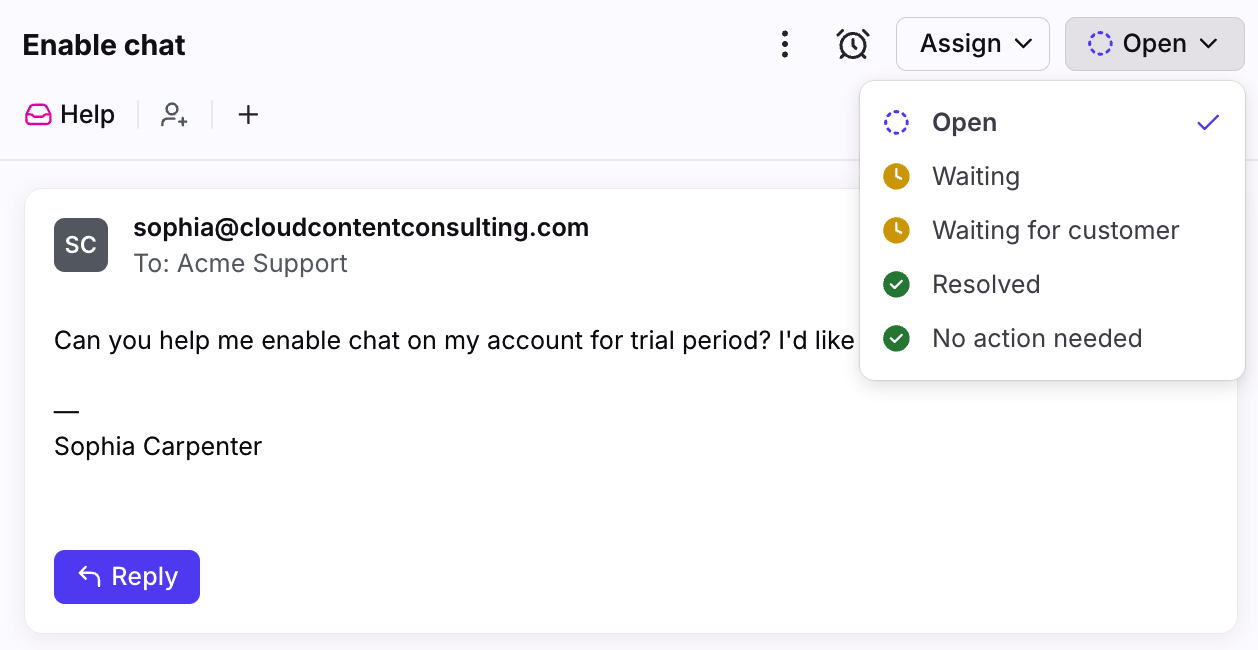
When custom ticket statuses are configured, teammates can select them in the conversation status bar.
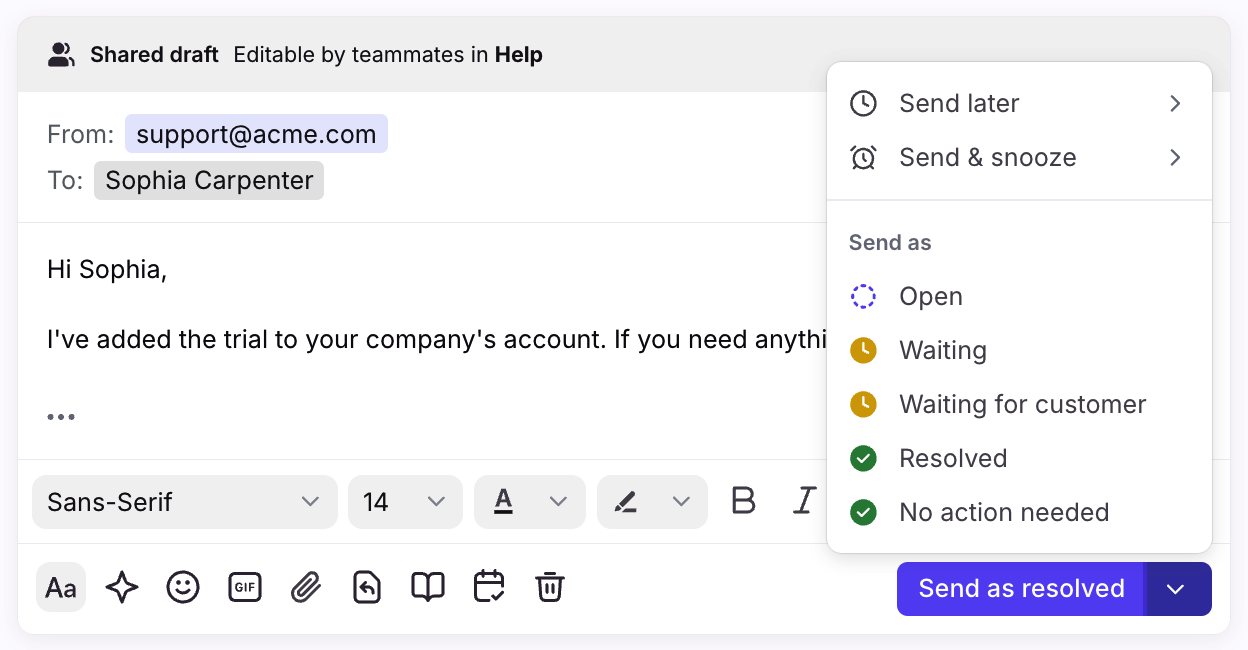
Teammates can also select the appropriate status when sending a message using the composer.
Creating statuses
Step 1
Click the gear icon and navigate to your company settings tab.
Step 2
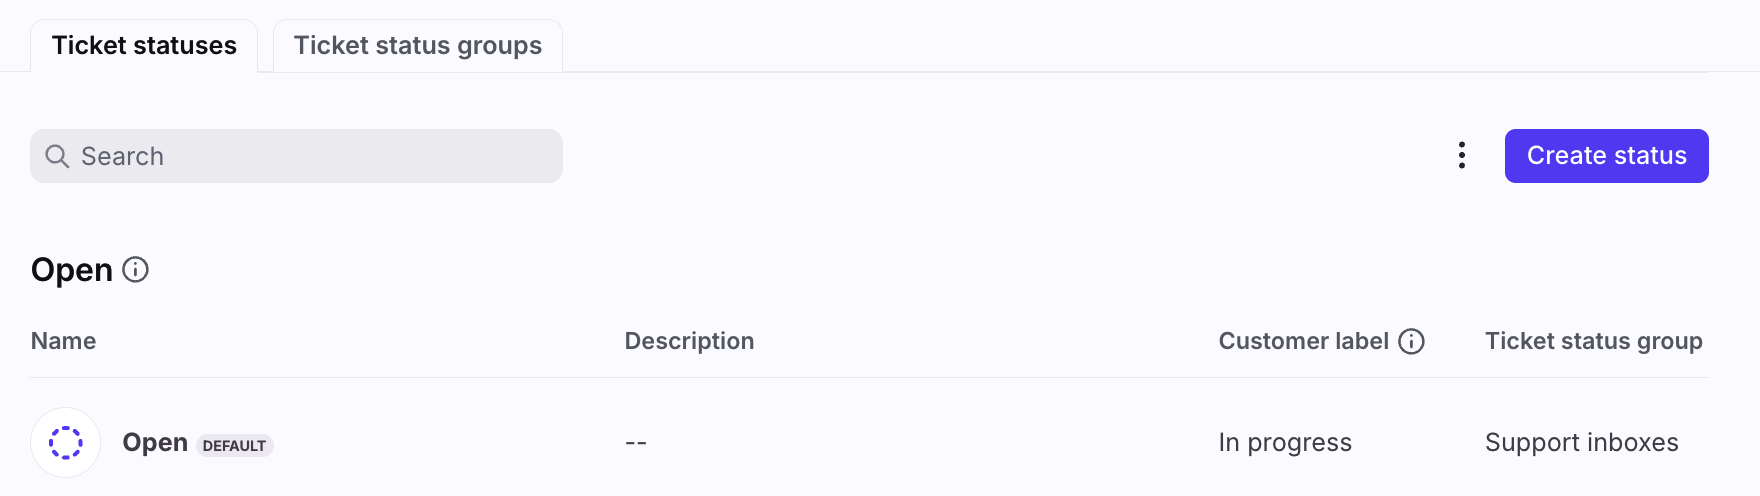
Select Ticketing in the left sidebar, then click Create status in the Ticket statuses tab.
Step 3
Fill in the following fields:
Category: Choose whether the status is considered Open, Waiting, or Resolved. This cannot be changed after the status is created.
Name: Enter the name displayed in shortcut buttons and inboxes.
Description (optional): Explain when agents should use this status. This description will display in the tooltip for your team.
Customer label (optional): If you're using Front's customer portal, enter the name displayed to customers when they view their tickets.
Set as default for reopen (for Open status only): Check the box for “Set as the default for reopened conversations” to assign this status to a conversation when it reopens.

Step 4
Click Save when finished. The status is now available in your ticketing inboxes.
Creating ticket status groups
Prerequisites
You must enable ticket statuses in your inbox settings and set up custom ticket statuses.
Step 1
Click the gear icon and navigate to your company settings tab.
Step 2
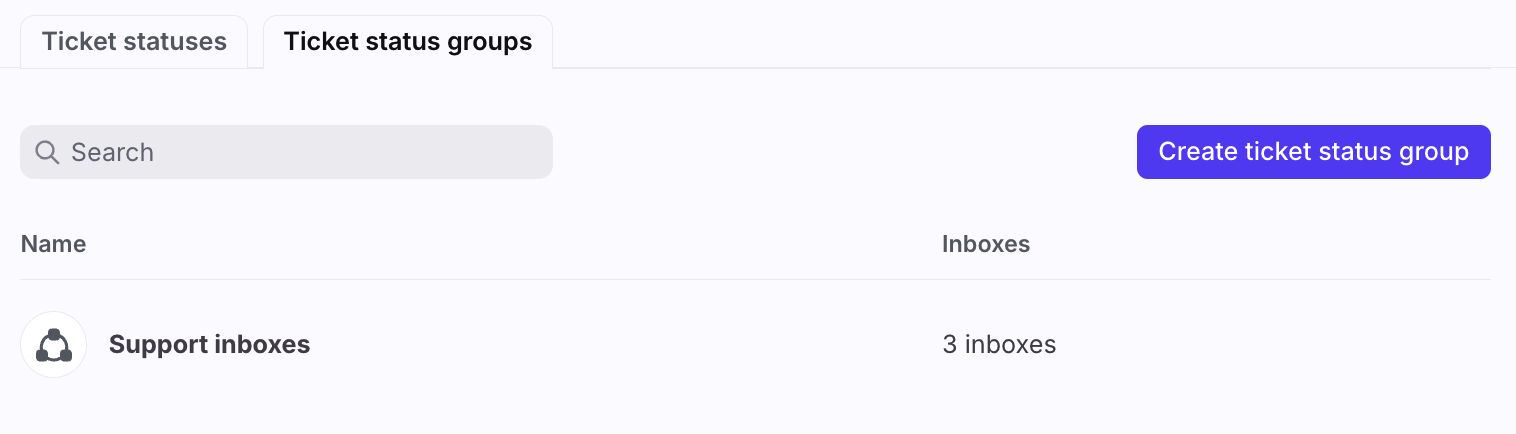
Select Ticketing in the left sidebar. Select the Ticket status groups tab, then click Create ticket status group.
Step 3
Fill in the following fields:
Name: Enter the name of the ticket status group.
Ticket statuses: Select up to 10 ticket statuses to include in the group. You must select at least one status per category (e.g. one Open, one Waiting, one Resolved).
Show in: Select the inboxes the group should be assigned to. If you don’t see the inbox you’re looking for, make sure the inbox has ticketing enabled.
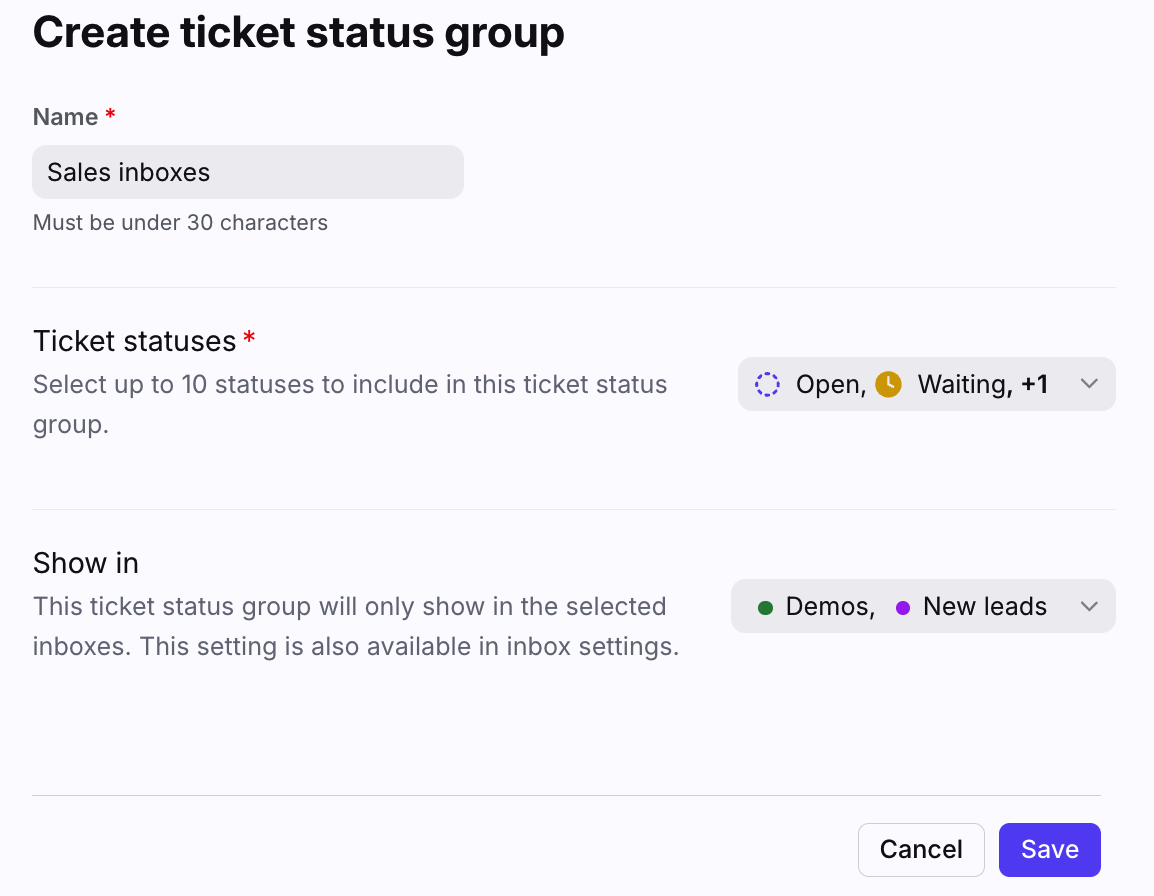
Step 4
Click Save when finished. The ticket statuses in your group are now available in the selected ticketing inboxes.
Managing statuses
Hover over a status, click the three-dot menu, then select one of the actions. You can also click directly on the status to access the editor.
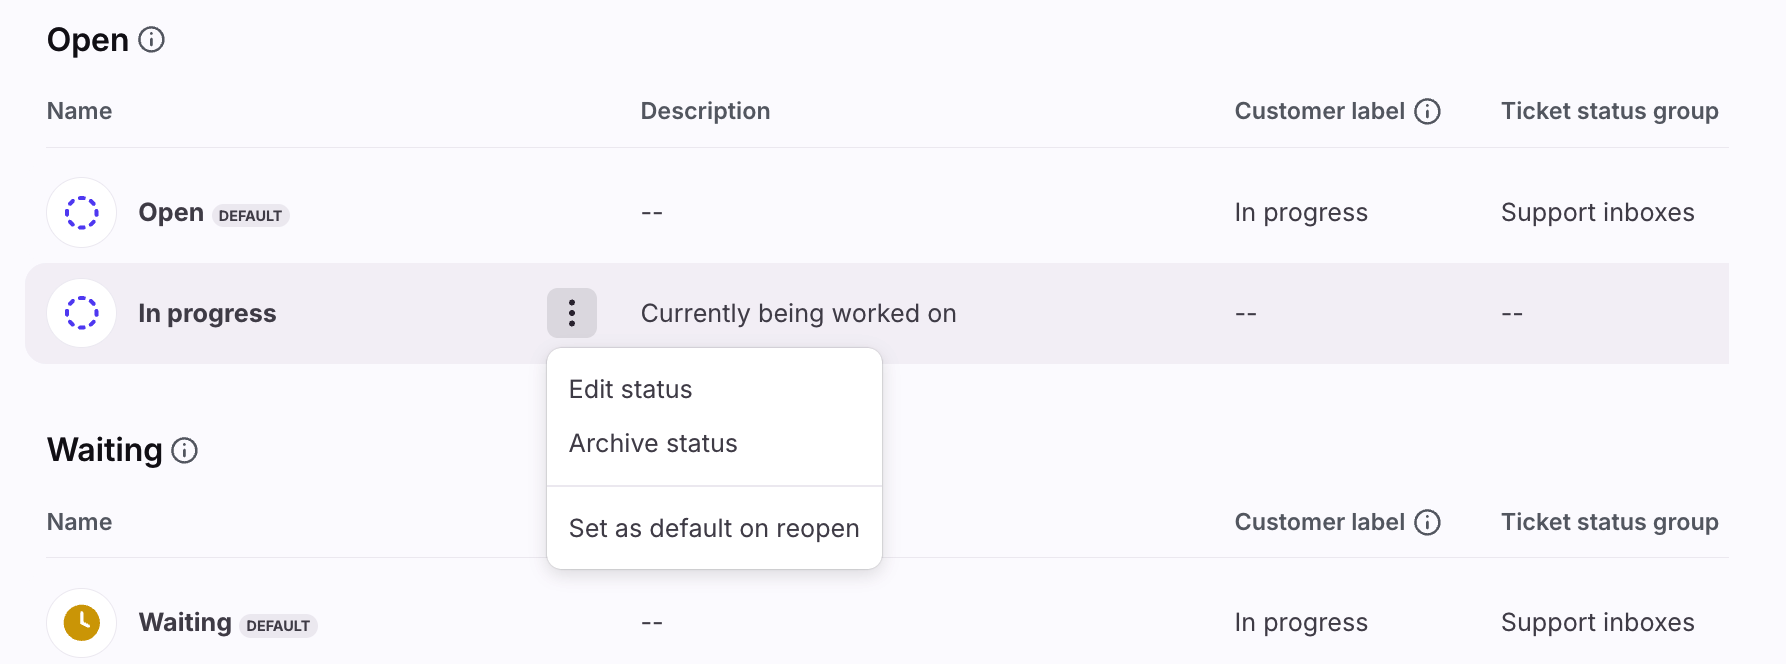
Archiving statuses
If you archive a status, you’ll see a pop-up to confirm the resulting actions.
Default statuses cannot be archived.
A custom ticket status cannot be archived if it’s selected in a ticket status group.
To archive a custom ticket status, you must remove the status from all ticket status groups.

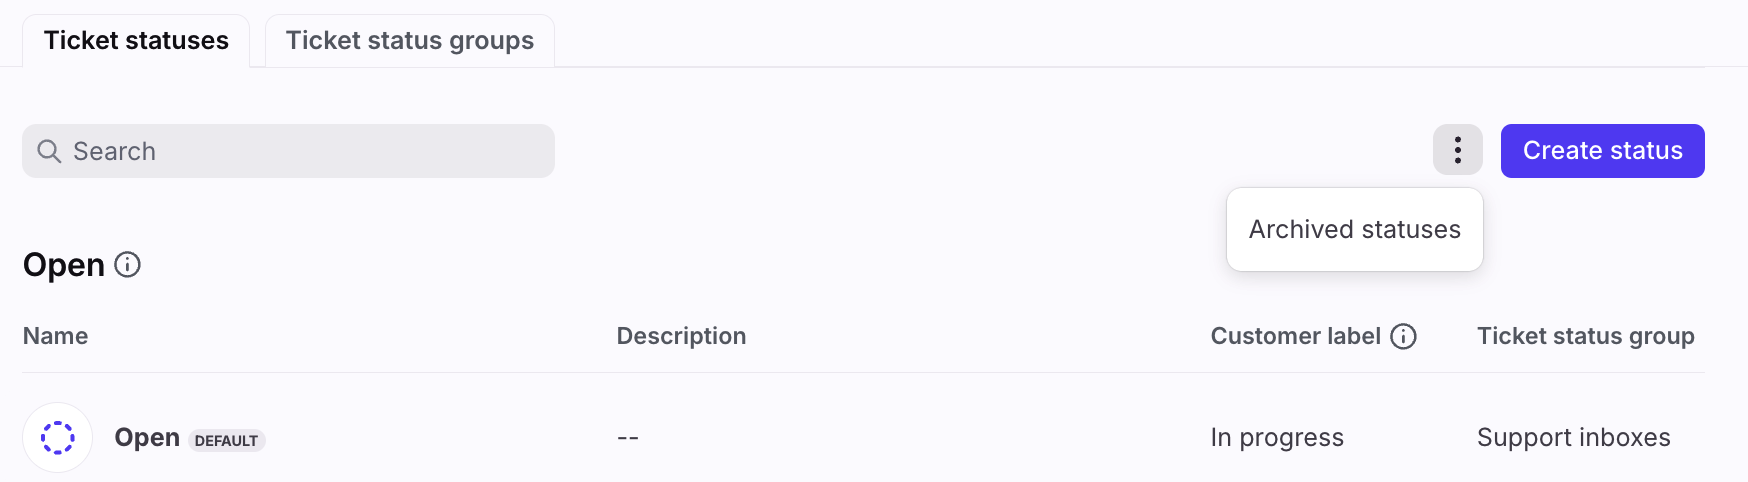
Restoring statuses
To restore a status, click the three-dot menu in your list of statuses, then select Archived statuses. Hover over the status you want to restore, click the three-dot menu, then click Restore status.
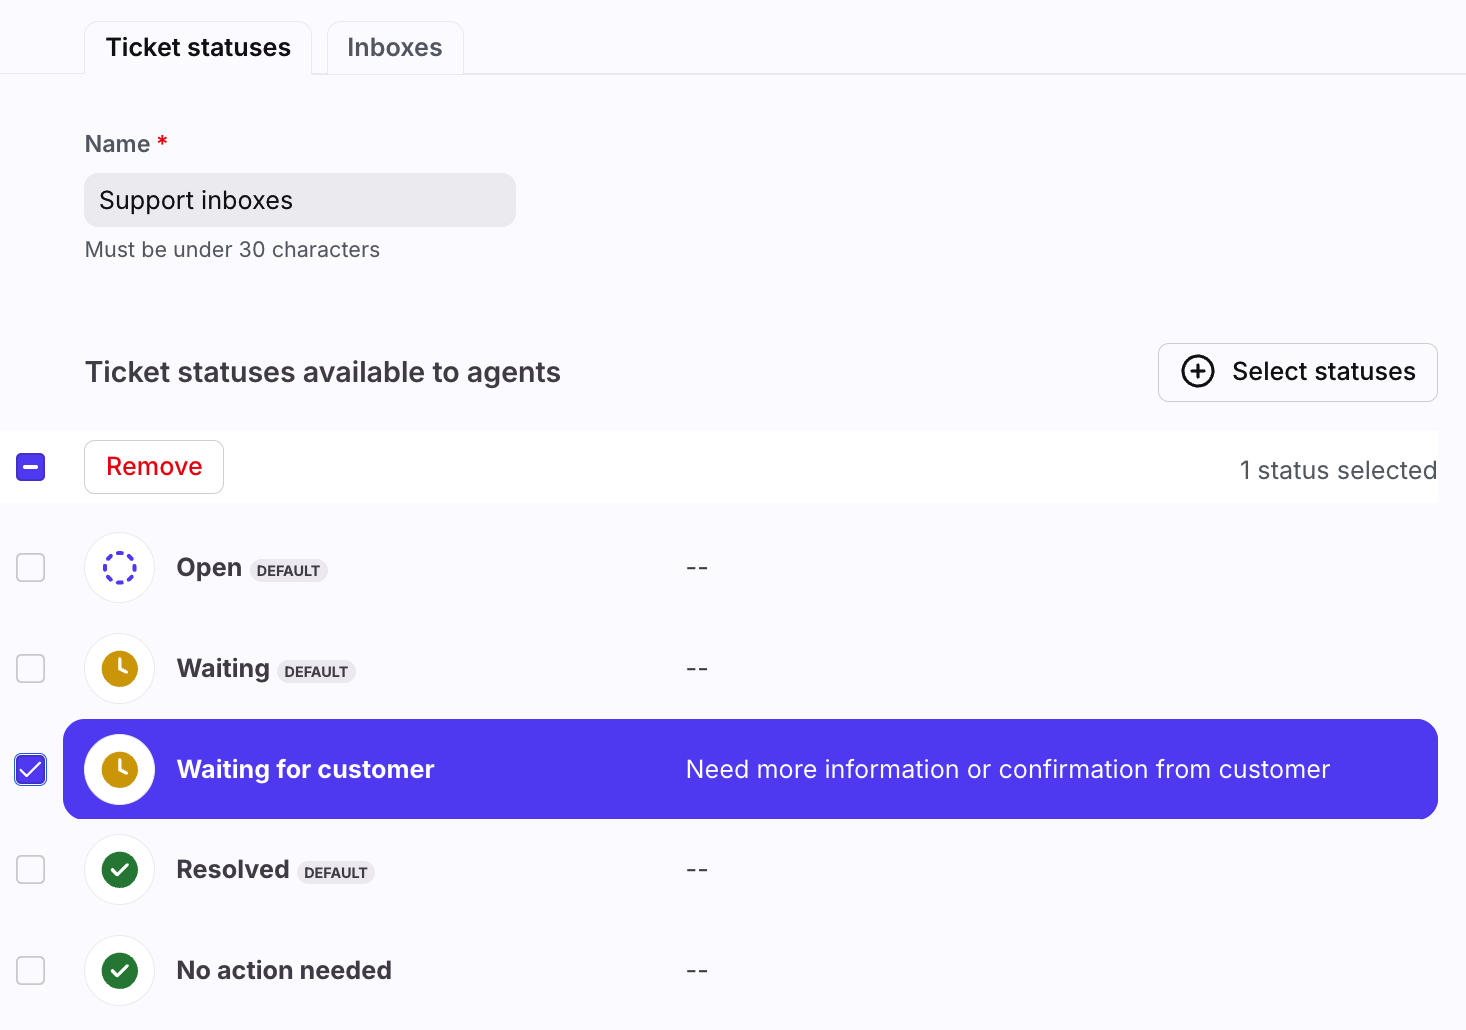
Managing ticket status groups
Editing ticket status groups
In your ticket status group settings, you can add or remove ticket statuses or inboxes to the group at any time. Each category must have at least one status selected.
Deleting ticket status groups
Select Delete status group inside your group settings, then click Delete permanently to remove it. This action cannot be undone.
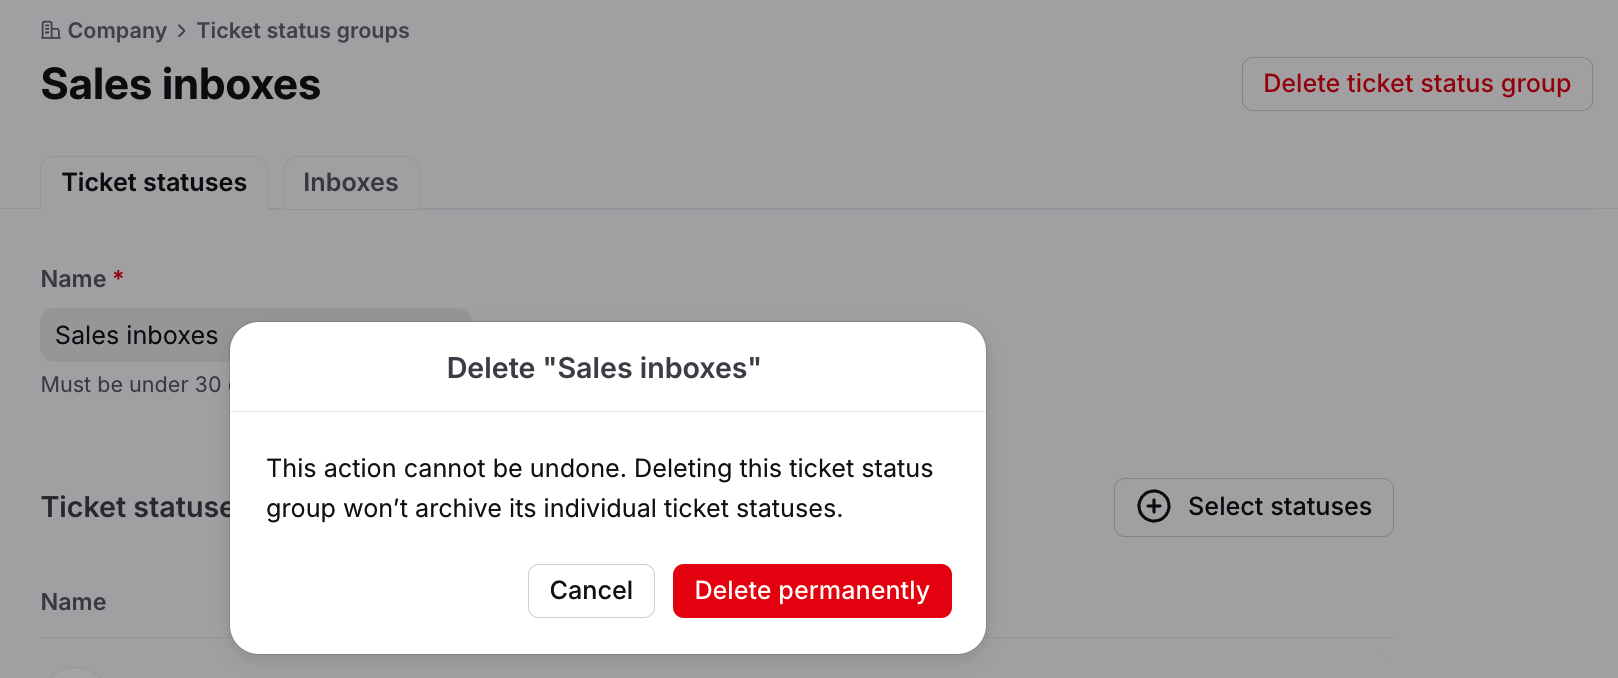
A ticket status group cannot be deleted if it’s selected in an inbox’s ticketing settings. To delete a ticket status group, you must remove the group from all inboxes.
Best practices
To ensure agents only see the custom ticket statuses that apply to their workflows, we recommend following these best practices.
Set up a “default” ticket status group
When setting up custom ticket statuses and ticket status groups for the first time, decide if you are likely to create many ticket status groups that require a lot of customization. If so, create a “default” ticket status group with the default statuses every inbox should use, then apply it to all ticketing inboxes. This ensures that agents do not see every custom ticket status each time you add a new status.
Determine which inboxes use default statuses vs. custom statuses
Check which inboxes have ticket statuses enabled, then determine which ones need to use custom statuses or default statuses. For example, the Support team has a workflow that uses a custom “Waiting for customer” status, but the Finance team only needs to use the default Open/Waiting/Resolved statuses.
Group inboxes that use the same custom statuses
Group together the inboxes that will use the same custom statuses so you can apply the same ticket status group to all of them. This keeps your ticket status group list tidy and prevents duplicating work.
FAQ
Are there ticket status limits?
Yes. You can have up to 10 active statuses in your company preferences.
Can I rename the default statuses?
No. You must have the default labels and descriptions for Open, Waiting, and Resolved statuses at this time.
Can I reorder my ticket statuses?
Not at this time. Tickets are ordered alphabetically within each category sorted by Open, Waiting, then Resolved.
Do I need to select a ticket status group for every ticketing inbox?
No. However, if a ticketing inbox does not have a ticket status group selected, agents will see all custom ticket statuses configured for the company in their conversations.
Pricing
This feature is available on the the latest plans. Custom ticket statuses in customer portal and ticket status groups are available on the Professional plan or above.