Collect teammate answers to power up macros
Overview
Macros can be configured to gather input from teammates through a form, allowing you to utilize these values in conditional branching, macro actions, and as inputs to application requests. Admins can require teammates to write summaries, set priorities, etc. to help macros take appropriate actions.
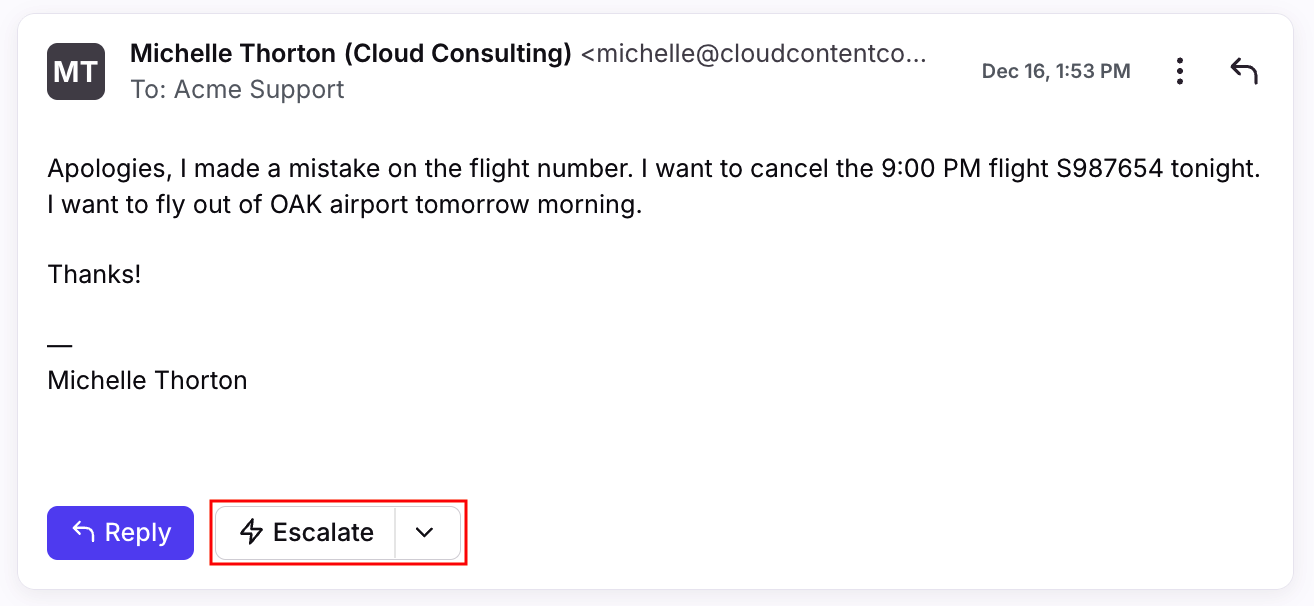
This is especially useful when enforcing an escalation workflow: you can ensure required fields are filled out before escalations occur.
Creating your macro
The following steps assume you’re familiar with creating macros.
Step 1
Create a new macro, or navigate to the macro you’d like to edit.
Step 2
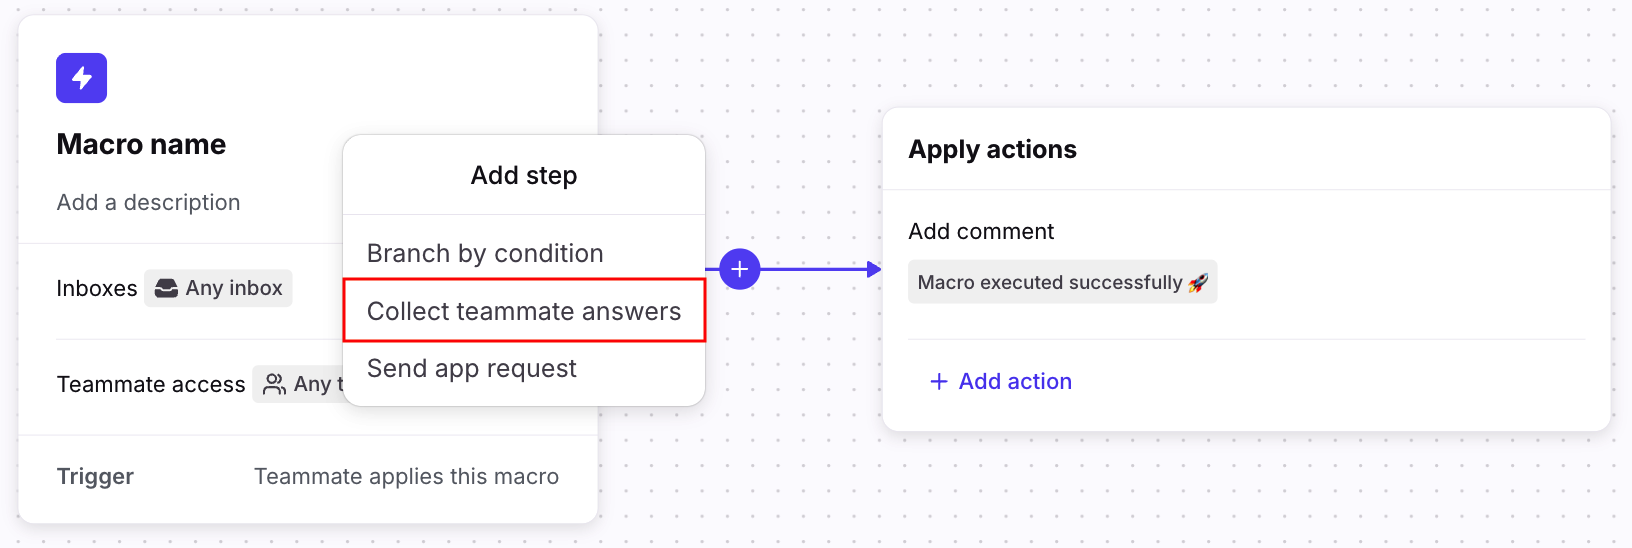
Click the (+) plus sign to add a step to your macro, then select Collect teammate answers.
Step 3
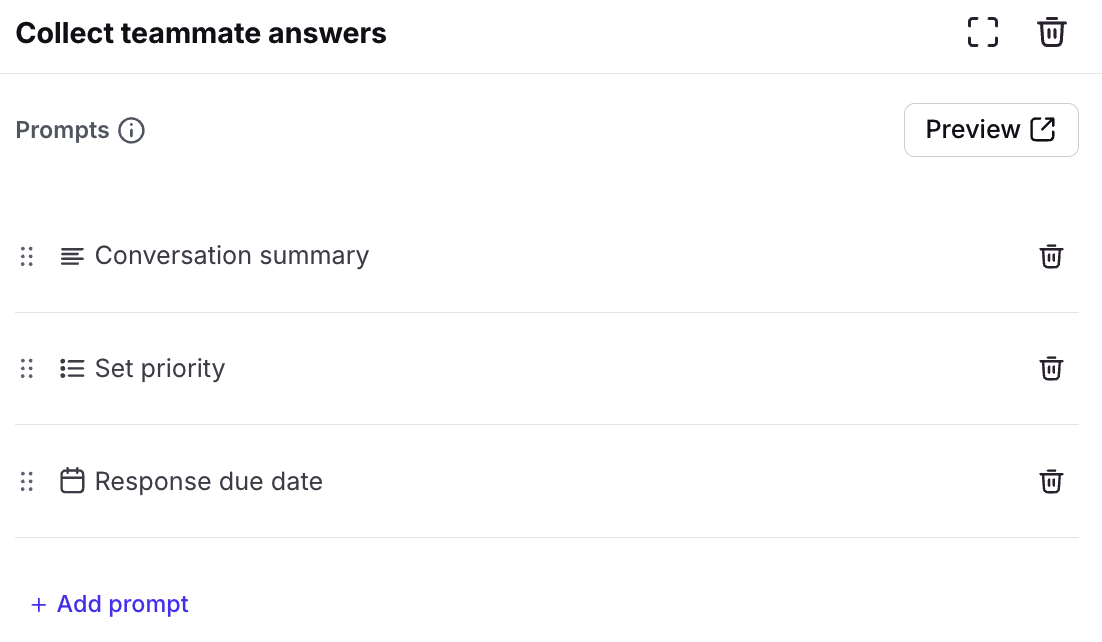
Click Add prompt, then enter a name and description for the prompt shown to teammates after they trigger the macro.
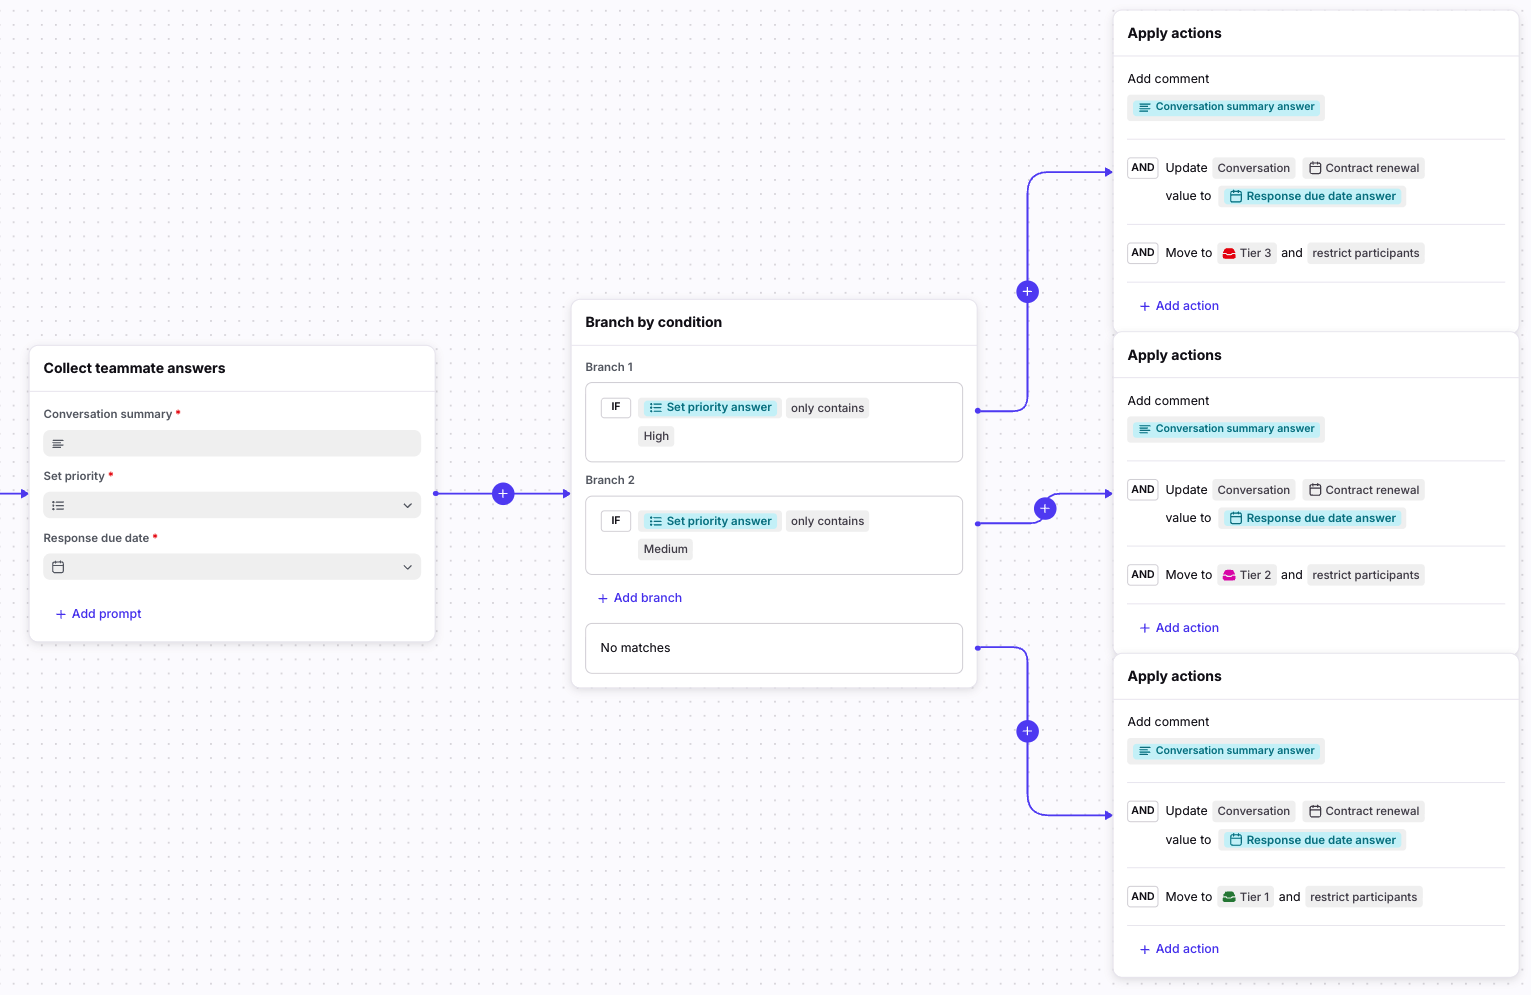
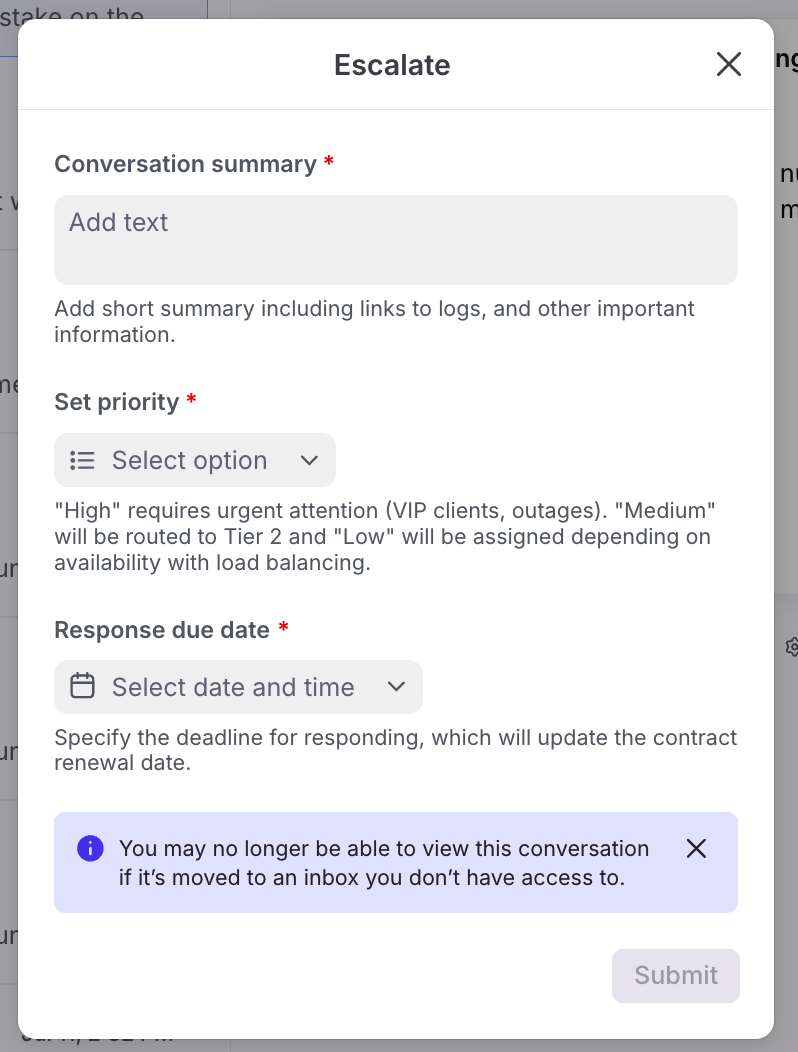
In this example, we want users to enter a text summary (free text), set a priority (dropdown), and enter a response due date (date and time) when triggering an escalation. Below is an example of the “Conversation summary” prompt.
Step 4
Click Done to add the prompt to your macro. Click Add prompt to add additional prompts as needed.
Optional: Click Preview to see how your pop-up will look when triggered by the macro.
Note: Each of these prompts automatically creates a dynamic variable in your macro. Follow the steps below to leverage them in your conditions and actions.
Step 5
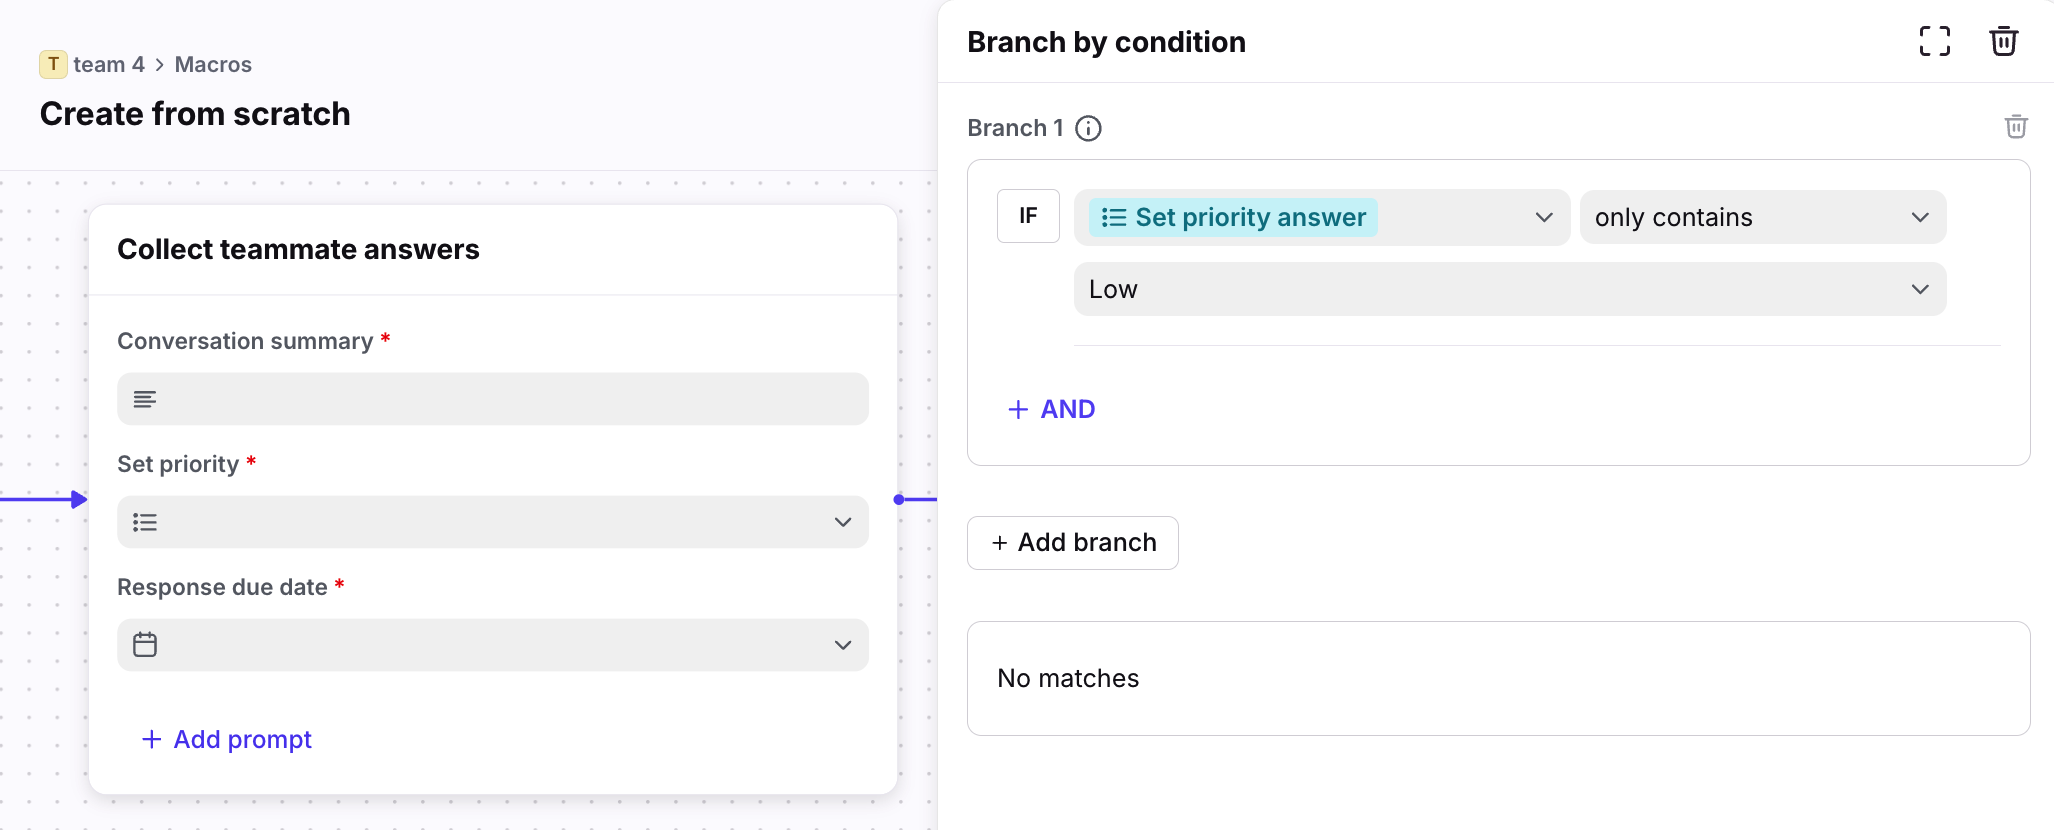
Next, click the (+) plus sign in the flow builder and select Branch by condition to add a new step.
Step 6
Select the prompt you want to branch on in the Dynamic variable matches condition.
In this example, we’ll create branches based on the “Set priority” prompt.
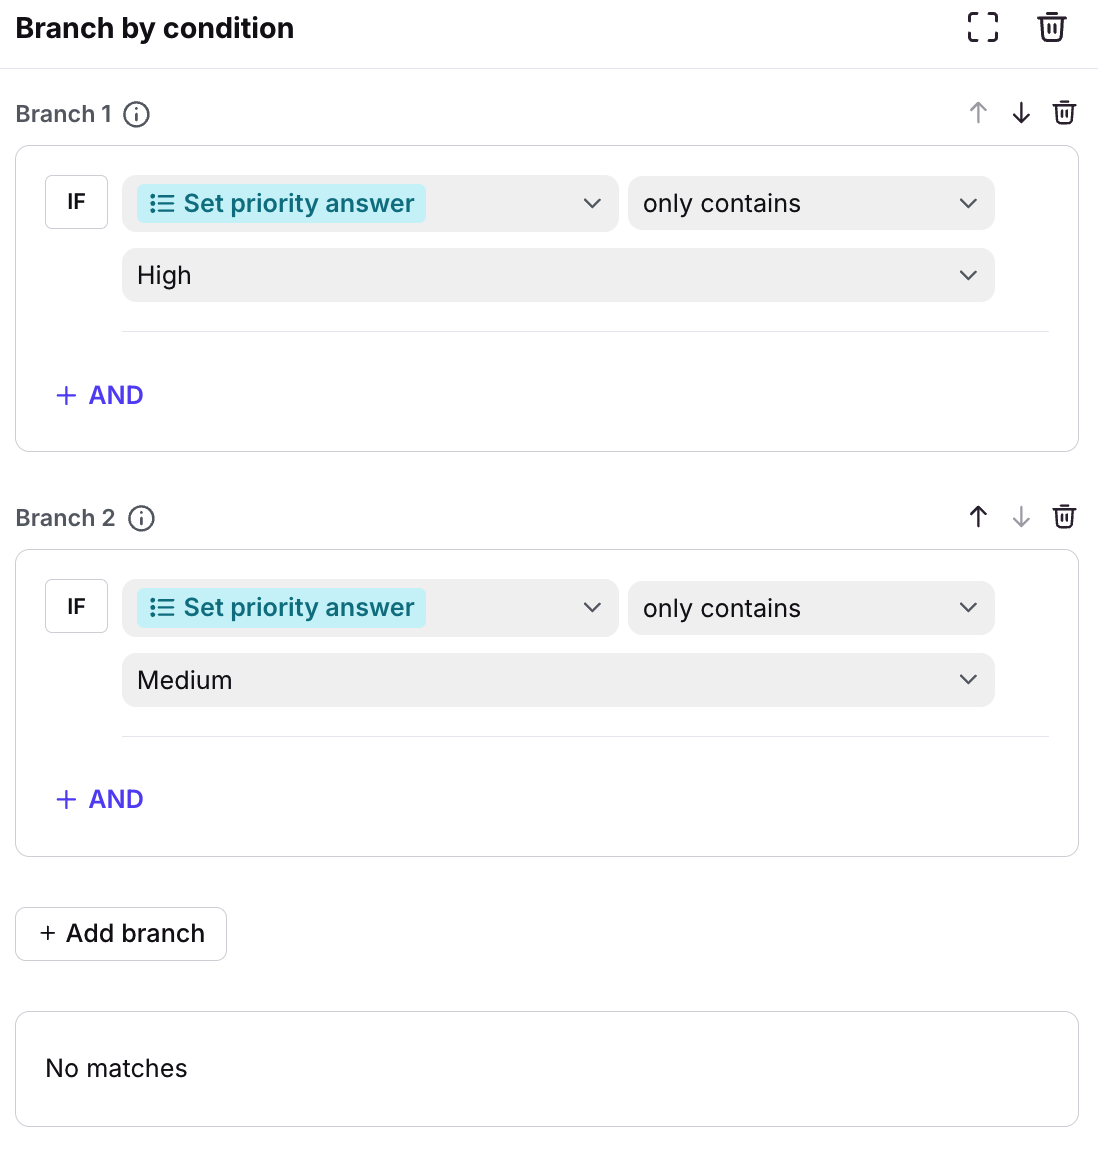
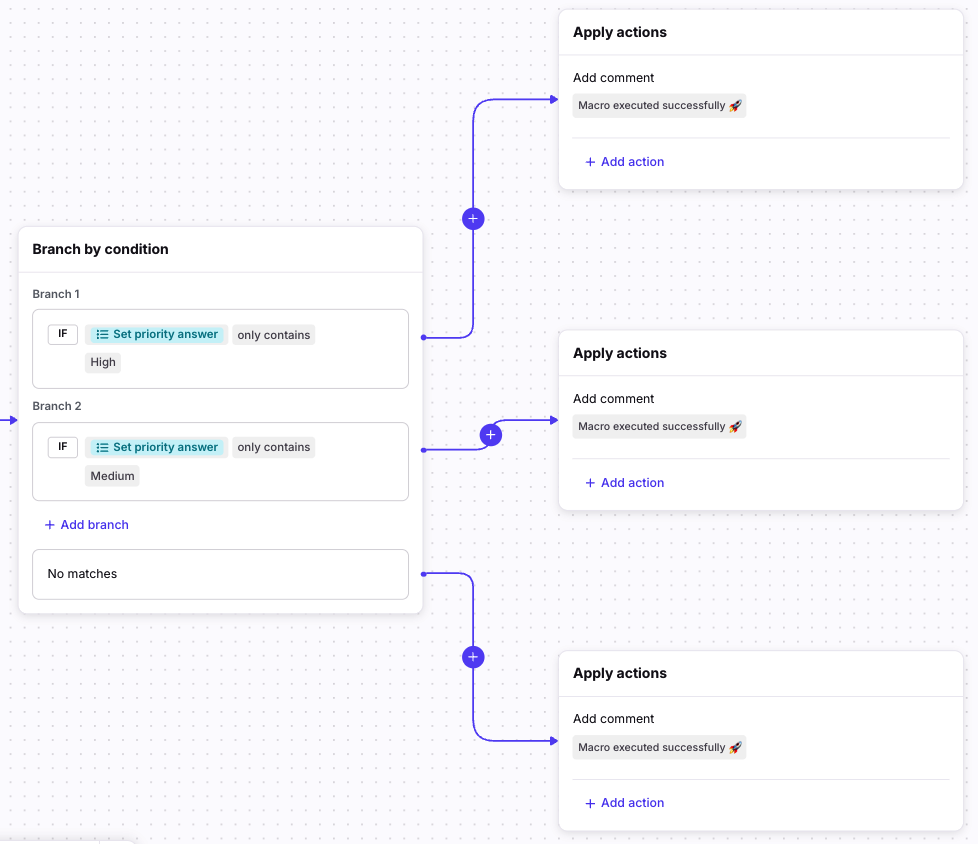
We set up three branches based on what is entered in the “Set priority” field: High, Medium, or no matches.
Step 7
Once your branches are set up, click Add action to modify the actions the macro should take when it is triggered.
Step 8
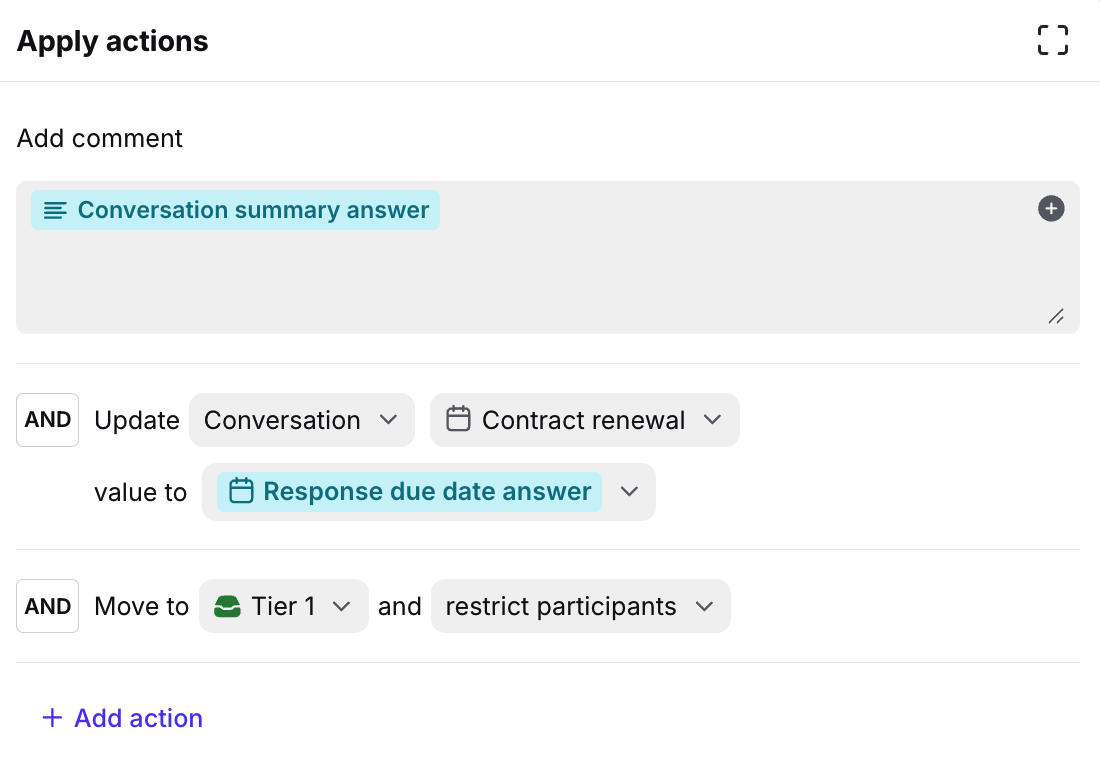
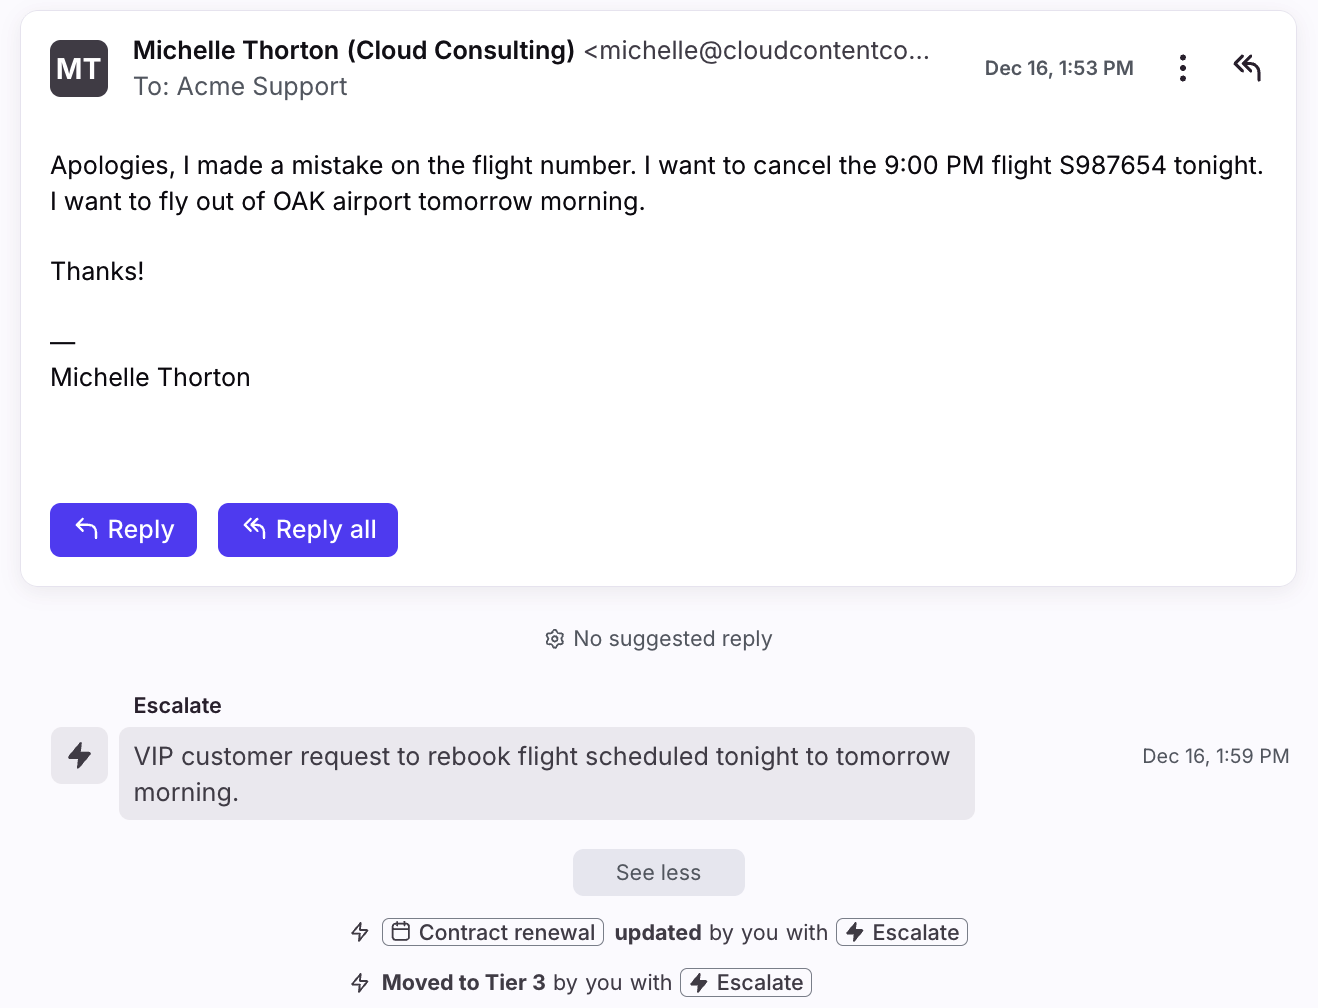
In this example, if the “Set priority” prompt value is “High”, we want the macro to:
Add a comment with the value entered in the “Conversation summary” prompt.
Update the “Contract renewal” conversation custom field with the value entered in the “Response due date” prompt.
Move the conversation to the Tier 1 inbox.
Step 9
Continue to add actions to the remaining branches as needed.
Step 10
Click Create when finished.
Using your macro
Step 1
Navigate to the conversation you’d like to use a macro on, then select the macro to trigger it. To review how to use macros, see this article.
Step 2
A pop-up will appear with prompts required for the macro to take action. Fill in the fields and click Submit.
Step 3
Once all actions have completed, you’ll see a confirmation banner at the bottom of your screen. Teammates can see which macros were applied to a conversation in the conversation’s activity history.
FAQ
Which input types are supported?
Macros support the following input types:
Date and time
Inbox
Number
Teammate (single select)
Text (free entry)
Yes or no (boolean)
Attachment
Dropdown (single select)
App object
Are all prompts required fields?
Yes. Users must select or enter in values for every prompt to successfully trigger the macro.
Pricing
This feature is available on the latest Enterprise plan.

