
Understanding scheduling links
Overview
Scheduling links are a feature of Front Scheduling that make scheduling meetings with anyone faster and easier. A scheduling link corresponds to a type of meeting you'd like to schedule, and you can create as many links as you'd like.
How it works
For example, a sales representative might create two scheduling links, one for sales discovery meetings, and another for product demo meetings. The sales rep can tailor each link to the type of meeting that's being scheduled. For example:
Link 1: Sales Discovery Meetings
Monday and Tuesday between 1pm and 5pm
Location: Phone call at 123-456-7890
Link 2: Product Demo Meetings
Wednesday and Thursday between 9am and 4pm
Location: Zoom conference
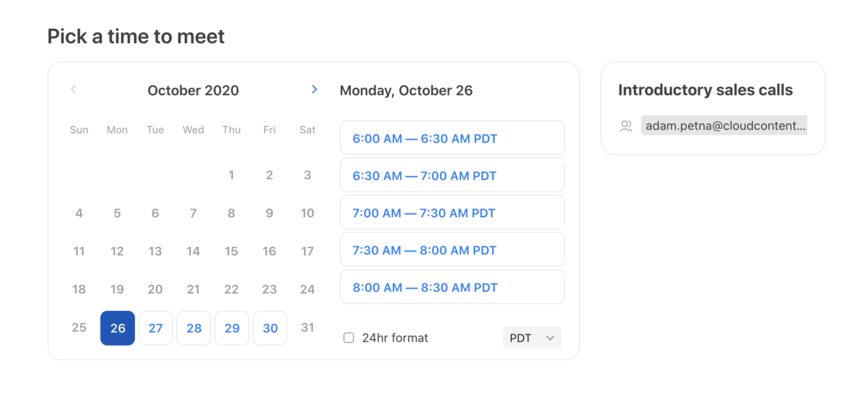
After creating a scheduling link, you can send its URL to anyone to allow them to schedule a meeting with you! Your participant can select a date and time up to 2 months in the future from the current date.
They'll see a booking page like this:
If your participant needs to reschedule, they'll see an instant rescheduling link in the calendar invite. Check out this article to learn more.
Note: You will need an individual inbox linked as either a Gmail or Office 365 account with two-way sync in order to utilize Front Scheduling.
Instructions
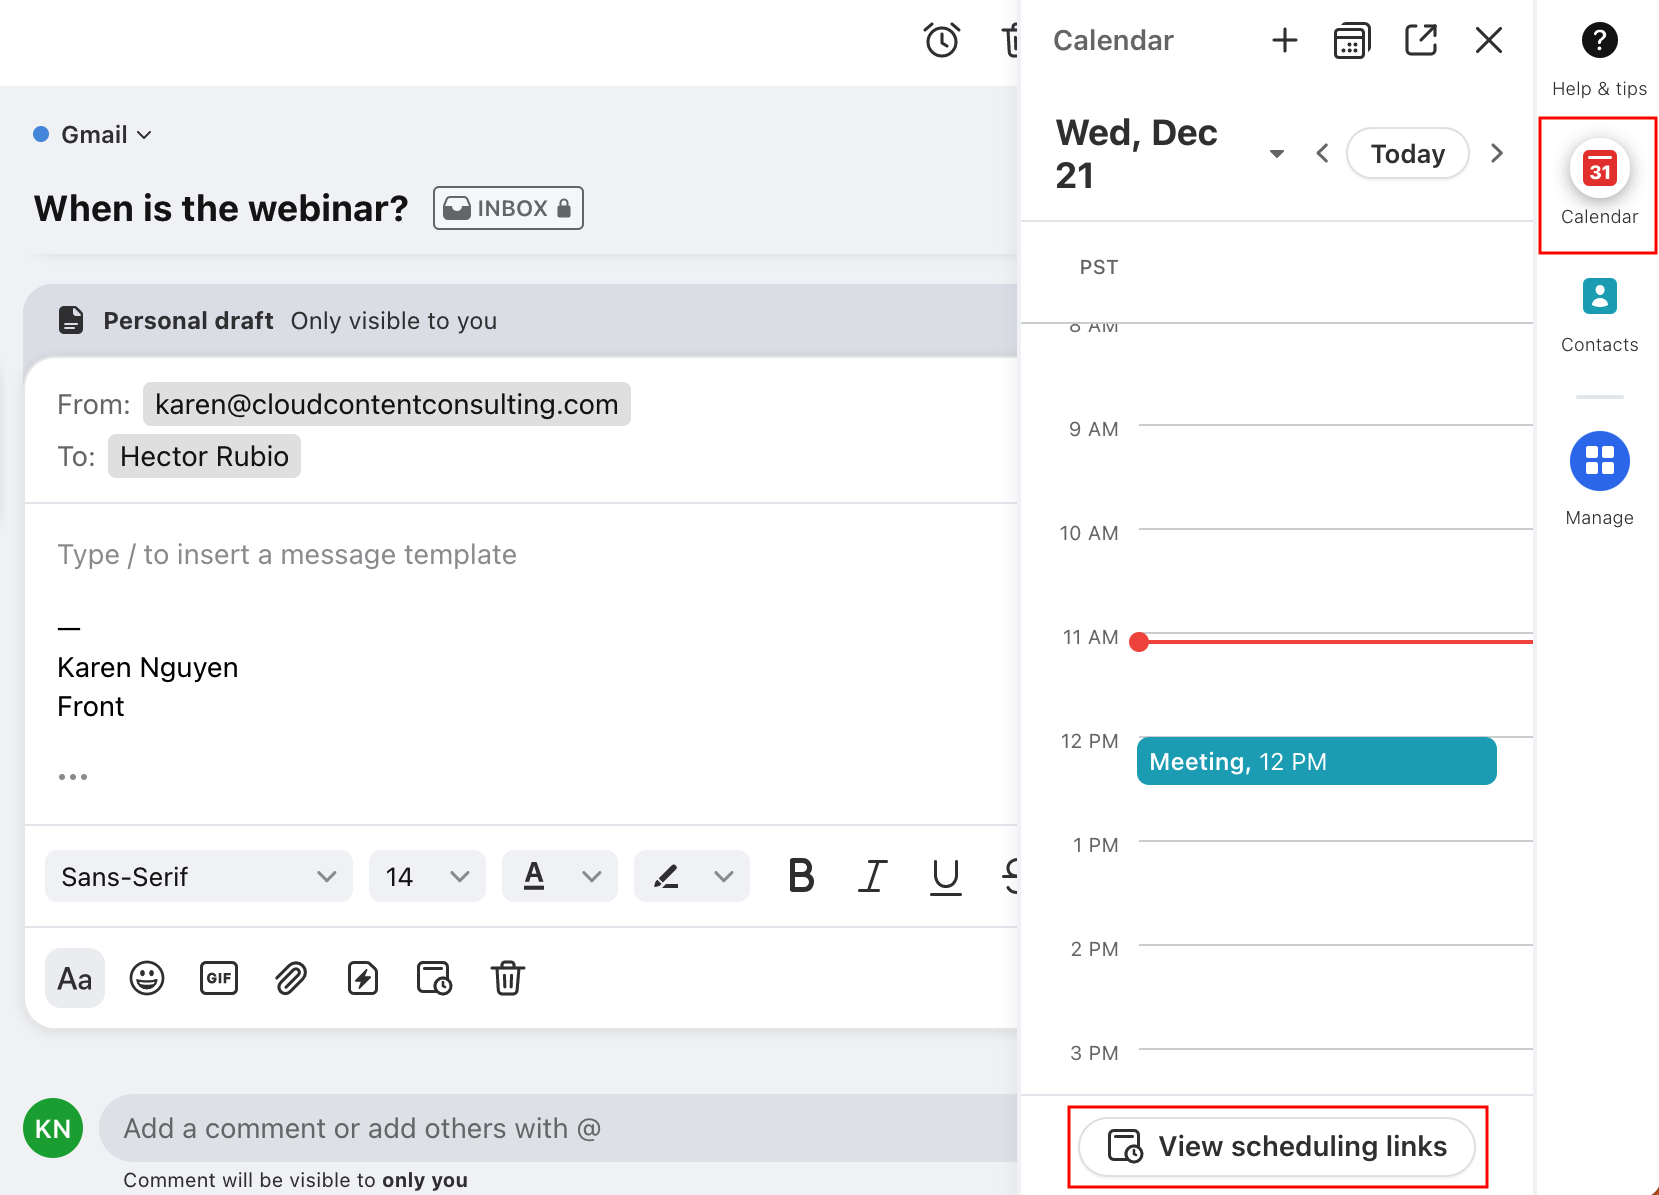
Step 1
Open the Calendar plugin on the right sidebar of Front and click the View scheduling links button.

Step 2
Click New scheduling link.
Step 3
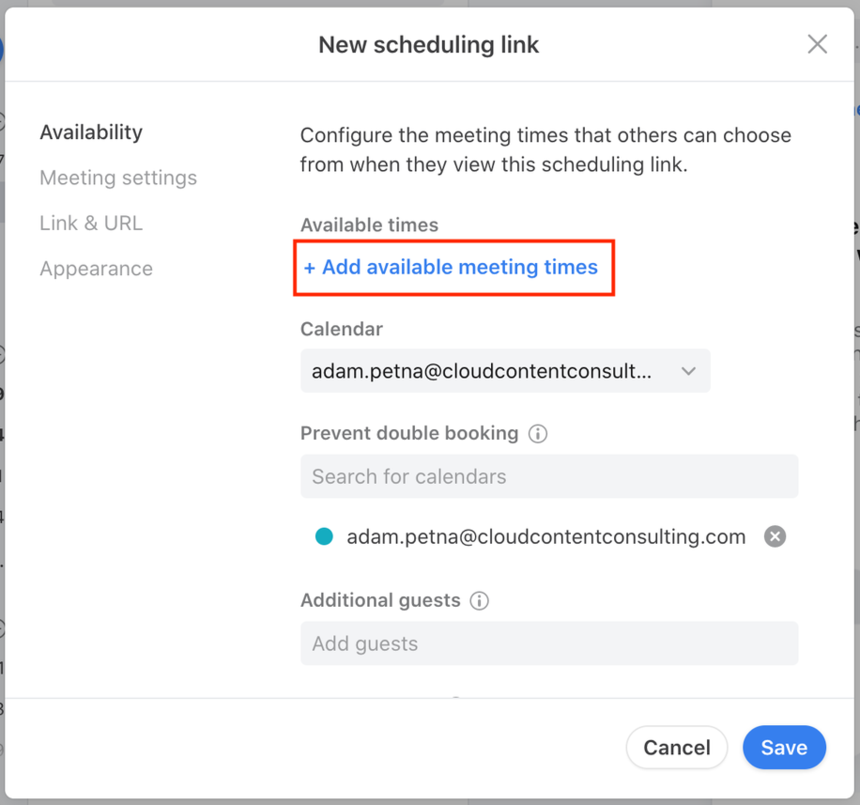
You’ll see a pop-up to create a new link. Click Add available meeting times to pick the times that you’d like to offer.
Step 4
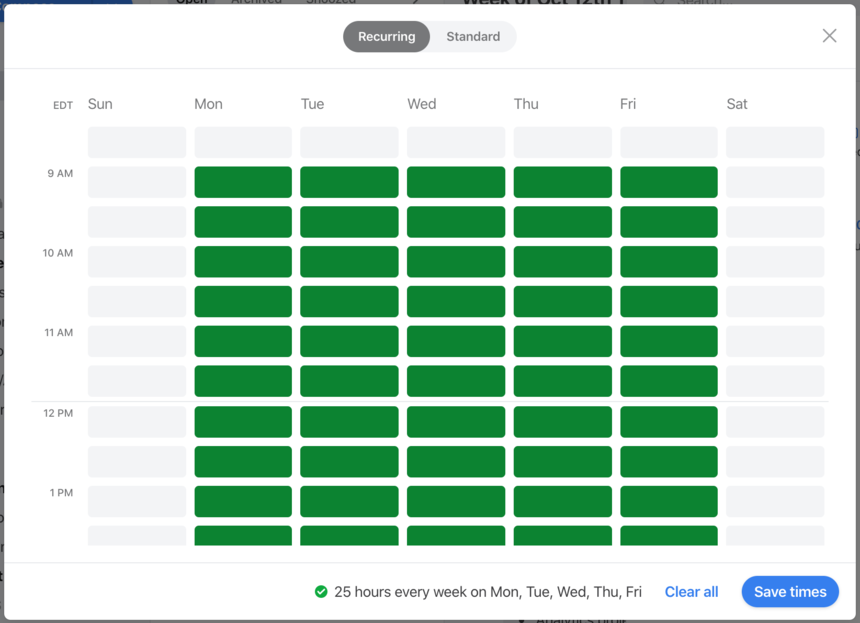
Here, you will choose either Recurring or Standard availability:
Recurring: Provide the same meeting availability week-to-week, such as every Tuesday from 9am to 4pm. To prevent you from getting double-booked, time slots will be automatically hidden from meeting requestors if times conflict with existing events on your calendar.
Standard: Specific time and dates in mind that are not recurring, such as June 20th, 2pm-4pm and June 22nd, 10am-12pm. You will see your calendar and be able to choose your desired times.
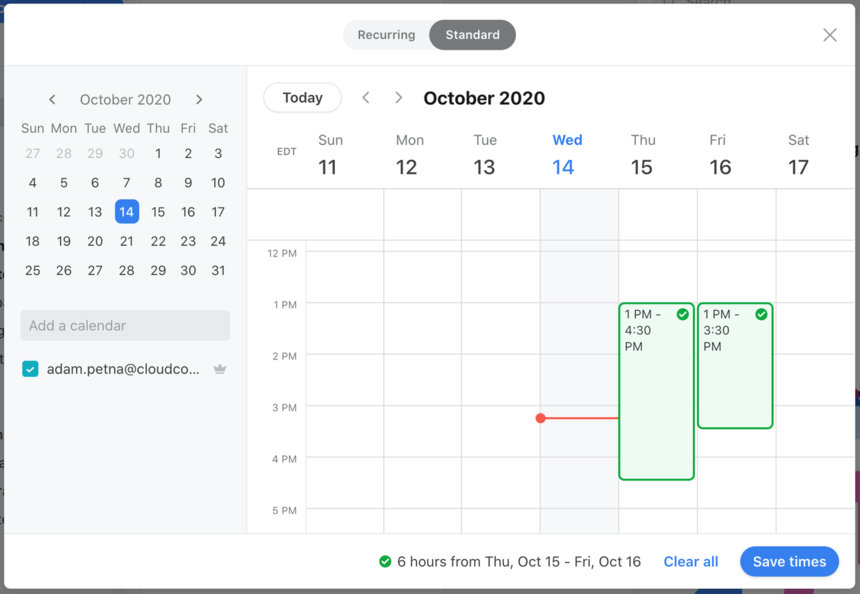
After selecting your desired meeting availability, click the blue Save times button on the bottom right corner to save your selections.
Step 5
While still in the Availability section, you can continue customizing your scheduling links availability with other settings:
Calendar: Controls the calendar that meetings will be added to. By default, this is set to your default calendar, which you can update by following instructions here.
Prevent double booking: Ensures that viewers of your scheduling link don’t see meeting slots that overlap with existing events on your calendar. By default, your default calendar will already be selected here, but you can also add or remove additional calendars to customize this behavior.
Additional guests: Allows you to automatically invite other people, such as a teammate, to meetings booked on your scheduling link.
Meeting buffer: Set a buffer time between meetings to prevent having meetings booked back-to-back.
Advance notice: Set an amount of time for advance notice before your meeting start time; people will not be able to book a meeting within your set time preceding a meeting, to prevent last-minute bookings.
Start time increments: Choose the start times presented to users for your scheduling link. Choosing 1 hour will start each meeting slot at the hour; choosing 30 minutes will start meeting slots at 1pm, 1:30pm; and so forth.
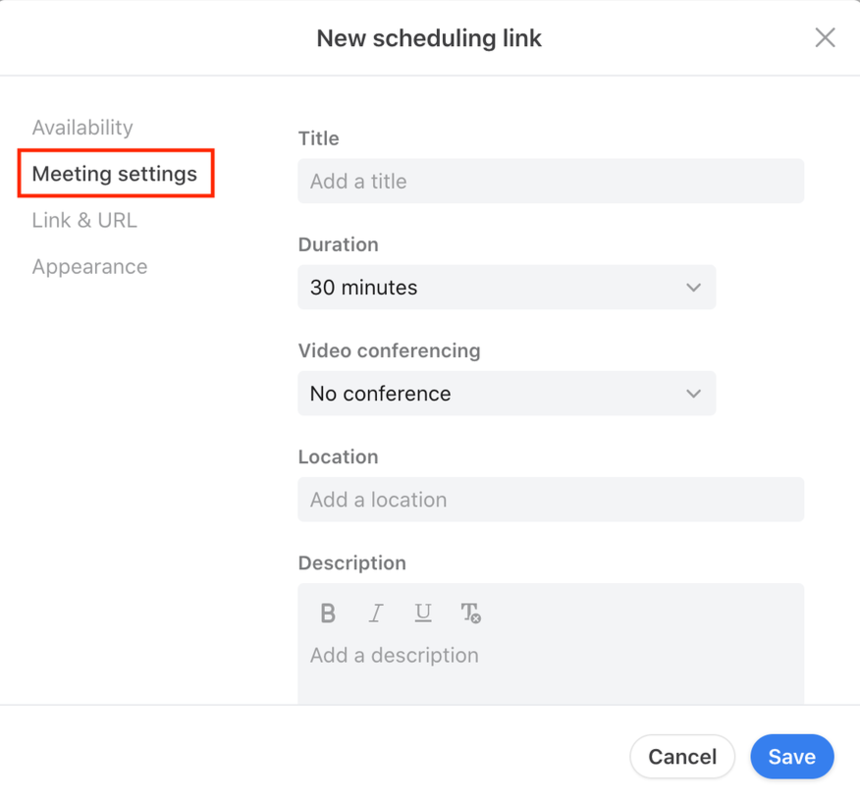
Step 6
In the Meeting settings section, customize the details of the calendar event that’s created after someone picks a time on your scheduling link:
Title: Add an event name. All calendar events booked with your scheduling link will use this title. If left blank, the title of the event will be "Your name / Guest's name".
Duration: Select the length of the calendar event.
Video conferencing: Add a video conferencing link to your meeting, if applicable. Zoom, Google Meet, Microsoft Teams, and Skype Meetings are supported.
Location: Enter a location for the meeting.
Description: Enter additional details for the calendar event.
Questions: Add questions that users are required to complete before booking a meeting with you. For example, sales representative can ask visitors to provide their company size and industry before booking a meeting.
Step 7
Click the blue Save button once you’re done configuring your scheduling link. You’ll now see your scheduling link in your list. From here, you can copy your link and share with anyone for easy meeting scheduling!
FAQ
Where can I access scheduling links?
Front scheduling links are accessible in three places:
1. From the Front Calendar plugin located in the app switcher on the right-hand side of Front.
2. From the calendar icon located in the Front message composer.
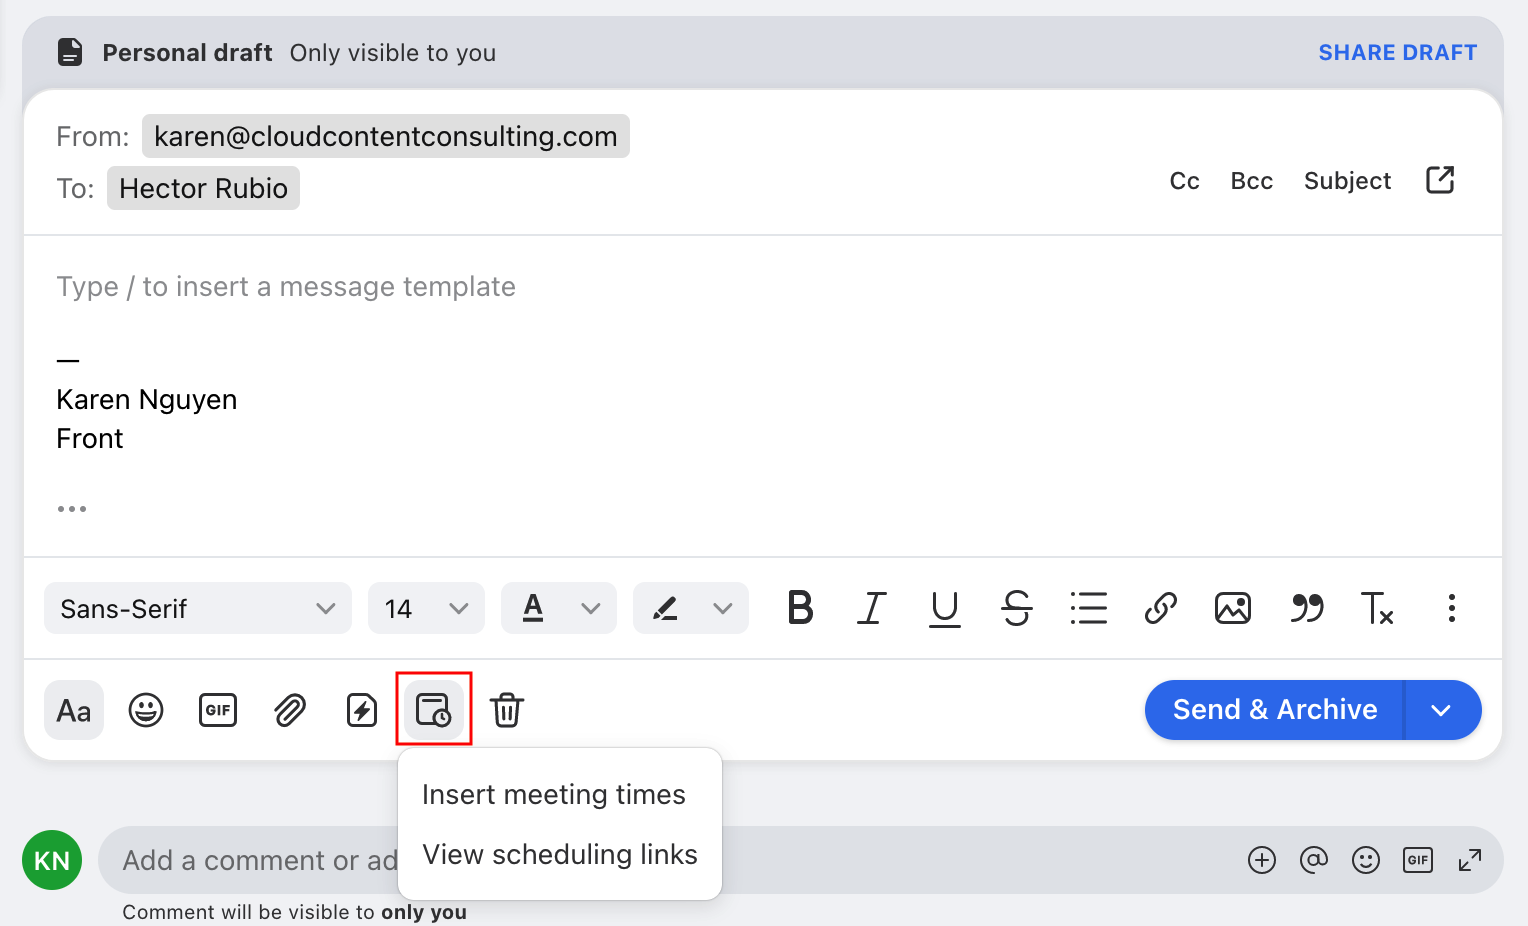
3. From the quick insert menu when you type /schedule or a forward slash in the composer. You can quickly find and insert a scheduling link without leaving your keyboard.
Do I have to add an individual inbox?
Yes. In order to access Front scheduling links, you'll need to have an individual inbox that is connected to a Gmail or Office 365 account via two-way sync.
If you've already connected your Gmail or Office 365 account as an individual inbox and you're receiving the prompt to add an inbox, it's likely you connected the inbox via SMTP email forwarding instead of two-way sync. Please remove the channel associated with your individual inbox following these steps and re-add it as a Gmail or Office 365 type inbox if you'd like to activate Front Calendar and scheduling.
How can I prevent double-booking?
When creating a new scheduling link, the Prevent double booking list will present any calendars you've pinned or subscribed to directly within Gmail or Office 365, or any calendars of teammates who are using Front. This list should match what you see in Front Calendar. Further instructions on how to add calendars here.
How can I view a team calendar in Front scheduling?
To access a team calendar within Front scheduling, you'll need to subscribe to that calendar directly within your Gmail or Office 365 interface. More information here.
Can I customize my scheduling link URL?
The URL pulls from your subdomain in Front, which is created at the time you sign up for Front and cannot be changed. Two workarounds are:
Embed the scheduling link in an iframe on your website to obscure the URL.
Use a URL shortener. Please note that when a user opens the URL they will still see the full URL in the browser.
Pricing
This feature is available on all plans. For the latest Starter plan, you must have email set as your company's channel type to sync a Google or Office 365 calendar.