
Instant rescheduling links
Overview
Rescheduling links make rescheduling meetings faster and easier. A rescheduling link is embedded in the event description and takes the user to a page to instantly reschedule the meeting to a new time based on the organizer’s availability.
You will need an individual inbox linked as either a Gmail or Office 365 account with 2-way sync in order to utilize Front Scheduling.
How it works
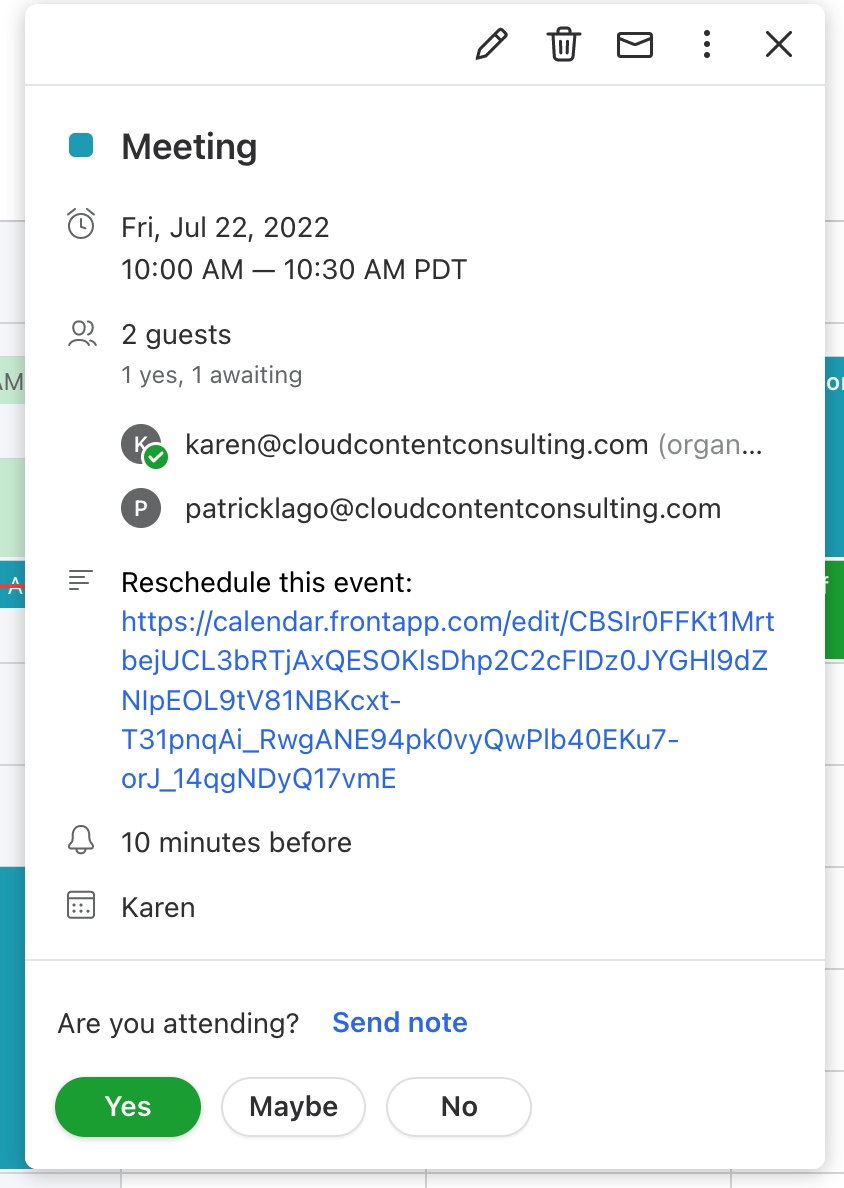
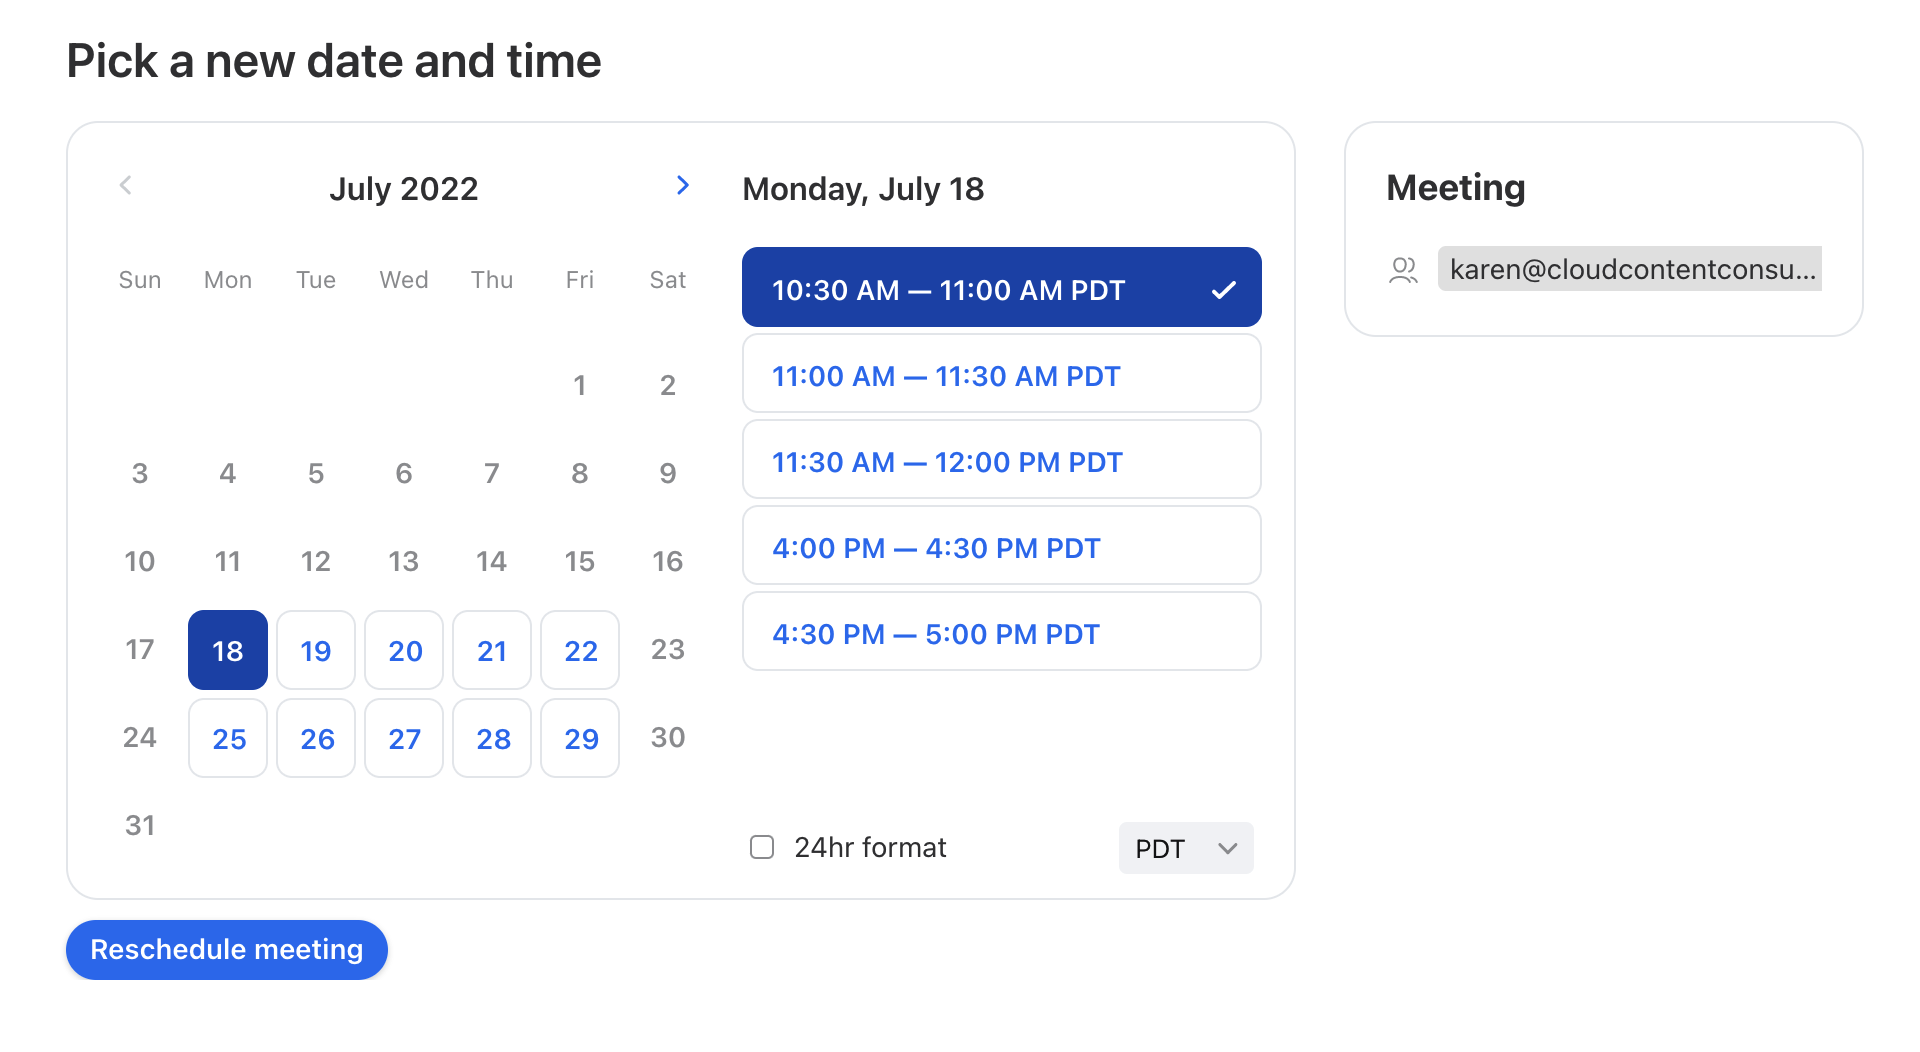
A rescheduling link is automatically embedded in all meeting invites scheduled via Front Calendar, unless toggled off when setting up the meeting. The link takes the user to a page that shows the organizer’s availability and allows the user to instantly reschedule the meeting to a new time:
Instructions
Add a rescheduling link to a calendar event
Step 1
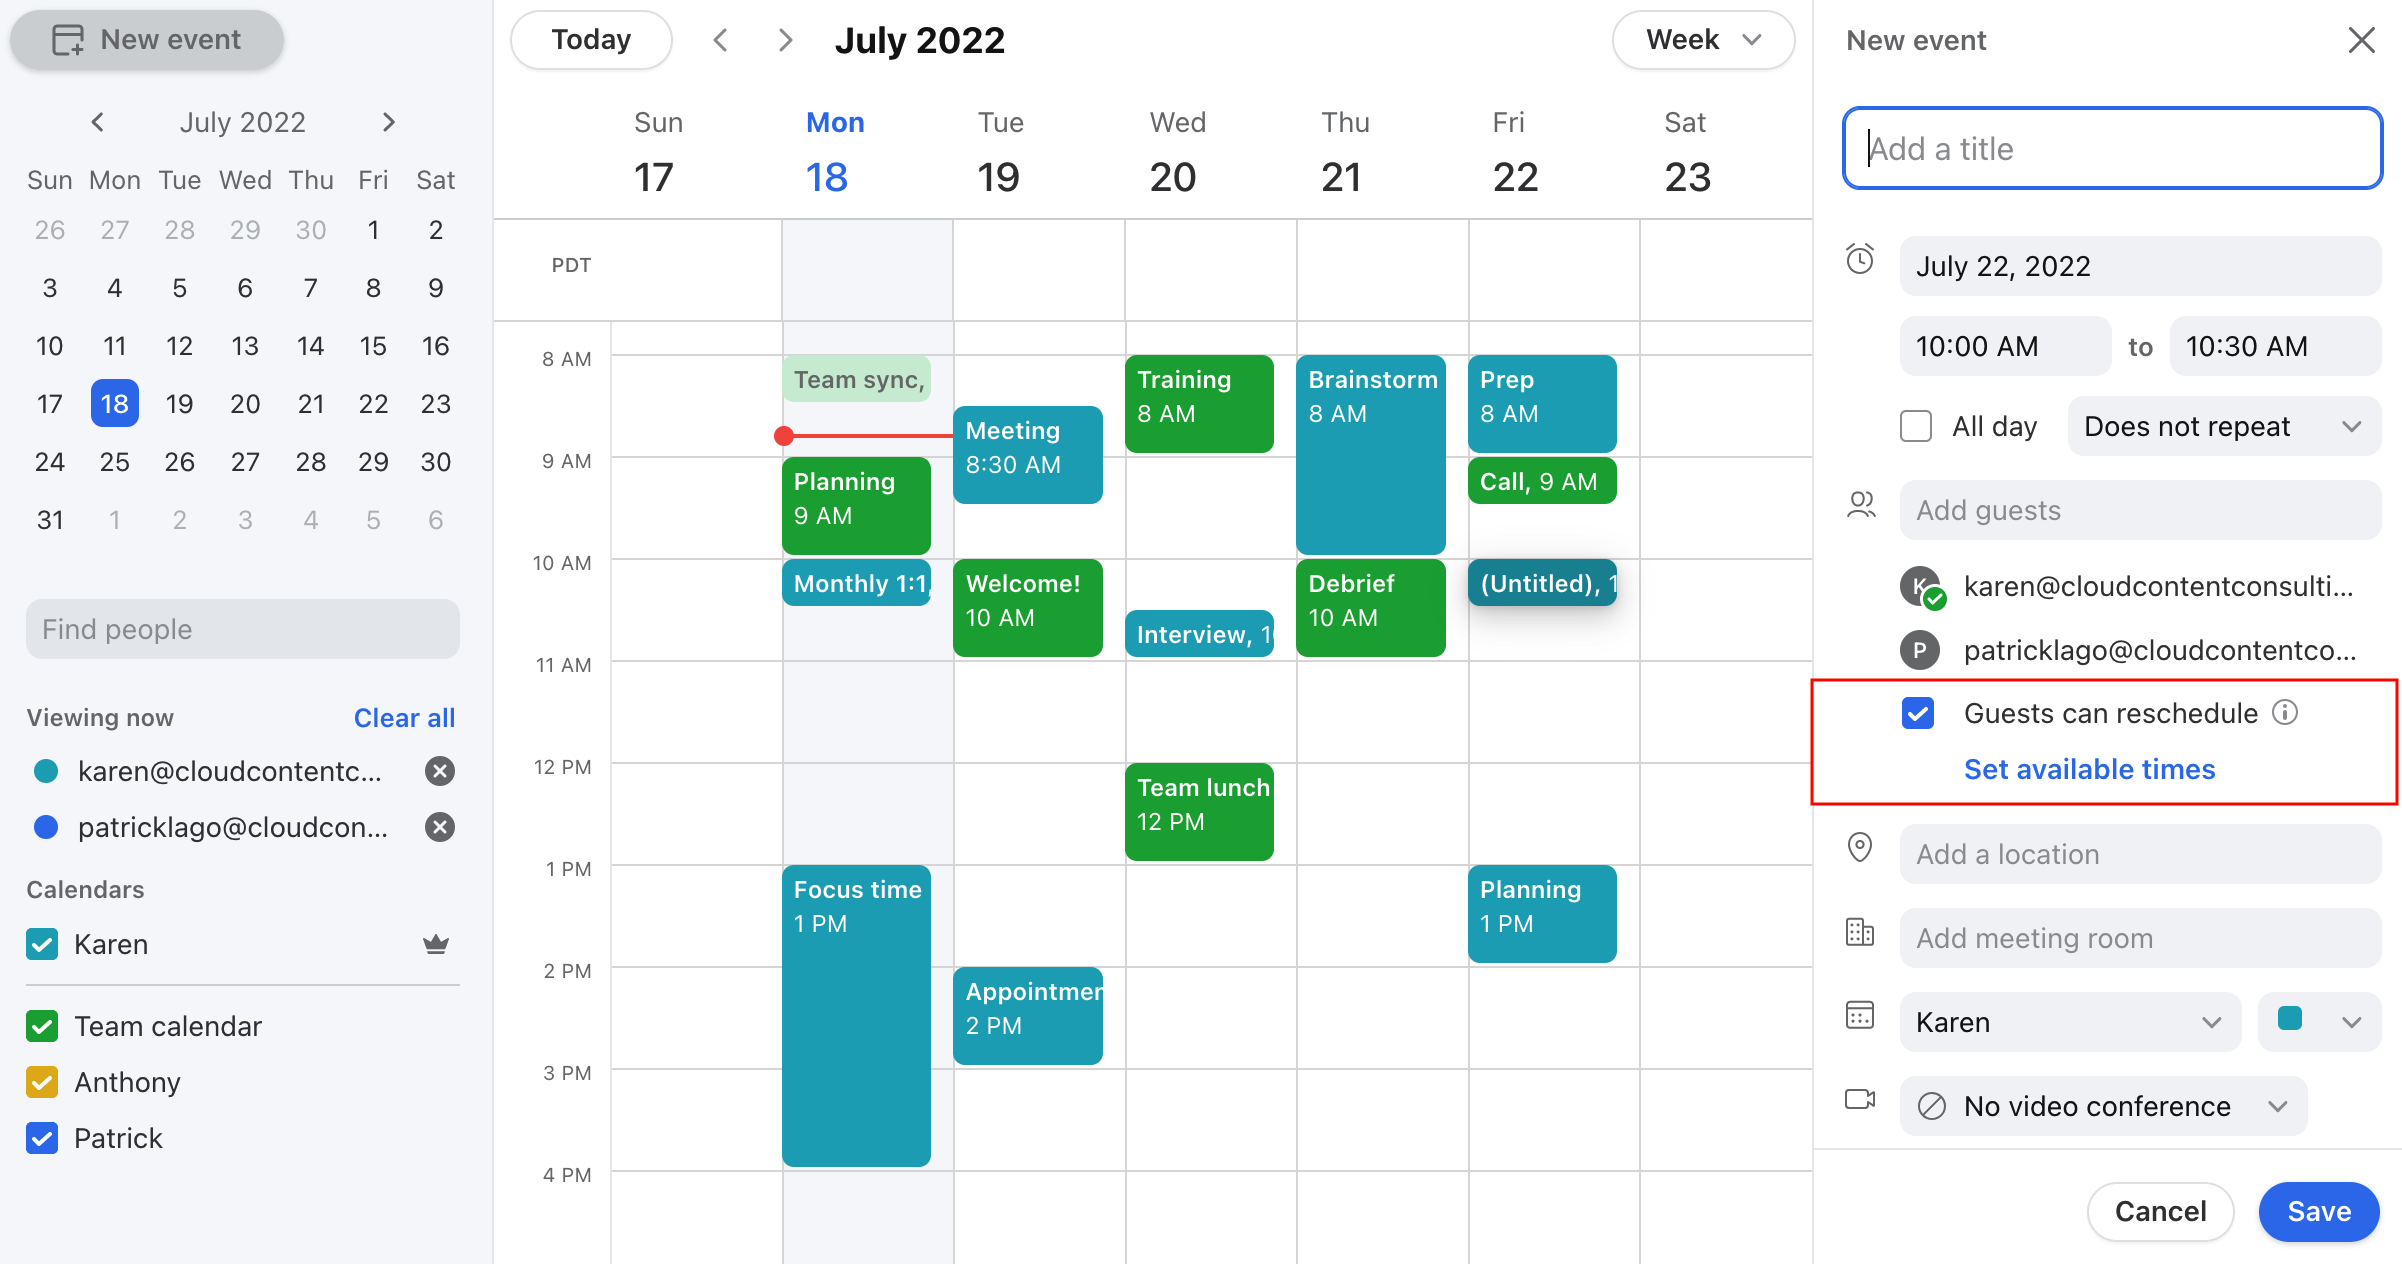
When creating a calendar event in Front Calendar, you will see the Guests can reschedule option to to add a rescheduling link to the event. The rescheduling link toggle will be turned on by default in Front Calendar.
To change the default setting, go to your personal preferences and find the Instant Rescheduling Links preference.
Step 2
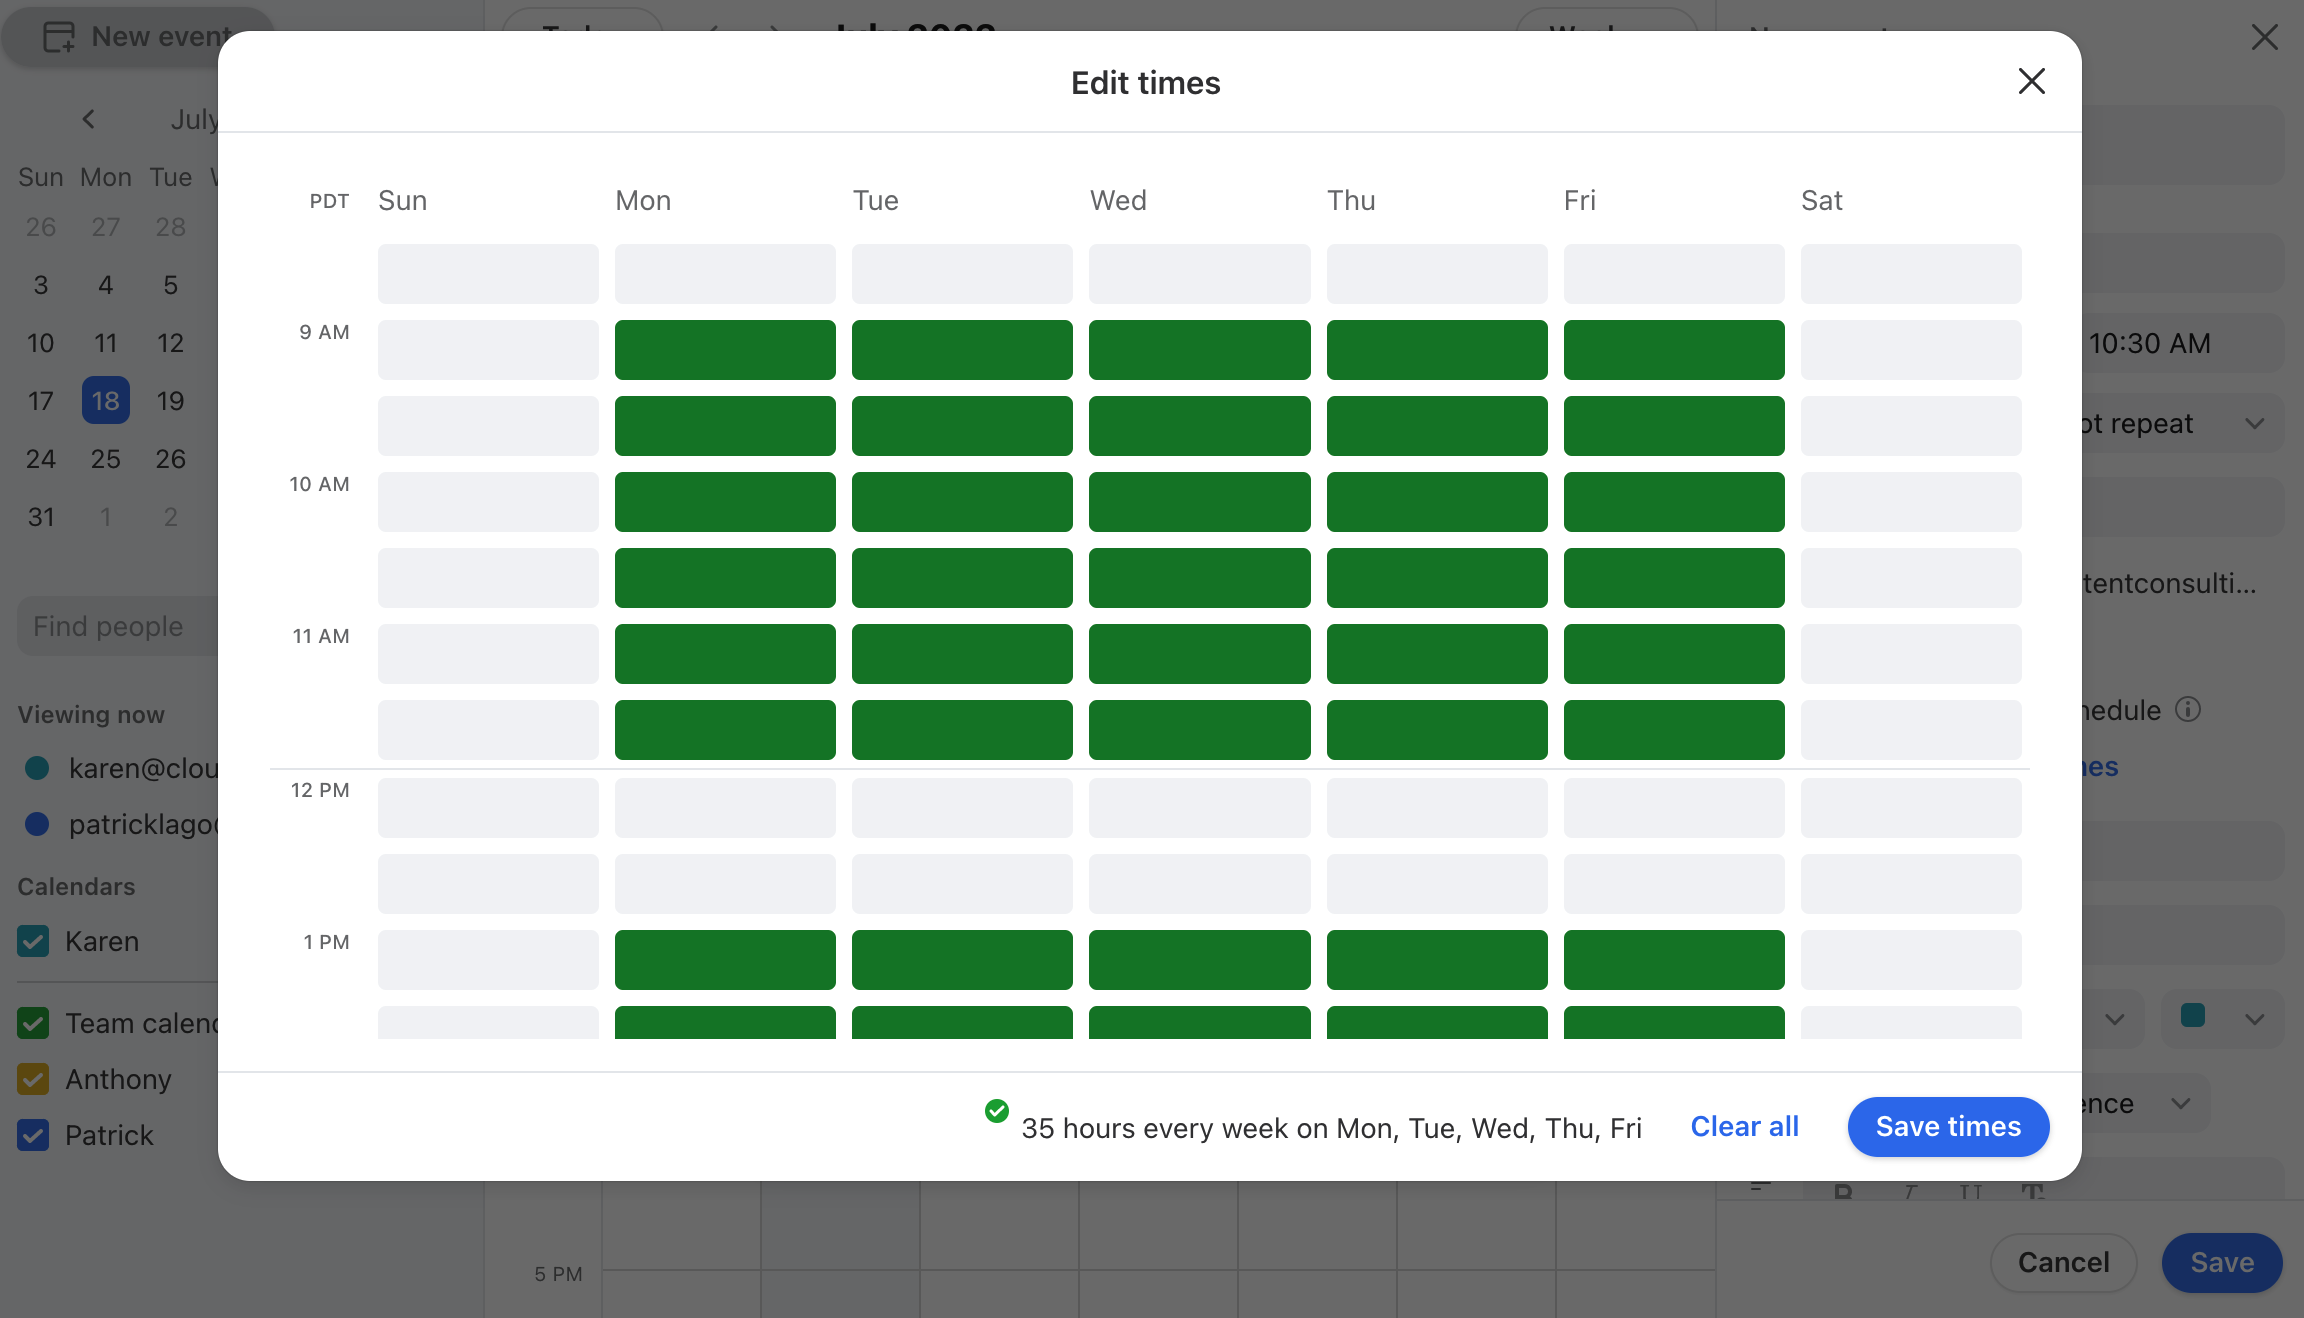
Click Set available times to customize your availability. You only need to provide your recurring availability, such as every Mon-Fri from 9am to 4pm. Front automatically checks your calendar and hides time slots that conflict with existing events on your calendar to prevent double booking.
Step 3
Front also automatically checks the calendar of teammates you have included in the invite, and hides time slots that conflict with their calendars. These teammates are listed in the edit availability window.
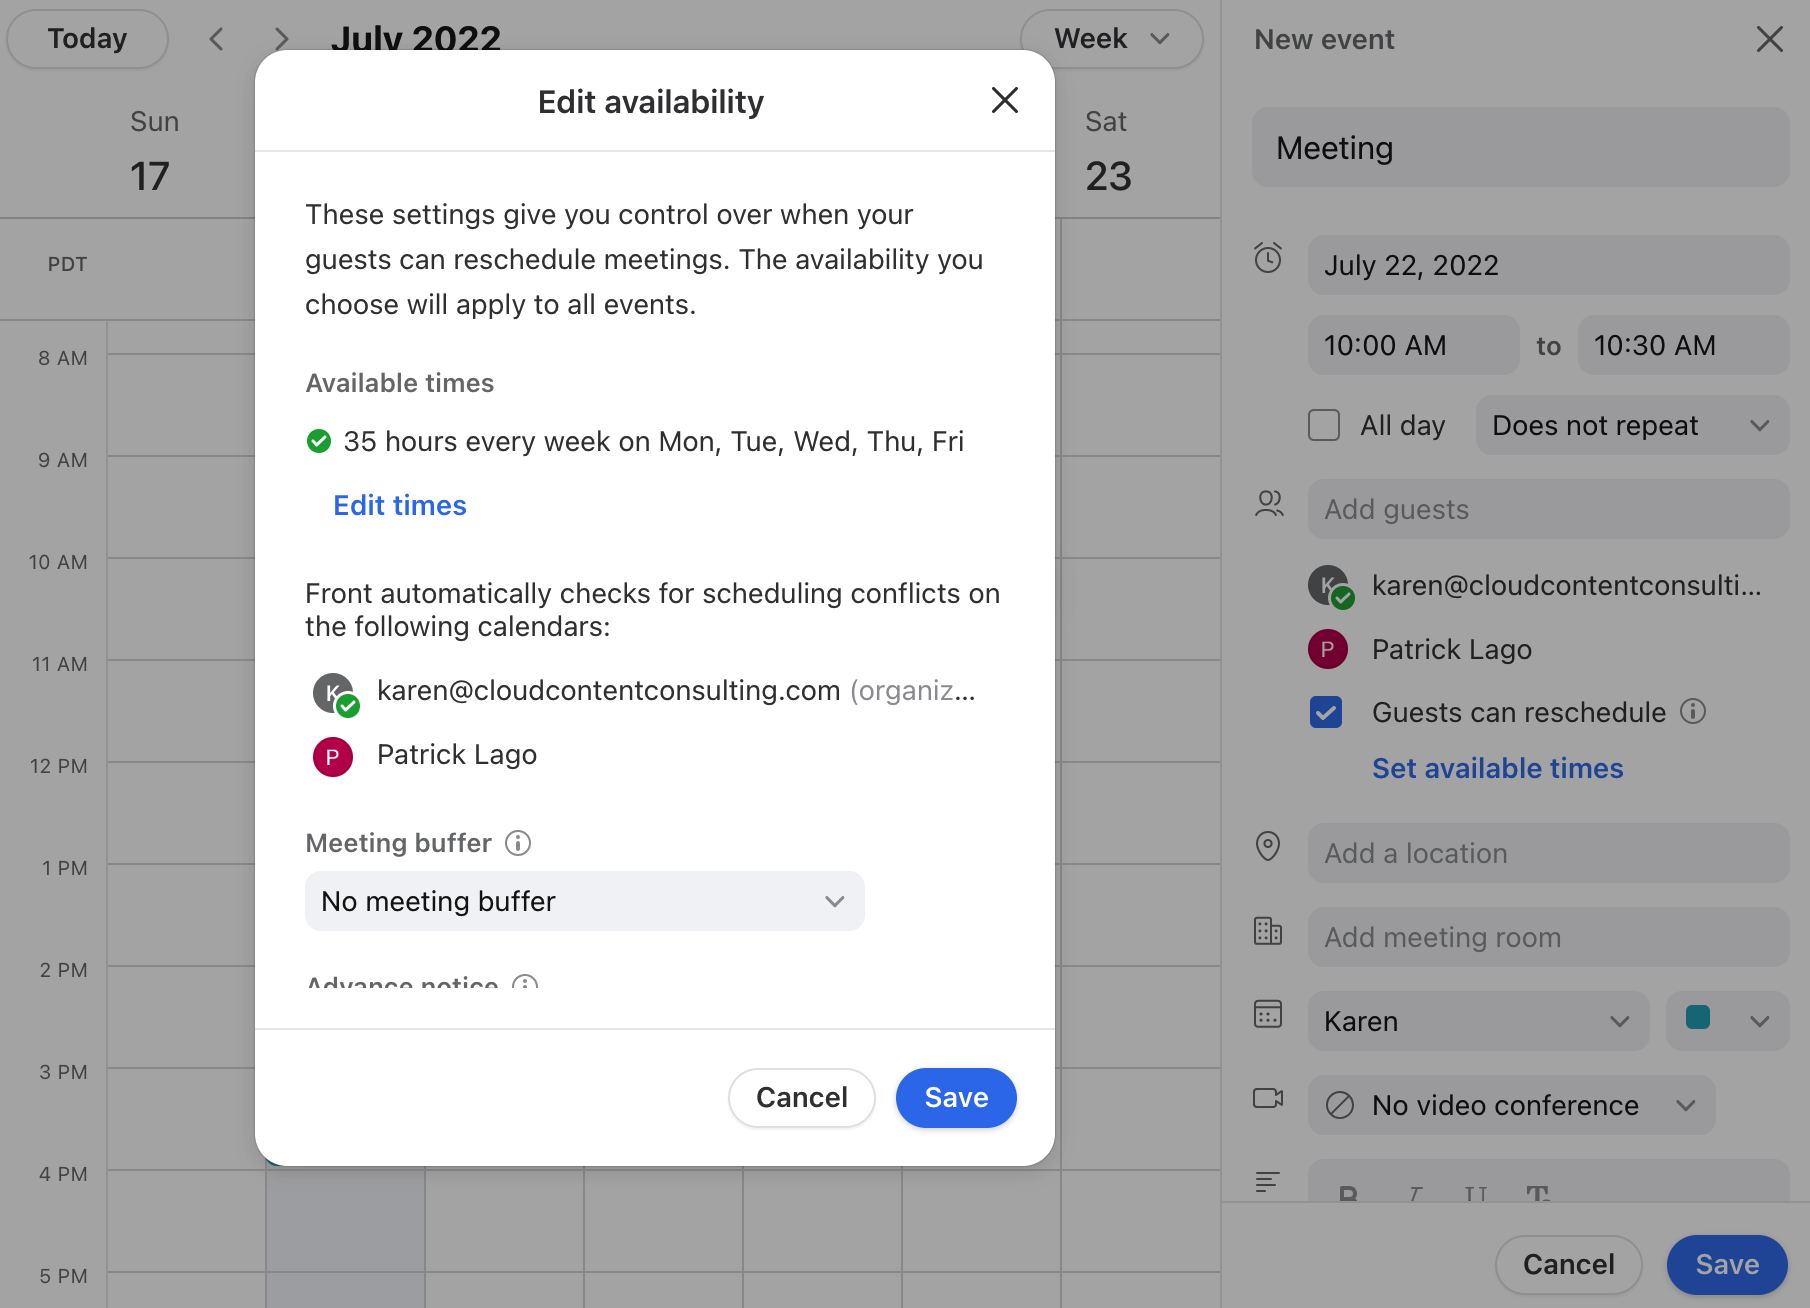
Customize other settings
You can continue customizing your rescheduling links availability with other settings:
Meeting buffer: Set a buffer time between meetings to prevent having meetings booked back-to-back.
Advance notice: Set an amount of time for advance notice before your meeting start time; people will not be able to book a meeting within your set time preceding a meeting, to prevent last-minute bookings.
Once completed, your invitee can choose to reschedule the meeting using your rescheduling link!
FAQ
Where can I edit my rescheduling link settings?
Create a new calendar event, add guests, then click Set available times to open the Edit availability popup. Click Save after changing your settings. Your edits to your availability and other settings will apply to all rescheduling links across all calendar events.
Front will still automatically check the calendar of teammates you have included in the invite, and will hide time slots that conflict with their calendars.
How can I remove a rescheduling link from an event?
Click the event in Front Calendar, then select the Pencil icon to edit the event. Remove the rescheduling link URL from the event description, then click Save.
Do I have to add an individual inbox?
Yes. In order to access Front scheduling links, you'll need to have an individual inbox that is connected to a Gmail or Office 365 account via 2-way sync. If you've already connected your Gmail or Office 365 account as an individual inbox and you're receiving the prompt to add an inbox, it's likely you connected the inbox via SMTP email forwarding instead of 2-way sync. Please remove the channel associated with your individual inbox following these steps and re-add it as a Gmail or Office 365 type inbox if you'd like to activate Front Calendar and scheduling.
Can I customize my rescheduling link URL?
The URL pulls from your subdomain in Front, which is created at the time you sign up for Front and cannot be changed. Two workarounds are:
Embed the rescheduling link in an iframe on your website to obscure the URL.
Use a URL shortener. Please note that when a user opens the URL they will still see the full URL in the browser.
Pricing
This feature is available on all plans. For the latest Starter plan, you must have email set as your company's channel type to sync a Google or Office 365 calendar.