
How to create application objects
Overview
Application objects allow you to transform text or URLs found in comments or messages into structured Orders, Shipments, Itineraries, Tasks etc. that are easy to access right from a conversation in Front.
Application objects are part of Front’s “Connectors” framework (composed of both application objects and application requests) - allowing you to configure how your third-party data is used in Front. See our developer documentation for additional details.
More resources:
Take a Front Academy course here to learn more about how Connectors work.
Have questions? Visit the community to:
View example videos demonstrating how to build Connectors.
Join our Connectors group to learn of events or share insights with us.
How it works
If a customer writes in to your team with a question that references a particular order, shipment, itinerary, task, etc., an application object can automatically extract that text or URL and other metadata, and highlight it in your conversation. Application objects can be viewed in the following areas:
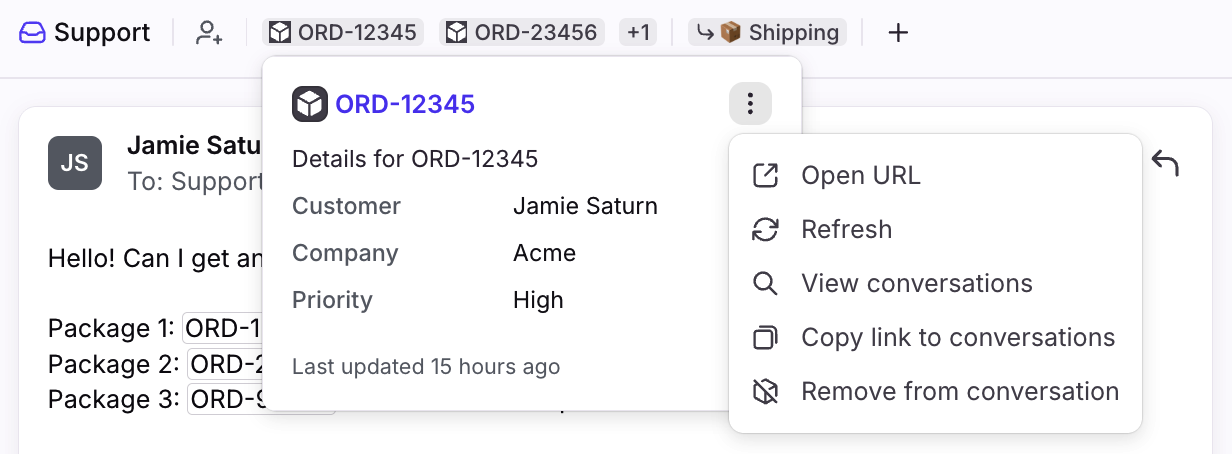
Conversation header
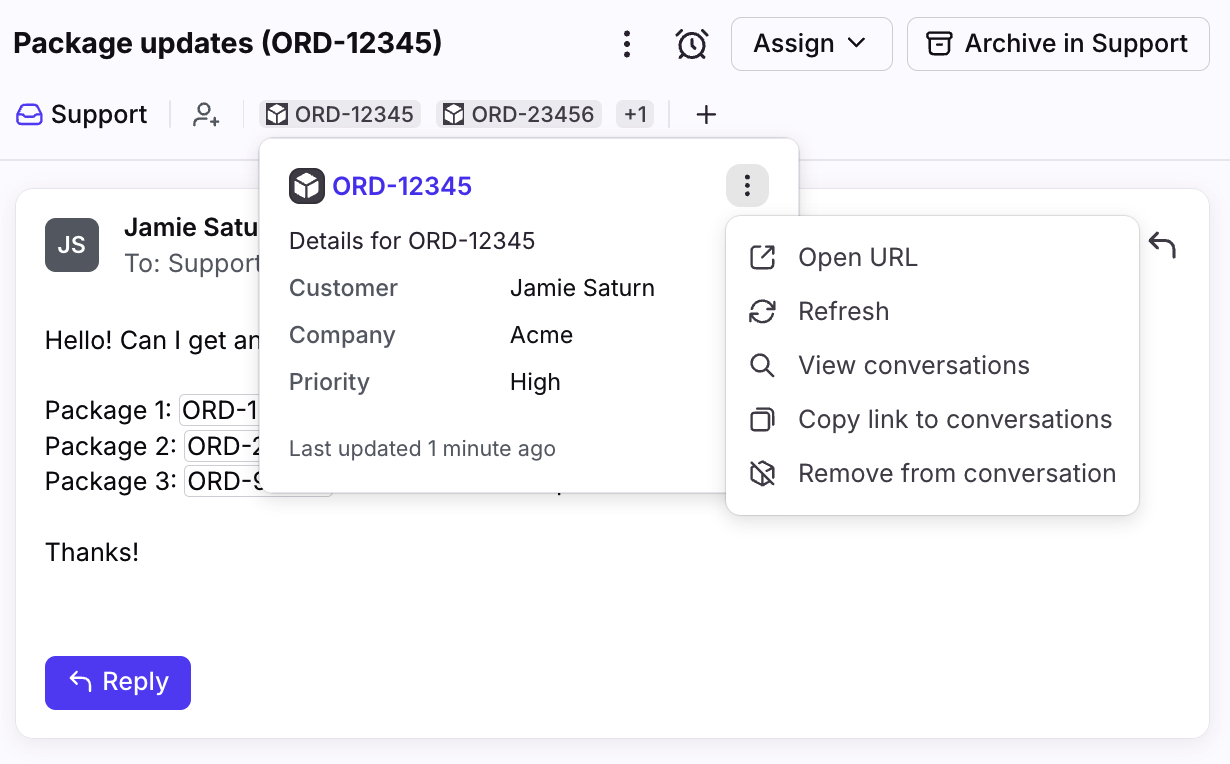
Application objects are attached to the header of the conversation for easy access. When you click on the object, click the three-dot menu to easily open it in your external CRM/TMS/management system, or view details directly in Front.
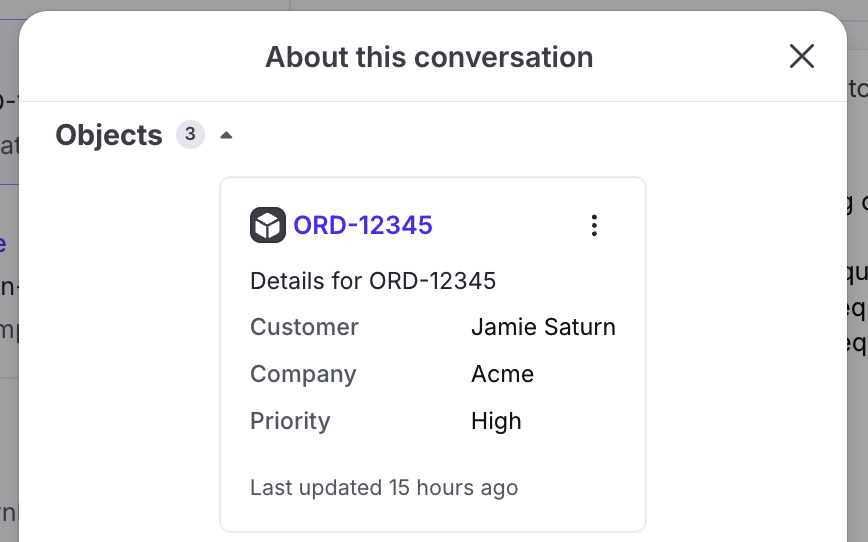
Conversation details
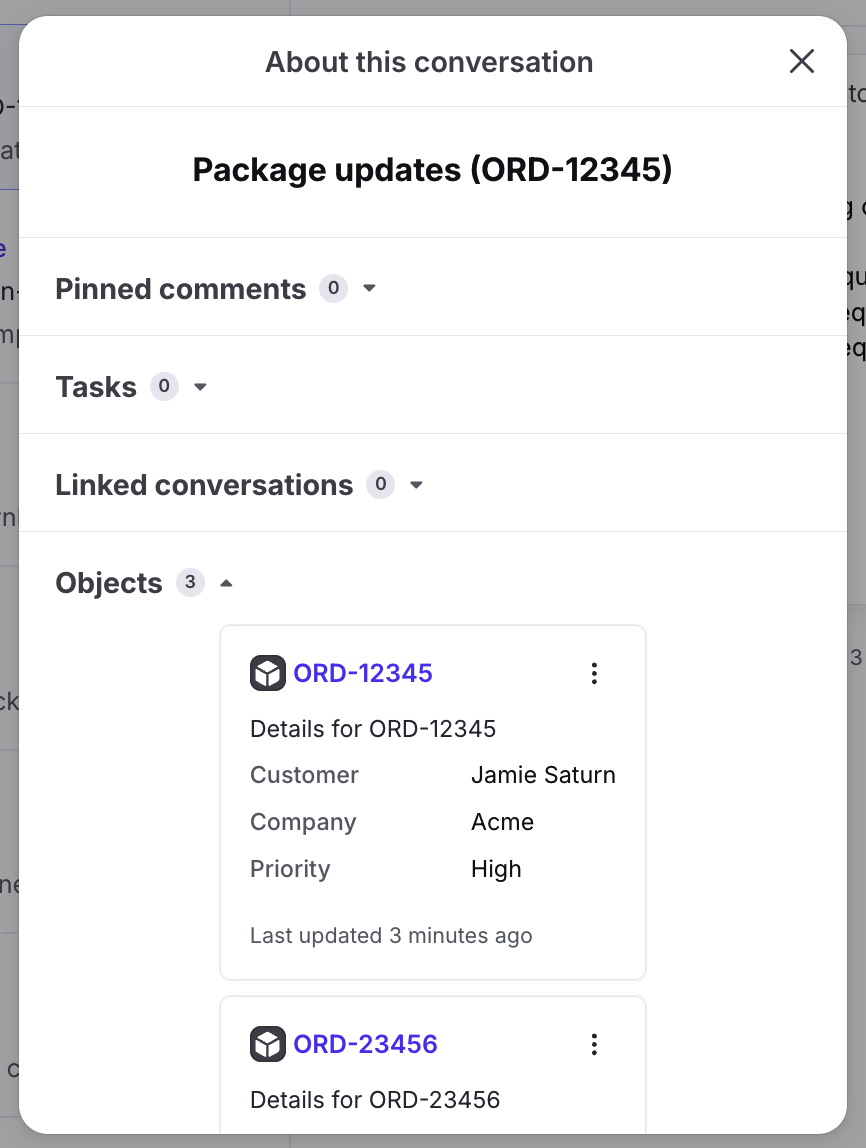
You'll also see the object when you navigate to the conversation summary.
Messages
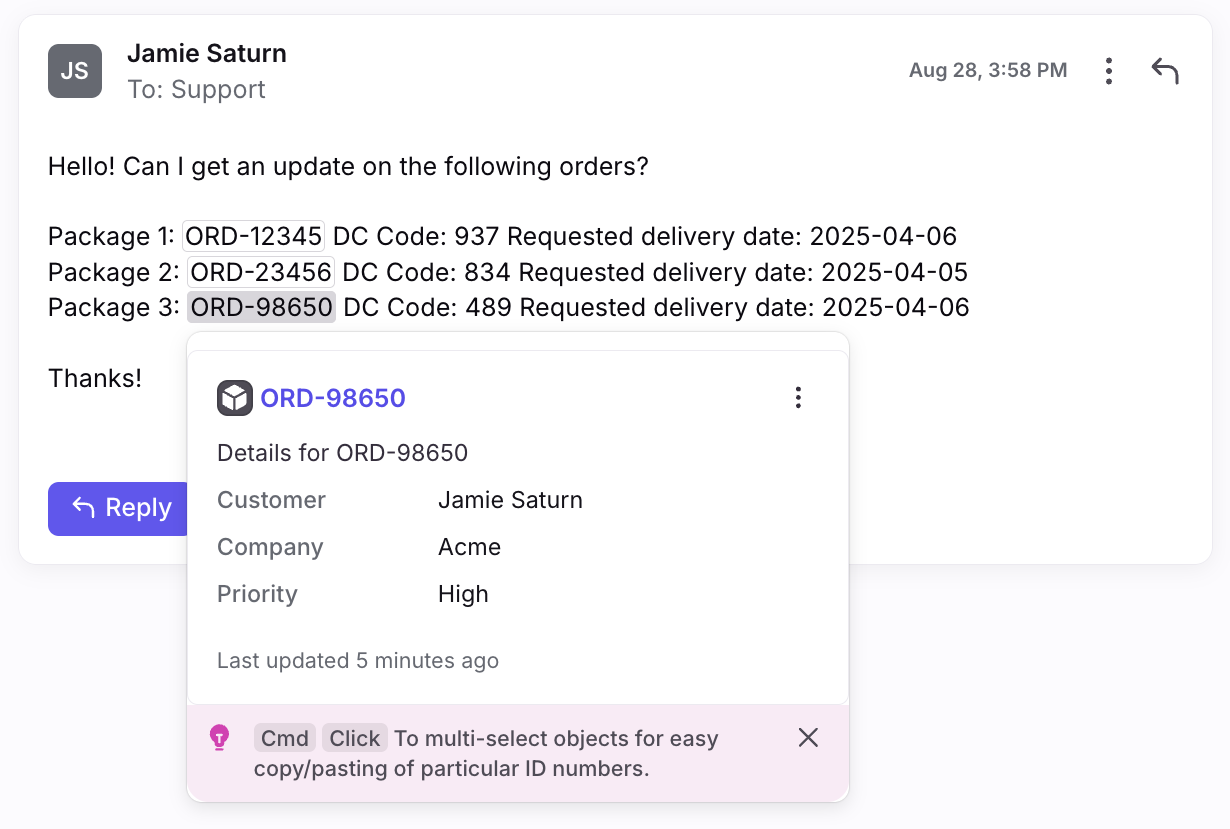
Application objects will be outlined in the conversation. Click the application object to view the preview card.
Comments
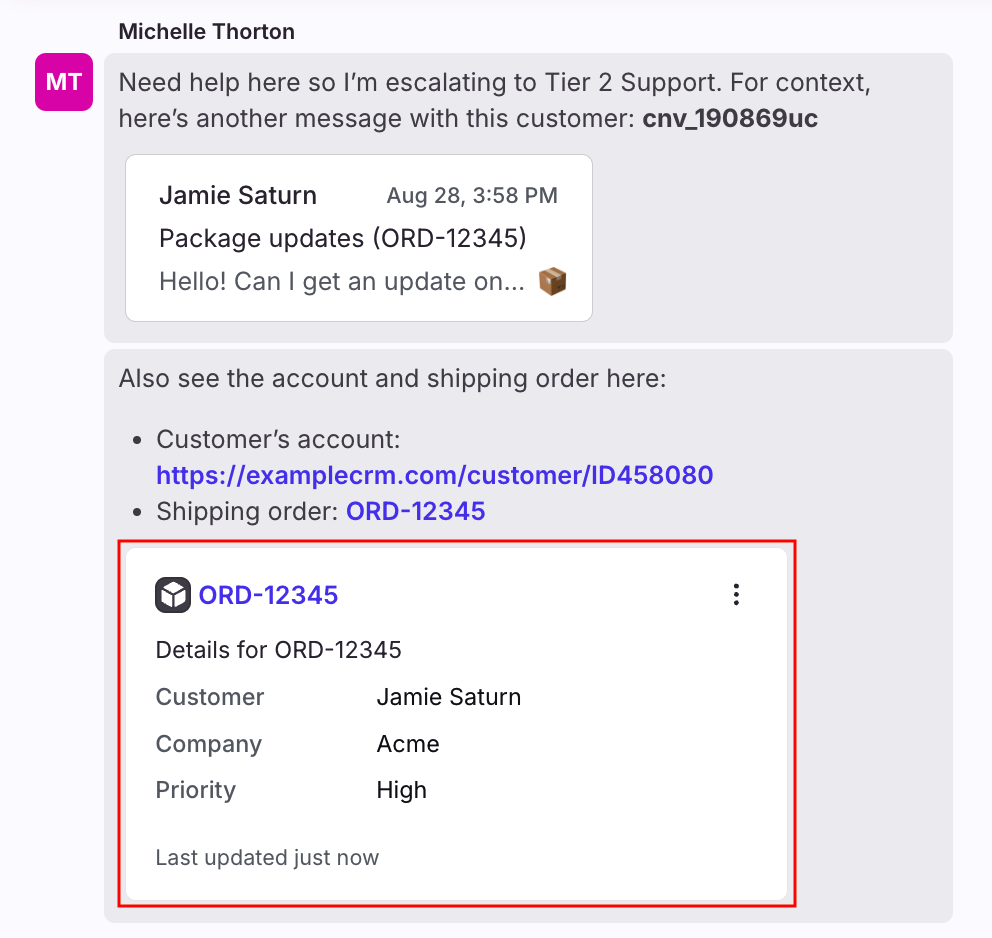
Application object preview cards will automatically display when referenced in comments.
Part 1: Initial setup
You must be a Front company admin to create application objects.
Step 0 (create an app)
Access your Developer settings by clicking the gear icon, navigating to company settings, then selecting the Developers tab from the left sidebar.
Once in the Developers settings, click Create app. In your app, click the Settings tab and provide a name for your app, add a short description, and set an icon to be used for your application objects.
Click the Features tab. If you have existing application objects, you will see them in the list labeled as Objects. To create a new application object, click Add feature, then select App Object from the pop-up window.
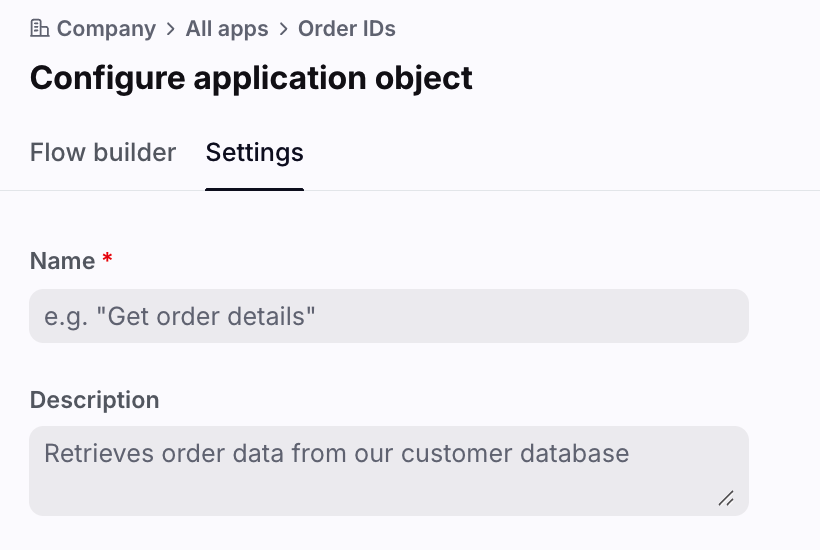
Step 1
Provide a name and a short description for your object. Click Next.
Step 2
In the Flow builder tab, configure the pattern to identify your object. Click Add reference in the Collect reference node.
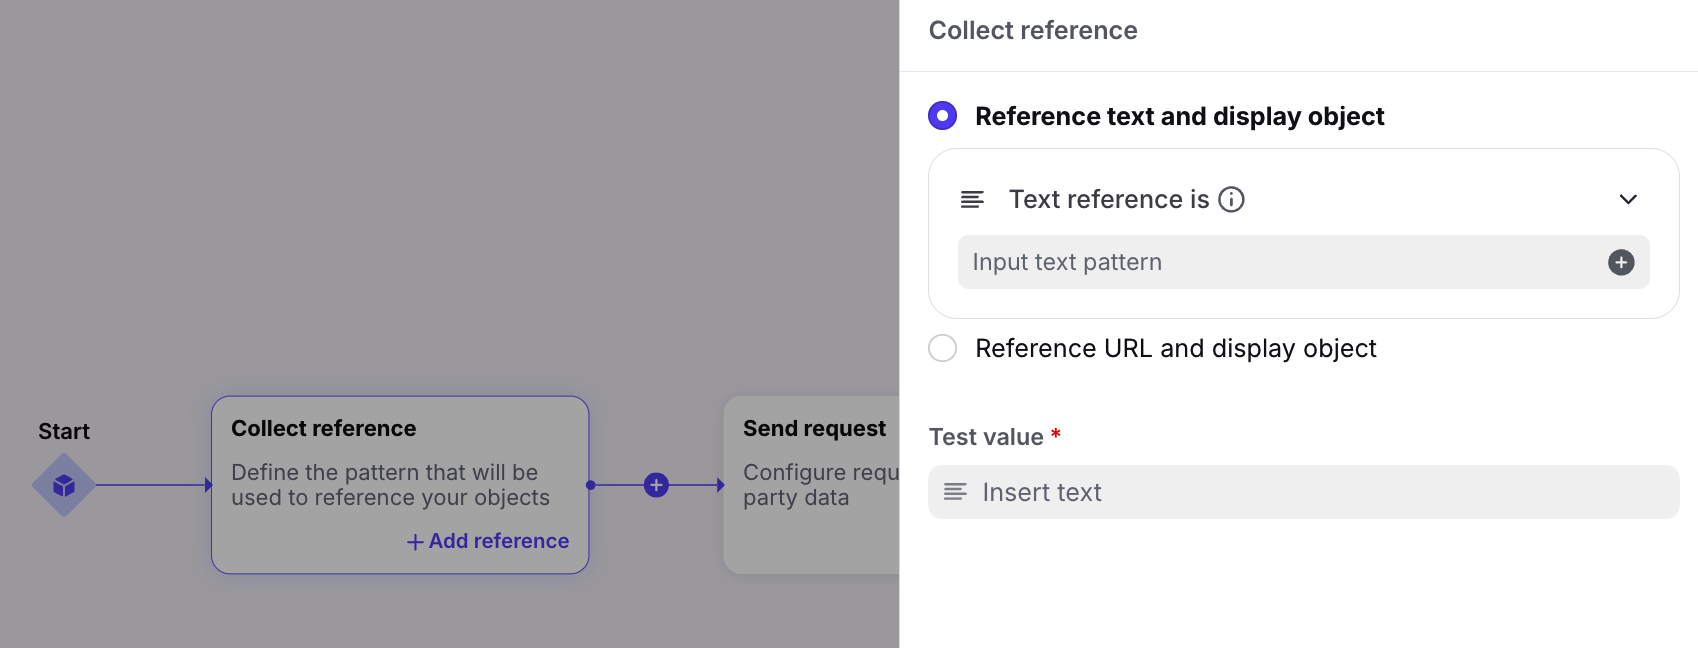
You can choose between matching against a text pattern or a URL pattern.
If you want to match against text like “#1234” or “AB-1234”, select Reference text and display object.
If you want to match against URLs like “https://example.com/orders/123”, select Reference URL and display object.
To determine the proper format, consider the types of patterns you expect to see, and which parts of those patterns are static or dynamic (i.e. can change across instances of those patterns).
For URL patterns, we require it to contain the domain (e.g.: example.com) as well as the protocol (e.g: https://).
A few examples:
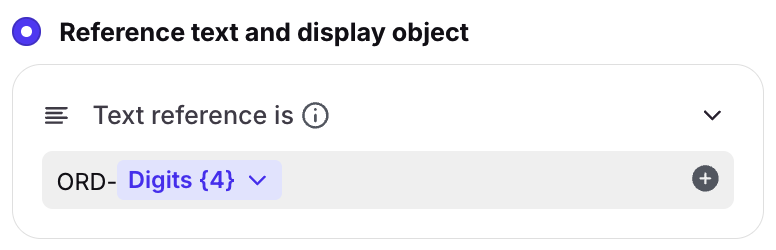
Example patterns | Text pattern format |
ORD-12, ORD-201, ORD-9023 | ORD-[Digits] |
#123, #493, #4930 | #[Digits] |
AB-123, FJ-392, K-594 | [Letters]-[Digits] |
https://example.com/orders/AB-123 | https://example.com/orders/[Letters]-[Digits] |
Make sure your pattern format is defined as strictly as possible to prevent unwanted matches. Examples:
If you know that a portion of your text pattern will always be digits, use the Digits variable instead of the Letters or digits variable.
If you know that a portion of your text pattern will always have a defined length (for example, exactly three digits), make sure you define the variable as such. You can click on a variable to set its length.
Provide a test value for your reference so it can be used in the remainder of the configuration.
Click Done to return to the flow builder.
Step 3 (optional)
If you want to populate your object using third-party data you can configure your application object to send a request to an external API. You can read more about it in the article Create application objects with third-party data.
Otherwise, you can remove the Send request node and continue to the next step.
Step 4
Click Add output in the Return data node.
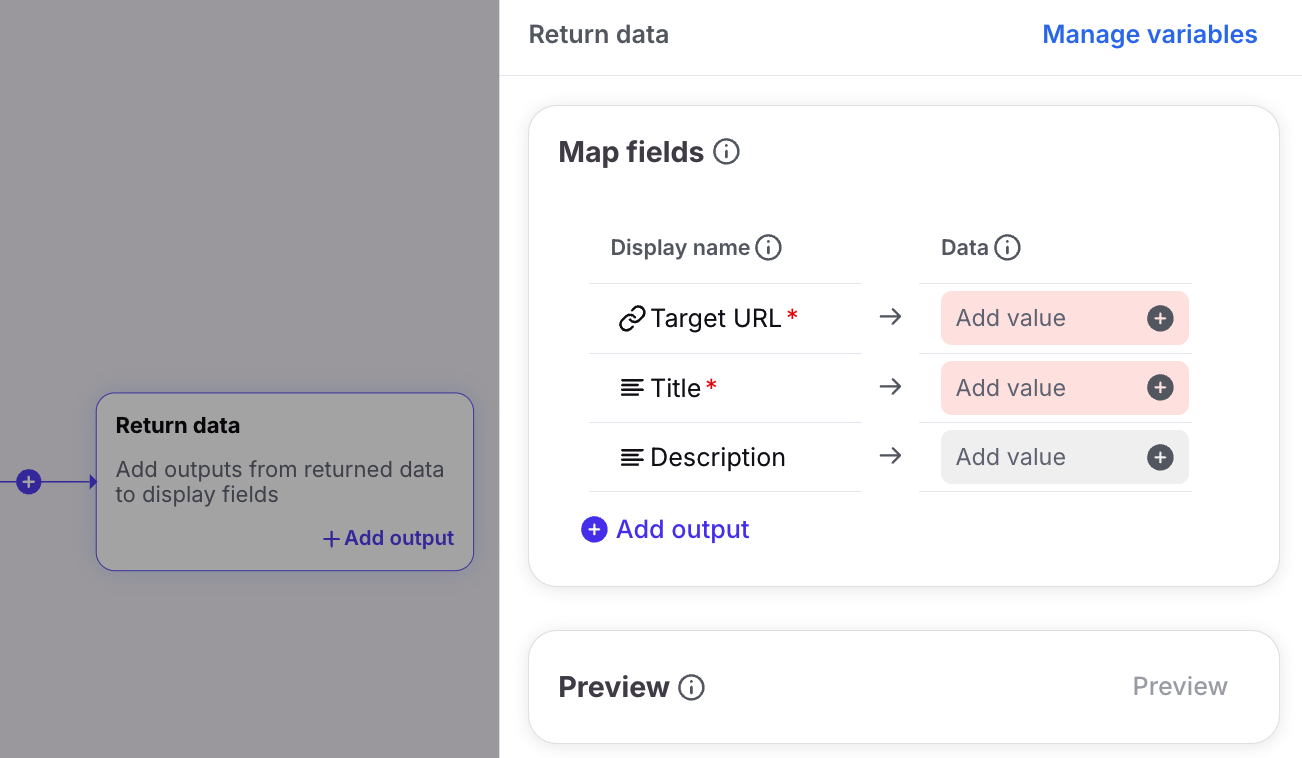
In this step, you can choose how generated application objects will be previewed in the inbox view. By default, each object includes a target URL, title, and description (optional). You can expand the application object preview with important information by clicking on Add output to add custom fields.
Any variables you defined when setting up your text pattern or URL pattern will be available to populate the value of the object’s properties.
Additionally, you can populate these fields with third-party data by creating dynamic variables (available on Enterprise plan). See this article to learn more. If you’d like access, please contact your account manager.
To determine the proper target URL, you should open an example of content you are looking to extract using an application object, and determine how you can generate that URL using the text pattern from Step 2.
For example, let’s imagine you want to extract order IDs that look like “ORD-123”, and they live in your CRM at a URL like this: https://example.com/orders/ORD-123
In this case, in Step 2 you would have defined a text pattern like this: “ORD-[DIGITS]”. To generate the proper URL, you would use the “Digits” variable generated by Step 2 in the Target URL field. This will ensure that whatever number is extracted for the particular order is also used for the URL for that application object.
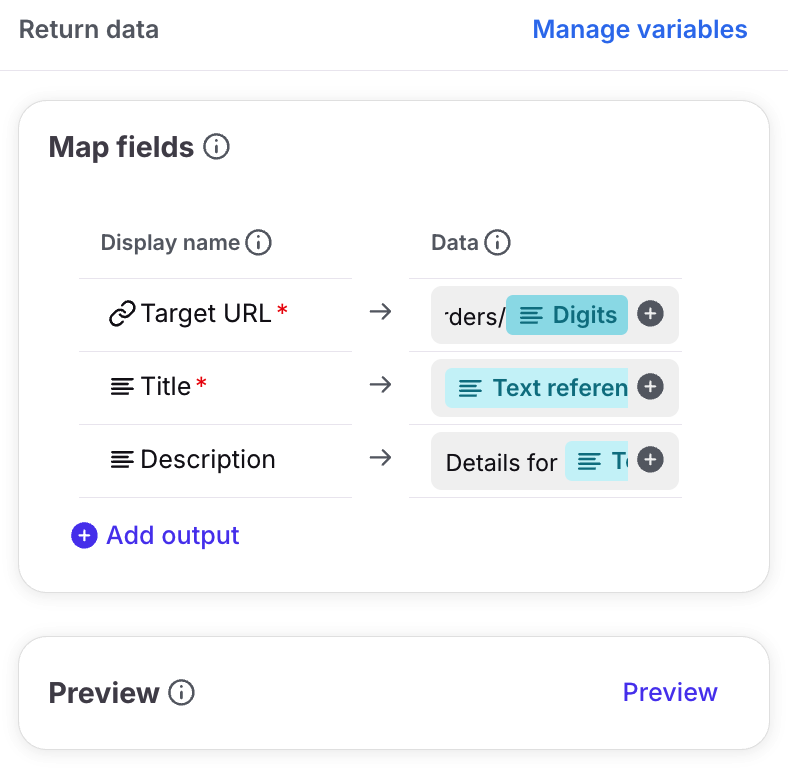
The Target URL field will be used when a user selects the Open URL option in the menu of a particular application object, or when clicking on an application object preview in a comment.
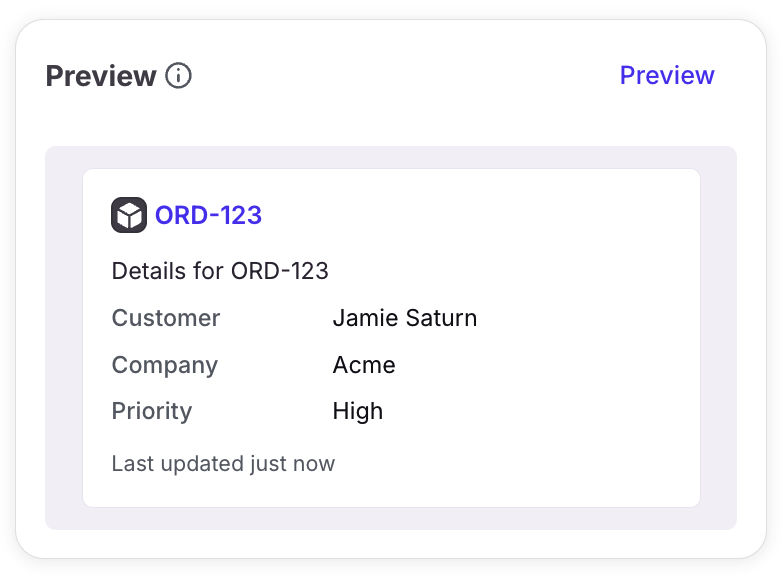
In the example application object below:
Title: ORD-12345
Description: Details for ORD-12345
Custom fields:
Customer: Jamie Saturn
Company: Acme
Priority: High
Step 5
Test your configuration to confirm that the Preview works as you expect it to. If everything looks good, click Done to return to the flow builder. Then click Save to finish your application object.
Part 2: Create application object rule
Once an application object has been created for an application, a rule is required to define when and where this application’s objects will be generated. An application object can be generated from references found in messages, comments, or a dynamic variable.
Step 1
To create an application object rule, follow How to create a rule from scratch.
Step 2
Enter your preferred rule configuration for creating your application’s objects. Similar to other rules, you can define the triggers (when), conditions (if) and actions (then) of your rule. See this article to learn more.
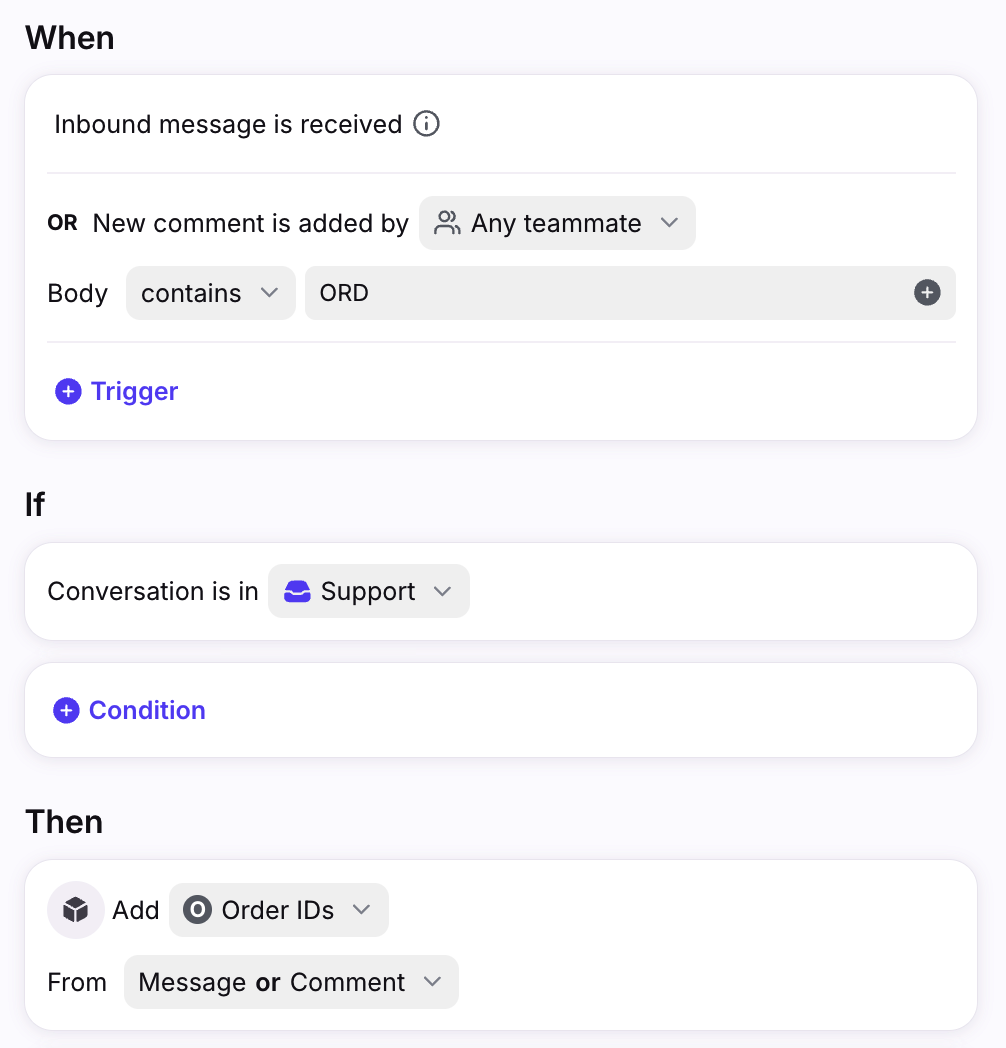
A common configuration is to trigger the rule whenever inbound messages are received or a comment is added to a conversation.
If the conversation is in the inboxes that the application object should apply to, you may specify the creation of one or multiple application objects to apply. Use the dropdowns for the Add app objects rule action to define this behavior.
Which application object(s) to add (defaults to all objects)
Where to look for references matching the pattern defined by the application object.
Select Message to find references in the latest message's subject or body
Select Comment in the latest comment's body
Select Reference to use a specific value (e.g. The value of a dynamic variable)
Step 3
Click Create to complete the rule configuration. A new rule will populate in the relevant rule list.
An application object rule can be adjusted or deactivated at any time. However, a rule is required for an application’s application objects to appear in conversations.
Copying and pasting application objects
Many messages will include multiple IDs of interest that you may need to copy and paste one by one. You can easily view and multi-select application objects within a message to copy and paste much more efficiently.
Hover over a application object to quickly copy it, or select multiple application objects using Command+click on Mac or Ctrl+click on Windows to copy them.
Refreshing application objects
When an application object is first attached to a conversation, the data displayed is fresh and current. However, as time goes by, the data in the application object becomes stale. A timestamp on the application objects captures the last time the data was updated.
Note: Application objects cannot be refreshed more than once every 30 seconds.
Refresh manually using the Refresh option
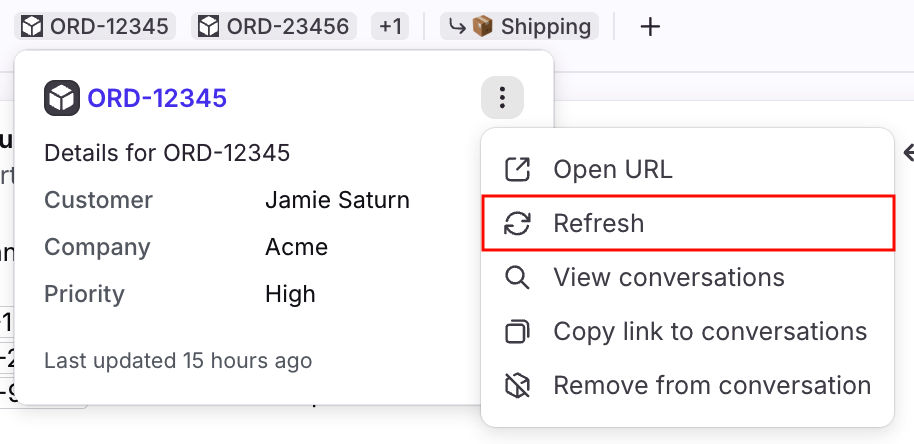
To refresh an application object, click the three-dot menu, then select Refresh.
For example, the following image shows an application object that was last refreshed 15 hours ago. Clicking Refresh would update the last updated time to just now.
Refreshes that happen automatically
In addition to using the refresh option, application objects update when their triggers recur, such as when a new comment or message contains the URL or matching pattern for the application object, or when a workflow such as a rule or macro accesses an application object while it executes.
Refresh programmatically using the API
You can use the Create link API endpoint to refresh application objects. Refer to the API reference documentation for details.
This method allows you to create a web application or service that listens for changes to the data in the external system and then immediately pushes a change to the affected application objects (based on their reference) so that you don’t have to rely on a rule triggering or ask teammates to manually type comments to refresh application objects. Consult with your technical or developer contacts for help implementing application object refreshes through the API.
Application object fields and message templates
Once application objects are generated on a conversation, you can use the application object fields to automatically populate variables in message templates for your replies. See this article to learn more.
FAQ
Do application objects operate on historical comments or messages?
No, they only operate on new comments or new messages created after the application object rule is configured.
Can application objects extract content from message subjects as well as message bodies?
Yes. By default, the Identify text pattern in messages and comments option is selected during the setup process. This allows matching text patterns or URL patterns in subjects or bodies of messages to be extracted.
What happens if I delete an application object? Will objects previously created by it also get deleted?
If you delete an application object, any objects created by it in the past will not be automatically deleted, but no new objects will be extracted or previewed.
How many custom fields can I add to an application object?
You can add up to 50 custom fields per application object.
How many application objects can be attached to a conversation?
Up to 30 application objects can be attached to a conversation. Once the limit is reached, additional application objects cannot be attached to the conversation.
If a single comment or message that has more than 30 distinct references, this will trigger the limit and no objects will be attached.
Why is my application object displaying data for a different resource?
It's most likely you're using a static target URL in the Define outputs step (Step 4) of the application object setup flow. Your target URL should leverage a dynamic variable to create a unique URL.
Front uses the target URL to create a unique internal reference for the application object. If you don't have a unique target URL, then you're referencing the same application object each time, and just updating the name.
The target URL's purpose is to provide an in-app permalink for teammates to access specific objects in your external app. The link should align with both the API and user-facing views. A dynamic element is required for it to function properly.
If a truly unique URL to the external app isn't available, consider appending a unique, non-functional argument to the query string of your target URL.
For example, if a target URL was https://this-is-a-target.com/all-active-orders you can edit and append a query string to make it unique. That could look like: https://this-is-a-target.com/all-active-orders?foo={Custom Field}.
Can I save my progress as I build my application object?
Yes. While building your application object, you’ll find a Save as draft button that allows you to save your progress and return later.
Pricing
Application objects are available on the latest Professional plan or above. See additional details about pricing of certain application object features below:
Feature | Professional plan | Enterprise plan |
Transform text patterns or URL patterns into application objects | ✅ | ✅ |
Create application objects with third-party data using application requests* | ✅ |
*Customers on the latest Enterprise plan can further enhance their application objects. For example, an order found in a message could be enriched with the status of that order pulled from a CRM or TMS, all without writing any code. See this article to learn more.