
Common routing and triaging rules
Overview
Create rules to automatically route and triage customer communications – and save your team time. Below you’ll find set-up instructions for common, recommended rules that help you handle messages quickly and with ease.
Assign or move based on content
Automatically assign or move emails based on message content. For example, if your teammate, Jane, responds to all billing questions, create a rule to assign any message containing "billing" to Jane.
Step 1
Click the gear icon and navigate to your workspace settings. Select Rules and macros from the left menu, and click Create rule. Select the Assign to teammate template from the rule library, or Create from scratch.
In this example, we'll select the Assign to teammate template.
Step 2
The template will automatically select triggers, conditions, and actions to get you started. You can further customize your rule by selecting specific inboxes, adding additional conditions, and more.
Step 3
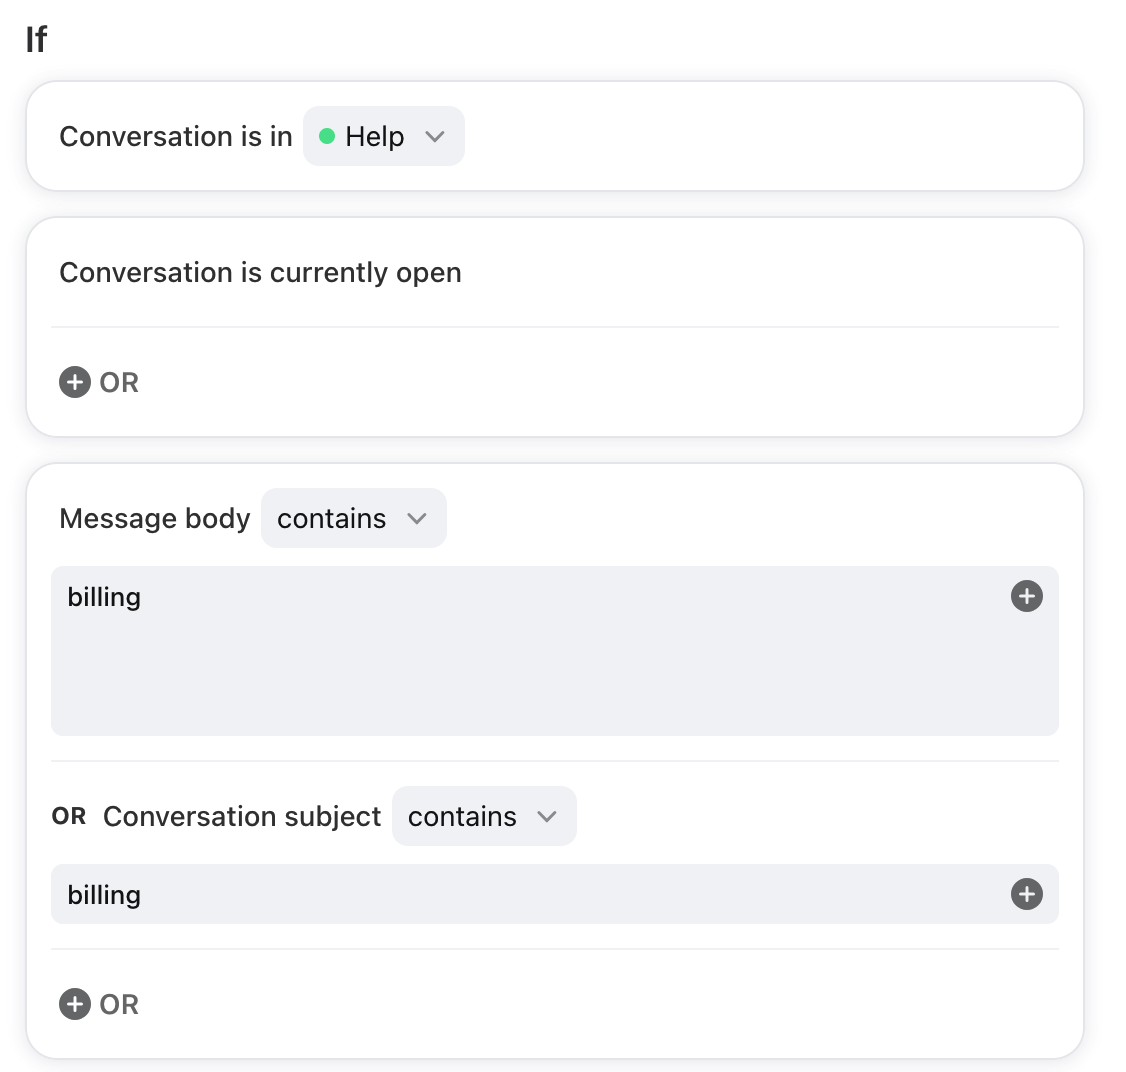
Make the following changes to the If conditions:
In the Conversation is in condition, select the shared inbox this rule should apply to (e.g. Help inbox), AND
Add Message body contains and Conversation subject contains, then enter the word of your choice (e.g. billing). Ensure these are connected by an OR statement.
Step 4
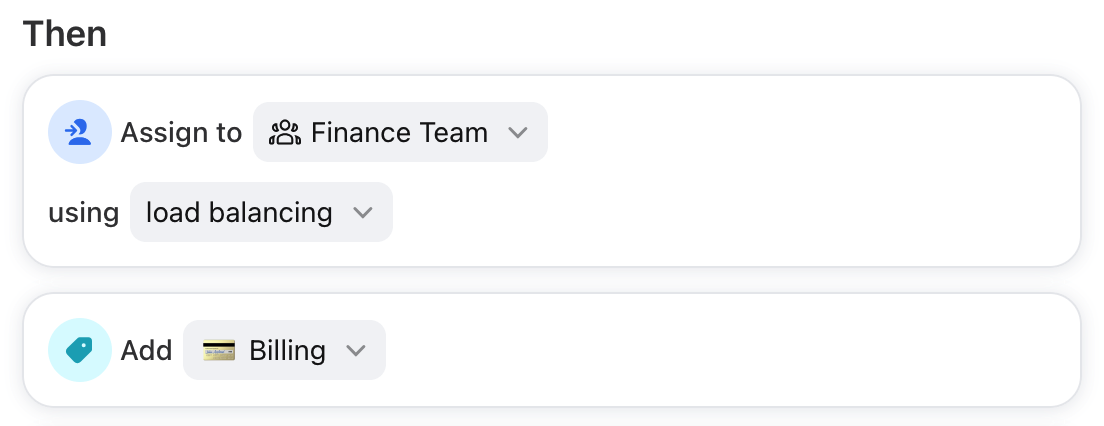
Set the Then action to either of the below:
Assign to teammate action to assign it to one specific person. Alternatively, you can also assign to multiple selected teammates or a teammate group to distribute the emails amongst the team via round robin or load balancing*.
Move to inbox action to move it to a different inbox.
💡 Tip: Add an additional tagging action. This will help with general organization and future analytics reports.
Assign or move based on sender
Automatically assign or move emails based on the sender. For example, if Acme is a VIP customer, create a rule to move all emails from @acme.com to a VIP inbox.
Step 1
Click the gear icon and navigate to your workspace settings. Select Rules and macros from the left menu, and click Create rule. Select the Move new or Move ongoing templates from the rule library, or Create from scratch.
In this example, we'll select the Move new template.
Step 2
The template will automatically select triggers, conditions, and actions to get you started. You can further customize your rule by selecting specific inboxes, adding additional conditions, and more.
Step 3
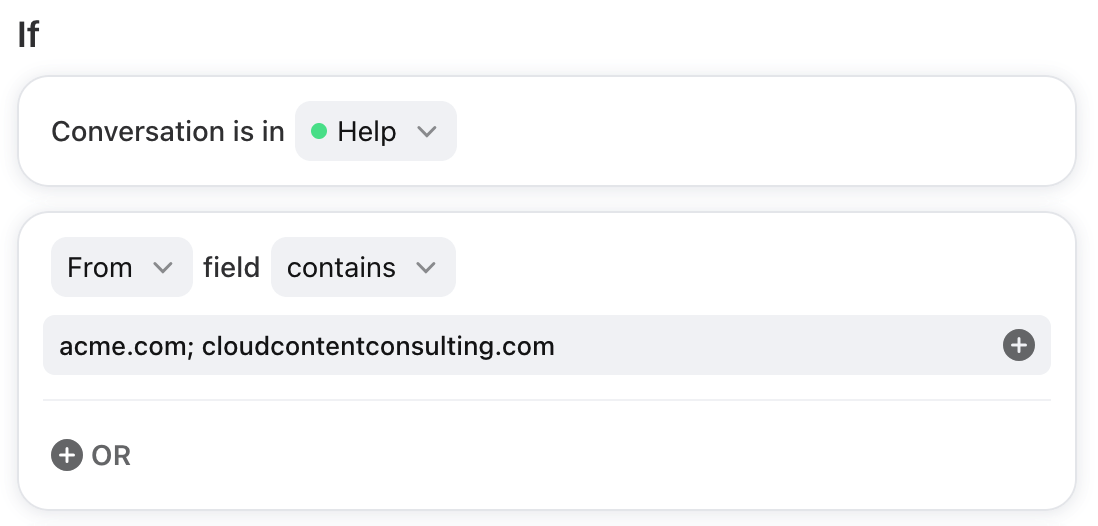
Make the following changes to the If conditions:
In the Conversation is in condition, select the shared inbox this rule should apply to (e.g. Help inbox), AND
Add From field contains the email domain(s)
(Optional) Remove the Message body contains condition
💡 Tip: Add multiple email domains by listing multiple domains separated by semicolons (;) in the same line, or adding more OR conditions.
Step 4
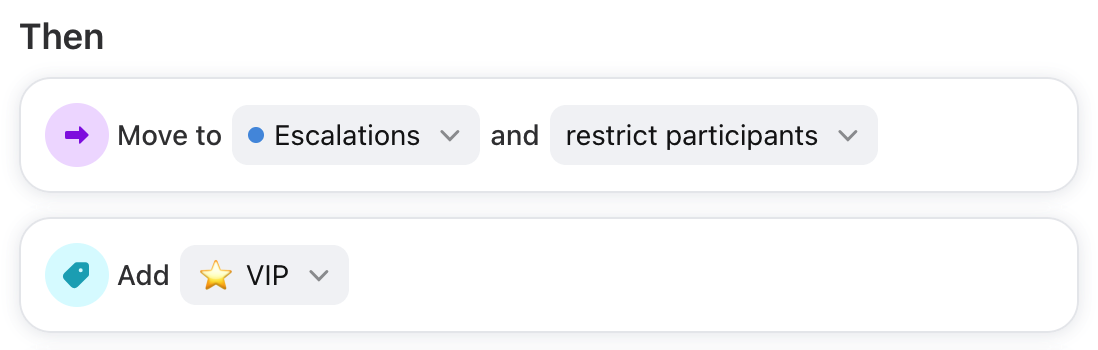
Set the Then action to either of the below:
Assign to teammate action to assign it to one specific person. Alternatively, you can also assign to multiple selected teammates or a teammate group to distribute the emails amongst the team via round robin, or load balancing*.
Move to inbox action to move it to a different inbox.
💡 Tip: Add an additional tagging action. This will help with general organization and future analytics reports.
Archive and tag based on content
Automatically archive and tag emails based on content. For example, if you want to filter out non-urgent newsletter emails, create a rule to archive messages containing the word "newsletter." Tag these messages to easily find them later.
Step 1
Click the gear icon and navigate to your workspace settings. Select Rules and macros from the left menu, and click Create rule. Select the Archive template from the rule library, or Create from scratch.
In this example, we'll select the Archive template.
Step 2
The template will automatically select triggers, conditions, and actions to get you started. You can further customize your rule by selecting specific inboxes, adding additional conditions, and more.
Step 3
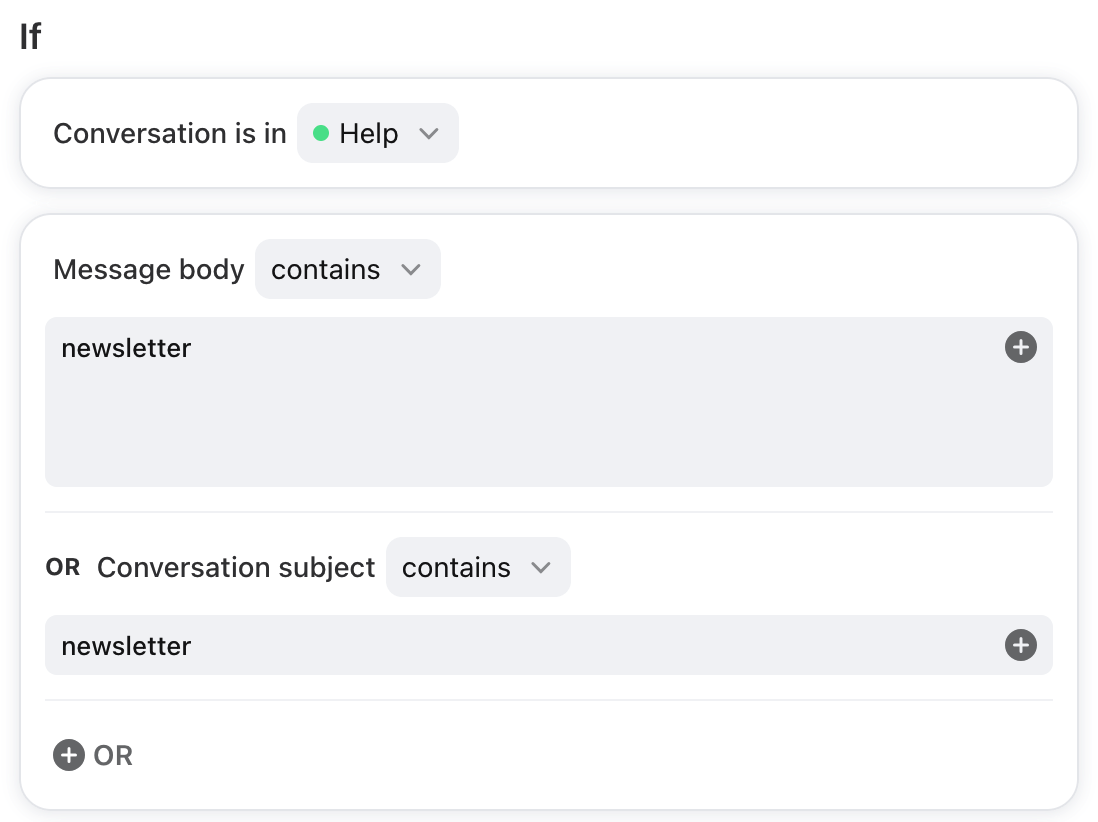
Make the following changes to the If conditions:
In the Conversation is in condition, select the shared inbox this rule should apply to (e.g. Help inbox), AND
Set Message body contains to the word of your choice (e.g. newsletter)
Add Conversation subject contains and set to the word of your choice (e.g. newsletter). Ensure Message body contains and Subject contains are connected by an OR statement.
Step 4
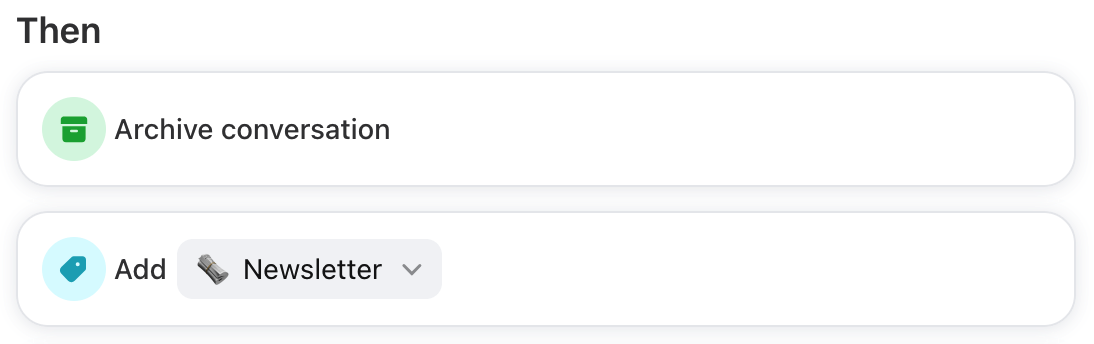
Set the Then actions to:
Archive conversation
Add the Add tags action and select your tag
Archive and tag based on sender
Automatically archive and tag emails based on sender. For example, if you want to filter out non-urgent newsletter emails, create a rule to archive messages sent from newsletter@acme.com. Tag these messages to easily find them later.
Step 1
Click the gear icon and navigate to your workspace settings. Select Rules and macros from the left menu, and click Create rule. Select the Archive template from the rule library, or Create from scratch.
In this example, we'll select the Archive template.
Step 2
The template will automatically select triggers, conditions, and actions to get you started. You can further customize your rule by selecting specific inboxes, adding additional conditions, and more.
Step 3
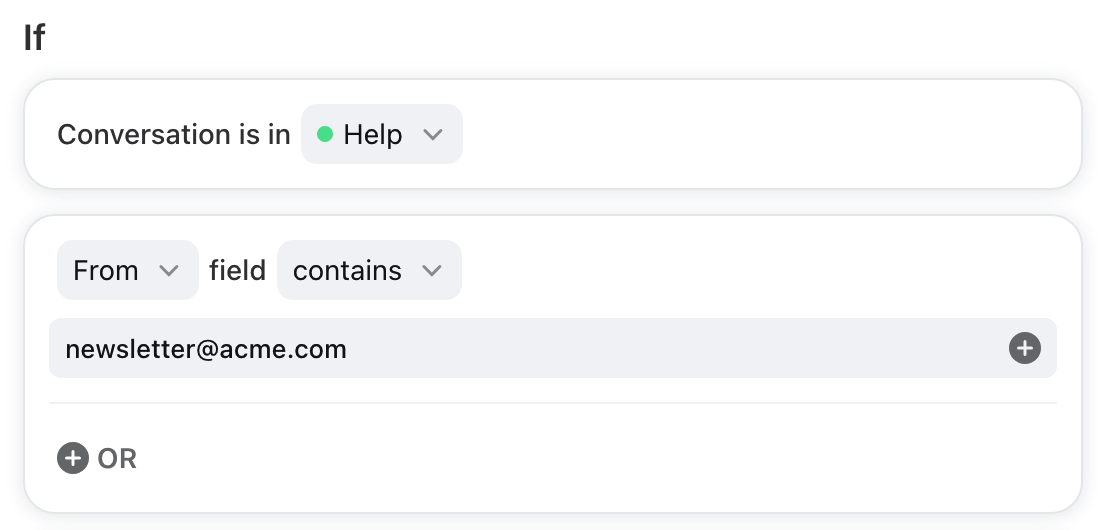
Make the following changes to the If conditions:
In the Conversation is in condition, select the shared inbox this rule should apply to (e.g. Help inbox), AND
Add From field contains the email address(es)
(Optional) Remove the Message body contains condition
💡 Tip: Add multiple email addresses by listing multiple addresses separated by semicolons (;) in the same line, or adding more OR conditions.
Step 4
Set the Then actions to:
Archive conversation
Add the Add tags action and select your tag

Pricing
Rules are available on all plans. See this article to review triggers, conditions, and actions included in each plan.
* Asterisks denote features available on the Professional plan or above.