
Use accounts and contacts in rules to automate conversations
Overview
You can use rules to automatically tag conversations, assign to specific teammates and more, based on your customer data. There are several options to add or import your data, which can be stored for individual contacts or for accounts representing the organizations your team works with.
This article provides an overview on how to use your customer data to automate conversations with Front’s rule builder.
You must be a workspace admin or company admin to configure shared or company rules.
Adding customer data to Front
Importing account and contact data
There are several ways to bring your customer data into Front, including:
Manually creating accounts and contacts
Importing via CSV
Syncing with a CRM such as HubSpot or Salesforce
See these articles for more information on adding account and contact data to Front.
You can define which data fields should be stored in Front by creating custom account or contact fields. Custom field data can be added via all the methods of importing accounts and contacts mentioned above. When configuring your CRM sync, you can map fields from the CRM to custom fields in Front, ensuring that your automations stay up-to-date with customer data in your CRM.
When to use contacts vs. accounts
Accounts represent the companies or organizations that your team works with. Generally, the customer data needed for rules should be added for accounts. For example, if you build a rule which assigns conversations to the relevant account manager, then you store account manager as an account custom field.
There may be some cases where it makes more sense to use contact data for your rules:
If you don’t use accounts. For example, if your customers are individual people with personal email addresses rather than a company domain.
If you receive messages from multiple contacts within an account, and the relevant teammate depends on which contact started the conversation. For example, if you deal with multiple departments in your customer’s organization, and have an account manager assigned to each department.
Create a rule using accounts or contacts
Option 1: Assign automatically to account owners
Many teams assign ownership of certain accounts to specific team members. For example, account management teams typically have an Account Manager that’s assigned to a specific account. This ensures relationship continuity because your customers can maintain a personal relationship with a representative from your team. You may have additional team members assigned to specific accounts such as Project Manager, Billing Manager, Customer Success Manager, etc.
One common need is to assign new conversations from any contact within an account to the teammate in Front who owns that account. This ensures that a new inquiry from an account is always handled by the right teammate, even if the customer reaches out to a shared email inbox, such as support@ or sales@, or even a different team member.
Here’s how to automate this assignment using a rule in Front.
Step 1: Set up at least one teammate-type account custom field
In order for a rule in Front to assign a conversation based on an account, your accounts must have at least one teammate-type custom field such as Account Manager, Project Manager, etc. You can learn to how to set up custom fields here.
Step 2: Create or import your account data into Front
You can learn how to get started with setting up your account data here. Front provides a variety of options to start setting up account data; all explained here.
For the assignment rule to work, it’s important that you use the teammate-type custom field on your accounts from Step 1, such as Account Manager, to designate an owner for your various accounts.
Step 3: Create a company or workspace assignment rule
Shared rules are rules that can be only applied to shared inboxes within a specific workspace. Company rules can be applied to all shared inboxes and/or individual inboxes, available to company admins only.
In most cases, creating a shared rule is sufficient for this workflow. There are two scenarios where you’ll want to use a company rule instead:
Your customers send emails to other teammates’ personal inboxes rather than their designated account owner’s personal inbox, so you want to reassign these conversations internally. This would be useful if, for example, someone from an account emails amysmith@example.com rather than johndoe@example.com, when John is the account manager, and you want to reassign the conversation in Amy Smith’s inbox to John Doe.
You have multiple workspaces in Front and want to create a rule that assigns conversations from shared inboxes in more than one workspace. You could create one company rule that applies to all workspaces.
Step 4: Use the Assign to owner rule template
If you are creating a company rule or you do not have access to Front’s rule templates, you can create a rule from scratch as described below. Otherwise, follow these steps to create your assignment rule:
Navigate to Settings by clicking the gear icon in Front
Choose the Rules and macros tab in the left sidebar in company settings or workspace settings. If creating a company rule, select Company rules.
In the template library, select the Assign to owner template.
Add a name for your rule, select the inboxes that the rule should apply to, and add any other triggers, conditions, or actions.
Select whether you are assigning based on accounts or contacts and select the custom field that conversations should be assigned to.
Click Create rule.
That’s it! You’ve now created a rule that will automatically assign conversations to the right teammate on the account. As your account ownership changes and as your account list grows, you just have to keep your account data up-to-date in Front and your assignment rule will automate the rest.
Option 2: Tag based on account or contact
You can also use rules to automatically add tags to conversations based on account or contact data. You can then use these tags to filter conversations in analytics, views, and other rules.
A common use case for service teams is to provide a specialized experience for certain customers. You may have accounts that are particularly sensitive or have higher service requirements because of their revenue or tier. In this example, we show how you can tag conversations to indicate they are from VIP customers. You can adapt this example for other use cases.
Step 1: Set up the account custom fields
You can learn to how to set up custom fields here. Here are a few example use cases and the account custom fields or indicators that you might use:
Revenue: If you want to provide specialized service for higher-paying customers, you could set up a Revenue custom field with the Number type. Your rule would then check the value of this Revenue field on the account before automating an action.
Tier: If you want to provide specialized service for customers of a certain tier, you could create a Tier custom field with the Text type. For example, your rule would then check if the Tier property contains certain text such as Gold, Silver, Bronze tiers.
Region: If you want to provide specialized service for customers that are in a certain region, you could create a Region custom field with the Text type.
Step 2: Create or import your account data into Front
You can learn how to get started with setting up your account data here. Front provides a variety of options to start setting up account data; all explained here.
Step 3: Create a company or workspace assignment rule
Shared rules are rules that can be only applied to shared inboxes within a specific workspace. Company rules can be applied to all shared inboxes and/or individual inboxes, available to company admins only.
In most cases, creating a shared rule is sufficient for this workflow. There are two scenarios where you’ll want to use a company rule instead:
Your accounts send emails to other teammates’ personal inboxes rather than their designated account owner’s personal inbox, so you want to reassign these conversations internally. This would be useful if, for example, an account emails amysmith@example.com rather than johndoe@example.com, when John is the account manager, and you want to reassign the conversation in Amy Smith’s inbox to John Doe.
You have multiple workspaces in Front and want to create a rule that assigns conversations from shared inboxes in more than one team. You could create one company rule that applies to all workspaces.
Step 4: Use the Tag rule template
If you are creating a company rule, you will need to create a rule from scratch as described below. Otherwise, follow these steps to create your tagging rule:
Navigate to Settings by clicking the gear icon in Front.
Choose the Rules and macros tab in the left sidebar in company settings or workspace settings. If creating a company rule, select Company rules.
In the template library, select the Tag template.
Add a name for your rule then select the inboxes that the rule should apply to, and add any other triggers, conditions, or actions.
Add the Account custom field contains condition and select the custom field you want to use to define when the conversation is considered an 'Important conversation’. For example, based on the revenue, tier, or region fields created in step 1.
In the Add tag action, select the tag ‘Important conversation’ to be added to the conversation when the criteria are met.
Click Create rule.
That’s it! You’ve now created a rule that will automatically tag conversations based on your account data. You could then use this tag to route conversations to a ‘VIP inbox’ or apply a time goal rule with a shorter expected response time.
Rule conditions and actions
Front's rule builder has a variety of conditions and actions that allow you to specify what type of conversations you want to filter for. The following conditions are tailored for account filtering and actioning.
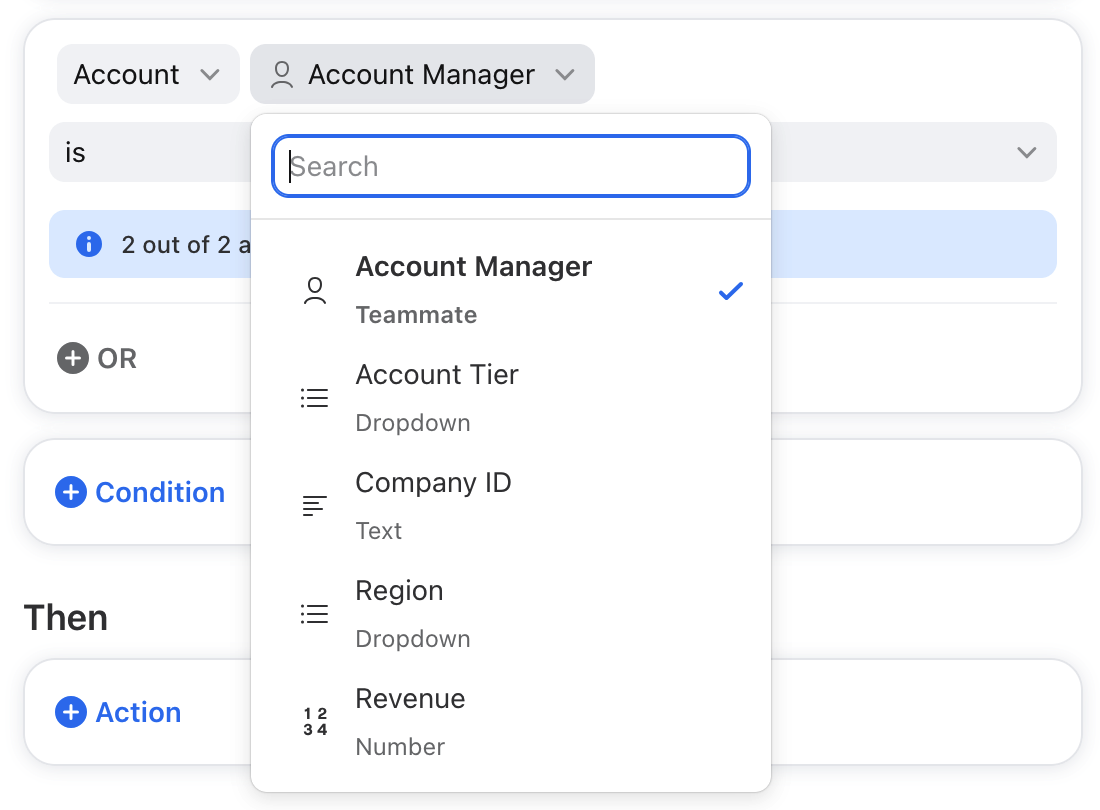
Filter: Account/contact custom field contains
This condition allows you to define criteria based on any custom account fields.
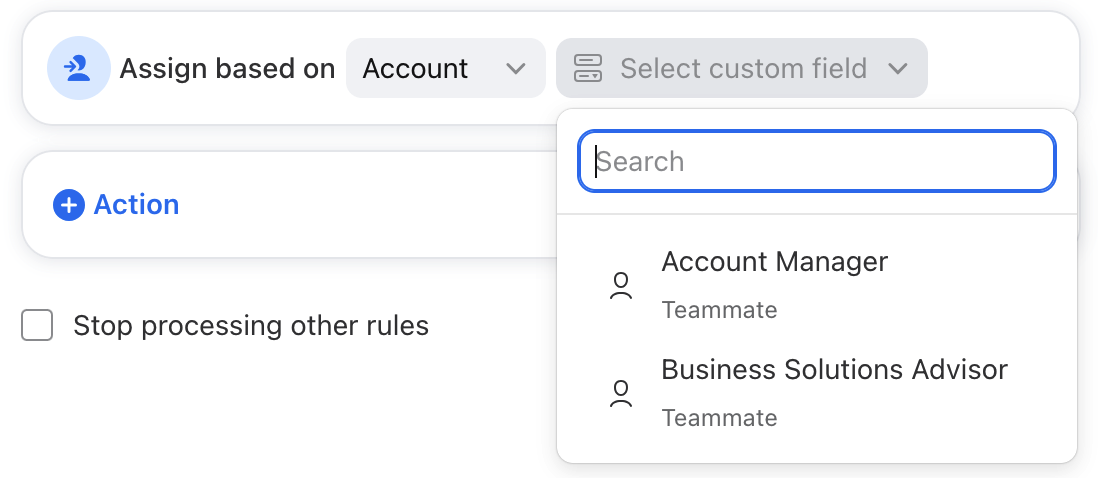
Action: Assign based on account/contact custom field
This action allows you to assign conversations based on a Teammate custom field on the account.
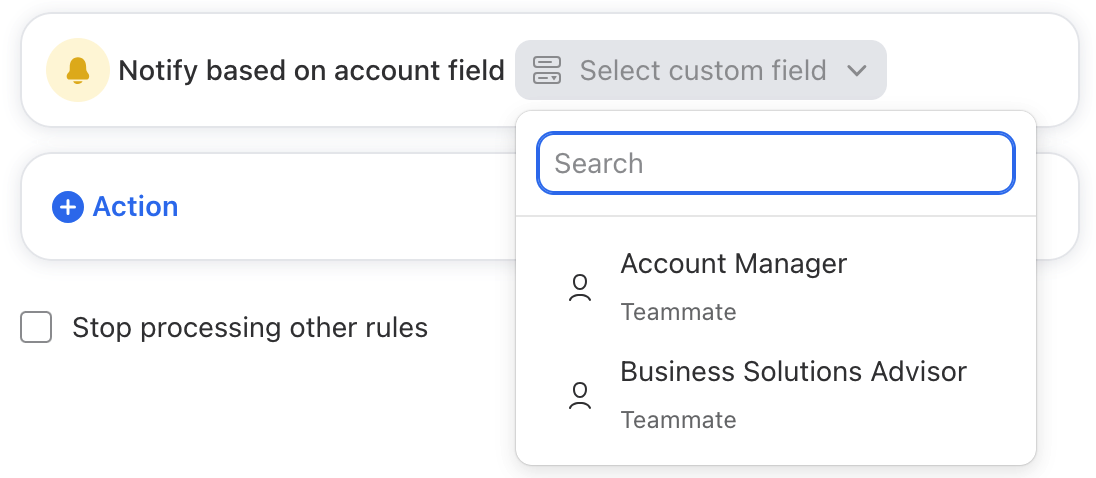
Action: Notify based on account field
This action allows you to notify a teammate based on a Teammate custom field on the account.
Pricing
This feature is available on the Professional plan or above.