
How to build a Smart Rule
Overview
Creating tailored, scalable workflows as your team grows is essential, but can often require hours of coding to implement effective ones. The good news is that Front’s rules engine grows, adapts, and flexes with you. Rather than manually create hundreds of static workflows, use our Smart Rules to quickly create dynamic formulas that trigger actions based on your chosen dependencies. No coding or messy workflow manager is necessary, and only a few high-impact Smart Rules are needed to get the results you want.
Instructions
Part 1: Start the rule
Step 1
Determine whether you need to create an individual, company rule, or shared rule. Individual rules will apply to personal conversations in your individual inbox, shared rules will apply to shared conversations in shared inboxes, and company rules will apply to multiple inboxes in your different workspaces.
Step 2
Click the gear icon, then navigate to company, workspace, or personal settings, depending on which space you want to work with.
In our example, we will create a shared rule within a specific workspace.
Step 3
In your workspace settings, select Rules and macros in the sidebar. Click Create rule.
Step 4
In the rule library pop-up, choose a rule template to start with, or create one from scratch. For this example, we'll select Create linear rule to create one from scratch.
Step 5
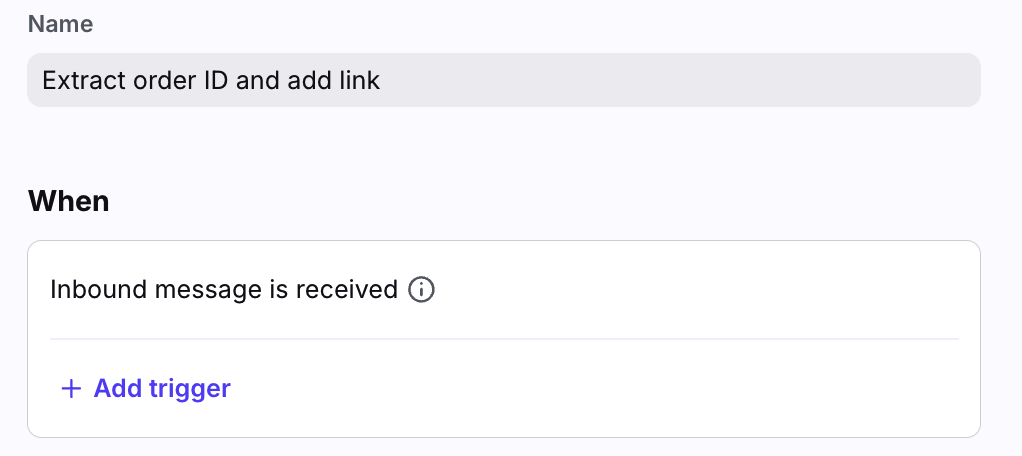
You will see the rule builder. First, give your rule a name. Then, choose the When trigger event(s) for this rule.
Example: We will create a rule that reads the body of an incoming message, extracts all order IDs following a specific pattern, and adds topic links pointing to the order URLs. Thus, the trigger we choose will be When inbound message is received.
Step 6
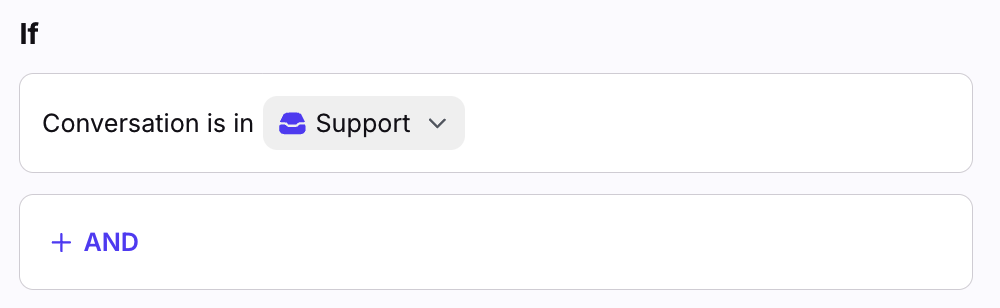
Next, set the If filters for the rule that will allow the rule to narrow down the correct type of messages or actions.
Example: Set the filter to If conversation is in Support inbox.
Part 2: Build the dynamic variable
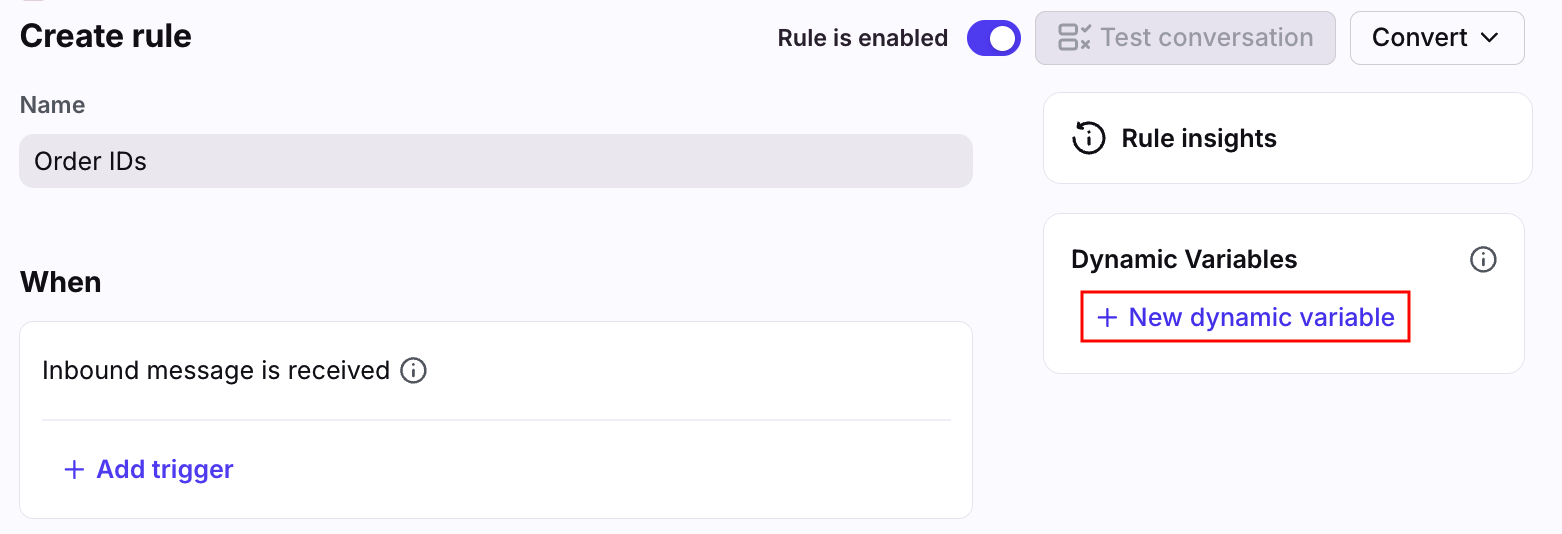
Step 7
Now we're ready to build the dynamic variable, which is what makes this rule smart. Click New dynamic variable.
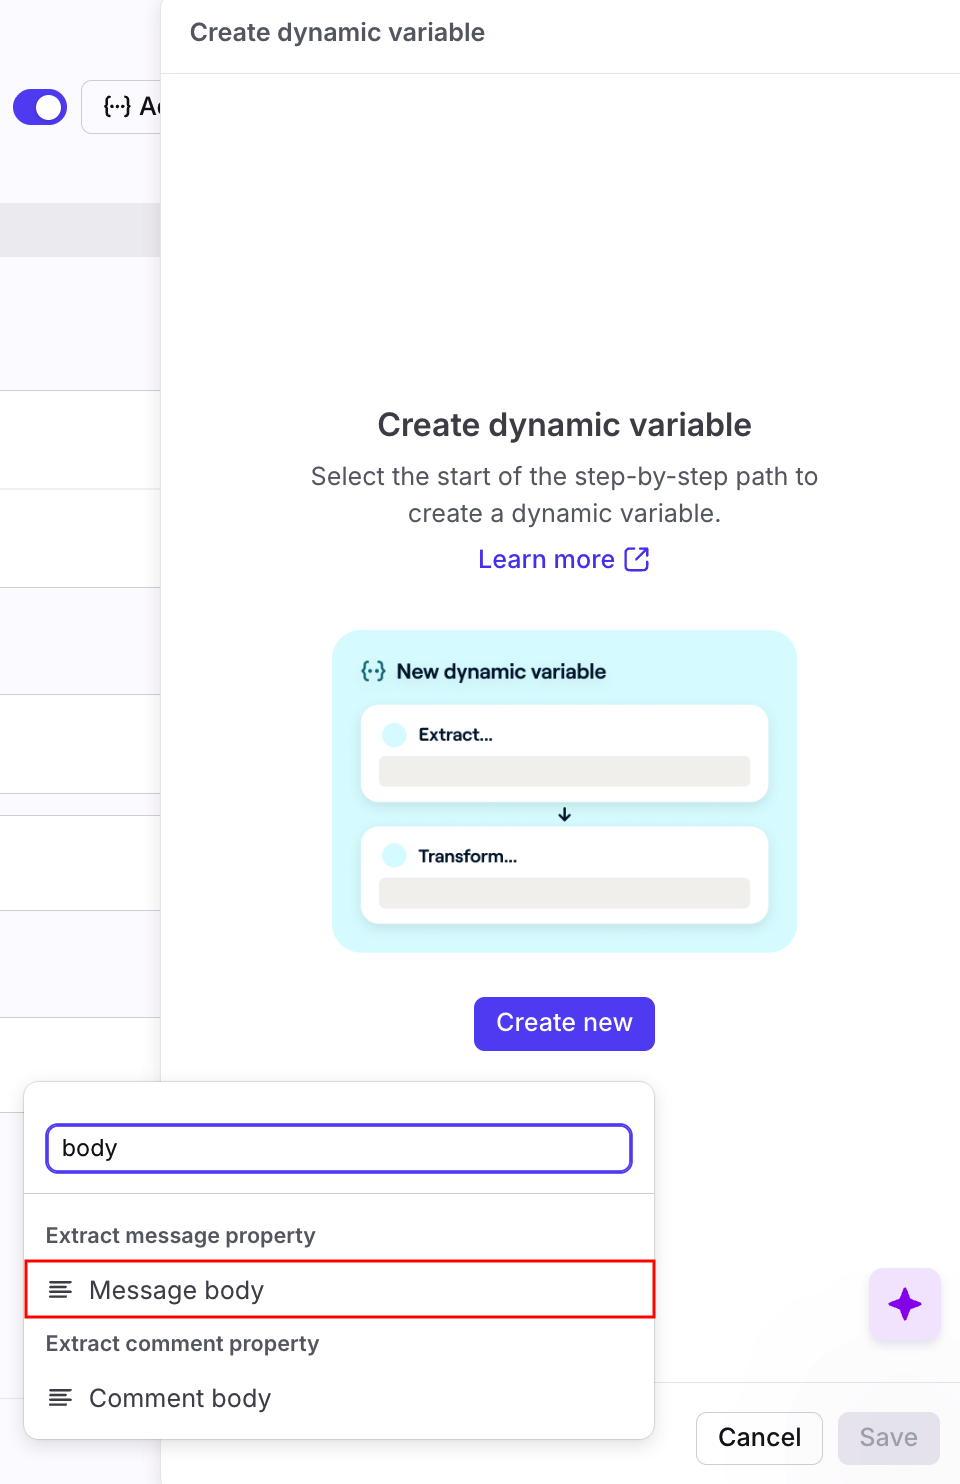
Step 8
A panel will appear, which is the starting point of the variable you are building. Next we’ll add the different elements that create this variable. From here, you can select:
Create new to manually build the variable, or
Build with AI icon to describe the variable you’d like AI to create. See this article to learn more.
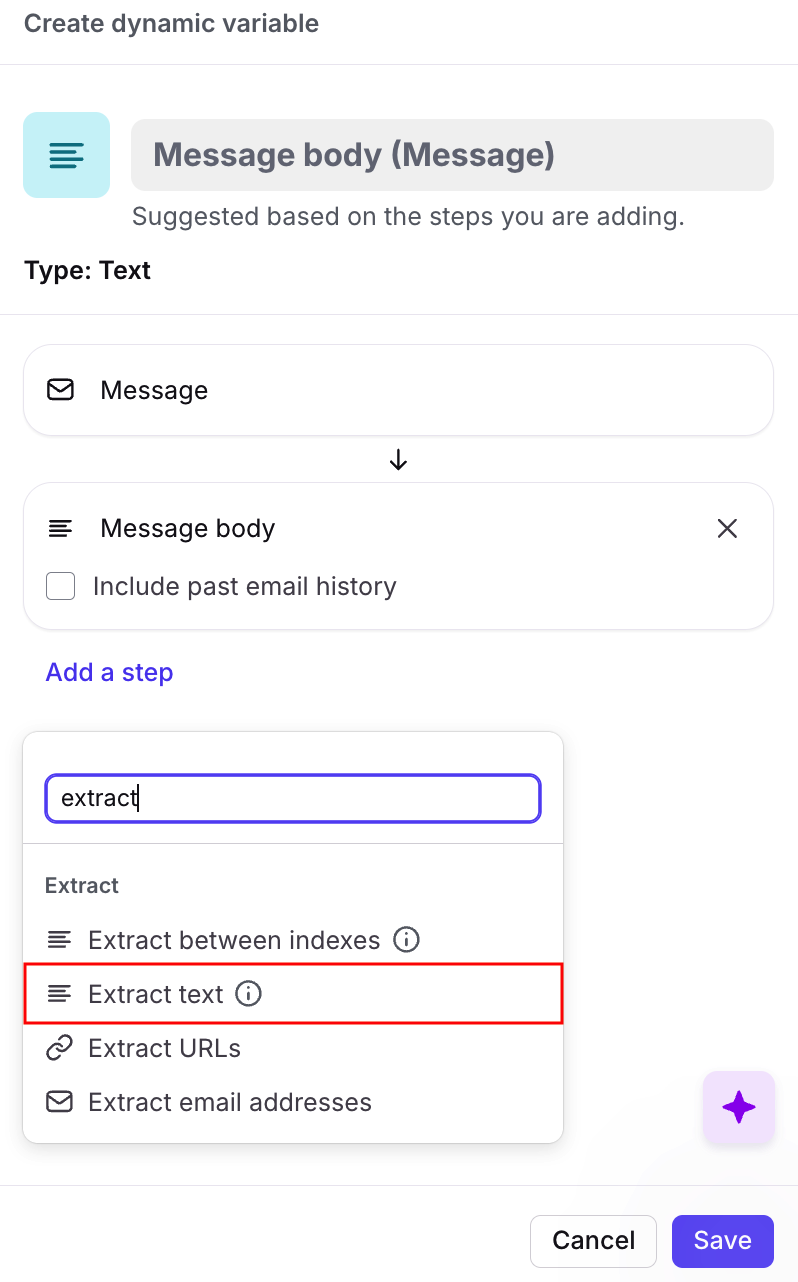
In this example, we’ll click Create new. You'll see a list of all the properties you can work with, grouped into different variable functions. To learn what each option does, see the Guide to dynamic variables.
Example: Under the "Extract message property" section, select the Message body option. You can also search for the option.
Step 9
Once you've selected the first step of the dynamic variable, you will see the structure of the variable you are building on-screen, including the step you just added.
Step 10
You will also see the Type of variable you've chosen displayed at the top, which is helpful because the subsequent steps you add will depend on the type of the previous step. If your previous step is of Type: Text, you'll see the text options in the next step; if it's of Type: Number, you'll see the number options, etc. We only show what is useful based on the type at the step you're currently building. Click Add a step to continue building the variable.
Example: In this next step, we will be using the Extract text option.
Step 11
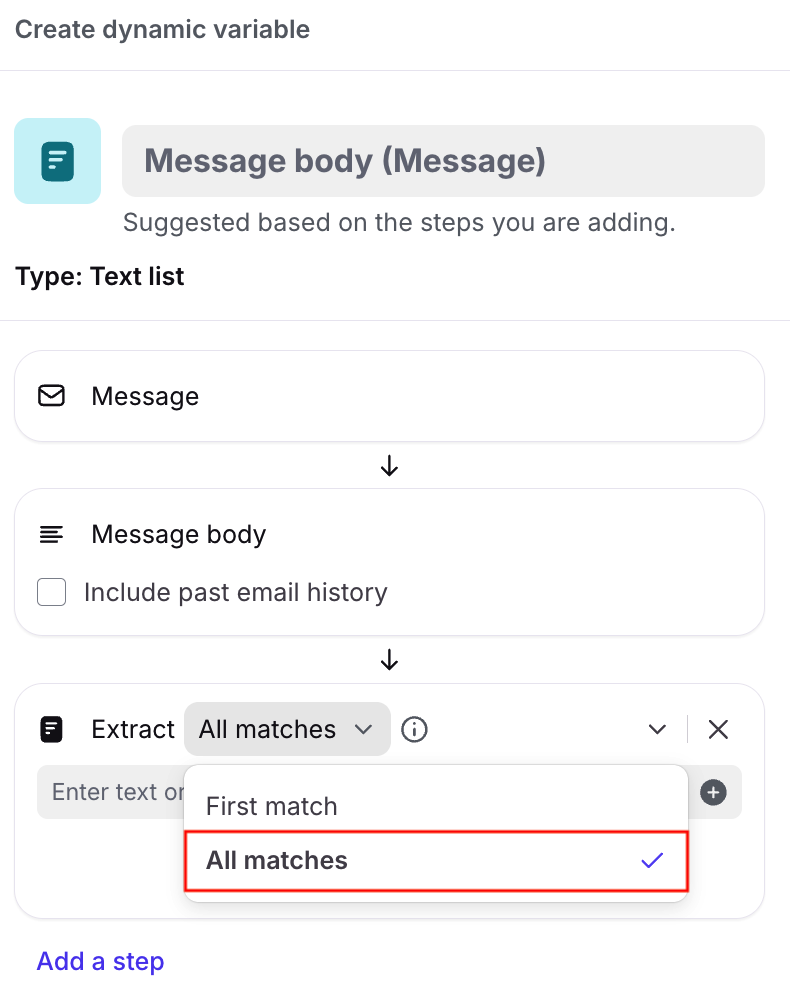
You'll see the next step listed in your variable. Some steps will have additional dropdown options to choose from, such as this one.
Example: We will choose All occurrences because we want to extract all order IDs in the message, and not just the first occurrence of an order ID. You will also notice that once you select this option, the Type at the top updates to Type: Text list because the result will be a list.
Step 12
Continue building the newest variable step by specifying the format of the order ID the rule should look for. In the text box that says Enter text or select placeholder, click the plus (+) sign to build out the format of the order ID by stringing together the different elements of your specific order ID.
Example: If your order ID is ZZ-83765-32, then the format would be as shown below.
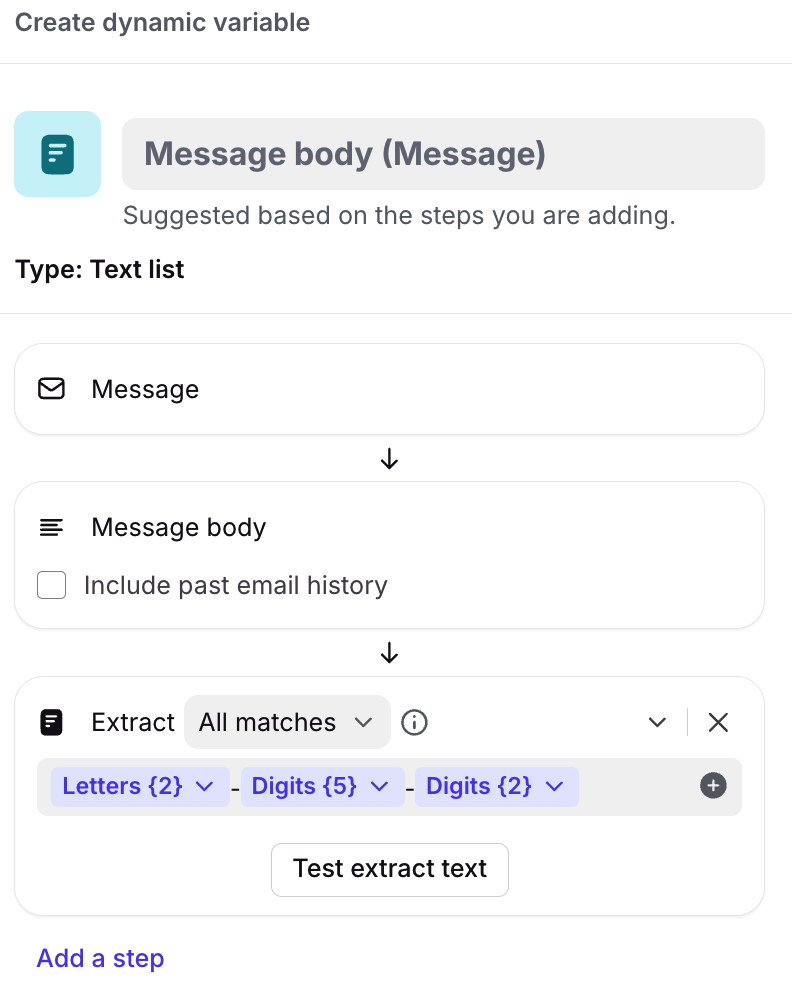
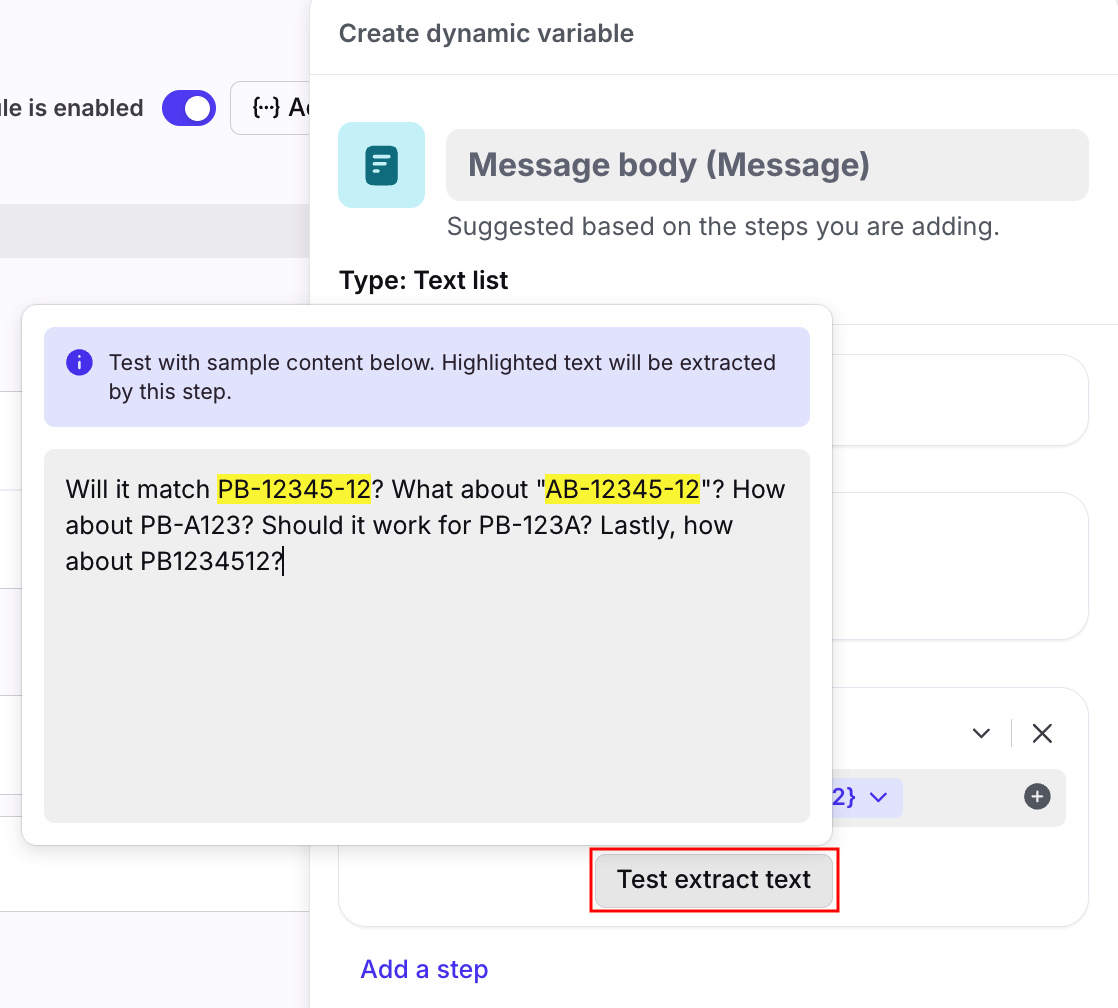
You can use the Test extract text feature to quickly test the rule extraction in the rule editor. Enter sample text into the popup. The highlighted text will be extracted.
Step 13
Continue adding steps to the variable to complete the full function of the variable you need.
Example: In our example, we will add a few more steps.
Transform each element (map): Creates a new list with the results of the previous element
Parse as URL: Paste in the URL format of the order management system that accesses the order IDs, and include the order ID format I created in the previous step.

Part 3: Finish the rule
Step 14
Remember to add a name for this variable at the top; or one will automatically be created for you based on the elements used. Click Save.
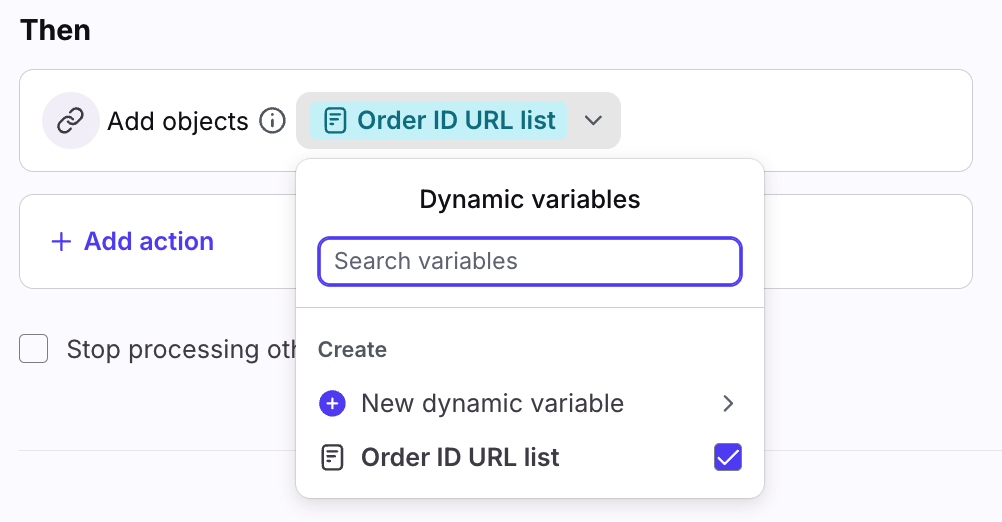
Return to the rule builder and click the Then action section. Choose the type of action compatible with your variable. Now, when you click the dropdown menu to Select variables, the new variable you created will be listed to choose from. Click Create rule to finish.
Example: We'll name our variable Order ID URL list, and add the action Add objects. From the dropdown, choose the new variable you've created.
Step 15
Now, when messages or actions matching the rule occur, the rule will automatically evaluate for the dynamic variable and run the associated action.
Example: When we receive an inbound email containing order IDs, links to the full URLs will be automatically added to the conversation in the form of topic links.
Tips & tricks
Log variables in a comment
To see a log of exactly how your Smart Rules are running, use the rule action Add comment to debug dynamic variables, which will post a comment in the conversation of the results of your rule. This will help you understand if a rule is not working as intended, and also help our Support team troubleshoot with you if you reach out to us.
Accounts & Contacts custom fields
Front's Accounts and Contacts have a custom field feature in which you can add your own fields to the account or contact. The default rule engine, even without Smart Rules, already has these custom fields conditions built-in. Smart Rules also have these custom field options in dynamic variables.
When building a rule that requires custom fields, first try creating with the default rule engine without using dynamic variables; if it does not work as intended, then move to Smart Rules.
Rules and empty values in custom fields
When rules evaluate custom field values, null values (when a custom field lacks that value) are considered false. For example:
WHEN: Inbound message is received
IF: Account custom field [Customer Group] is not [Partner]
THEN: Move conversation to [Tier 1] inbox
If sophia@acme.com sends in an email and she is does not have a Customer Group value in her contact record, the rule evaluates the Customer Group as false, despite it technically being true for this contact.
To work around this, we recommend adding an OR condition with a dynamic variable to check whether or not that custom field exists for an account.
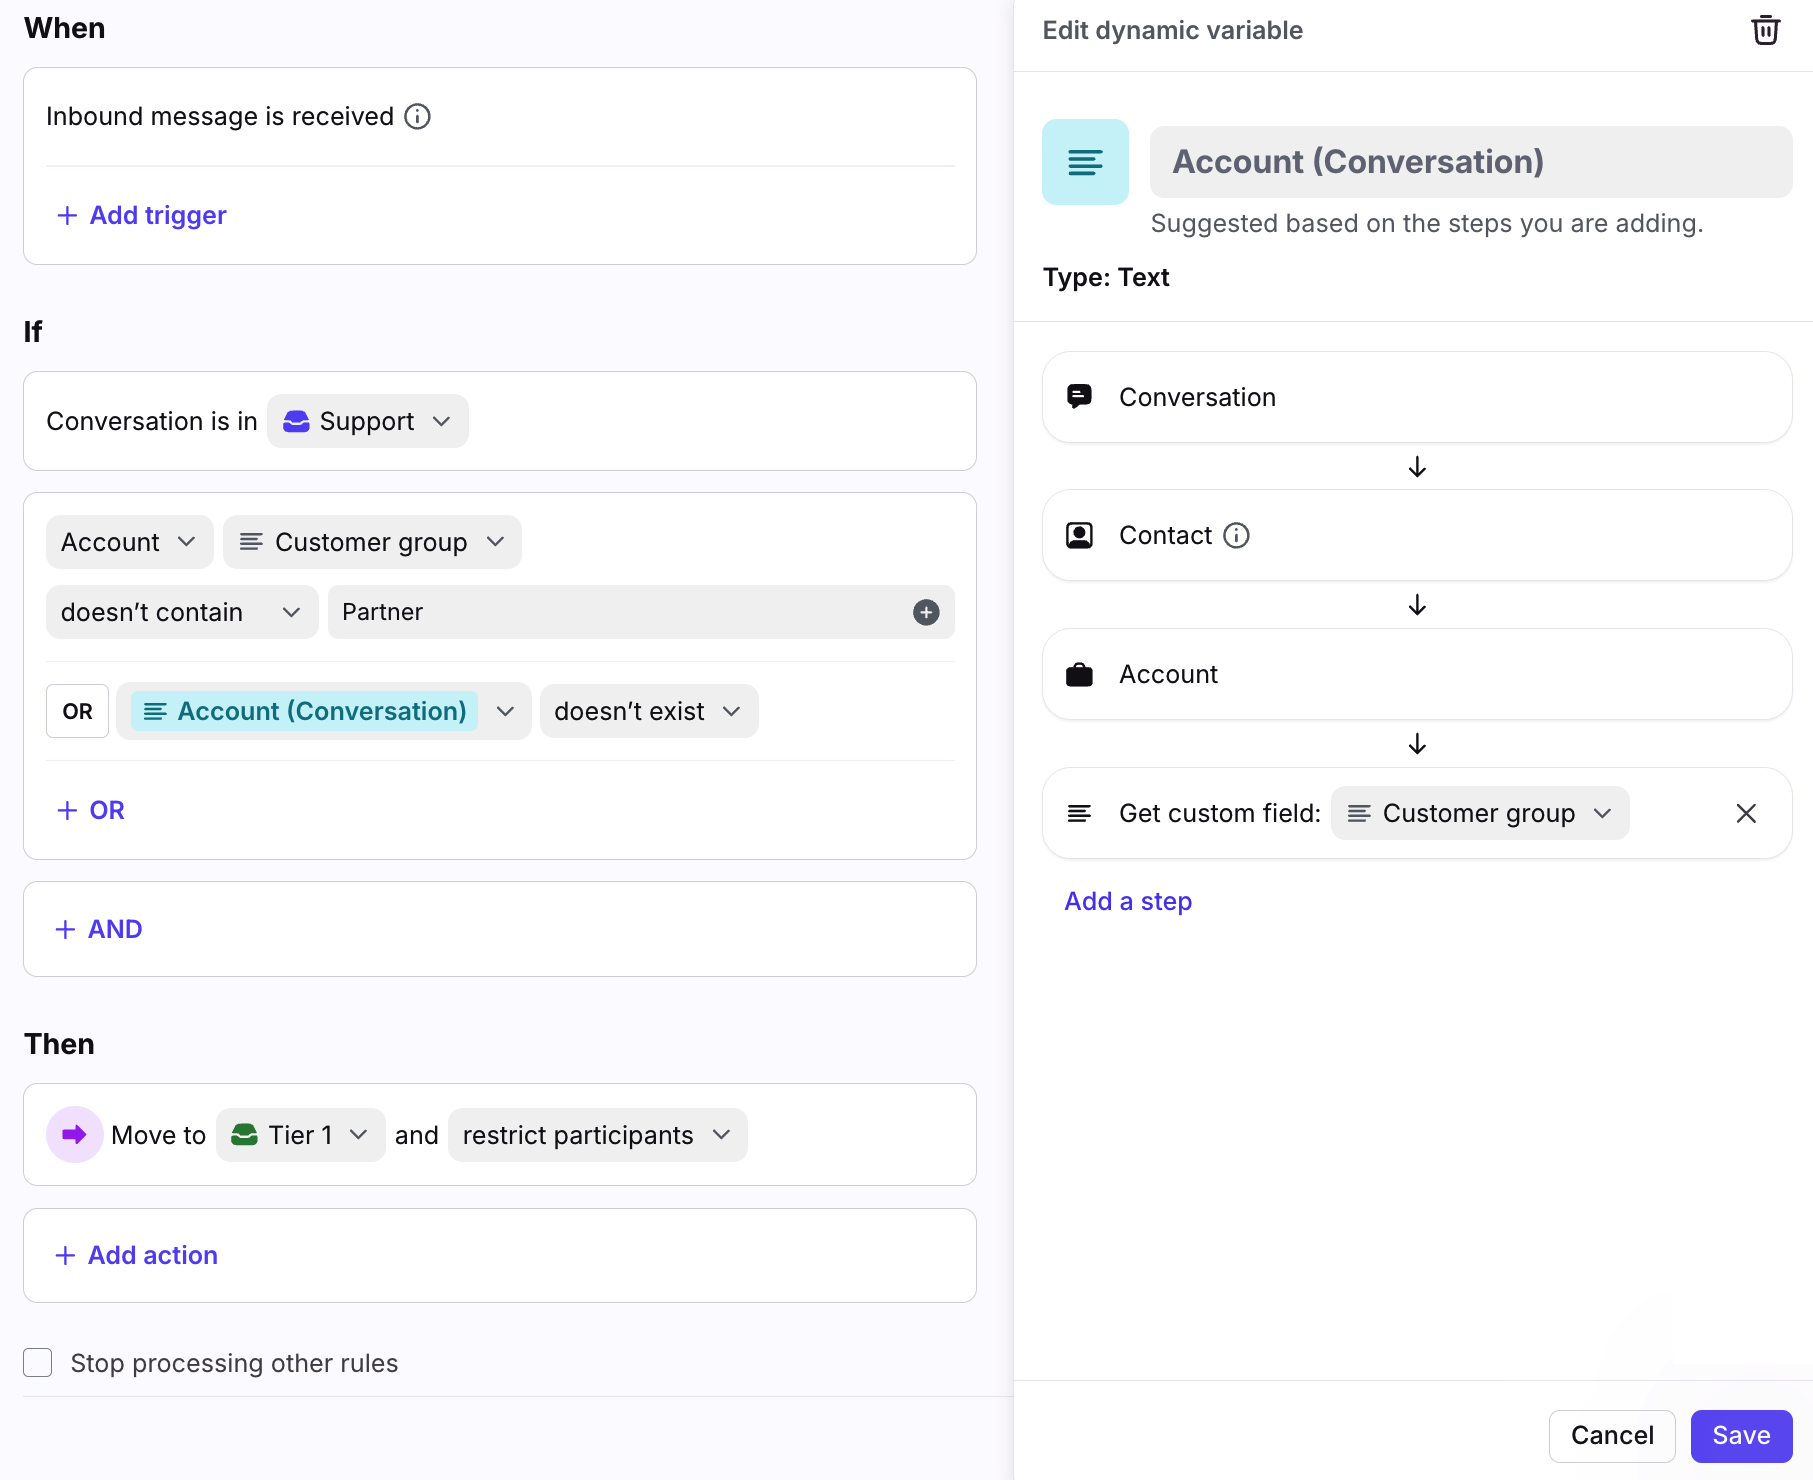
You can then check for whether or not that custom field does not contain 'Partner' OR if that custom field does not exist.
Advanced: chaining variables
A dynamic variable can reference a previous dynamic variable you built in the rule, useful for advanced use cases. When chaining variables, you can only reference variables created before the variable you're currently editing, and you cannot reorder the variables.
For instance, you might want to assign an inbound message to the recipient and add a comment starting with "Hi [name of recipient]." You start by creating a variable Main recipient referring to the teammate in the To field of the email, and use it for the assign action. Rather than starting from scratch for the second variable, Name of main recipient, you can start by reusing the result of the previous variable.
Related guides
Smart Rules: Get an introductory orientation on Smart Rules and the related resources.
Smart Rules use cases: Gain inspiration from common ways to leverage Smart Rules to supercharge your workflows.
Understanding dynamic variables: Get the breakdown on how exactly the dynamic variables, which are what enable the rule to be smart, work.
Guide to dynamic variables: Check out the glossary of all the different steps and options you can have in the dynamic variable of a Smart Rule.
Pricing
This feature is available on the Enterprise plan.