How to set up a Google Business Messages channel
⚠️ Google is planning to deprecate Google Business Messages in July 2024. We will be reaching out to impacted customers before July. See here for more details from Google.
Overview
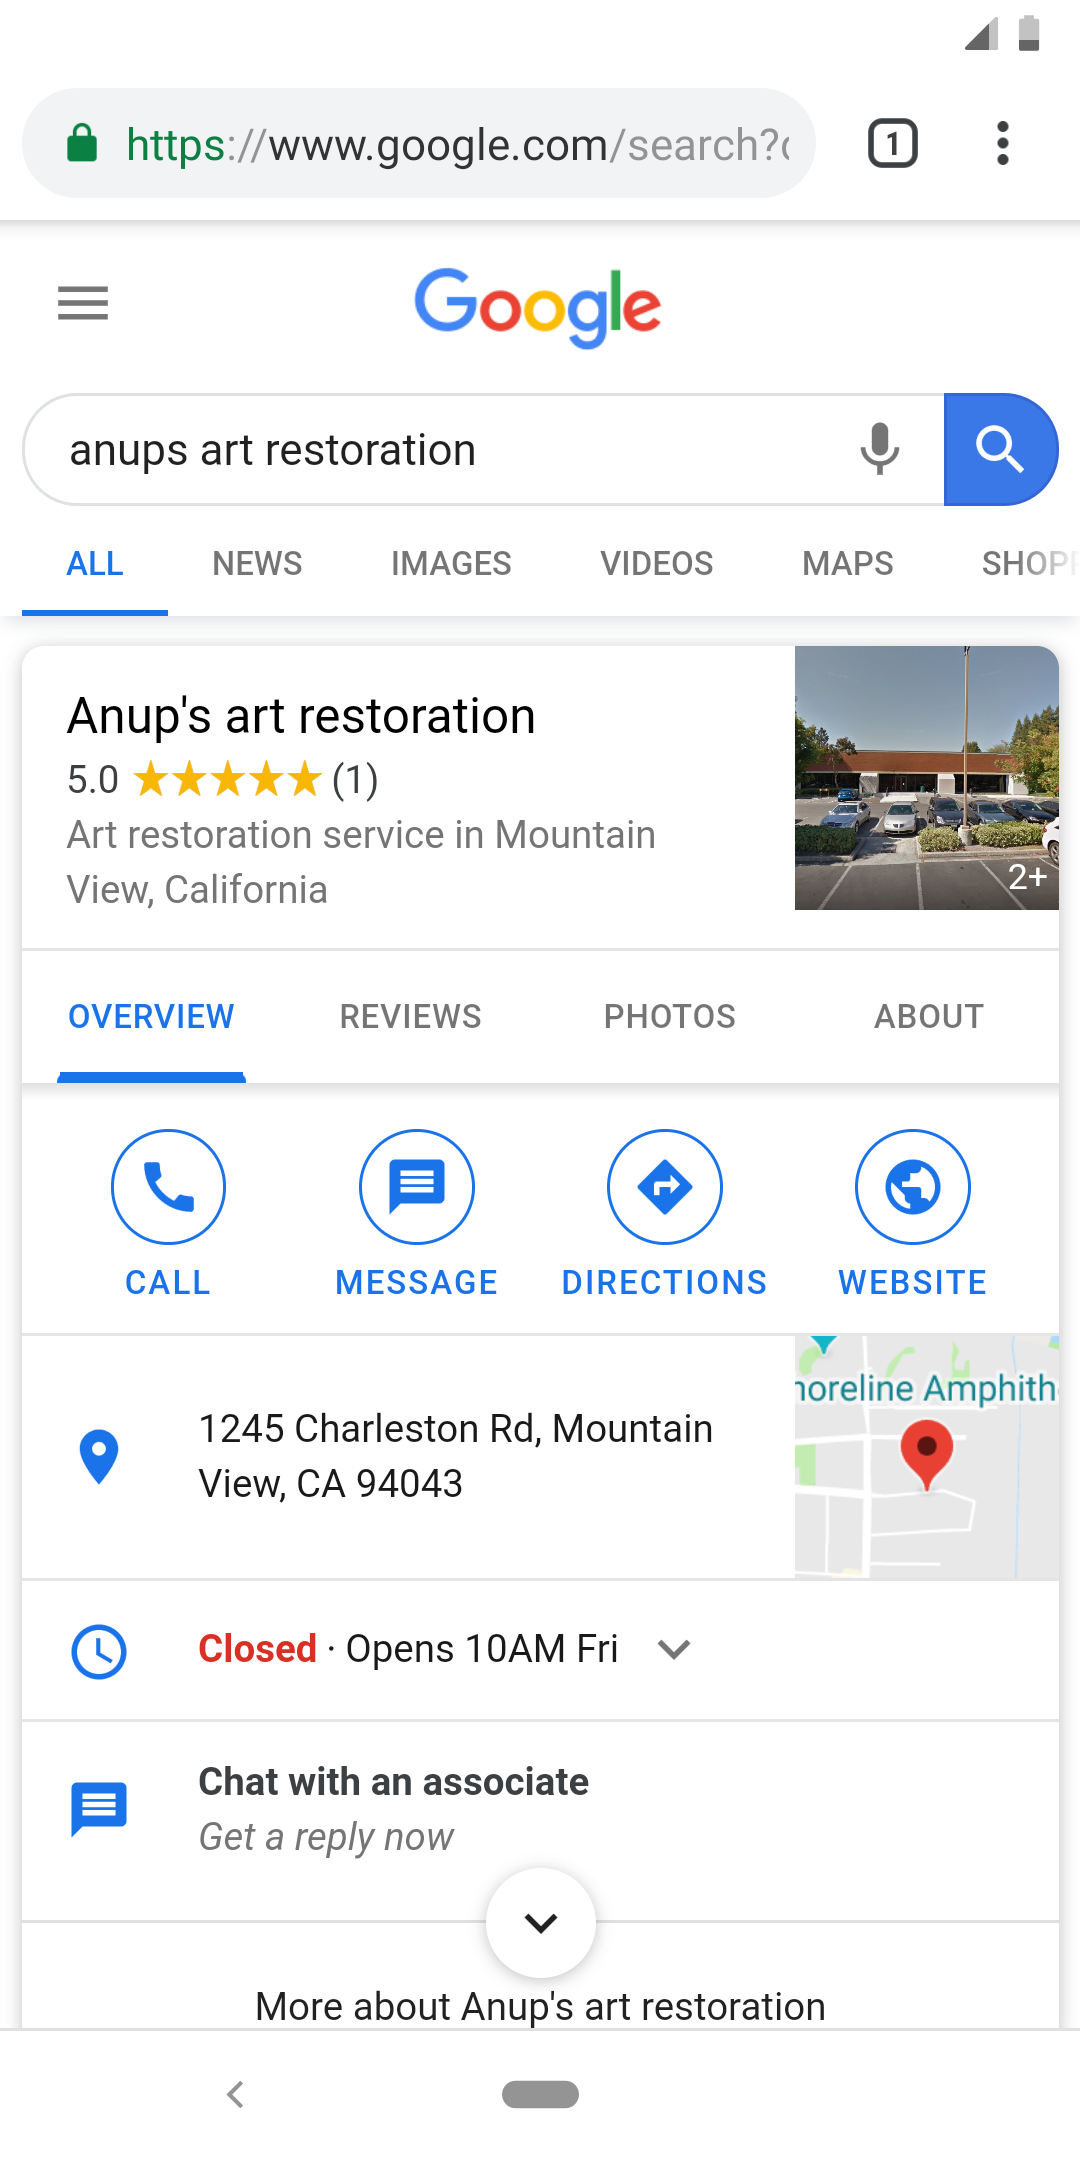
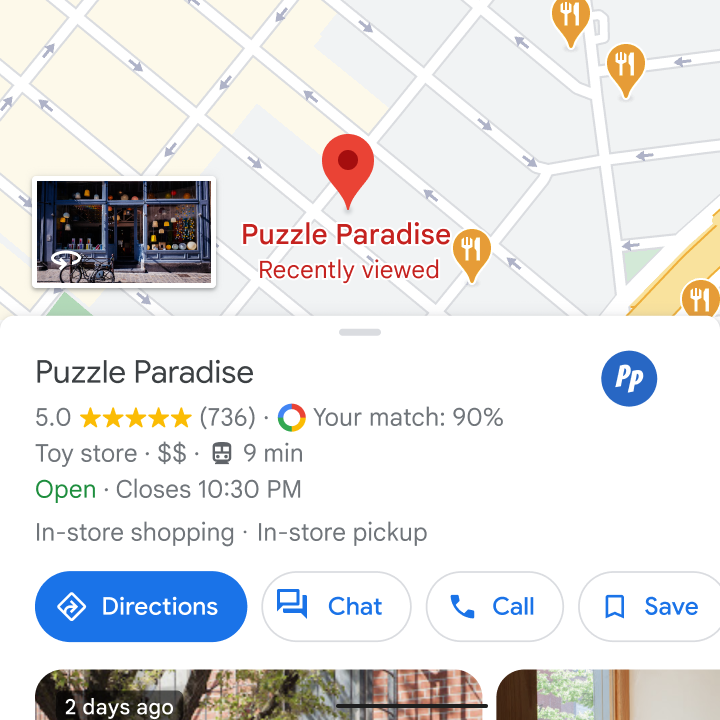
Front's Google Business Messages channel allows you to manage messages received from leads or customers via Google Search or Google Maps directly in Front. Once set up, listings on Google like your company website or locations in Google Maps will include a Chat option that will allow users and potential customers to start a conversation with you. With the Front integration, you can receive and reply to those conversations directly from Front.
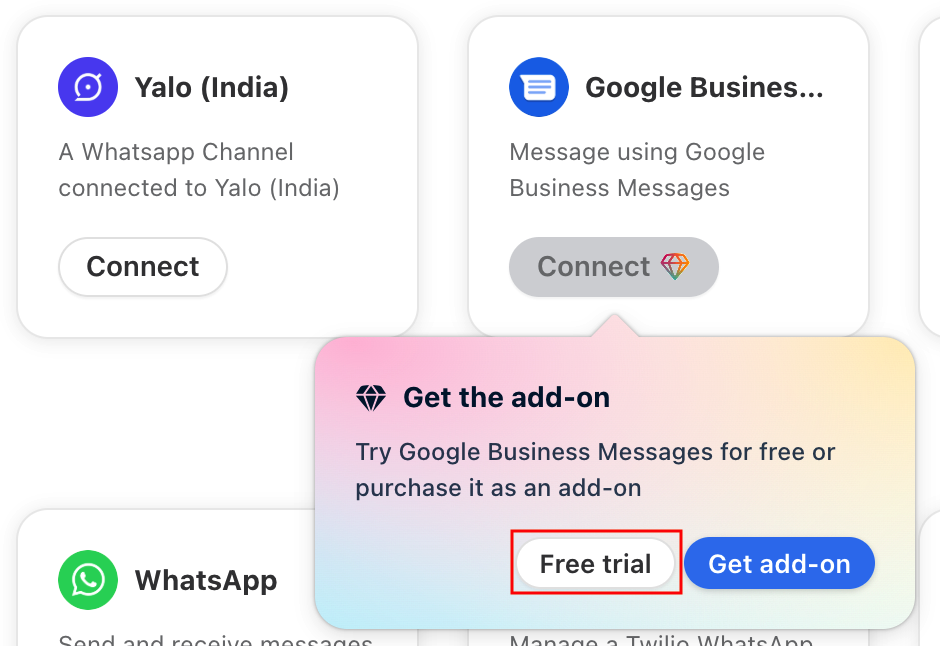
The Google Business Messages channel is available via a plan add-on. For more details on how to purchase the add-on. See the Pricing section below. You'll need to purchase the add-on before continuing with the set up instructions.
Managing brands and agents in Google Business
Before connecting the channel in Front, you'll need to properly configure your Google Business brands and agents from Google Business Communications console if you haven't already. Note that if you've already set up your brand and agents previously, these steps may not be required.
Step 1
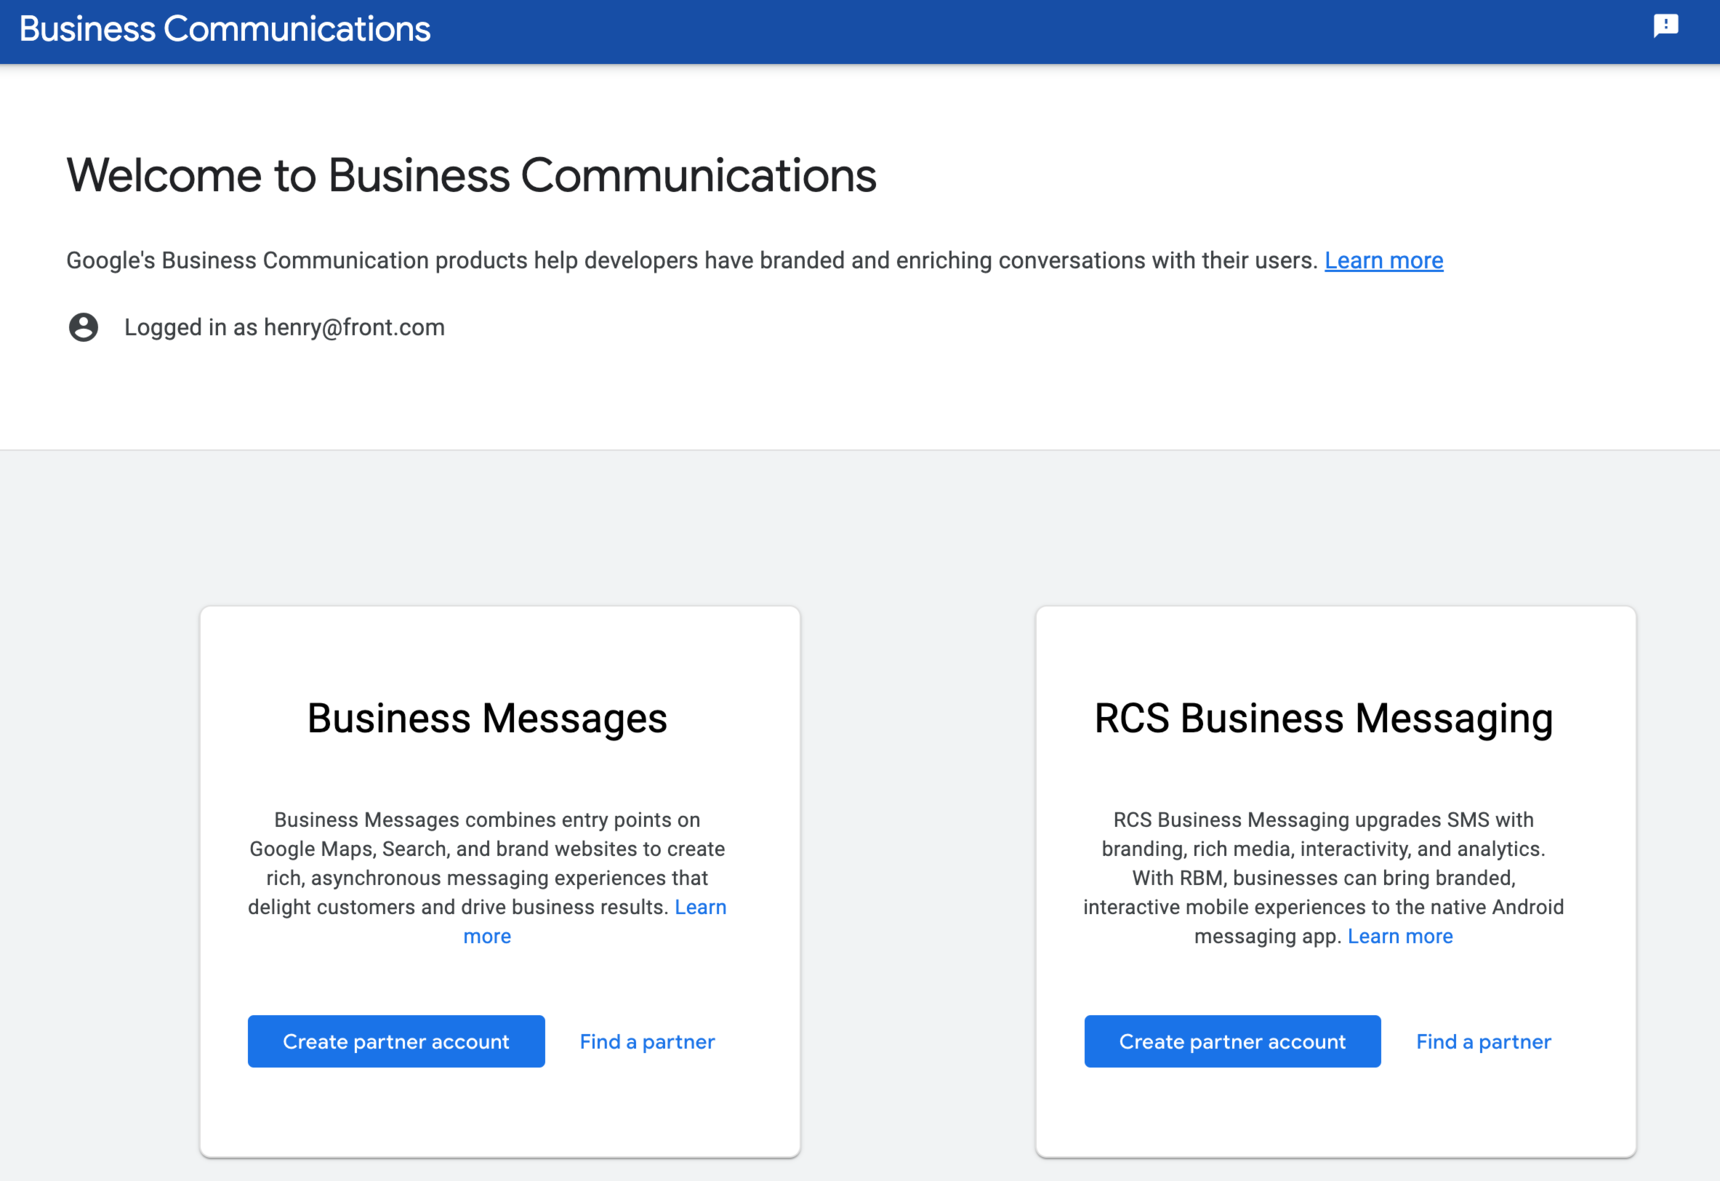
Visit the Google Business Communications console. Make sure you are signed into the G Suite account on the same domain as the Google Business listings you want to support. If you or a colleague hasn't already created a partner account, create one by clicking Create partner account under Business Messages.
Step 2
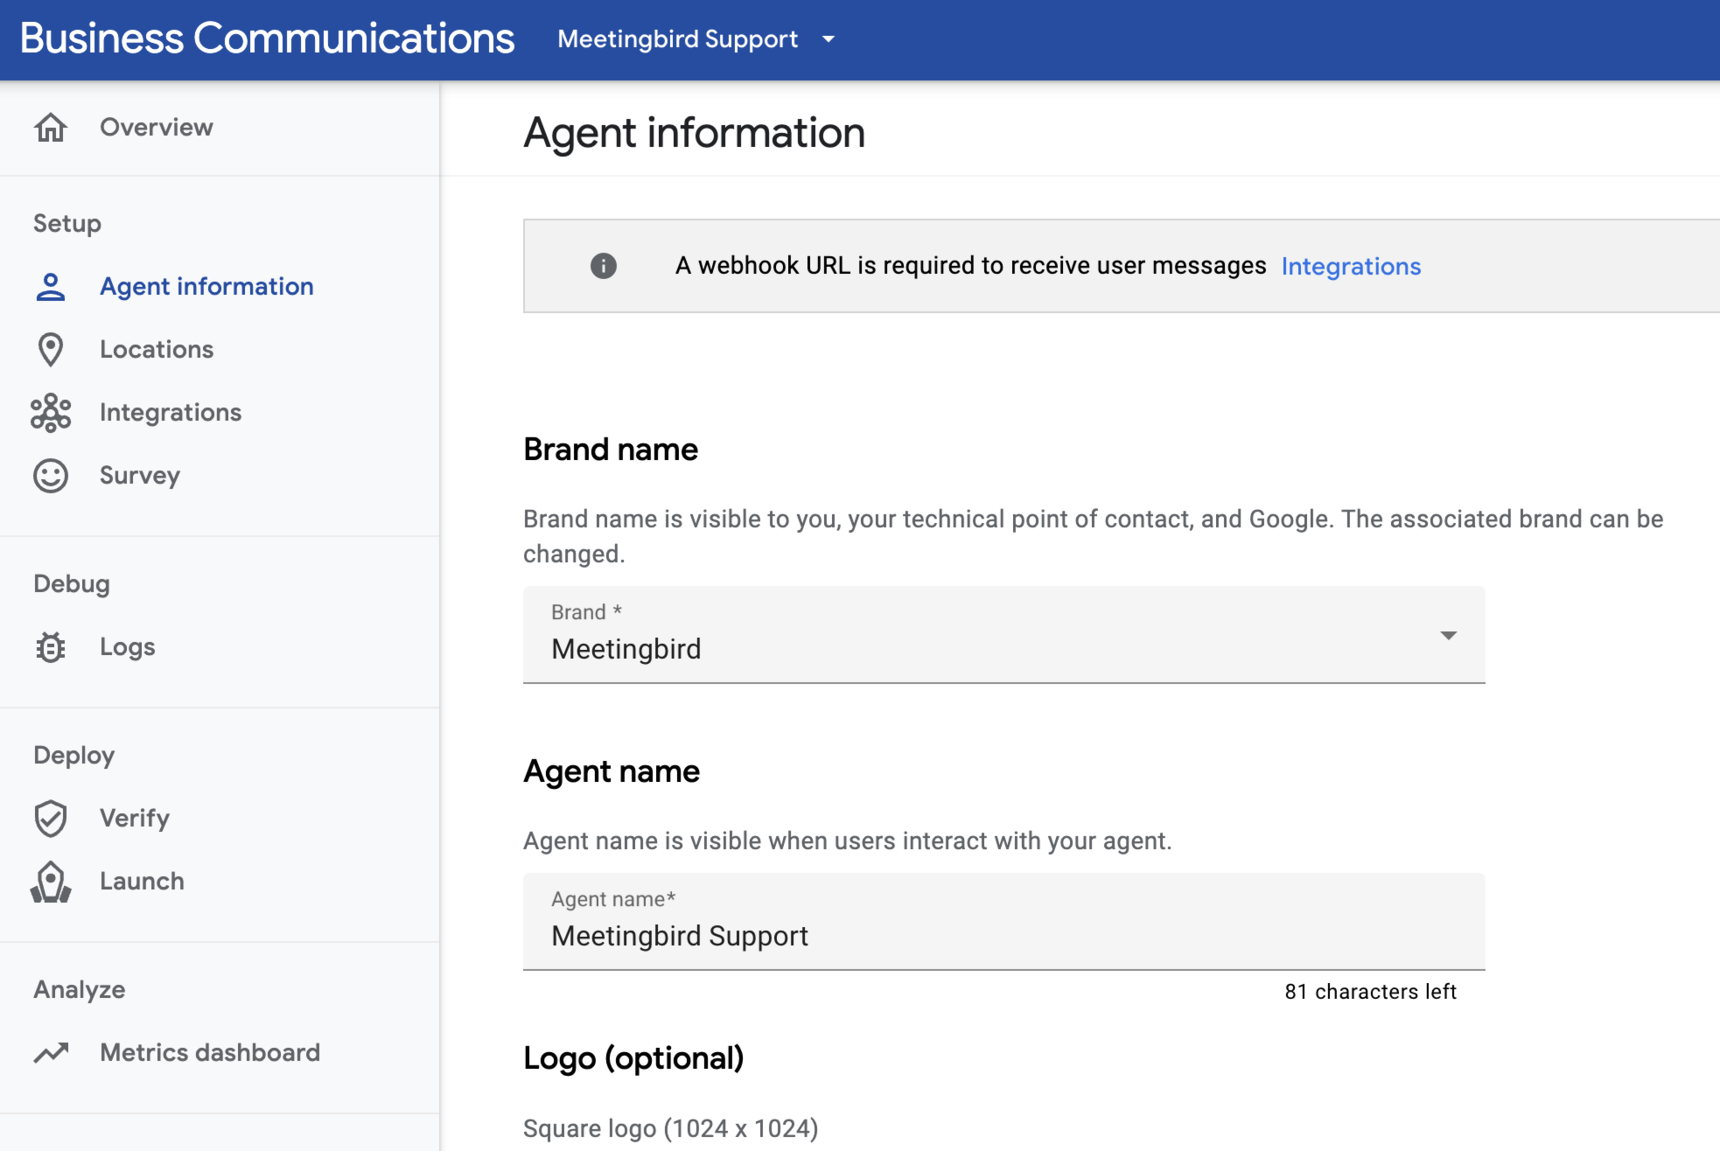
Once you've created a Business Messages partner account, return to the Business Communications console and select the option to create a new agent. You'll be asked to provide a name for your Brand (e.g. "Acme") and a name for your Agent (e.g. "Acme Support"). Save the agent, and then click into it to edit more details.
Step 3
In the agent editor, you can customize a variety of options like logo, phone number, welcome message, and locations of your agent. We recommend referring to Google's guides on how to configure agents, in particular their articles for how to create agents, set messaging availability, set non-local information, and adding locations. The only setup option to avoid for now is the webhook — we'll get to that later when connecting the channel to Front.
Step 4
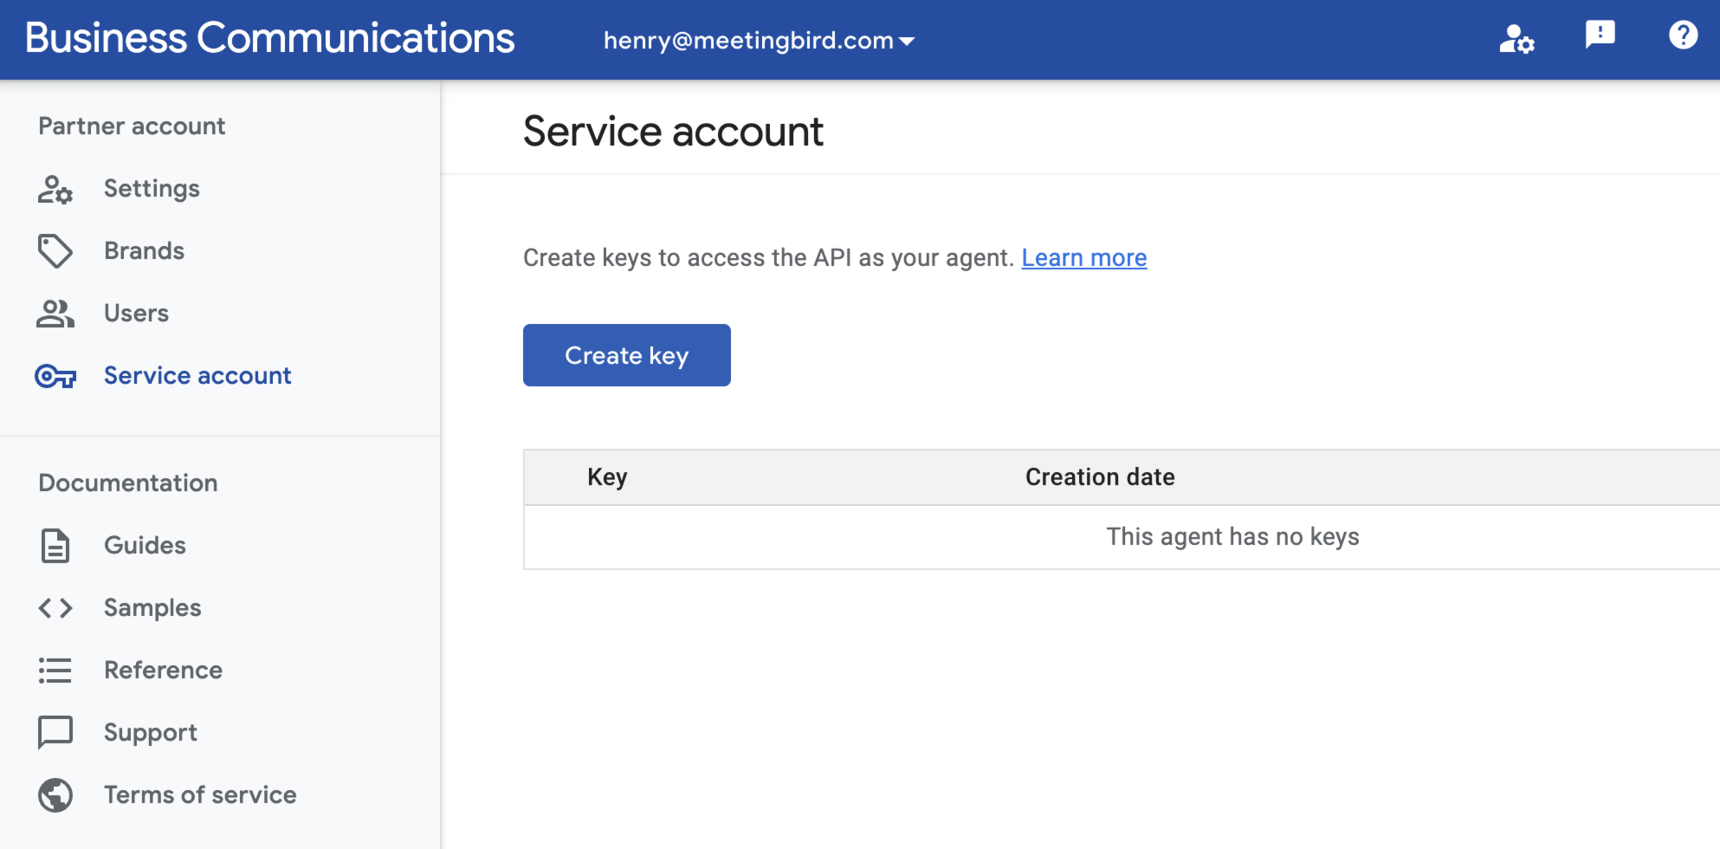
Once you've properly configured your agent and locations, visit your partner account settings by clicking the profile gear icon in the top right of the Business Communications navigation bar. Then select Service account from the sidebar and then Create key. When the key is created, a download should be triggered of a JSON file with credentials to access your account. Store this somewhere safe for now, you'll need the credentials when connecting the channel to Front.
Connecting the Google Business Messages channel in Front
Step 1
Click the gear icon on the top right of Front and select company, workspace, or personal settings in the left sidebar, depending on the space you’re working with. Admins can also access user settings by following these steps.
Step 2
Click on Inboxes on the left menu and create a new shared inbox or individual inbox.
Step 3
Click Channels on the left menu, and click the Connect a channel button.
Step 4
Select Google Business Messages from the channels menu.
Step 5
Click the blue Connect to Google Business Messages button. You'll be asked to authorize the channel with your Front account.
Step 6
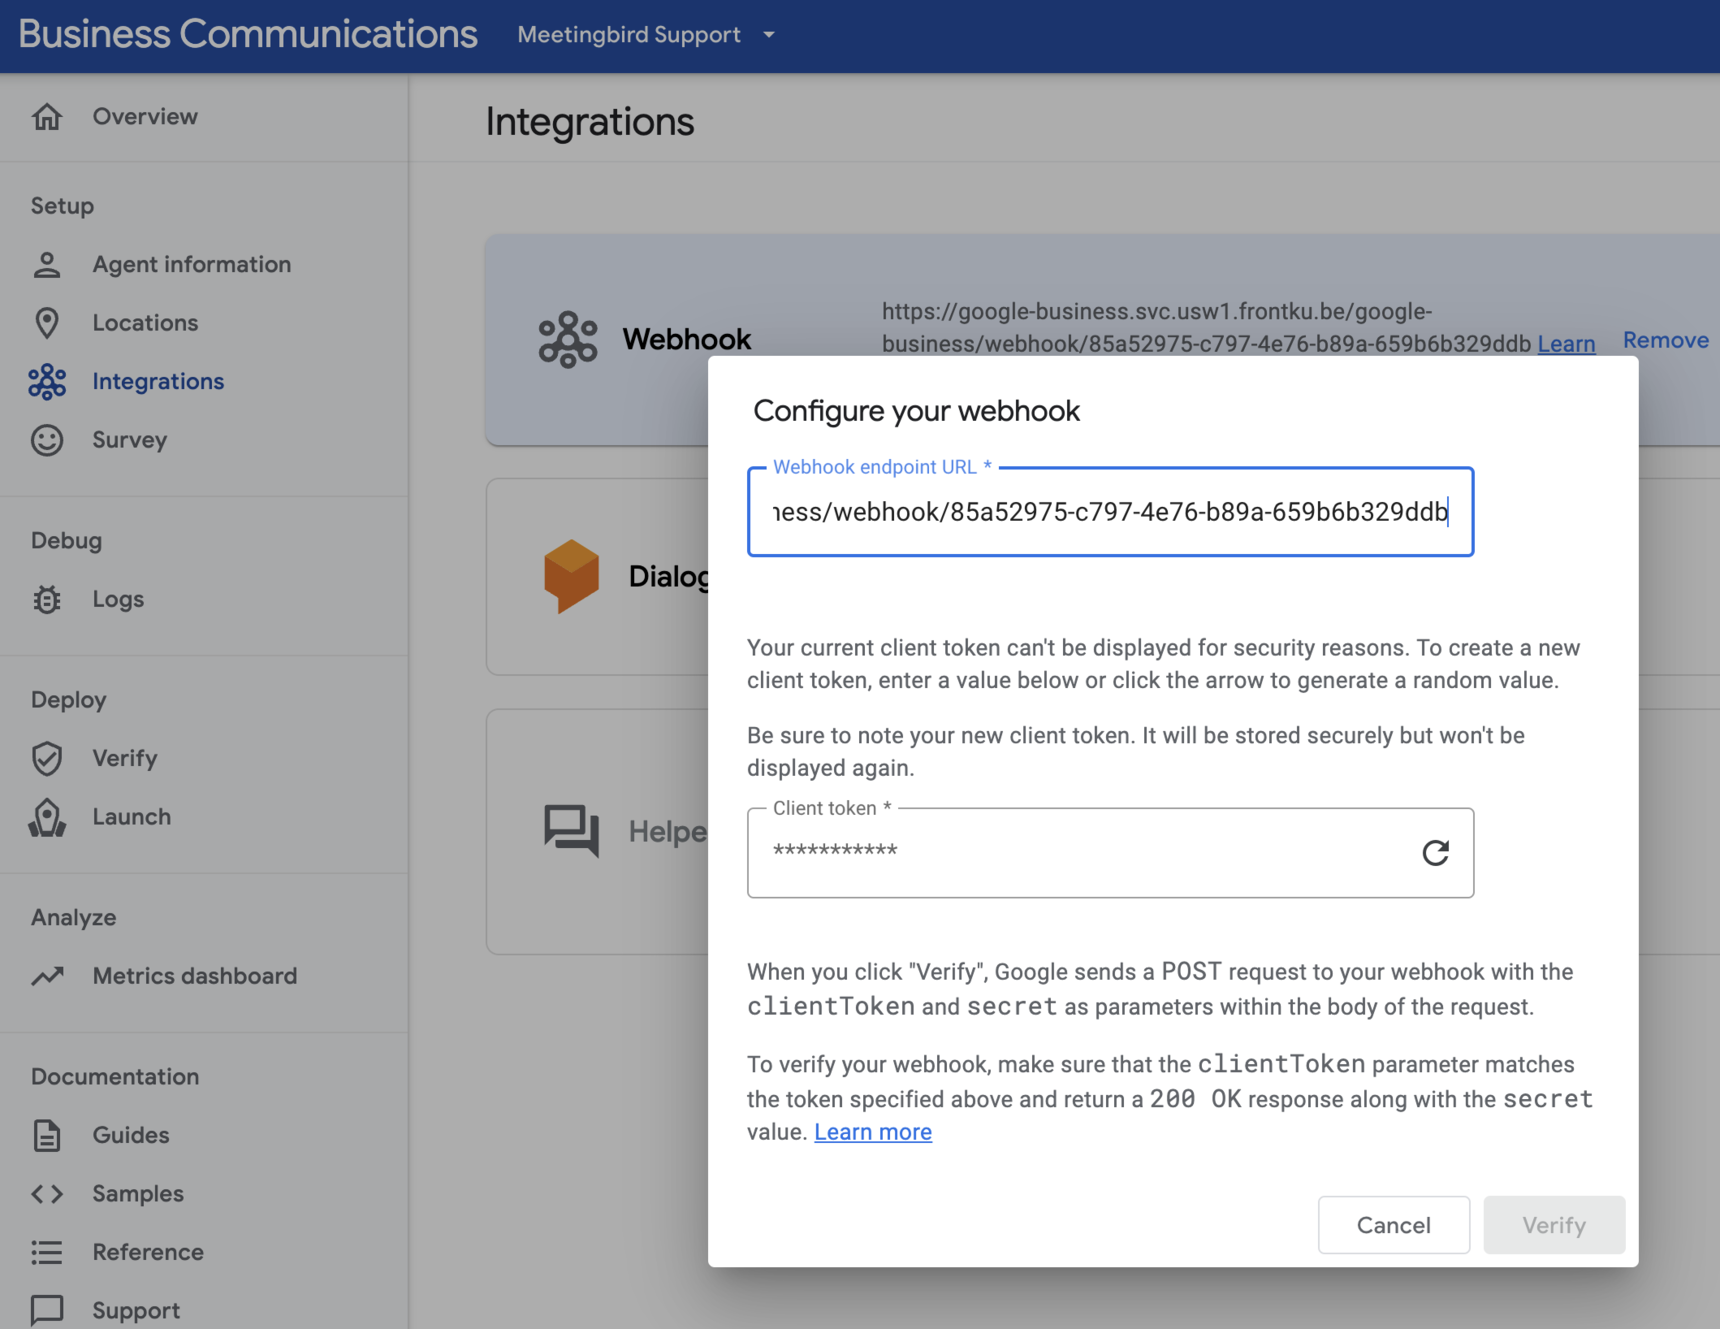
Once authorized, you'll be asked to provide a Service account key and Service account email. These fields can be found in the JSON you downloaded from the Business Communications console earlier. Copy the string between the quotes for `private_key` into the Service account key field and `client_email` into the Service account email field. Then click Next.
Step 7
On the Webhook configuration step, you'll see fields for Webhook endpoint URL and Client token. Copy these fields, and then open your Google Business agent settings in a separate tab. Select the Integrations page from the sidebar and then click Configure for the Webhook integration. Paste the Webhook endpoint URL and a Client token from Front and then click Verify. If you're not able to configure the Webhook integration, you may need to disable the Helper bot first.
Step 8
Back in the Front channel setup wizard, click Save. At this point, the channel should be connected to Front. You can select who on your team has access to this inbox, and click Save changes.
How it works
Message imports
Historical messages will not be imported into Front, but any new conversations will be imported.
The channel support any messages that are received by your agent, regardless of location. You only need to create a channel in Front for each agent in Google Business Messages — messages for any locations or entry points managed by the agent will sync into Front.
Any attachments shared by users will also be imported with their message into Front
The availability of your agents to receive messages can be controlled within the Google Business Communications console under the Agent information page of an agent. You can set the business hours during which the chat widget will be visible to customers.
Sending messages
Basic text and image attachments can both be sent from Front
Pricing
You must purchase the Google Business Messages add-on before you can set up and use the channel.
The add-on is only available to customers on the latest Growth plan or above.
The add-on costs a flat $100 per month, for an unlimited number of channels and users.
If you have any questions, contact your account manager or reach out to accountservices@front.com.
Enable the add-on
To enable the add-on, you must be an admin of your Front instance and you must be on the latest Growth plan or above.
Click the gear icon on the top right of Front and select the Company settings tab, then select Billing. Scroll to the Add-ons section in your current plan to add the Google Business Messages channel. Once you've updated your plan, you can follow the setup instructions above to begin sending and receiving messages.
Start a free trial
To try the Google Business Messages channel for free, click the Free trial button when hovering over the Connect button for Google Business Messages when connecting a new channel. This will start a 14-day trial.