
Create application objects with third-party data
Note: This article focuses on use cases involving application objects and third-party data (application requests). If you're just getting started with application objects, please review the general application objects article first.
Overview
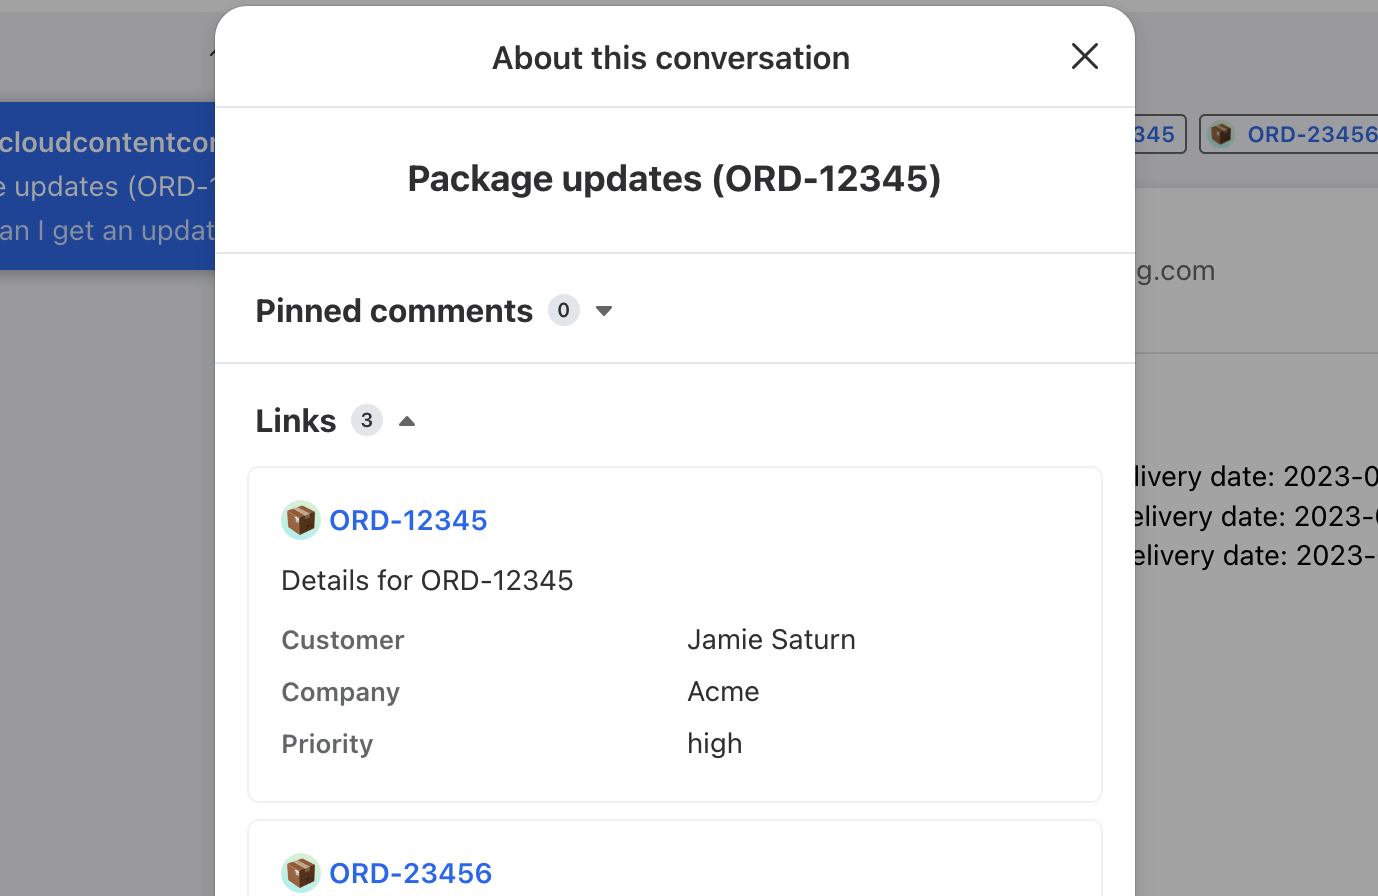
Application objects allow you to transform text or URLs found in comments or messages into structured Orders, Shipments, Itineraries, Tasks etc. that are easy to access right from a conversation in Front.
That core functionality is available on the latest Professional plan and above, but customers on the latest Enterprise plan can use application requests to populate an application object's custom fields with data pulled from a third-party application.
Take a Front Academy course here to learn more about how Connectors work.
When to use third-party data
A few examples where application objects with third-party data are useful:
You want to see metadata about the objects you're dealing with, directly within Front. For example, the expected arrival date of a shipment, the completion status of a task, or the teammate that owns an itinerary could be synced onto the application object and visible from Front without opening any external tools.
You want to use object metadata to power rules in Front. For example, routing conversations to a particular teammate depending on the owner of an associated load in your CRM.
You want to use object metadata to generate a useful target URL for your application object. This is sometimes needed if the matched text or URL pattern is not enough to generate a useful target URL.
Application objects make these use cases possible without writing any API code or hosting your own server, so long as you have access to an API that allows you to retrieve the data you're looking for.
Configuration
Creating a Server
At a high level, application objects with third-party data work by allowing you to connect Front with an external API to fetch relevant data for your objects. Using Front's Application Servers feature, no code or self-hosting is required.
Step 1
After you've created an app, select the Servers tab and then click Create server.
Step 2
Set the Origin field to the URL origin of your API. Don't worry about the particular API endpoint you'll be using yet — this field should just include the origin. For example, if the API endpoint you want to use is https://api.airtable.com/v0/{baseId}/{tableIdOrName}/{recordId}, the origin would be https://api.airtable.com
Step 3
Set the Authentication strategy used by your API. Today, API Key, Basic, Bearer, and OAuth2 authentication are supported. Depending on the strategy you select, you may be asked to provide additional configuration fields. Finally, click Create.
Step 4
After creating the Server, open it once more to set the Local credentials. These credentials should be the ones that allow you to connect to the third-party API. For example, if you selected API Key as the Authentication strategy in Step 3, you would save the particular token you use to access the API in Local credentials.

That's it! Your Server is now ready to make API requests.
Using your Server to enrich application object metadata
The following steps assume you already have an application object set up. If you haven't, follow the instructions in the general application objects article.
Step 1
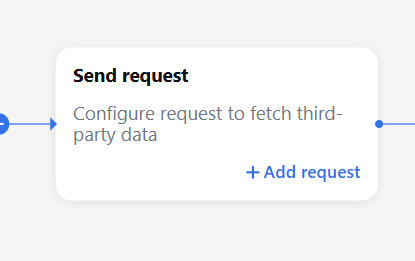
On the application object flow builder page, click Add request in the Send request node.
Step 2
Select the server you just created and enter the path of the API endpoint you want to use, with any relevant variables filled in using variables from the original text pattern of your application object.
For example, let's imagine we wanted to use Airtable's Get record endpoint: https://api.airtable.com/v0/{baseId}/{tableIdOrName}/{recordId}.
The base ID and table ID would be static for all of our application objects, but the record ID would be pulled from the text pattern. Therefore, we'd configure the path as follows:
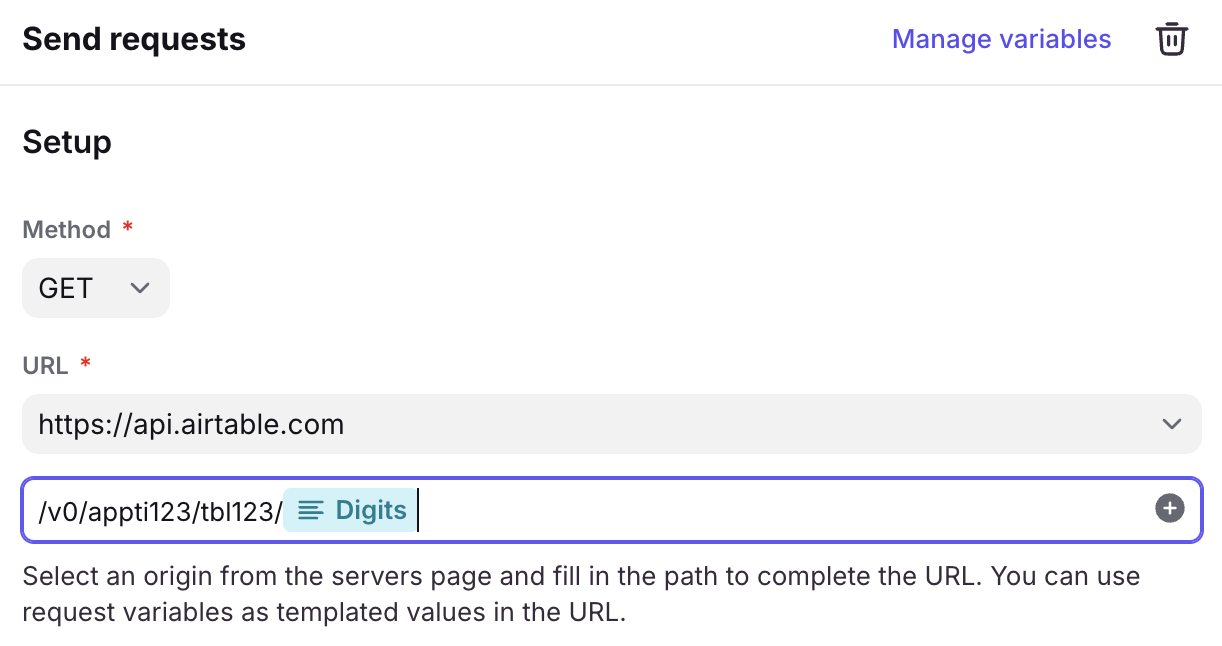
Note that "appti123" and "tbl23" are set statically, whereas the dynamic portion of the URL ("DIGITS1") comes from the Digits variable we created in the Text pattern field from the Collect reference step.
When a matching text pattern is identified by the application object, Front will send a GET request to the server and path specified using the Local credentials you previously configured.
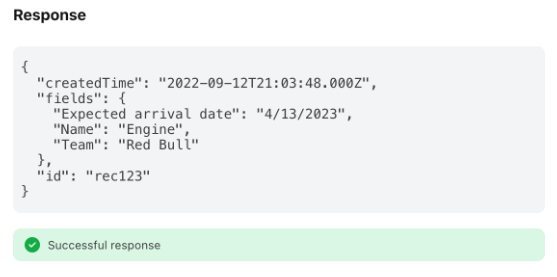
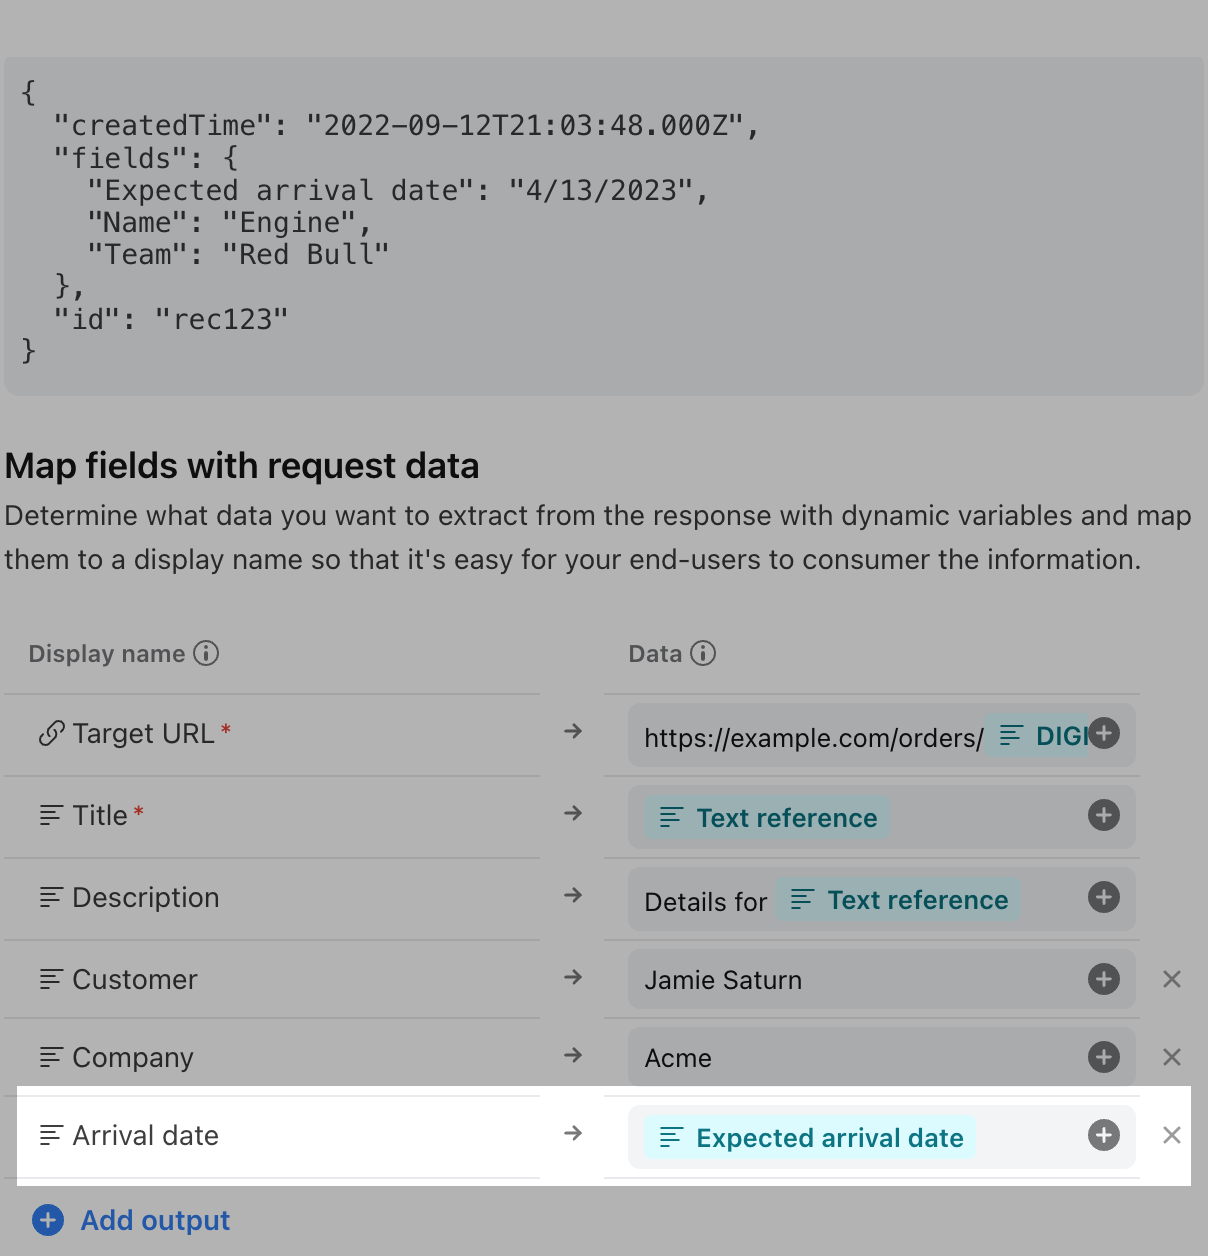
In order to move to the next step, you need to test your request by entering a matching reference and clicking Run test. In our example using Airtable, we'll receive a response looking like this:
{
  "createdTime": "2022-09-12T21:03:48.000Z",
  "fields": {
    "Expected arrival date": "4/13/2023",
    "Name": "Engine",
    "Team": "Red Bull"
  },
  "id": "rec123"
}
Step 3
For each piece of metadata you want to add to your object, determine what data you want to extract from the response by expanding the response in the Test section. Click the response property you want to save. Doing so will open a modal window to save the property as a dynamic variable. Accept the default display name or choose one that is easy for your end-user (workflow admins) to consume.
For example, to extract the "Expected arrival date" property from our example above as its own variable, expand the response, expand the "fields" object, and click the "Expected arrival date" property. This will ask you to save the "Expected arrival date" property as a dynamic variable with a default type of "String". After you click Save, you can see the dynamic variable on the righthand sidebar and open it to view its details.
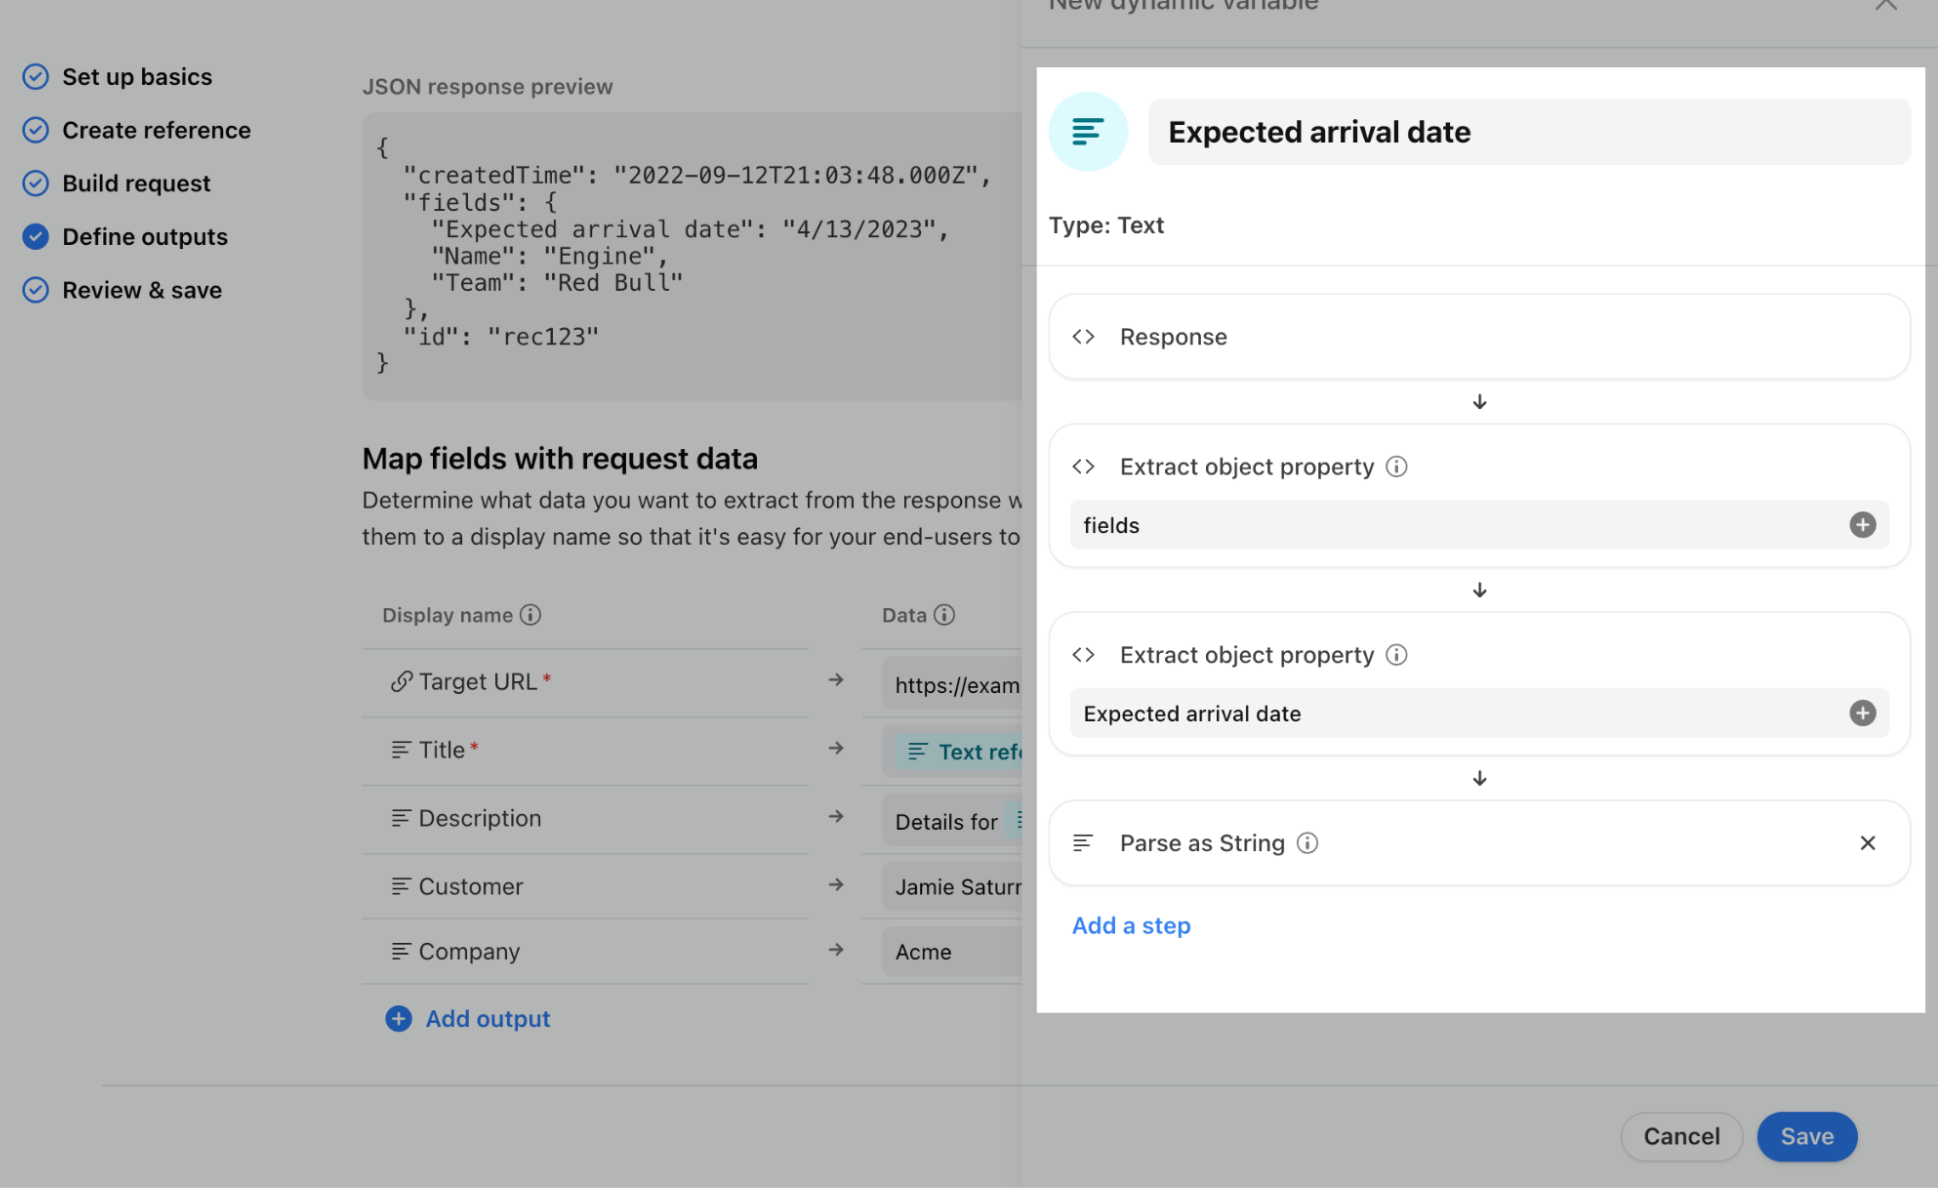
All the properties you save will display in the Extracted properties section. The extracted properties become available for display in the Return data node of the flow builder.
Click Done to return to the flow builder after extracting all desired properties.
Step 4 (Optional)
Front allows you to string multiple application requests together. This unlocks more complex workflows — like retrieving data with one request and using it as input for another — without needing separate Connectors or custom code. To add another application request, click the blue plus sign in the flow builder.

After doing this, you'll see a second request added to the flow builder. Click on the request and configure it as needed.
You'll have access to the extracted variables from previous steps. For example, the first application request might return a customer account number that you want to use as an input to your second request. You can access this variable by clicking Manage variables.
Step 5
After configuring all necessary application requests, return to the flow builder and complete the Return data node to configure the outputs the application object should display. Refer to the general application objects article for more details.
Additional tutorials
Check out these step-by-step walkthroughs to continue exploring how to set up application objects to retrieve data via an API:
Application objects and rules
Once you've configured an application object with third-party data that syncs metadata onto your objects, you can use that metadata in Smart Rules by creating conditions that check against the objects attached to the conversation.

For more details, check out our articles on Smart Rule variables and How to build a Smart Rule.
FAQ
When is metadata for a particular object updated/refreshed?
Metadata will be refreshed for a particular object each time its reference is found in a message or comment, or when used in a dynamic variable (for example, within a rule or macro). You can also manually send an API request with the reference of the object using https://dev.frontapp.com/reference/create-link to refresh it.
Learn more about refreshing application objects here.
Pricing
Application objects connected to third-party data are available on the latest Enterprise plan. You can also access pre-built application objects on the Professional and Enterprise plans by visiting the App Store.