How to move a channel from one inbox to another
Overview
Front allows you to move a channel from one individual inbox to another individual inbox, or from one shared inbox to another shared inbox. If you have multiple workspaces, you can move channels across workspaces.
Moving a channel to another inbox will transfer the conversation history attached to that channel, for all conversations currently residing in the inbox associated with the channel. This means that conversations already moved out of the inbox associated with the channel will not be automatically moved.
How it works
Same workspace
Preparation
Make sure that all teammates who need to use the channel have access to the destination inbox.
If you would like to move a channel to a brand new inbox, you will need to create an empty inbox before moving the channel. For steps on adding a new shared inbox, check out this article.
Helpful to know
When you move the channel, conversations will retain their conversation history, status, tags, assignees, and participants.
Different workspaces
Preparation
If you are moving a channel from one workspace to another workspace, you will need to take the following steps before moving the channel:
Ensure that the teammate moving the channel is a member of the destination workspace.
Create an empty inbox in the destination workspace. For steps on adding a new shared inbox, check out this article.
Make sure that all teammates who need access to the inbox are members of the destination workspace, and give them access to the newly created inbox.
Helpful to know
Conversations will retain their conversation status and history.
Conversations will retain their assignees. If an assignee is not a member of the destination workspace, they will still have access to the conversation after the channel is moved.
Conversations will retain their participants. If a participant is not a member of the destination workspace, they will still have access to the conversation after the channel is moved. However, if a participant unsubscribed from the conversation, and they are not a member of the destination workspace, they will lose access to the conversation.
Conversations will retain their current tags. However, the tags themselves will not move when moving the channel to a different workspace. Tags will need to be manually recreated in the destination workspace.
Limitations
Only one channel can be moved at a time per inbox. If either the origin or destination inbox are part of an ongoing move, you must wait for the move to finish before starting another move to/from the same inbox. Completion times may vary per channel.
Instructions
Step 1
Click the gear icon, then navigate to your workspace settings or personal settings, depending on which space you are working with. Admins can also access user settings by following these steps.
Step 2
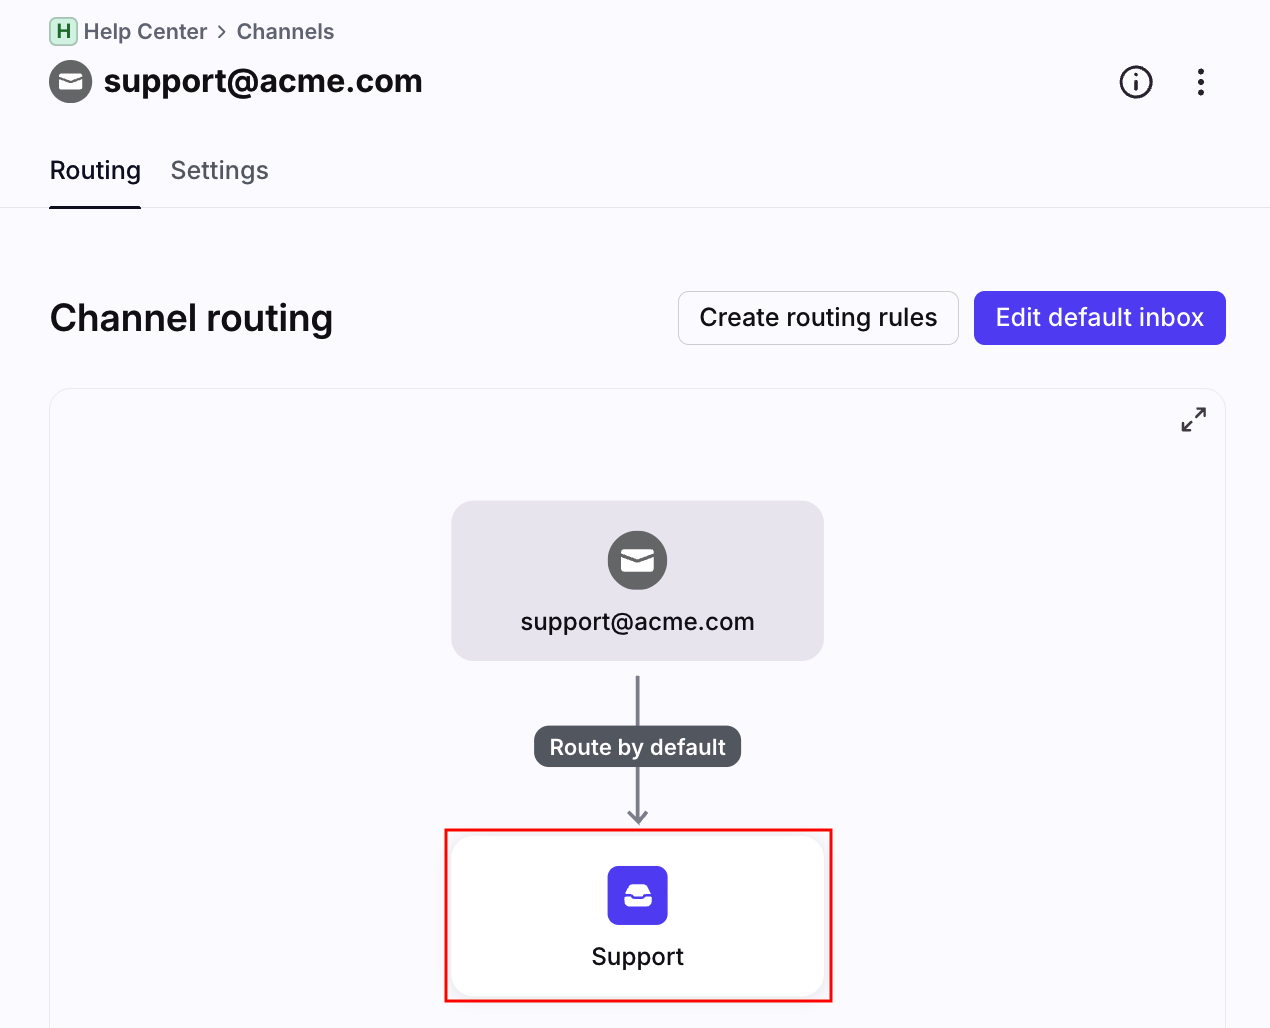
Click Channels in the left menu and select the channel you want to move.
Step 3
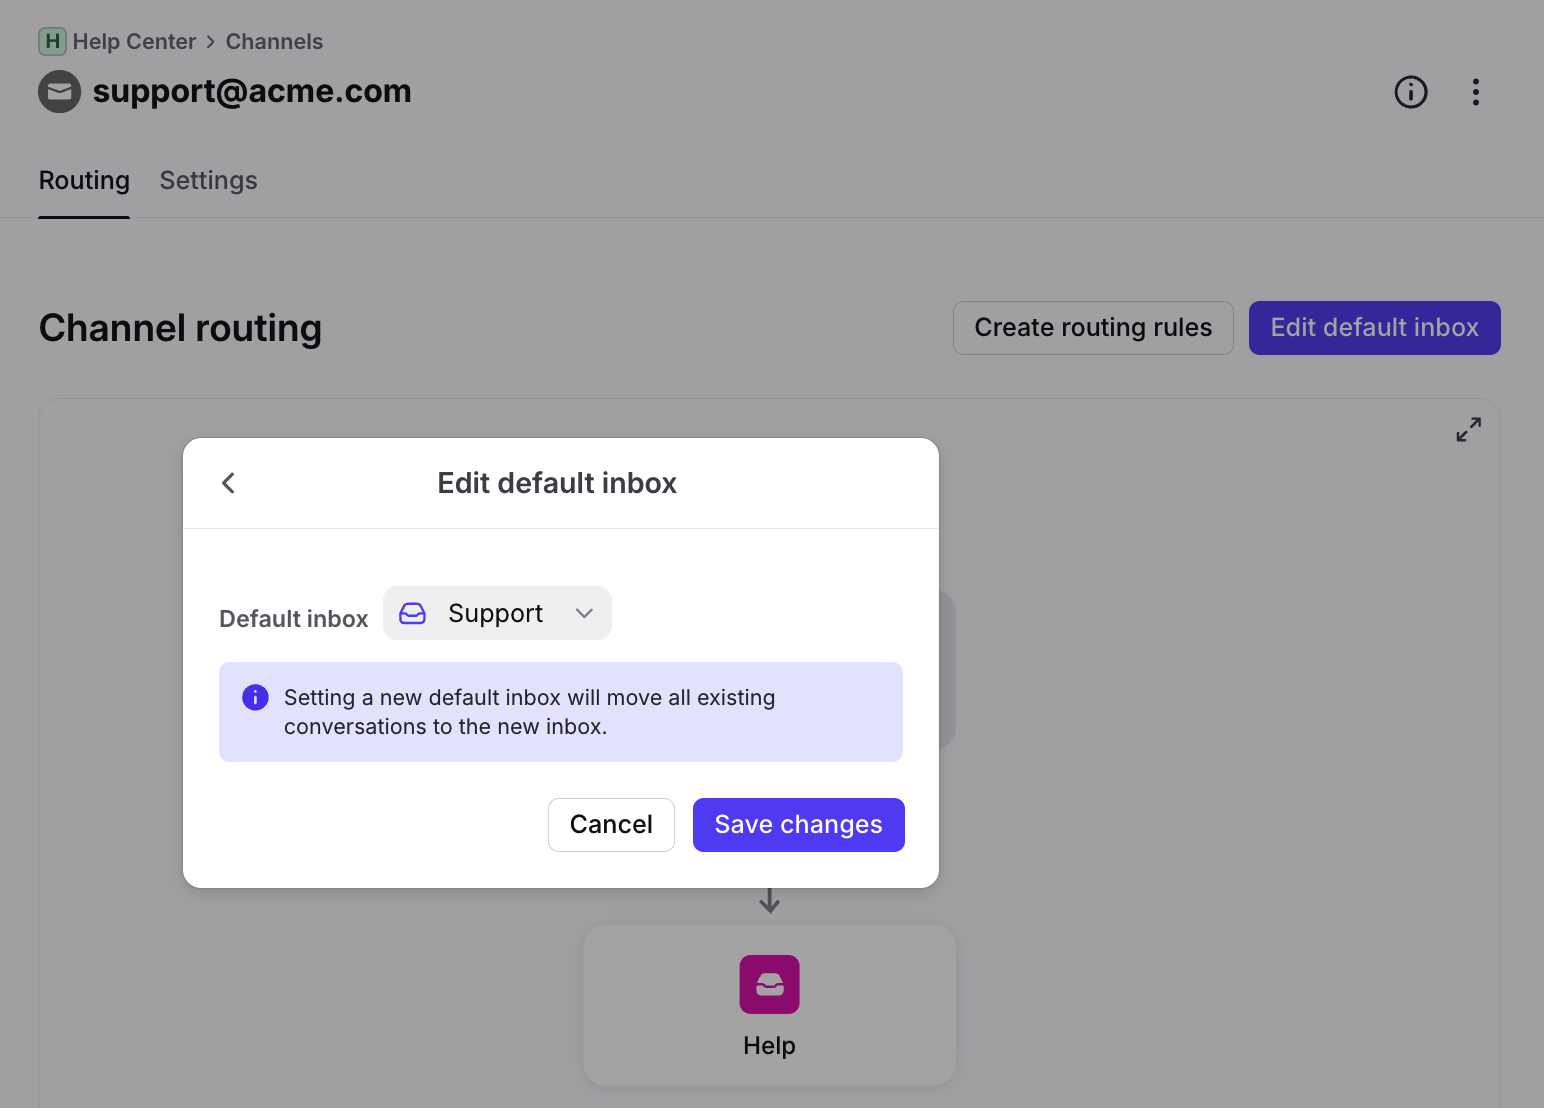
Click Edit default inbox, then use the dropdown to select the new default inbox the channel will route messages to. Click Save changes.
Step 4
Any new messages sent to the channel will be in the new selected inbox, which displays in the channel routing chart.