
How to add an Exchange Online User Mailbox (Office 365)
Overview
Follow these instructions to add your Exchange Online User Mailbox (e.g. sophia@acme.com) to an individual inbox in Front. A user mailbox is a mailbox that you log into using a username and password.
Helpful information before you get started
Front will automatically import 50k of your most recent email messages. More on the import behavior here.
Front has two-way sync with user mailboxes on Office 365. More on sync behavior here and exceptions here.
All Outlook folders will be converted into tags and applied to the conversation. The tags will be made private or public depending on whether the channel is added to an individual or shared inbox.
By default, any Office 365 user mailboxes will have their threading mode set to Office 365. This will allow for two-way sync for all inbound and outbound email, and spam email. Changing your threading mode will not affect the two-way sync.
If you already have an SMTP setup for your Office 365 account, see this article on how to transition.
Office 365 accounts that have two-factor authentication (2FA) enabled are supported.
How to prepare your inbox before adding it to Front
To ensure your transition to Front goes smoothly, prepare your inbox using the following best practices before adding your Office 365 user mailbox to Front.
For emails that still need to be worked on - create a unique Office 365 folder and move all the emails you want to keep track of into that folder.
We assume user mailboxes will be added to individual inboxes. Follow these instructions after you've gone through the configuration steps in the next section:
Mass archive your conversations up to the current date if you see any are open in your new Front inbox.
Once you’ve archived your entire inbox, simply navigate back to your Inbox and click into the search bar and use the tag modifier tag: to search for all email conversations that have your unique Office 365 label on it.
Select all and unarchive those conversations.
Instructions
Step 1
Click the gear icon on the top right of Front and into the Personal settings tab. Admins can also access user settings by following these steps.
Step 2
Click on Inboxes in the left menu and create a new individual inbox.
Step 3
Click Channels on the left menu, then click the Connect a channel button.
Step 4
Choose Microsoft from the channel menu, then Office 365 (Exchange Online), and click the User mailbox option. Click Continue.
Step 5
Click the Sign in with Microsoft button to log in with your credentials.
Step 6
Choose whether or not you want to import historical emails and folders. If you do not wish to import these items, turn the toggle(s) off so they appear greyed out.
Step 7
Select the inbox to connect to your channel. All messages from your channel will route to this inbox by default. Click Save changes.
Your channel will be added and your history will be imported into the Archived tab of your inbox.
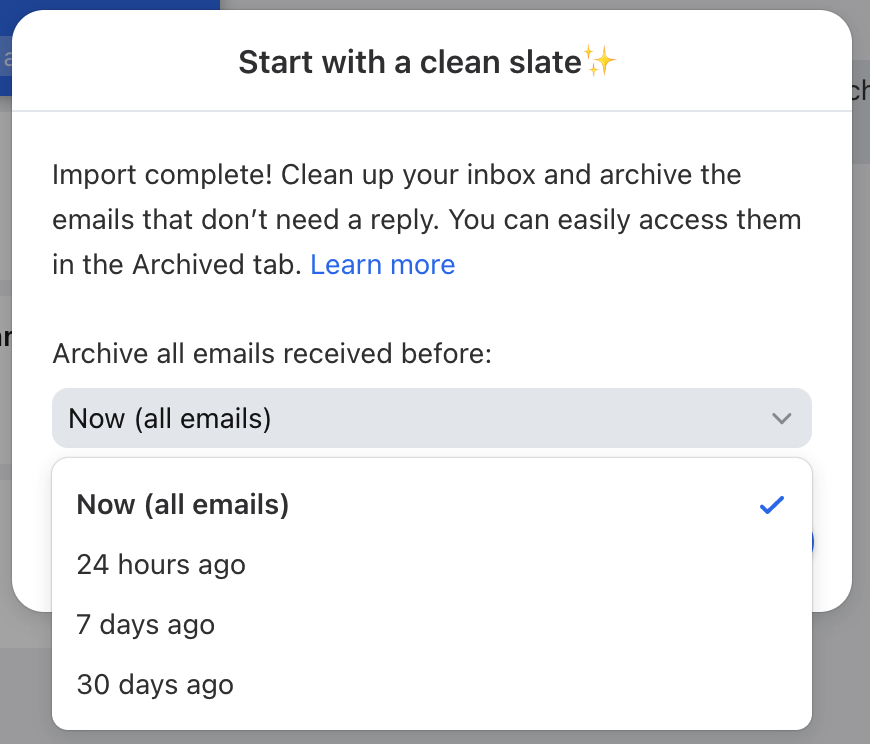
Start your individual inbox with a clean slate [optional]
While adding your individual inbox, if you choose to import your email history and Front detects more than 50 conversations in the import, you will receive a Start with a clean slate pop-up that will ask if you'd like to archive all emails received before a specified timeframe:
Conversations will automatically import in the open state if your individual inbox's import contains less than 50 conversations.
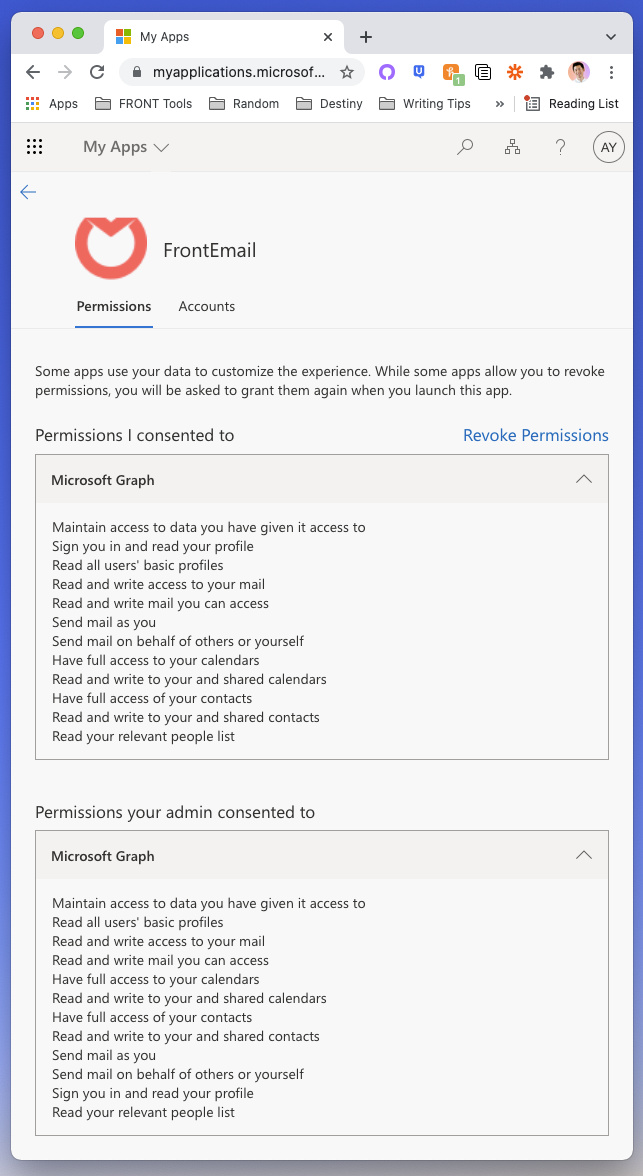
Permissions
When connecting an Office 365 account, you are agreeing to give Front the following permissions:
FAQ
How will Front sync with Office 365?
Check out the full breakdown here.
Folder setup
The default folders that need to exist in your Office 365 account, in order to successfully complete your sync, are: Inbox, Drafts, Sent Items, Deleted Items, Junk Email, and Archive. If you rename one of these folders or if a message is in a customized folder or part of a shared mailbox, Front will tag the conversation with the name of the folder when it syncs over. If you experience an error referencing missing required folders, please contact us.
What happens to my shared and private folders from Office 365?
Front has one-way sync for user-created Office 365 private folders, which sync to Front as private tags (including nesting) within an inbox. Folder/tag changes will not continue to sync after the initial import.
Outgoing display name
Office 365 does not support setting a different display name for the From address when sending an email. It uses the name set on your Office 365 account.
Authentication
The person who signs in and authenticates the inbox will have their account tied to this channel. If they change their password or their user account is deleted in Office 365, the channel will stop syncing. If that happens, an admin will need to go into the channel settings to re-authenticate the channel to bring it back online.
Automatic history import
When you connect an Office 365 email account to Front, we will automatically import your most recent 50K messages.
Is Microsoft Azure GCC supported?
No. Microsoft Azure GCC and GGC High are not currently supported, nor are there any workarounds that exist. These features have data isolation requirements that we are currently not equipped to support.
Troubleshooting
See here for common troubleshooting questions for Office 365 channels.
Pricing
This feature is available on all plans.