
How to set up a Slack inbox in Front
Note: This article describes the channel capabilities of the Slack integration. These capabilities allow you to send and receive Slack messages from Front.
If you'd like to learn how to use the integration to create Slack messages based on Front rules, or how to manually create one-off messages from Slack to Front or vice versa, refer to the How to enable and use the Slack integration topic.
Overview
Front’s Slack channel integration allows you to connect Slack channels to receive and send Slack messages directly from Front.
🎥 Check out a demo below:
Prerequisites
You must be a Front company admin or workspace admin to add a Slack channel to a shared inbox.
The Slack channel must be created in Slack before following the steps below.
The Front user connecting the Slack channel must also be a member of the channel. If connecting channels from multiple workspaces, the Front user must also be a Slack admin for each workspace.
Private Slack channels must have the Front integration bot added as a member of the channel.
Instructions
Step 1
Click the gear icon and select workspace or personal settings in the left sidebar, depending on the space you’re working with.
Step 2
Click Inboxes in the left menu and create a new shared inbox or individual inbox.
Step 3
Click Channels in the left menu, then click Connect channel.
Step 4
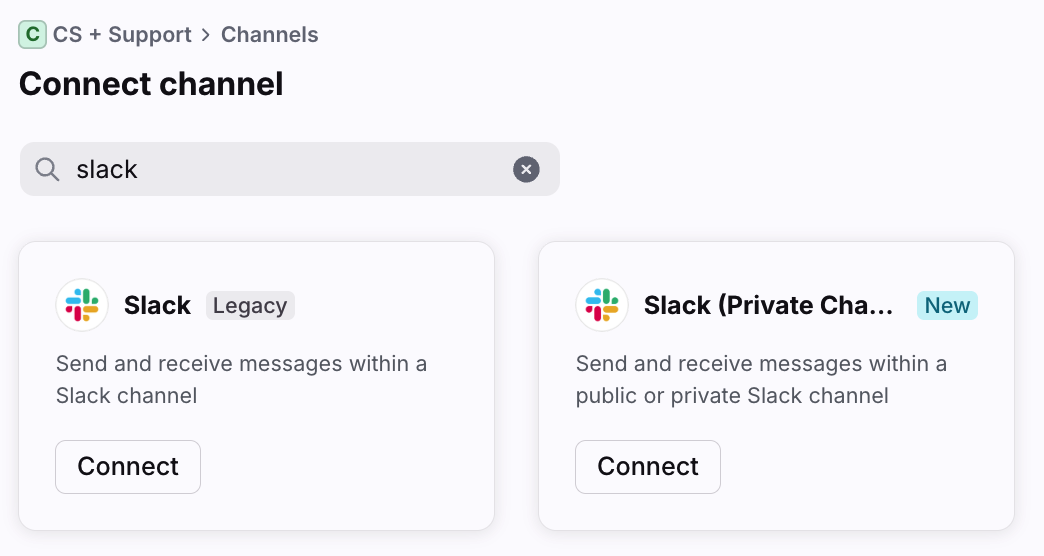
Select Slack, then click Sign in with Slack.
Step 5
A window will open prompting you to sign in with a Slack account. Sign in with an account that has access to the Slack channel you want to connect to Front.
Step 6
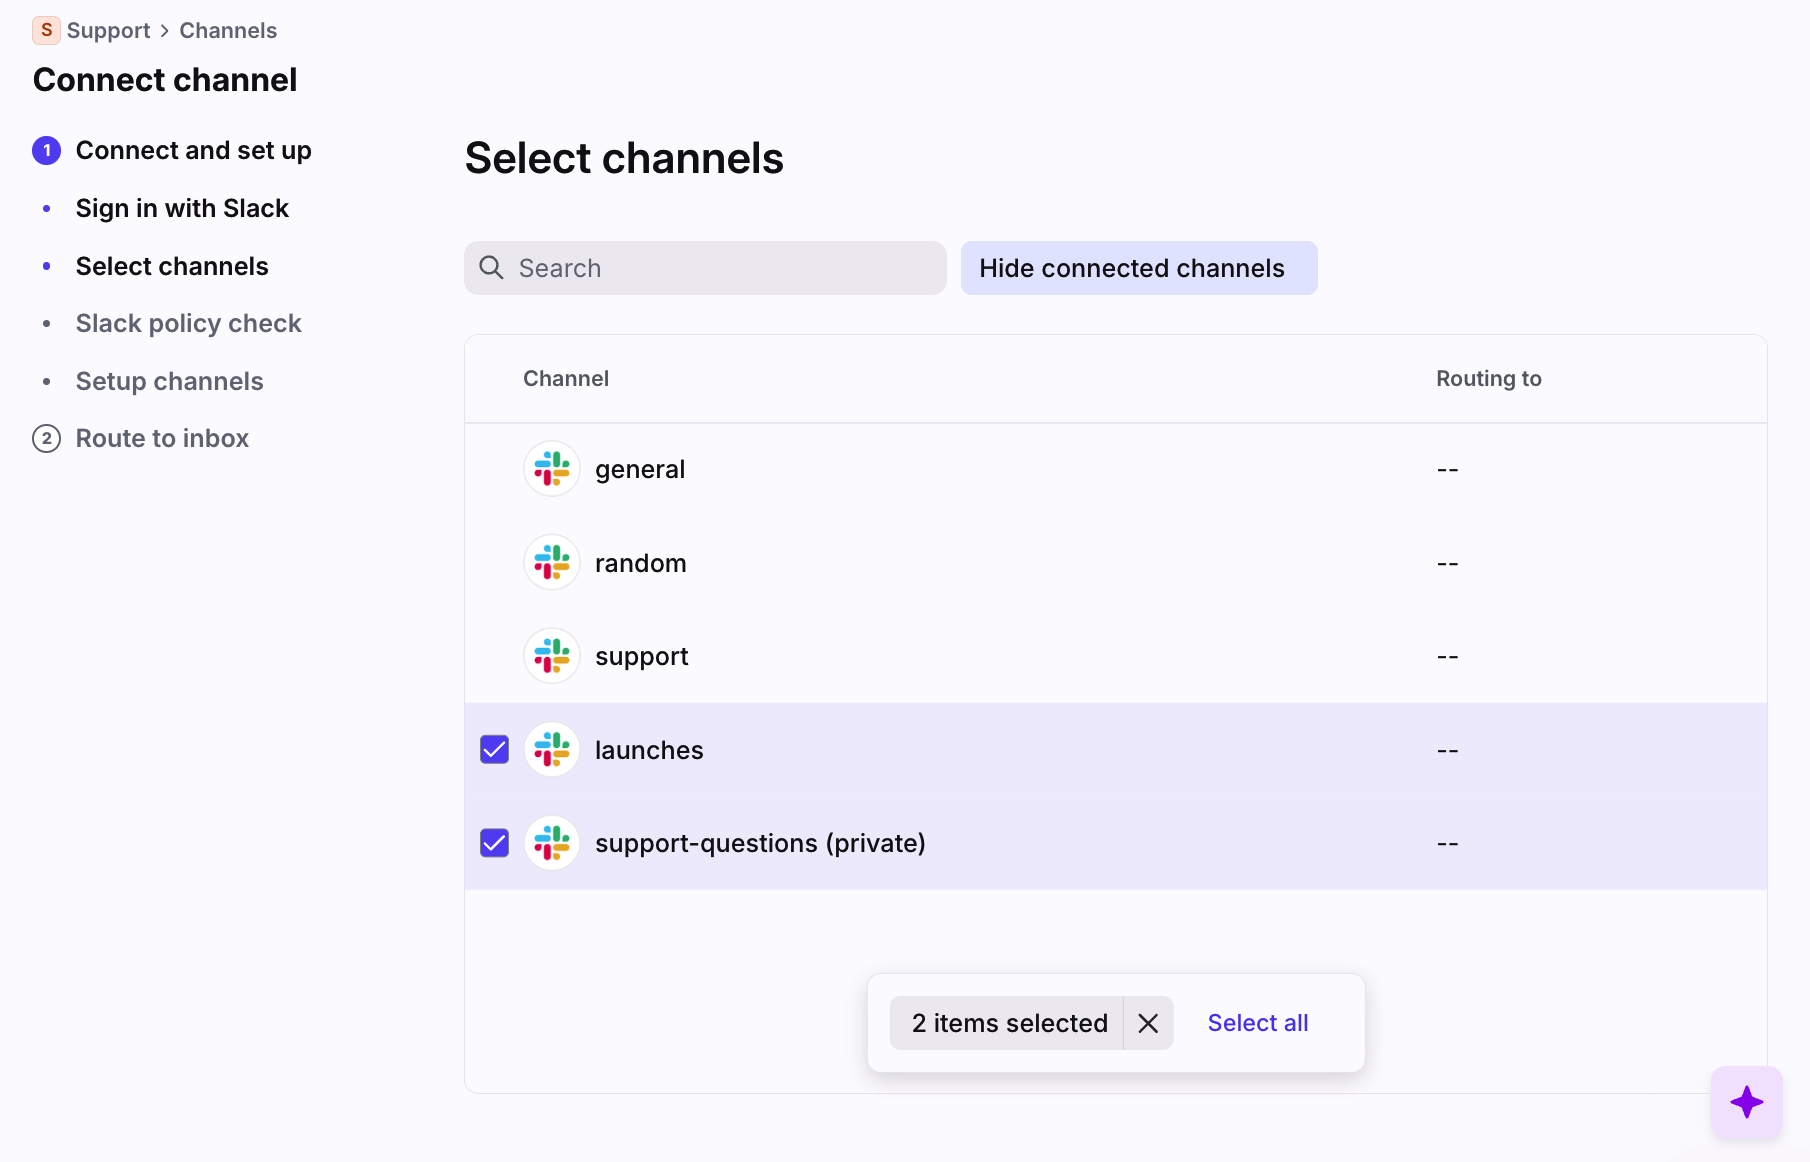
Select the Slack channels you want to add to Front. Select multiple channels to connect them in bulk.
Click Continue.
Step 7 (optional)
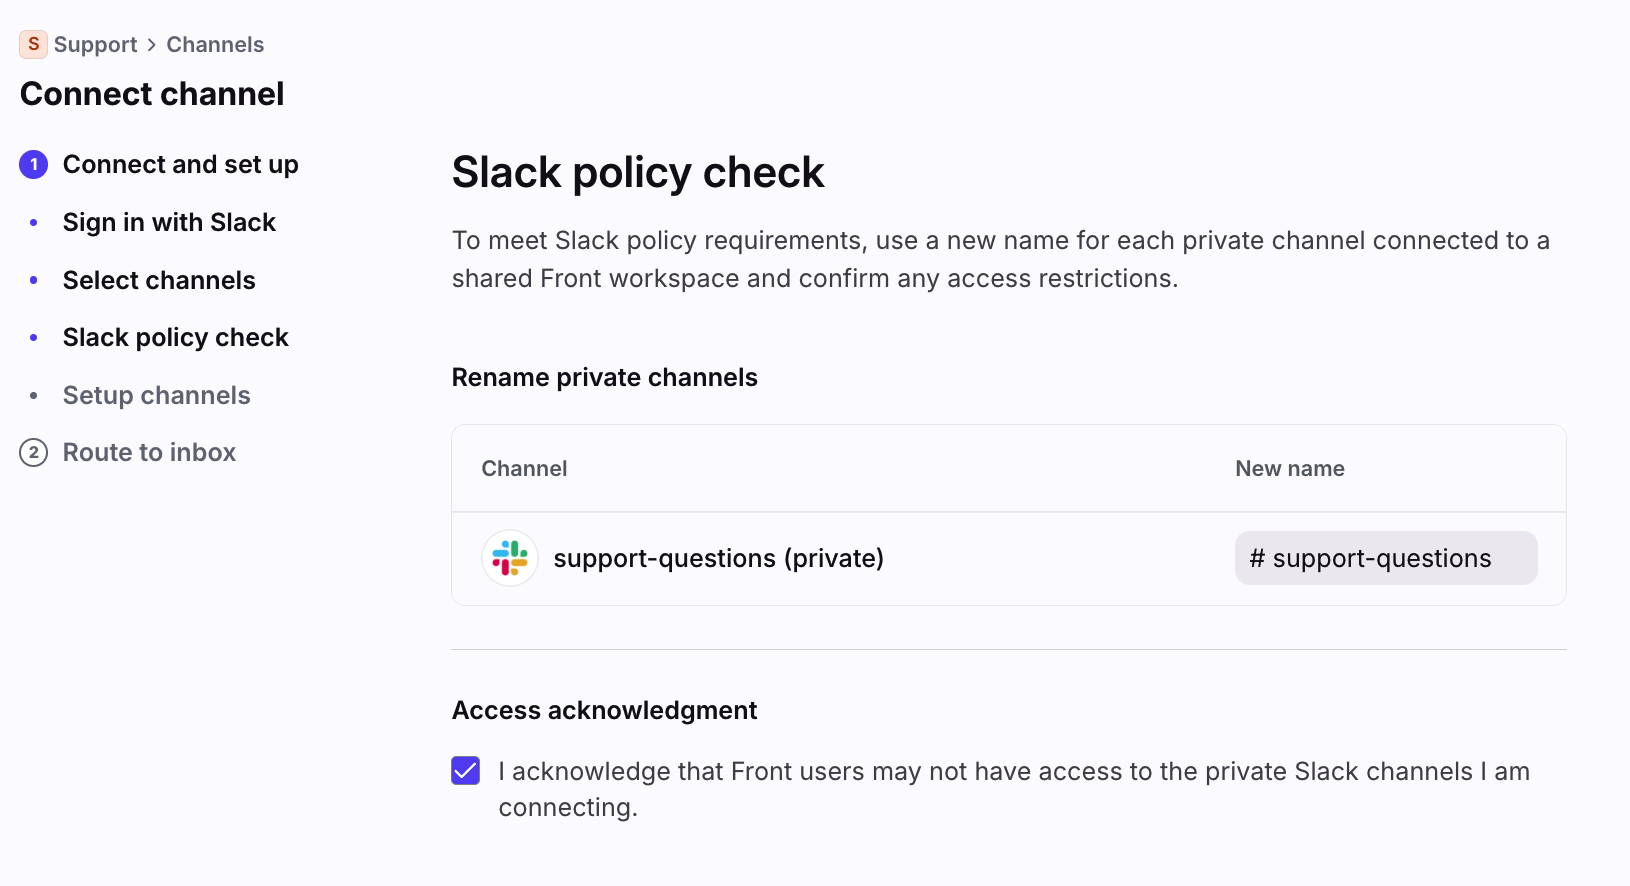
If you’re connecting any private Slack channels, enter a new name for each channel and check the box under the Access acknowledgement section.
Click Continue.
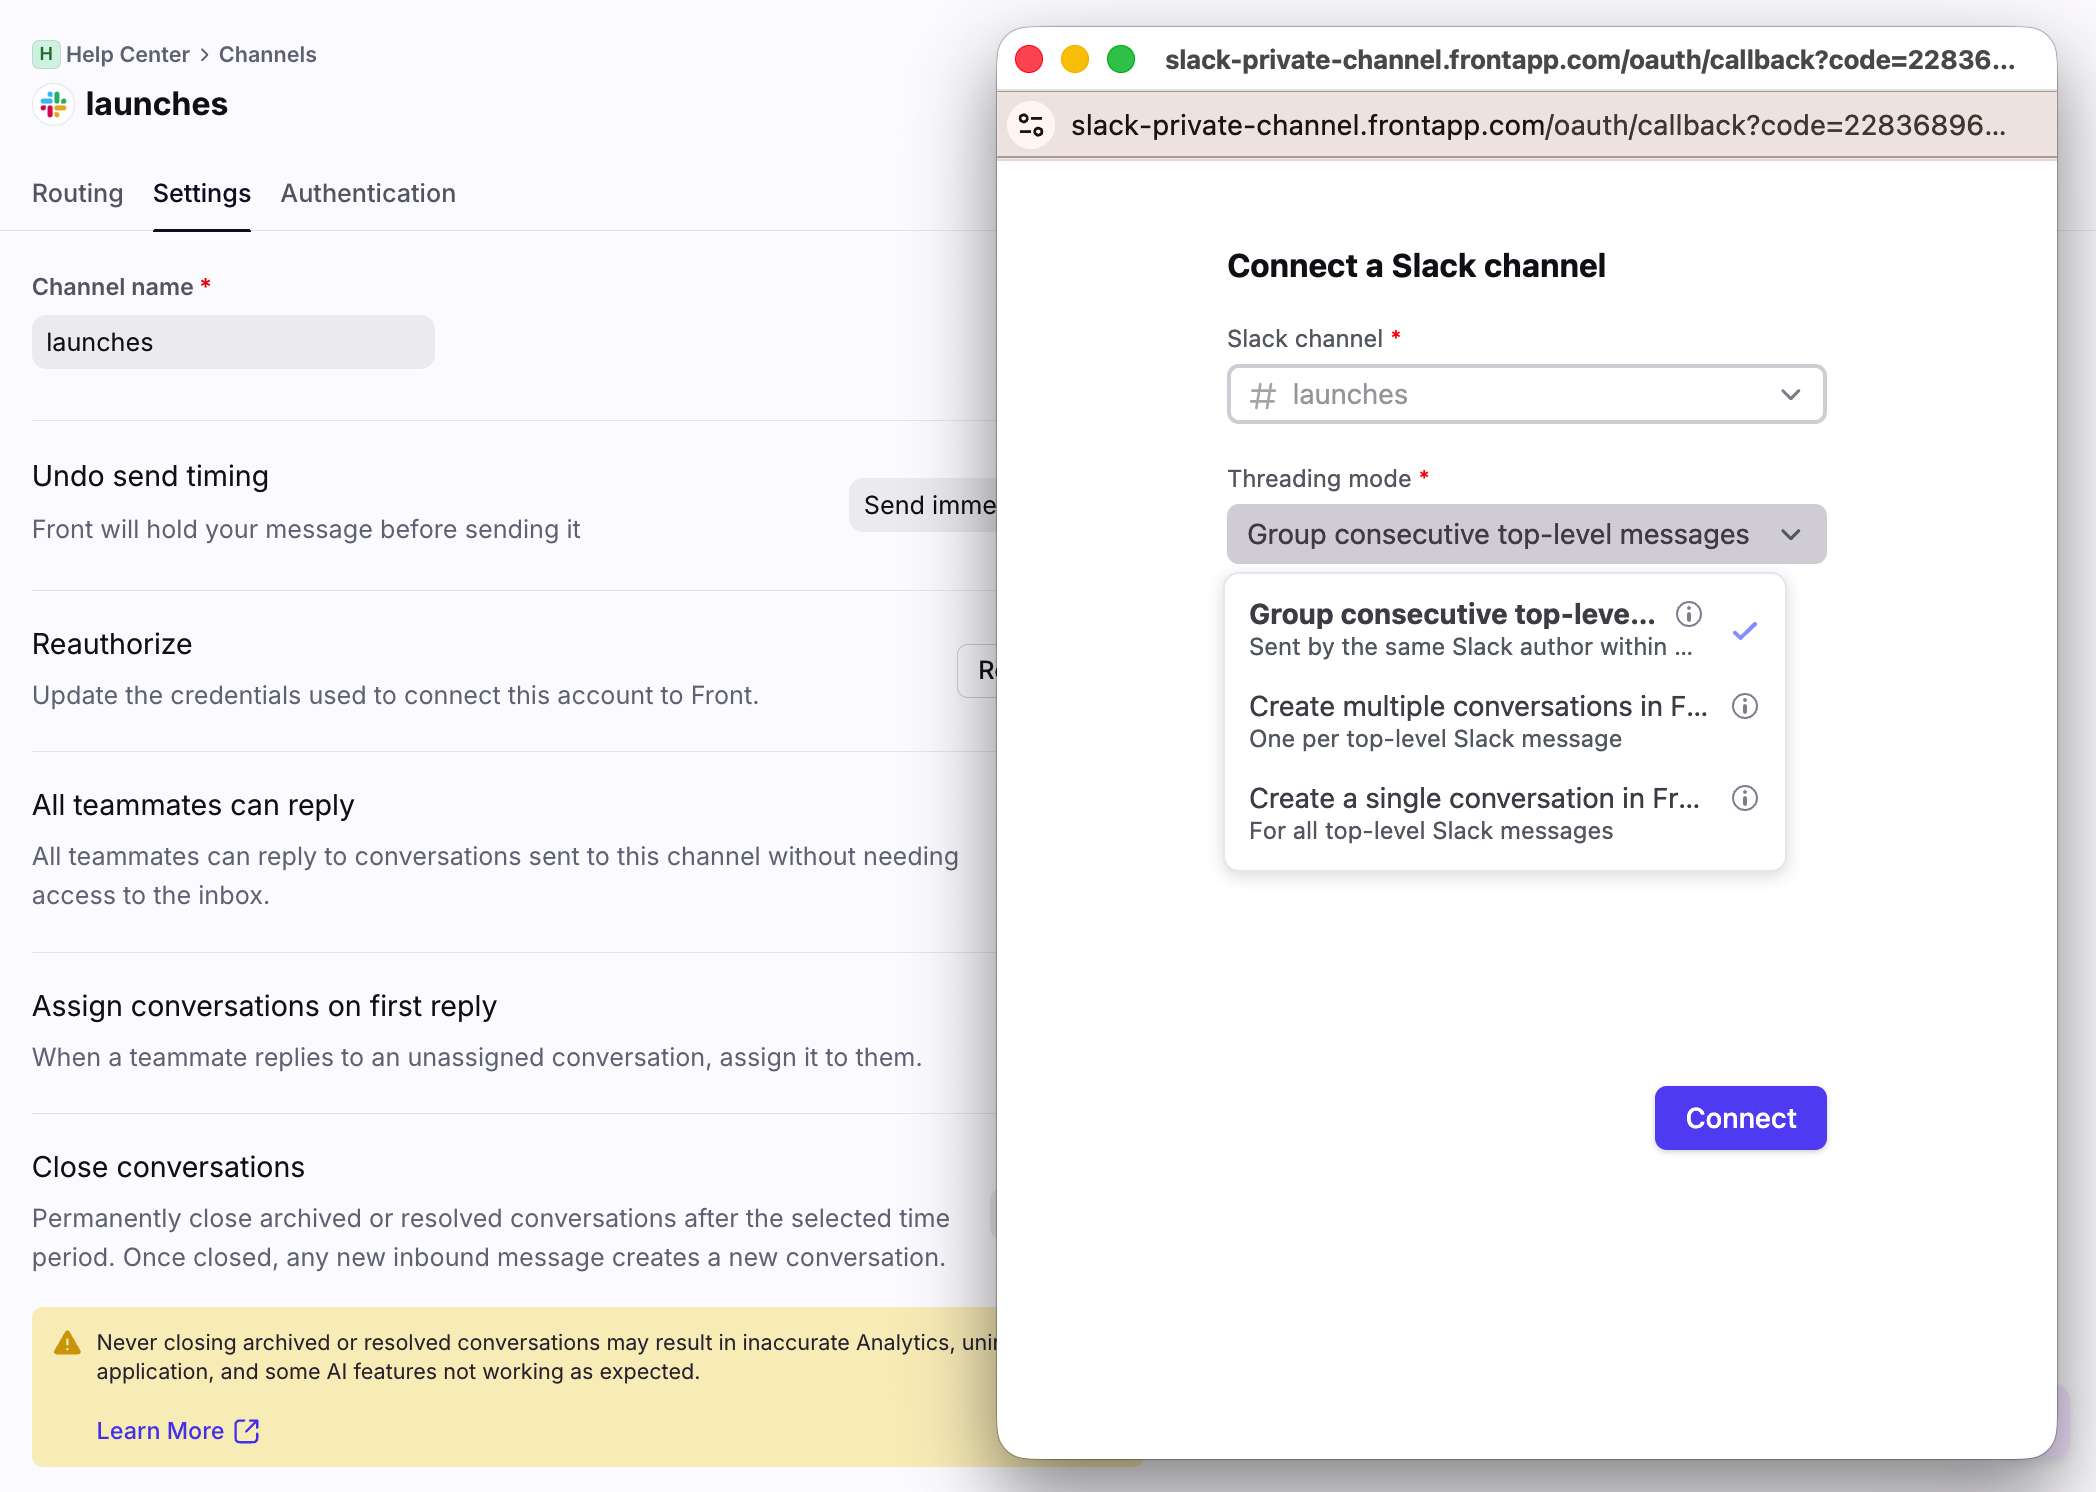
Step 8
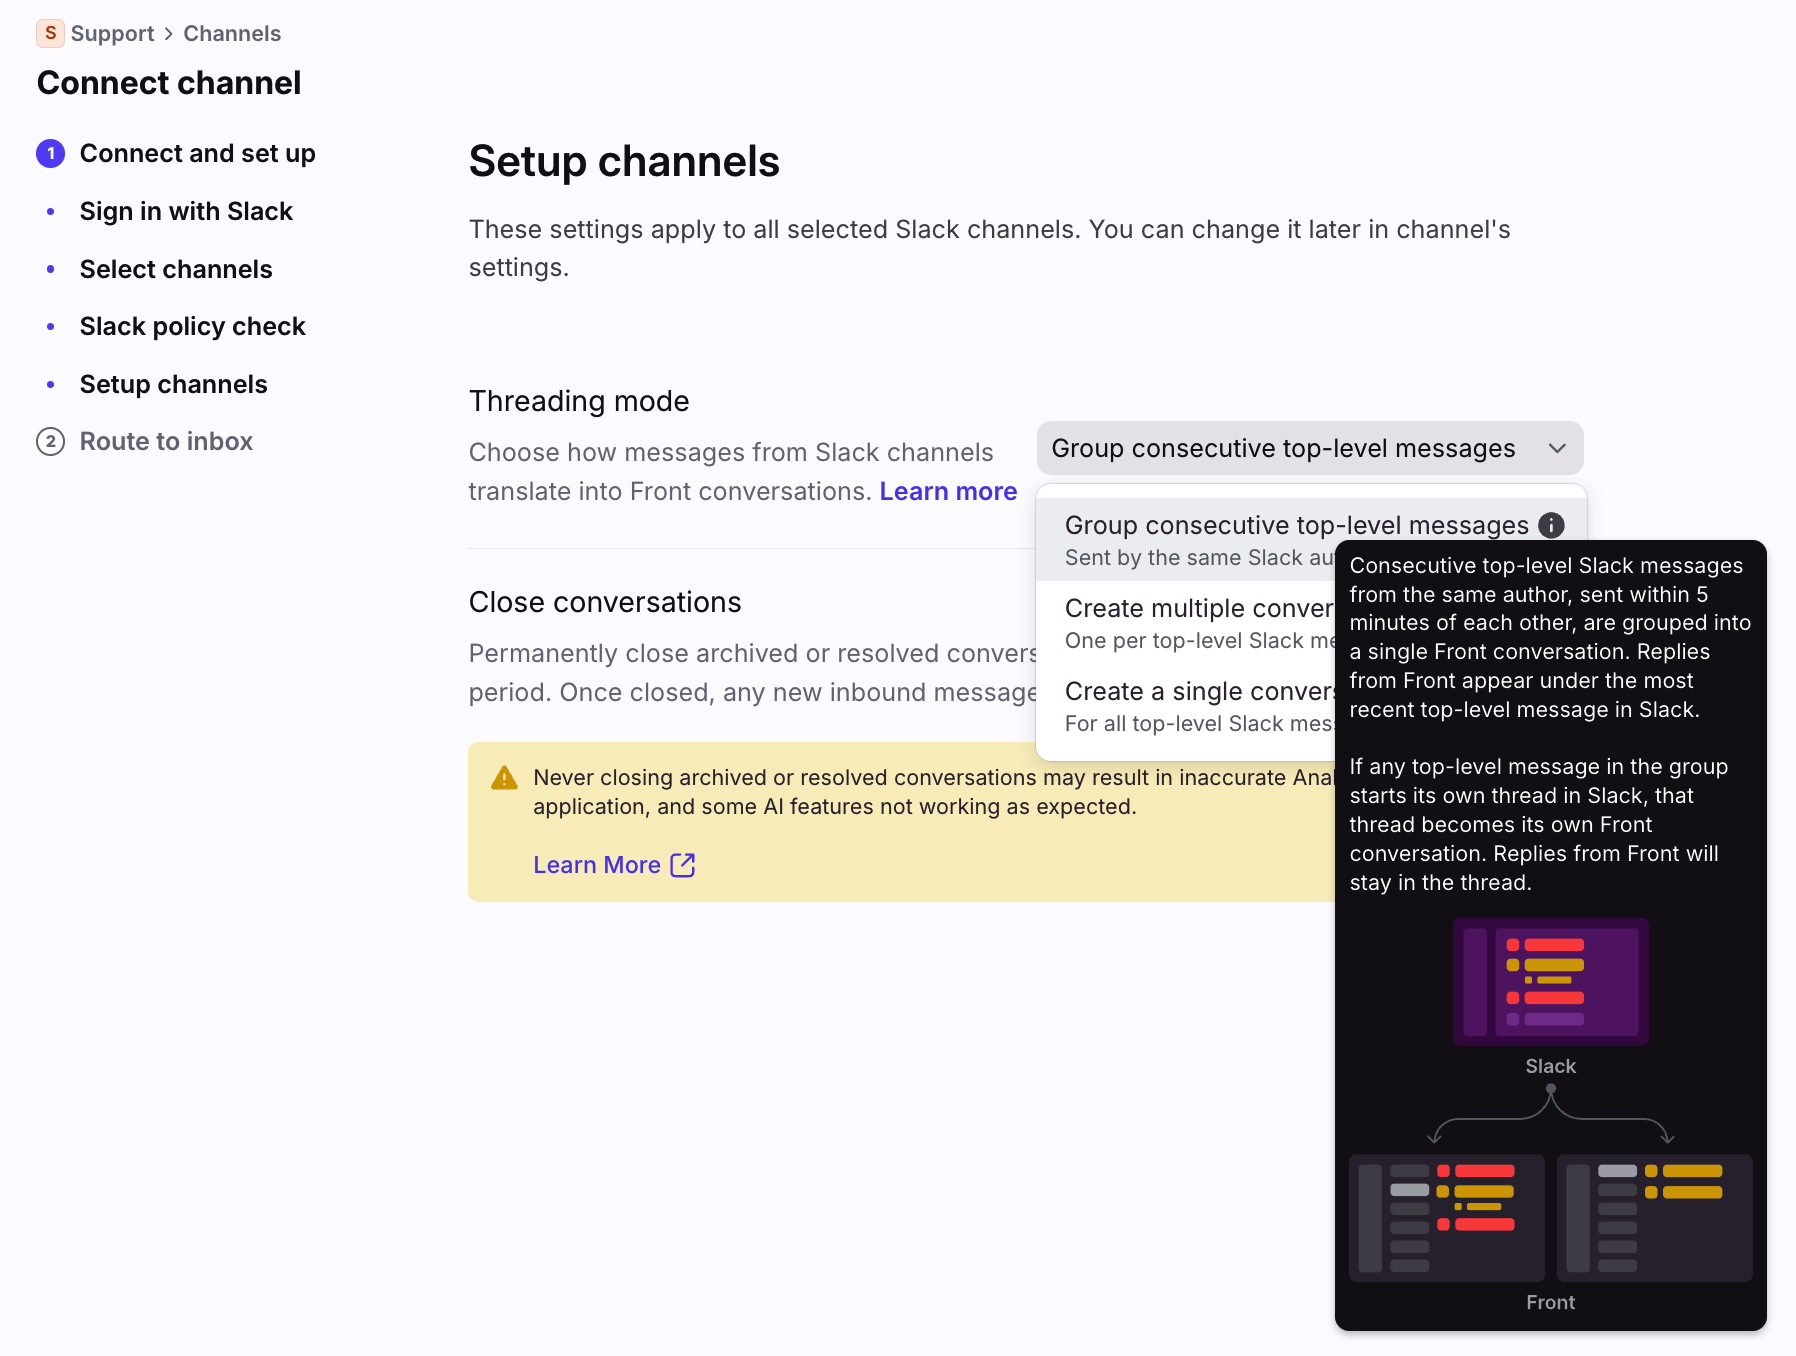
In the Threading mode setting, select how your Slack messages will thread in Front. You can hover over each option to learn more. If you’re bulk connecting Slack channels, the setting will apply to all of them by default, but they can be changed in your channel settings.
See the Threading section for more details.
Step 9
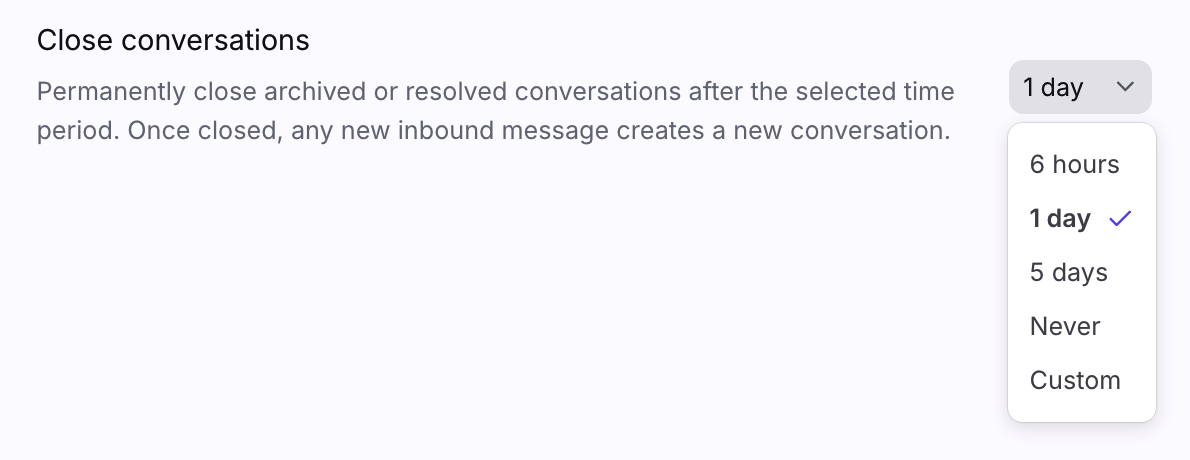
In the Close conversations setting, select when you want conversations to automatically close.
If you selected the "Group consecutive top-level messages" or "Create multiple conversations in Front" threading modes, we recommend setting this to "Never."
If you plan to use your Slack channel for support use cases (e.g. creating tickets for customers) and selected the “Create a single conversation in Front” threading mode, we recommend selecting "1 day" so your conversations will permanently close. This helps Front separate new inquiries into unique conversations to help you better track your work.
See this article to learn how the Close conversations setting affects AI features.
Click Continue.
Step 10
In the Route to inbox page, select whether you want to route the channel(s) to a single inbox, or multiple inboxes.
Option 1: If routing to a single inbox, use the dropdown to select the inbox.
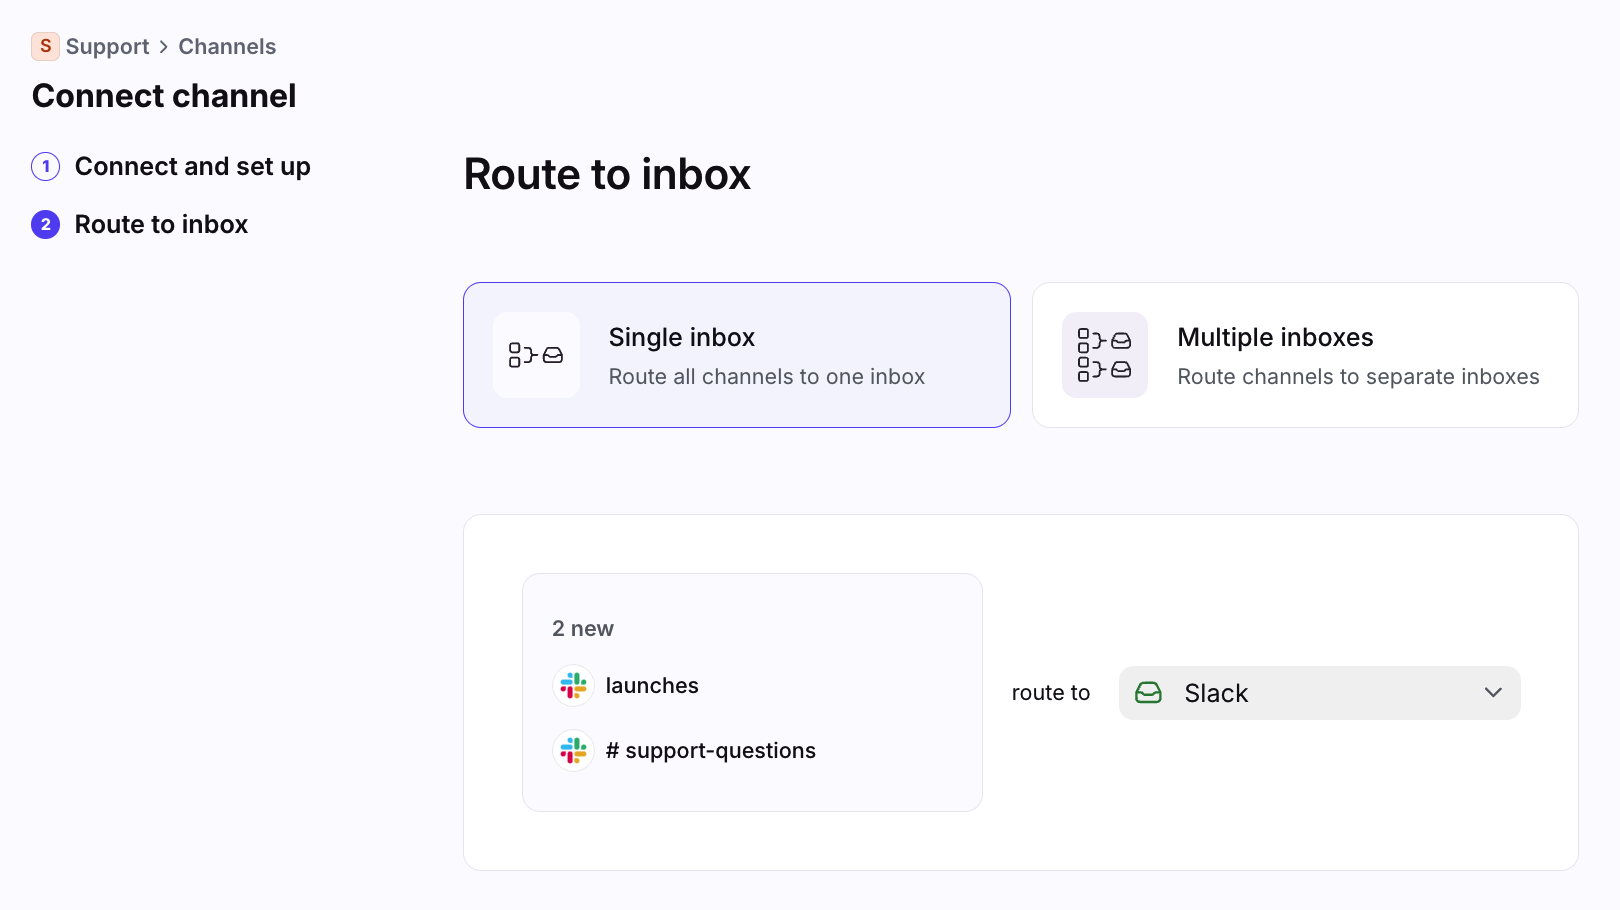
Option 2: If routing to multiple inboxes, use the dropdowns to select the inboxes the Slack channels should route to, then select the corresponding Slack channels in the other dropdown.

Step 11
Click Continue to finish. That’s it! Once your channels are successfully created, you can start sending and receiving messages from Slack to Front.
Threading options
During the authentication process, you can choose from three threading options in Front. Afterwards you can change the threading mode at any time using the instructions here.
Option 1: Group consecutive top-level messages
Threading behavior: Select this threading mode if you’d like to group multiple messages sent by the same Slack user, within 5 minutes of each other, into one Front conversation. If another Slack user sends a top-level message within that 5 minutes, their message will sync to Front as a separate conversation.
Reply behavior: Replies from Front appear as inline replies under the most recent top-level message in Slack.
Use case: Use this threading option if your Slack users typically send multiple related messages in the top-level thread in Slack.
View in Slack:
View in Front:
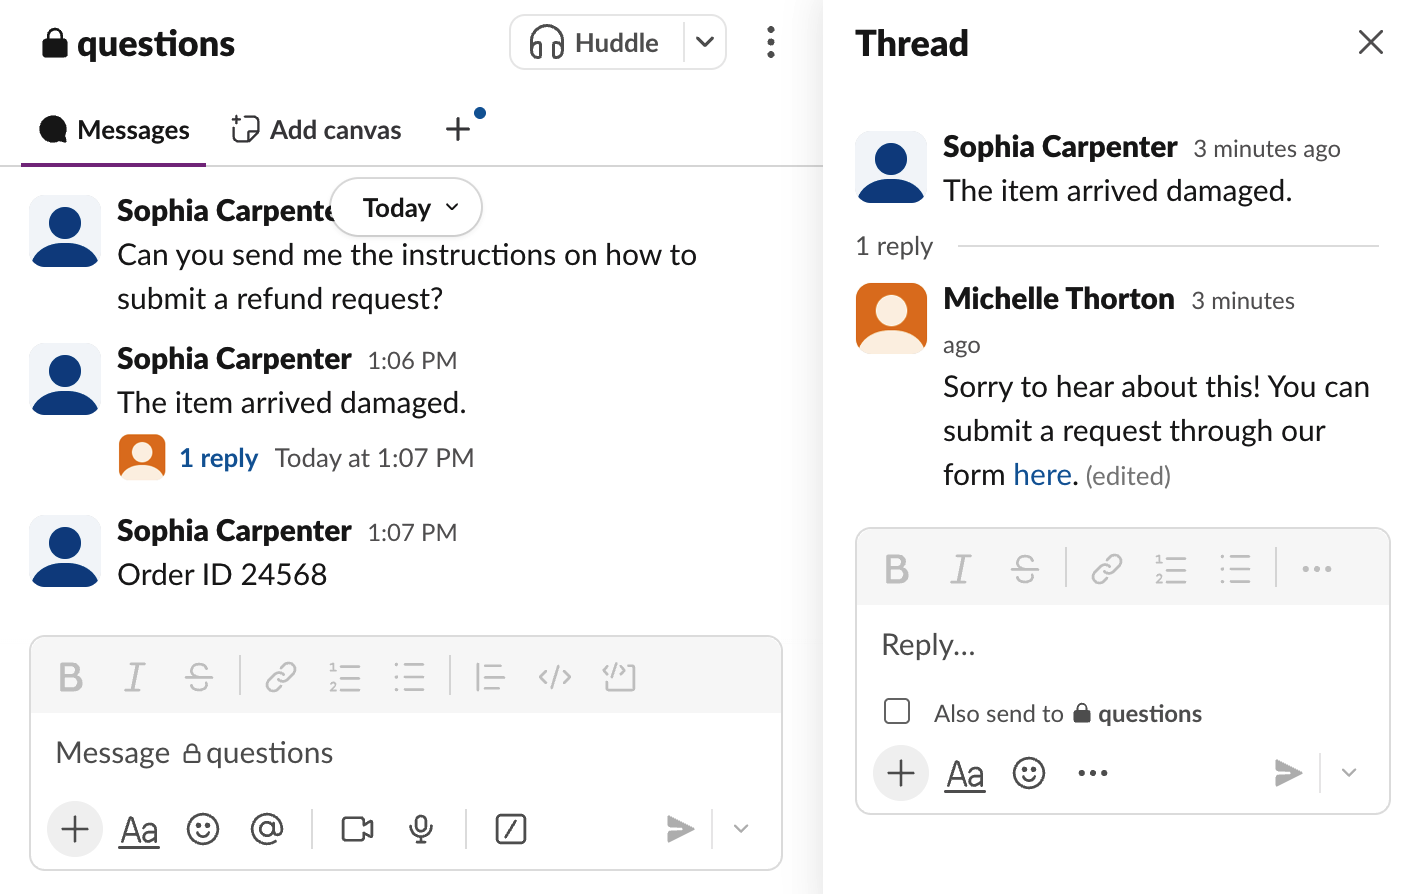
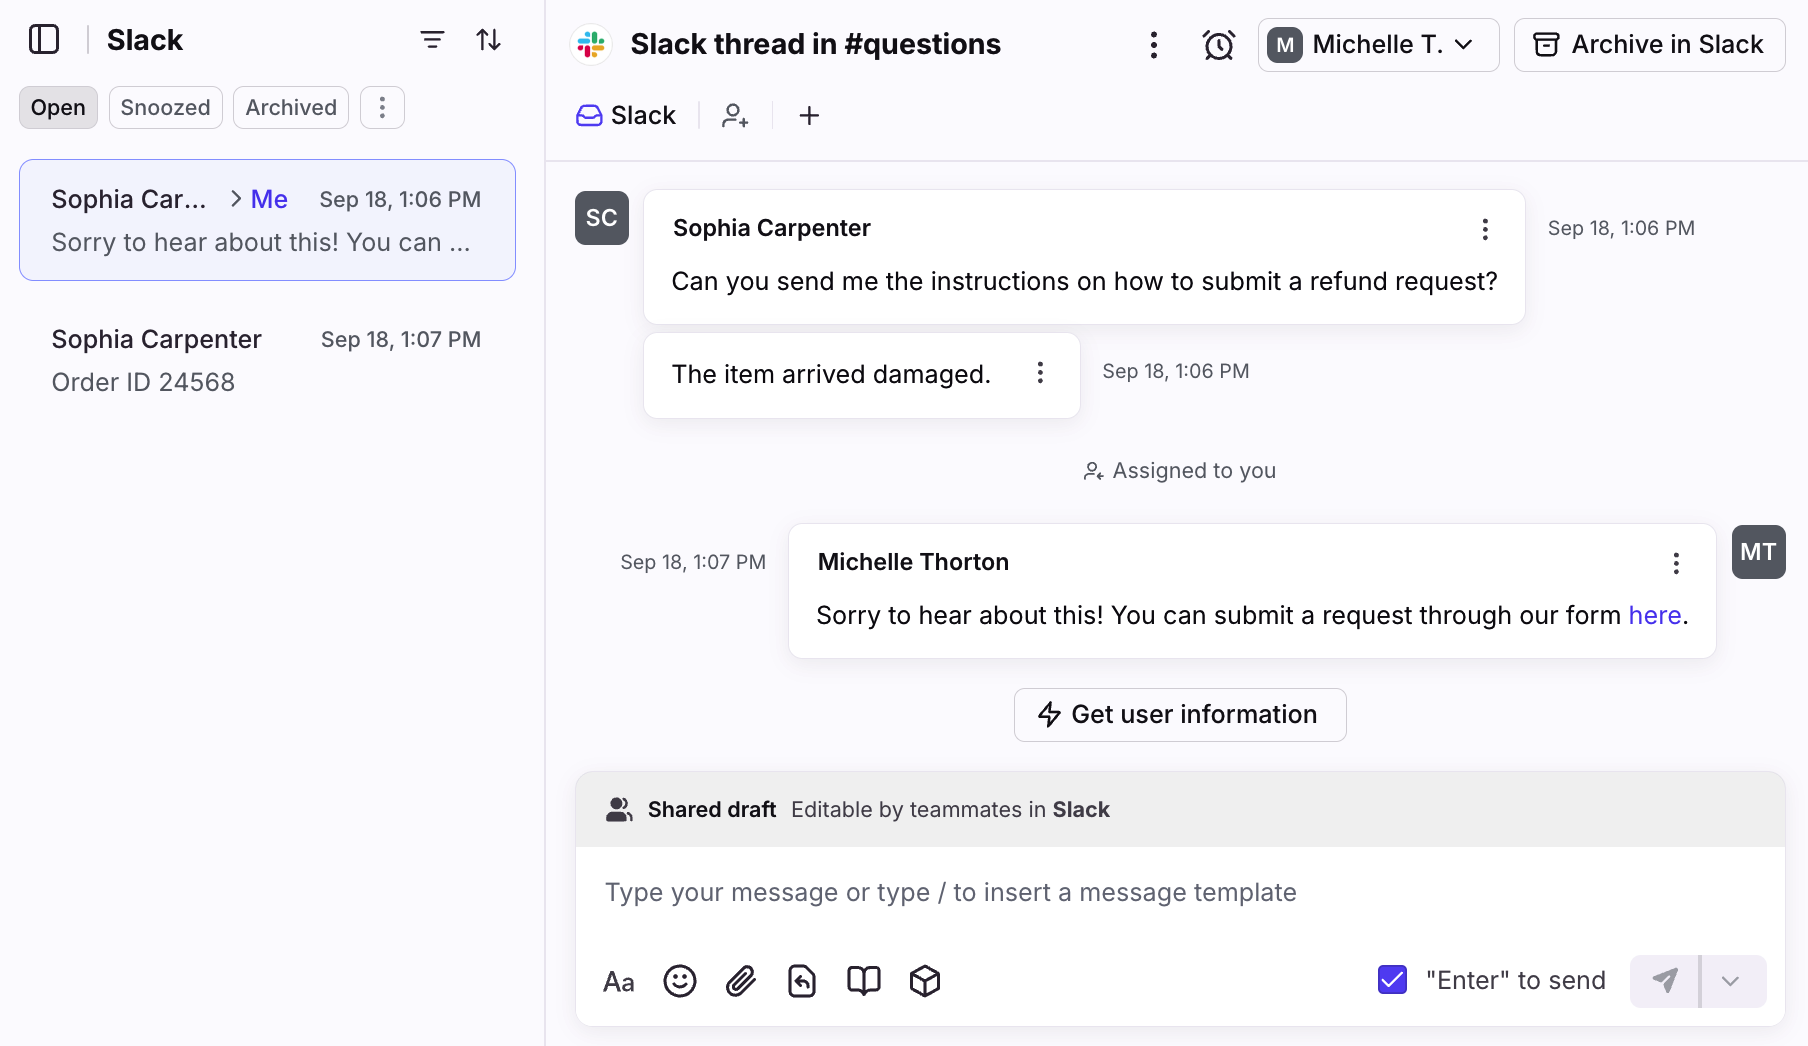
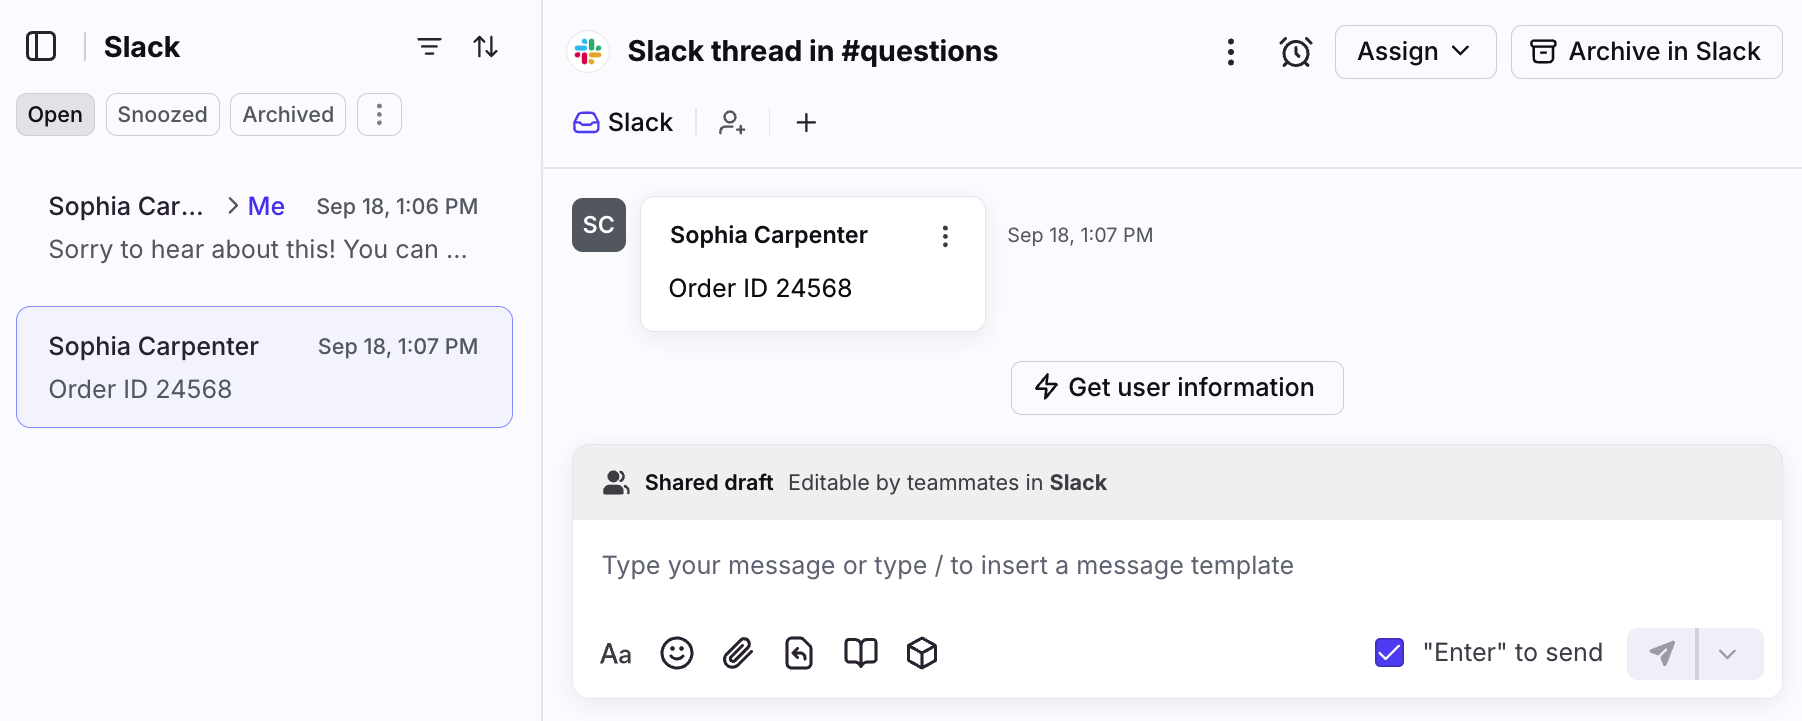
Option 2: Create multiple conversations in Front
Threading behavior: Select this threading mode if you'd like all top-level messages to be their own conversations. If a top-level message has inline replies (a Slack thread), they stay in the same Front conversation.
Reply behavior: Replies from Front will always be inline replies in Slack.
Use case: Use this threading option if you want to treat each top-level message in Slack as a separate "ticket".
View in Slack:
View in Front:
Option 3: Create a single conversation in Front
Threading behavior: Select this threading mode if you'd like all top-level comments without inline replies (a Slack thread) to thread into one conversation in Front. Inline replies in Slack will create separate conversations.
Reply behavior: Replies from Front will appear as a top-level message in the Slack channel. If replying to an inline reply, replies from Front will stay in the thread.
Use case: Use this threading option if you typically reply to messages in the top-level thread in Slack.
View in Slack:

View in Front:
Using the integration
Reply to Slack messages using Front
When you reply to a Slack message from Front, your messages will sync with Slack. Once you've logged into your Slack account using the Front side panel, the messages will appear in Slack as if they were sent directly from there, providing a smooth and integrated experience.
In Front, you can use features like internal comments to collaborate with teammates, take notes, and more.
View in Front:
View in Slack:
Start new conversations
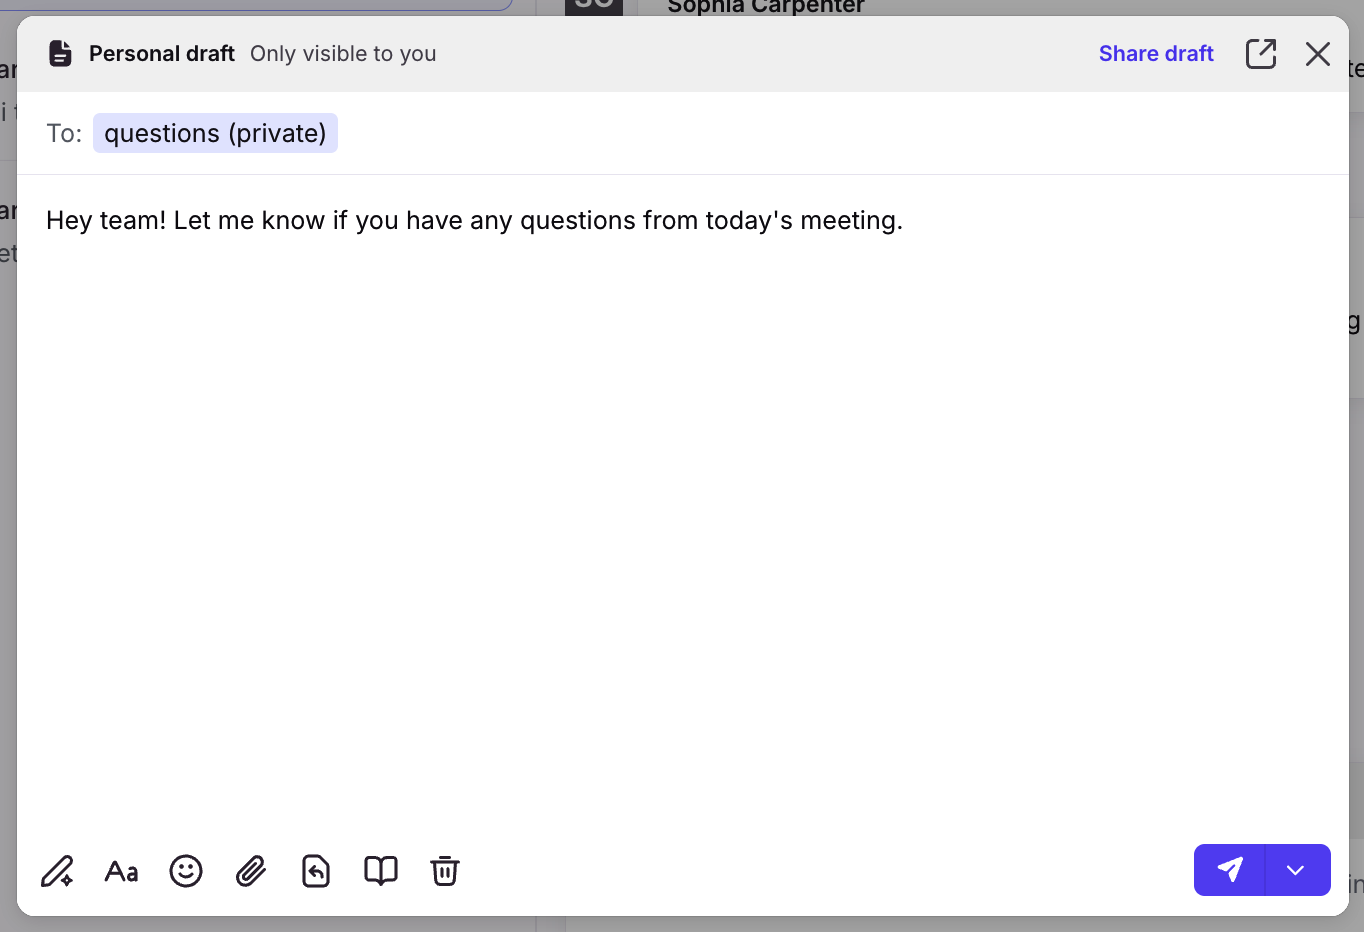
New Slack integration only: In the From field in Front's composer, you can select a Slack channel you want to send a brand new message to (which then switches to the To field). The message will appear in Slack as if it was sent directly from there, and will follow your threading settings for replies.
View in Front:
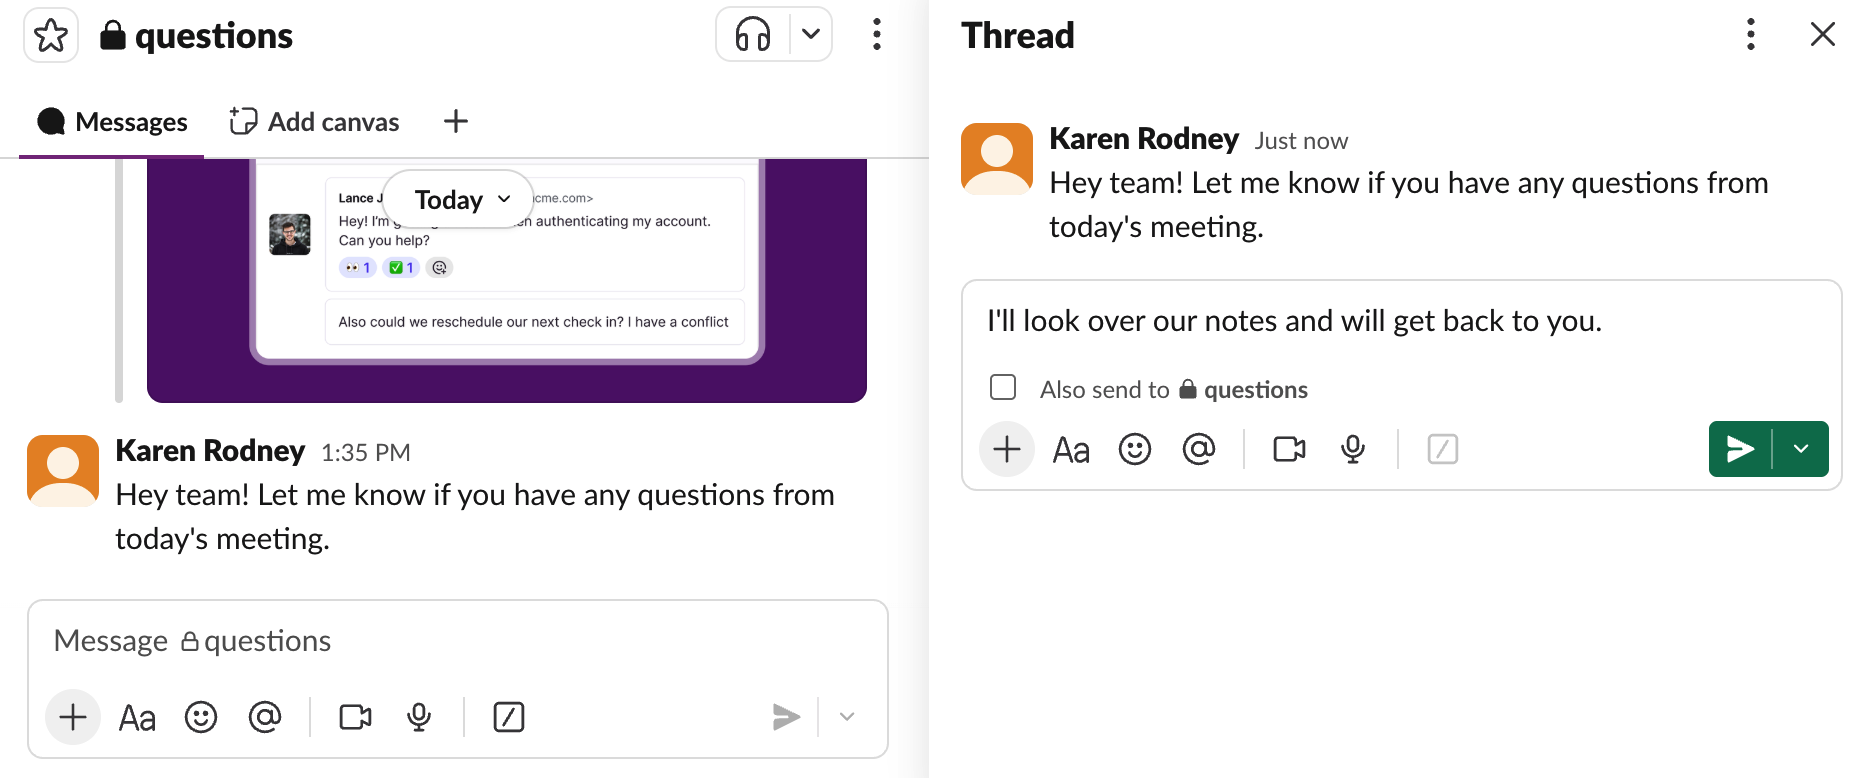
View in Slack:
Send and receive emoji reactions
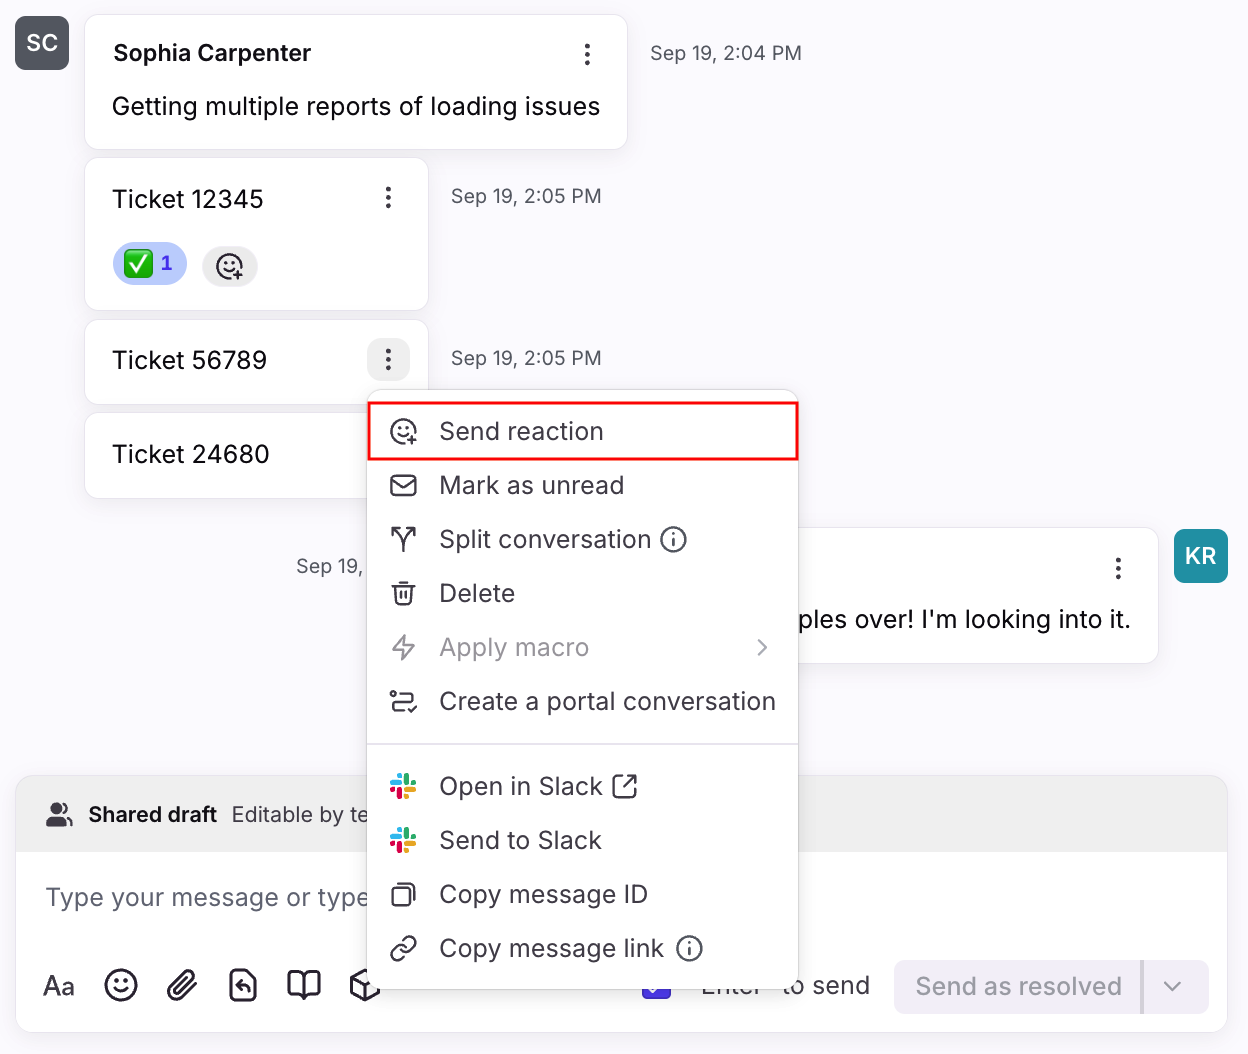
Click the three-dot menu in a message, click Send reaction, then select an emoji to add a reaction to a message.
When you add emoji reactions to a message from Front or receive a reaction from Slack, these reactions will be synced to the other app. This is useful for acknowledging messages with visual cues.
View in Front:
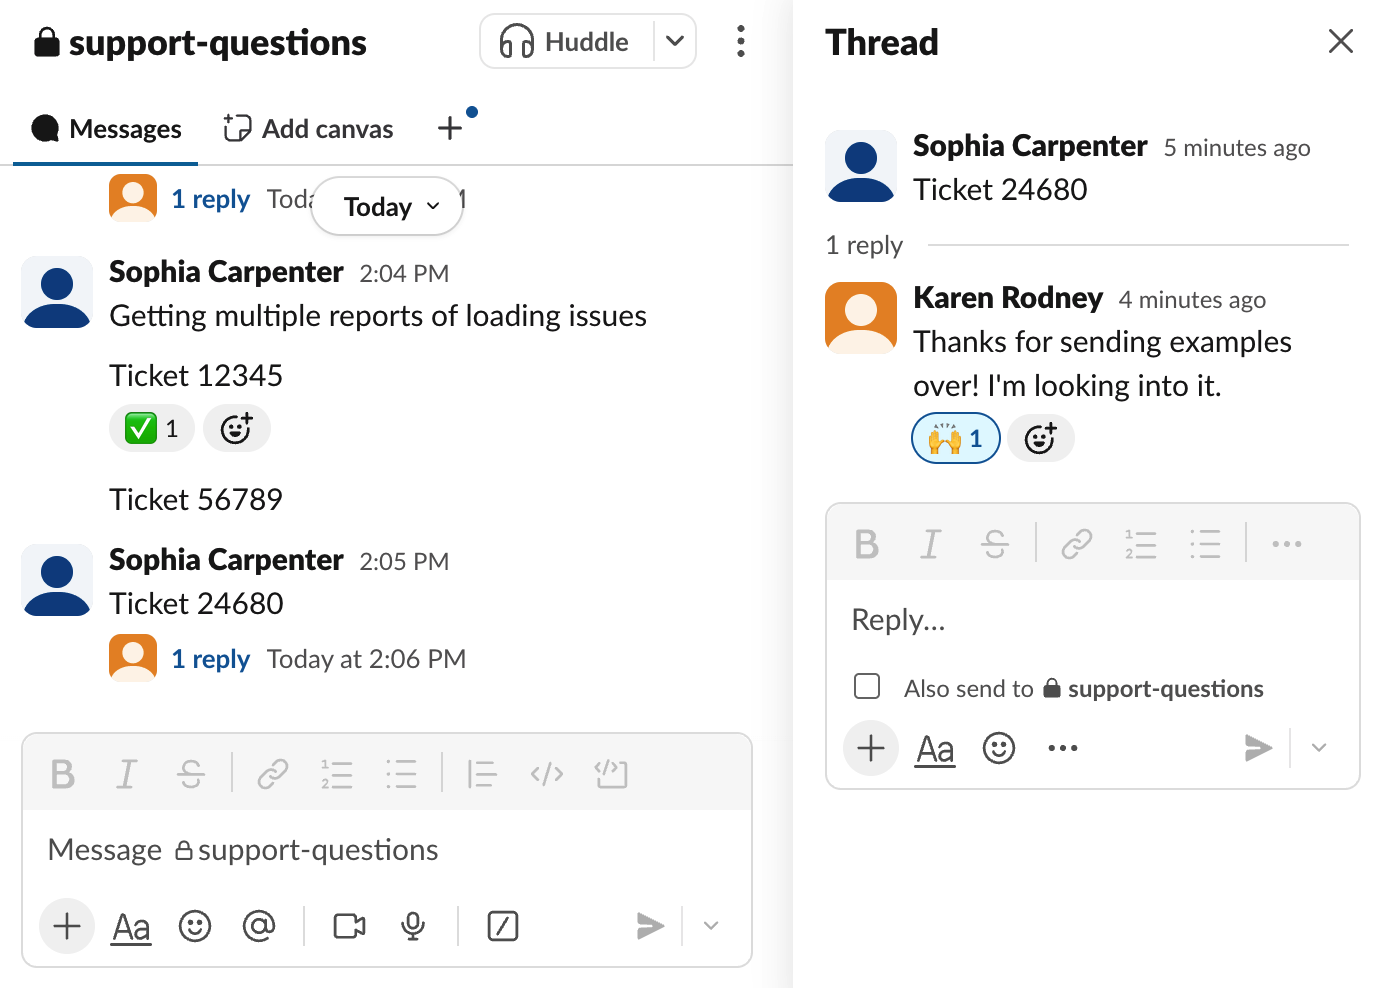
View in Slack:
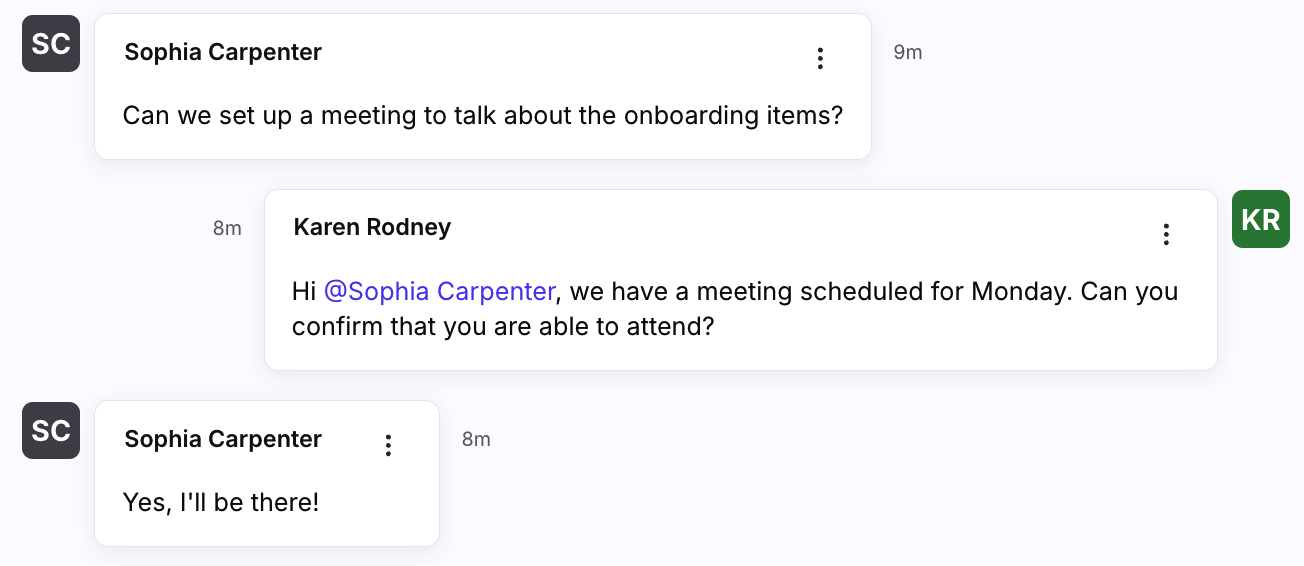
Mention teammates using Front
When you need to loop a teammate into a conversation, you can @mention a teammate in Front's composer. This will notify your teammate as if you mentioned them in Slack.
Important:
You can only @mention members already in the Slack channel, and will not be able to invite new users to the channel using @mentions from Front.
If your Slack channel has more than 500 members, the Front will not show the auto-suggestion dropdown with the list of members.
View in Front:
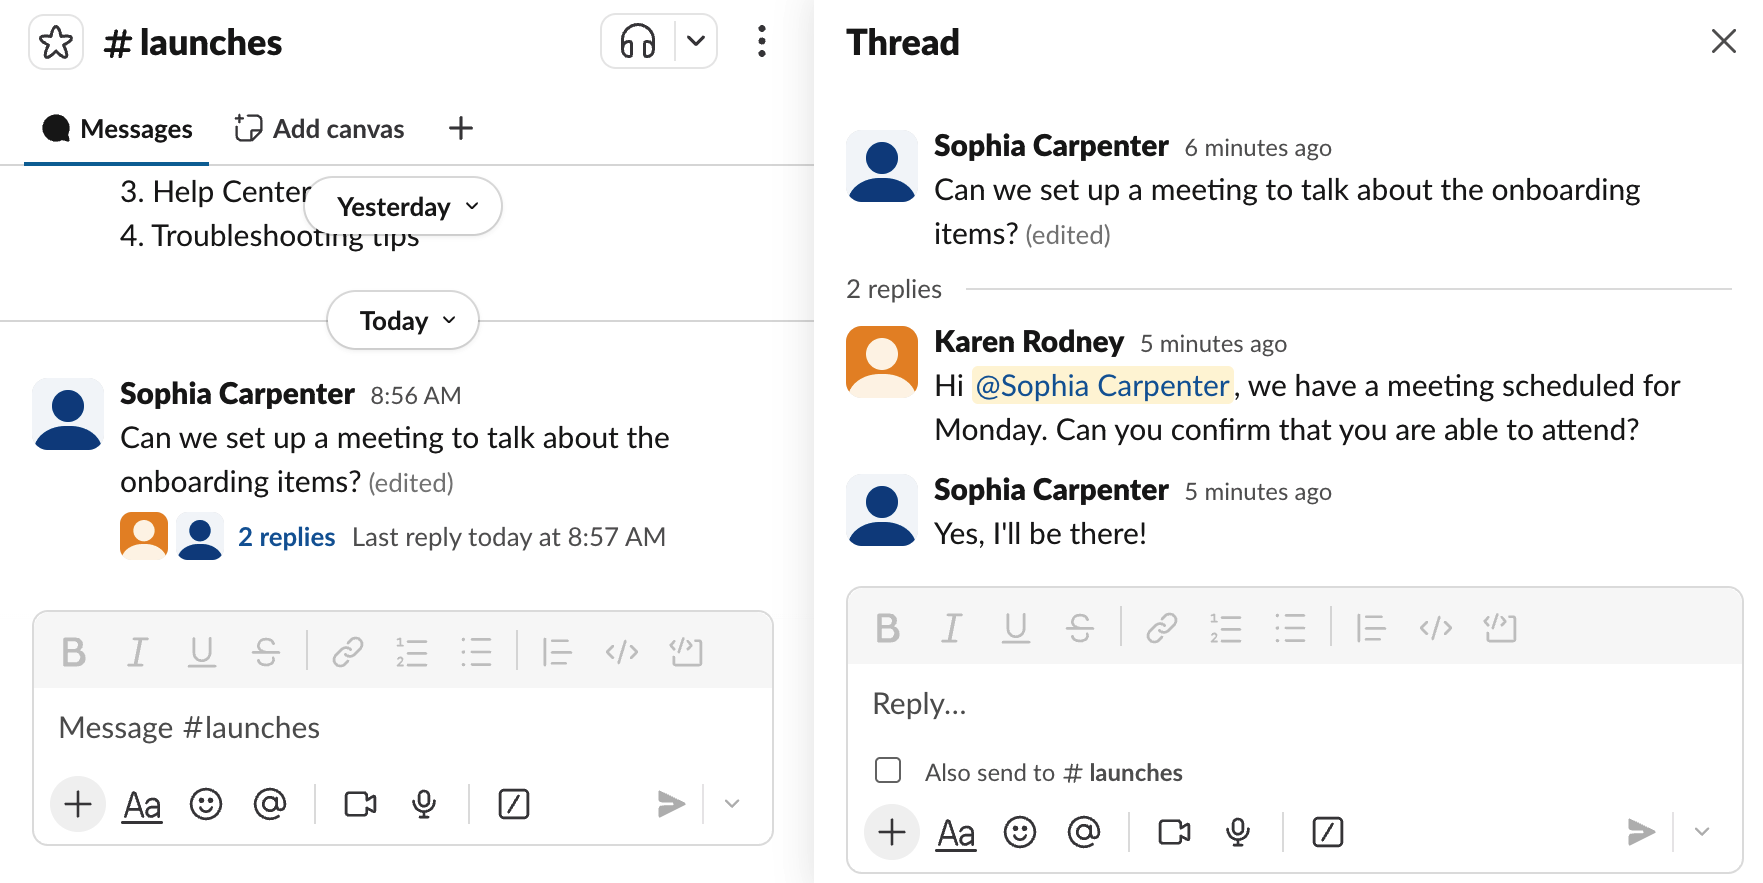
View in Slack:
Quickly navigate to Slack messages from Front
Click the three-dot menu in a message, then select Open in Slack to navigate to the corresponding message in your Slack app.
This is helpful when you want to loop in a Slack teammate who doesn’t use Front, or add additional context for a Slack-specific workflow.
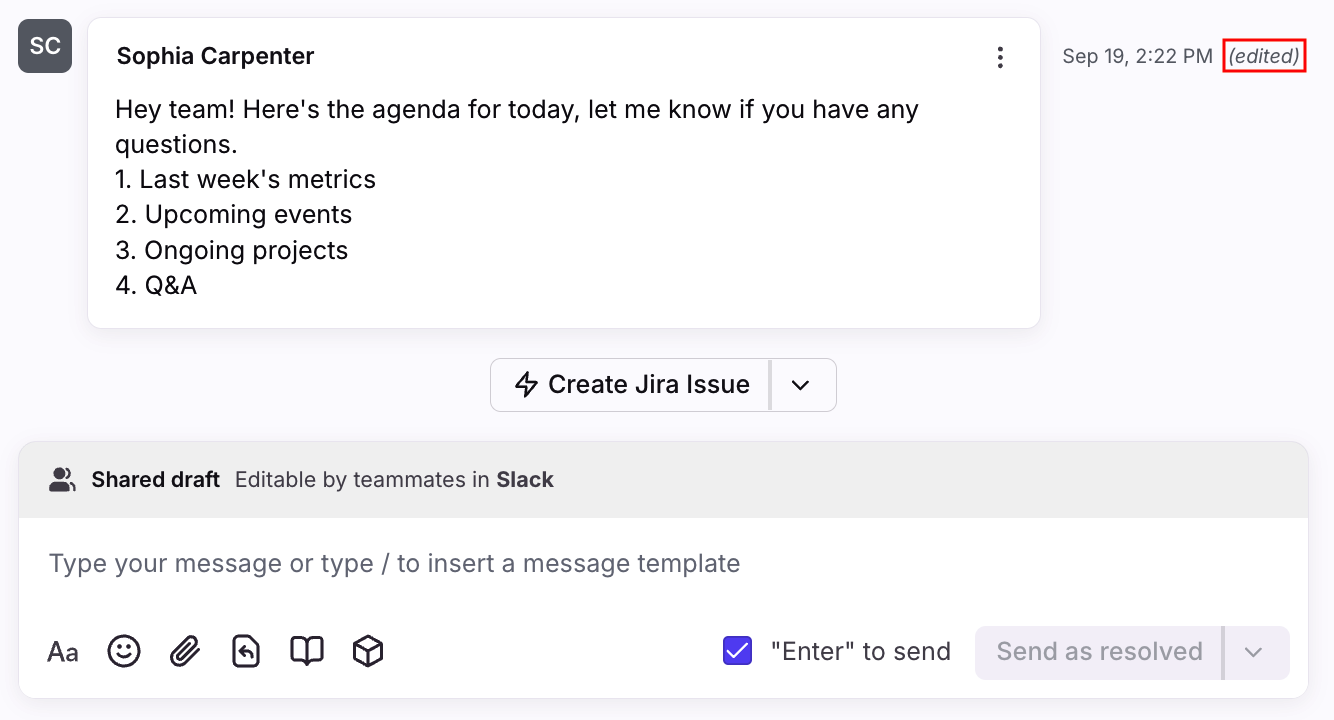
View edited messages from Slack
When a message is edited in Slack, you’ll see an Edited indicator next to the message in the Front conversation. All updates and messages are reflected in both apps, ensuring your teams have the latest information. Rules will not be re-run when Slack messages are edited.
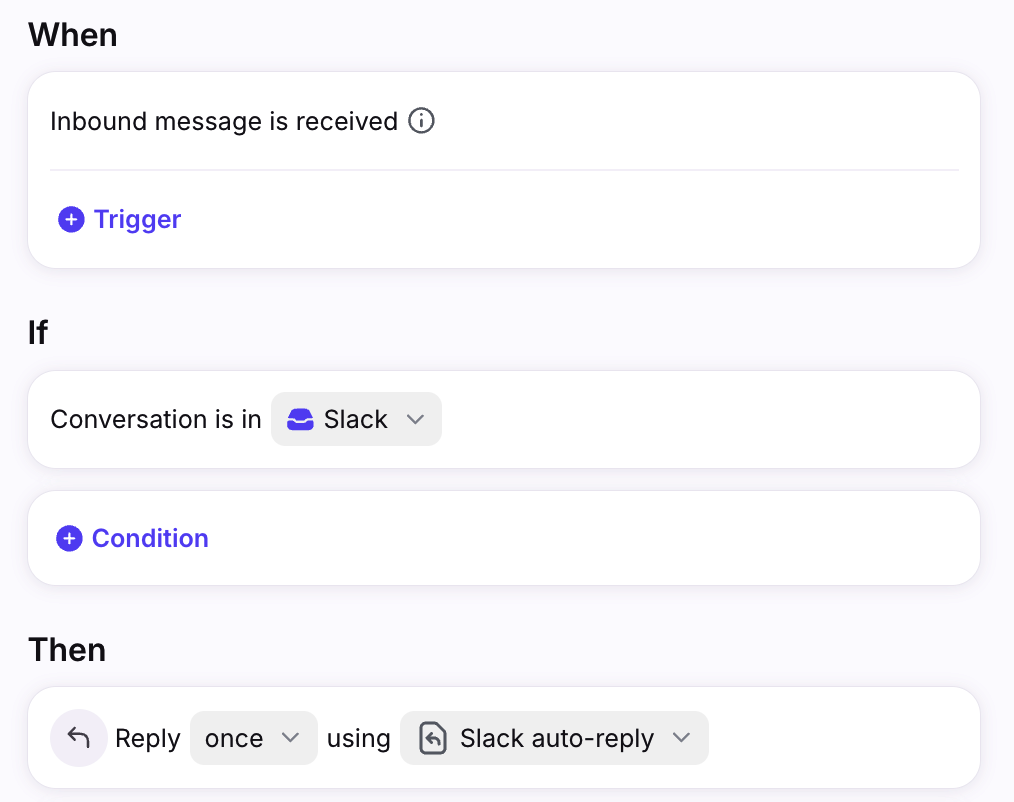
Use rules automate workflows
Use Front rules to automate workflows, such as setting reply expectations for your Slack messages. In this example, we want to send an automated reply notifying users when they can expect a response.
Example rule in Front:
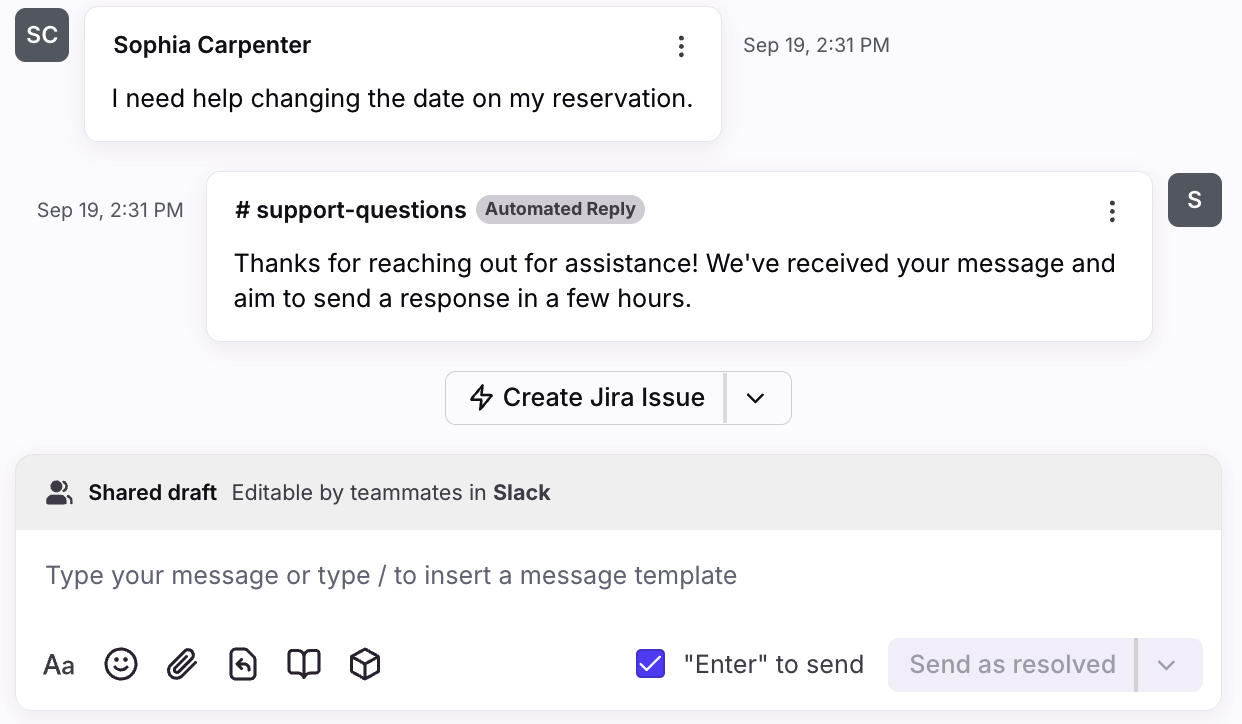
View in Front:
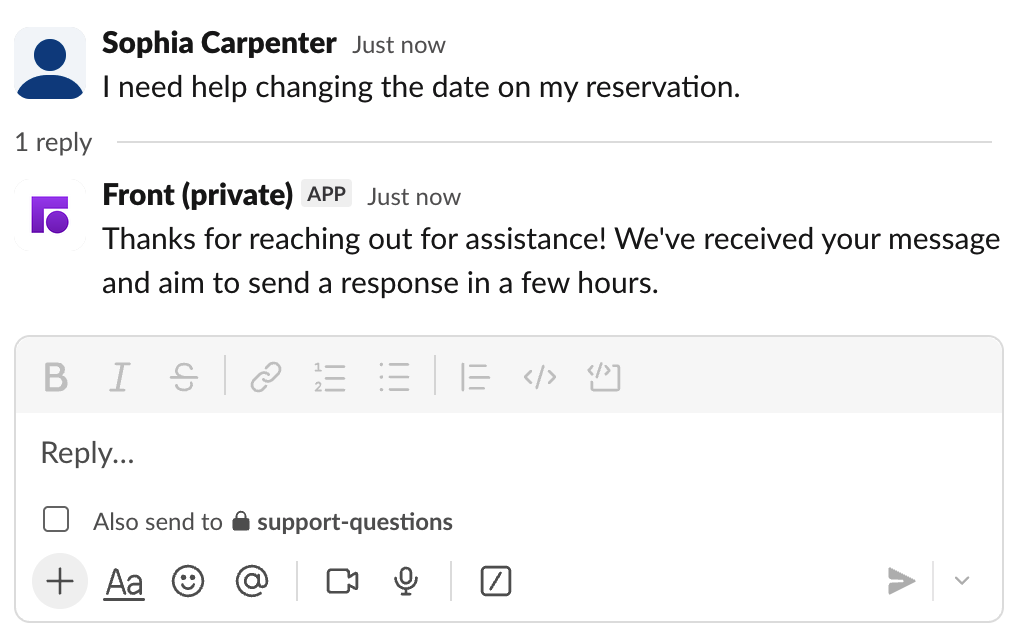
View in Slack:
Enable Smart CSAT or Smart QA
If you’re using your Slack channel as a help desk to support your customers, you can optionally set up Smart CSAT or Smart QA for your Slack conversations. This allows your team to collect AI-powered customer satisfaction and quality assurance scores to help ensure high-quality customer experiences.
How it works
Messaging experience
The channel supports the following:
Sending new messages to Slack channels without needing an existing conversation thread (available for new Slack integration only)
Replying to messages received from Slack channels
Sending and receiving attachments
Sending and receiving rich text messages (bolding, italics, links etc.)
Sending and receiving emojis in messages (custom emojis are not supported)
Sending and receiving emoji reactions (custom emojis are not supported)
Syncing message edits from Slack to Front
Messages deleted in the Slack channel will be automatically removed from Front as well. However, messages deleted in Front are not automatically deleted in Slack.
The channel does not currently support:
Historical import of messages. Only new messages will arrive in the inbox after it is connected.
Messages from other bots in the channel
Sending and receiving custom emojis in messages or as reactions are not supported
FAQ
Can I connect multiple Slack channels?
Yes. You can connect multiple Slack channels to Front as separate channels.
Which Slack channels are supported?
Supported:
Public channels
Private channels
Public and private Slack Connect channels - You must be the channel owner. Guest organizations cannot connect a Slack Connect channel.
Not supported:
Direct messages
Why isn't my private channel appearing?
Make sure you invite the Front Channel Integration to your Slack private channels, then restart the channel connection process. It should then appear in your list of Slack channels to connect.
What if I'm using the legacy version of the integration?
If you’re using the legacy version of the Slack channel, you’ll see a “Legacy” indicator on the Slack app. We recommend migrating to the new version of the channel as soon as possible by deleting the old channel, then re-adding the channel using the new app. Note that this will break the sync for any existing Slack conversations.
If you haven’t used the legacy version of the Slack channel, you’ll only see the new app.
What does the “This app is not approved by Slack” error mean?
If you see the “This app is not approved by Slack. Apps are reviewed to ensure a quality experience” or "Apologies, but Front Channel can't be installed" errors, this means this means you're using the legacy version of the app. The legacy app is no longer published on Slack's marketplace.
Once you use the new version of the channel integration, you'll no longer see the error.
How do I change the channel threading mode?
You can change the channel threading mode by reauthorizing the Slack channel in Front. This change is not retroactive, and only applies to new conversations going forward. We recommend changing the threading mode when there are no active conversations to prevent disruptions.
Click the gear icon, navigate to workspace settings, then select Channels.
Select your Slack channel, then click the Settings tab.
Click Reauthorize.
A pop-up will appear. When prompted to allow Front access to Slack, click Allow.
In the Threading mode field, use the dropdown to select your new threading mode.
Click Connect.
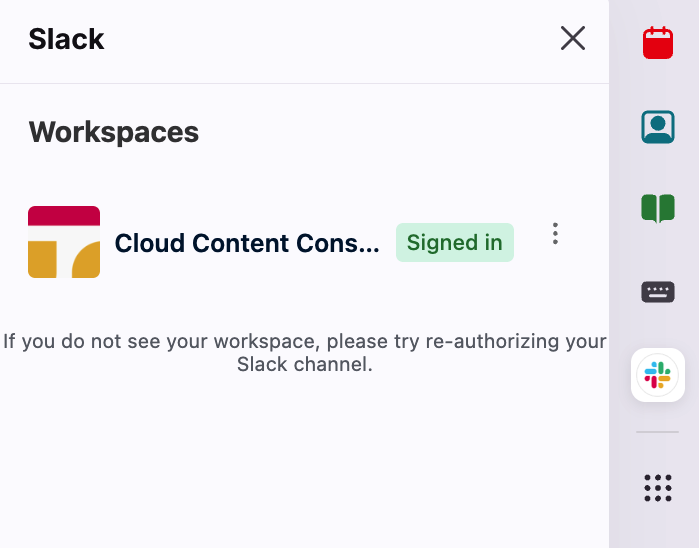
How do I log in to my Slack account in Front?
Select the Slack app in your app switcher, then click Sign in. Click Allow in the pop-up prompting you to grant permissions to Front. Once logged in, you’ll see the name of your workspace and a “Signed in” indicator.
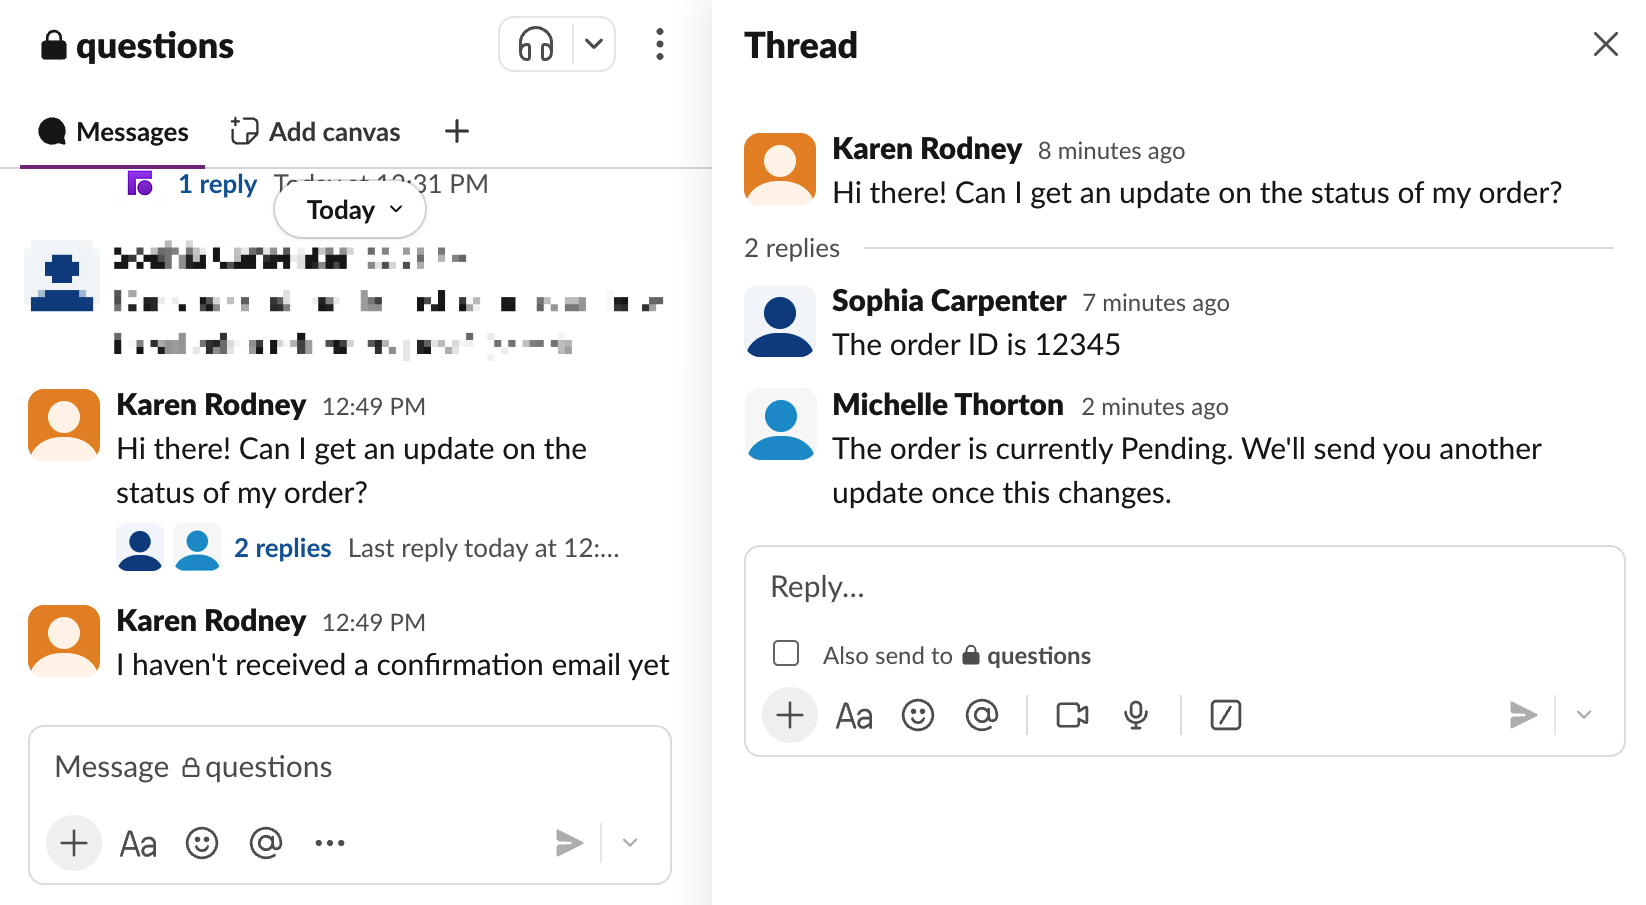
What if a Slack user replies in-thread for messages that were grouped in Front?
If your threading mode is set to “Group consecutive top-level messages”, two conversations are created in Front. For example:
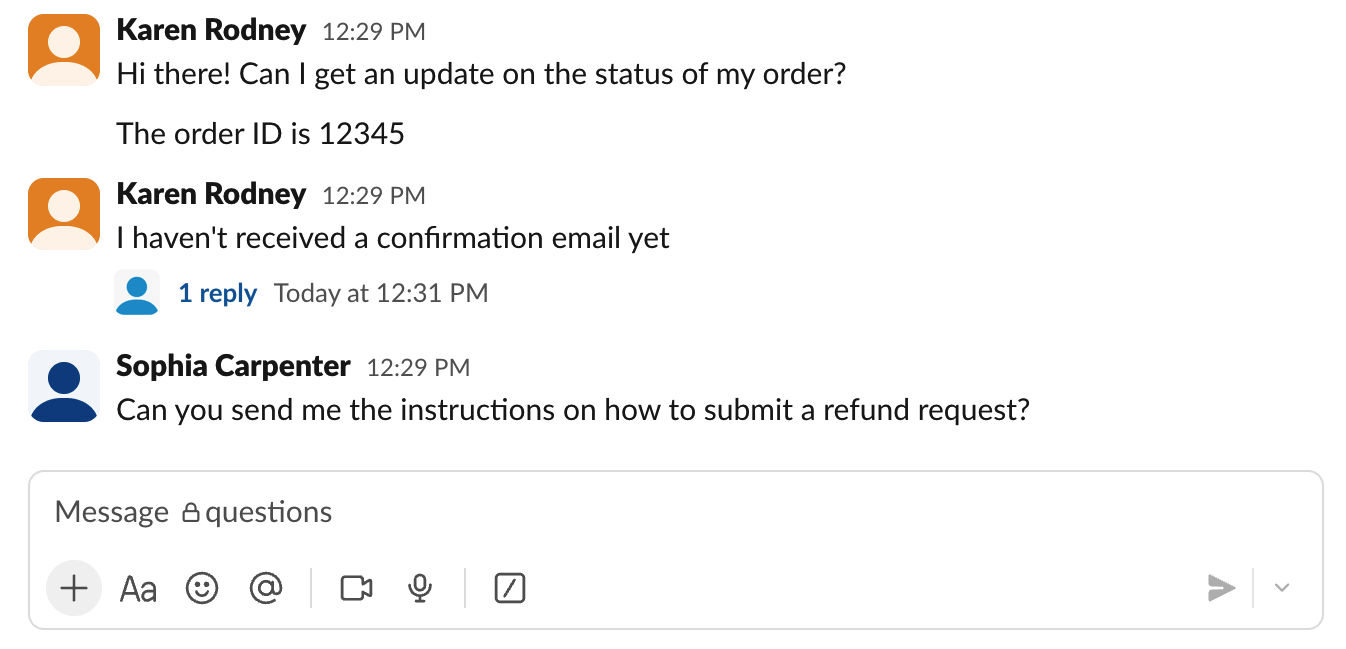
In Slack: Karen sends two top-level messages, then Sophia replies in thread for the first message.
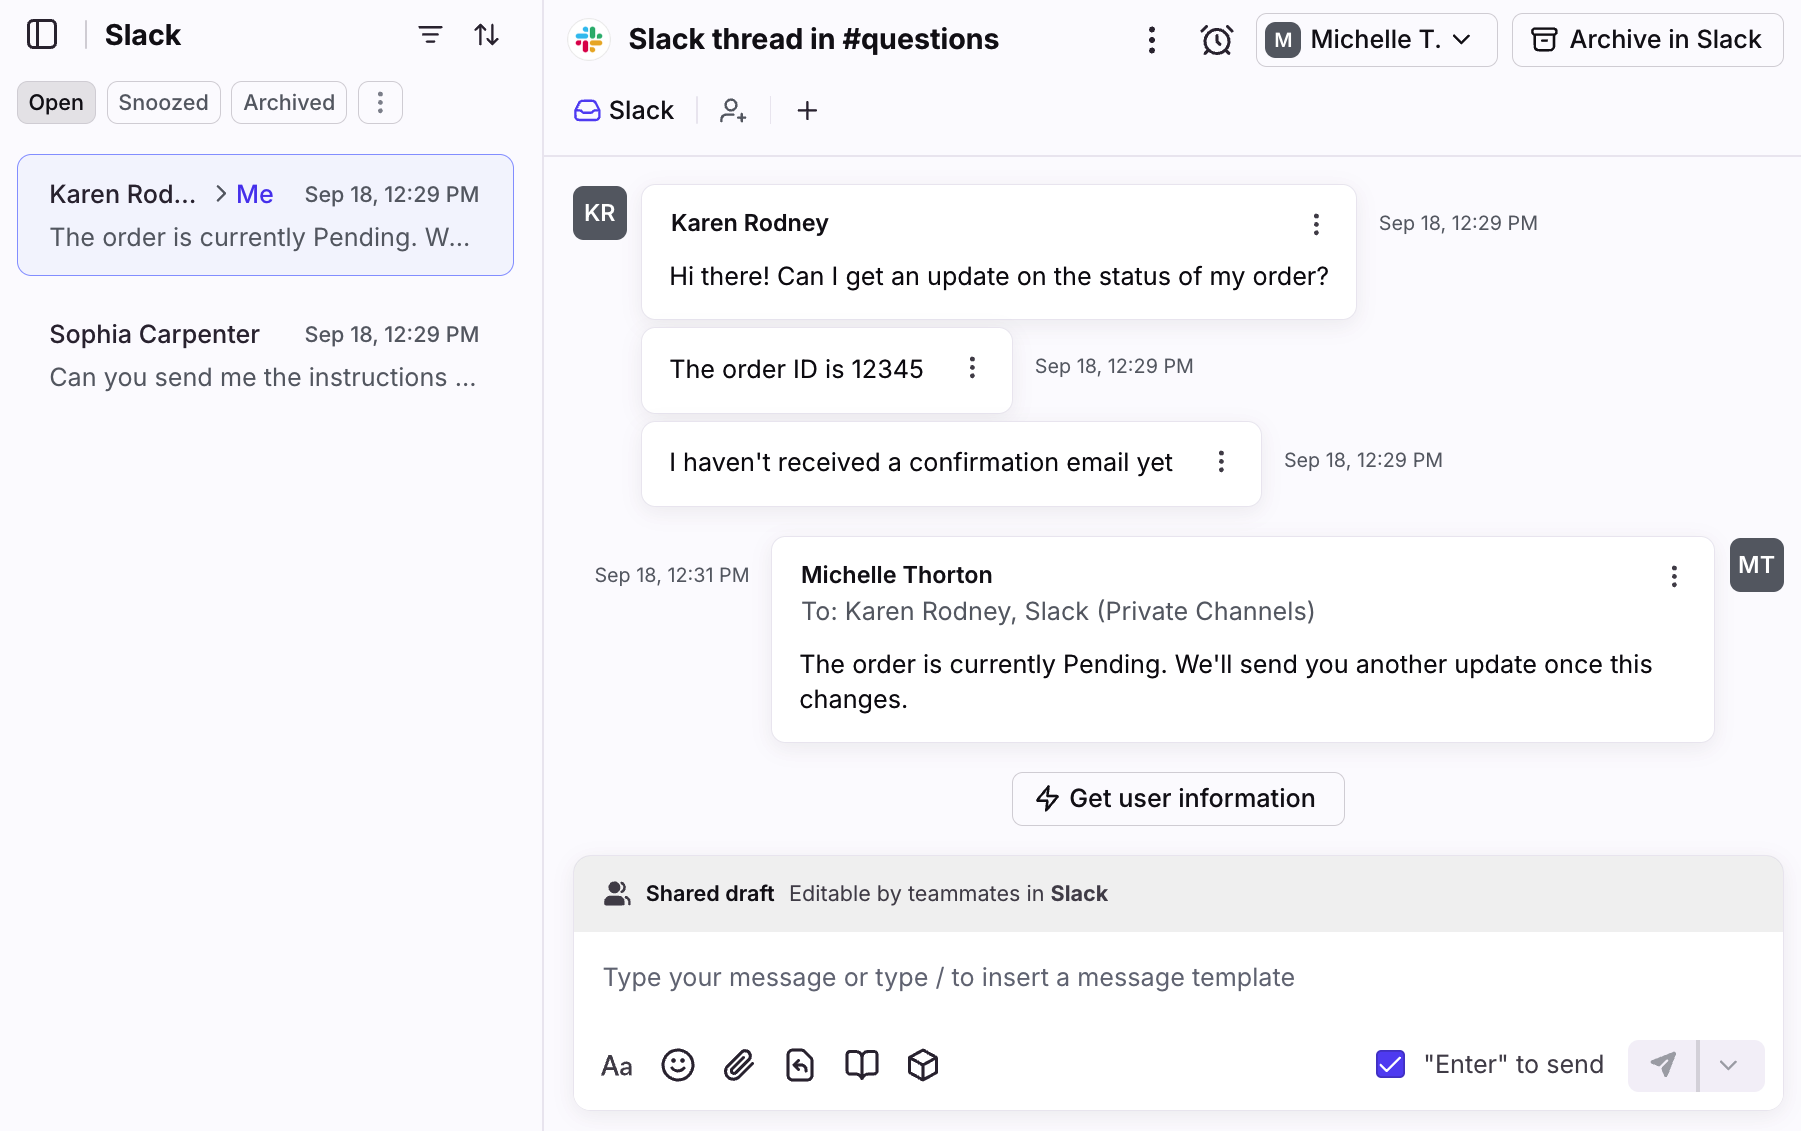
In Front: Two conversations are created
Conversation 1: Displays both top-level messages threaded into one conversation, and has an indicator and link that shows the first message was split into a new conversation.
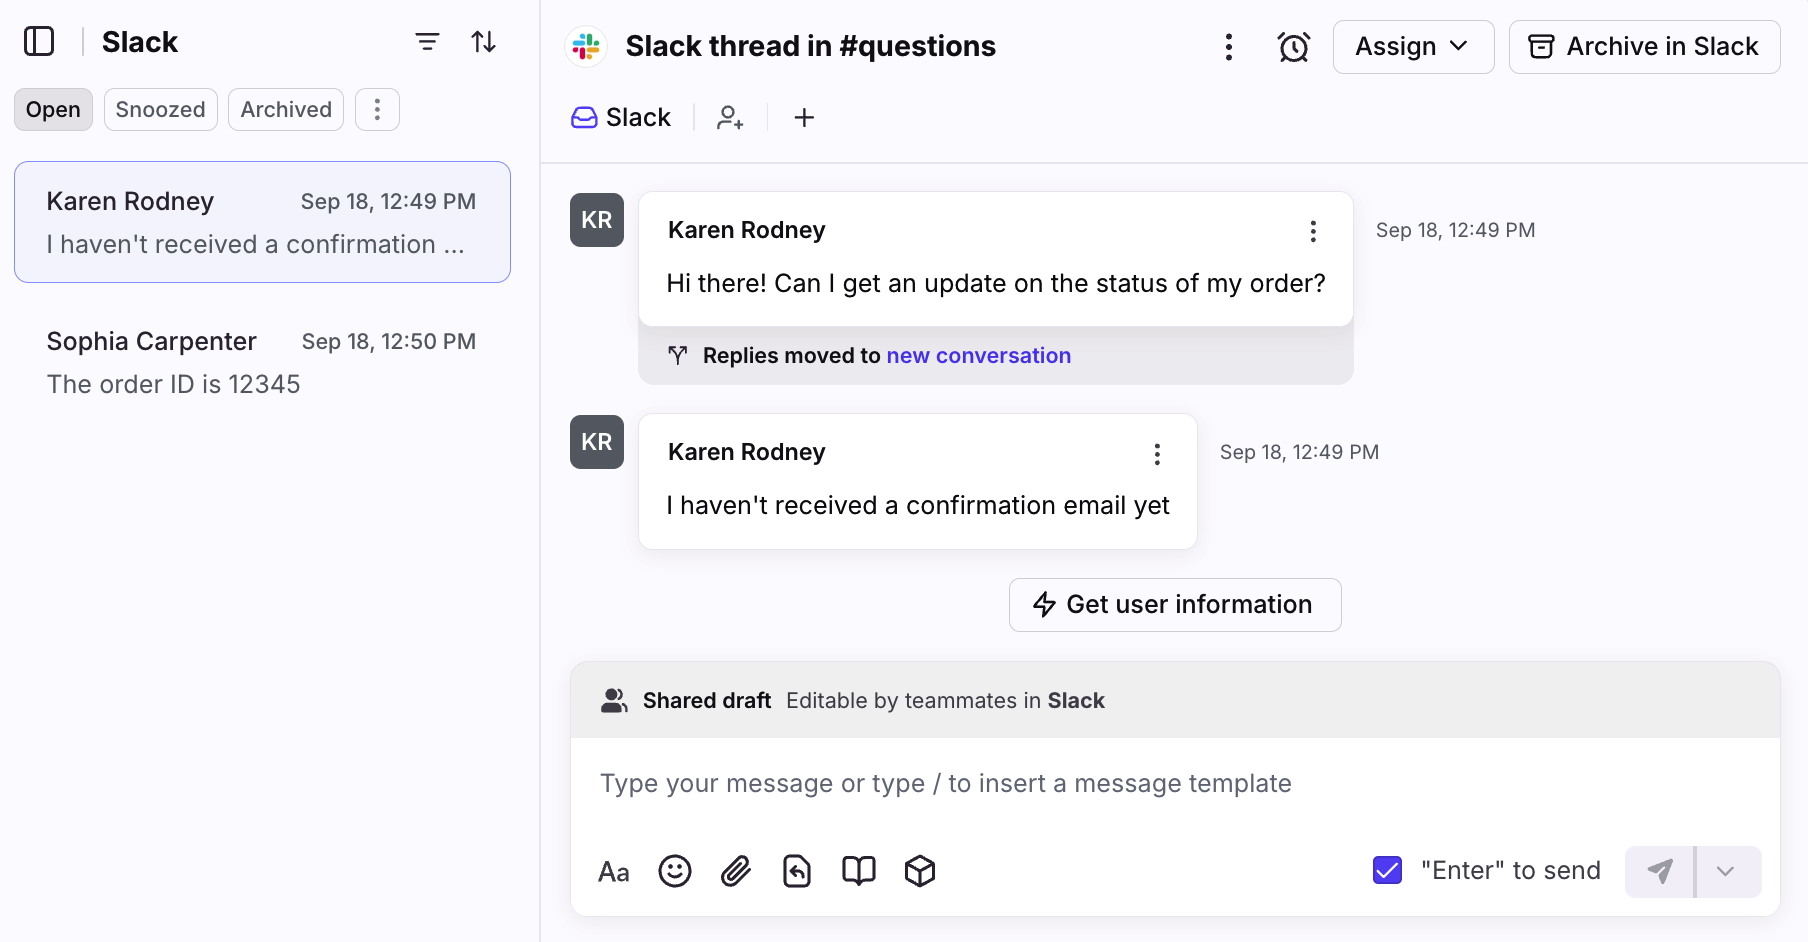
Conversation 2: Displays the first top-level comment from Karen and the threaded reply from Sophia.
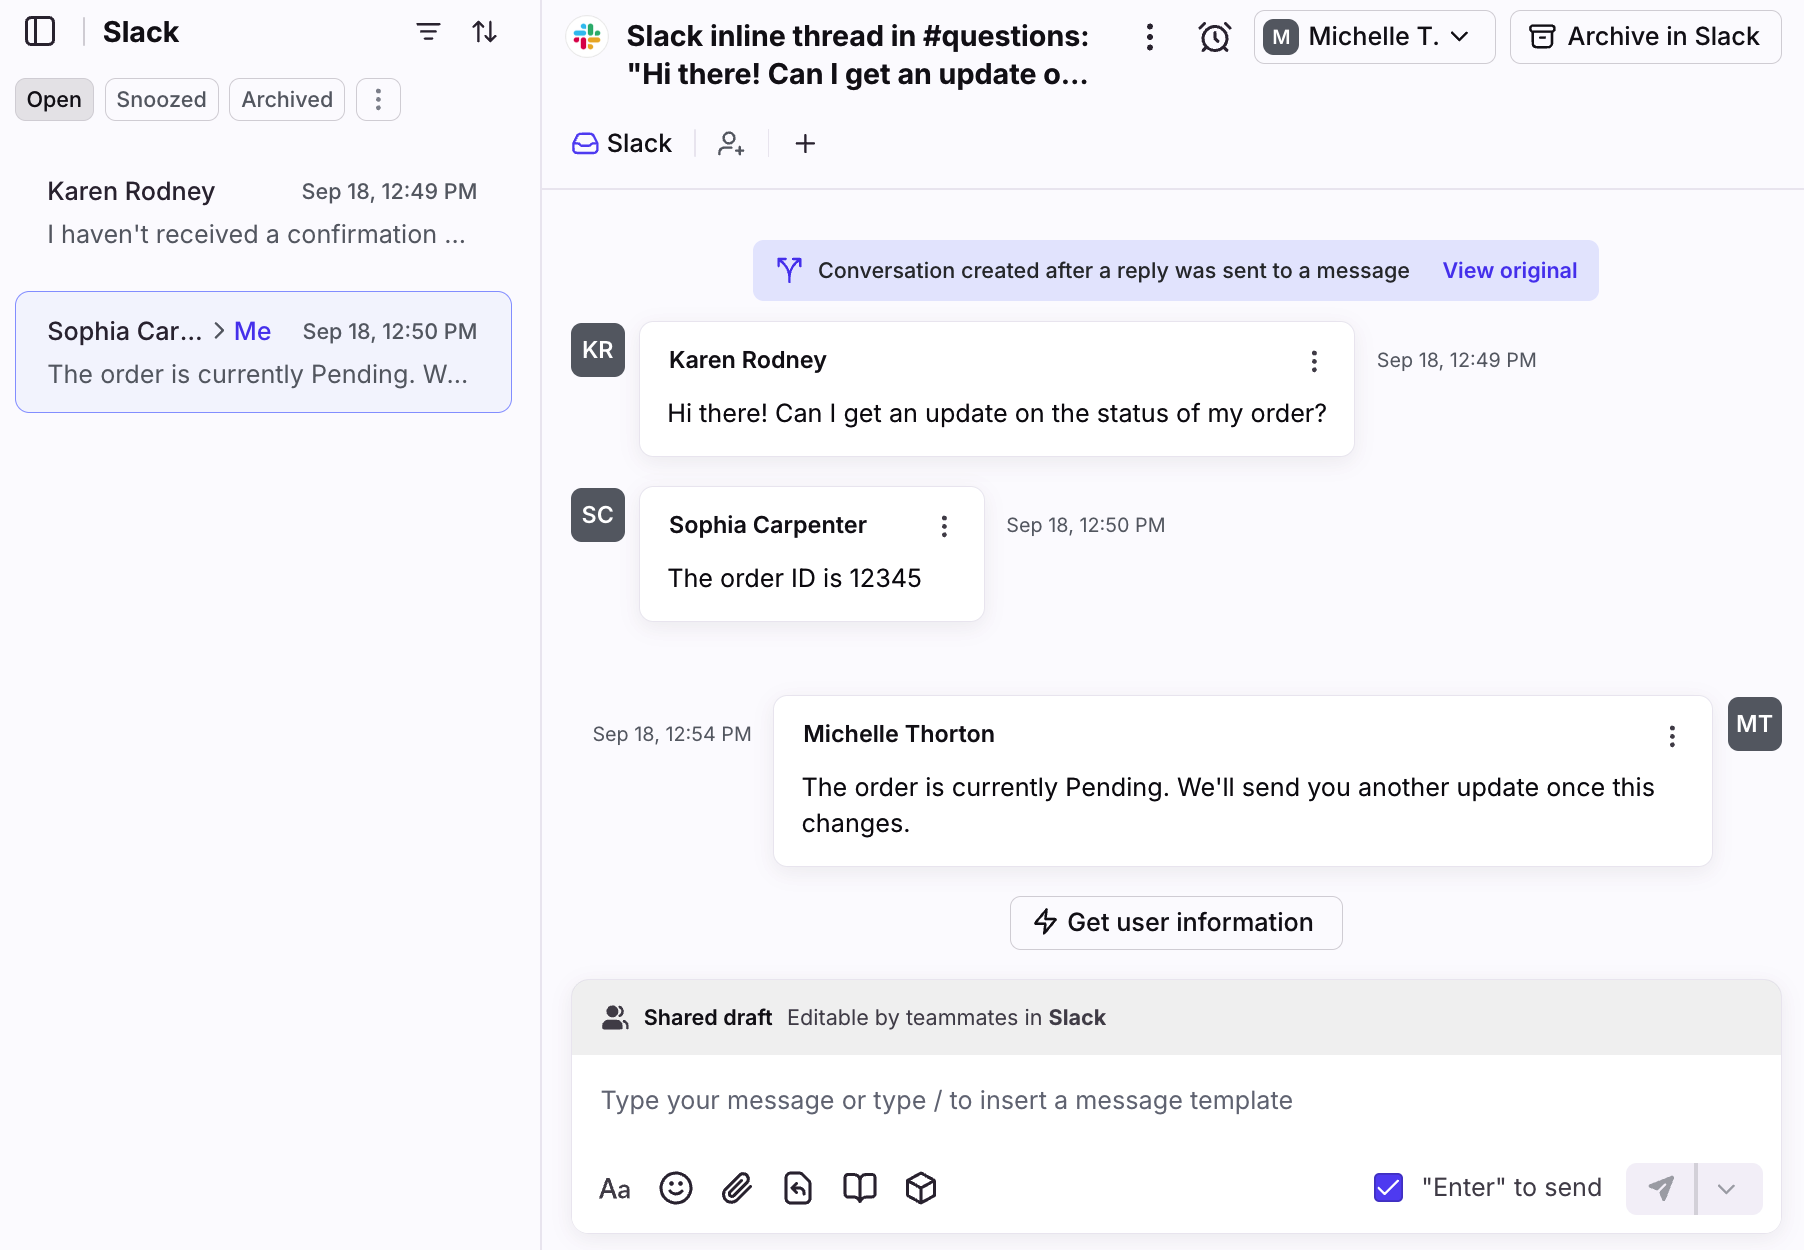
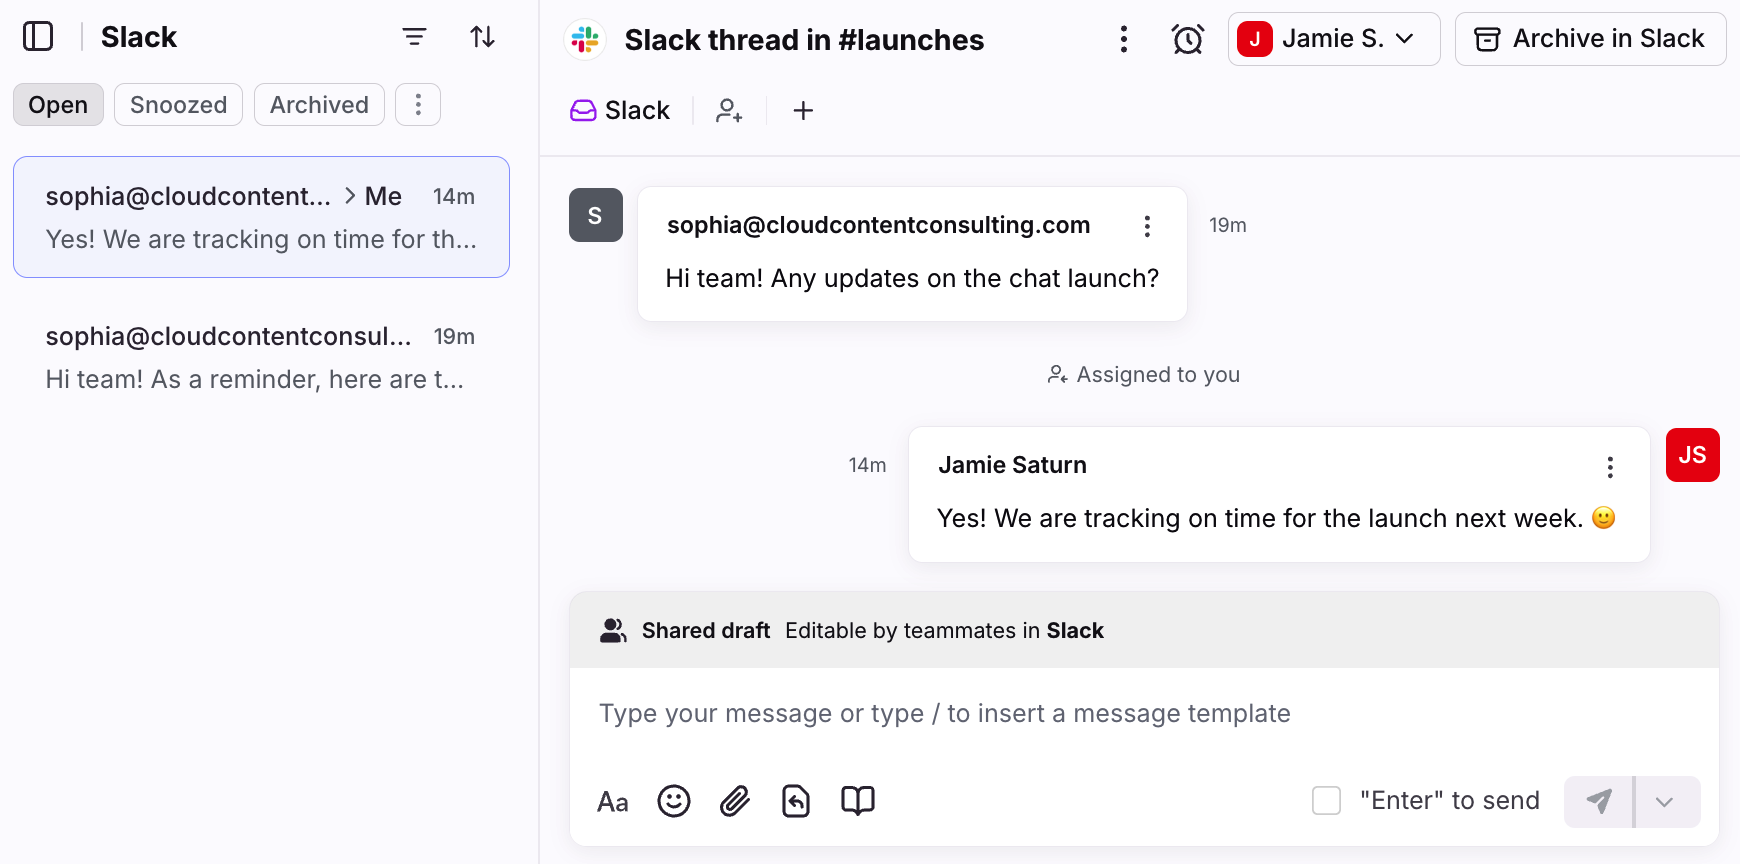
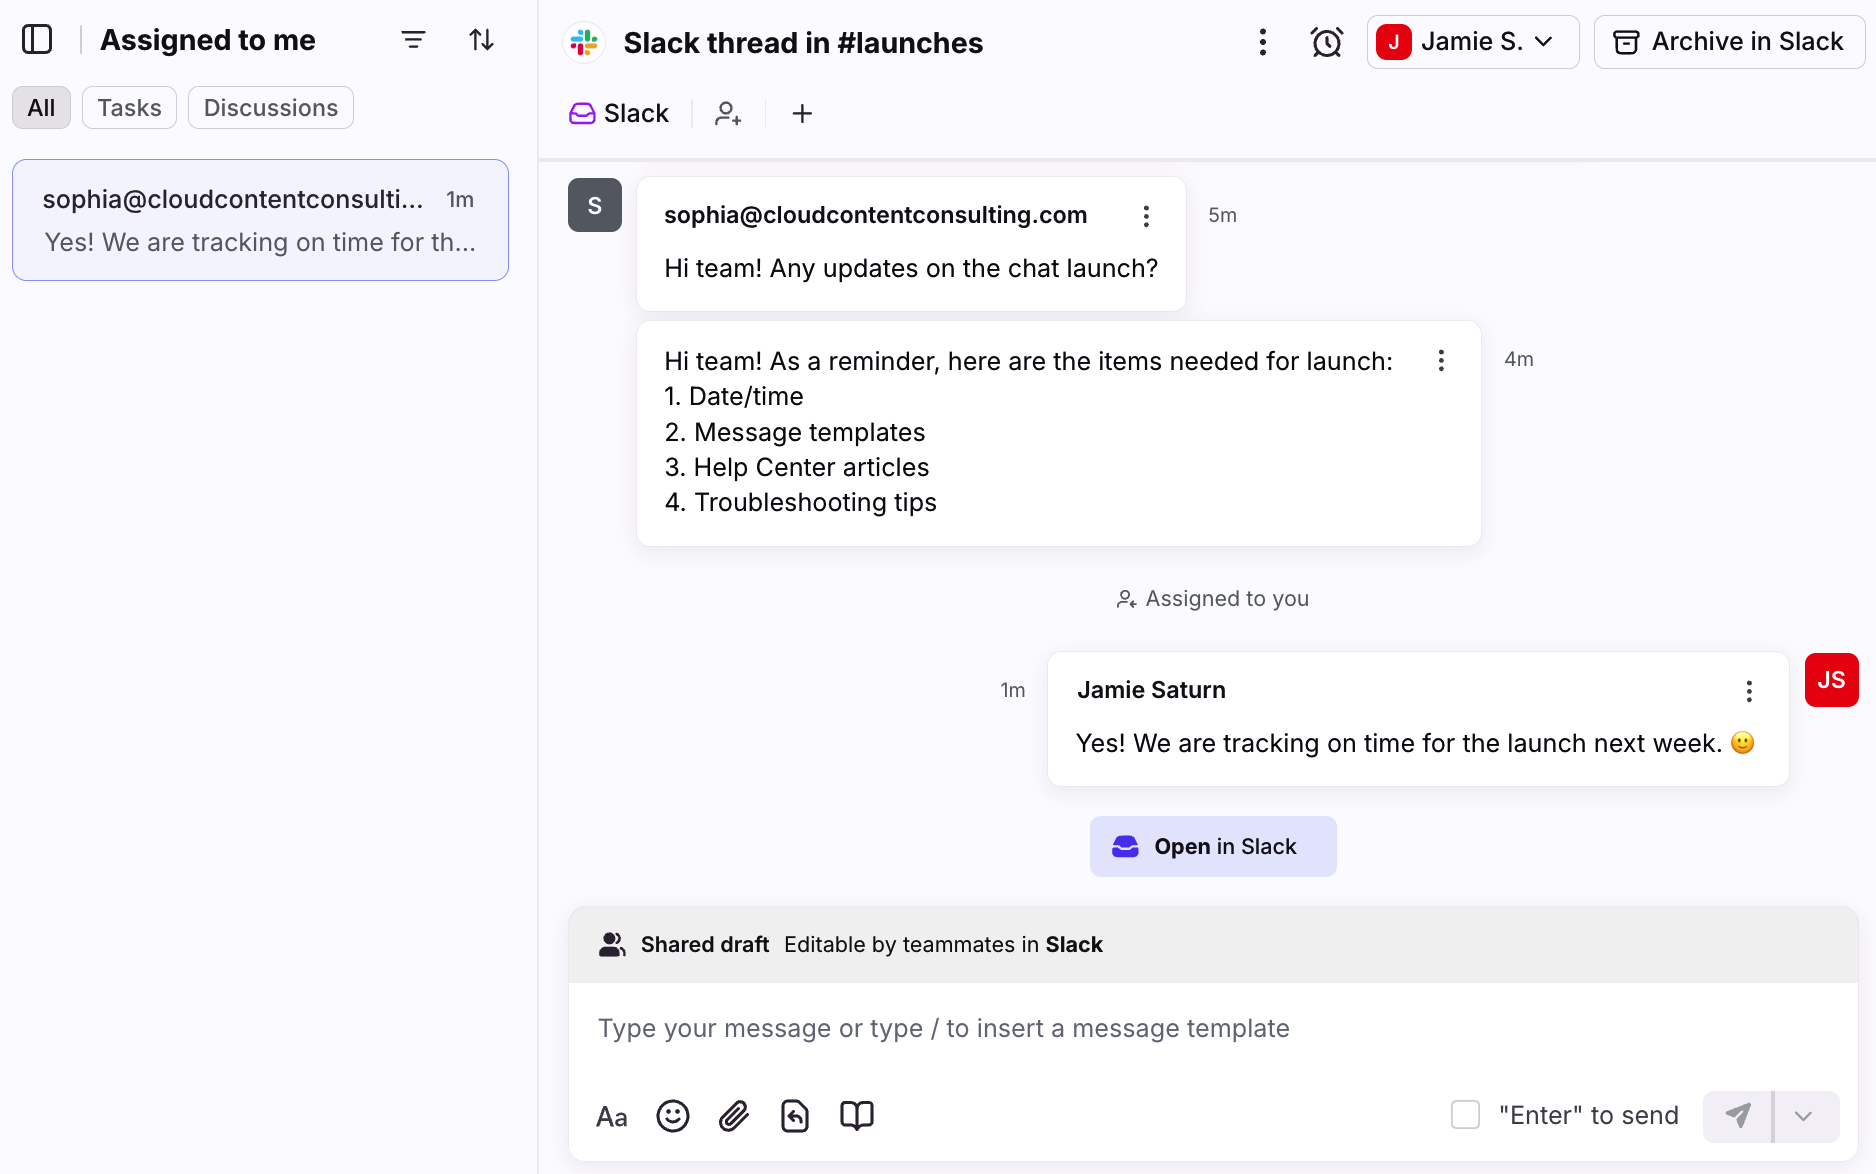
What if a Slack user sends a top-level message in Slack when they already received a threaded reply from Front?
If your threading mode is set to “Group consecutive top-level messages”, the new top-level message will sync to Front as a new conversation. All Slack messages will thread into the same conversation UNLESS there is a reply from the Front agent. For example:
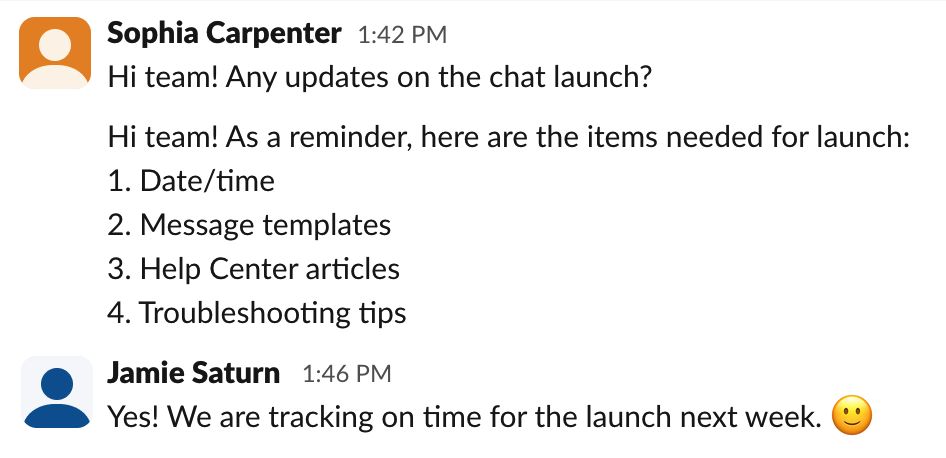
In Slack: Sophia sends two top-level messages, receives a reply from Front, then sends a third top-level message within 5 minutes of the first message.
In Front: Two conversations are created
Conversation 1: Displays the messages threaded together at the time the Front agent replied.
Conversation 2: Only displays the content from the third Slack message that was sent after the Front agent replied. This conversation cannot be merged with conversation 1, but you can link them together.
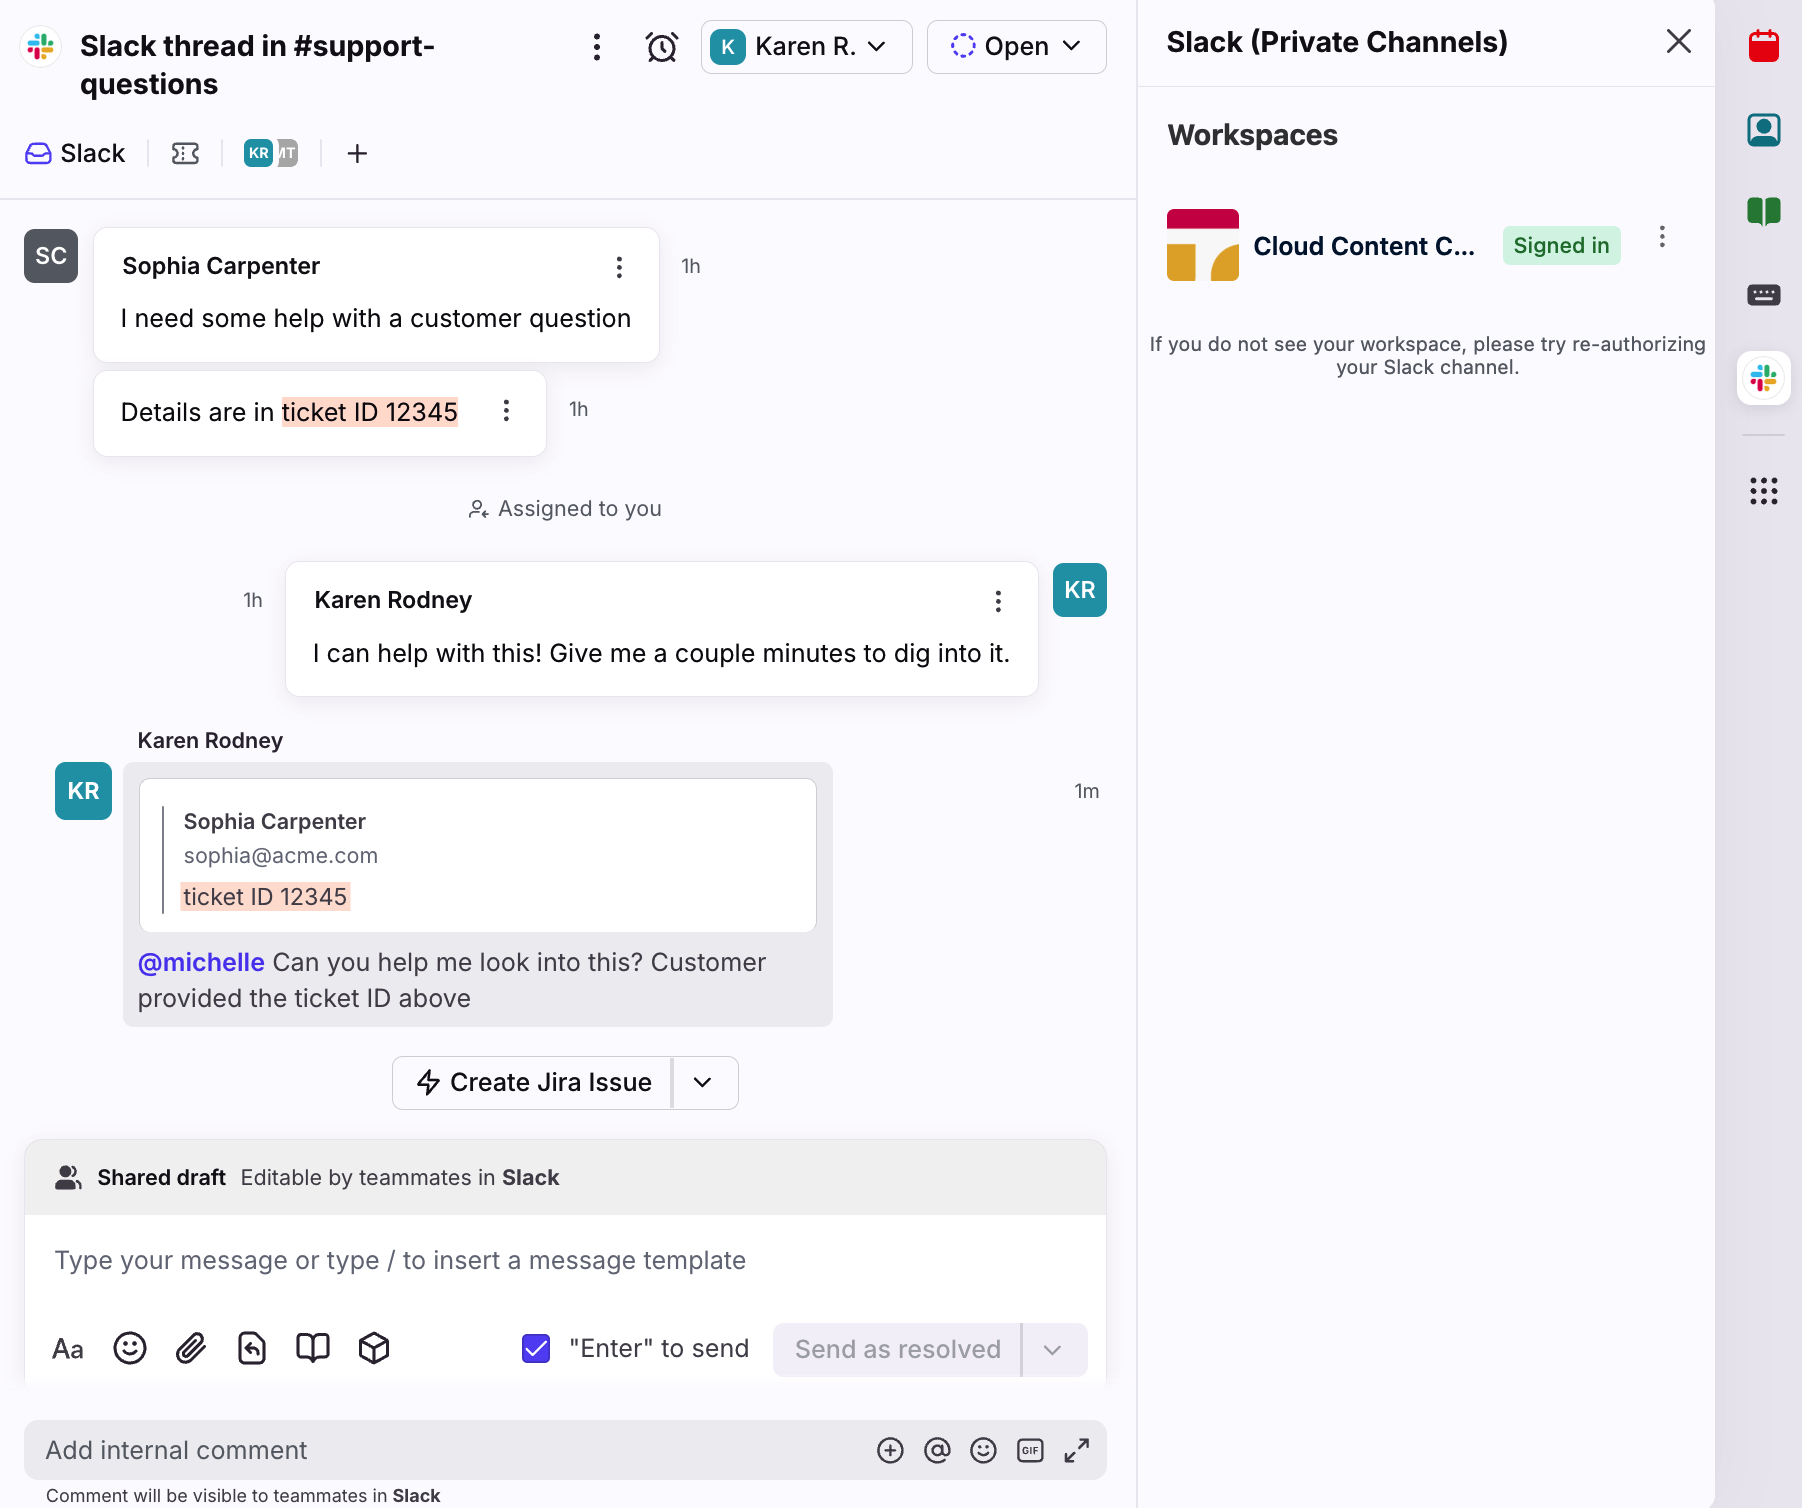
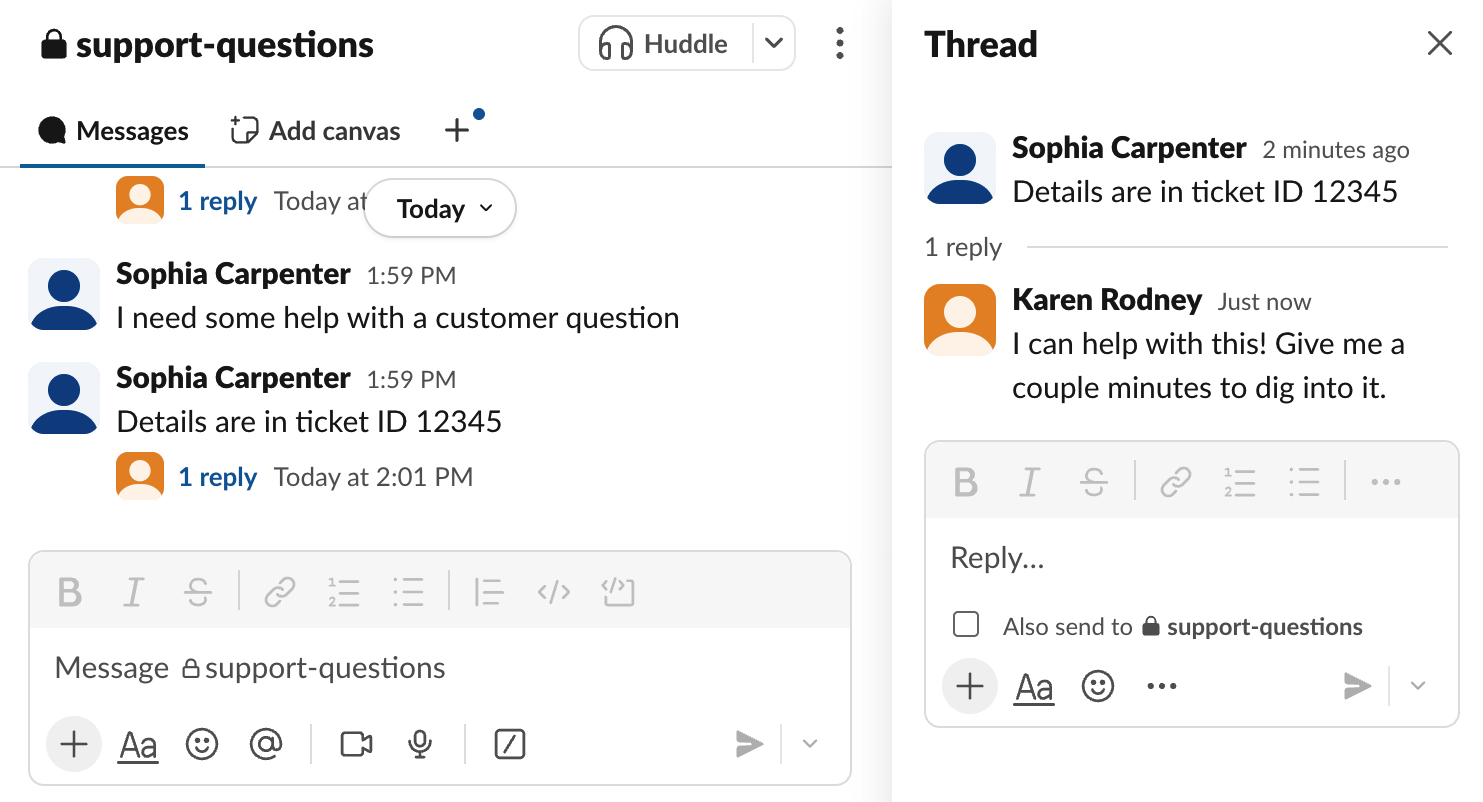
How do Slack mentions and private channels work?
If you send a Slack message in a private channel and mention a Slack teammate that isn’t a member of the channel:
A conversation is created in Front
The mentioned teammate is added as a participant and can see the message in Front if they have a Front account
If the teammate tries to send a reply using Front, they’ll see an error message indicating that they don’t have access to the private Slack channel. This mirrors their Slack permissions.
Any teammates that need to send outbound replies to private Slack channels via Front must be added as a member of those channels from Slack.
Pricing
This feature is available on all plans.