How to enable and use the Slack integration
Note: This topic describes how to use the integration to create Slack messages based on Front rules, or how to manually create one-off messages from Slack to Front or vice versa.
If you'd like to learn about the fully-fledged channel capabilities of the Slack integration, which allow you to send and receive all Slack messages in a channel directly from Front, refer to the How to set up a Slack inbox in Front article.
Overview
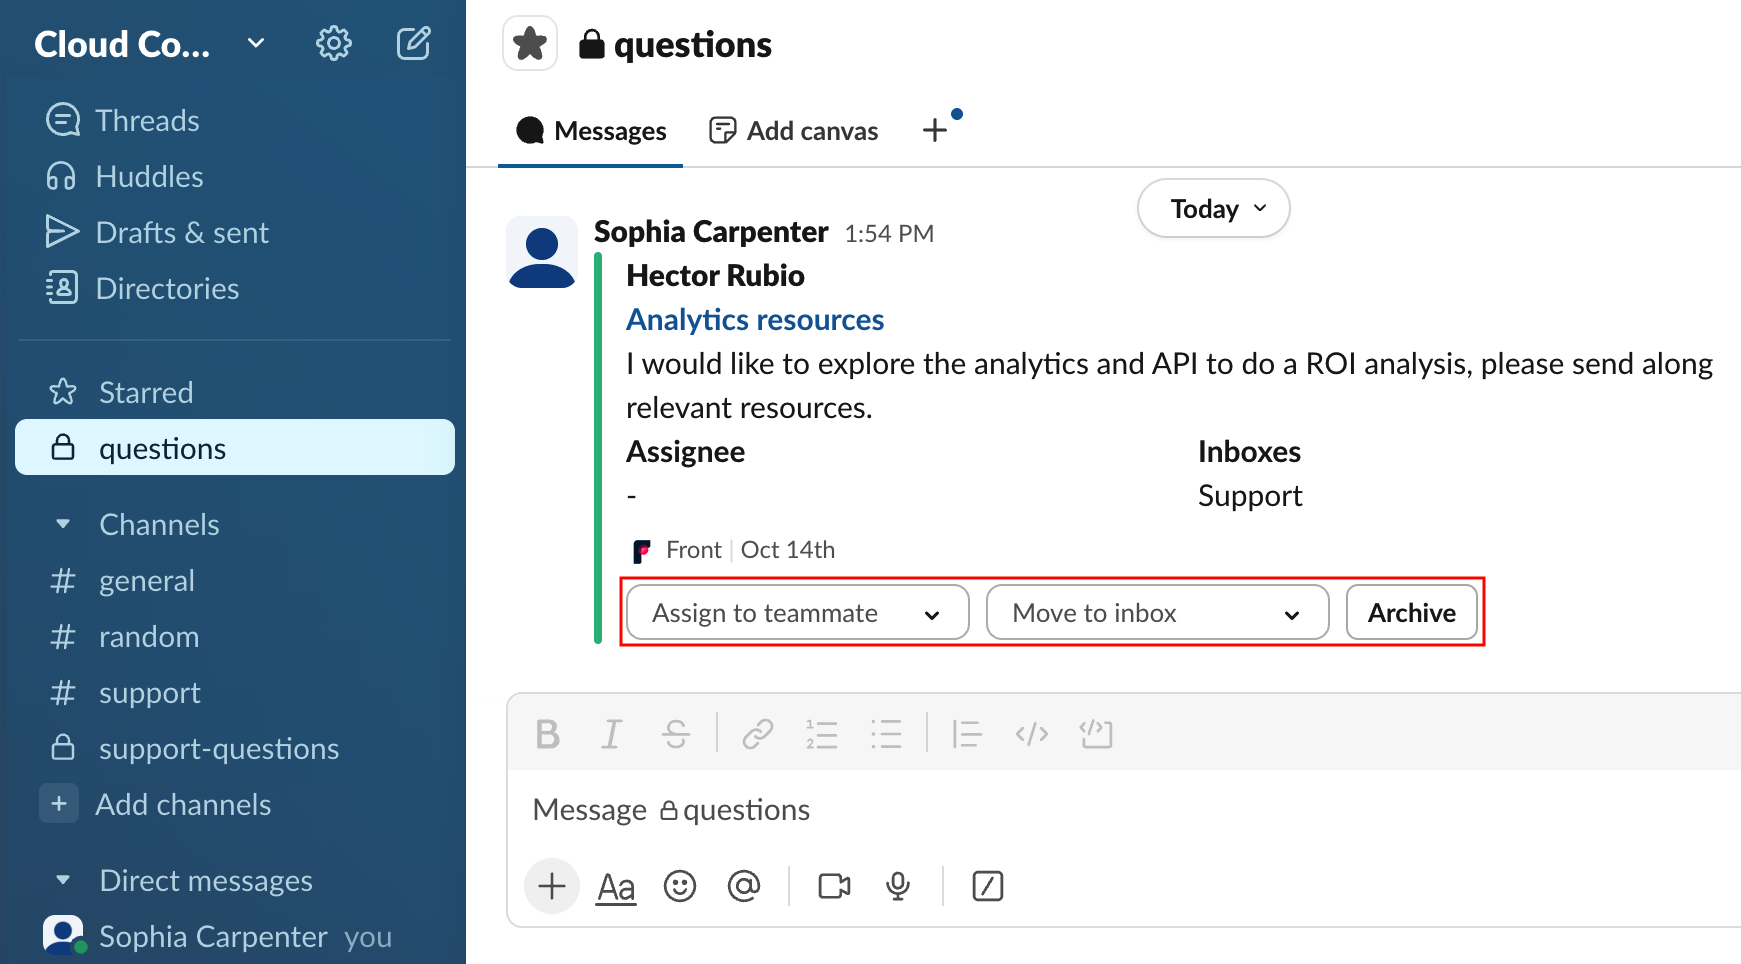
With the Slack integration, you can manually send messages from Front to Slack, or define Front rules that post conversations in Slack for you automatically. You can use message buttons in Slack to archive or re-open a conversation, assign it to another Front teammate, or move it to another Front inbox.
You can also use Slack message actions to create new conversations in a Front shared inbox. Instead of sending yourself an email or setting a reminder, just send the Slack message to Front as a new conversation for follow-up later.
You must have Front company admin permissions to set up the integration.
Enable the integration
A company admin will first need to enable the integration one time for the entire company to use.
Prerequisites
In Slack, ensure your Slack Admin has enabled the ability to install Front in your Slack Workplace. They will either need to turn off the "Require app approval" setting, or approve Front as an app that all Slack users can install. Read Slack's Manage app approval for your workspace guide for full details.
Step 1
In Front, click the gear icon, navigate to company settings, then select App store from the left menu.
Step 2
Select Slack from the list of integrations. Click See details, then click Enable app to enable the integration.
Step 3
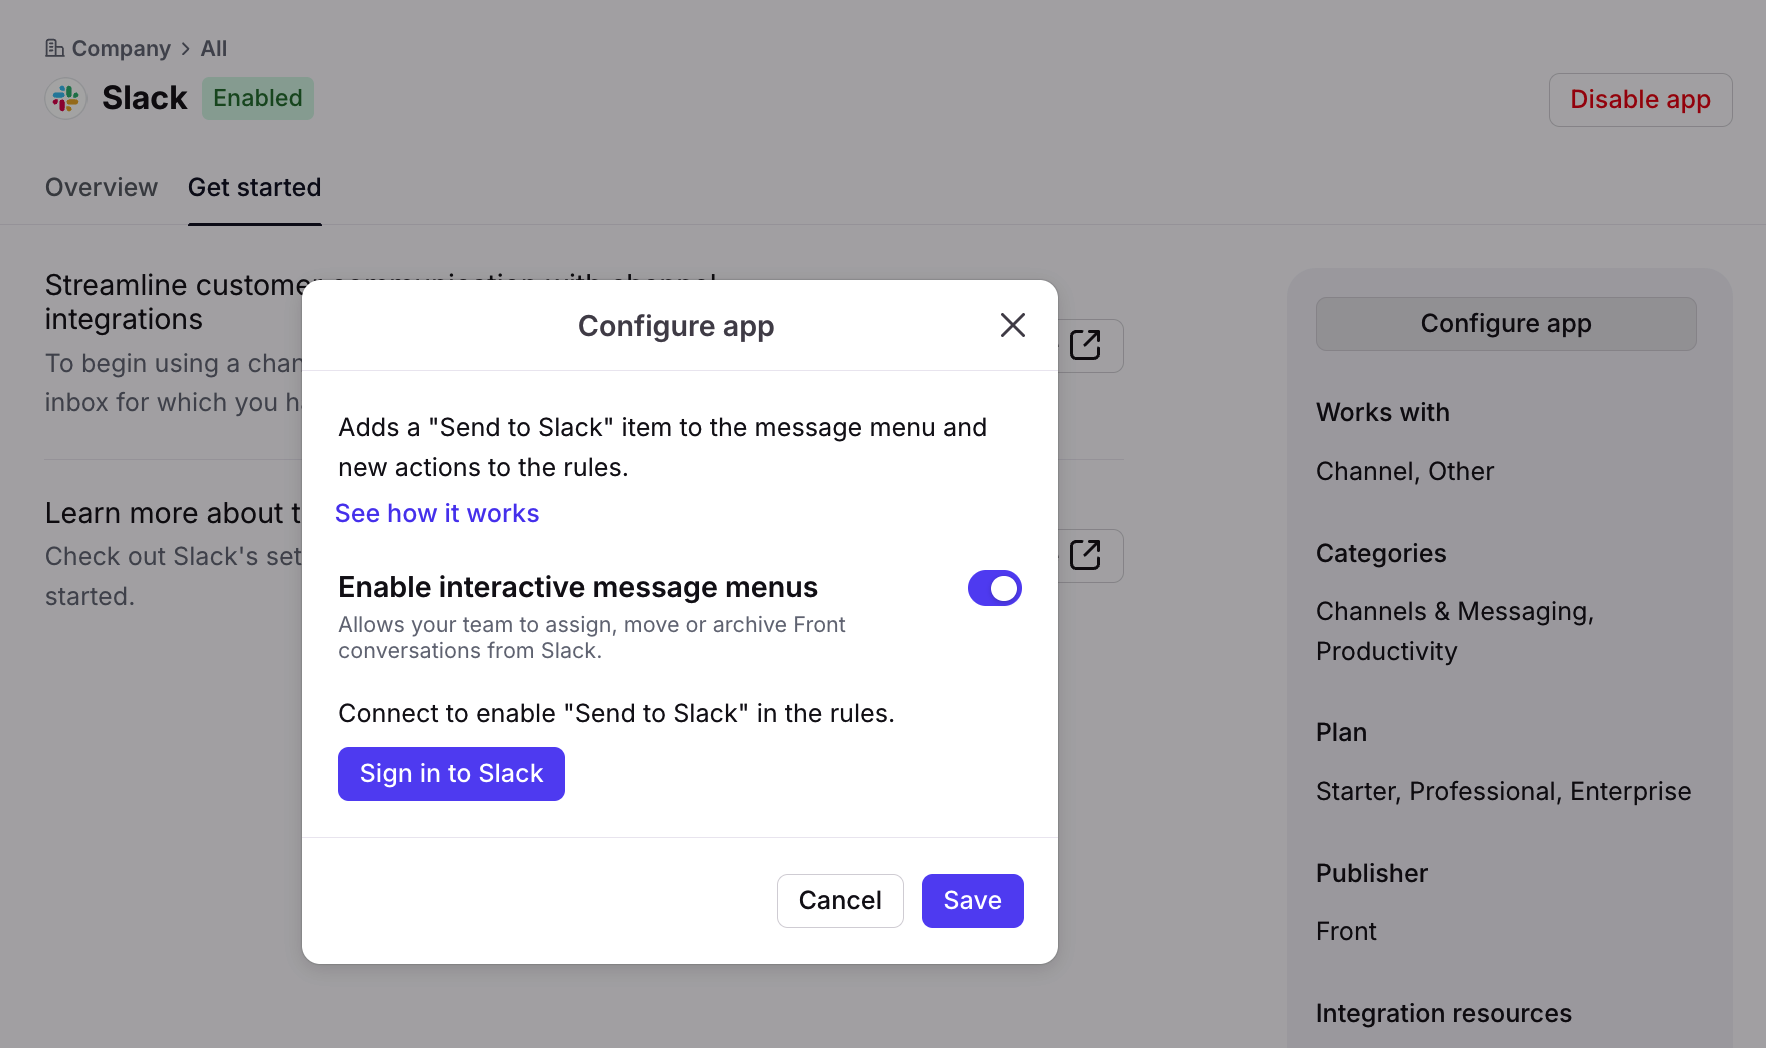
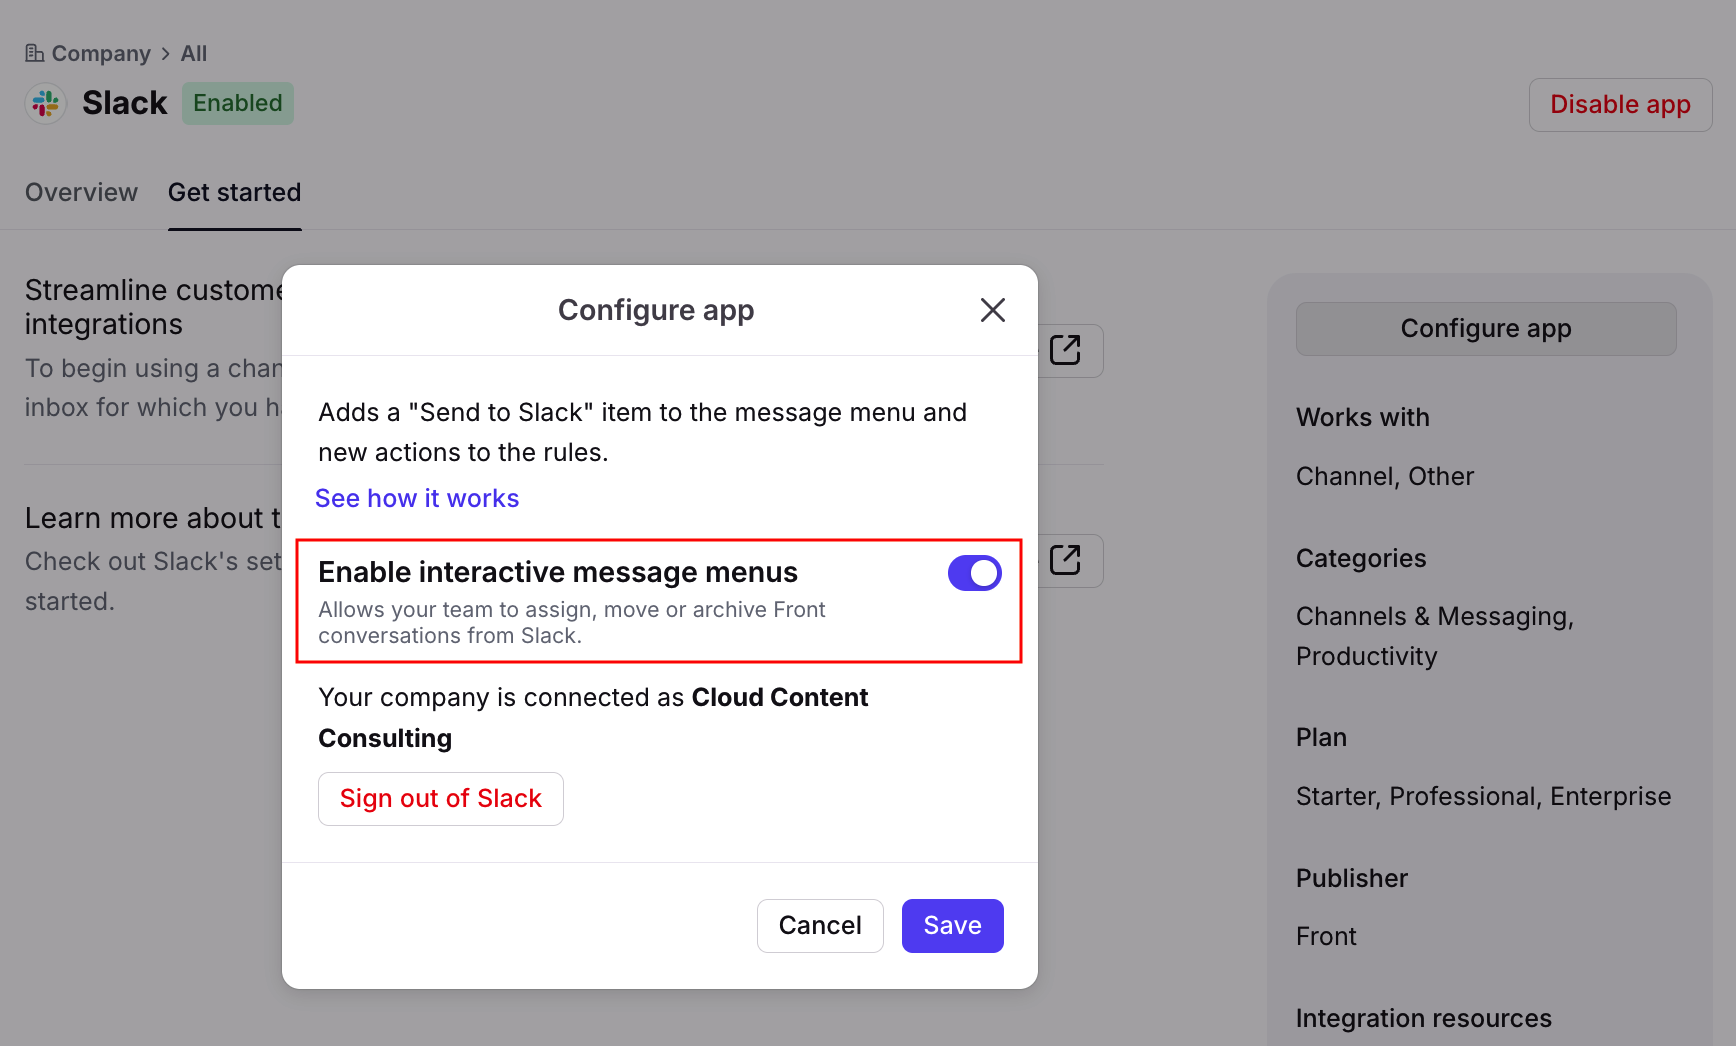
Click Sign in to Slack and link your account to authorize the integration. This will allow you to send Front conversations to Slack, where they'll be posted by a Front bot in your Slack workspace.
You can also turn on the toggle for the Enable interactive message menus feature. This will allow any user in Slack to use message buttons to assign, move, or archive the Front conversation that was sent to Slack. If you do not turn on this toggle, then messages will be posted to Slack without these buttons.
Step 3
Click Save to finish enabling the Slack integration.
Use the integration
Once enabled, any end-user will now be able to use the integration's various features described below.
Automate messages to Slack with rules
Step 1
Click the gear icon, then navigate to workspace or personal settings in the left sidebar, depending on where you want to create your rule.
Step 2
If creating a workspace rule, click Rules and macros in the left sidebar, then click Create rule. If creating an individual rule, click Rules in the left sidebar, then click Create rule.
Step 3
Select the Send to Slack rule template (workspace rules only) or create a rule from scratch.
Step 4
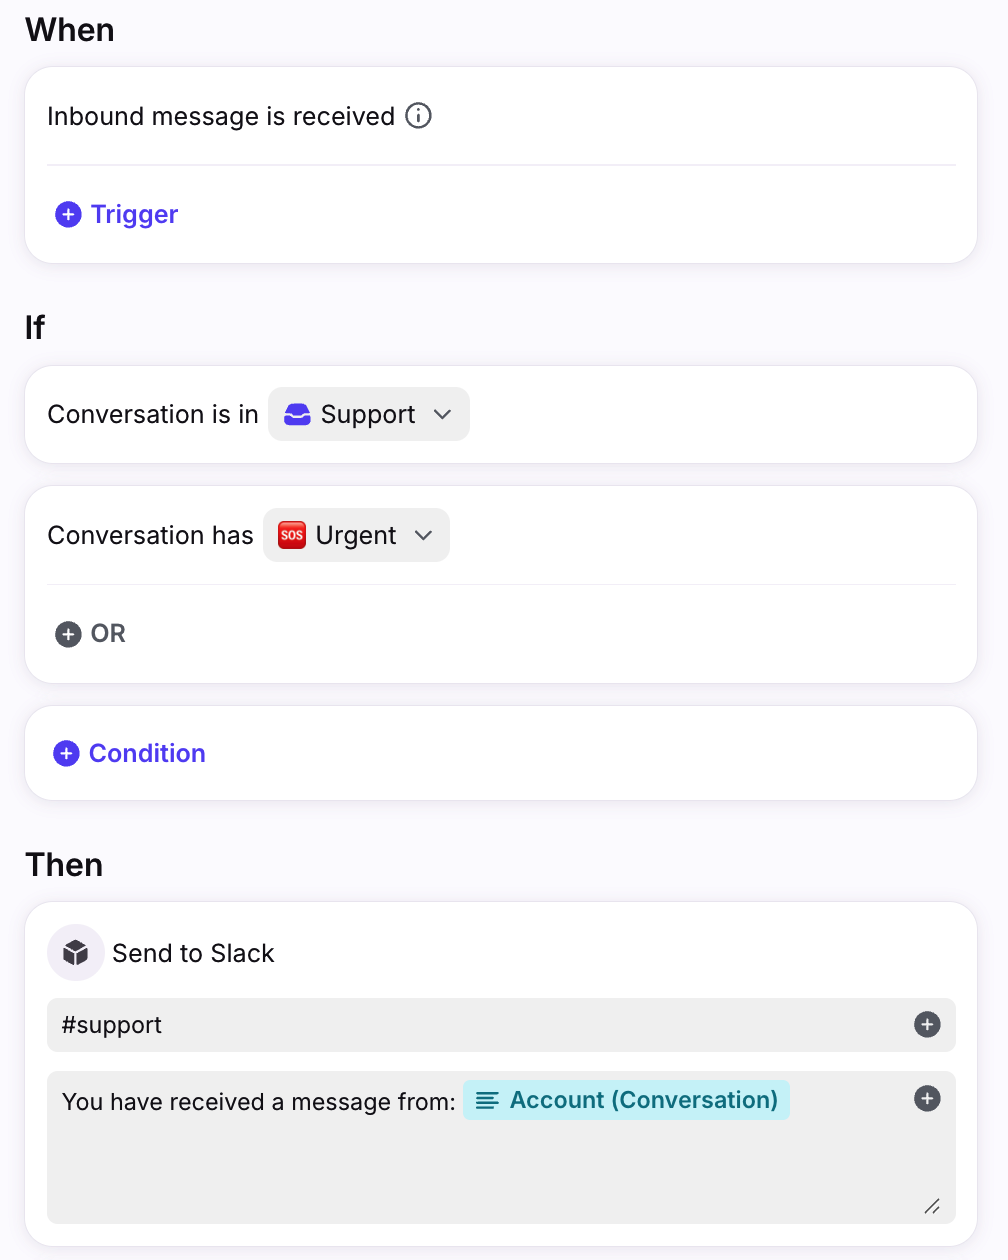
The template will automatically select triggers, conditions, and actions to get you started. You can further customize your rule by selecting specific inboxes, adding additional conditions, and more. Ensure the action Send to Slack is included in your rule.
In the example below, we'll create a rule to send a message to the #support channel in Slack when the conversation is in the Support inbox and has the Urgent tag in Front. We'll also add a customized message to include the account name for the contact.
The Send to Slack rule action can send notifications to a Slack channel or a specific user.
Channel: Enter the Slack channel name with the hash sign. Example: #support
User: Enter the user's Slack display name (@ sign optional). Example: sophia or @sophia
Step 5
Click Create to save your rule.
Send messages to Slack manually
Step 1
You can also send individual conversations to Slack on a one-off basis to share them with your team.
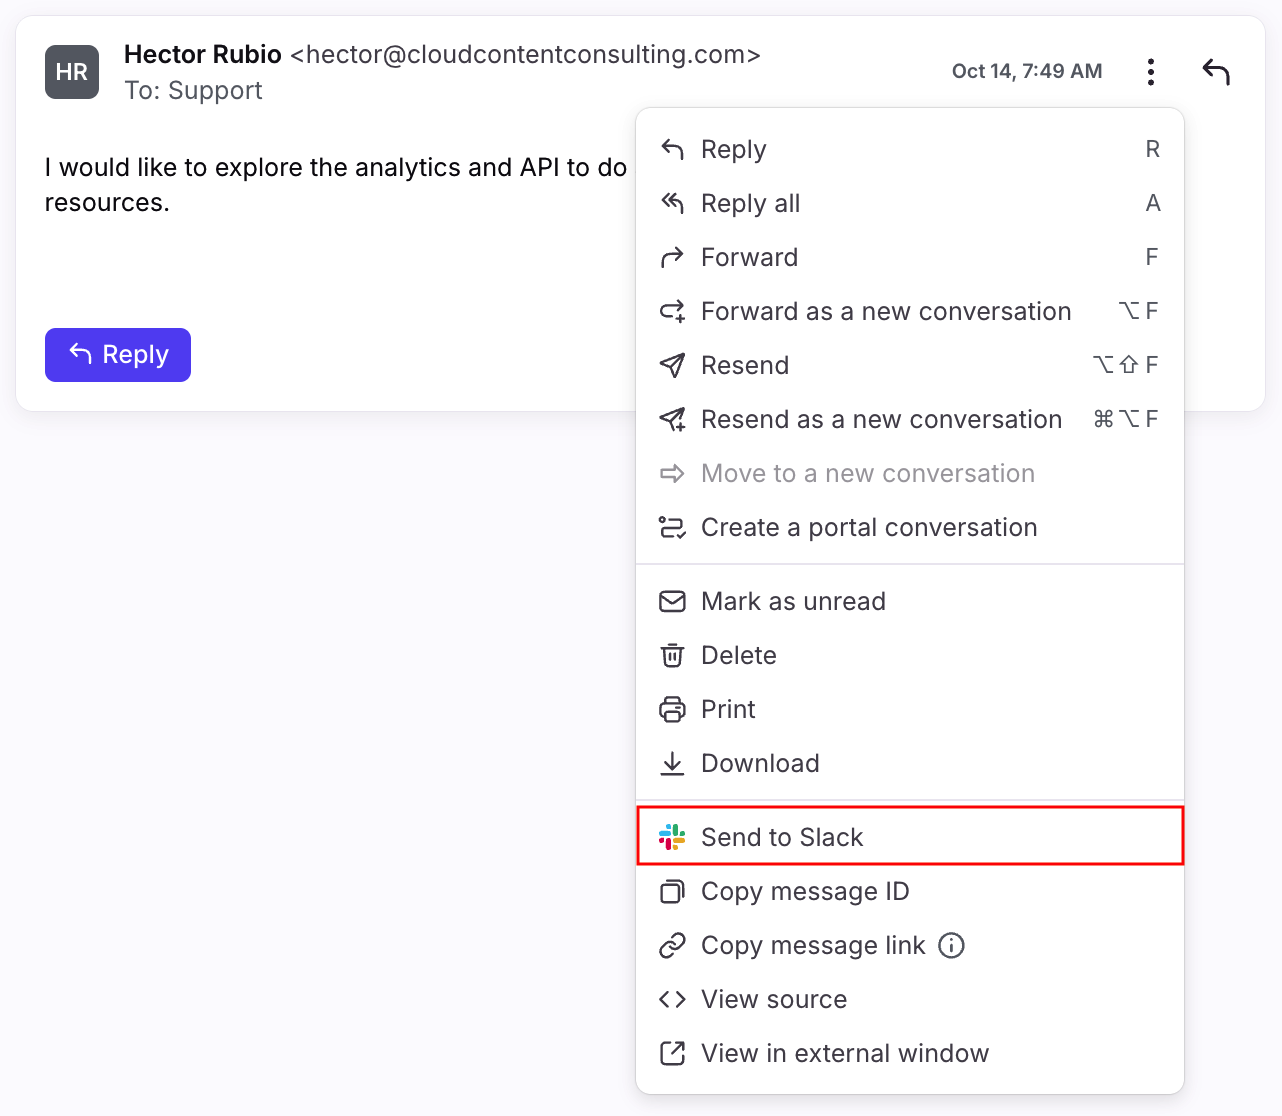
Click the three-dot menu in a message, then select Send to Slack.
Step 2
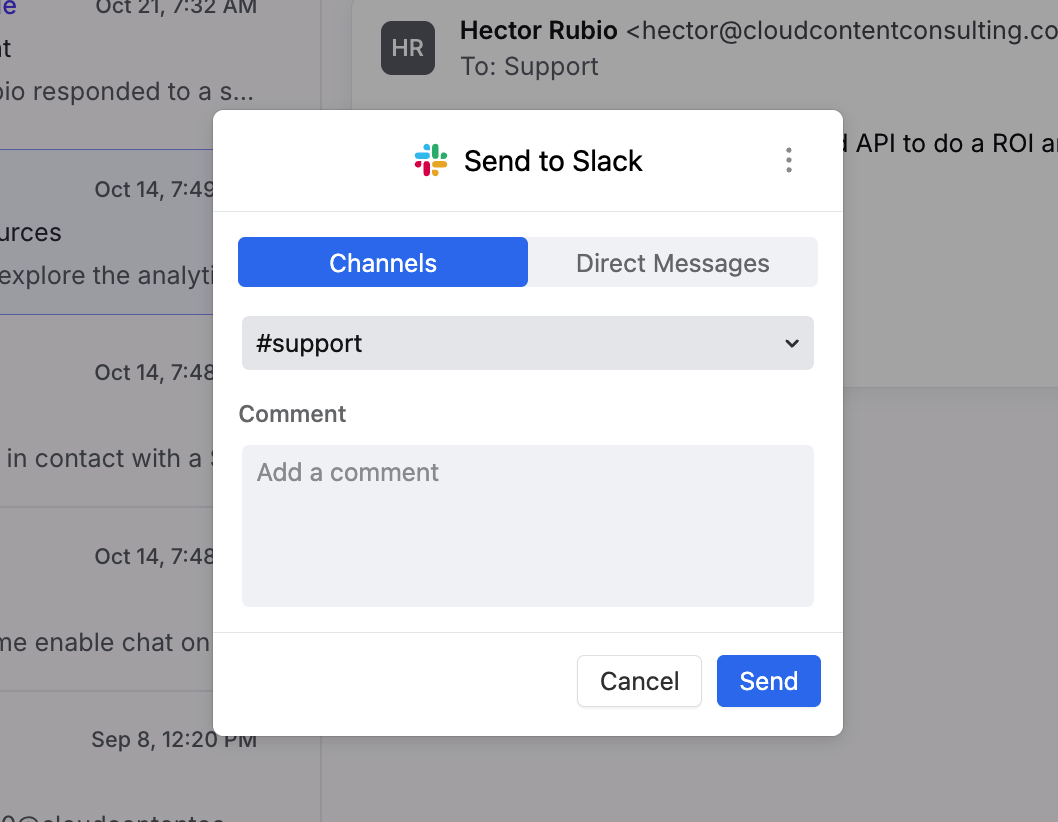
Each teammate will be prompted to link their Slack account the first time they do this. Then, they can add a comment and choose a destination channel or DM. When you're done, click Send to send your message to Slack.
Assign, archive, and move conversations from Slack
You also have the option to use Slack message buttons to take action on your Front messages from Slack. When this option is turned on, any member of the Slack channel where you’ve sent the message can assign, move, re-open, or archive the message directly from Slack.
Step 1
Message buttons are enabled at the company-level for Front accounts — so your admin will choose whether this functionality is enabled for every message sent to Slack by anyone on your Front team, or not enabled for anyone. You can turn off this functionality at any time in your Slack integration settings.
Step 2
Once this is enabled, anyone in the channel can use message menus to choose a teammate to assign the message to or move it to another inbox. The Archive button will dynamically change to Re-open if the message has been archived. All your actions will be synced with Front in real time.
Send Slack messages to Front
In addition to sending Front messages to Slack, you can also create new Front conversations from Slack.
Sometimes, messages come up in Slack that you want to handle later or track with other customer conversations — like when a teammate pings you asking for an update on a big project, or a bug is reported that you're tracking already in Front.
Now, you can send those Slack messages to handle them in Front shared inboxes. Once the Slack integration has been enabled for your team by an admin, you'll need to add the Front message action yourself too. Only users with Front licenses can create Front conversations from Slack in shared inboxes.
Step 1
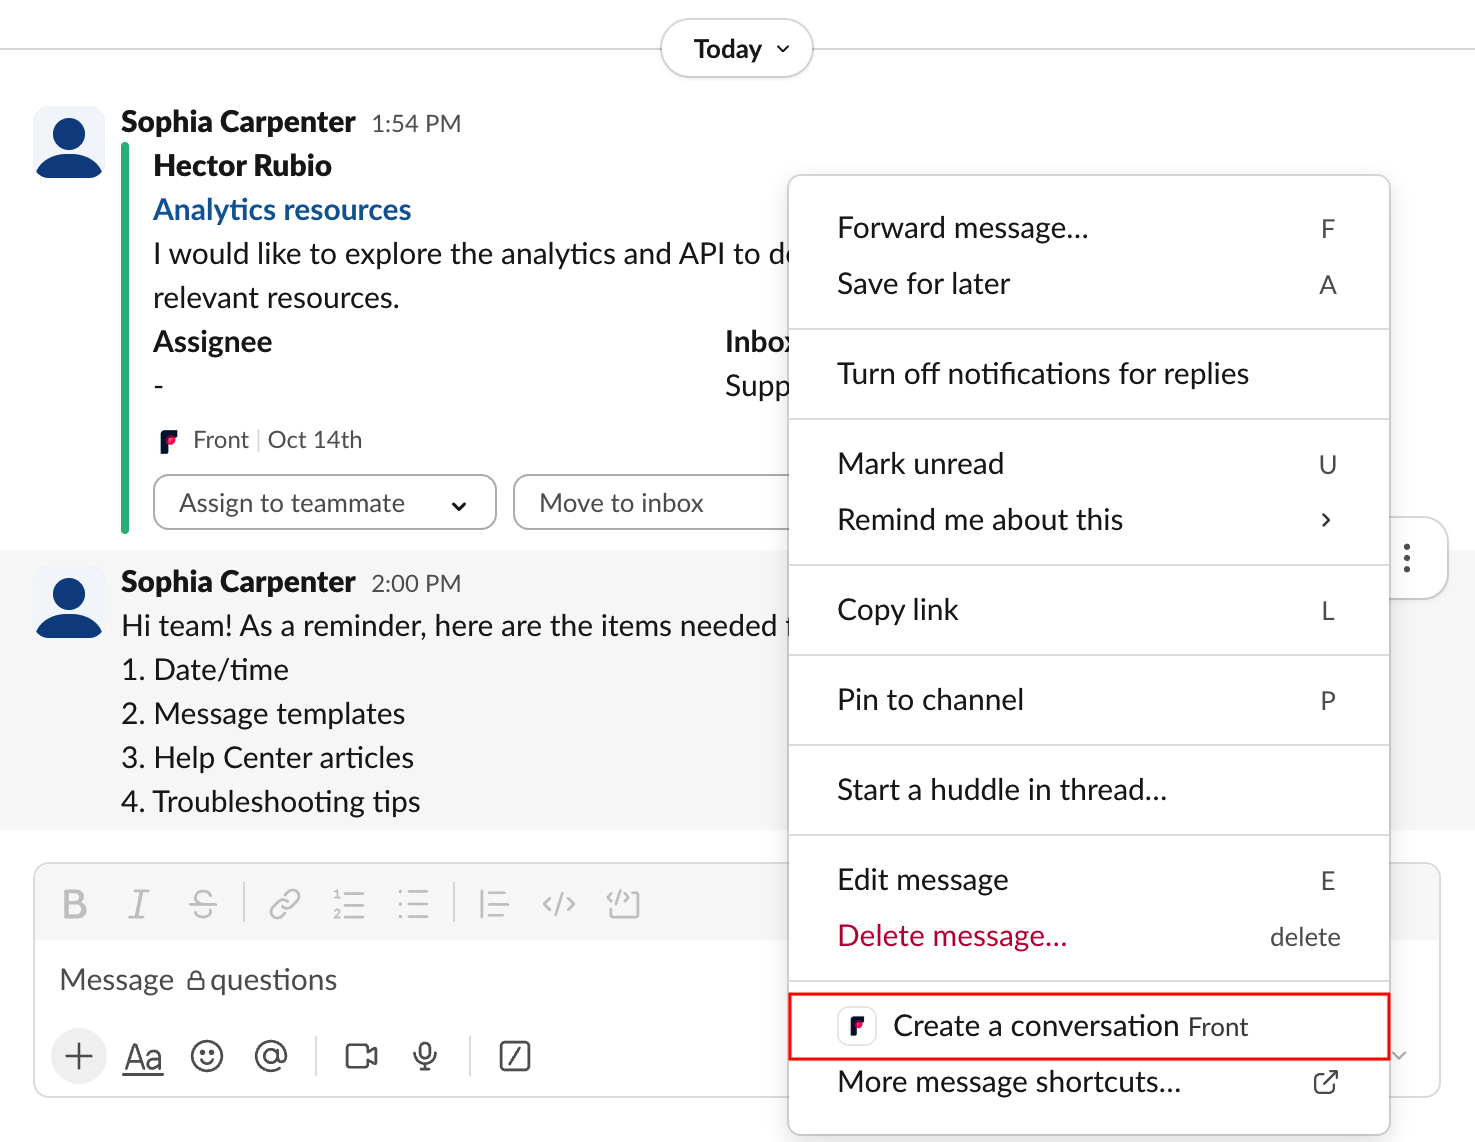
Click the three-dot menu on any Slack message, then click Create a conversation Front action.
If you don't see the option to create a Front conversation, click More message shortcuts in the three-dot menu to set this up.
Step 2
Search for Front, and click on the Create a conversation Front action.
Step 3
Front will post a message asking you to connect your individual account. Click Connect to Front, then Authorize in the pop-up window.
Step 4
Now, you're ready to start creating Front conversations from Slack.
Step 5
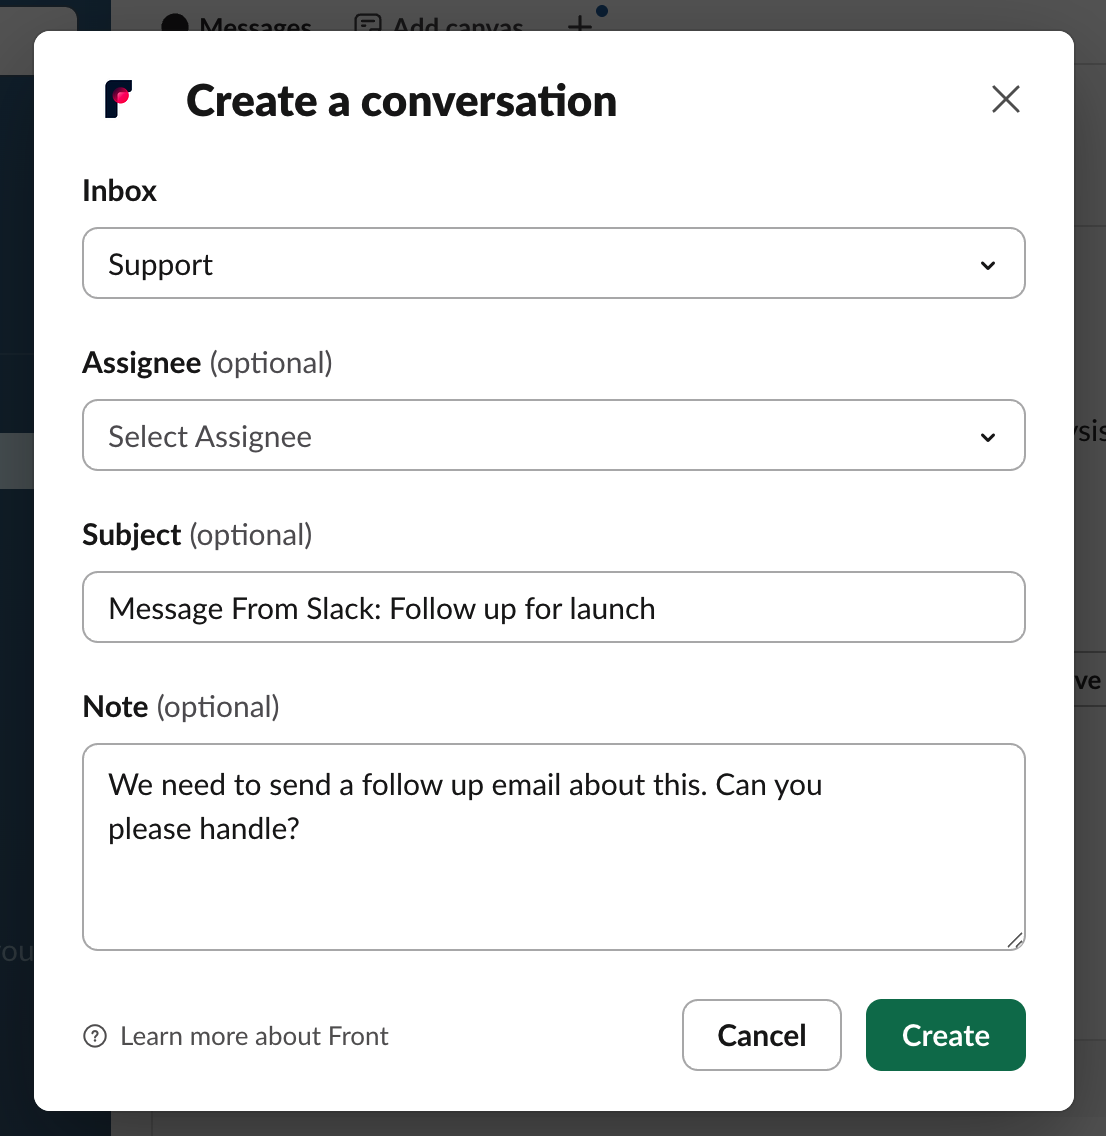
In the pop-up, fill in the following fields:
Inbox: Select the shared inbox you want to create the message in
Assignee: Select an assignee, or leave it unassigned
Subject: Enter the subject line you want to use for the Front conversation
Note: Enter a comment if you need additional context to the Slack message. This will appear in the message body in Front.
If you are sending a Slack attachment to Front, the created Front conversation will include a Slack link that can only be accessed by users who have access to the original Slack attachment.
Click Create to send it to Front.
Step 6
In the Slack channel, you'll see a link to quickly open the conversation in Front, or you can find it later in the inbox where you created it! From there, you can comment or assign it just like any other conversation in Front.
Troubleshooting
My Send to Slack rule isn't working
You may have created a rule to send to Slack, but the messages are not showing up in the Slack channel. One of the most common causes of this is that the Slack channel you're attempting to write to is a private Slack channel.
You can resolve this by adding Front as an integration for your private channel.
Step 1
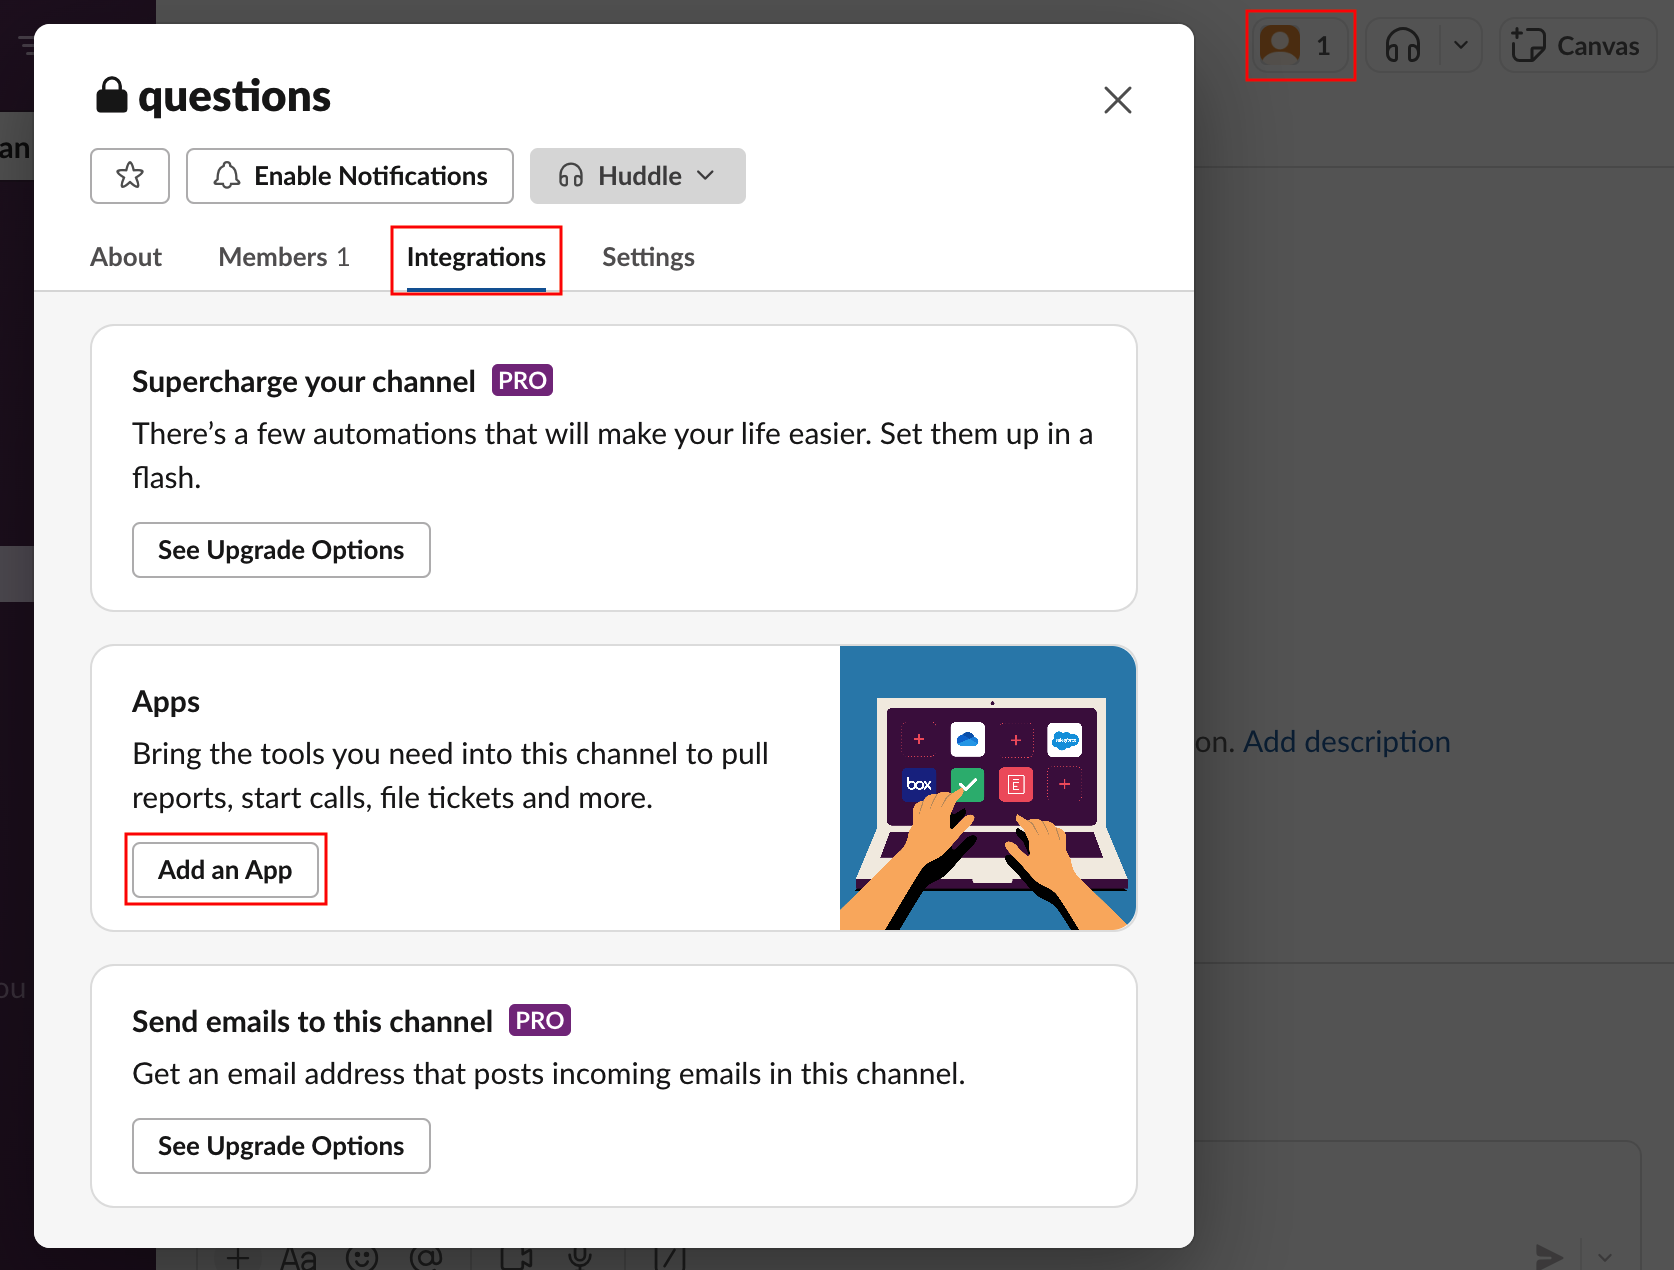
In your private Slack channel, click the members icon, select the Integrations tab. Click Add an App or Add apps, depending on your view.
Step 2
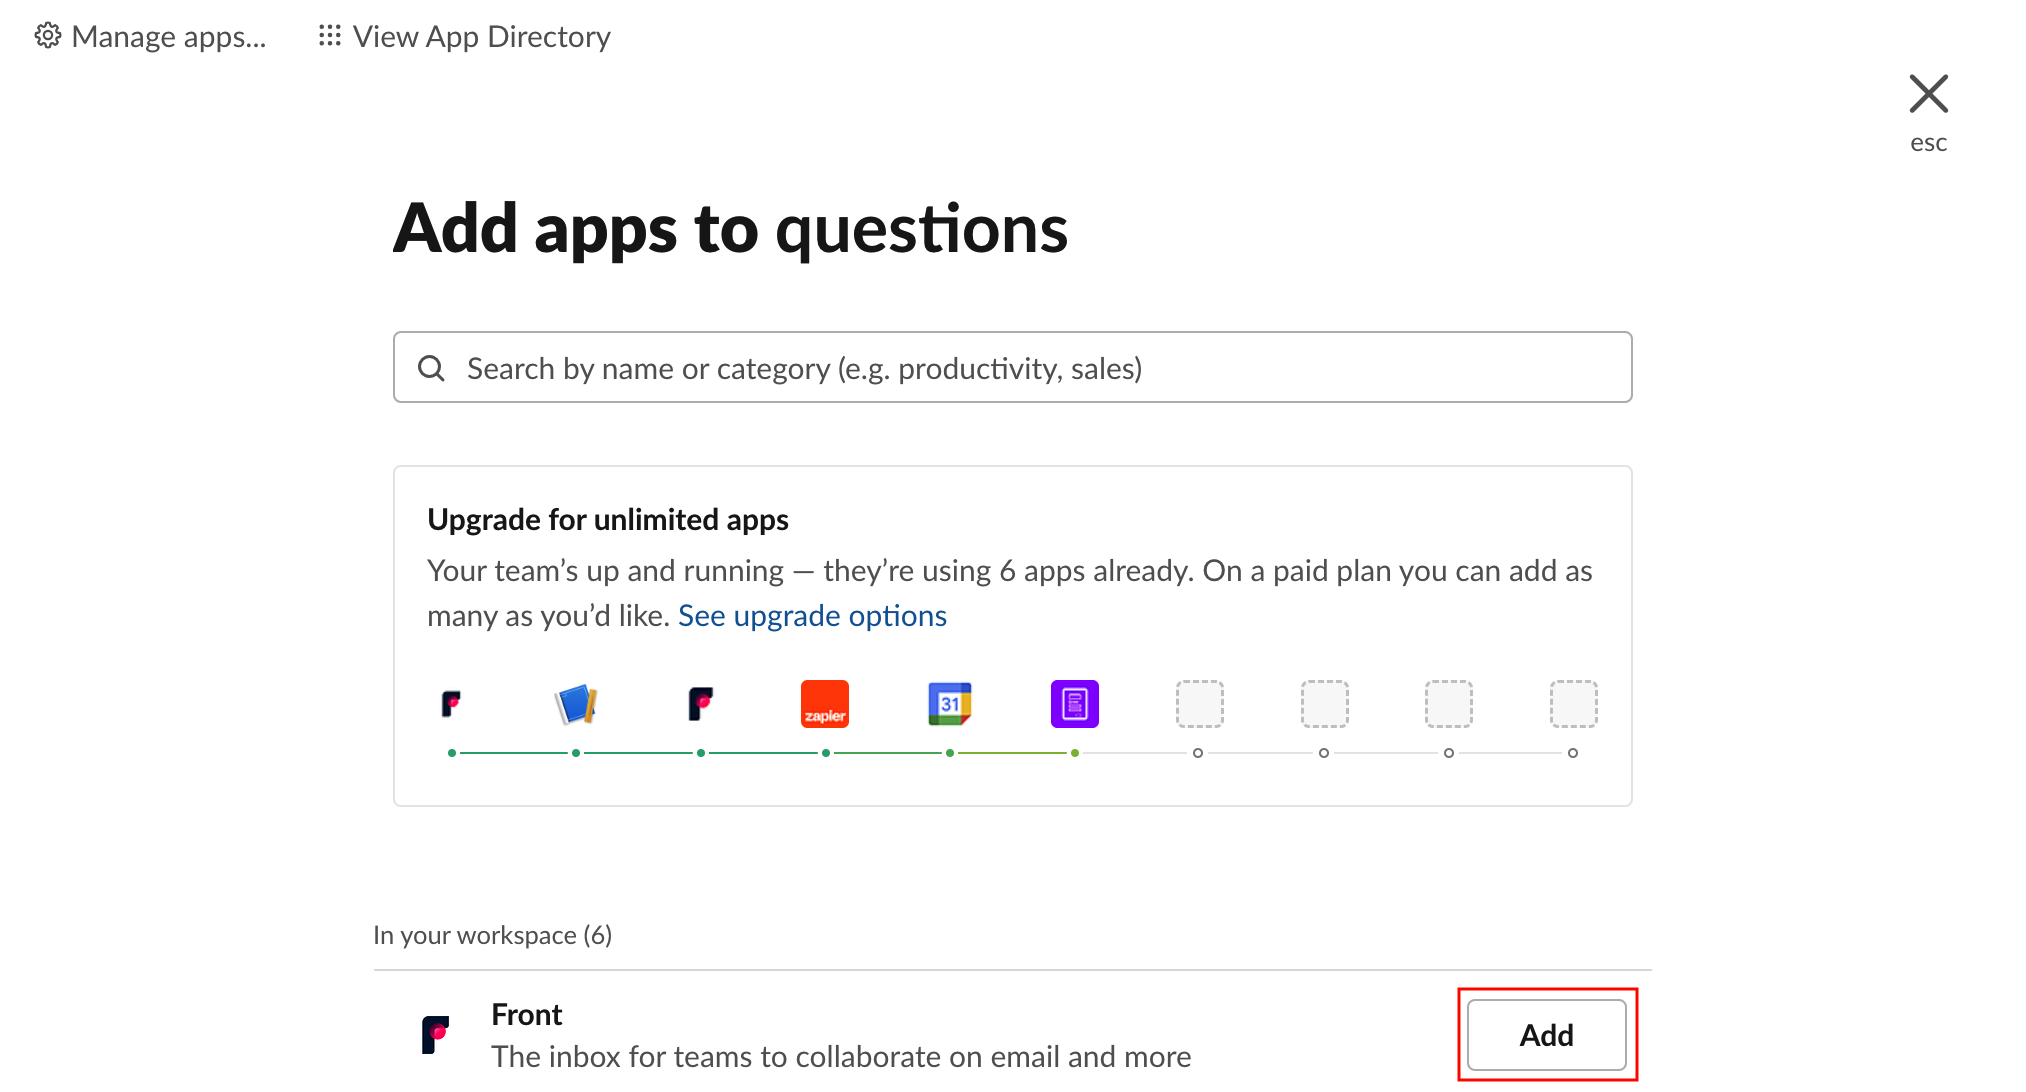
Find the Front app, then click Add.
Step 3
You'll see a message in Slack confirming that Front has joined your channel. The Send to Slack rule will now send messages to your private channel!
Clicking the conversation link in Slack leads to an error
If your Send to Slack rule is triggering on private messages, then your teammates will run into an error clicking that link, as that message is inaccessible to them. To resolve this, add an action to @mention teammates into your conversation before sending it to Slack.
Pricing
This feature is available on all plans.

