
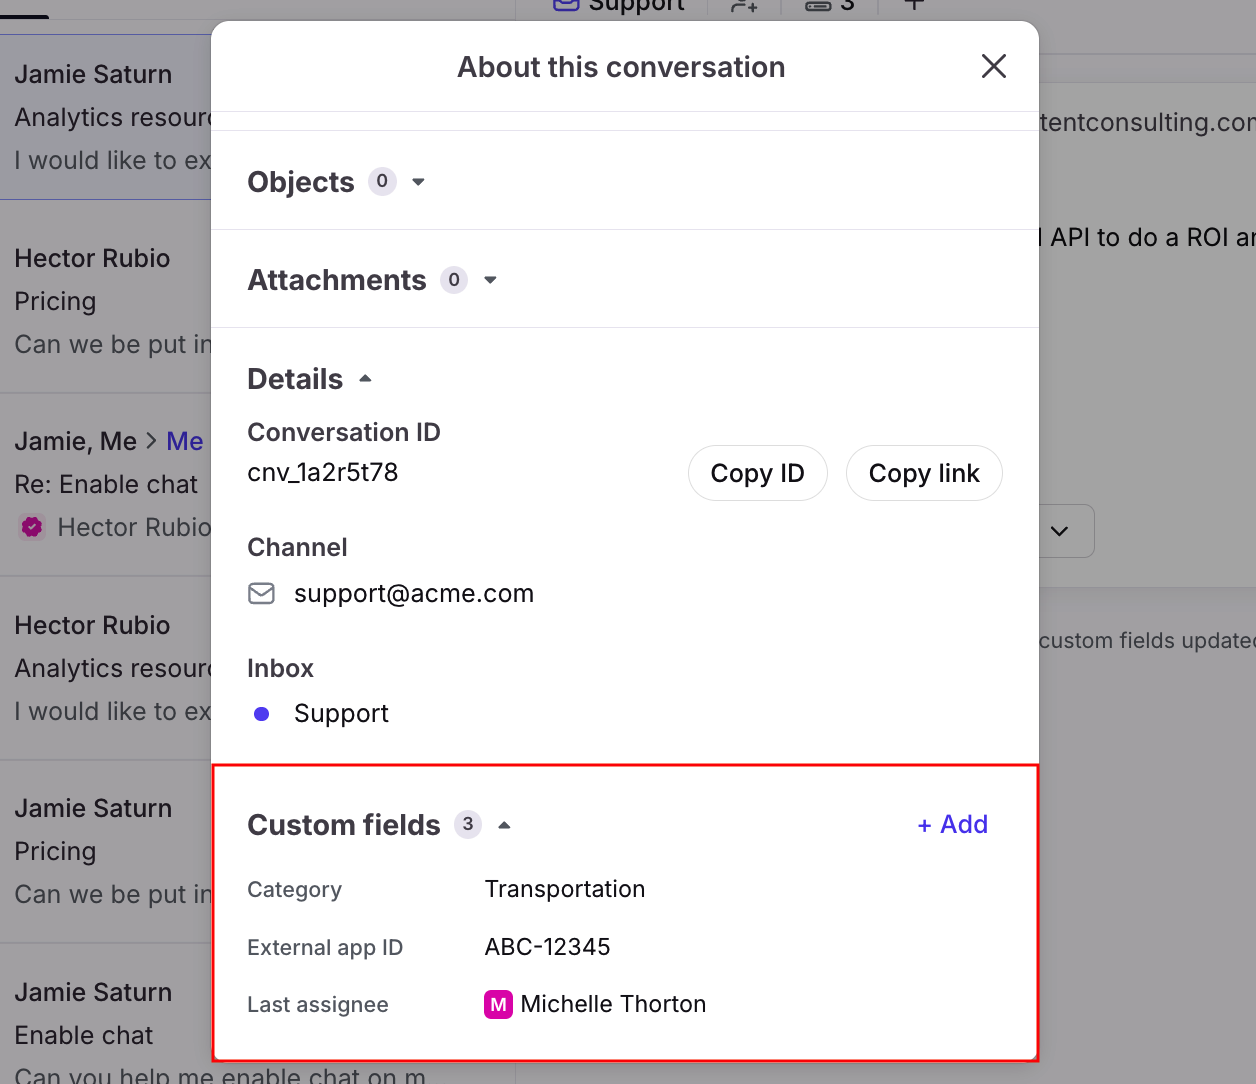
Conversation custom fields
Overview
Front allows you to add custom fields to a conversation to designate information like Category, Last Assignee, or External app ID to add extra context to the thread. After the custom fields are set, they can also be used in Smart Rules to automate many of your workflows.
Only company admins can create new custom field types.
When to use custom fields
Add more context to conversations
You can use conversation custom fields to add conversation-specific information to a thread.
Add an External app ID to quickly find and reference the corresponding thread in one of your external systems
Add a Category field to classify the conversation based on content
Automate workflows using conversation custom fields
Professional plan or above: You can use the Conversation custom field contains rule condition to match on a specific conversation custom field value and perform an action.
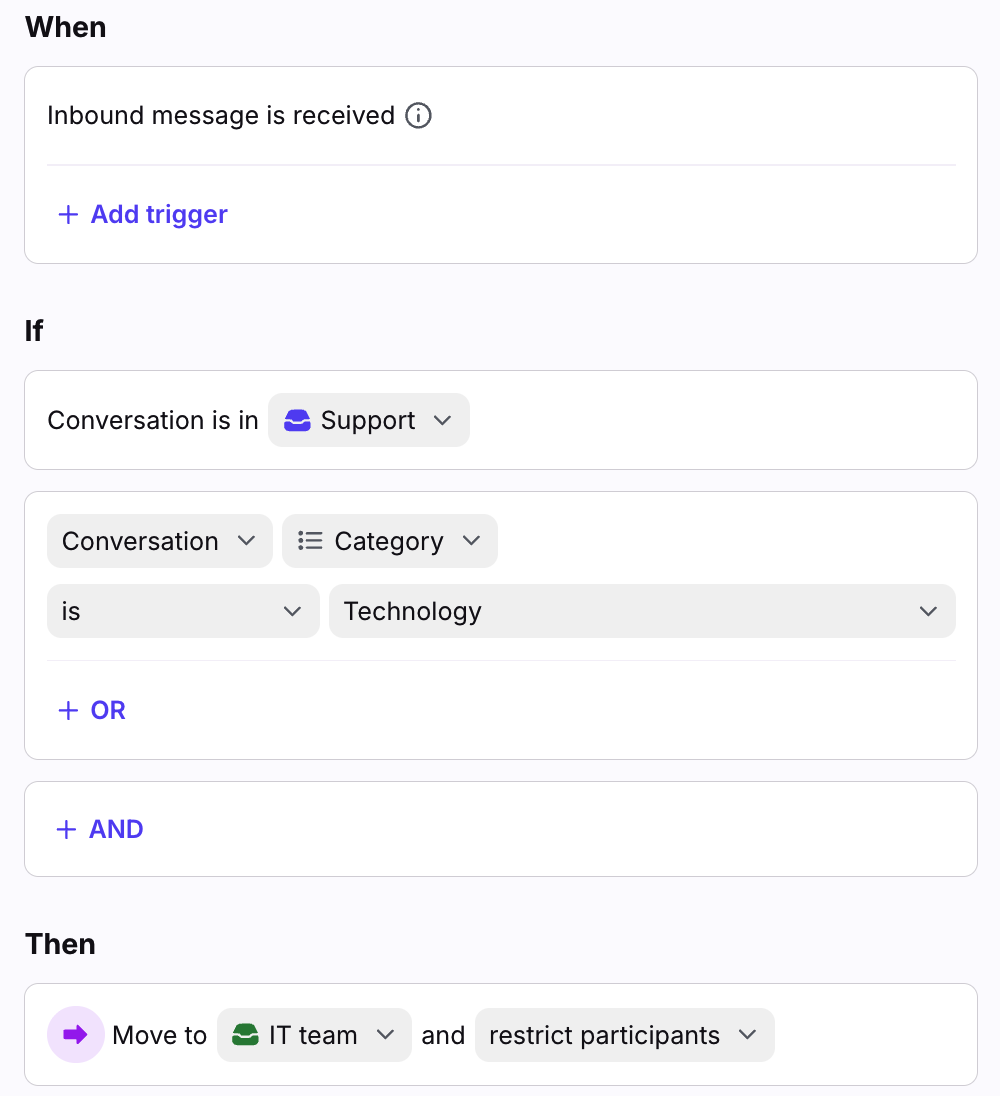
Example 1: Move to an inbox based on a conversation custom field
Conversation custom field setup:

Rule setup:
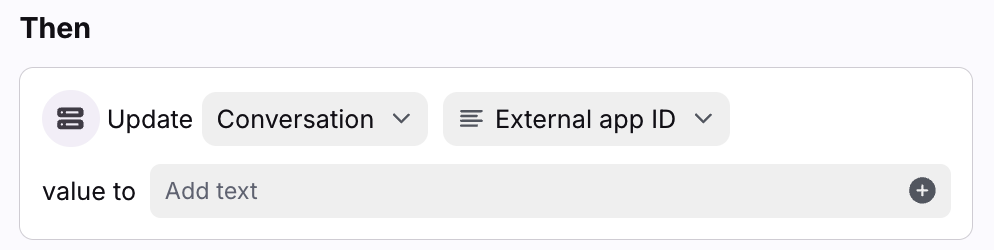
Enterprise plan: You can use Smart Rules to automatically update conversation custom fields when a conversation attribute changes.
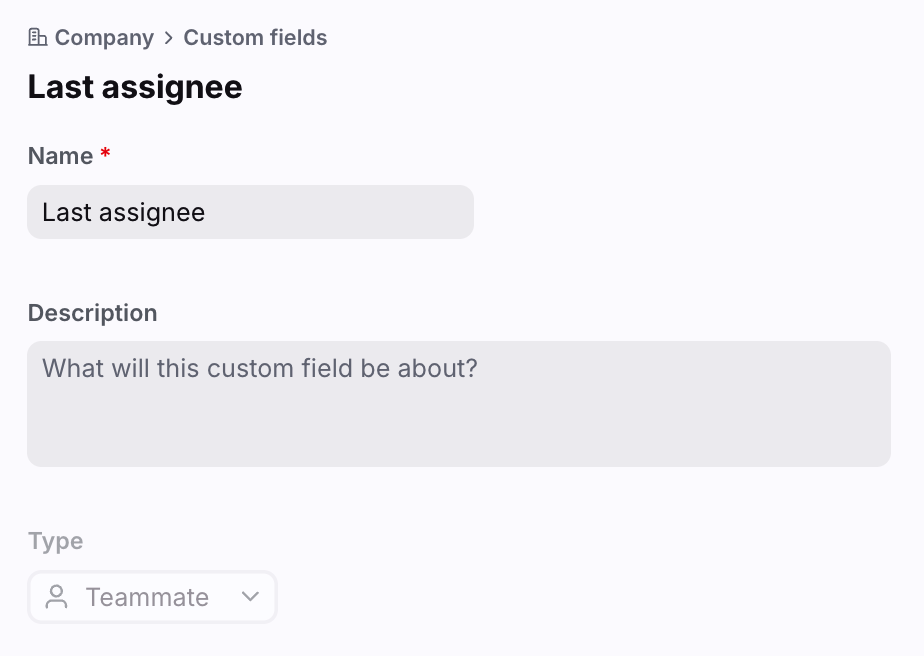
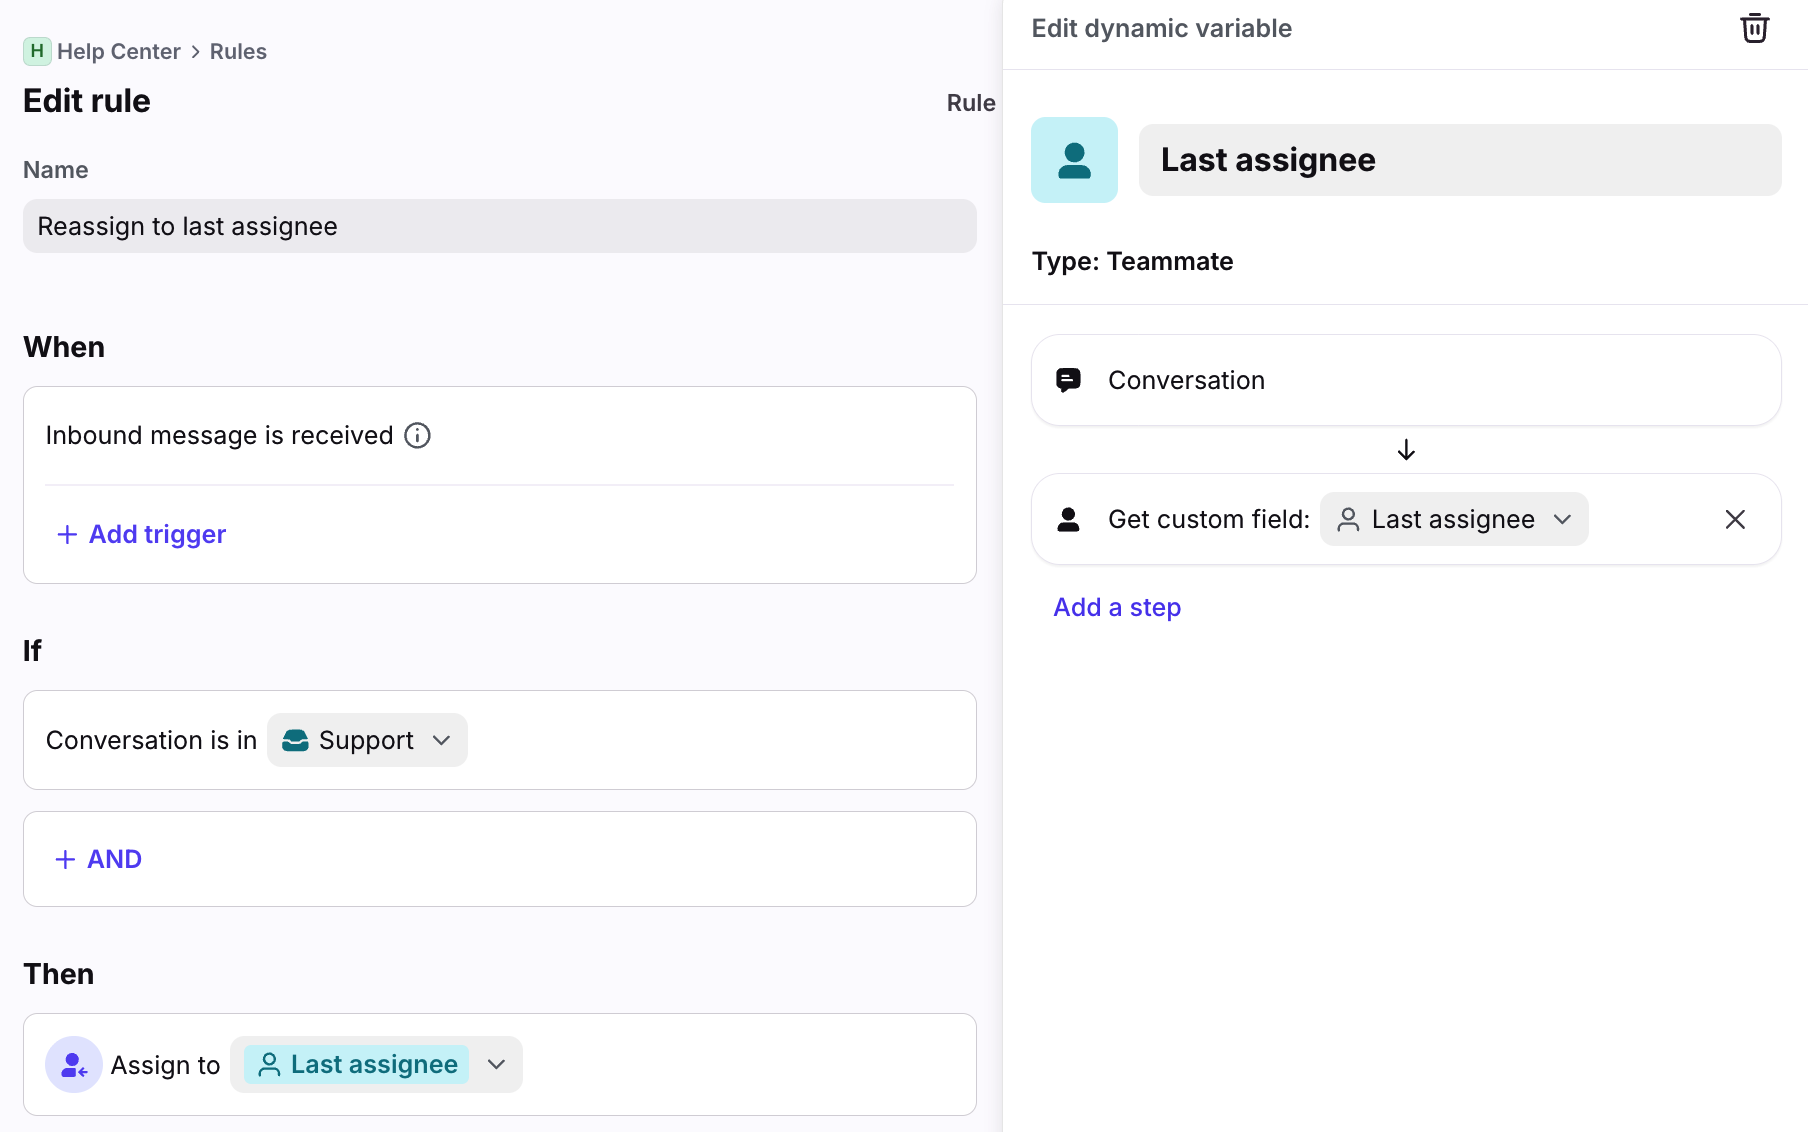
Example 2: Update the Last assignee conversation custom field when the assignee changes, then assign inbound messages to the last assignee
Conversation custom field setup:
Rule 1 setup:
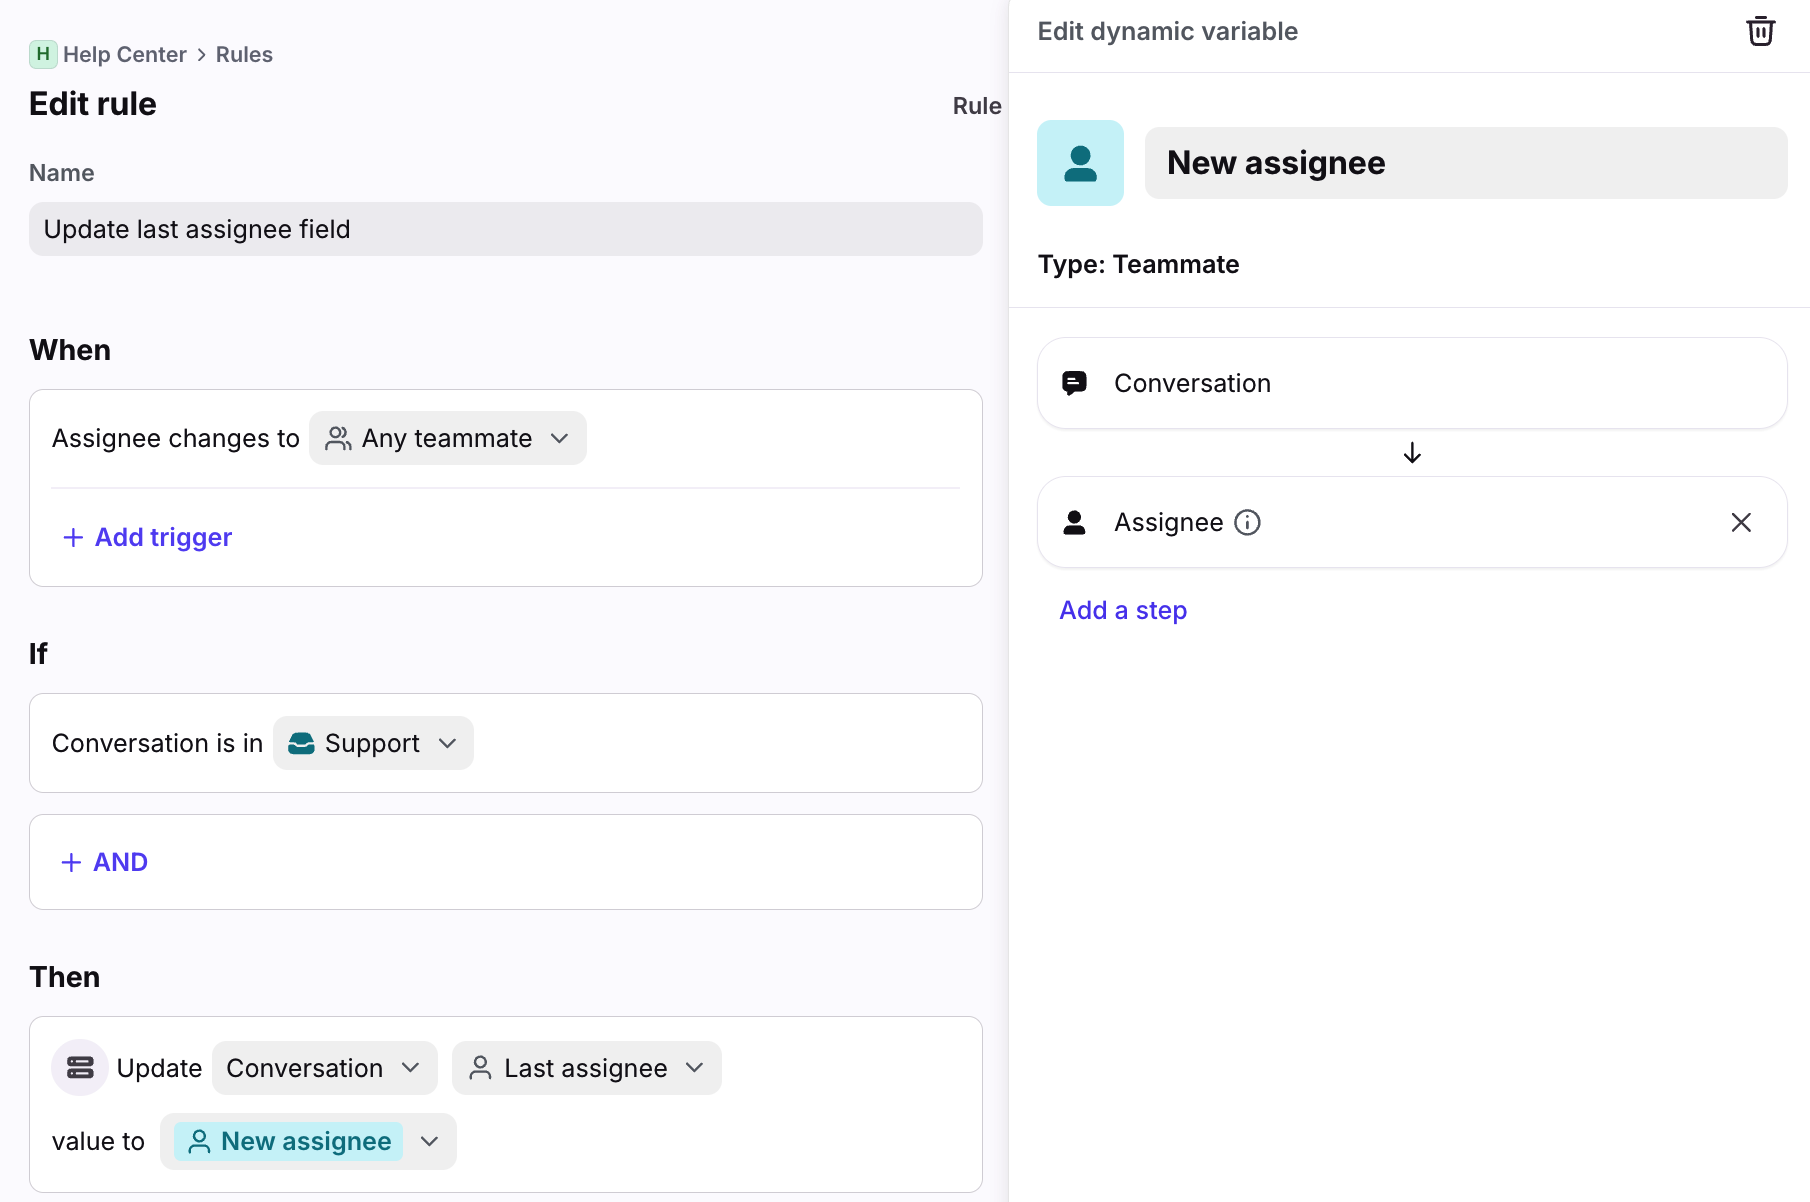
Rule 2 setup:
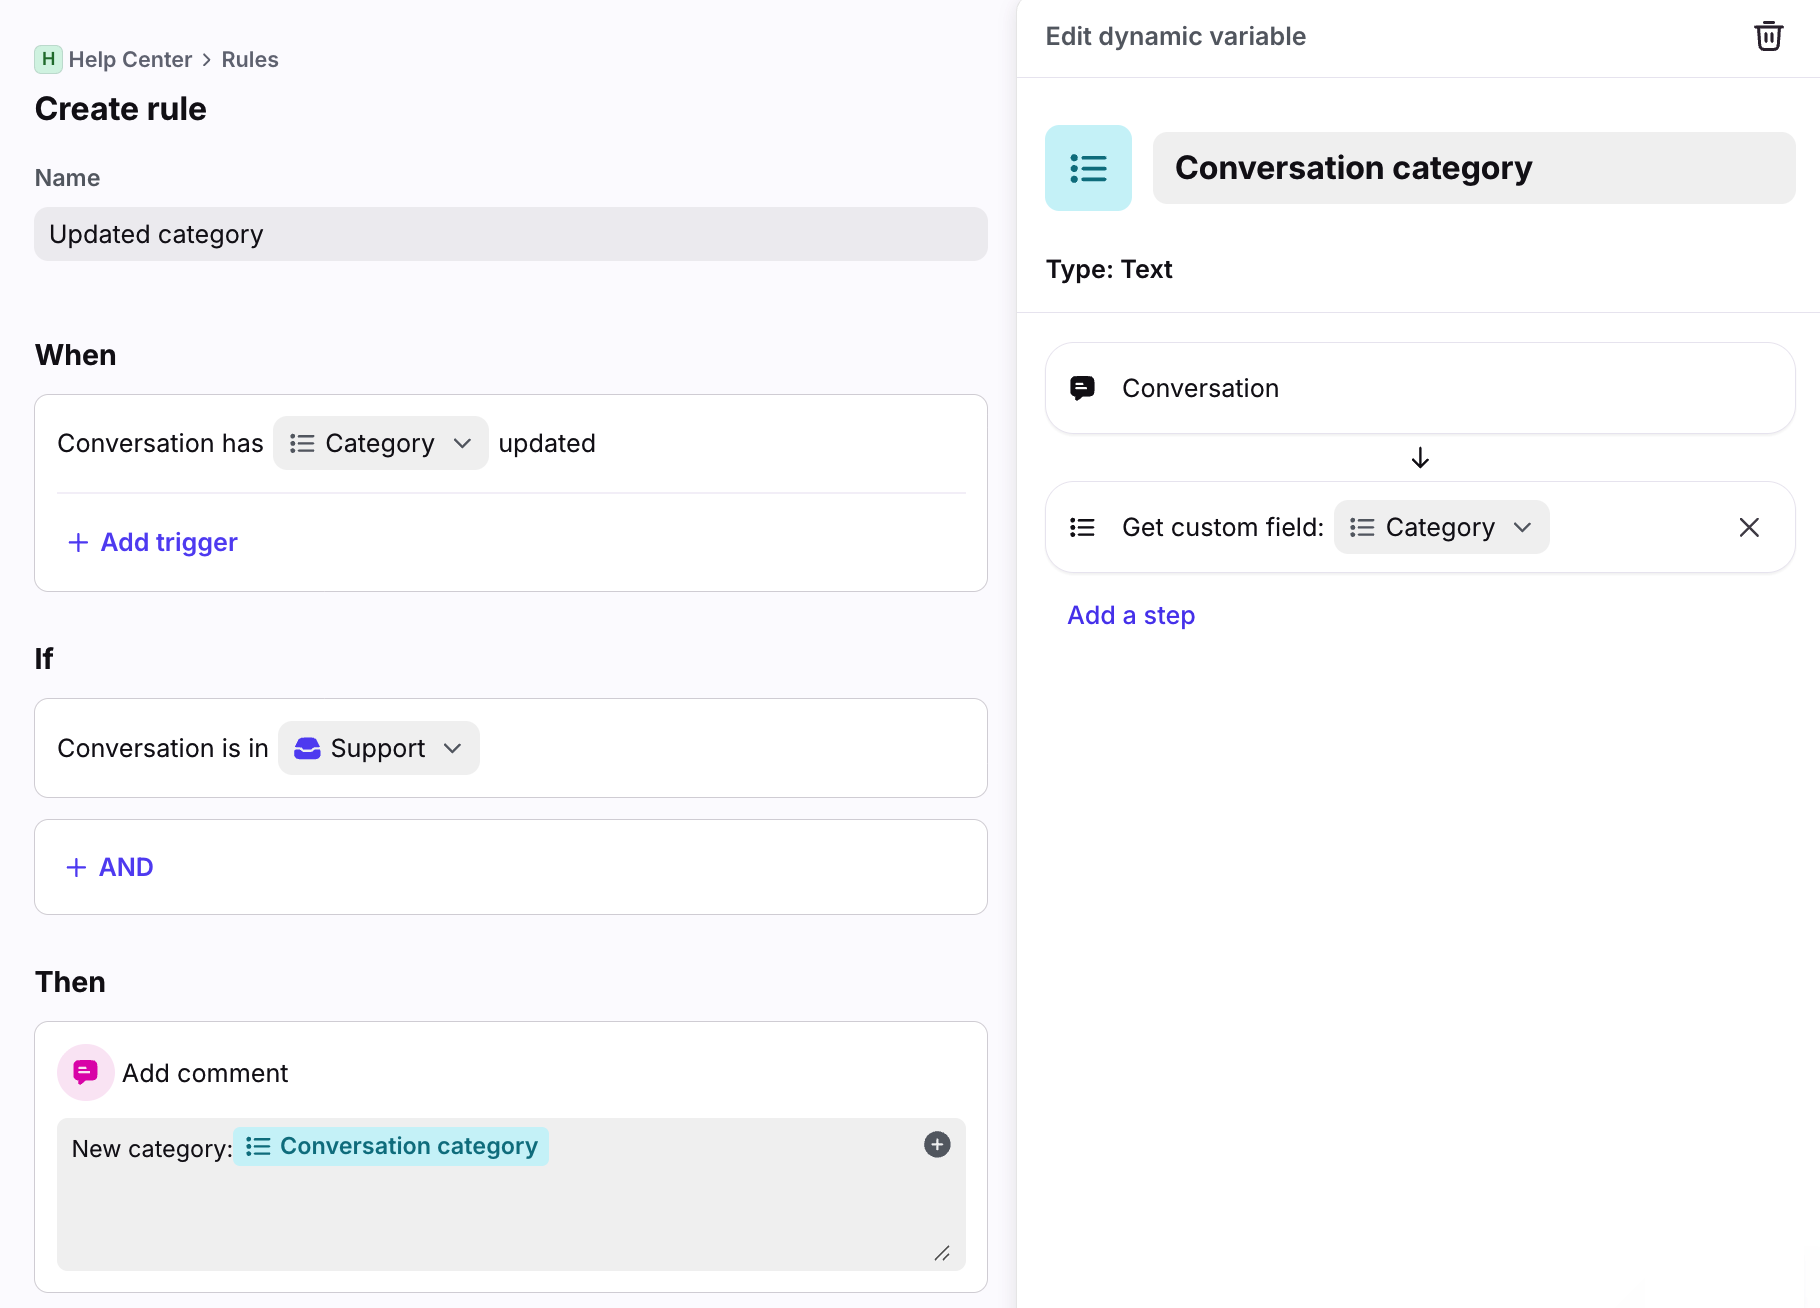
Trigger an update comment based on custom field
Enterprise plan: You can use the Conversation custom field is updated rule trigger to add a new comment to a conversation when a custom field is updated.
Rule setup:
Create custom fields
Step 1
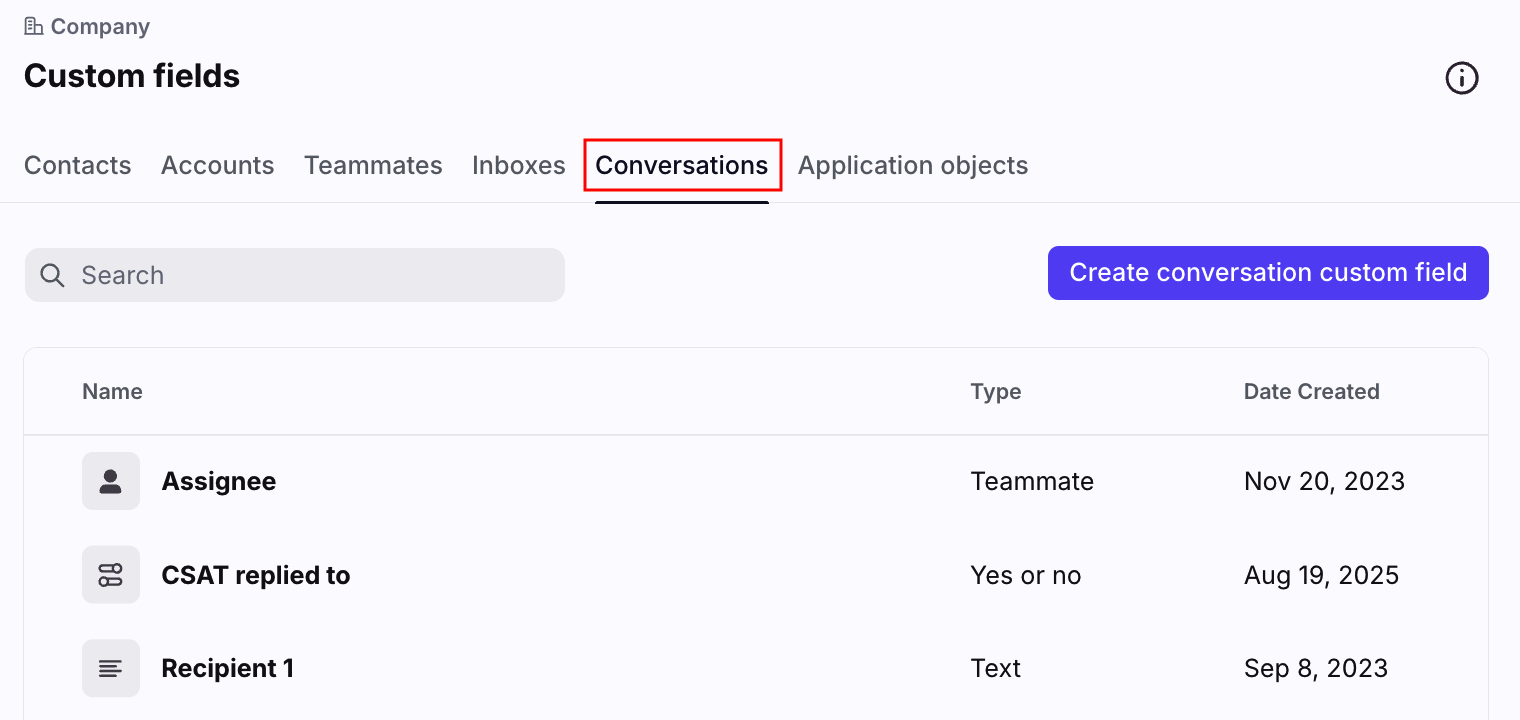
Click the gear icon and navigate to company settings. Select Custom fields from the left sidebar.
Step 2
Select the Conversations tab, then click Create conversation custom field.
Step 3
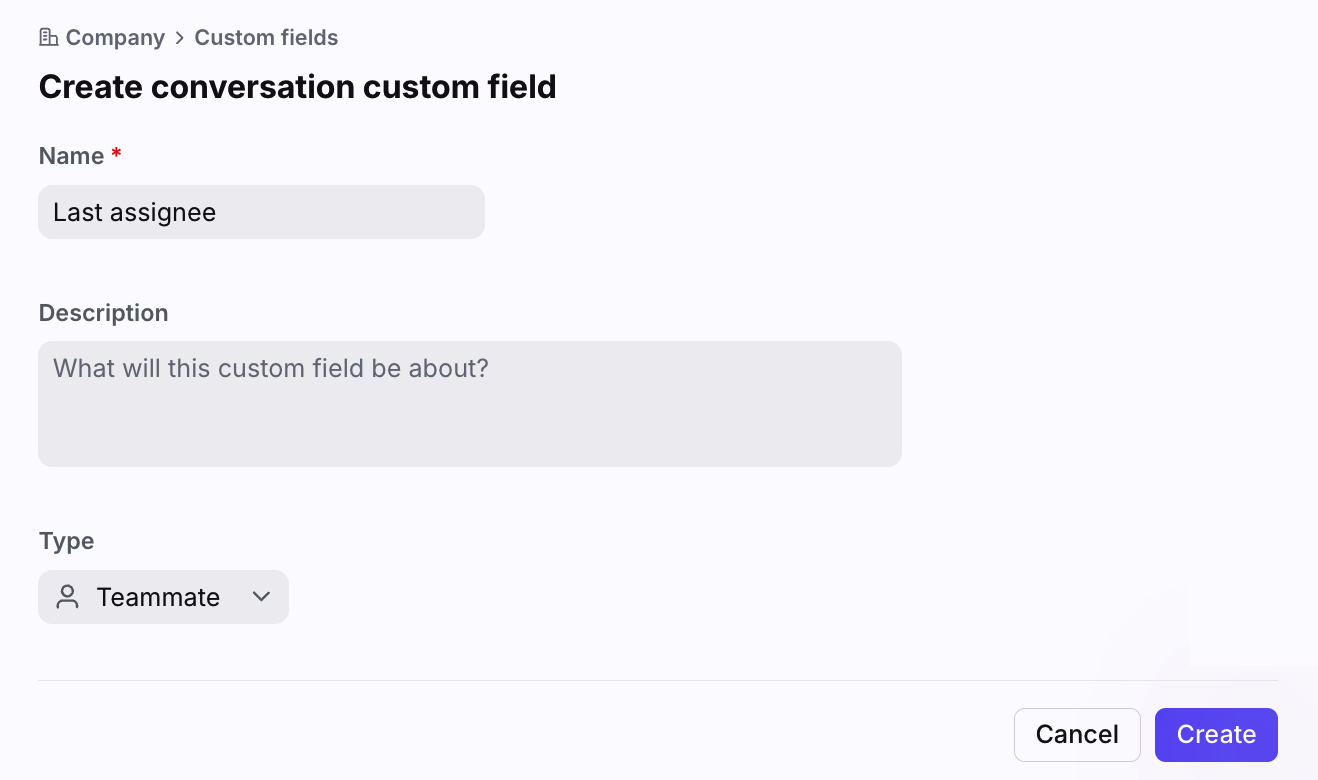
Enter a Name and Description for your custom field, then select a data Type. See this article to learn more about custom field data types.
Step 4
Click Create.
Add custom field data
There are several ways to add custom field data to your conversations, each described below.
Via the API
You can use the API to create and update conversation custom fields programmatically. API documentation is available here.
Via rules
Enterprise plan: You can use the Update custom field value rule action and create rules to automatically update conversation custom field values.
Via manual entry
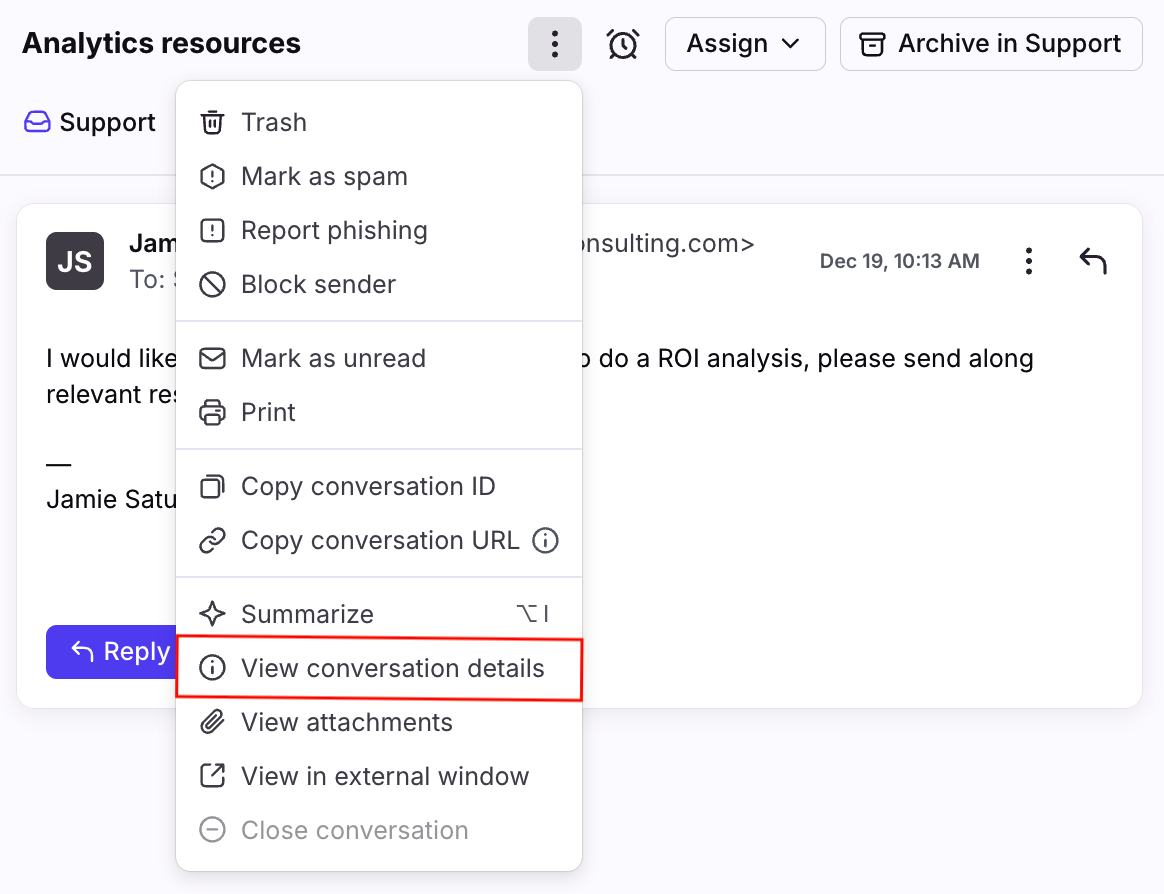
Step 1
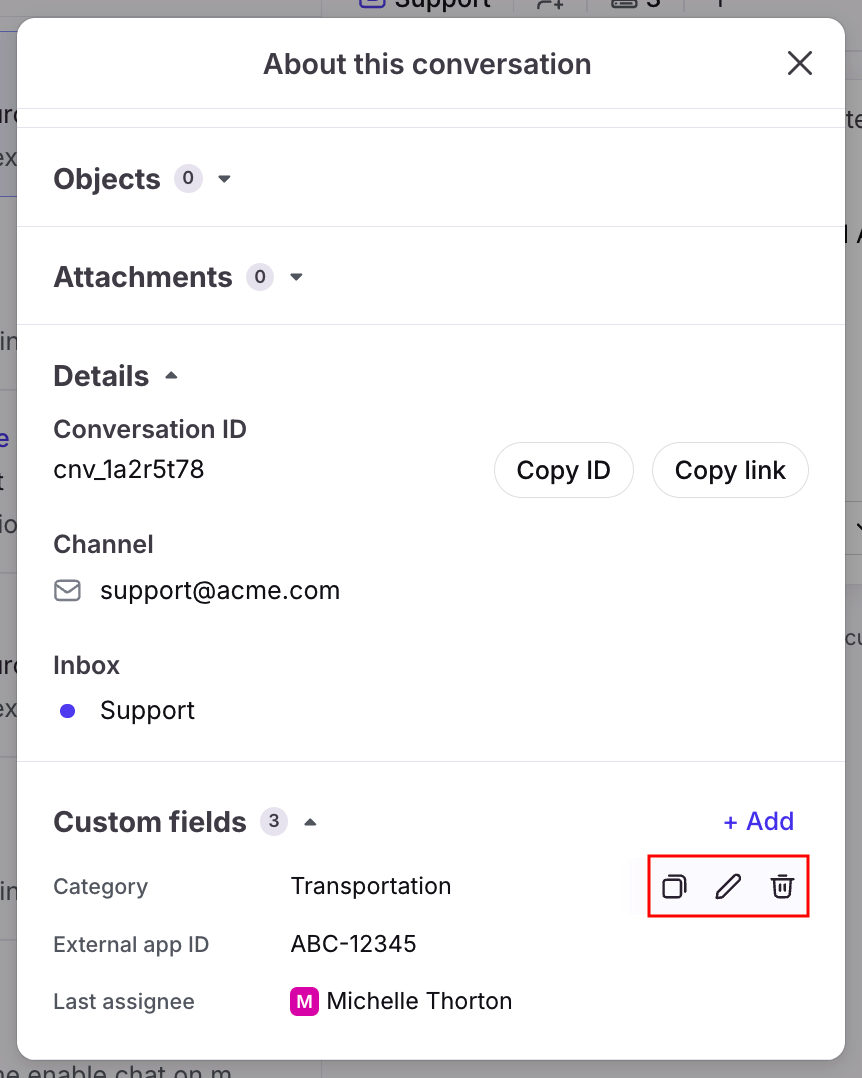
Click the three-dot menu at the top of a conversation, then click View conversation details.
Step 2
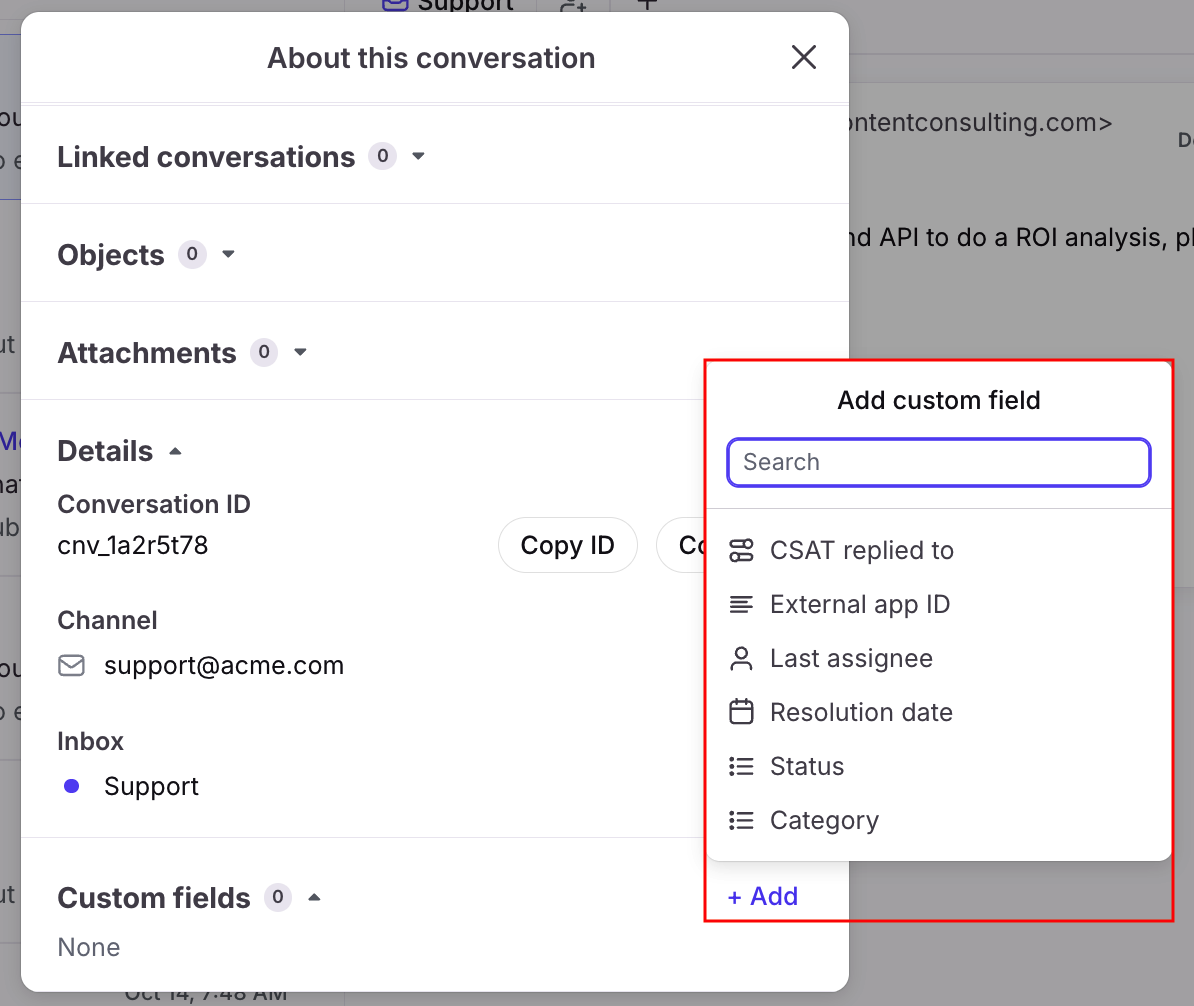
Click the Custom fields area to expand the section. Click Add, then select the custom field you’d like to add.
Step 3
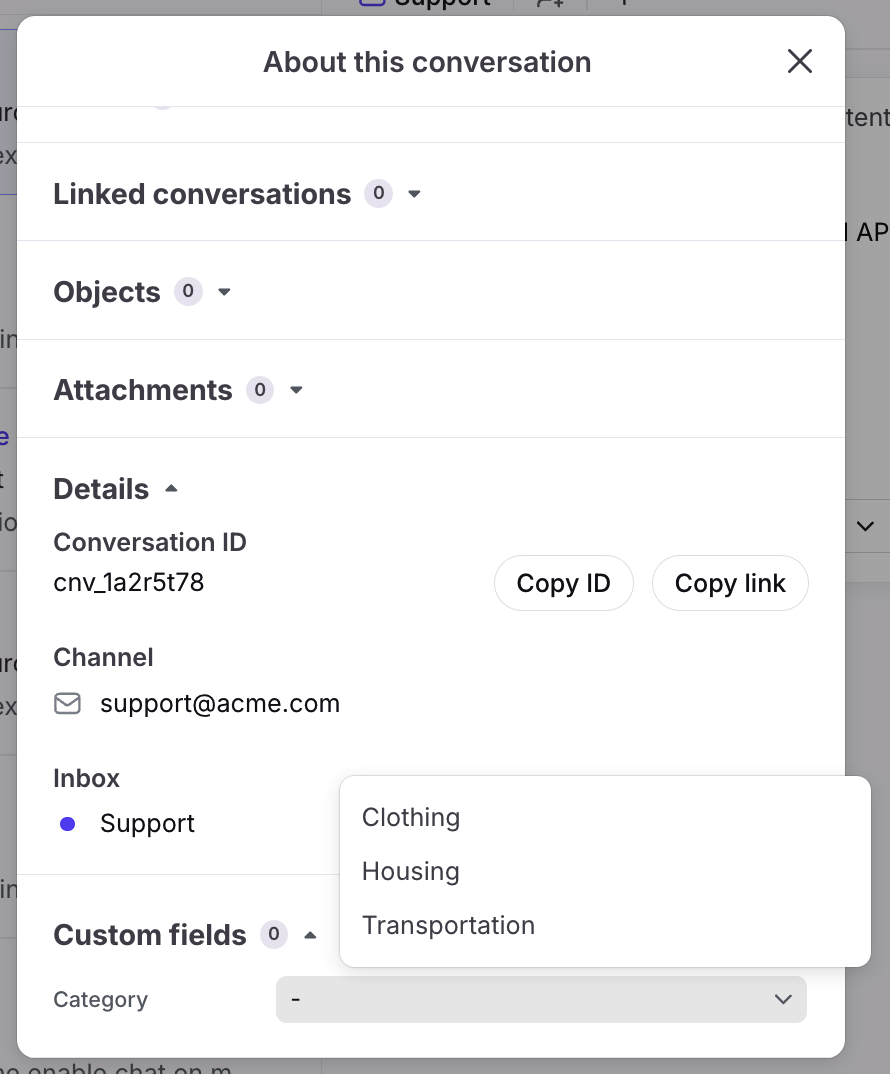
Enter the custom field value for the conversation. The data will automatically save.
Step 4
Hover over the custom field to copy, edit, or delete the value.
Pricing
Conversation custom fields are available on all plans. See additional details about pricing of certain features below.
| Starter | Professional | Enterprise |
Create and use conversation custom fields | ✅ | ✅ | ✅ |
Use the Conversation custom field is rule condition |
| ✅ | ✅ |
Use the Update custom field value rule action and Smart Rules to dynamically update conversation custom field values |
|
| ✅ |