Import, upload, and export contacts in Front with a CSV
Overview
You can quickly import a large number of contacts into Front using a comma delimited CSV file, without the need to manually add your contacts one by one. You can even upload their lists, description, and X handle (previously Twitter), in addition to basic phone and email contact information.
Other methods for uploading and managing your contacts in Front are:
Using our Contact API
Using contact integrations
If you'd like to upload accounts rather than contacts, see this guide.
Prepare your CSV file
Important to know
Column headers for default contact fields are not case-sensitive; "Name" will be treated the same as "name". However, custom field names are case-sensitive, so the column header for a custom field must exactly match the custom field property. For example, if you setup a custom "Agency" field, your CSV column header would need to "Agency" not "agency".
Extra columns and rows must be deleted, including blank columns and rows.
Row limits:
If your file contains the accountName field, you can upload up to 3,000 rows (not including headers) in a single upload.
If your file does not contain the accountName field, you can upload up to 30,000 rows (not including headers) in a single upload.
For large batches of contacts, you can break up your file into smaller files that meet the row limits. Files must be uploaded one at a time.
Custom fields do not support appending numbers to column names. This functionality is limited to the default fields listed in the table, such as email, phone, and contactList.
Template
You can download a CSV template at the bottom of this article.
File formatting
Column headings and naming conventions are critical for a successful import. The file must be comma delimited and may only contain the exact fields listed below, in any order:
Column heading | Contact field | Example value | Description |
name | Name | John Smith | Must contain the full name. First Name and Last Name cannot be divided in separate columns. |
jsmith@front.com | Include the email address associated with the contact. You can add multiple email addresses to a contact by appending the heading: email2, email3, etc. | ||
phone | Phone number | 19998887777 | Include the country code (like +1 for USA) in any phone numbers for consistency. If no country code is provided, Front will add the +1 country code by default. You can add multiple phone numbers to a contact by appending the heading: phone2, phone3, etc. |
link | Link | https://front.com/ | A link associated with this contact |
contactList | Contact list | VIPs | The name of the contact list the contact belongs to. You can add a contact to more than one contact list by listing them in contactList, contactList2, contactList3, etc. |
X (previously Twitter) | @jsmith123 | The contact's X (previously Twitter) handle | |
description | Description | Front is the leading Customer Communications Hub | A description of the contact |
accountName | Account | Front | The name of the account the contact belongs to. This will associate the contact to the oldest account in Front with a matching case-insensitive name. For example, supplying "Acme" would link the contact to an existing "Acme" account in Front. |
name of your custom contact field, e.g. Account Manager | Custom fields | Depending on the type of custom field, this could be a string, number, boolean, date time, or teammate email | You can add columns for any of the custom contact fields you’ve set up. Column header name is case-sensitive. See here to learn more. |
Here are the valid values that can be supplied for each type of custom field column:
Custom field type | Valid CSV values |
Date and time | Unix timestamp, to millisecond accuracy. 2021-11-18 09:30:00 PST would be uploaded as 1637256600000. |
Inbox | Provide the inbox ID (e.g. inb_12345), not the inbox name (e.g. Marketing Shared Inbox). The inbox ID can be obtained via the API. |
Number | A number |
Teammate | The login email address of a user within your company in Front (usernames are not accepted) |
Text | Any text |
Dropdown | Text must match one of the dropdown values listed in the custom field |
Yes or no | Valid values include “True”, “False”, “Yes”, or “No” (case insensitive) |
The following default contact fields cannot be imported:
X (previously Twitter) DM
Custom channel
Example
Below is an example of a CSV file we can upload:
Instructions
Step 1
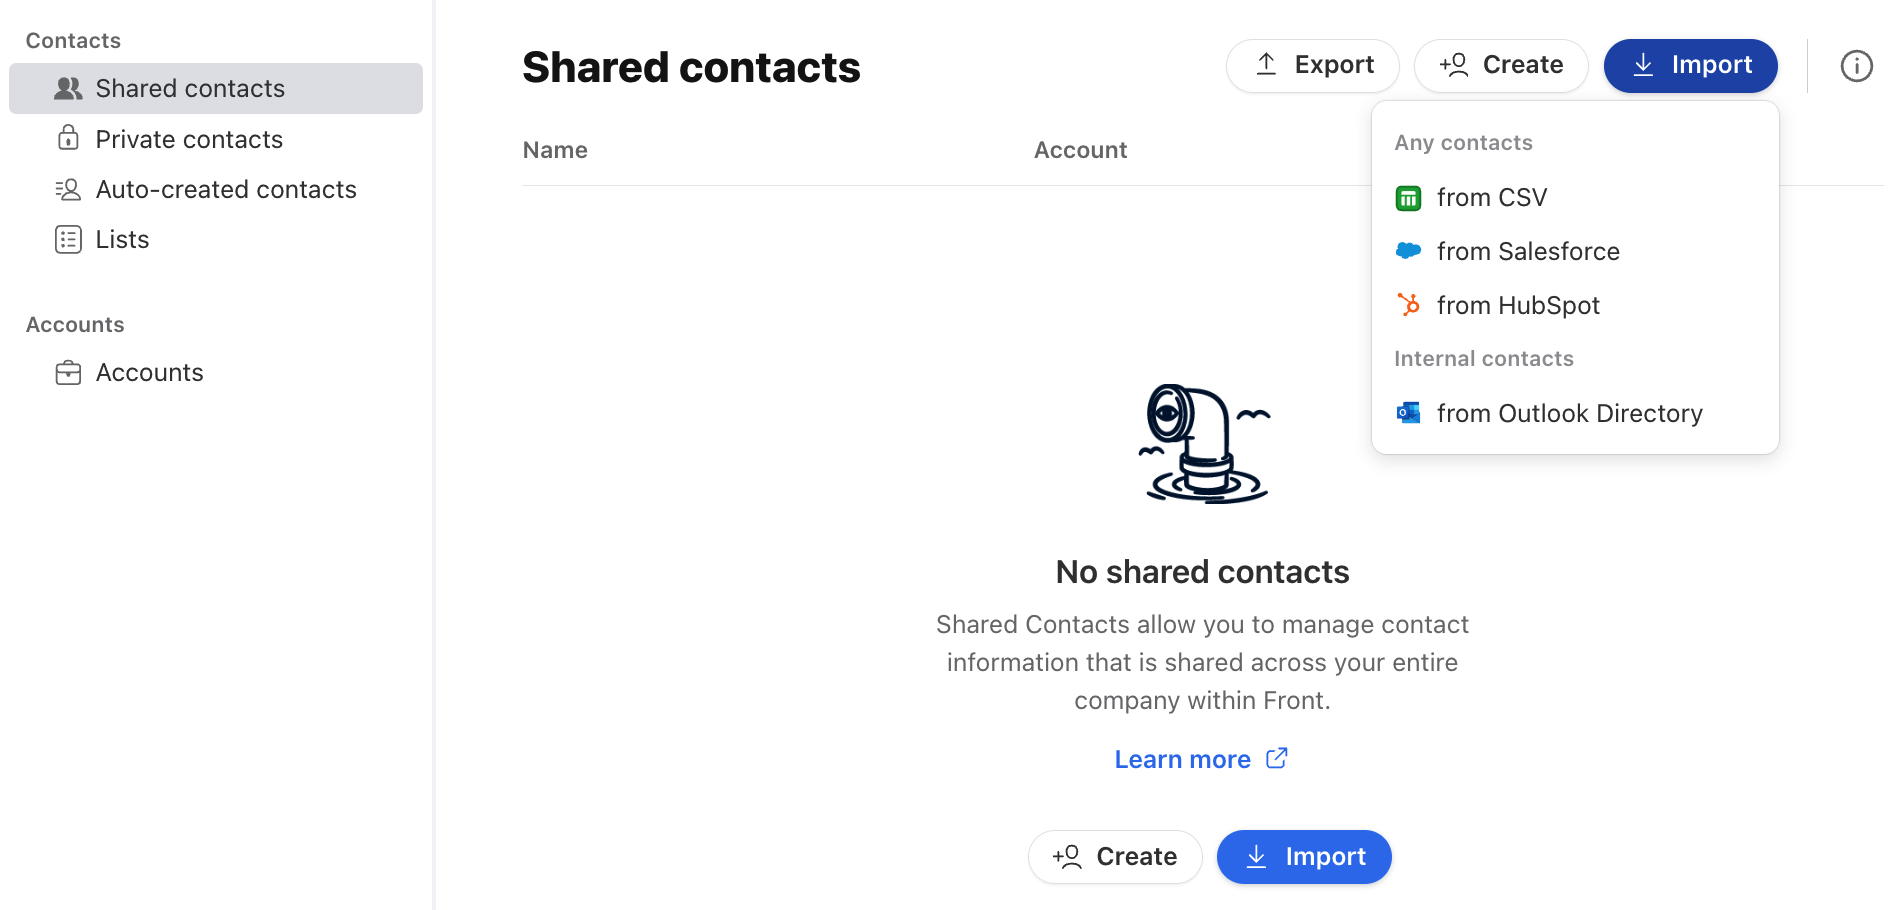
In the navigation menu, select Contacts to access the Contact Manager in Front.
Step 2
In the left sidebar menu, click Shared contacts or Private contacts, depending on whether you want to upload contacts that are visible to all teammates or only to yourself. The contacts space you have selected will determine where your contacts are uploaded, as shared contacts and private contacts are kept separate.
You can also click Accounts to import a list of accounts.
Step 3
Click the Import button at the top right, then select from CSV.
Step 4
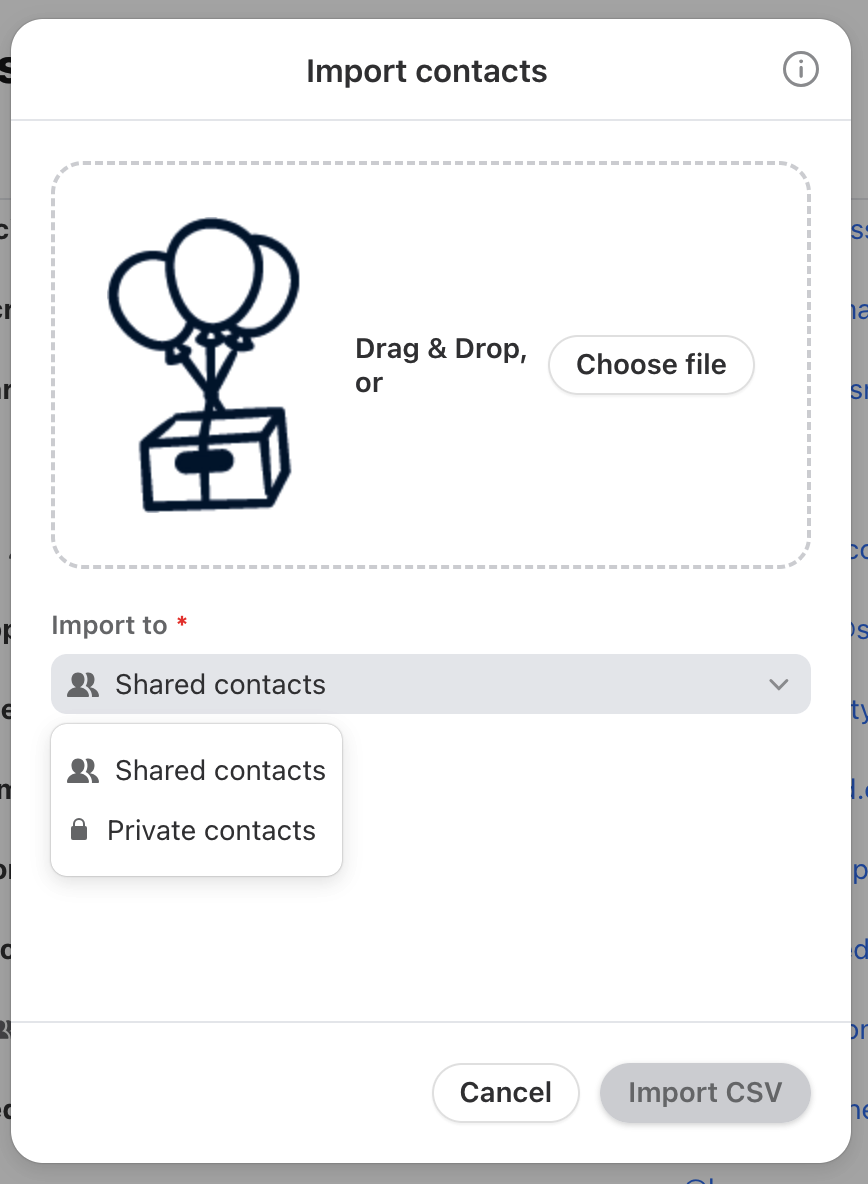
Drag and drop a CSV file or click the Choose file button to select a file from your computer. Then select whether you'd like to import to shared or private contacts.
Step 5
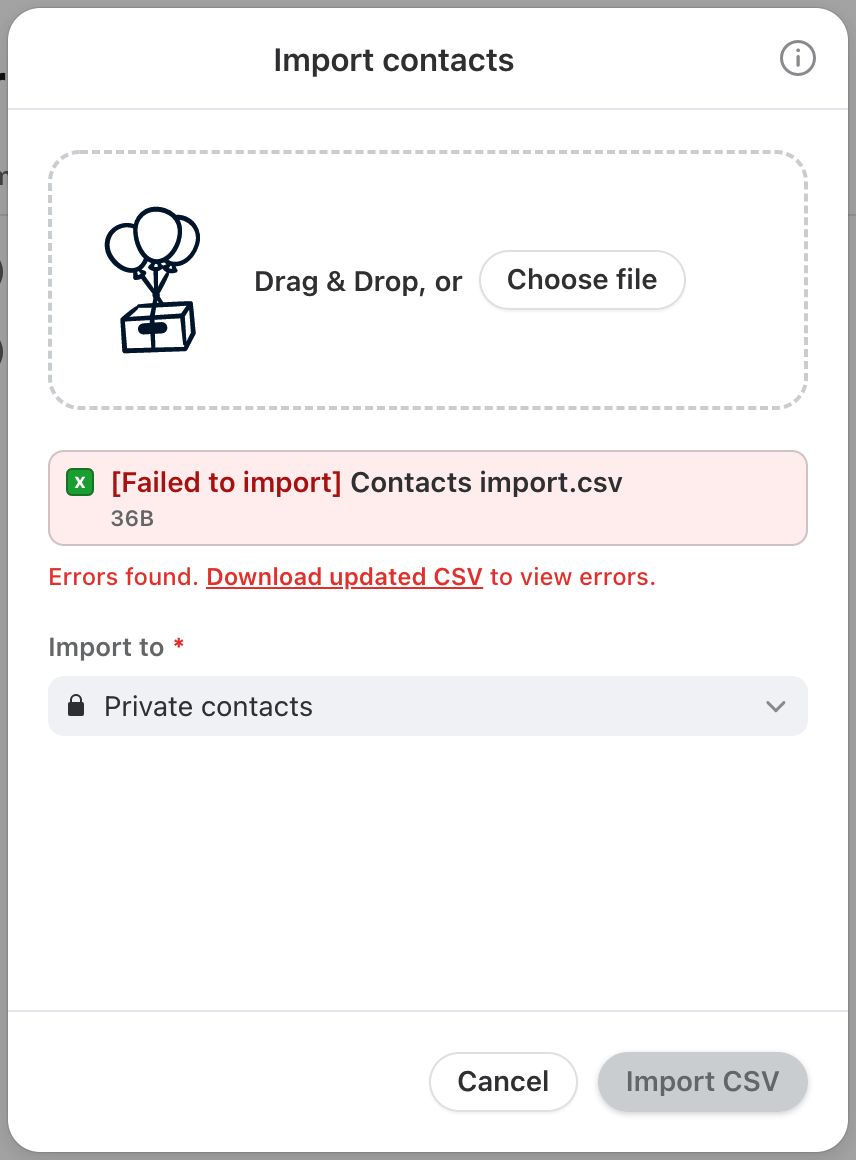
Click Import CSV to start importing your file. If your CSV is correctly formatted, you’ll see a confirmation in green text.
If the contact import fails:
Records without errors will be imported.
Records with errors will be provided in an error file. See this section to learn more.
If the import job ends halfway, all contact records imported up until the failure will be kept.
Step 6
After the import, you will see a new contact list created in the left panel based on the import date, in the format: YYYY-MM-DD. This is an easy way to access your contacts from a single import all at once.
If you'd like, you can delete this contact list by following the steps here. If you listed any new contact list names in your CSV, those contact lists will also be created for those contacts. Otherwise, you’ll find your contacts in your specified lists.
Errors you might see
Contact imports require specific formatting to ensure you can use your contacts correctly in Front! If you hit an error, please check the following common issues and solutions:
We display | How to fix |
Missing headings in first row | We cannot detect a header row. Check to see if you have an extra empty row and check that your first row contains field names. |
File type not in .csv format | We only support comma delimited CSV files. Convert your file to a .csv format. |
Maximum rows 3000 | We only support a maximum of 3000 rows per file if you're importing accountName data (not including the header). You can always split large CSV files into smaller ones. |
Invalid column heading | There are columns we don’t recognize (could be typo or totally new fields) or columns we don’t support multiple of (name#, description#, team#). If you wish to bring in custom columns, you may do so with our API. See this page for additional details. |
Email or phone must be included | You’re missing values in critical fields: email or phone for certain rows. Double-check and remove those rows or fill them out. |
Invalid email | A value in the email column is not properly formatted (<text>@<text>.<text>). |
Invalid X (Twitter) handle | A value in the X (previously twitter) column is not properly formatted (@name between 1 and 15 characters). |
Invalid phone number | Please ensure that your phone number is in the format: +1-999-999-9999. |
More row columns than header columns | You have more columns in that row than in the header row. |
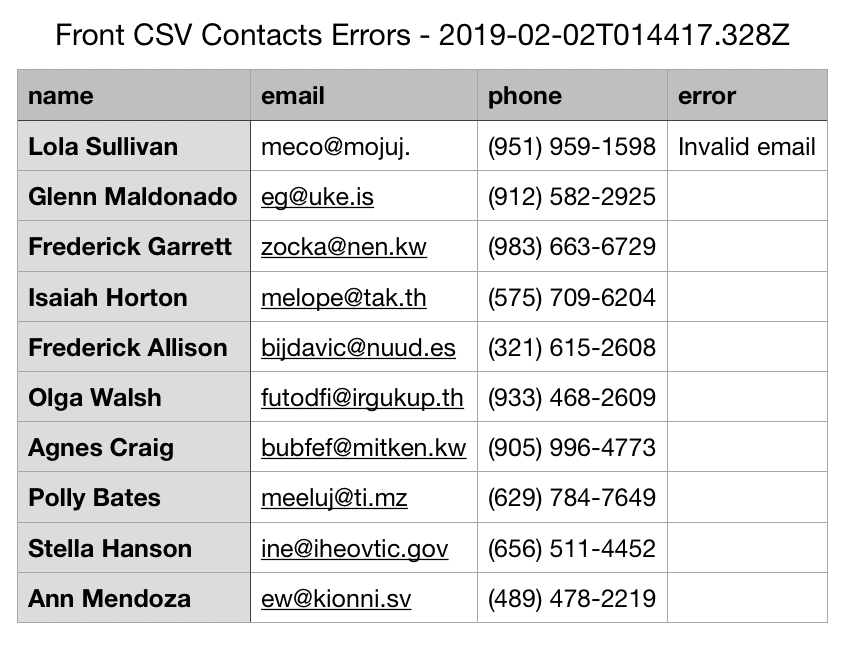
Download error file: Click Download updated CSV to view a file containing rows with errors, along with the error messages. Please see an example error log file below.
Updating contacts with a new upload
If you upload a new CSV that may have some of the same contacts that are already in your Contact Manager, Front will scan for duplicates automatically based on an existing phone number or email address. If there is a match in phone or email, then Front will only replace or update the new fields in your new CSV.
How fields on existing contacts are updated
If the value was blank before and there is a new value provided in the CSV, use the new value provided in the import.
If there was an old value before and there is a new value now, we add the new value provided in the CSV and remove the old value. Exception: When the value being updated is a email, phone number, or contact list, we will add the new value as a separate entry and keep the old value.
If there was an old value before and the value provided for that field in the CSV is blank, the old value in Front will be retained.
Exporting contacts
There are two ways to export your Front contacts: either directly from your Contacts Manager, or through Front's Contacts API endpoints.
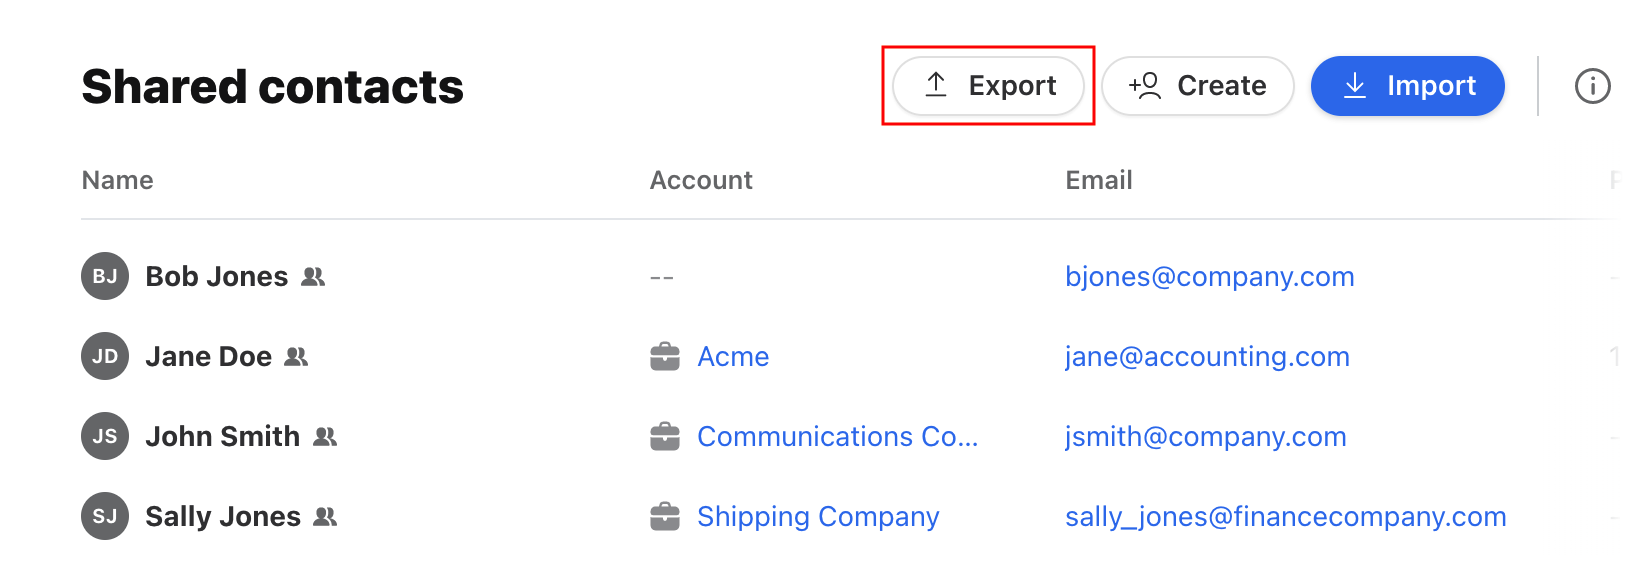
To export your contacts directly from your Contacts Manager, go to your Contacts Manager and click Export at the top right.
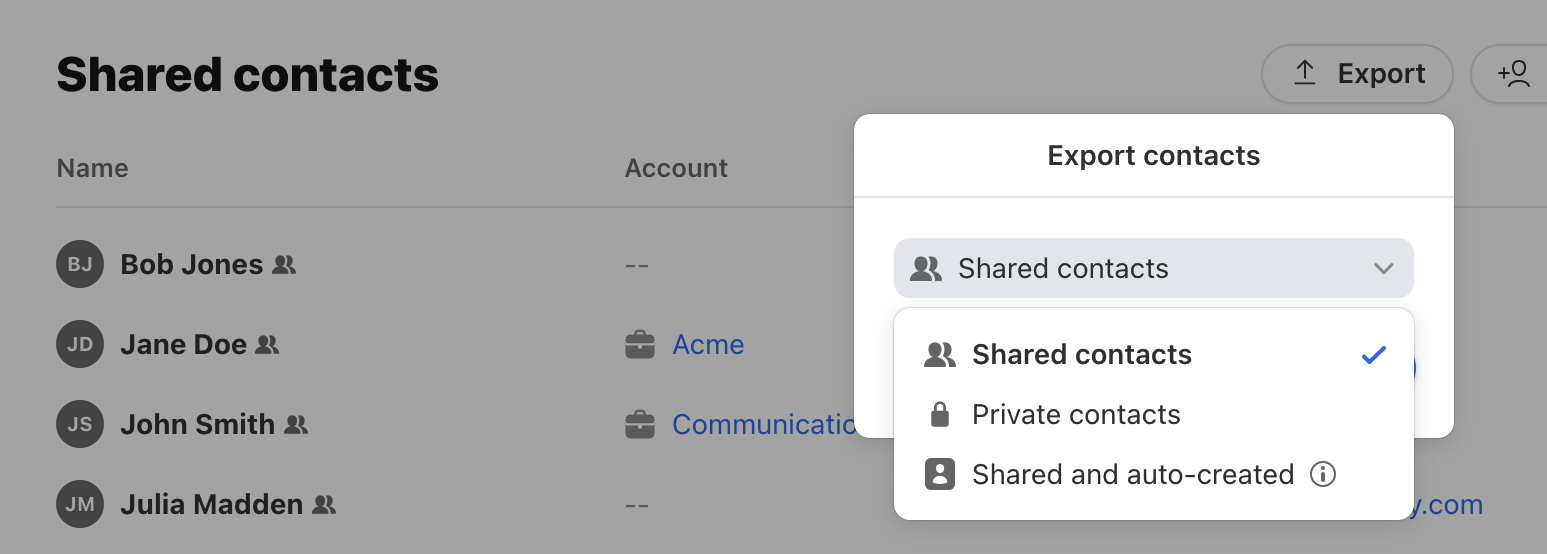
You'll be able to choose to export Shared contacts, Private contacts, or Shared and auto-created contacts.
The Shared and auto-created contacts option will export all contacts from your Shared contacts plus any contacts from your auto-created contacts that were created in shared inboxes that you have access to.


