
Macros best practices
Overview
Macros allow admins to create shortcuts in your Front messages to help teammates take multiple actions in a single click. Not sure where to start or if macros are right for your team? Read on to review best practices on macro settings and explore example use cases.
Once you’re ready to create a macro, see this article to get started.
For more training, check out our Front Academy course here to learn more about leveraging value from macros.
Best practices
The flow builder allow you to customize macros to match your team’s unique workflows. With so many available options, here are a few tips to set your macros up for success.
Tip #1: Less is more
Use branches to reduce the number of macros your team needs to keep track of. This keeps your macro list tidy and makes them easier to maintain. e.g. Instead of having 3 different Support escalation macros (Escalate Tier 1, Escalate Tier 2, Escalate Tier 3), use branches to house all escalations in one “Escalate” macro.
Use the Teammate access setting to restrict who can see team-specific macros. This allows teammates to focus on the macros relevant to their workflows. e.g. The Sales team doesn’t need to scroll through a list of macros for the Support team.
Tip #2: Naming conventions
Use consistent naming conventions for your macros. This makes them easy to find and manage. e.g. If you have multiple escalation macros, use the naming convention “Send to [team name]” for each macro.
Tip #3: Descriptions
Add a thorough description to help your teammates easily understand when they would use a macro. The more details, the better! e.g. Move conversation to the Security inbox. This includes phishing attempts or inquiries specifically for the security team to review.
Example use cases
Escalate to a higher support tier
When teammates need to escalate a customer inquiry to a higher support tier, a single macro can evaluate the conversation conditions and automatically trigger a set of appropriate actions. Teammates no longer need to reference an internal knowledge base to figure out the correct workflow.
To support this use case, here’s an example macro you can build:
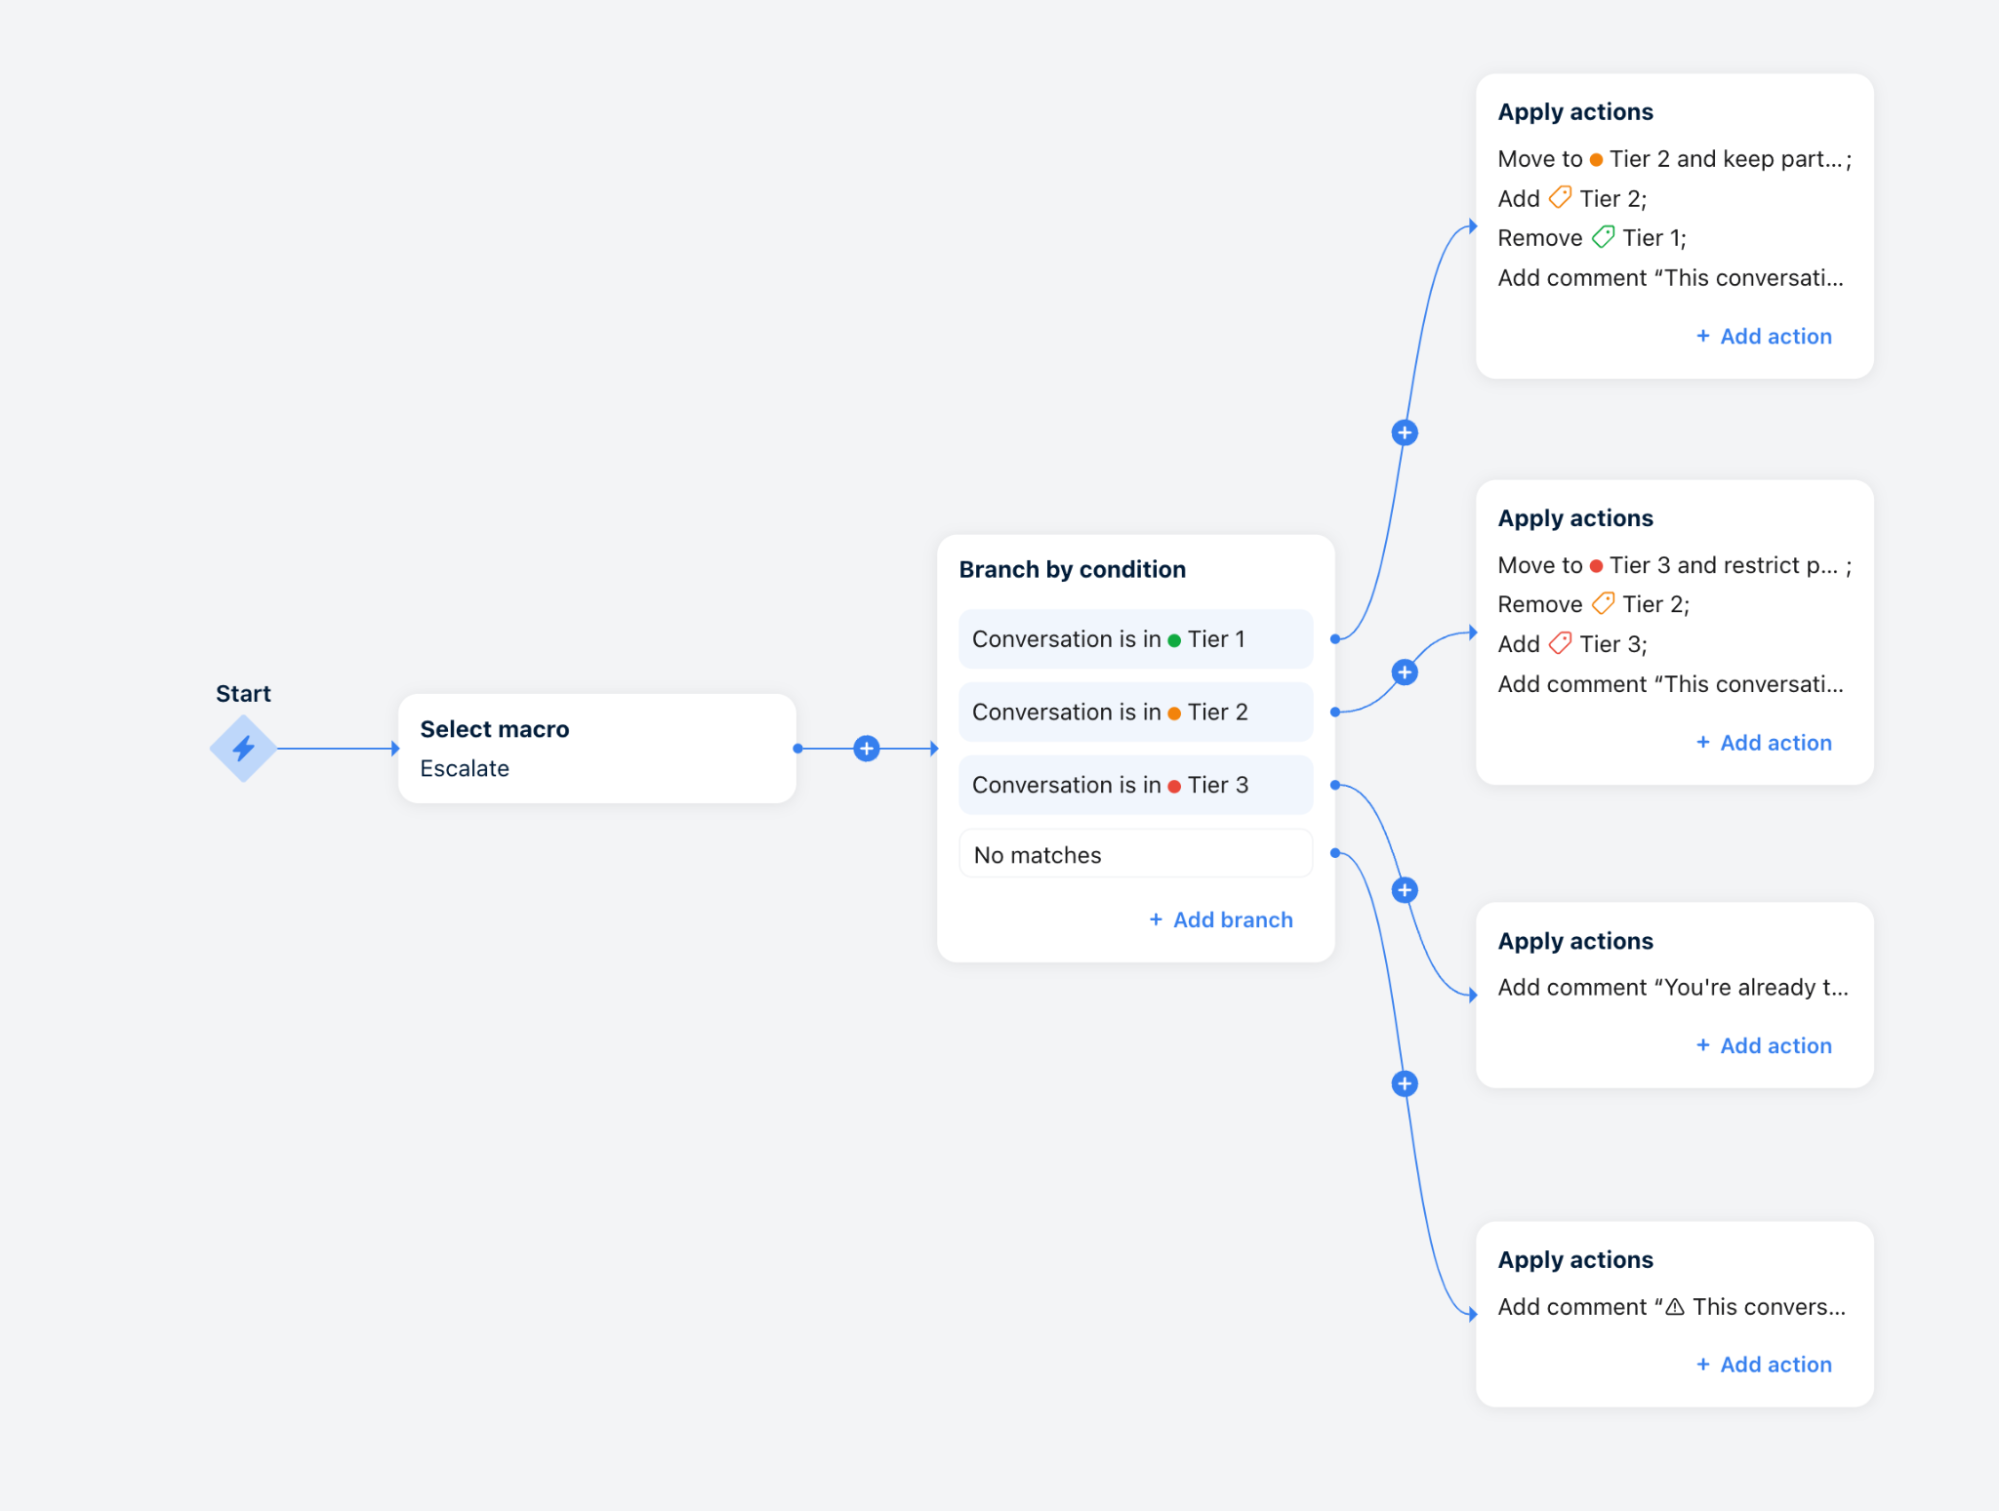
Conditional branching based on inbox attribution
Actions:
Move to Support inbox (value based on conditions). e.g. Tier 2
Remove tag(s) (value based on conditions). e.g. Tier 1 Support
Add tag(s) (value based on conditions) e.g. Tier 2 Support
Add comment (value based on conditions). e.g. This conversation has been escalated to Tier 2 through the Escalate macro.
If none of the condition sets are met, then a comment is added with an error message.
💡 Tip: This escalation scenario can be adapted to any handover situation, whether it’s Support-related or not.
Automatically cancel service subscriptions with a webhook
When receiving a request to cancel a service subscription from one of your customers, a macro can do the heavy lifting related to updating your subscription management system, as well as categorizing the message and replying appropriately.
To support this use case, here’s an example macro you can build:
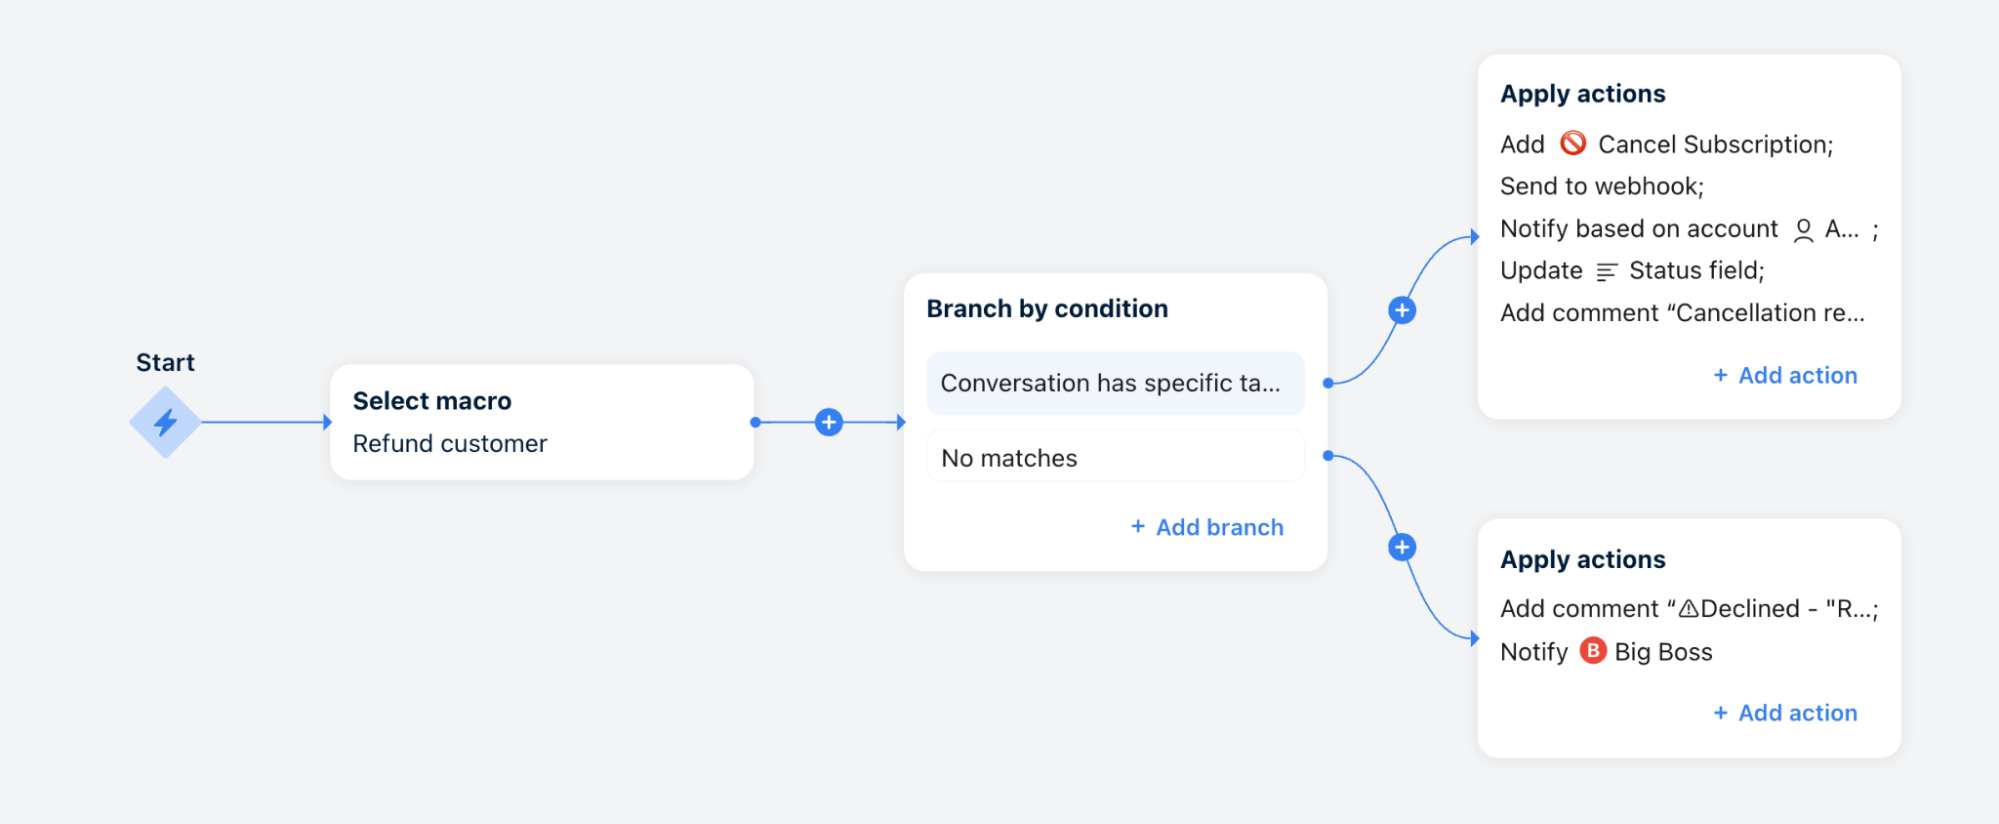
Conditional branching based on a custom contact field, where the macro checks if custom field “Subscription status” value = “live”.
Actions:
Add a tag. e.g. Cancel subscription
Send to webhook. This will send an event with the conversation data to your subscription management system.
Notify based on Account field. e.g. Account owner. This will notify the account owner that the contact has canceled their subscription.
Update custom field “Subscription status” value to “canceled”
Add comment. e.g. Cancellation request sent to the subscription management system.
If the condition isn’t met, then a comment is added with an error message. e.g.The contact doesn't seem to have a live subscription (see "Subscription status" field).
Send new automation requests to Front admins
When teammates start receiving multiple similar support requests from different customers without an automation built in Front to resolve them, they can use a macro to notify their admins.
To support this use case, here’s an example macro you can build:
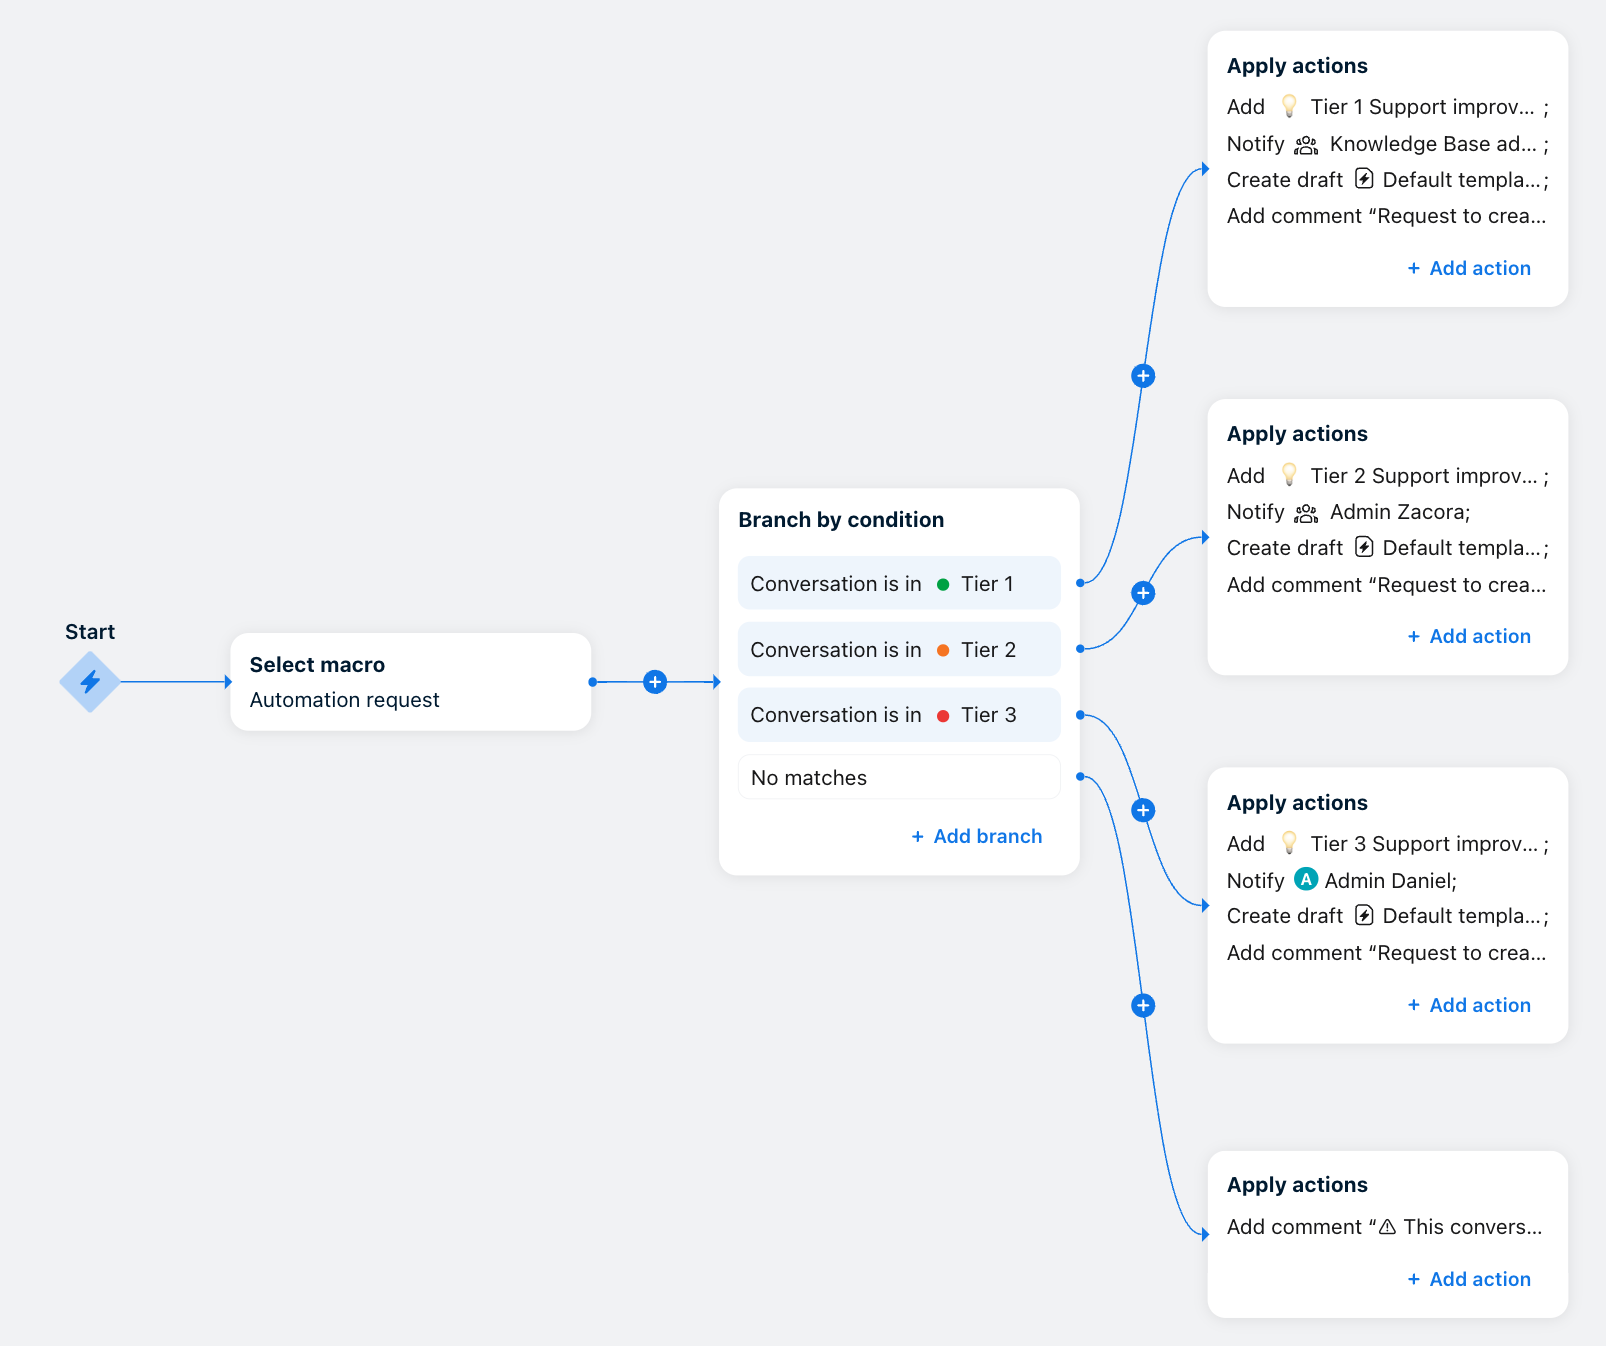
Conditional branching based on tag presence, inbox, or assignee. This will help with subsequent actions like notifying the right admins or adding specific tags.
Actions:
Add tag(s) (value based on conditions). e.g. Tier 2 Support improvement
Notify admins (value based on conditions)
Create a blank draft as a reply to the customer (admins will use that to create a dedicated template)
Add comment. e.g. Request to create a Knowledge Base entry for this new standard customer inquiry: please review this conversation and consider building a dedicated automation (see outbound reply to create message template).
Right after this macro has been triggered, a teammate can complete their draft, then send and archive the conversation. Admins will see the request in their Subscribed section.
Send product/service feedback to a dedicated team
When a customer inquiry provides valuable feedback for the business, teammates can use a macro to pass this feedback to the appropriate team.
To support this use case, here’s an example macro you can build:
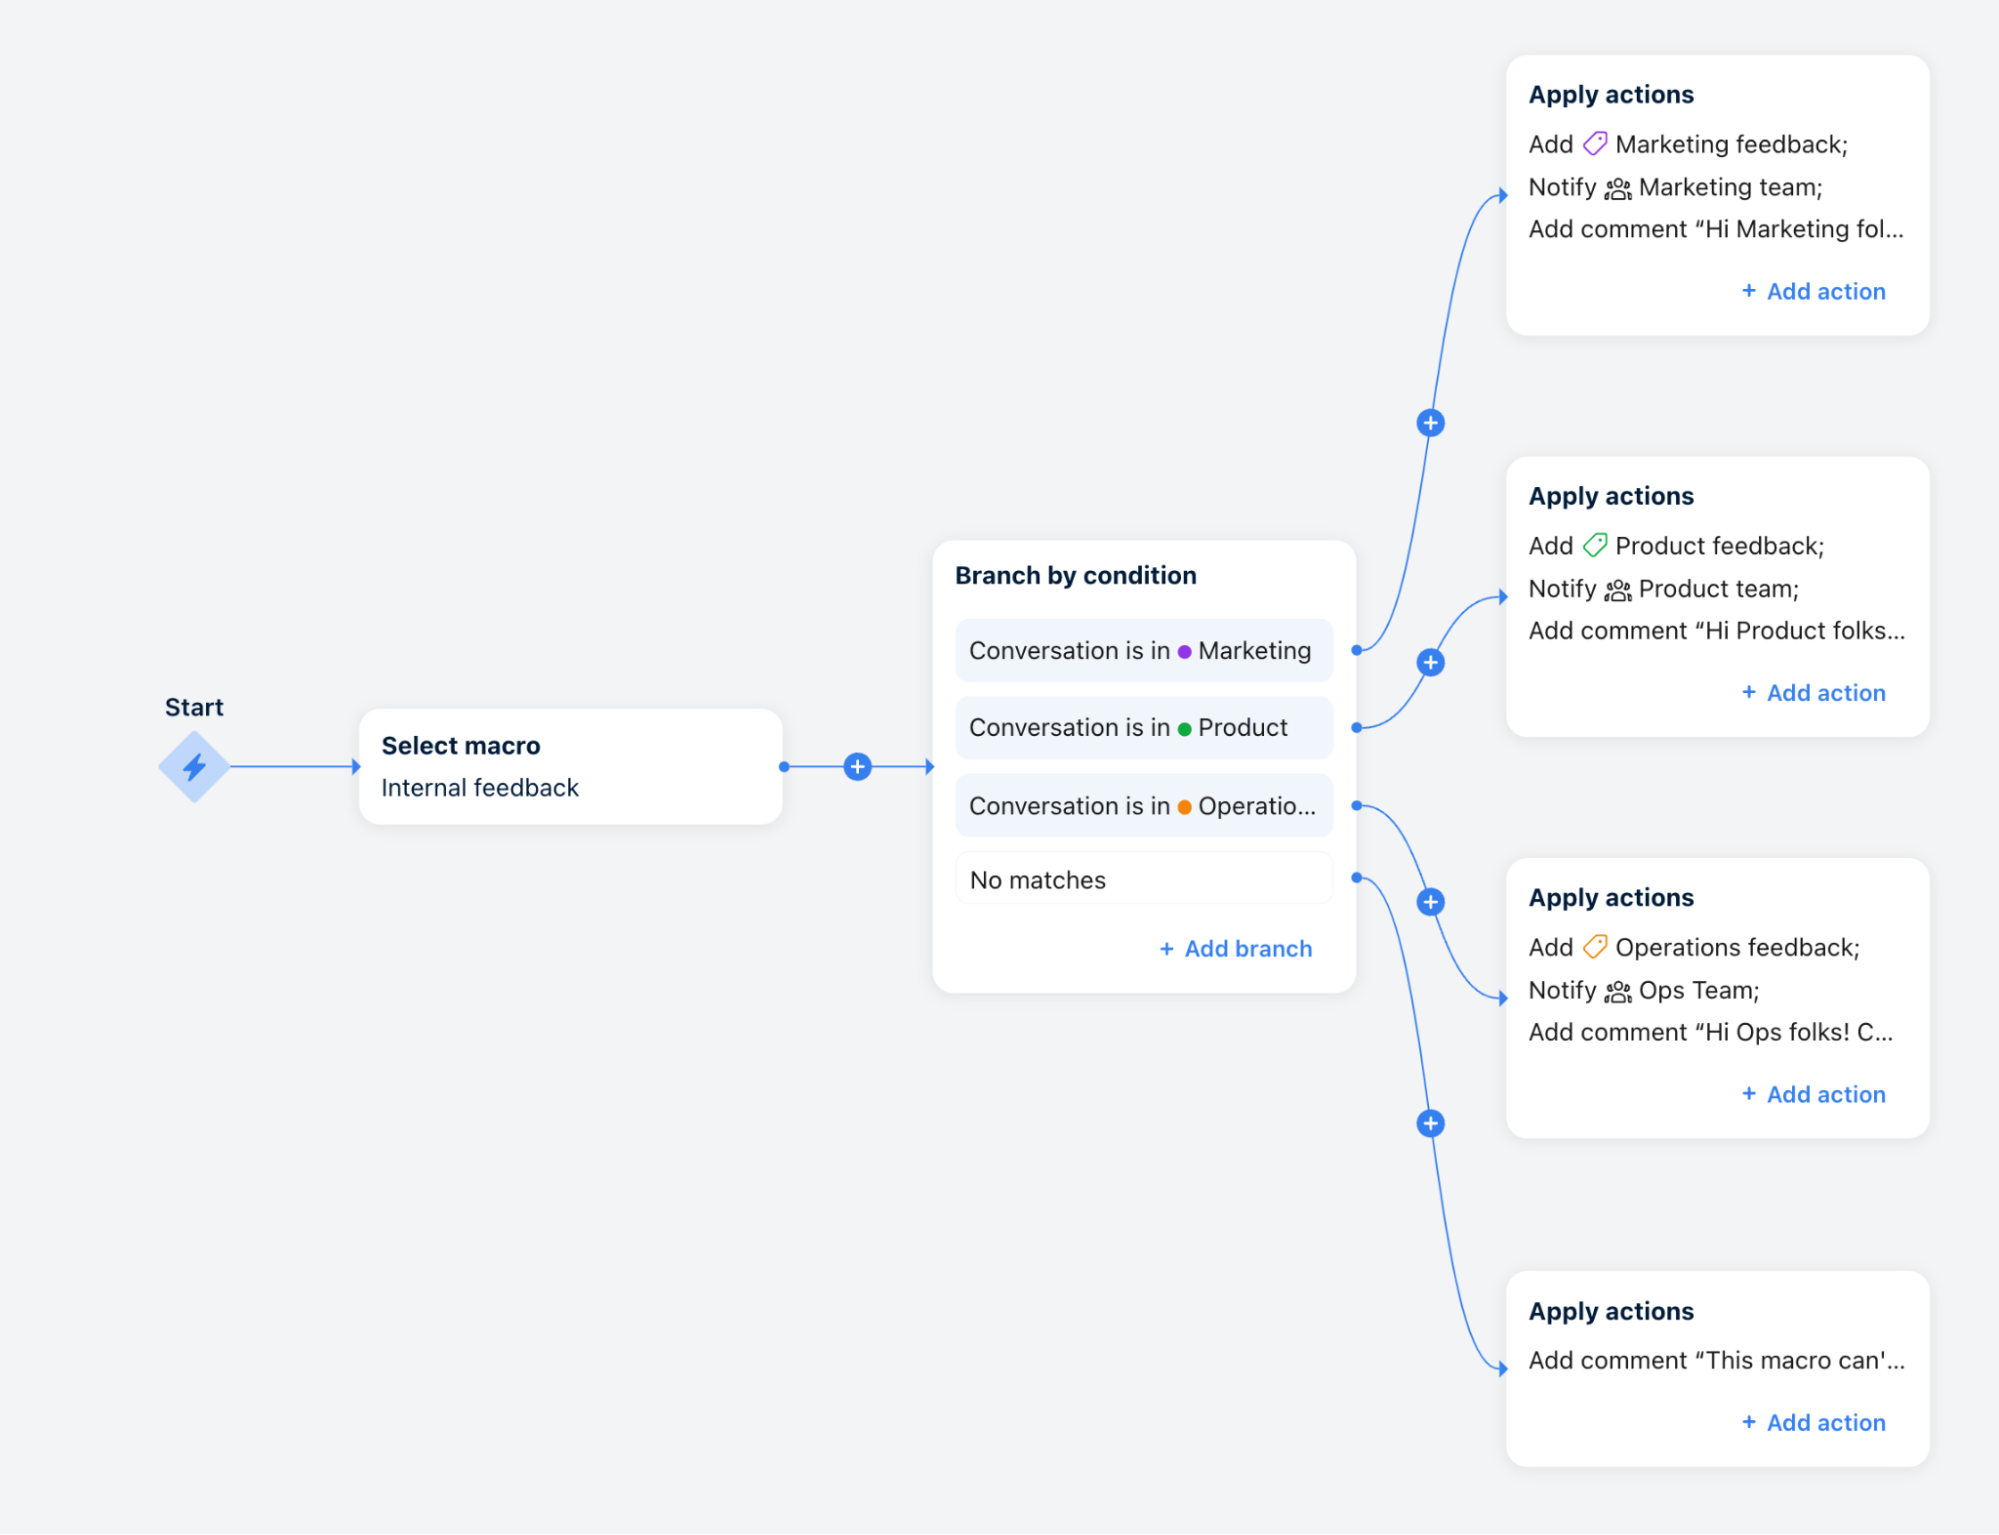
Conditional branching based on tag presence, inbox, or assignee/teammate group. This will help with subsequent actions like assigning to the appropriate team or adding specific tags.
Actions:
Add feedback tag(s) (value based on conditions). e.g. Marketing feedback
Notify teammate group (value based on conditions). e.g. Marketing
Add comment. e.g. Hi Marketing folks! Conversation to review for continuous improvement: see related messages above.
If none of the conditions are met, then a comment is added with an error message.
e.g. This macro can't be executed outside of the Marketing, Product, or Operations inboxes.
Pricing
This feature is available on the latest Professional plan or above.