
How to set up a Talkdesk inbox in Front
Overview
You can set up your Talkdesk to send messages to Front, so you can manage your call activity along with email, chat, and other channels in one place.
The Talkdesk integration allows you to sync your call history and data to Front. With Talkdesk's Callbar app and Click-to-call Chrome extension, you can also initiate calls right from Front.
Instructions
Part 1: Create inbox in Front
Step 1
Click the gear icon then select company, workspace, or personal settings, depending on the space you’re working with.
Step 2
Click Inboxes in the left menu and create a new shared inbox or individual inbox.
Step 3
Click Channels in the left menu, then click the Connect a channel button.
Step 4
Select Talkdesk from the channels menu, then fill in the following fields:
Name: Name of your channel
Talkdesk domain: Your unique Talkdesk URL for your account, such as https://front-partner.mytalkdesk.com
Step 5
Choose the inbox that conversations will route to and click Save.
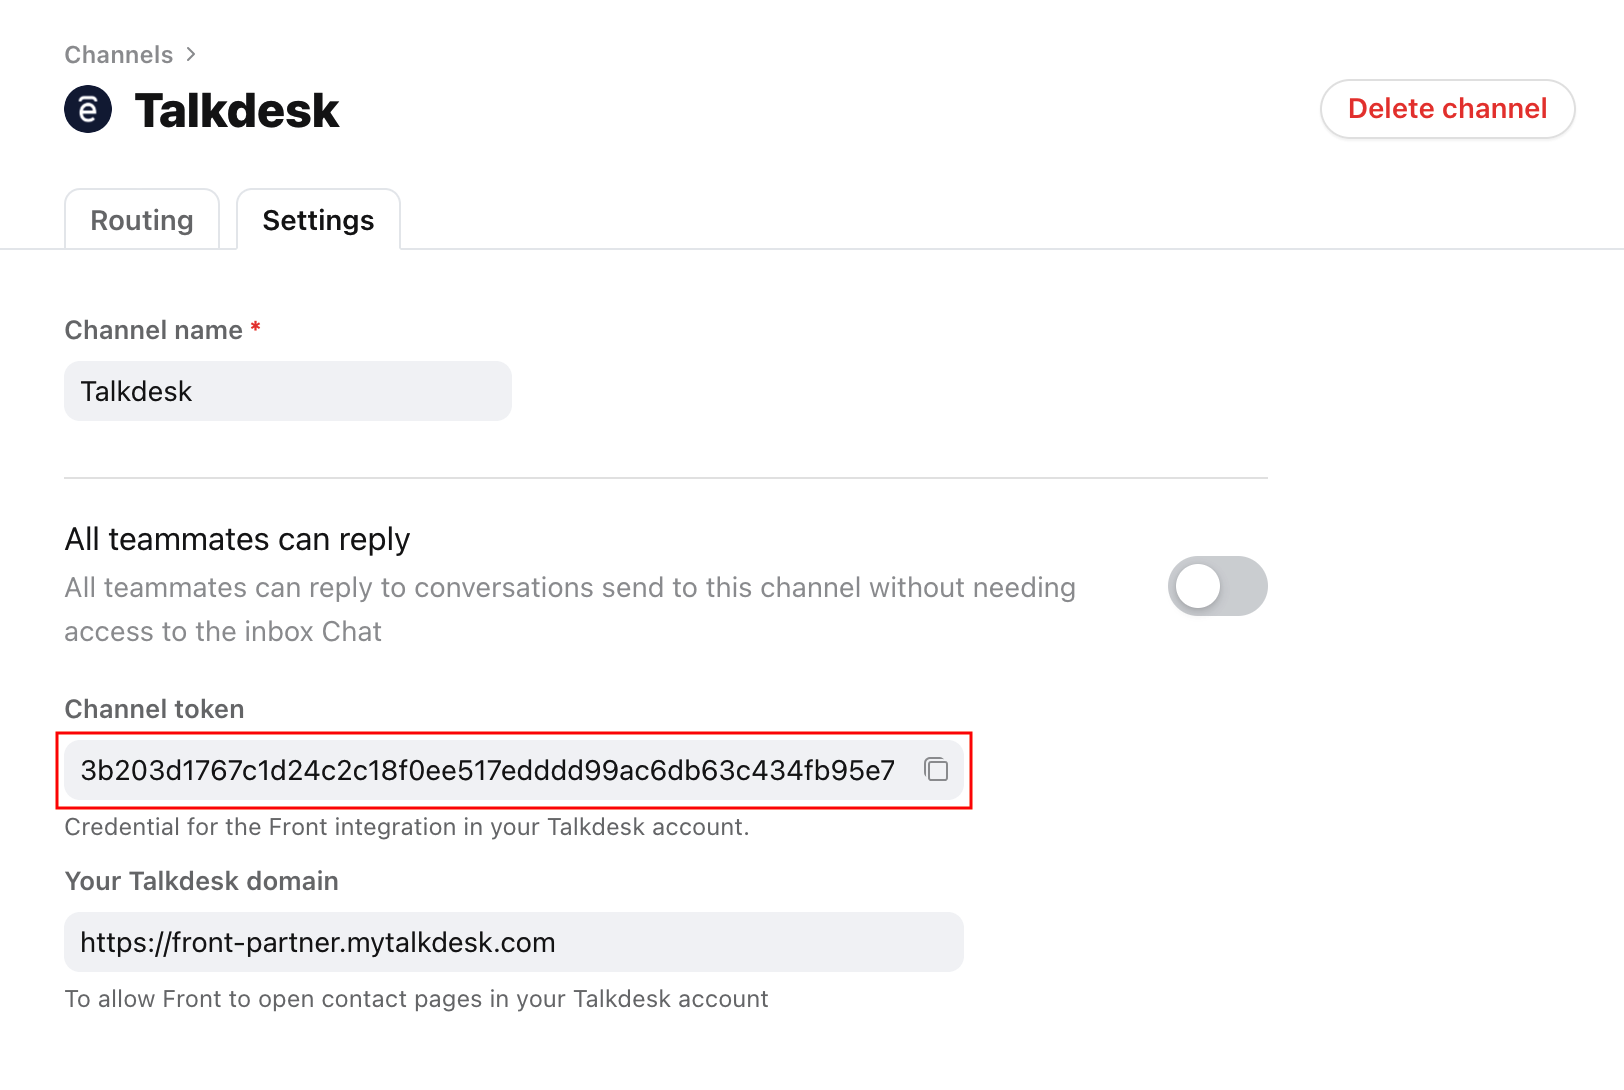
Step 6
Once the channel is created, click the Talkdesk channel, then click the Settings tab. Copy the Channel token so that you can enter it into your Talkdesk account.
Part 2: Set up integration in Talkdesk
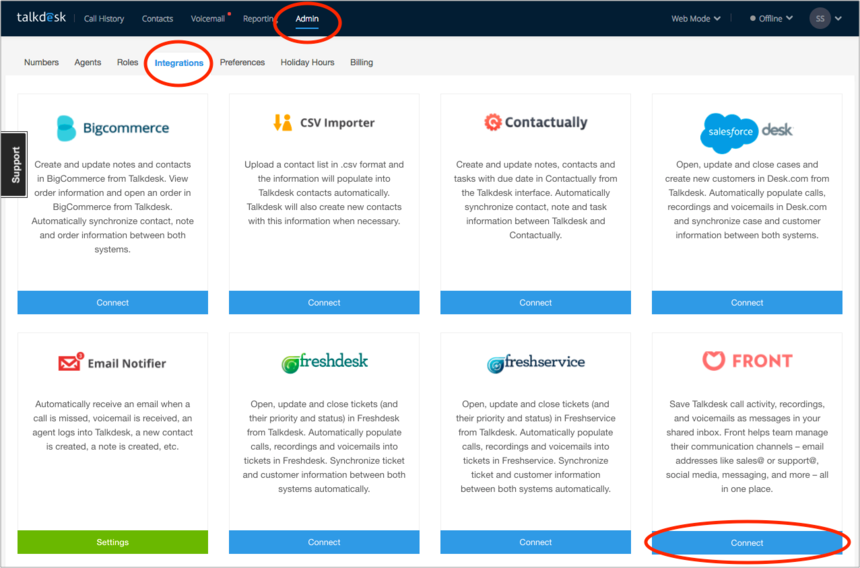
Step 7
Log in to your Talkdesk account. Select Admin, and choose the Integrations tab. Find Front and click Connect.
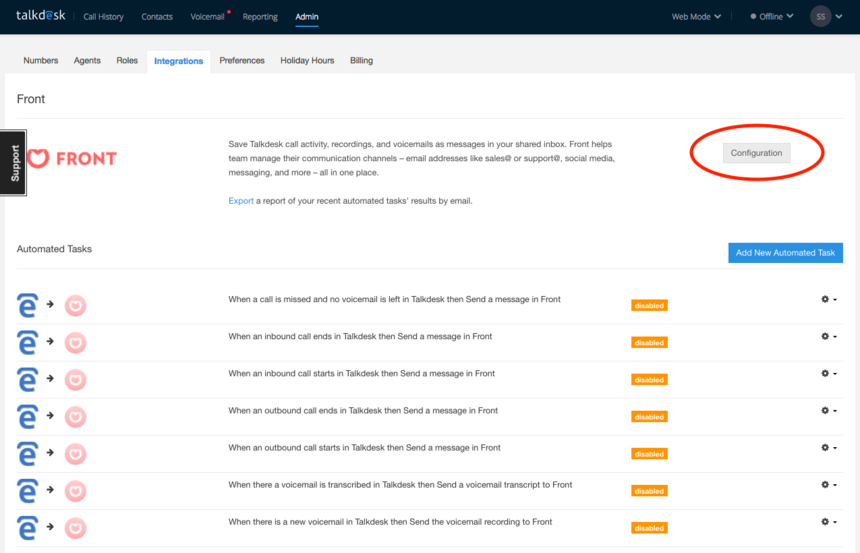
Step 8
Click Configuration in the upper right corner.
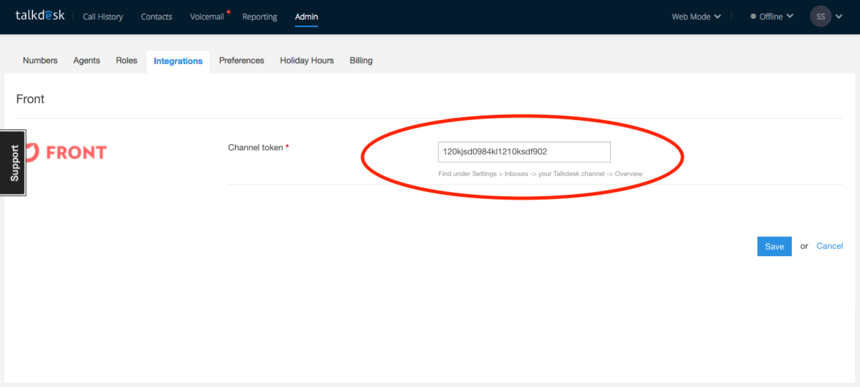
Step 9
Paste your Channel token that you copied from Front and click Save.
Step 10
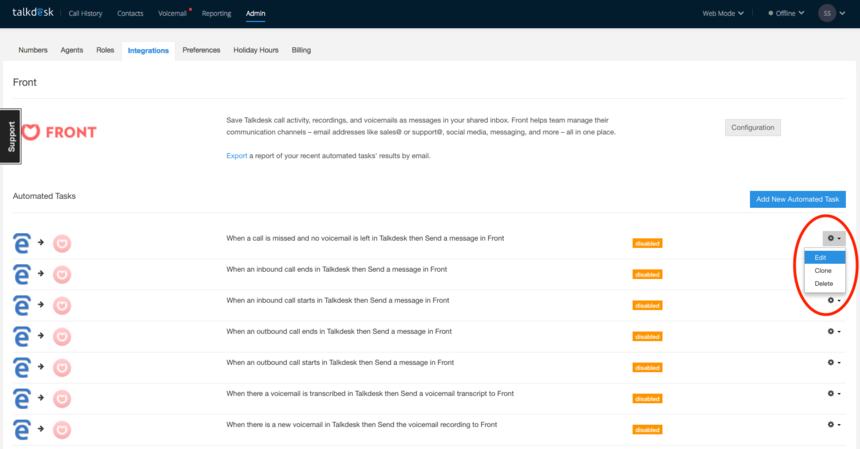
Now, choose what triggers in Talkdesk (like new voicemail available, missed call, etc.) you’d like to generate messages in Front. Find your desired Automated Tasks from the list, click the gear on the far right, and click Edit.
Step 11
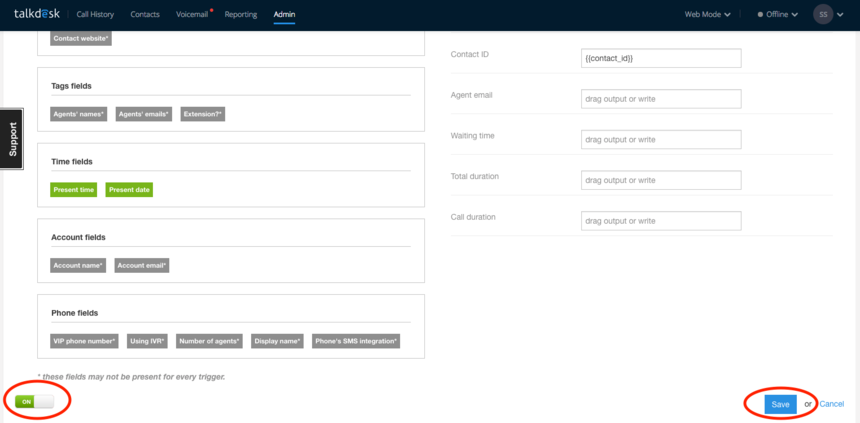
On the next screen, scroll down to the lower left corner, and flip the switch to On. Then click Save.
Step 12
You will see all automations you’ve enabled highlighted in green in the list. To disable them, return to Steps 6 and 7 to turn the switch to Off, and Save.
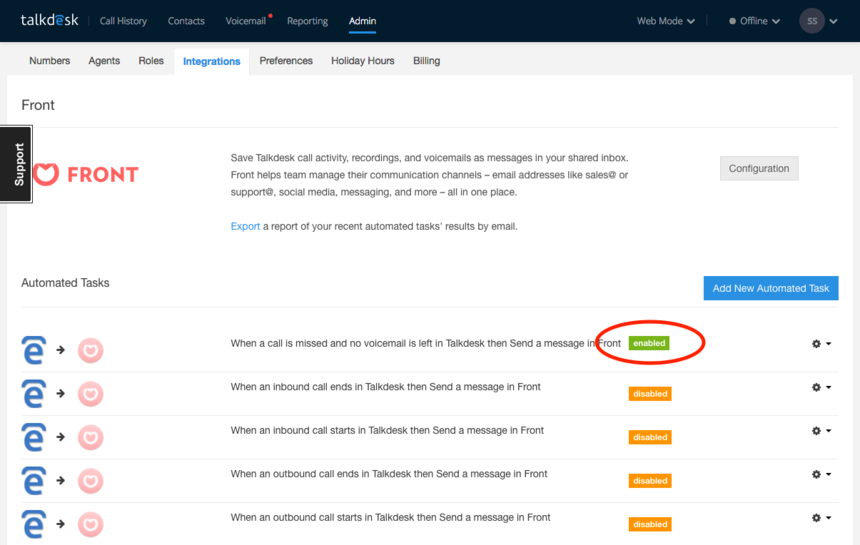
Front supports the following automated tasks in Talkdesk:
When a call is missed and no voicemail is left in Talkdesk then Send a message in Front
When an inbound call ends in Talkdesk then Send a message in Front
When an inbound call starts in Talkdesk then Send a message in Front
When an outbound call ends in Talkdesk then Send a message in Front
When an outbound call starts in Talkdesk then Send a message in Front
When there a voicemail is transcribed in Talkdesk then Send a voicemail transcript to Front
When there is a new voicemail in Talkdesk then Send the voicemail recording to Front
Step 13
Other automation triggers, such as a transferred call is answered or a call is abandoned will not create messages in Front.
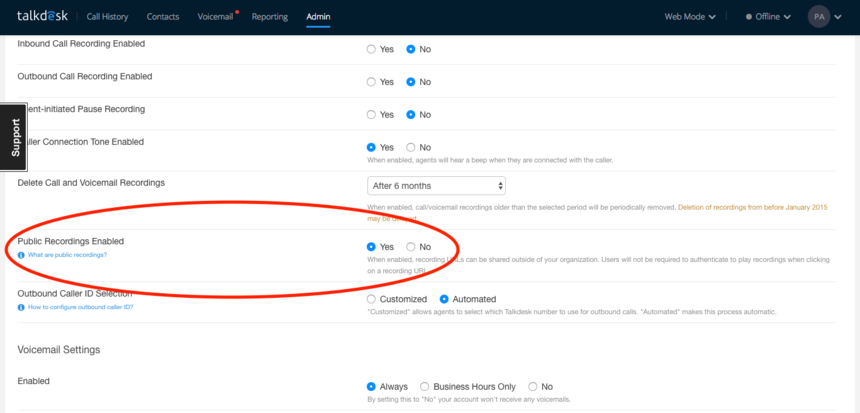
To use the voicemail recording automation, you need to set your Public Recordings Enabled option to Yes in Talkdesk, under your Admin Preferences. If this is set to No, you will not receive voicemail recordings in Front.
Step 14
For any enabled automations, you will begin to see messages arrive in your Talkdesk channel in Front.
All messages related a phone number will be threaded together. The subject of the conversation will dynamically change to reflect the most recent activity. For example, if you've set up both inbound call automations, the conversation subject will be "Talkdesk inbound call started" when the call begins and will change to "Talkdesk inbound call ended" when the call ends.
Part 3: Finish inbox setup in Front
Step 15 (optional)
Configure any additional inbox or channel settings for your inbox.
Set up Click-to-call from Front
With Talkdesk's Callbar app and Click-to-call Chrome extension, you can initiate calls from Front's browser-based web app by clicking on a phone number.
You will need to use Google Chrome as your web browser. This workflow is not yet supported for Safari, Internet Explorer, or other web browsers.
Step 1
Follow Talkdesk's documentation to install Callbar and their Click-to-call Chrome extension, if you haven't already.
Step 2
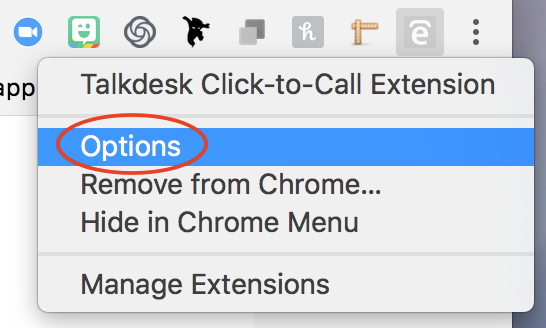
Select Click-to-call in your Chrome extensions menu, and choose Options.
Step 3
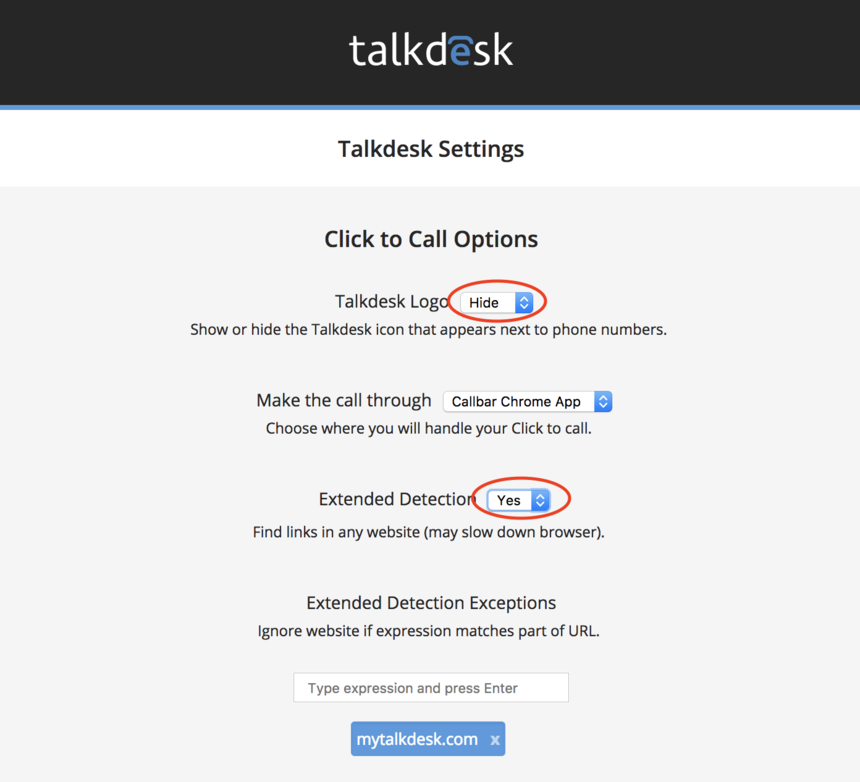
In the Options menu, set the Talkdesk Logo setting to Hide and Extended Detection to Yes.
You will need to change both of these settings for Click-to-call to work with the Front web app. Once you've changed these settings, click Save at the bottom of the page.
Step 4
Open the Talkdesk web app, and make sure Callbar is set to Widget Mode. If not, choose Widget Mode from the dropdown menu.
You can then close the Talkdesk web app.

Step 5
Quit Chrome. Re-start Chrome and log into the Front web app. Make sure the Callbar app is also open, or launch Callbar if it's not.
Step 6
Now, phone numbers that Talkdesk Click-to-call detects will be highlighted blue in Front. Click the number to initiate a call in Callbar.
FAQ
How do calls get assigned to agents?
If an inbound call is assigned to an agent in Talkdesk, it will also be assigned to the same agent in Front. If you’d like to change this, you can create Front rules to automatically unassign conversations.
Do contacts sync between Front and Talkdesk?
Contact sync between Talkdesk and Front is not supported, so you may want to import your contacts or add contacts to Front from Talkdesk manually. See this article for further instructions.
Front will display contact names for call activity from any phone numbers with a matching Front contact.
Pricing
This feature is available on the latest Professional plan or above. Some legacy plans may also have this feature.