How to add existing teammates to existing inboxes
Overview
You may need to edit teammate access to inboxes after you've initially invited the teammate or created the inbox. This article will show you how to add teammates to existing shared inboxes, as well as select additional inbox access for any existing teammate.
You will need to be an admin to make these changes. Additional actions admins can take for teammates are described here.
Instructions
Add teammates to inbox
Use these steps if you have an existing inbox and want to add teammate access for one or more teammates.
Step 1
Click the gear icon and navigate to your workspace settings. Select Inboxes in the sidebar, then click the shared inbox you want to edit.
Step 2
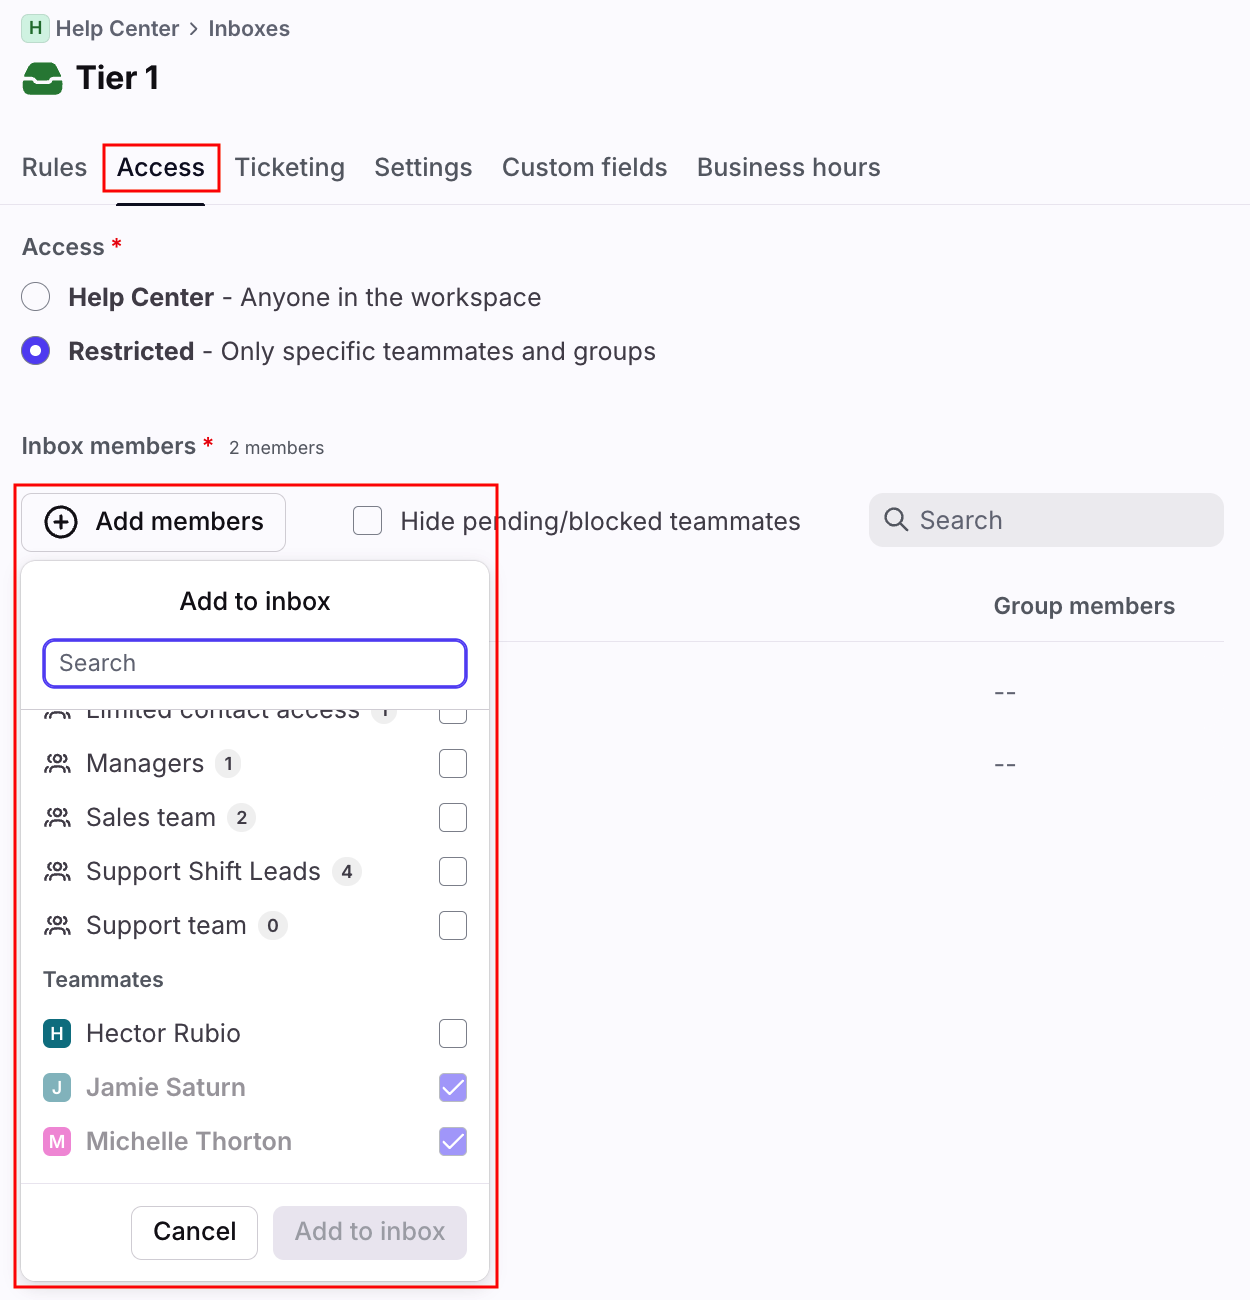
Click the Access tab at the top.
Step 3
Click the Add members button, then check off the teammates names you'd like to grant access to. Click Save when finished.
Grant inbox access to teammate
Use these steps if you have an existing teammate who needs access to multiple shared inboxes.
Step 1
Click the gear icon and navigate to your company or workspace settings. Select Teammates in the left sidebar, then click the teammate you'd like to edit.
Step 2
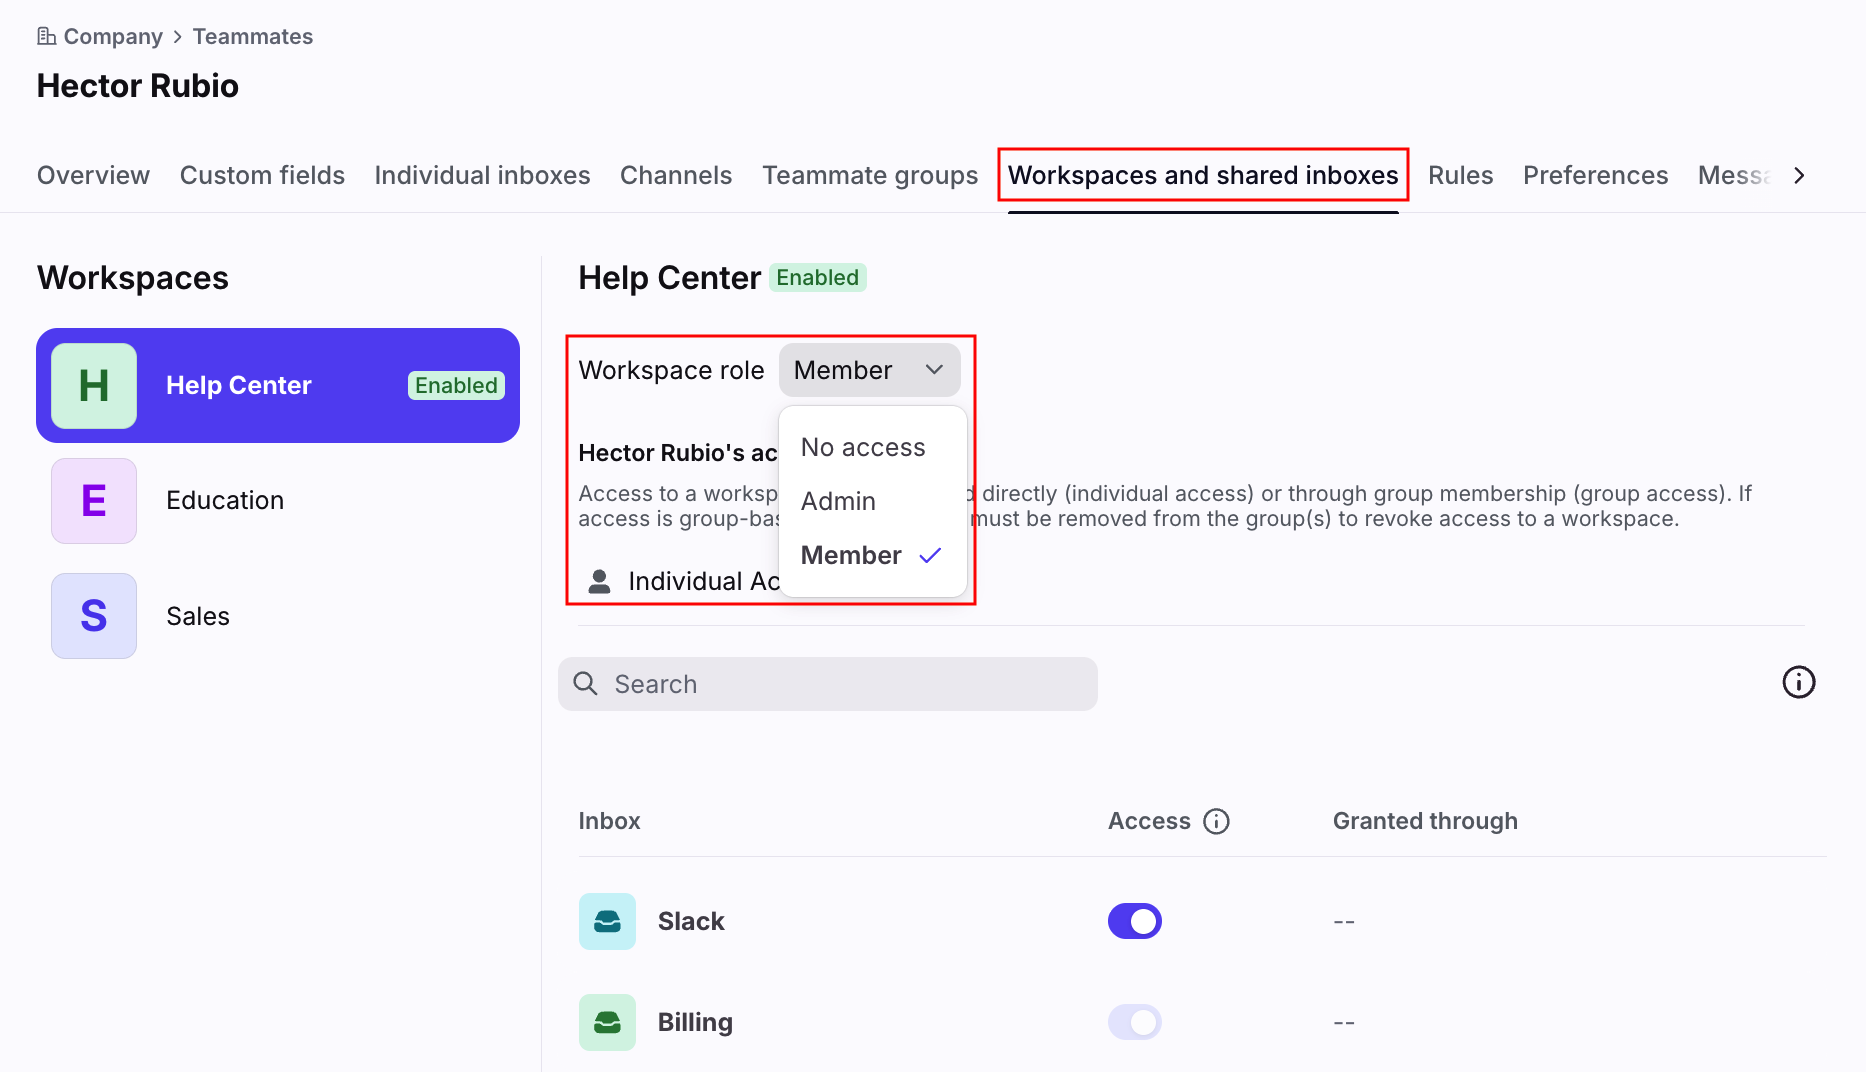
Click the Workspaces and shared inboxes tab. In the workspace view or if you have one workspace, you'll see the tab as Shared inboxes.
Step 3
Select the type of access the teammate needs using the Workspace role dropdown menu.
Under the Access column, toggle on any existing shared inboxes you'd like to grant access to. Click Save when finished.