
How to enable and use the HubSpot integration
Overview
The HubSpot plugin integration in the app switcher allows you to display, create, and edit customer records from your HubSpot CRM that match the open message in Front.
If you are on the Professional plan or above:
You can sync HubSpot contacts or companies into Front. See these articles to learn more:
This integration also includes a library of prebuilt Connectors that give you access to every action available in the HubSpot API. Use them in rules, macros, or chatbots to easily automate HubSpot actions directly from Front, supercharging your workflows without having to write any code.
How it works
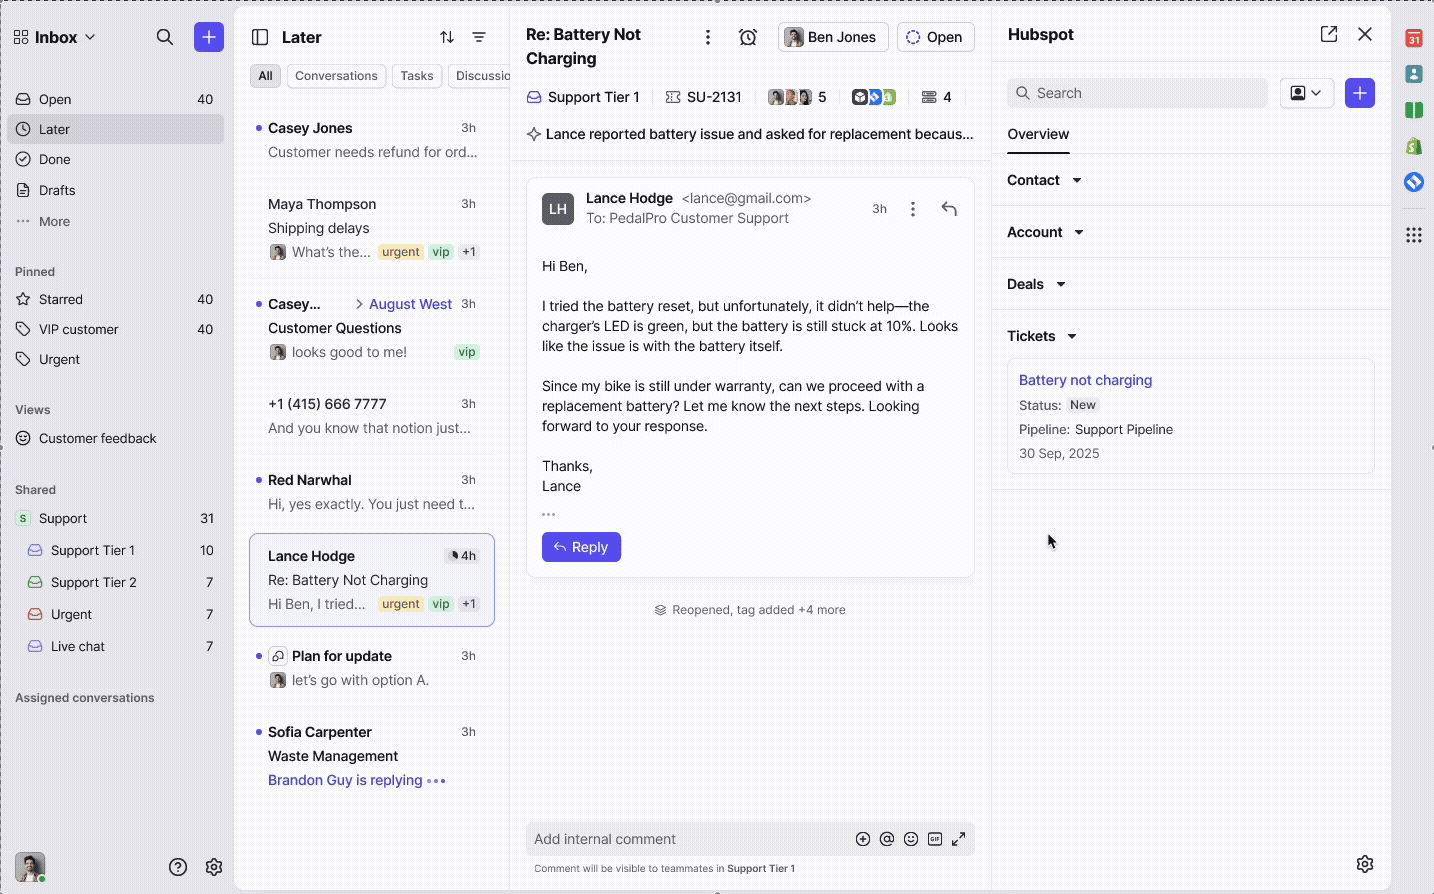
Sidebar integration
If the sender has a matching email or SMS contact in HubSpot, the contact details will be displayed in the HubSpot integration in Front. You can display any default or custom fields for these four default objects in your HubSpot plugin in Front:
Contacts
Companies
Deals
Engagements (notes, tasks, etc.)
Rules
You can also use rules to log messages in HubSpot as activities on the related contact record.
Important to know:
The most recent message body will be logged to the HubSpot contact as an email engagement
SMS messages, tweets, or other message types will not be sent to HubSpot
Instructions
Admin steps
You must have Front company admin permissions to set up the integration. Once enabled, any end user can use the integration's features.
Step 1
Click the gear icon, navigate to company settings, then select App store from the left menu.
Step 2
Select HubSpot from the list of integrations, then click Enable.
Step 3
Once enabled, the HubSpot app detail page will show a Sign in to HubSpot panel on the right side. Click Sign in to authenticate as a HubSpot administrator. A pop-up will appear prompting you to connect your HubSpot account — this step requires HubSpot administrator privileges.

Step 4
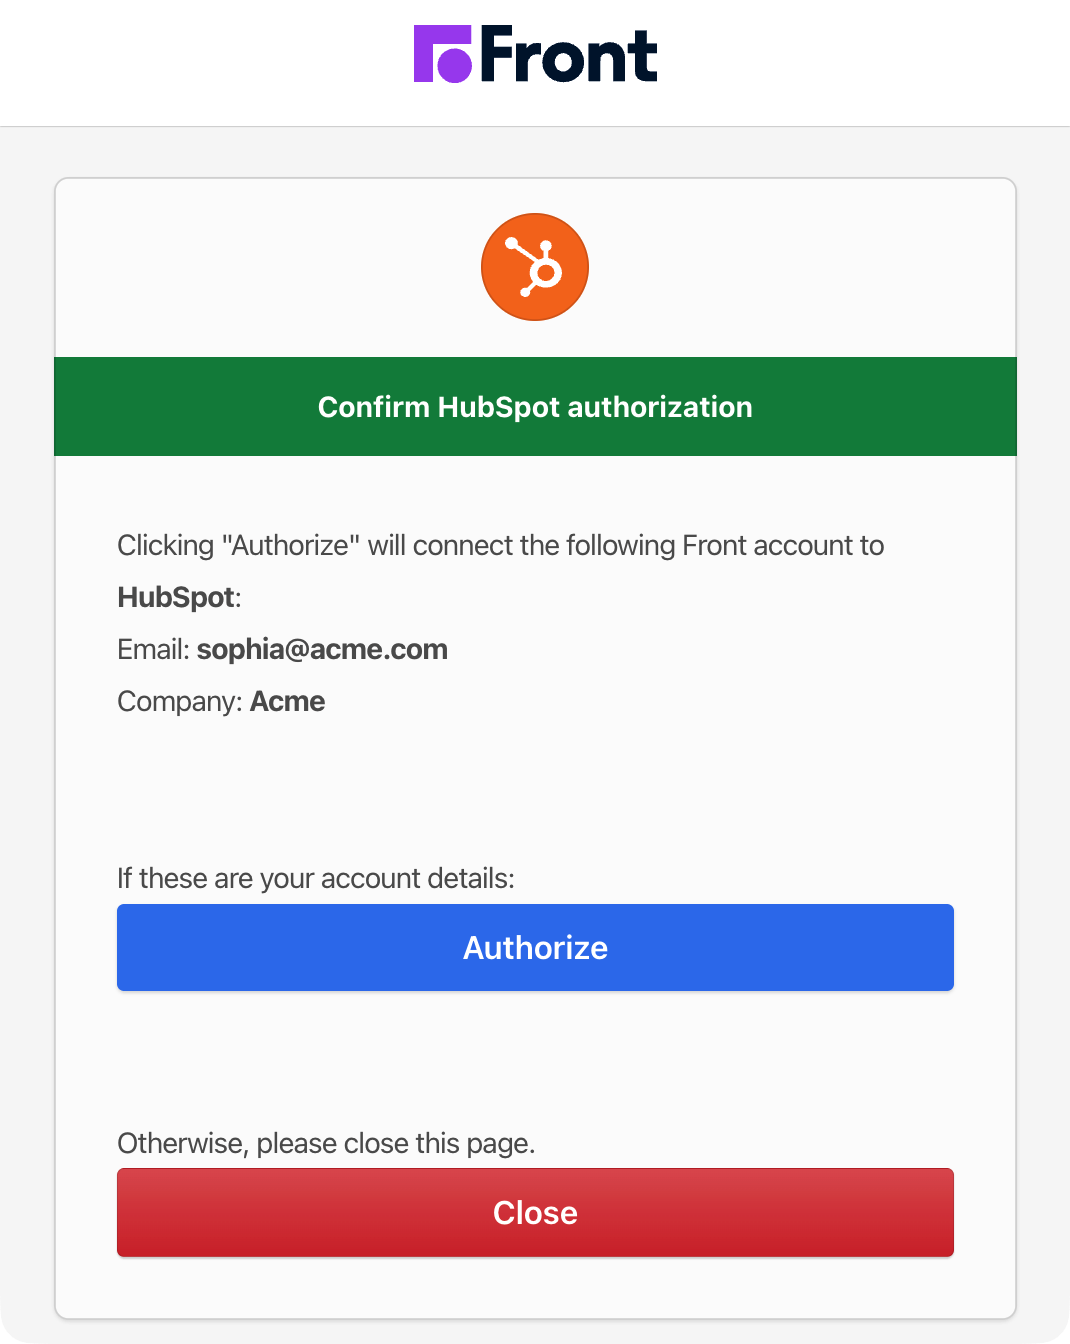
In the pop-up, you’ll see your Front email and company information. Click Authorize.
Step 5
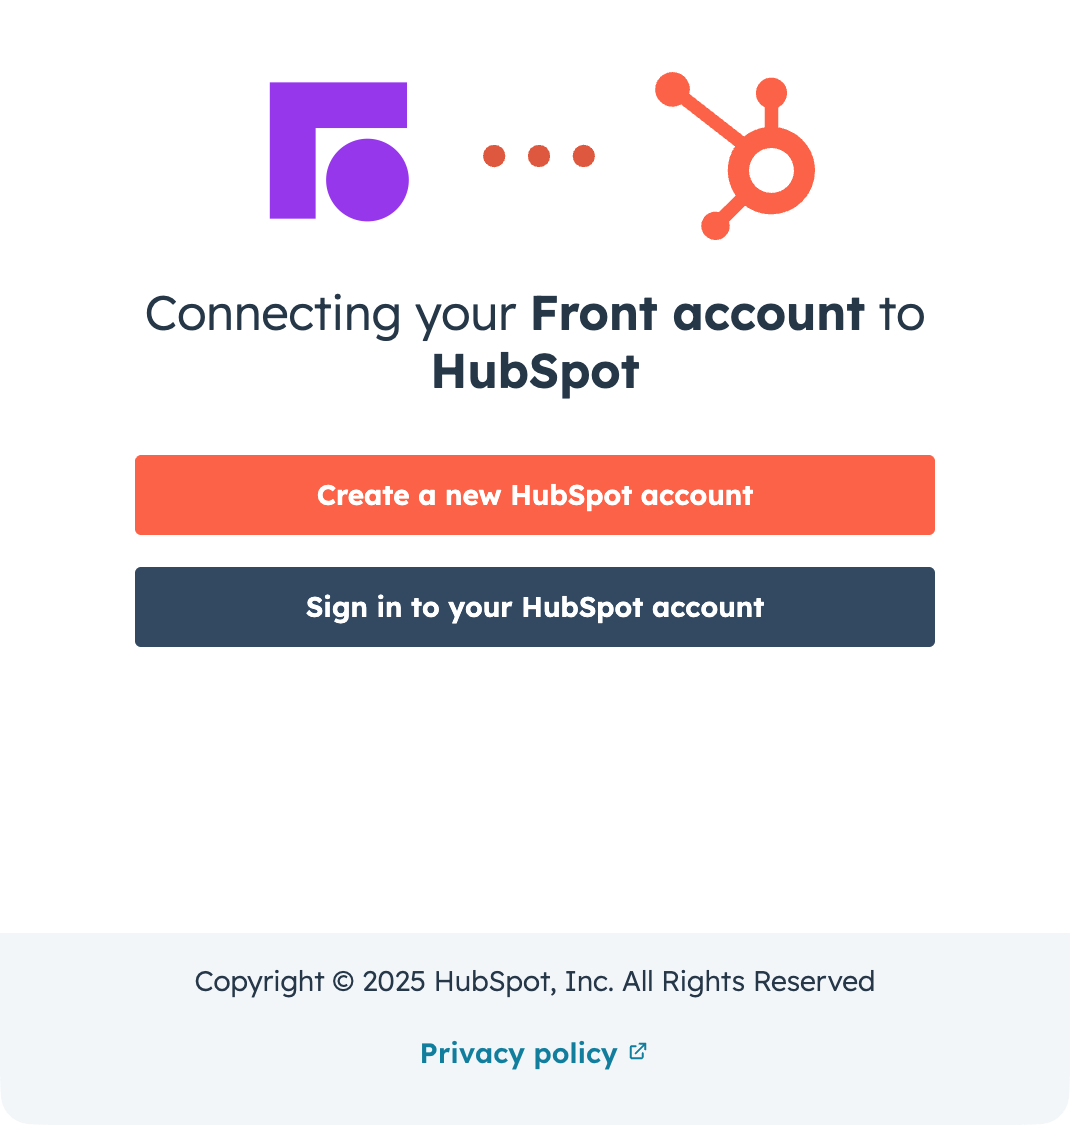
On the next page, click Create a new HubSpot account or Sign in to your HubSpot account.
Enter your HubSpot account login credentials. Once you’ve logged in, you’ll also be asked if you’d like HubSpot to remember your device.
Step 6
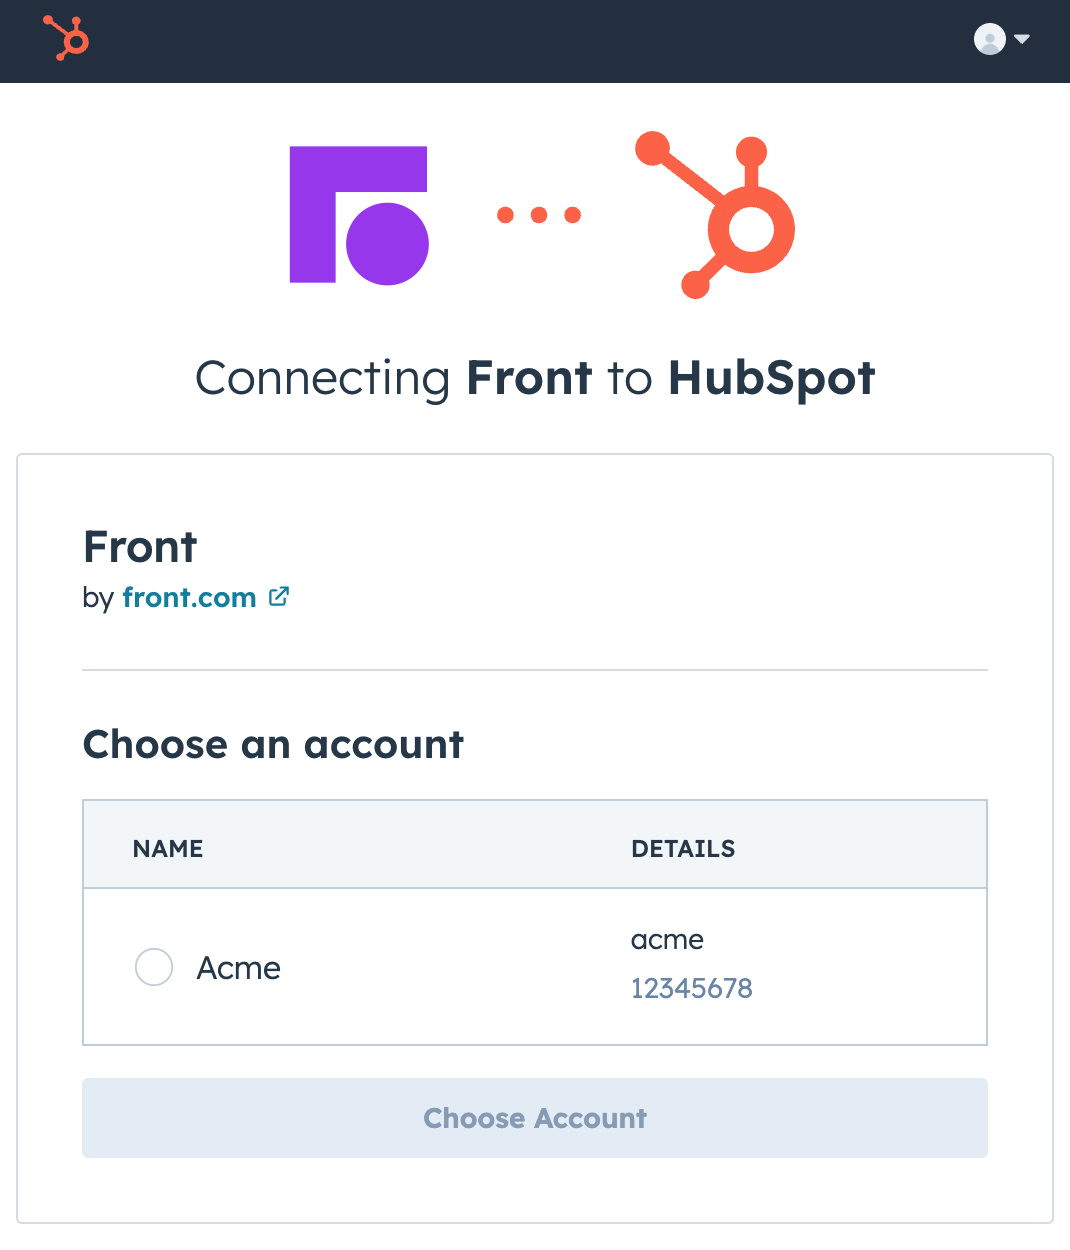
Select the HubSpot account you want to link to Front, then click Choose Account.
Step 7
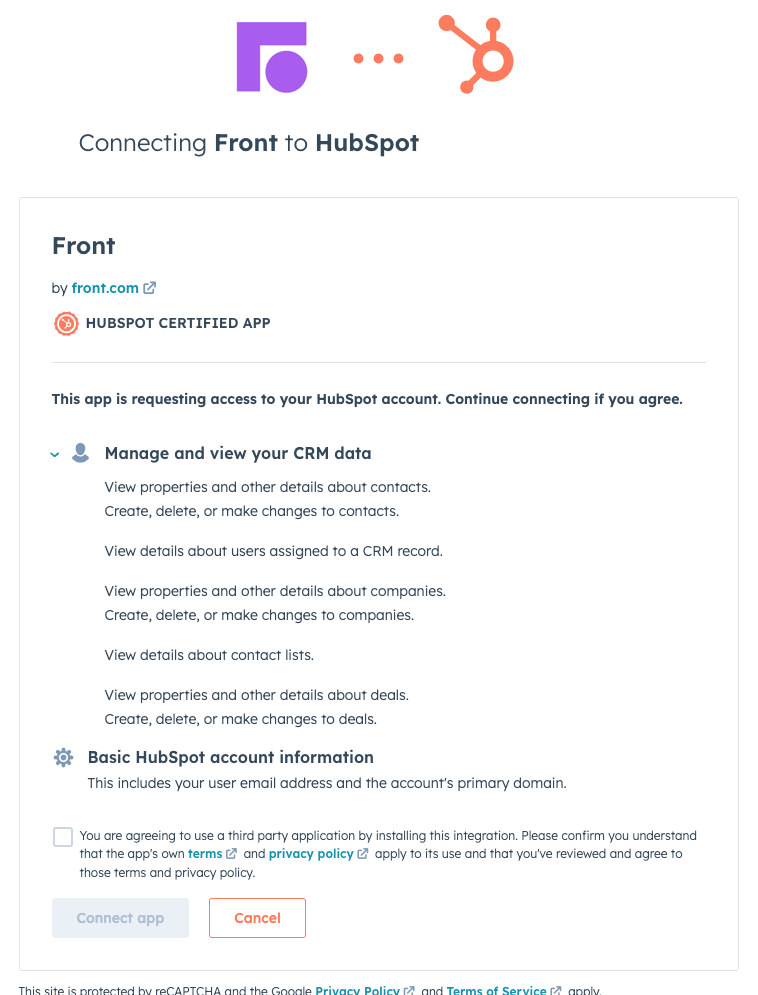
Review the scope approval screen, check the box, then click Connect app.
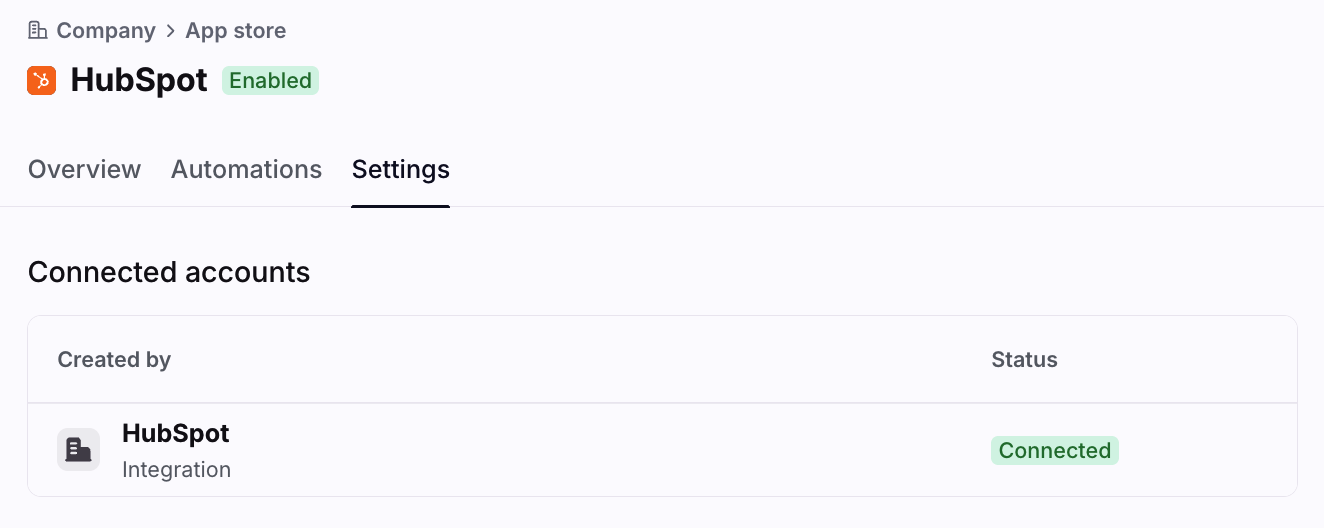
Step 8
When finished, you'll see your company's HubSpot account listed under Connected accounts.
Step 9 (optional)
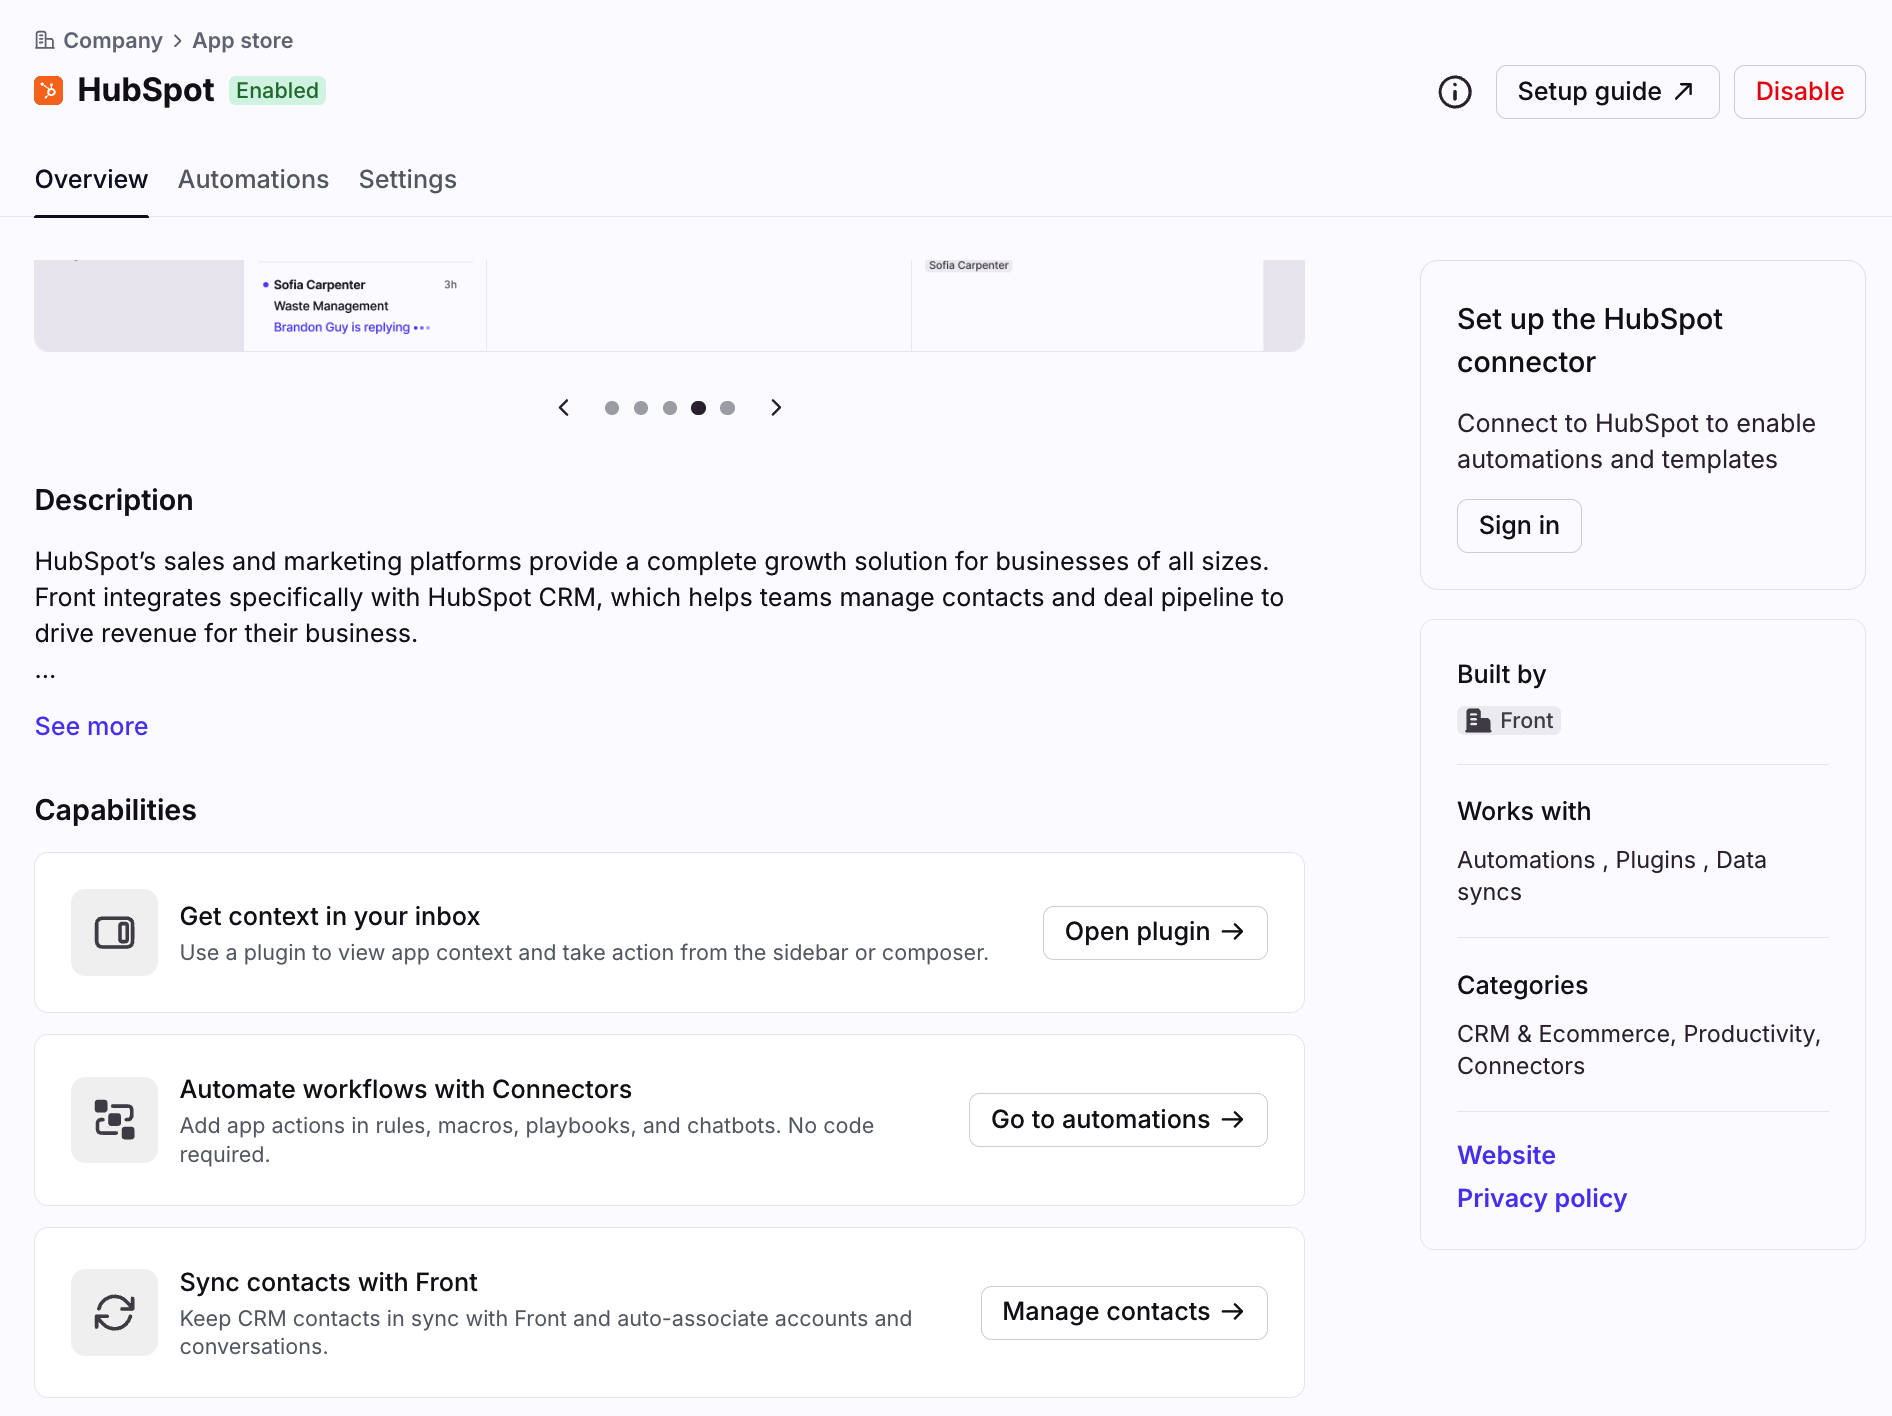
In the Overview tab, use the Capabilities section to navigate to additional settings:
Get context in your inbox: Click Open plugin if you'd like to sign into the plugin immediately.
Automate workflows with Connectors: Click Go to automations to set up HubSpot Connectors, rules, or macros.
Sync contacts with Front: Click Manage contacts to set up the HubSpot contacts sync or HubSpot companies sync.
End-user steps
Step 1
In your inbox view, select the HubSpot icon in the app switcher located in the sidebar on the right of the Front interface.
Step 2
In the plugin, click the Sign in button. A pop-up will appear for you to enter your HubSpot login credentials.
Step 3
Navigate to the Settings tab to choose which fields you want to be shown for standard objects.
To display custom objects, you will need to follow a few additional steps.
Using the integration
Viewing and editing records
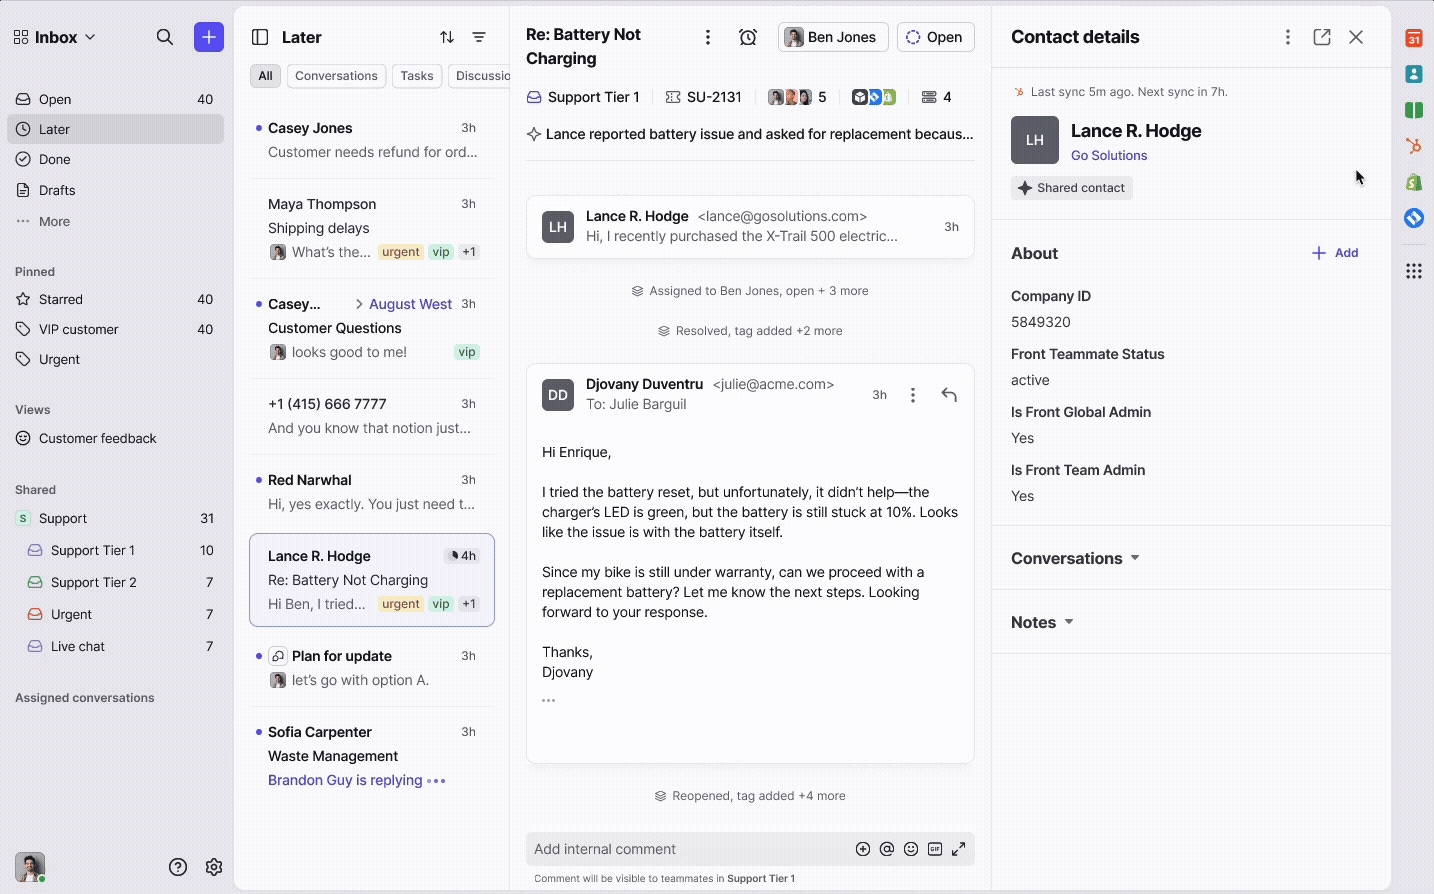
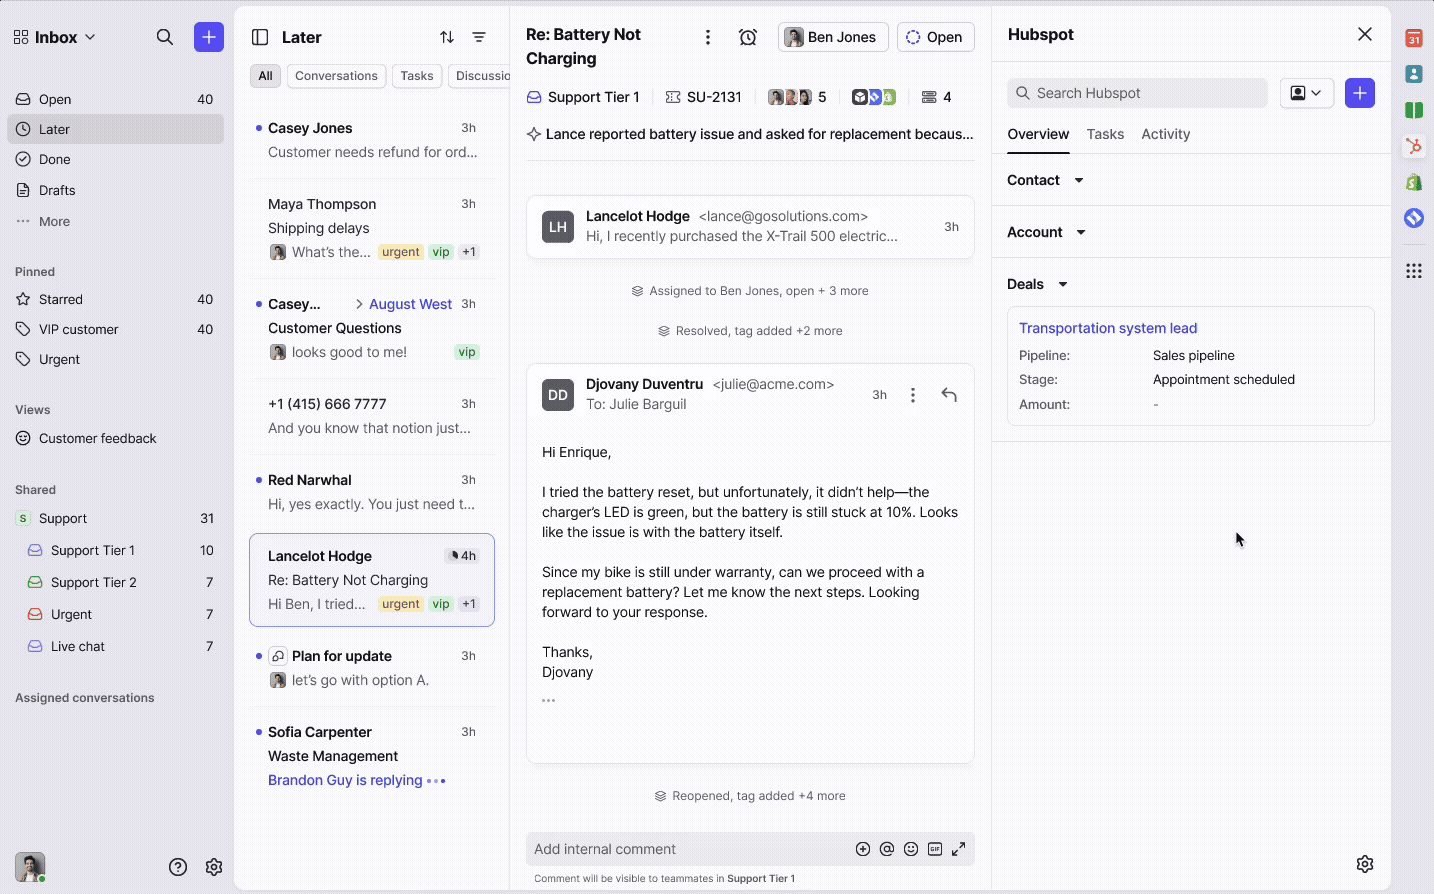
When you open a conversation, the plugin automatically finds related HubSpot records by matching the sender's email or name.
You can view and update information from Contacts, Companies, Deals, Engagements, and related custom objects.
All data is fetched live from HubSpot, and supported fields are editable within Front based on your permissions.
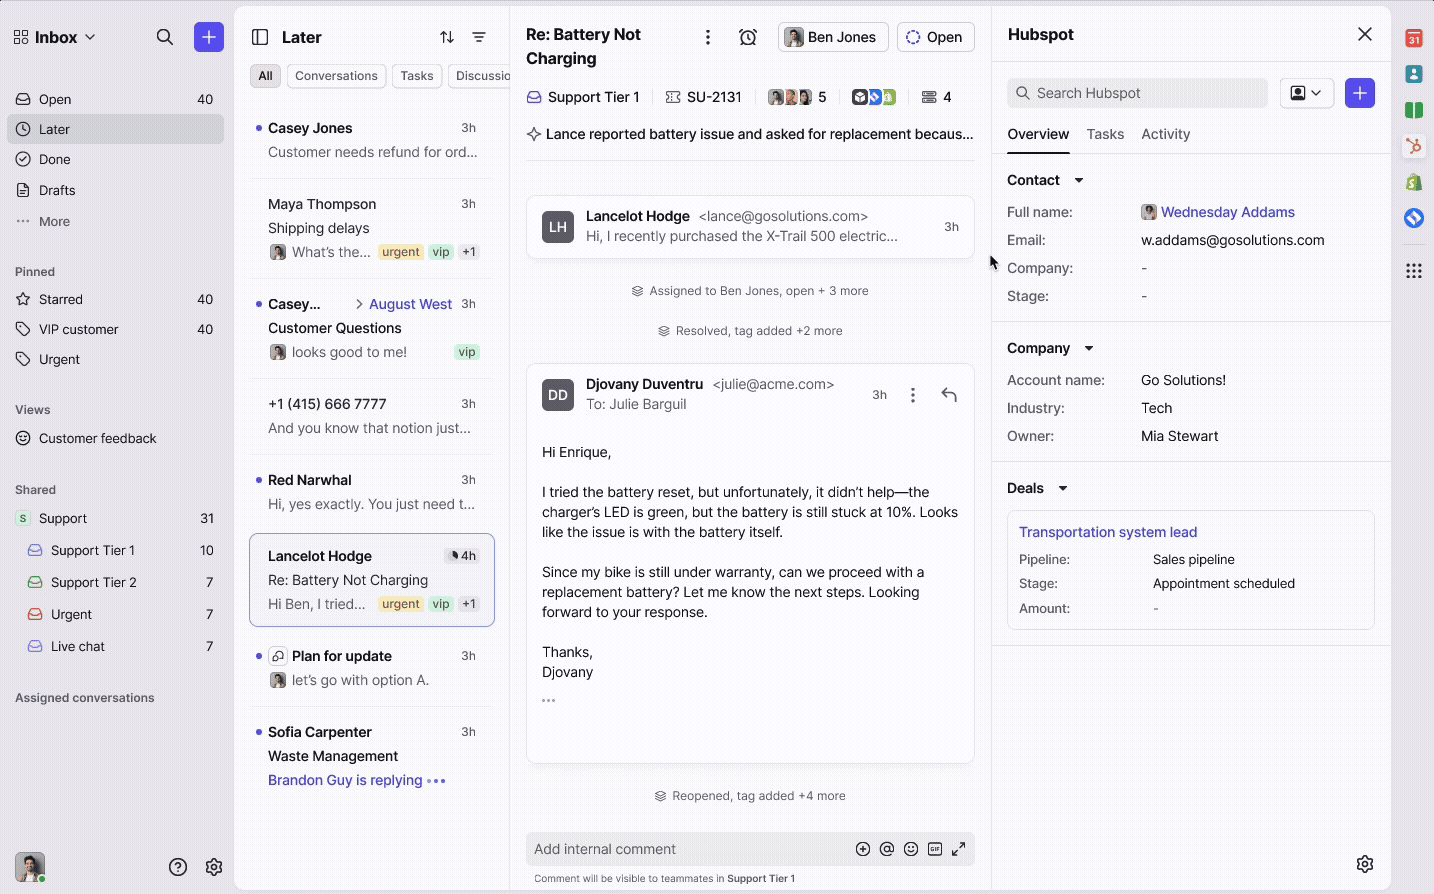
You can also update HubSpot ticket statuses directly from the plugin.
Logging conversations
Use the plugin to log emails directly to HubSpot:
Select which contacts, companies, deals, engagements, or custom objects to log the conversation to.
Choose to log either the most recent message or the full conversation thread.
Optionally assign a HubSpot user as the activity owner.
The plugin will auto-detect all known HubSpot contacts in the conversation and pre-select them for quick logging.
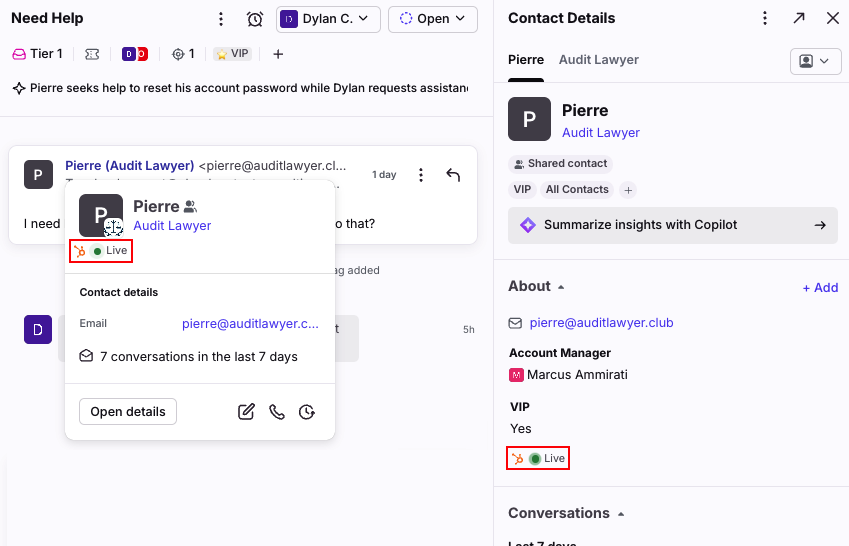
Syncing contact data
Your HubSpot information reflects in Front in real-time, represented by a Live indicator when viewing a contact.
When you make changes in HubSpot, this immediately pulls the latest information into Front. This ensures your contact and account data used throughout Front is always up-to-date.
Custom objects
Custom objects must be related to standard objects (e.g., linked to a Contact or Company) to appear in Front.
You’ll need to configure these relationships in HubSpot and ensure the API user has access.
Once set up, they will show in the plugin and can be used for viewing, editing, or logging.
To refresh schema and display new objects or fields, go to plugin Settings and select Reload custom fields.
Log message in HubSpot rule
You can use the Log message in HubSpot rule action automatically log messages from your Front inboxes into HubSpot.
This rule will run only on email conversations, and it will log the most recent message's body to the HubSpot contact as an email engagement.
Step 1
Click the gear icon, then select workspace or personal settings in the left sidebar, depending on where you want to create your rule.
Step 2
If creating a shared rule, click Rules and macros in the left sidebar, then click Create rule. If creating an individual rule, click Rules in the left sidebar, then click Create rule.
Step 3
Select the Send to HubSpot rule template (shared rules only) or create a rule from scratch.
Step 4
The template will automatically select triggers, conditions, and actions to get you started. You can further customize your rule by selecting specific inboxes, adding additional conditions, and more. Ensure the action Log message in HubSpot is included in your rule.
If there is no HubSpot contact related to the message, the message will not be logged.

Step 5
Click Create to save your rule.
Disconnecting HubSpot from Front
Use the following steps to unlink your HubSpot account from Front.
You can do this to log into a different HubSpot instance, or if you plan to disable the integration for your company.
Disconnecting your account will not affect your HubSpot accounts and data.
Step 1
Click the gear icon, navigate to company settings, then select App store from the left menu.
Step 2
Select HubSpot from the list of integrations. Click the Settings tab, click the three-dot menu next to your connected account, and click Disconnect account.
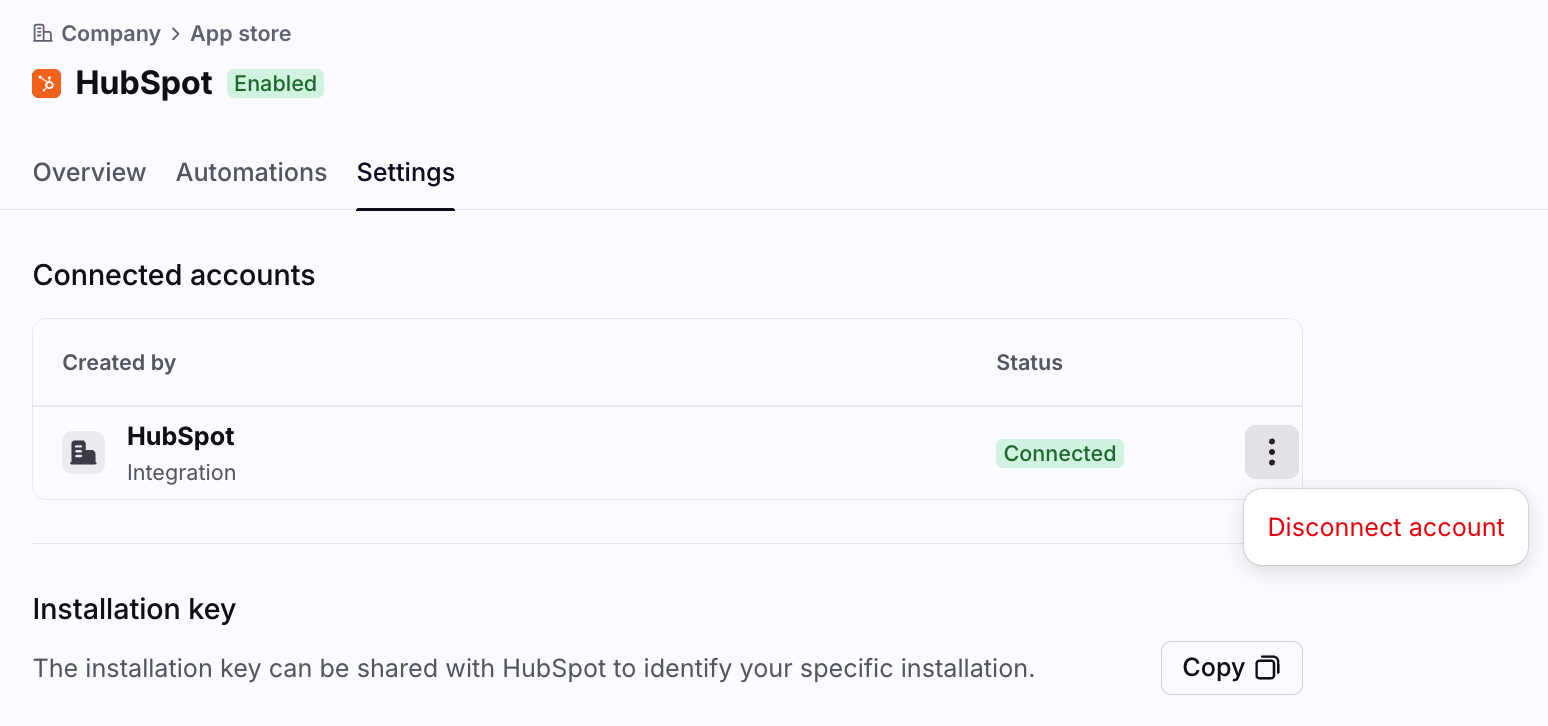
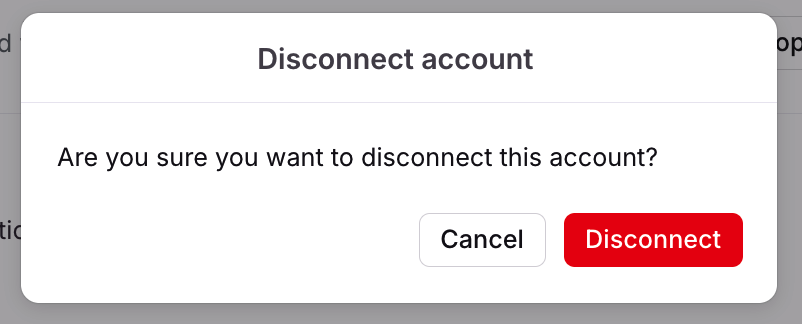
Step 3
A pop-up will appear. Click Disconnect to confirm.
Step 4
Your HubSpot account is now disconnected from Front.
Disabling the integration
Use the following steps to disable the integration for your company.
Disabling the integration does not disconnect your HubSpot account from Front. If you need to disconnect your account, see the steps above.
End users will no longer be able to access the sidebar plugin.
Any existing rules using the HubSpot rule action will stop working.
Disabling the integration will not affect your HubSpot accounts and data.
Step 1
Click the gear icon, navigate to company settings, then select App store from the left menu.
Step 2
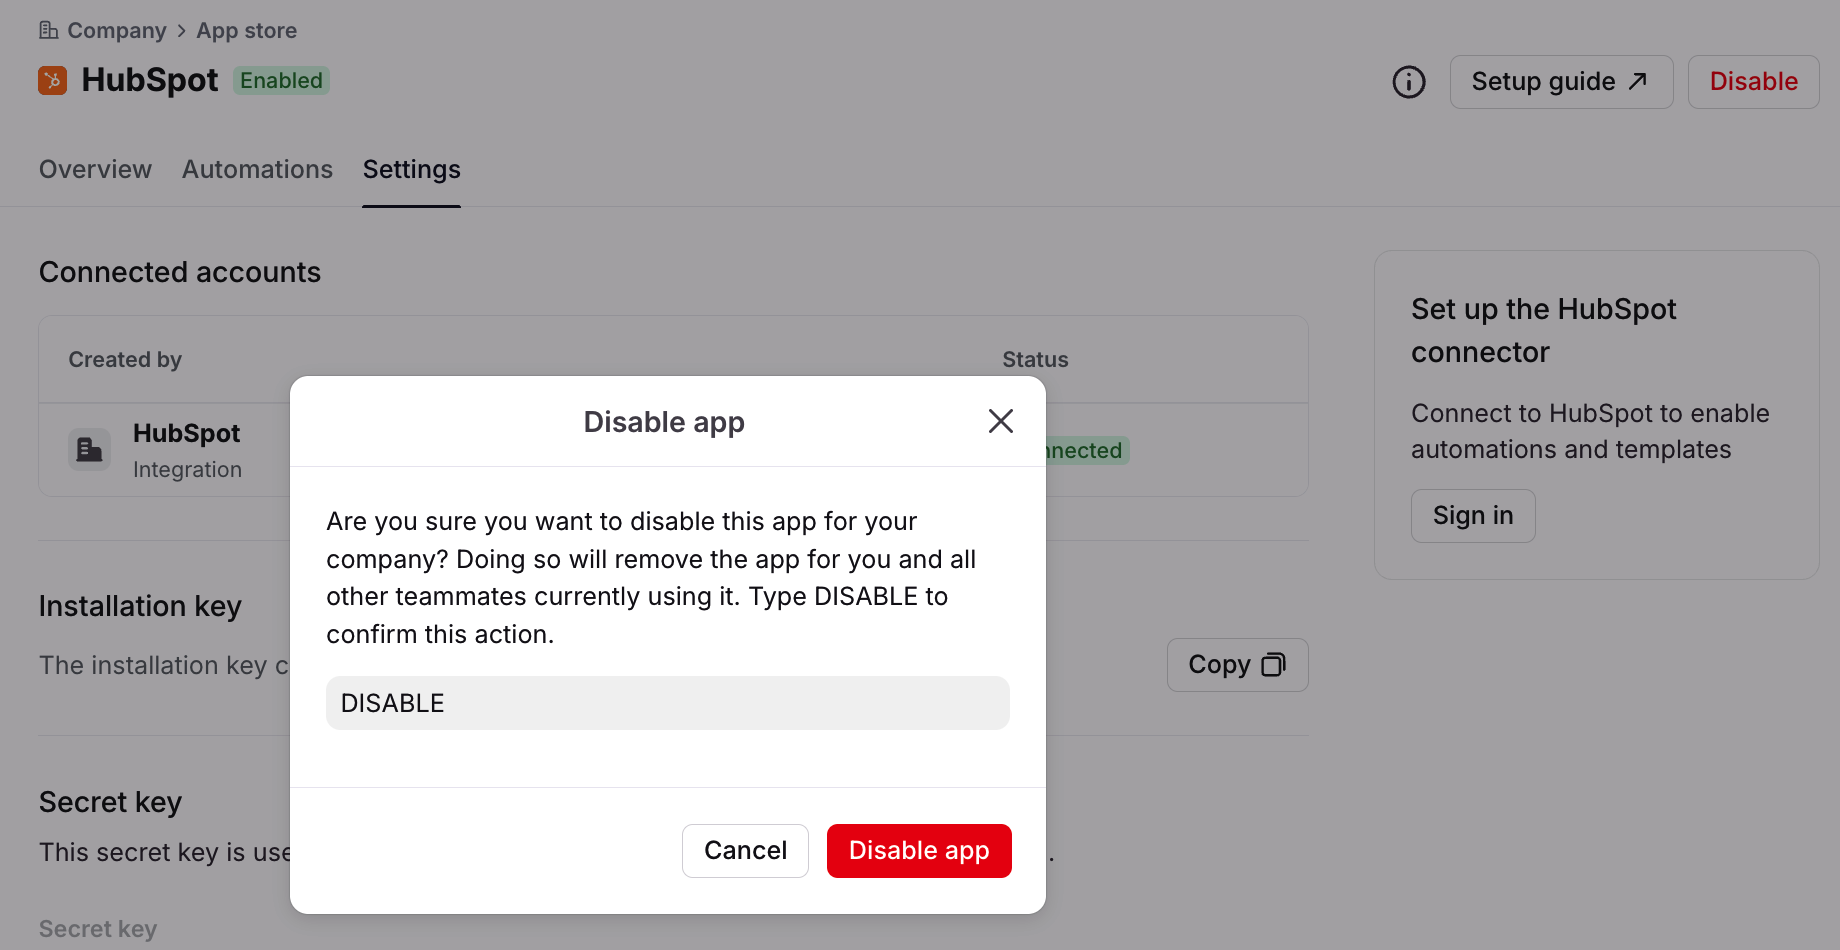
Select HubSpot from the list of integrations, then click Disable.
Step 3
A pop-up will appear. Type “DISABLE” in the text field, then click Disable app to confirm.
Step 4
The Enabled indicator will be removed from the HubSpot integration.
FAQ
What does this permissions error mean?
Users may receive an error that they do not have sufficient permissions to log in to the HubSpot integration in Front. Example error messages:
Request for integration permissions: You do not have the correct role to grant these permissions. Please contact your administrator.
Couldn't complete the connection: Authorization failed because you don't have permissions to authorize the scopes required by the app. Please contact your super admin to get the necessary permissions.
To resolve the error, a HubSpot admin must enable the following HubSpot permissions for users:
Read & write access (view and edit): Contacts, Companies, Deals
Read-only access (view only): Marketing - Lists
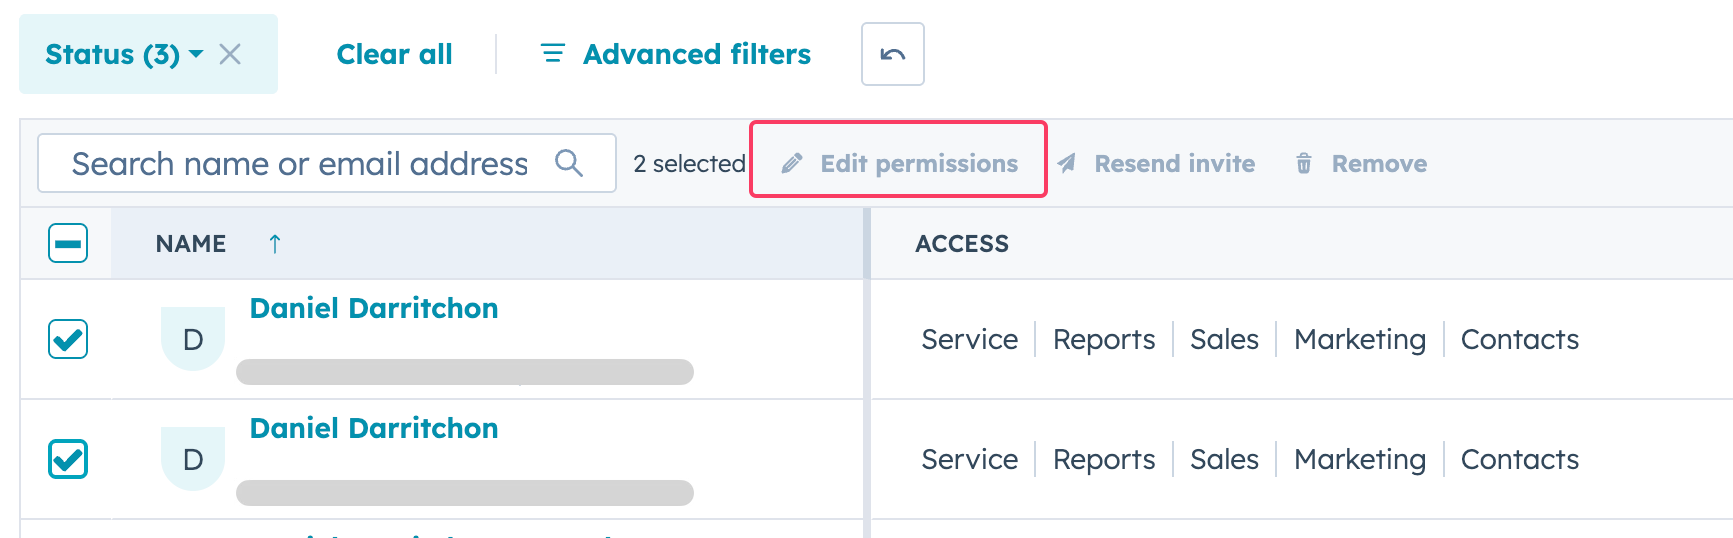
What permissions do I need to enable HubSpot ticketing?
Due to a HubSpot limitation, users must have the “Edit property settings” permission enabled in order to use HubSpot ticketing via the Front integration.
To grant this permission:
Go to your user access settings in HubSpot.
Select the users you want to update.
Click Edit permissions.
Enable Edit property settings in the access configuration.

You can update this permission in bulk by selecting multiple users before editing their permissions.
How do I associate logged messages with other HubSpot objects?
To enable automatic associations between logged messages and deals, companies, or other, you can enable automatic associations in your HubSpot settings and then create a Front rule with the Log message in HubSpot action.
Does the rule work with all triggers?
No. Rules with the action Log message in HubSpot work with specific When triggers. The compatible When triggers are:
Inbound message is received
Outbound message is sent (new conversation)
Outbound reply is sent (existing conversation)
New comment is added
Teammate is mentioned
Tag is added
Does the integration populate the Activity assigned to property?
We don't populate the Activity assigned to property, so activities will show as unassigned in HubSpot. We only populate Activity Created By, and that would log to the user who enabled the HubSpot integration in Front.
Pricing
The HubSpot plugin integration is available on all plans. The HubSpot Connector, contacts sync, and accounts sync are available on the Professional plan or above.