
Configuring Google Workspace accounts to send via Gmail SMTP Relay
Overview
You can connect Google Workspace user accounts to Front, and send outbound email via Gmail’s SMTP Relay in order to access higher daily sending limits for your Gmail channels (see Google’s article on sending limits for the SMTP relay service for more details).
When to consider implementing this configuration
Typical email usage will not require the higher sending limits that Gmail offers with the SMTP Relay, however if you are receiving errors such as 550 5.4.5 Daily user sending quota exceeded due to exceeding your Gmail sending limits, this is an approach you may want to consider.
Gmail also recommends using the SMTP relay service to filter messages for spam and viruses before they reach external contacts. You can also apply Google Workspace email security and advanced Gmail settings to outgoing messages.
Requirements
Any teammate who needs to configure their mail in this way must:
Connect that Gmail to Front as a Google Workspace account (see How to add a Gmail inbox to Front for instructions)
Have 2-Step Verification enabled on their Google account
For Google Administrators - see Google’s Set up 2-Step Verification article for information on enabling 2-Step Verification for your organization
For teammates - see Google’s Turn on 2-Step Verification article for instructions on how to set up Google 2-Step Verification for your Google account
Instructions
Step 1
Start by ensuring that 2-Step Verification is enabled for the Google account you are configuring.
Step 2
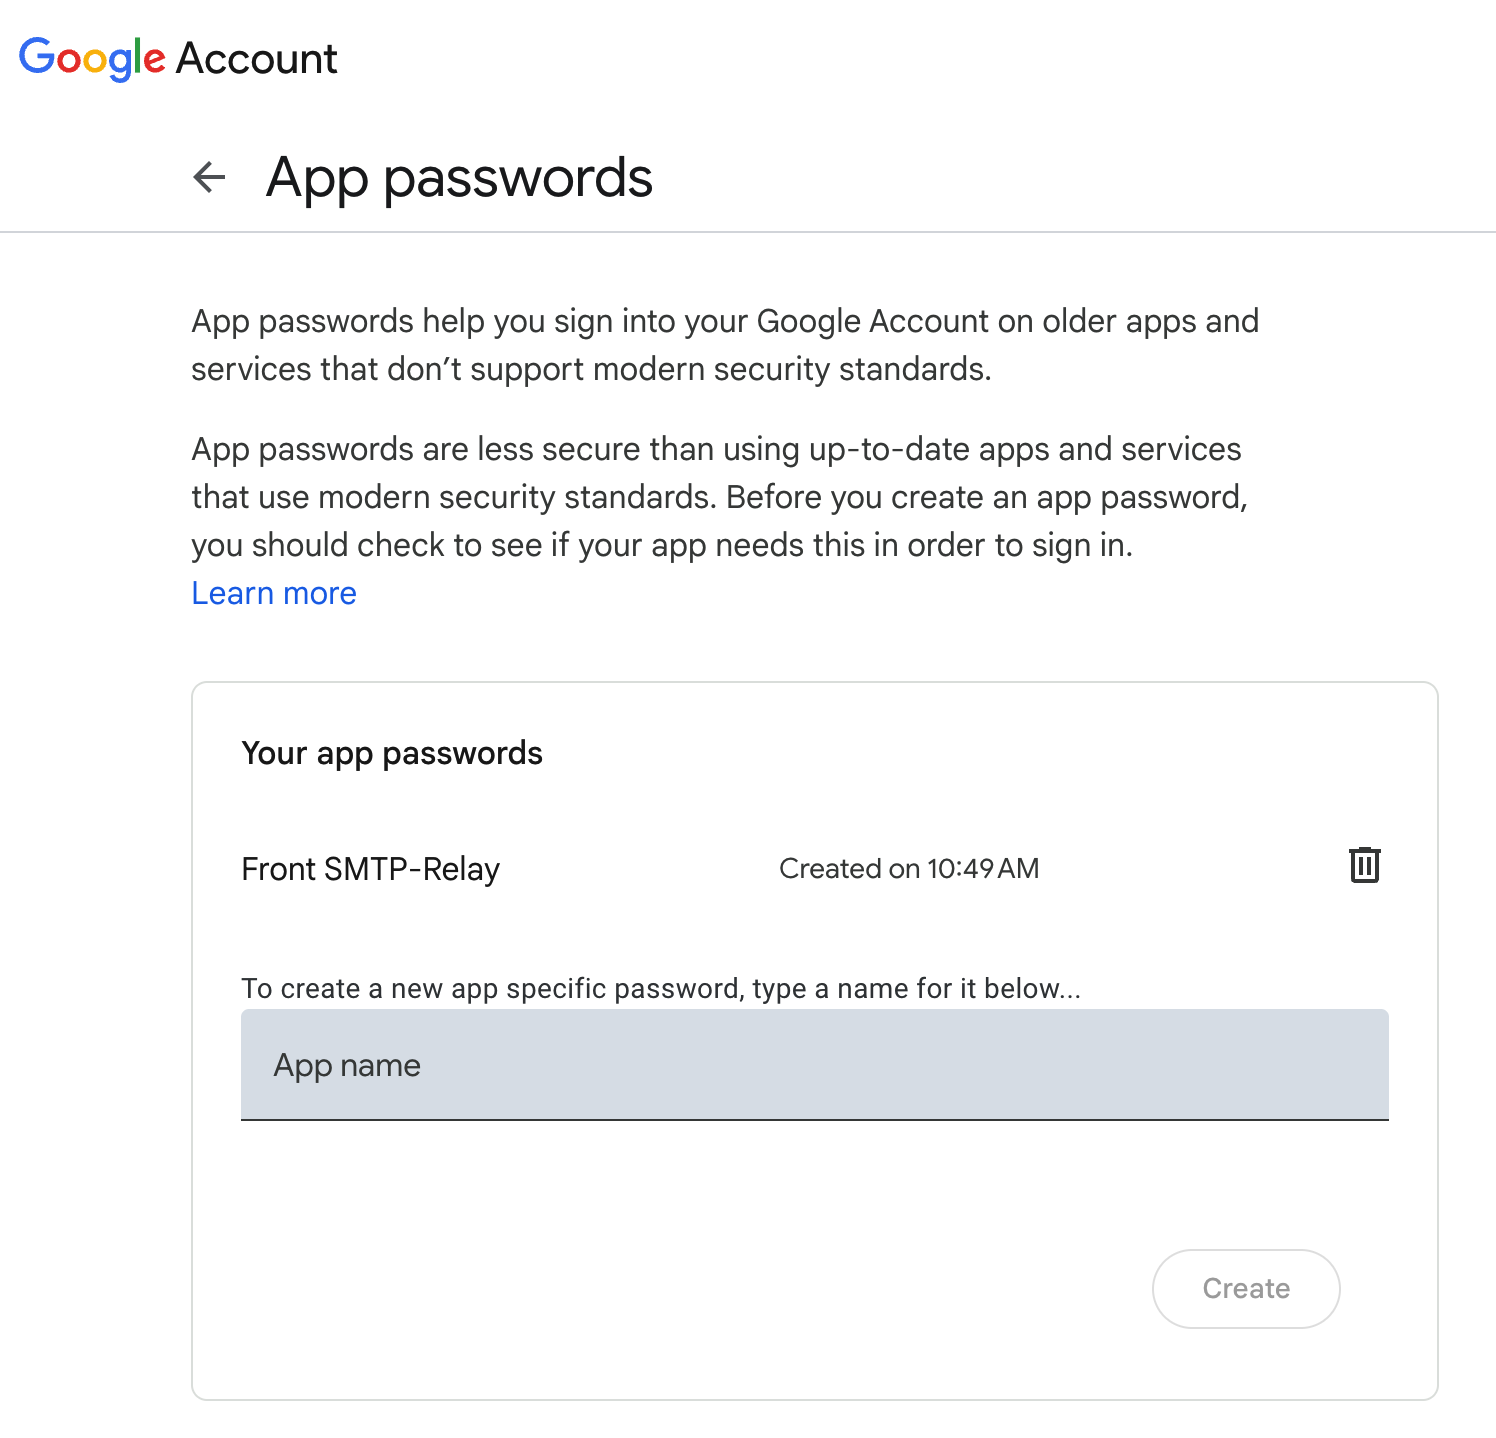
Create an app password for this Google account. See Google’s instructions on how to Sign in with app passwords on how to create these passwords.
For example, you can enter a name like "Front SMTP-Relay". Click Create.
Step 3
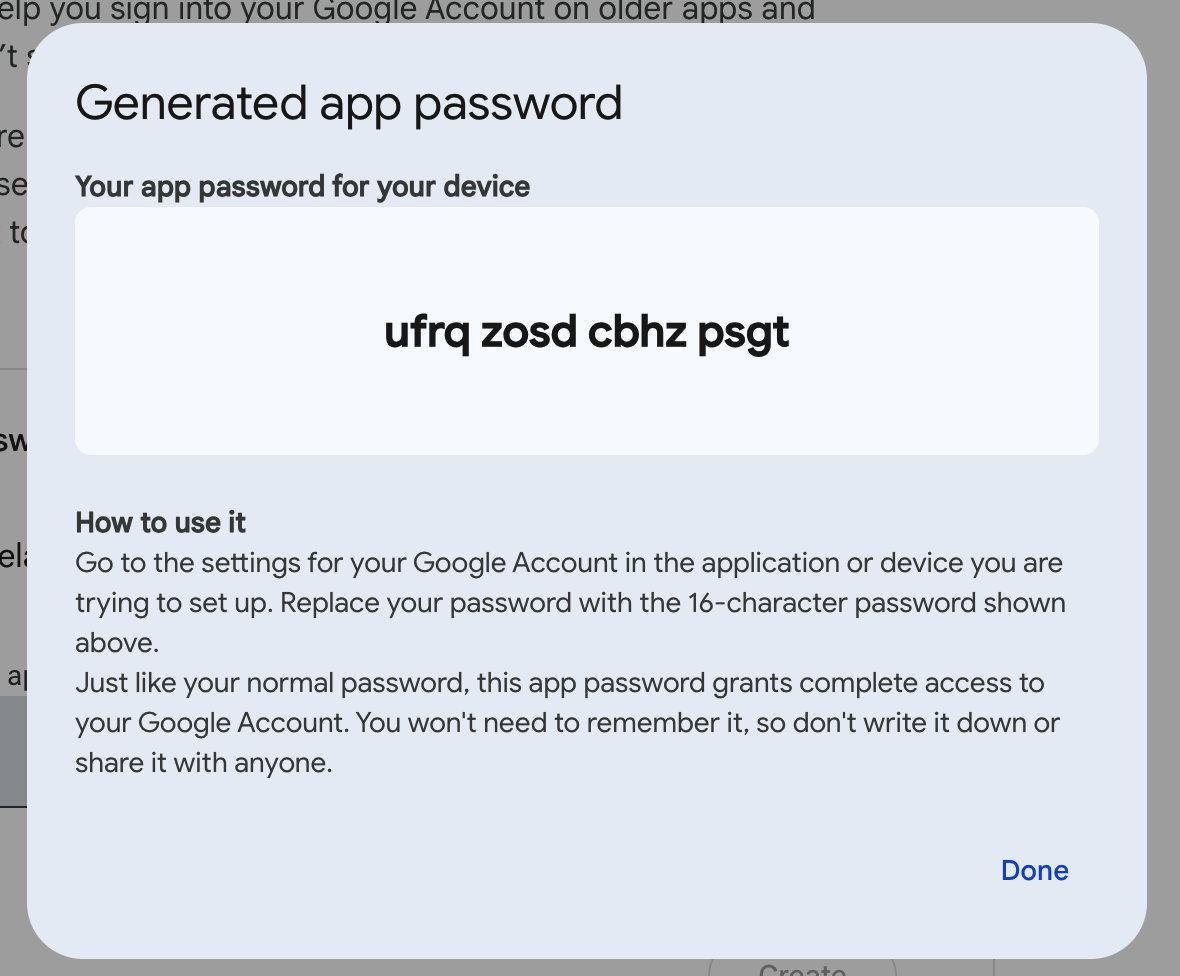
Copy the app password that is generated.
Step 4
Now you’ve created that password, head over to your Front settings.
Step 5
If you've already connected that Google Workspace account in Front, go to the channel settings for your existing inbox.
If not, then follow our How to add a Gmail inbox to Front instructions to connect the account before proceeding to the next step.
Step 6
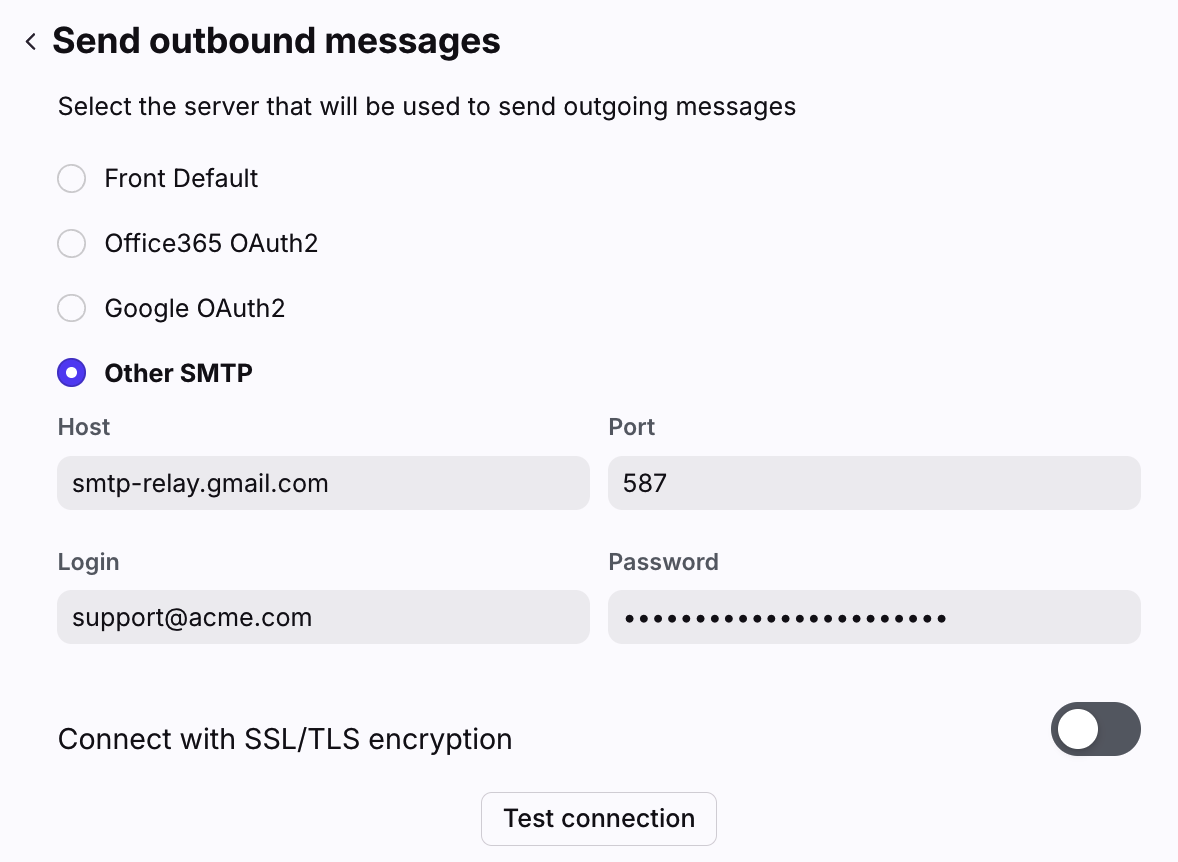
In the channel's Settings tab, navigate to the Send Outbound Messages setting, then click Modify.
Select Other SMTP and fill in the following fields:
Host: smtp-relay.gmail.com
Port: 587
Login: The email address of this Gmail account
Password: The Google app password you generated earlier
Step 7
Click the Test connection button. You'll see a Connection Successful message when set up correctly.
Step 8
Click Save when finished.
Step 9
That’s it! Test sending and receiving emails via that channel, to ensure everything is working as expected. Feel free to contact us if you have any questions, or these settings aren’t working as expected.
Troubleshooting
If after following the steps listed above you are experiencing sending errors, we suggest checking your Google Workspace account does not restrict the IPs which outbound mail can be sent from. If this is the case, you may need to lift these restrictions, or configure a sending policy to ensure mail can be sent via the SMTP relay.
Refer to Gmail's SMTP relay service error messages documentation for full details.