
How to create a linear rule from scratch
Overview
Rules save you time by automating repetitive processes. More information about understanding shared and individual rules can be found in the Understanding rules article.
See this article for a full list of rule triggers, conditions, and actions. For more examples of popular rules and templates, check out our rule library.
Instructions
Step 1
Click the gear icon, then navigate to company, workspace, or personal settings in the left sidebar, depending on the space you’re working with. Select Rules and macros or Rules from the left menu, depending on your view.
For a company rule, which could apply to all individual inboxes and shared inboxes, follow this guide.
In this example, we'll create a workspace rule.
Step 2
Click Create rule, then select Create linear rule.
Step 3
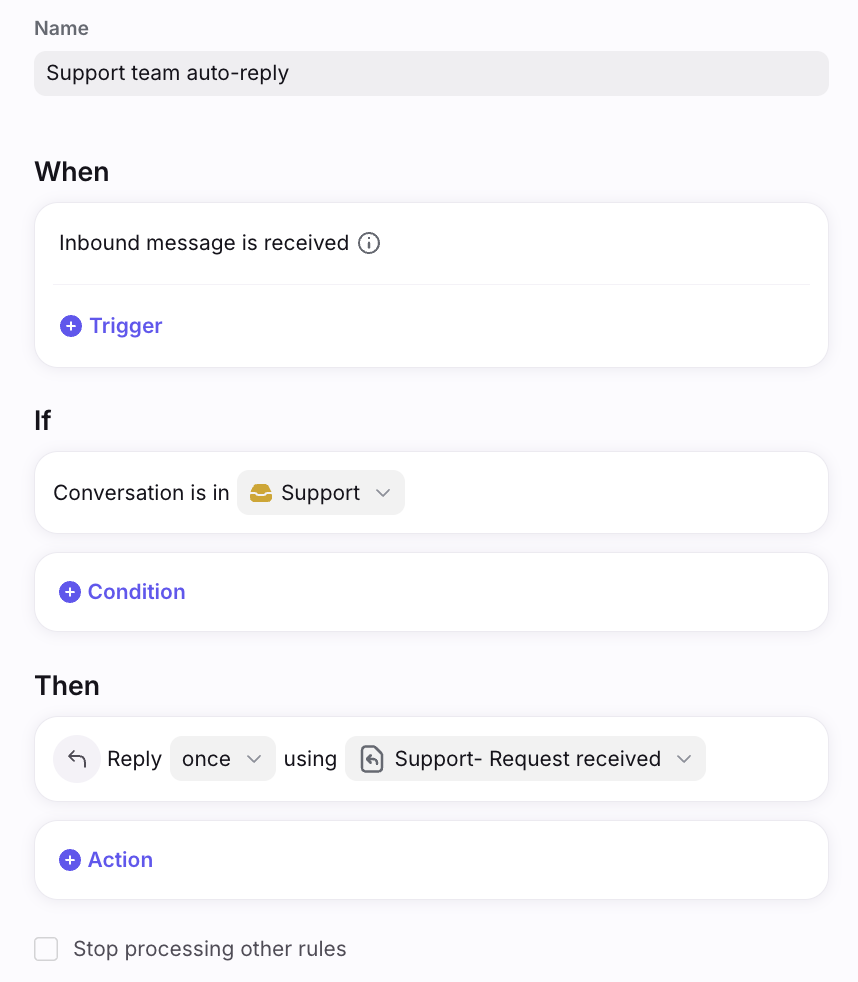
Give your rule a name, then adjust the triggers, conditions, and actions to customize the rule to your needs. The possibilities are endless for you to automate actions in your inboxes!
In this example, we are setting up an auto-reply to be sent after we receive a support inquiry. This rule states that an inbound message into the Help inbox will be automatically replied with the message template Request received. See this article for an in-depth guide on setting up auto-replies.
Step 4
Once your rule is complete, click Create.
Rule templates
Front has rule templates to help teams discover and create rules in a few simple clicks. Use our rule library to quickly create and build rules for your team. See this article to learn more.
Pricing
Rules are available on all plans. See this article to review triggers, conditions, and actions included in each plan.