
Account plans
Overview
Account plans allow Account Managers and Customer Success Managers to easily coordinate onboarding, renewals, expansion initiatives, and other core workflows directly in a Front account. Rather than managing disconnected spreadsheets and tasks, teams can execute account operation tasks and monitor real-time progress all in one location. This allows teams to establish consistent account processes, helps guarantee milestones are achieved during key lifecycle stages, and real-time visibility empowers leaders to promptly spot roadblocks to step in and assist.
Prerequisites
You’ve added accounts to Front’s Accounts Manager
Create plans from scratch or use plan templates: You must have permission to access the Accounts Manager
Create and manage plan templates: You must have company admins permissions, or the Templates - Create and edit permission via teammate groups
How it works
When viewing plans in the Accounts Manager, you’ll see plan steps (using Front’s tasks feature), and the status of every task in the plan. Resolving/archiving tasks moves the plan forward, which updates the plan’s percent completion.
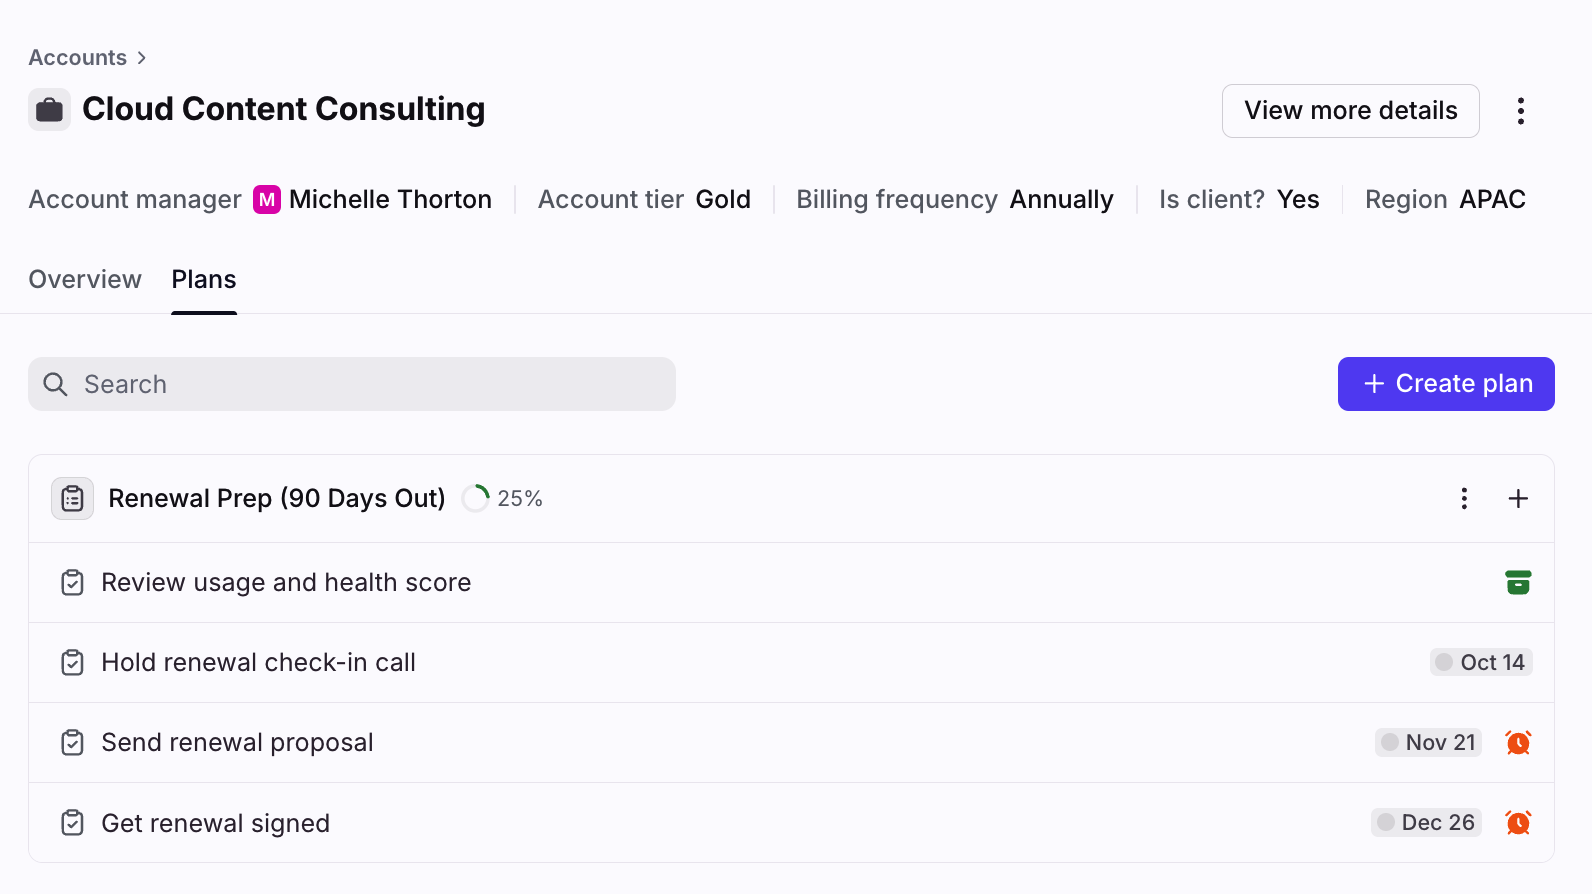
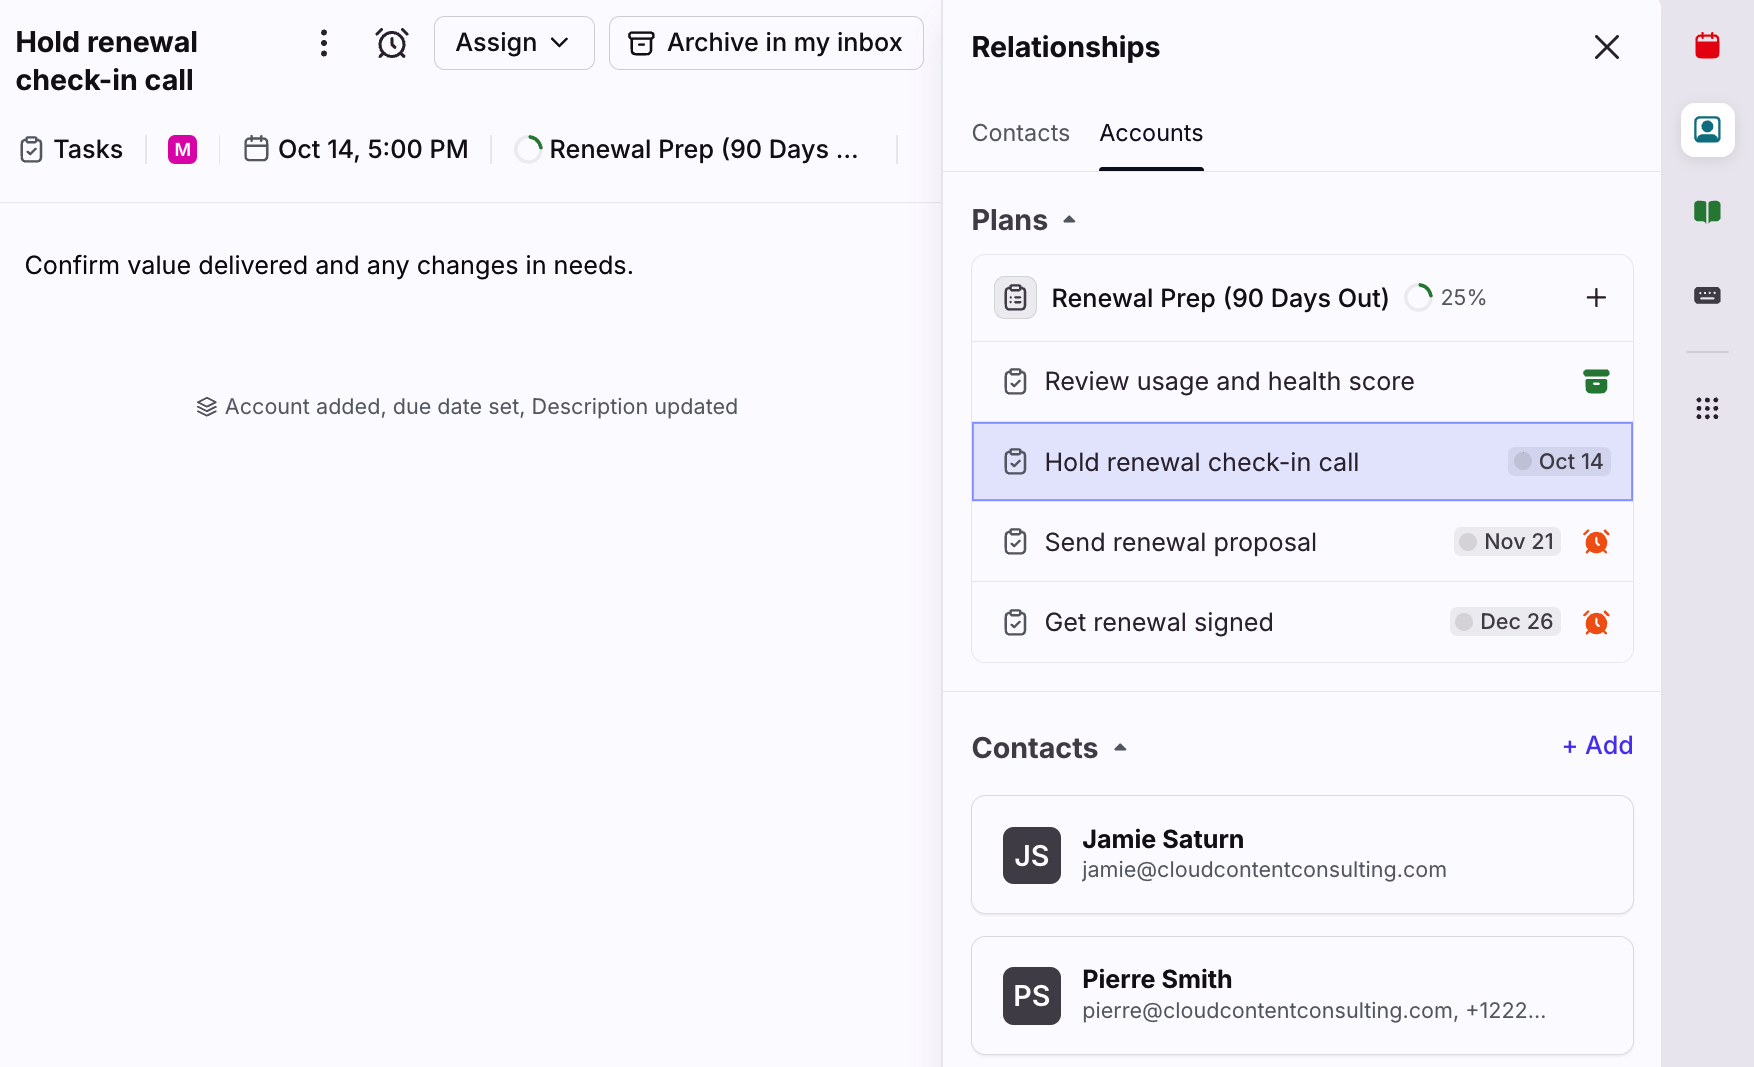
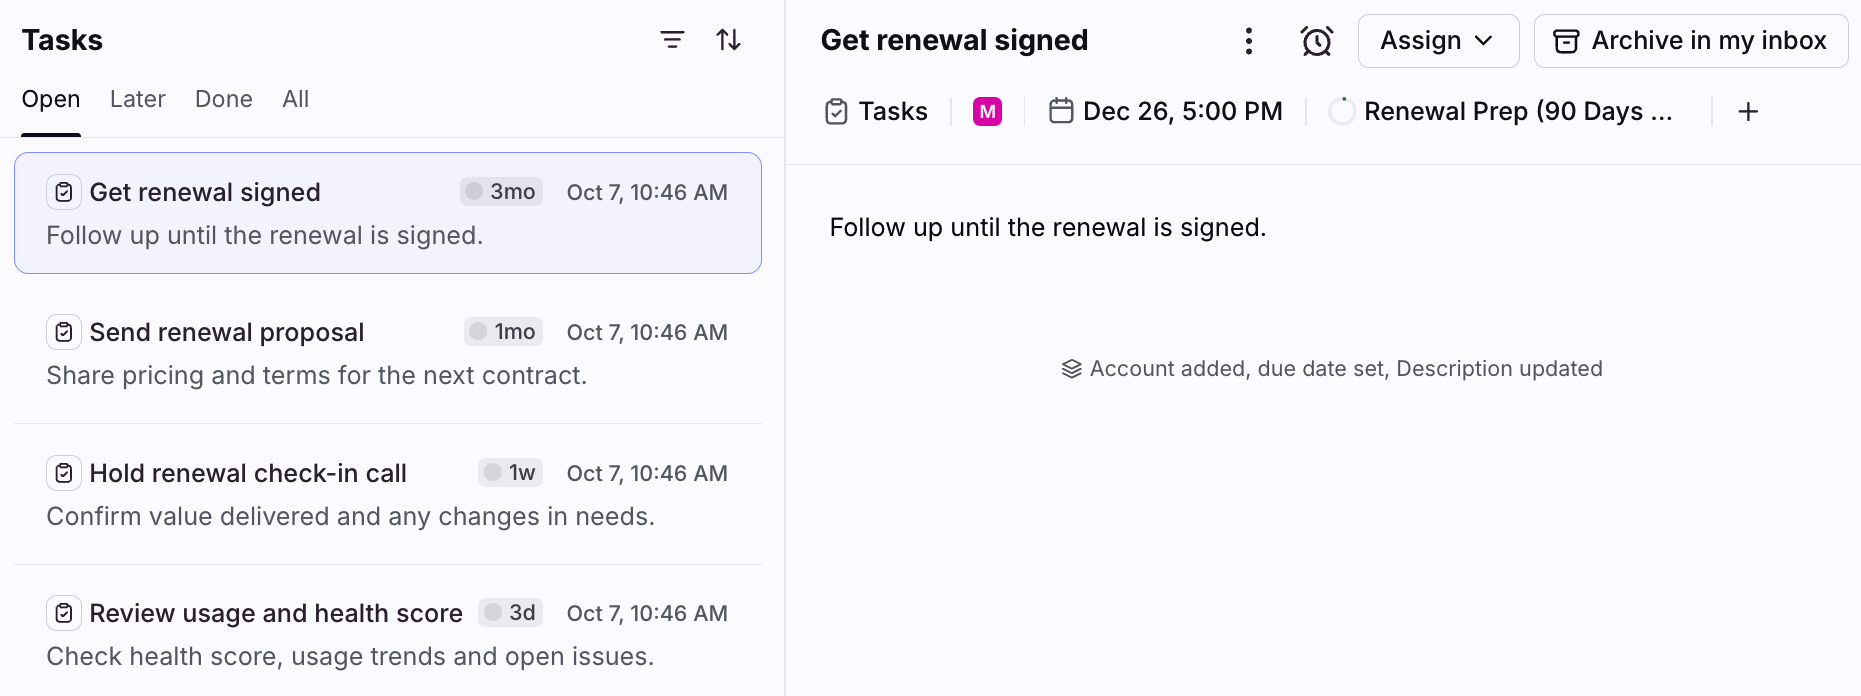
You can also view the percent completion in the task header and in the Relationships sidebar.
Create plans for an account
Step 1
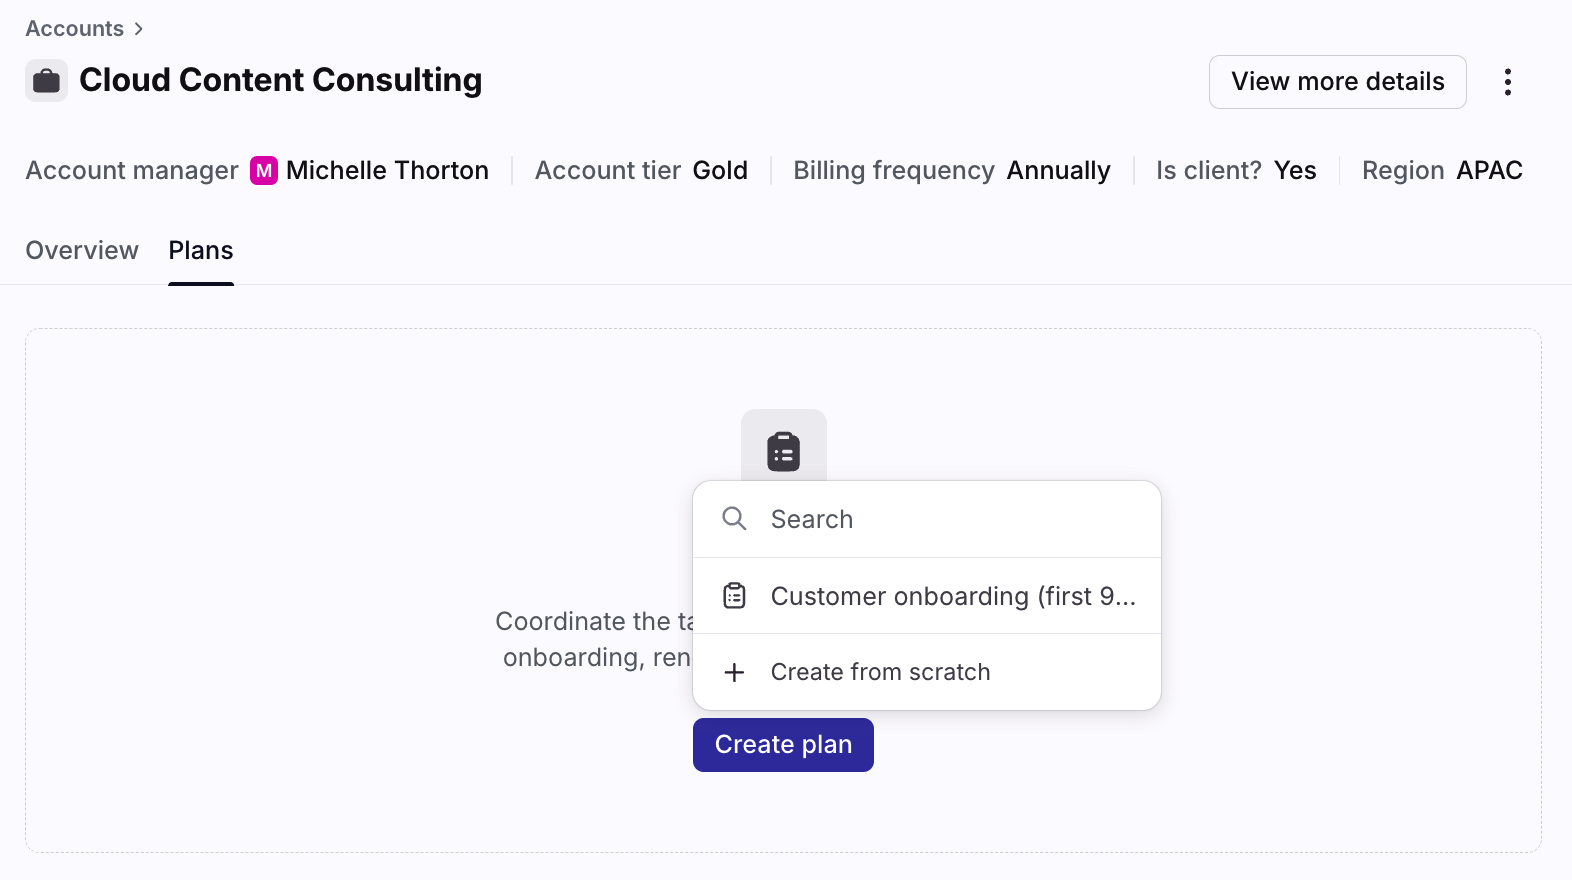
Navigate to the account you’d like to create a plan for, select the Plans tab, then click Create plan. Select a plan template, or create one from scratch.
In this example, we’ll select Create from scratch.
Step 2
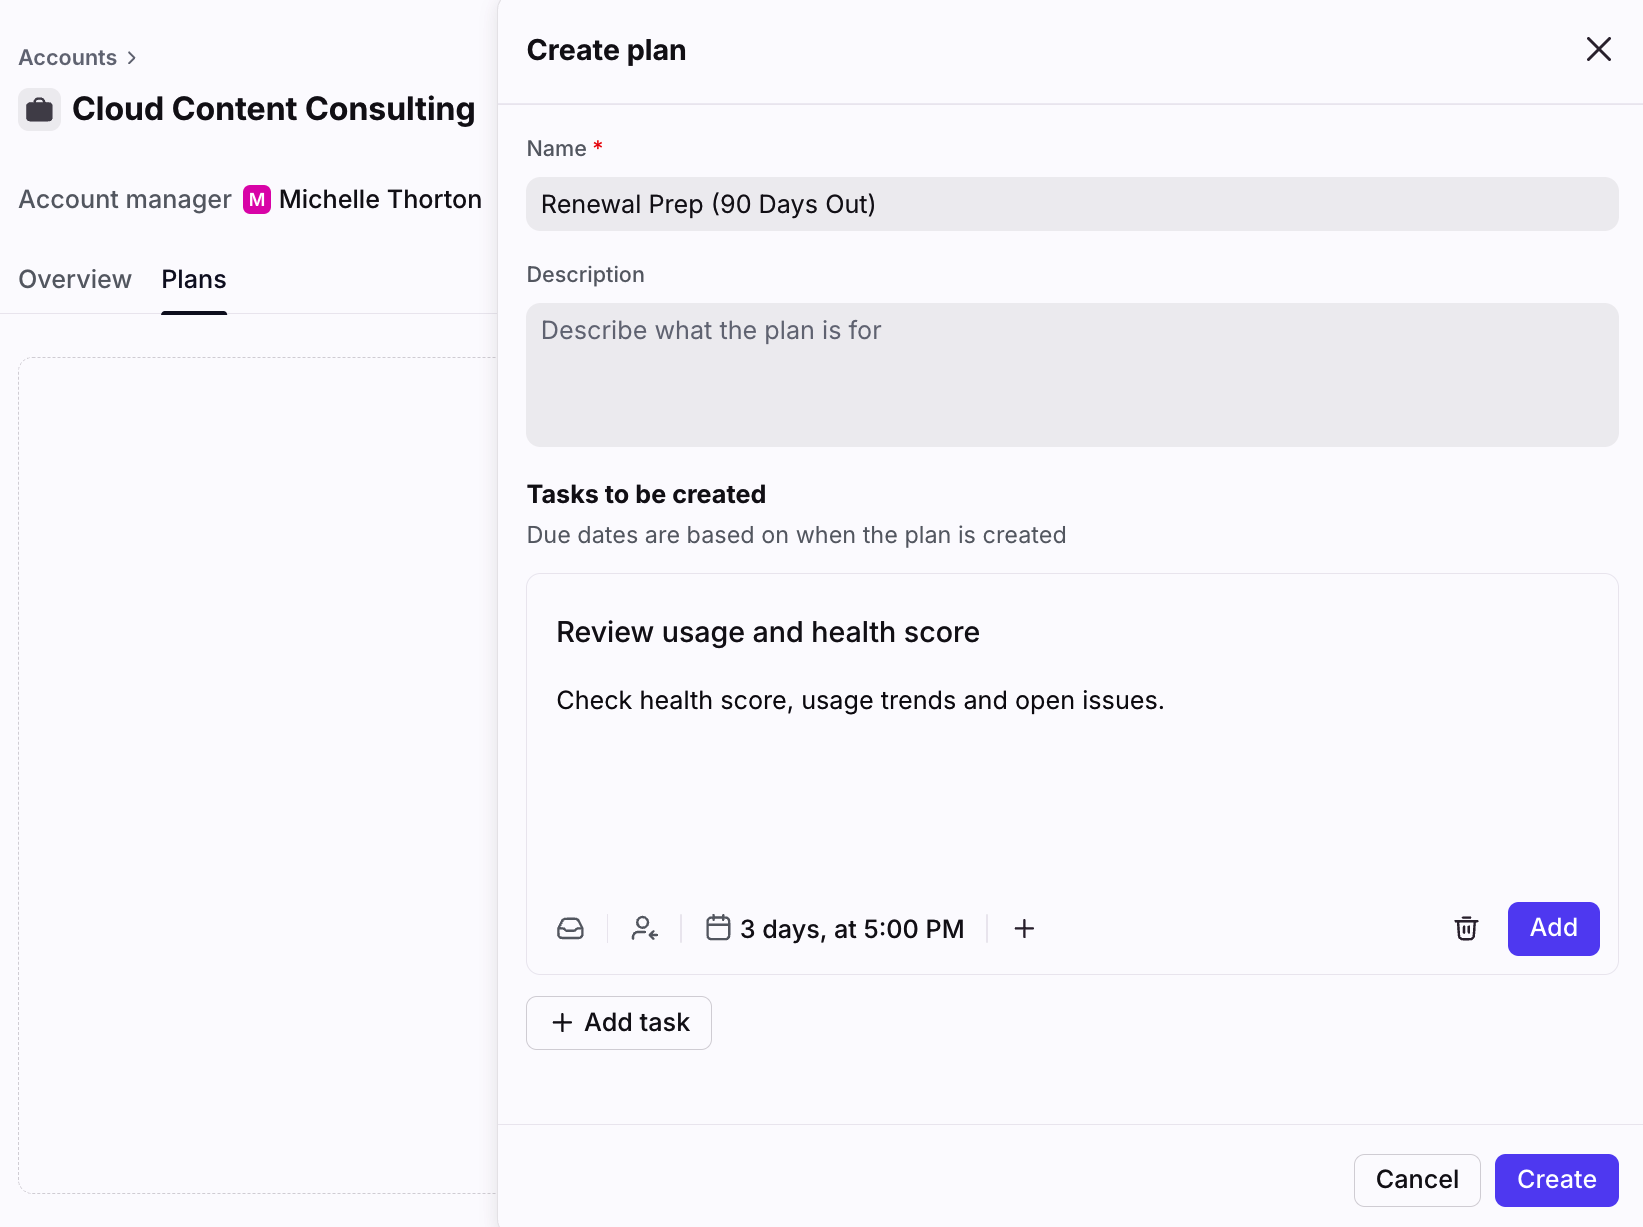
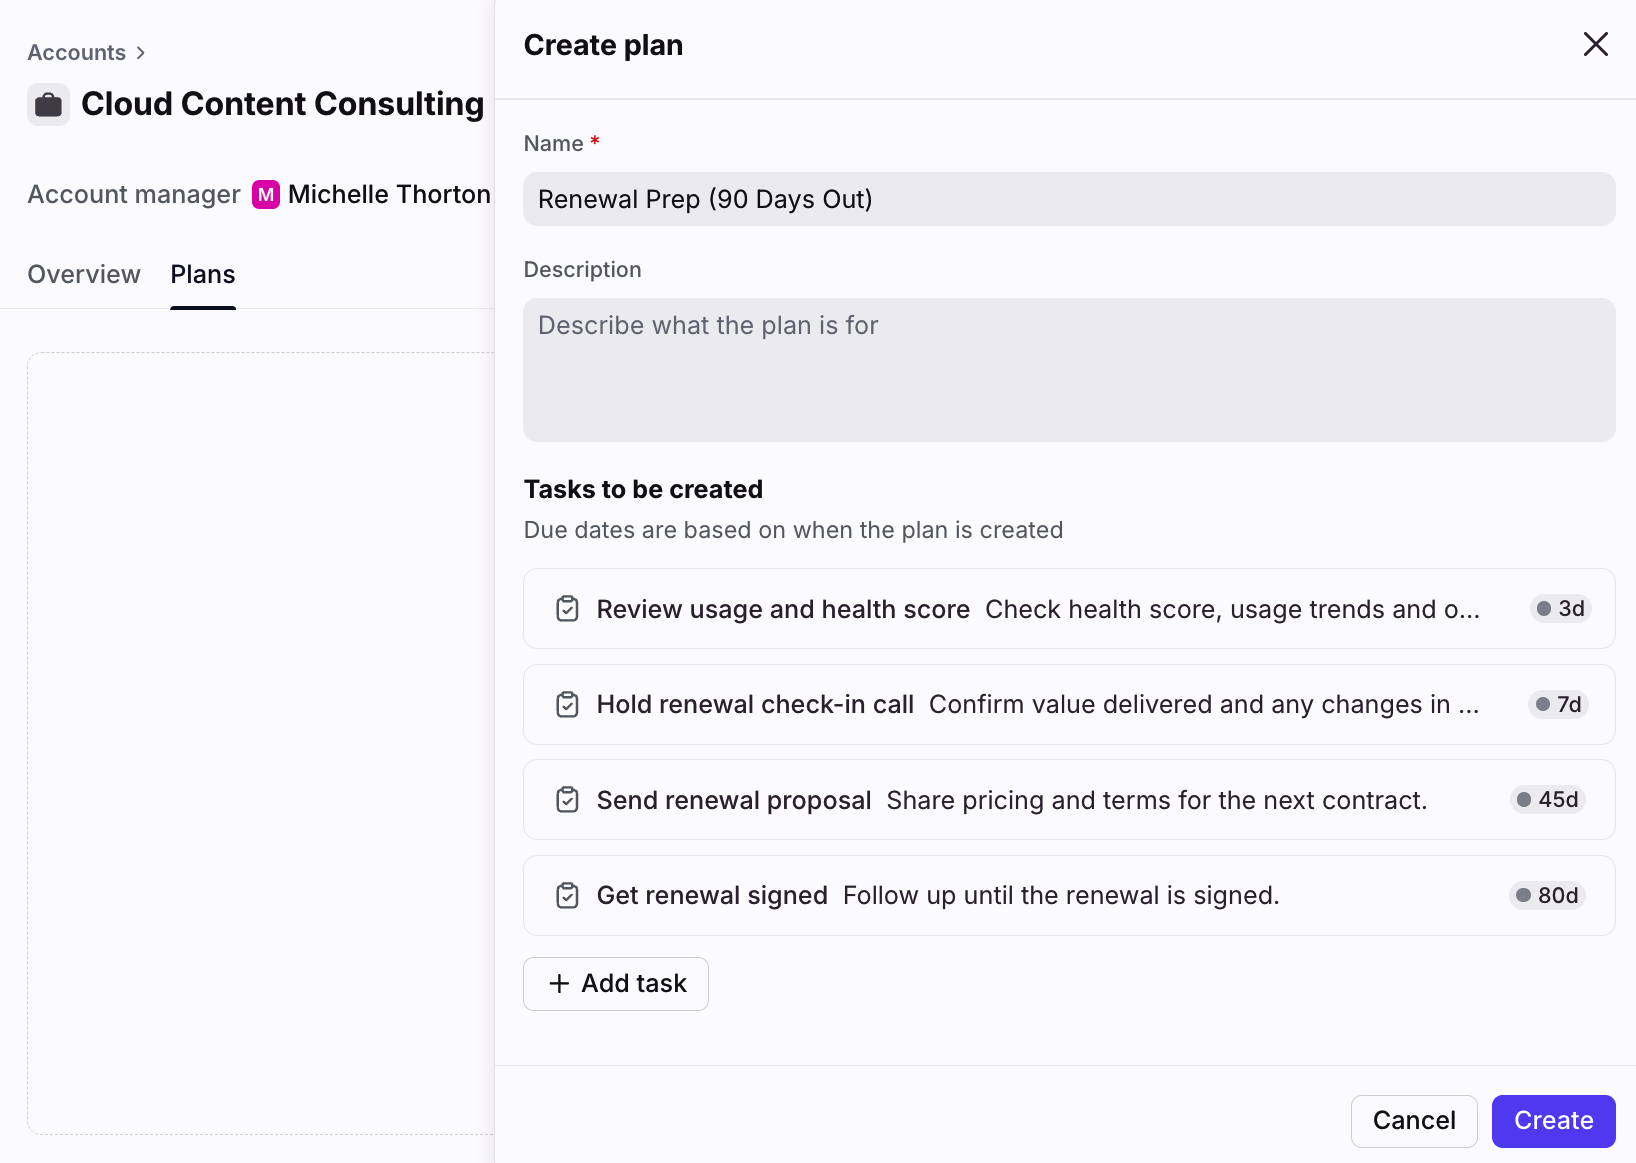
In the panel, fill in the following fields:
Name: Enter the name of the task. This displays in the task list for the plan.
Description: Explain when teammates would use this plan template.
Tasks: Click Add task, then fill in the task title, description, due date, and additional fields. See this article to review all task fields.
Click Add to add the task to the list.
Step 3
Continue adding additional tasks as needed, then click Create to finish.
Step 4
The plan and its associated tasks will be added to the Plans tab in the account. You can always return to the plan at any time to make adjustments.
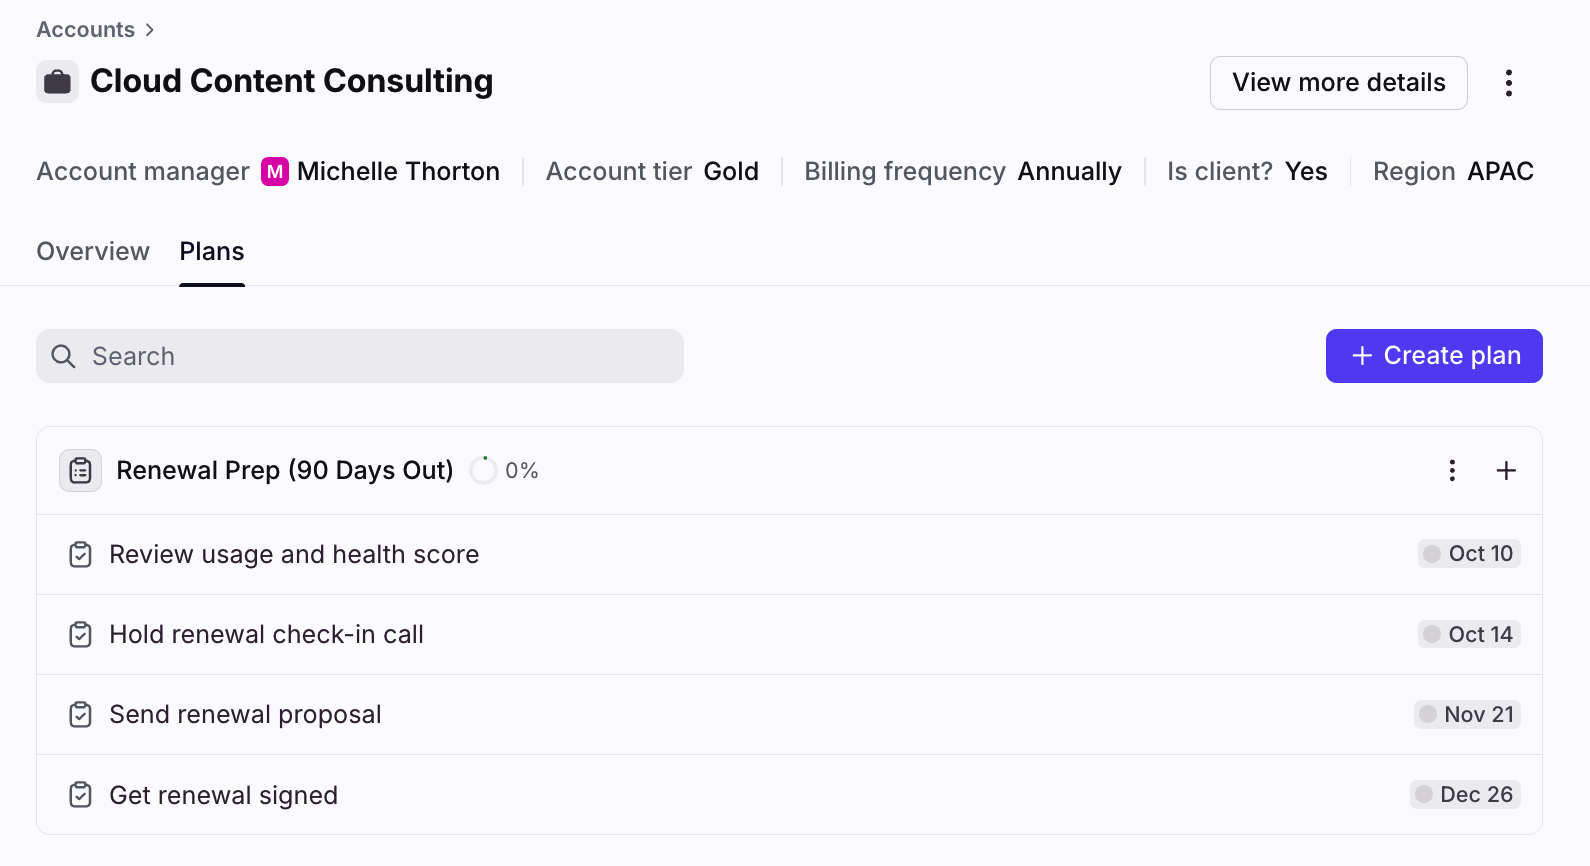
You’ll also see the tasks in the Subscribed and Tasks sections of your inbox. Resolving/archiving these tasks updates the plan’s percent completion.
Create plan templates
Build reusable plan templates to save time and ensure consistency across all your account workflows.
Step 1
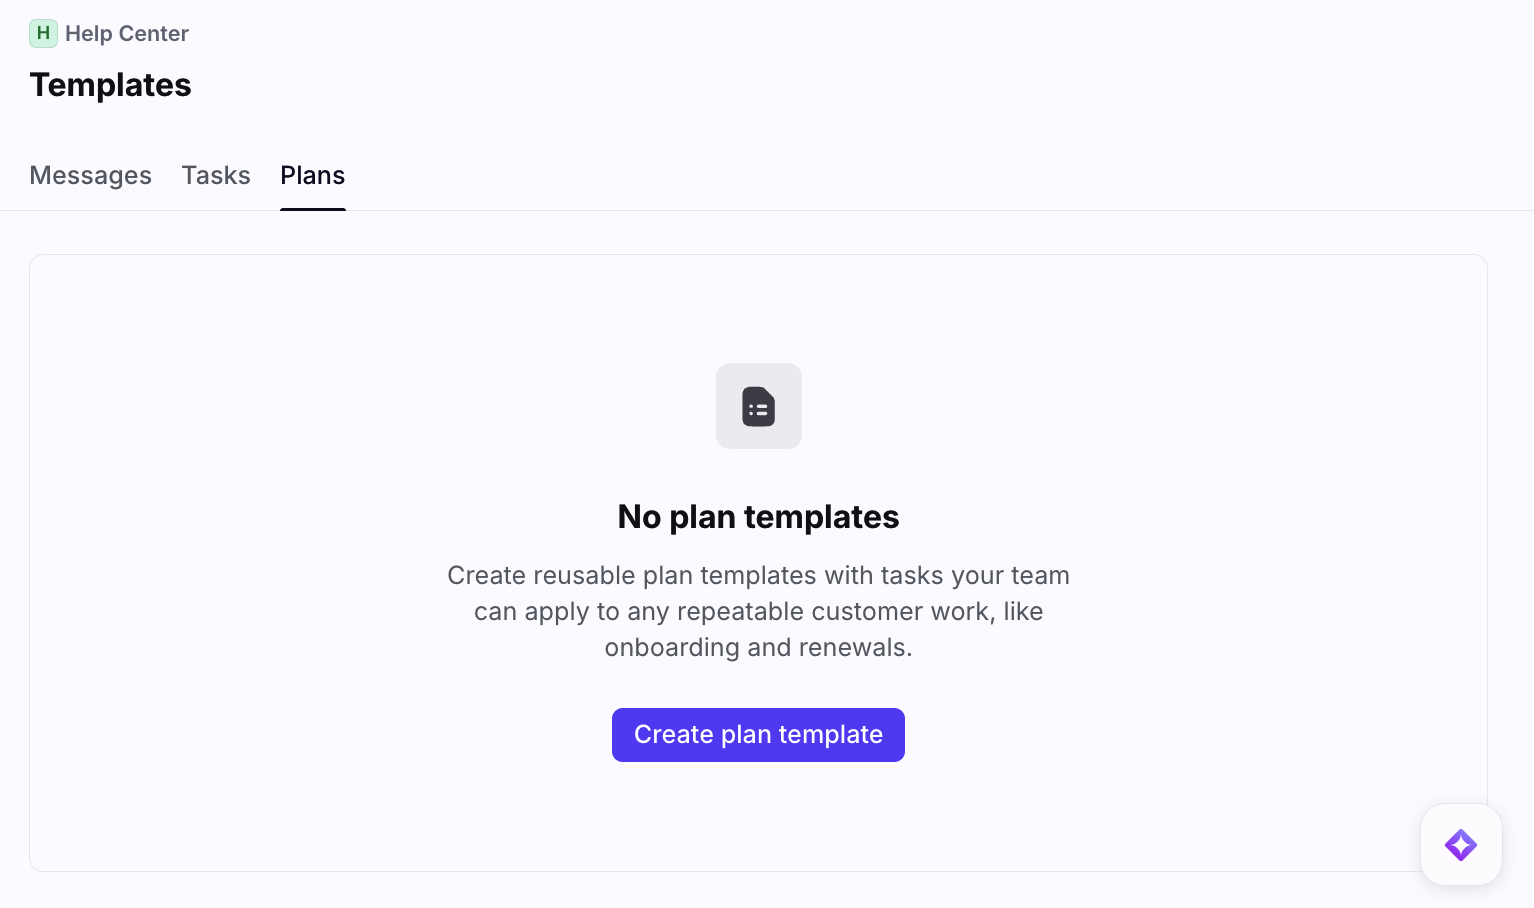
Click the gear icon, navigate to workspace settings, then select Templates.
Step 2
Select the Plans tab, then click Create plan template.
Step 3
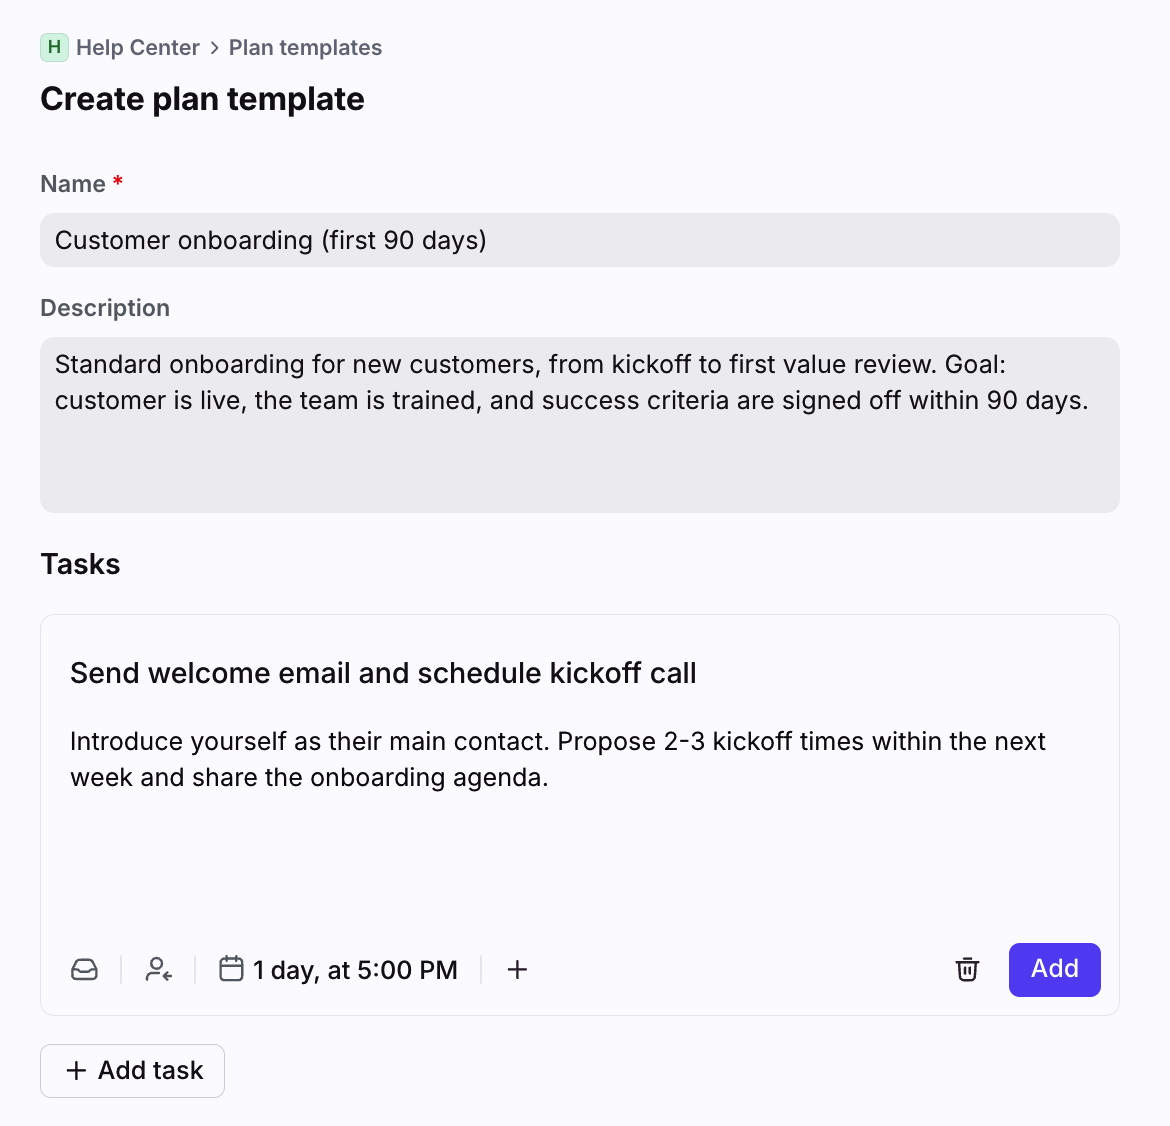
Fill in the following fields:
Name: Enter the name of the task. This displays in the task list for the plan.
Description: Explain when teammates would use this plan template.
Tasks: Click Add task, then fill in the task title, description, due date, and additional fields. See this article to review all task fields.
Click Add to add the task to the list.
Step 4
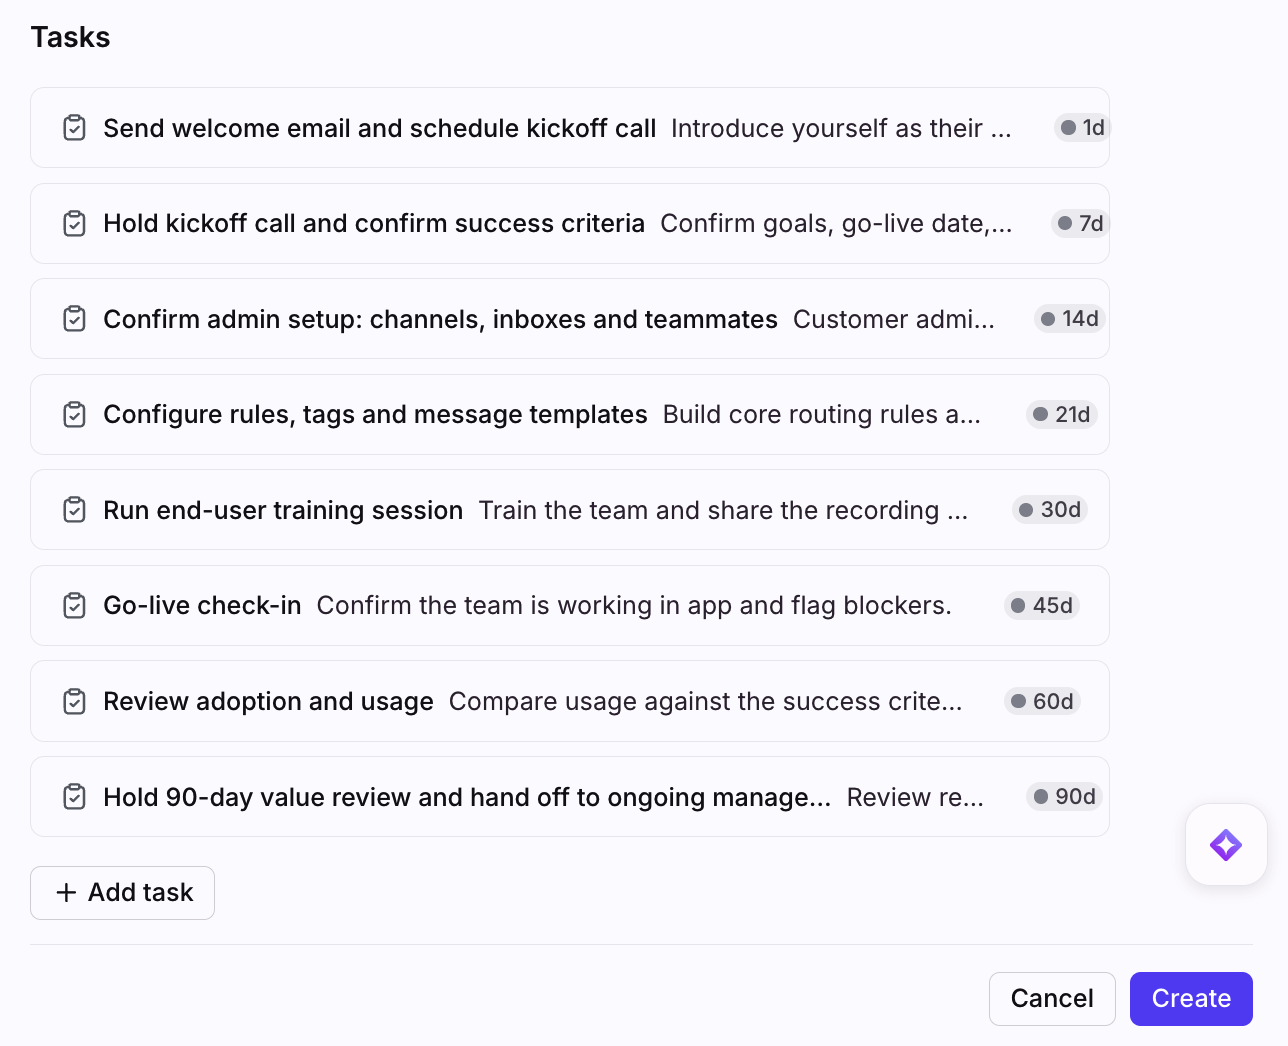
Continue adding additional tasks as needed, then click Create to finish.
Step 5
Your plan can now be applied to accounts in your Accounts Manager. You can always return to the plan at any time to make adjustments.
FAQ
How many tasks can I add to a template?
A plan template needs at least 1 task, and supports up to 50 tasks.
Can I select a specific due date for a task?
Not at this time. Due dates are set as "# days after the plan starts" (plus a time of day), and become calendar dates when the plan is applied.
Are plan templates workspace-specific?
Templates are created in workspace settings. However, since accounts aren’t tied to specific workspaces, you’ll see all templates from all workspaces when applying plan templates, even from workspaces you don’t have access to.
What if I edit a template that’s been added to an account?
A plan is a snapshot. Editing or deleting a template never changes plans that were already added to an account.
Pricing
This feature is available on all plans.