
Using tables in emails
Overview
When composing a message, you may want to include tables from external sources or create them from scratch in Front. This article outlines current compatibility with imported tables and what you are able to edit in Front.
Table features
What you can do
Copy and paste an external table into the composer
Create a brand new table in the composer
Add or delete rows and columns
Change column size
Select multiple cells
Use keyboard arrow keys to navigate between cells
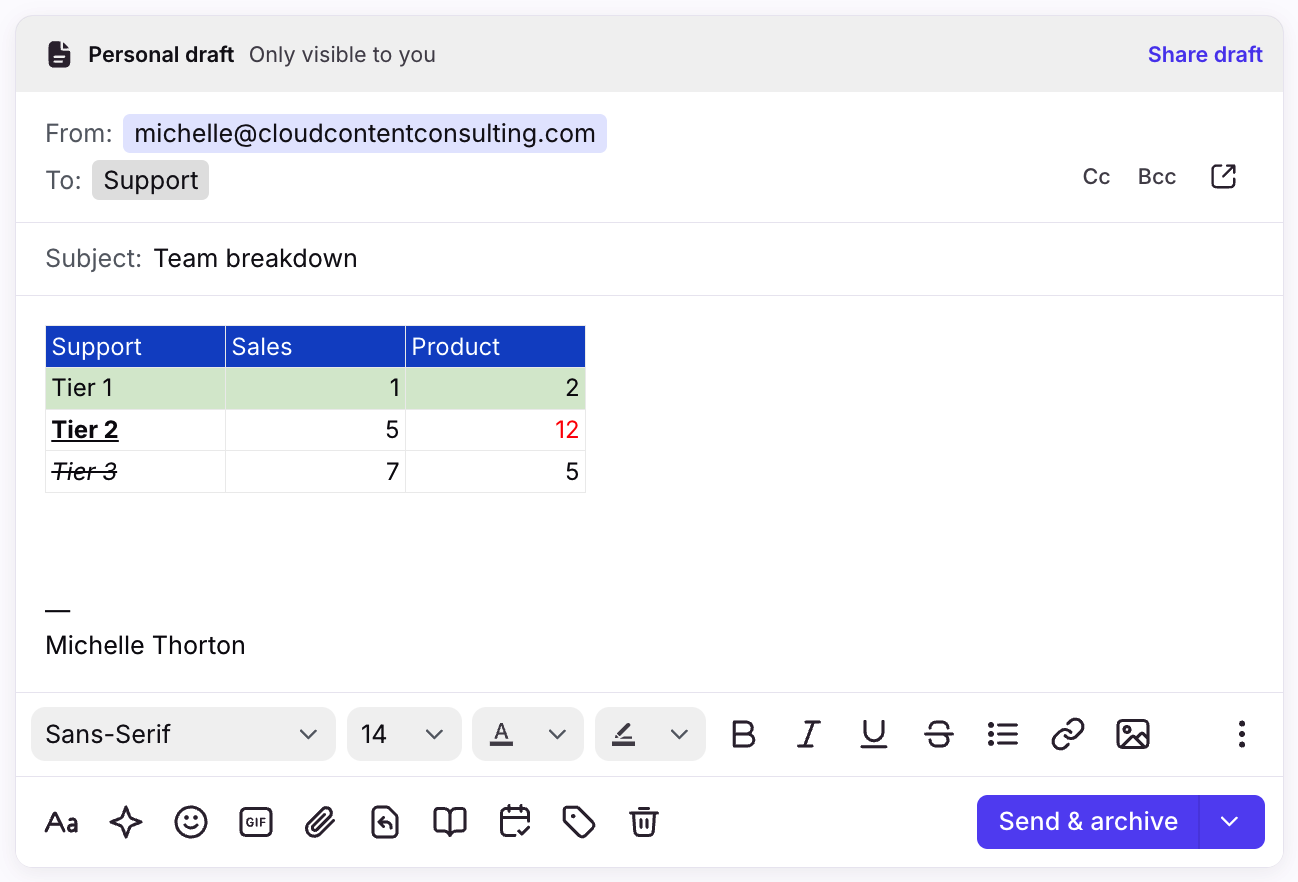
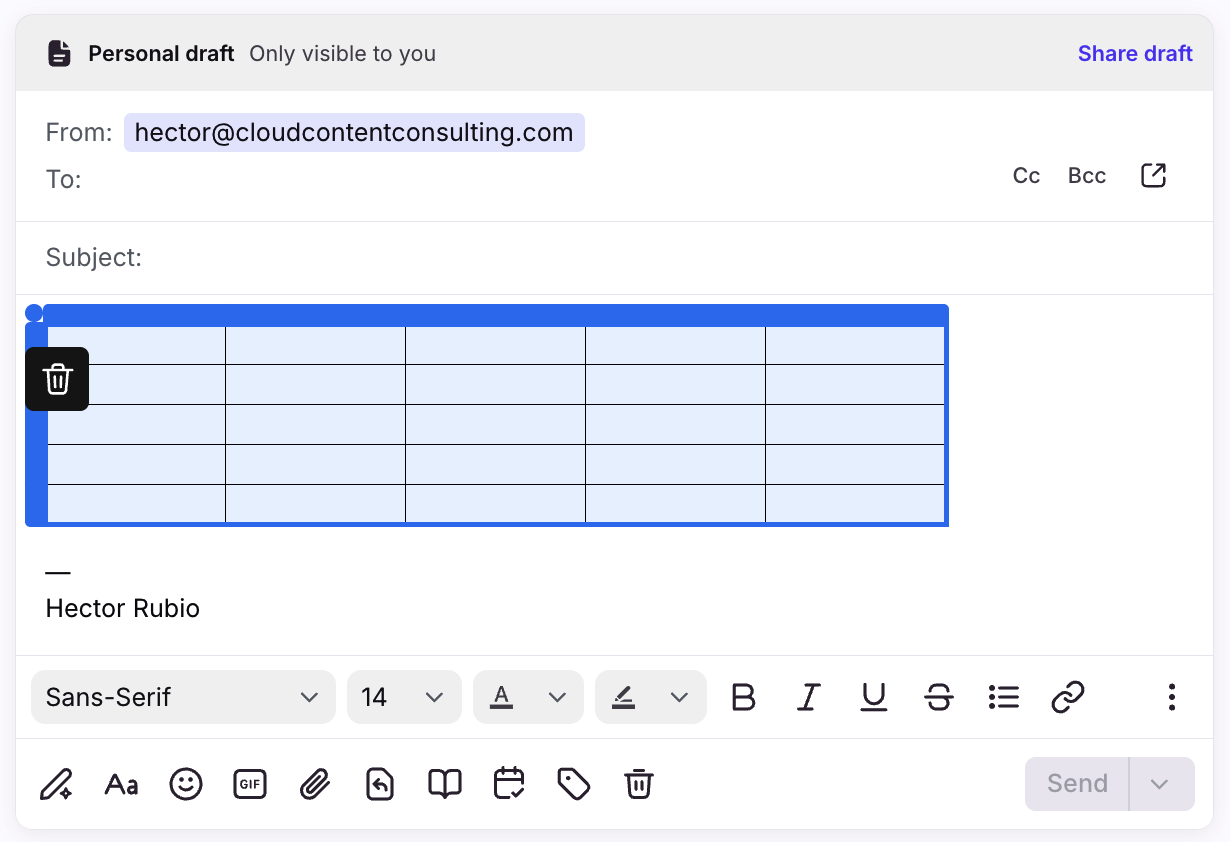
Example table pasted into Front:
What you cannot do
Style the table such as borders, background, etc.
Merge or split cells
Use the tab key on your keyboard to navigate between cells
Creating tables in Front
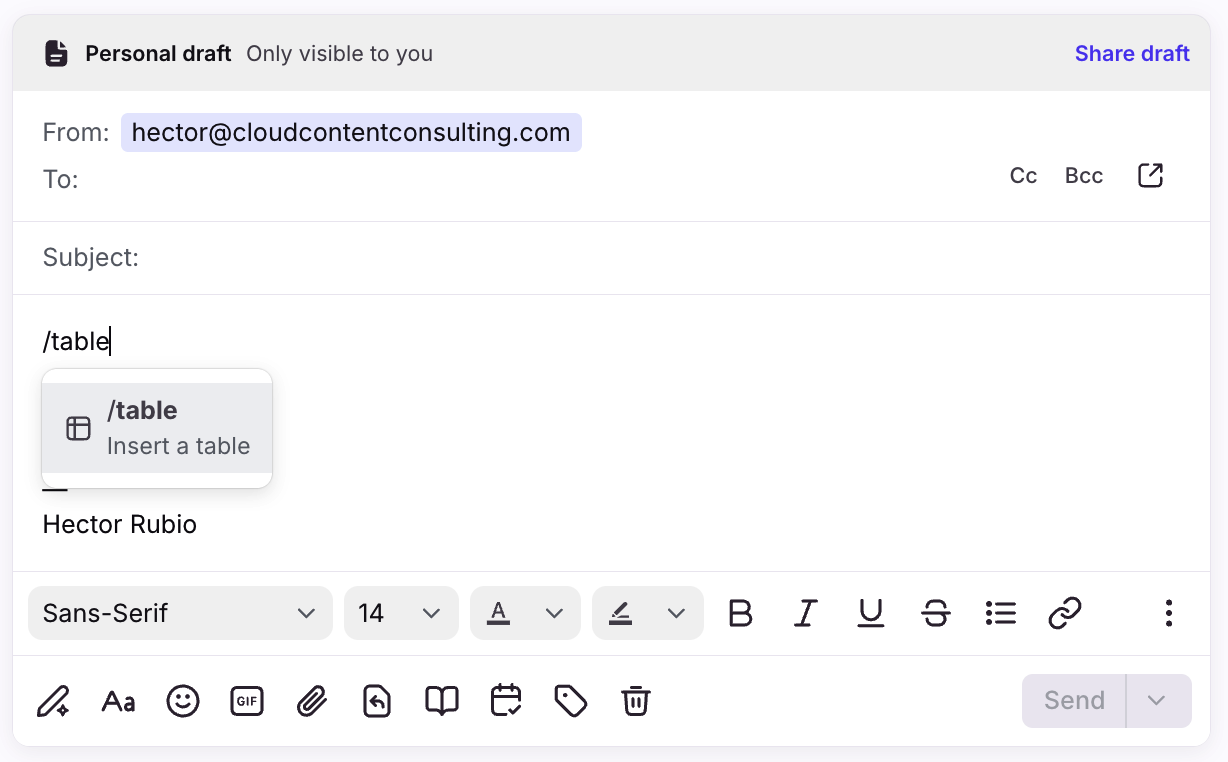
Step 1
In the composer, type /table then press Enter on your keyboard or click the dropdown option.
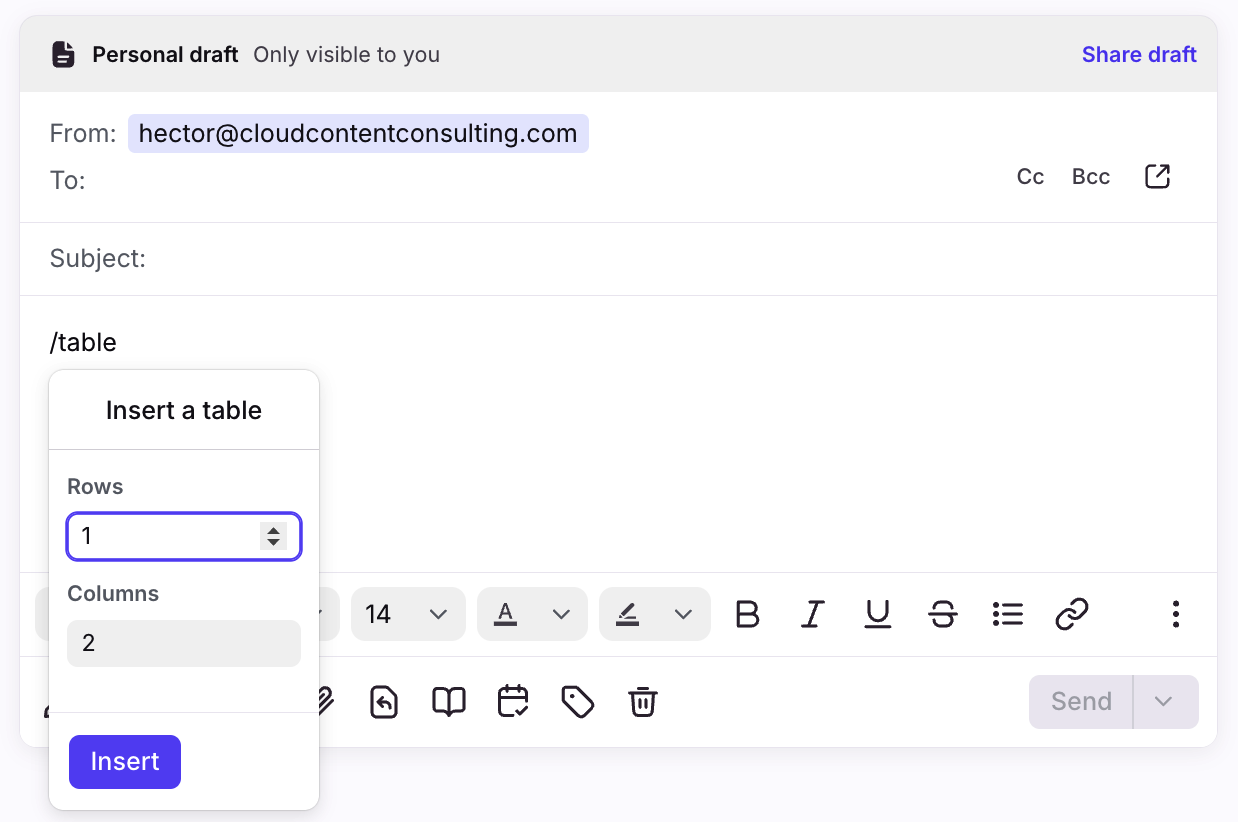
Step 2
Enter the number of rows and columns you'd like to include in your table, then click Insert.
Step 3
Fill in your table as needed. You can also take the following actions when selecting an entire row or column:
Add a row/column above/left of the selection
Add a row/column below/right of the selection
Delete the selected row/column
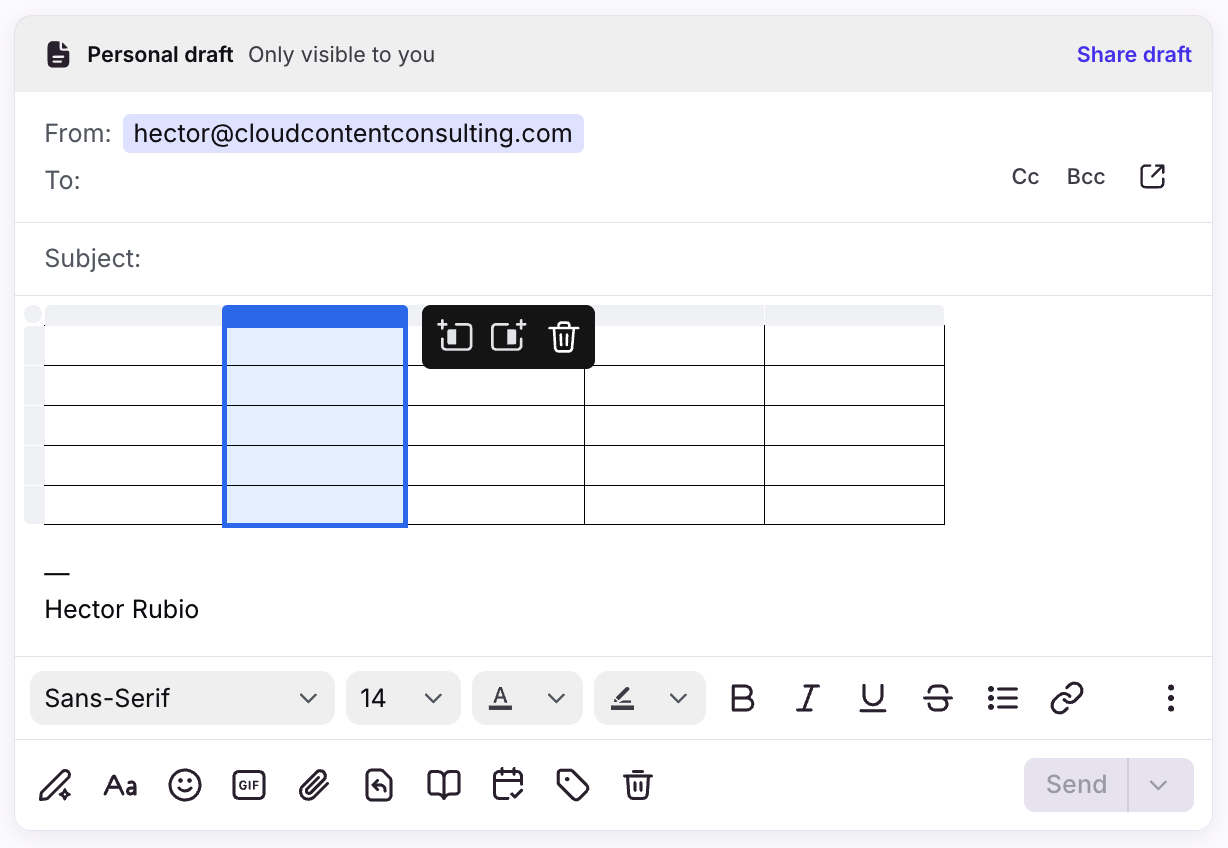
You can also click the top left corner to delete the entire table.
How tables paste into Front
Depending what program you are using to create tables, pasting a table into a Front email will look different. Differences between various applications are listed below.
Numbers
All formatting created in Numbers will copy over into Front. You do not need to add gridlines.
Excel
All formatting created in Excel will copy over to Front. Your content will appear in a table, and style and gridlines will carry over.
Google Sheets
All formatting created in Google Sheets will copy over into Front. You will need to add gridlines in Google Sheets in order for them to appear in Front.