Organize knowledge base articles with categories and sections
Overview
Categories and sections are folders that group articles together. Use categories and sections to organize your knowledge base articles and make your content easy to view.
You must have Front company admin, help center admin, or knowledge base content editor permissions to manage articles, categories, and sections.
How it works
Categories
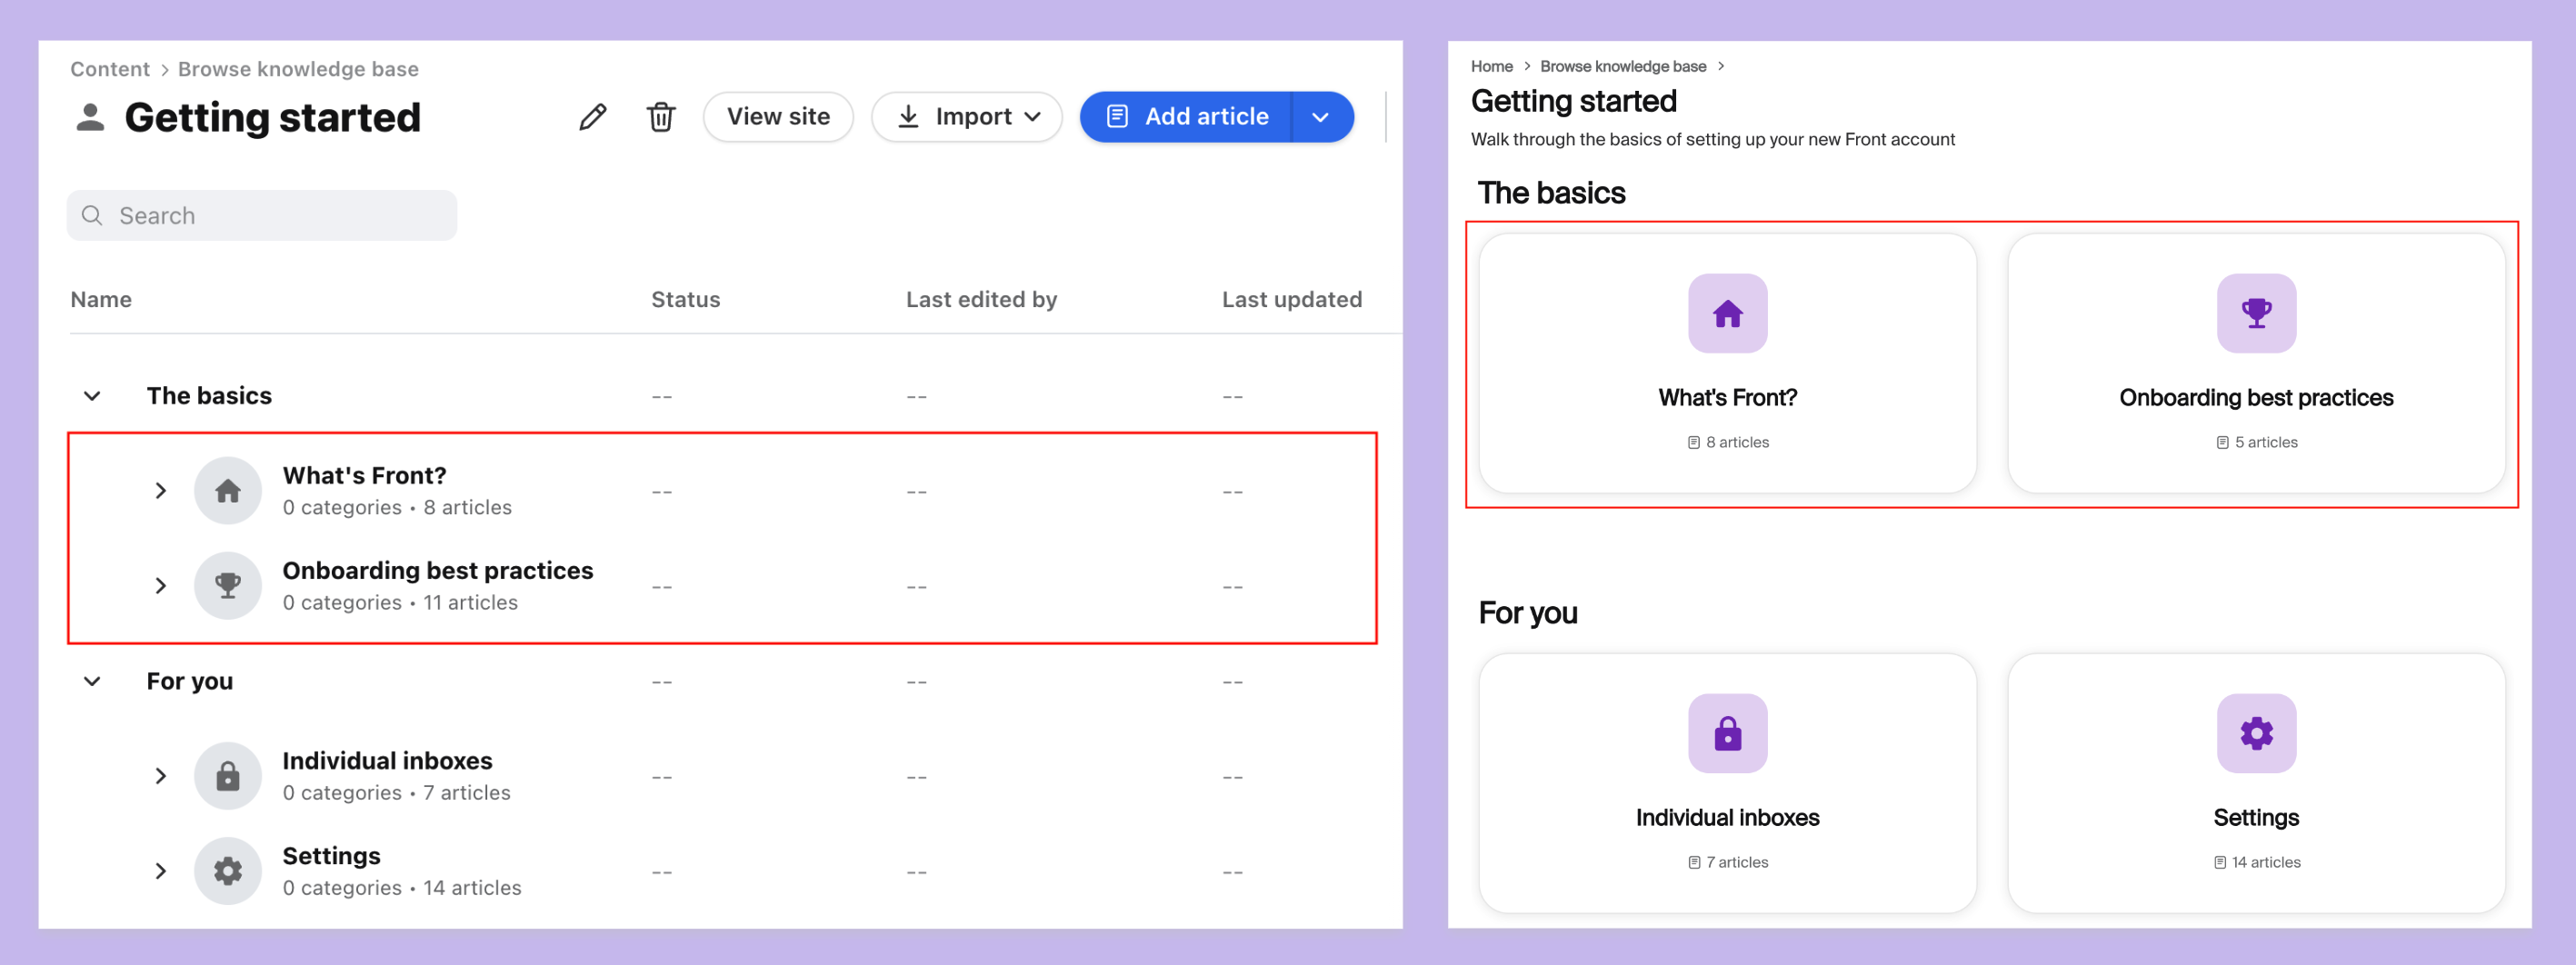
Categories are folders of articles and appear as cards in your knowledge base. Categories can be nested against each other to have multiple layers. An article can only belong to one category. You can configure a category to be private so it is only accessible via direct link.
Categories in the admin portal vs. the website view:
Sections
Sections are headers to group multiple articles or categories. You can use sections to organize categories and articles and optimize how they display in the website view.
Sections in the admin portal vs. the website view:
Instructions
Option 1: Add a category
Step 1
In the navigation menu, select Help center.
Step 2
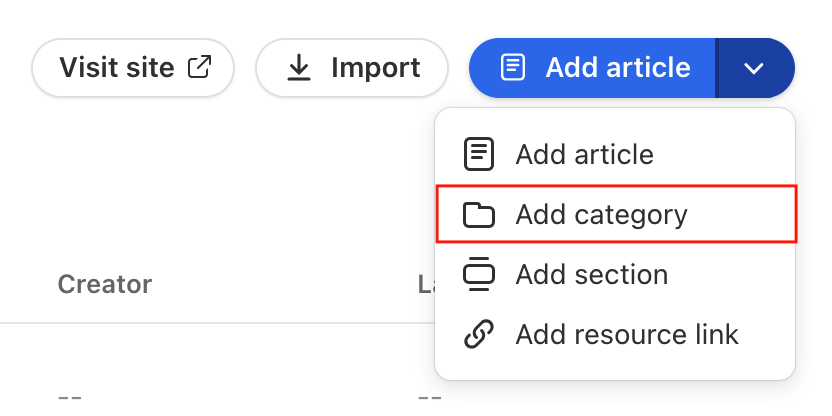
Under Knowledge base in the sidebar, select the Content tab, then click the arrow icon and select Add category.
Step 3
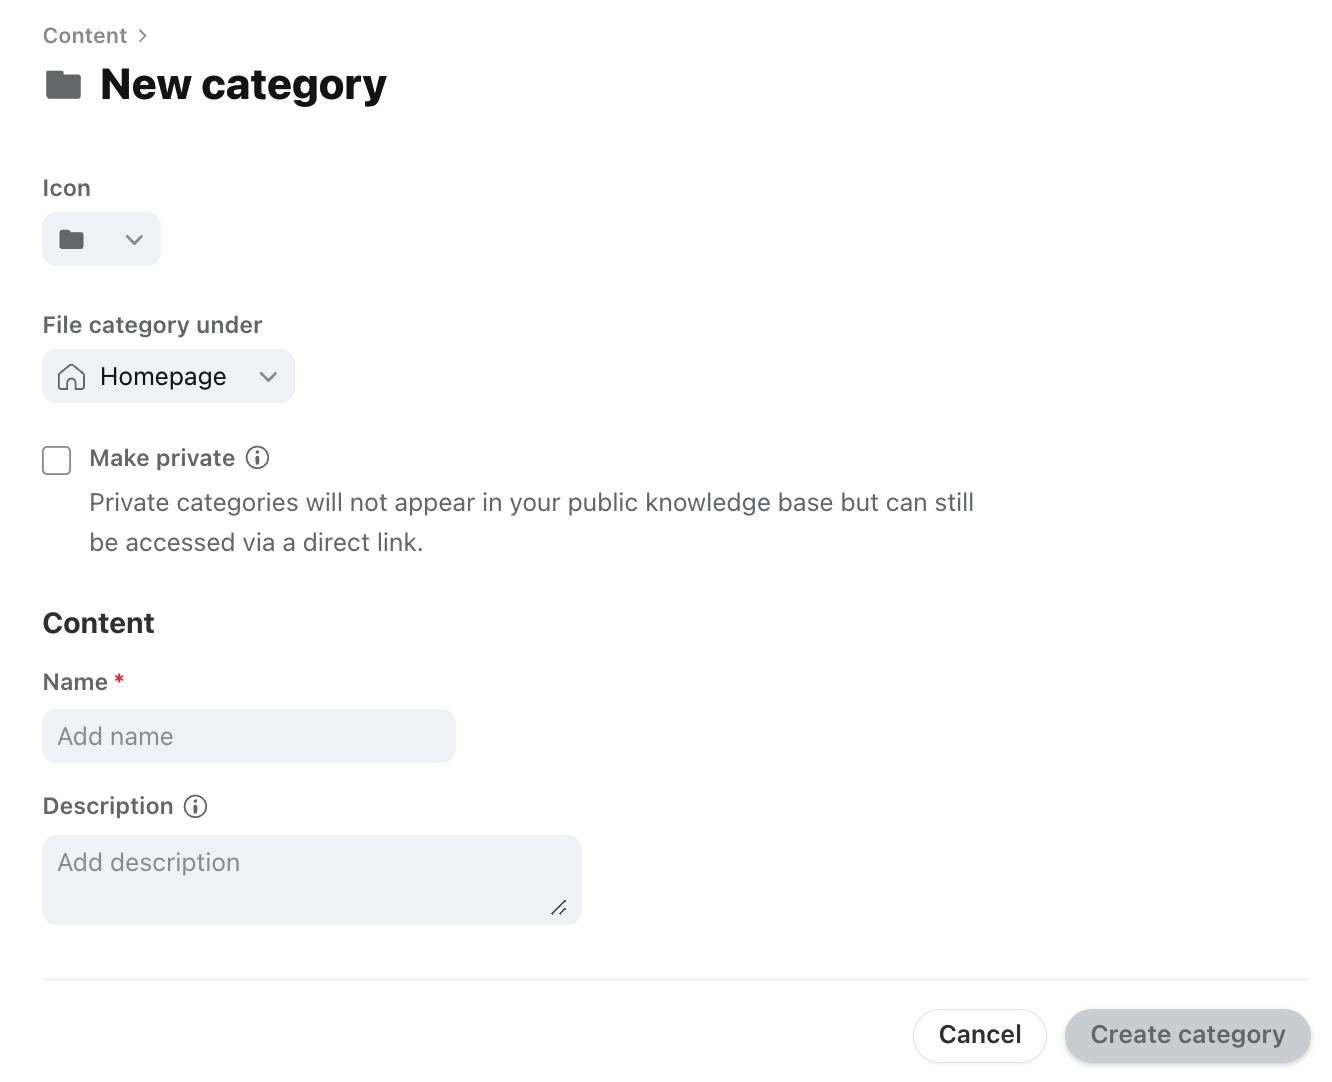
Fill out the fields:
Icon: Icon that displays on the category card
File category under: The location of your category
Make private (optional): Check the box to create a private category. Private categories and their contents will not appear in your knowledge base or via search. They can only be accessed via direct link, and can be used to house content for specific groups.
Name: Name that appears on the category card
Description (optional): Appears on the category card and page in your site
Step 4
Click Create category to finish. You can now add or move articles, categories, or sections to your new category.
Option 2: Add a section
Step 1
In the navigation menu, select Help center.
Step 2
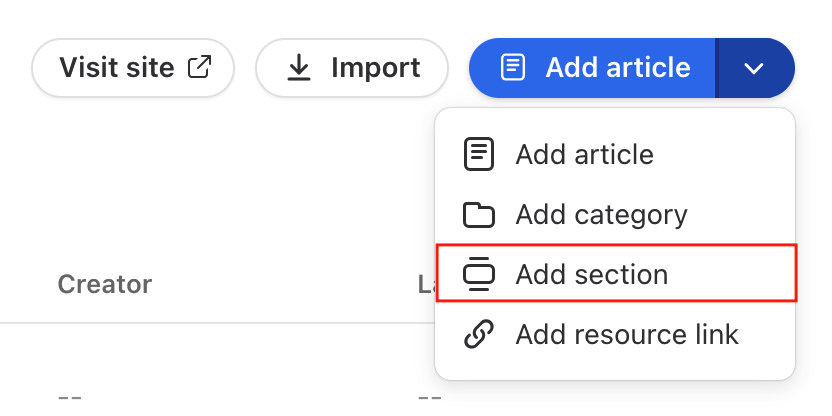
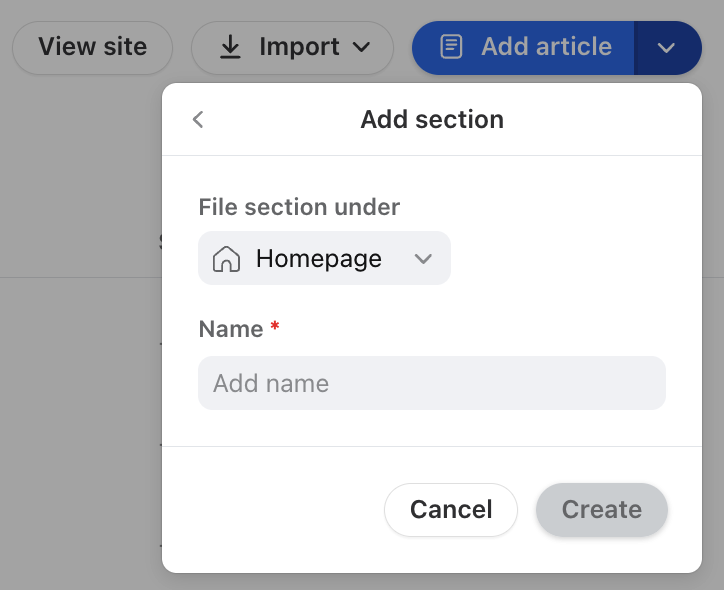
Under Knowledge base in the sidebar, select the Content tab, then click Add section.
Step 3
Fill out the fields:
File section under: The location of your section
Name: Name that appears in the section header
Step 4
Click Create when finished. You can now add or move articles or categories to your new section.
Manage categories and sections
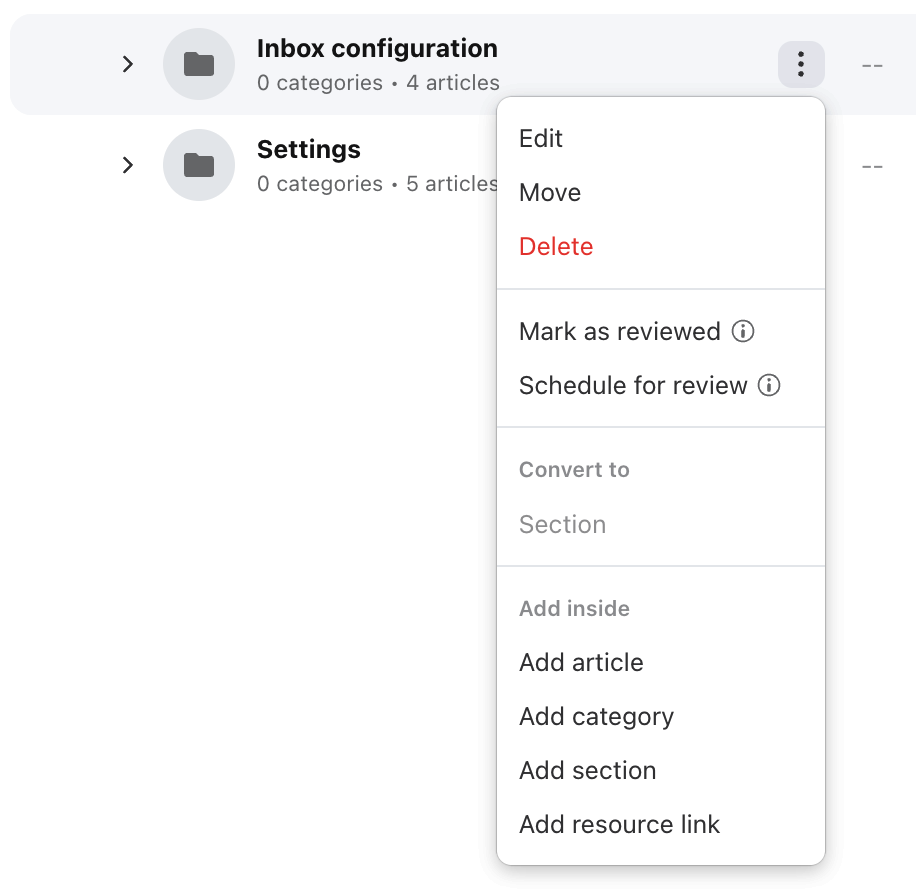
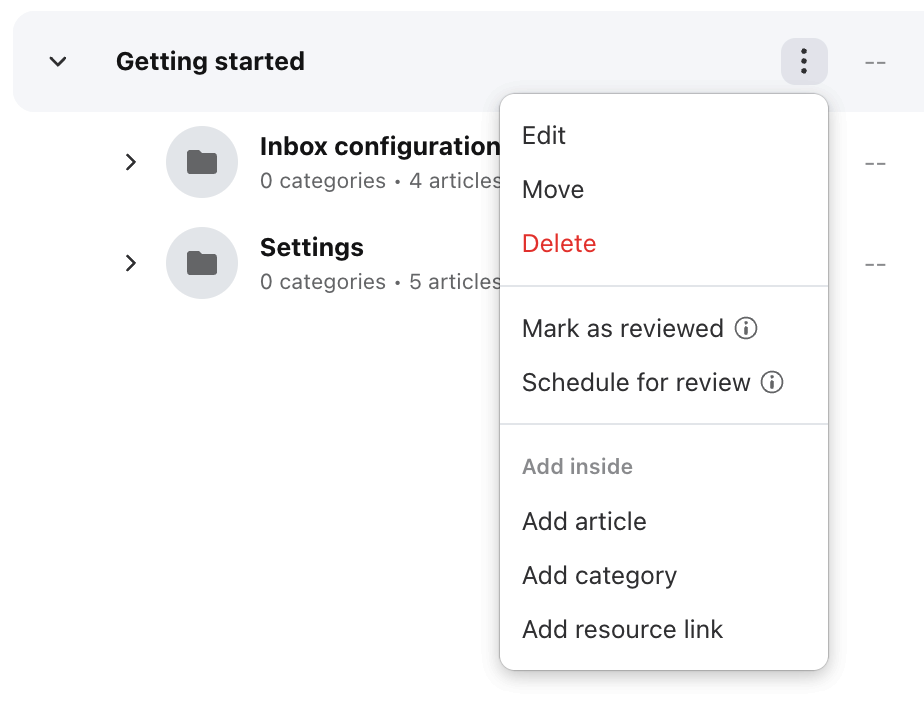
In the admin portal, you can click the three-dot menu to manage the selected category or section.
Category actions
Edit: Change the name, description, icon, location/nesting, or private/unprivate status for the selected category.
Move: Choose a new location for the selected category. You can also drag and drop the category to move it.
Delete: Delete the selected category. All nested articles, categories, and sections will be permanently deleted and cannot be recovered.
Mark as reviewed: Mark all articles in this category as up-to-date. Changes in those articles will not be published. See this article to learn more.
Schedule for review: Set the same review date for all articles in this category. See this article to learn more.
Convert to section: If applicable, convert the selected category into a section.
Add article: Add a new article inside the selected category.
Add category: Add a new category inside the selected category.
Add section: Add a new section inside the selected category.
Add resource link: Add a new resource link inside the selected category.
Section actions
Edit: Change the name and location/nesting for the selected section.
Move: Choose a new location for the selected section. You can also drag and drop the section to move it.
Delete: Delete the selected section. All nested articles, categories, and sections will be permanently deleted and cannot be recovered.
Mark as reviewed: Mark all articles in this section as up-to-date. Changes in those articles will not be published. See this article to learn more.
Schedule for review: Set the same review date for all articles in this section. See this article to learn more.
Add article: Add a new article inside the selected section.
Add category: Add a new category inside the selected section.
Add resource link: Add a new resource link inside the selected section.
FAQ
Are categories and sections automatically published?
Yes. Categories and sections do not have draft modes, so they are published and visible to readers if your help center is published. If you create a category/section without any articles in it, your website view will display an empty category/section.
Can I convert sections to categories?
No. Front knowledge base only supports converting categories to sections.
Can I modify the category URL?
No. The category URL is automatically generated and uses the category name.
Pricing
Knowledge base is available on all current plans.
If you are on a legacy plan and don't have access to this feature, you can update to one of our latest plans in your Billing settings or contact your account manager.

