Set up a Salesforce integration using Connectors
Note: This article focuses on use cases involving application objects and third-party data (application requests). If you're just getting started with application objects, please review the general application objects article first.
Tip: If you are on the Professional plan or above, the Salesforce integration gives you access to a library of prebuilt Connectors that provide every action available in the Salesforce API. Use them in rules, macros, or chatbots to easily automate Salesforce actions directly from Front, supercharging your workflows without having to write any code.
Overview
This article will guide you through setting up a Connector to your Salesforce instance from the ground up. We'll cover the authentication steps and show you how to link a Salesforce object, such as an opportunity, to a conversation in Front.
Once linked, you'll:
Have quick access to all related conversations for that opportunity right within Front.
Gain instant context within each conversation on relevant details from Salesforce, helping your team work smarter and faster.
Configuration
Creating a Server
Step 1
In the Developers tab in your company settings, create an app. You might want to name your app ‘Salesforce’ or similar for easy reference.
Step 2
In your newly created app, navigate to the Servers tab then click Create server.
Step 3
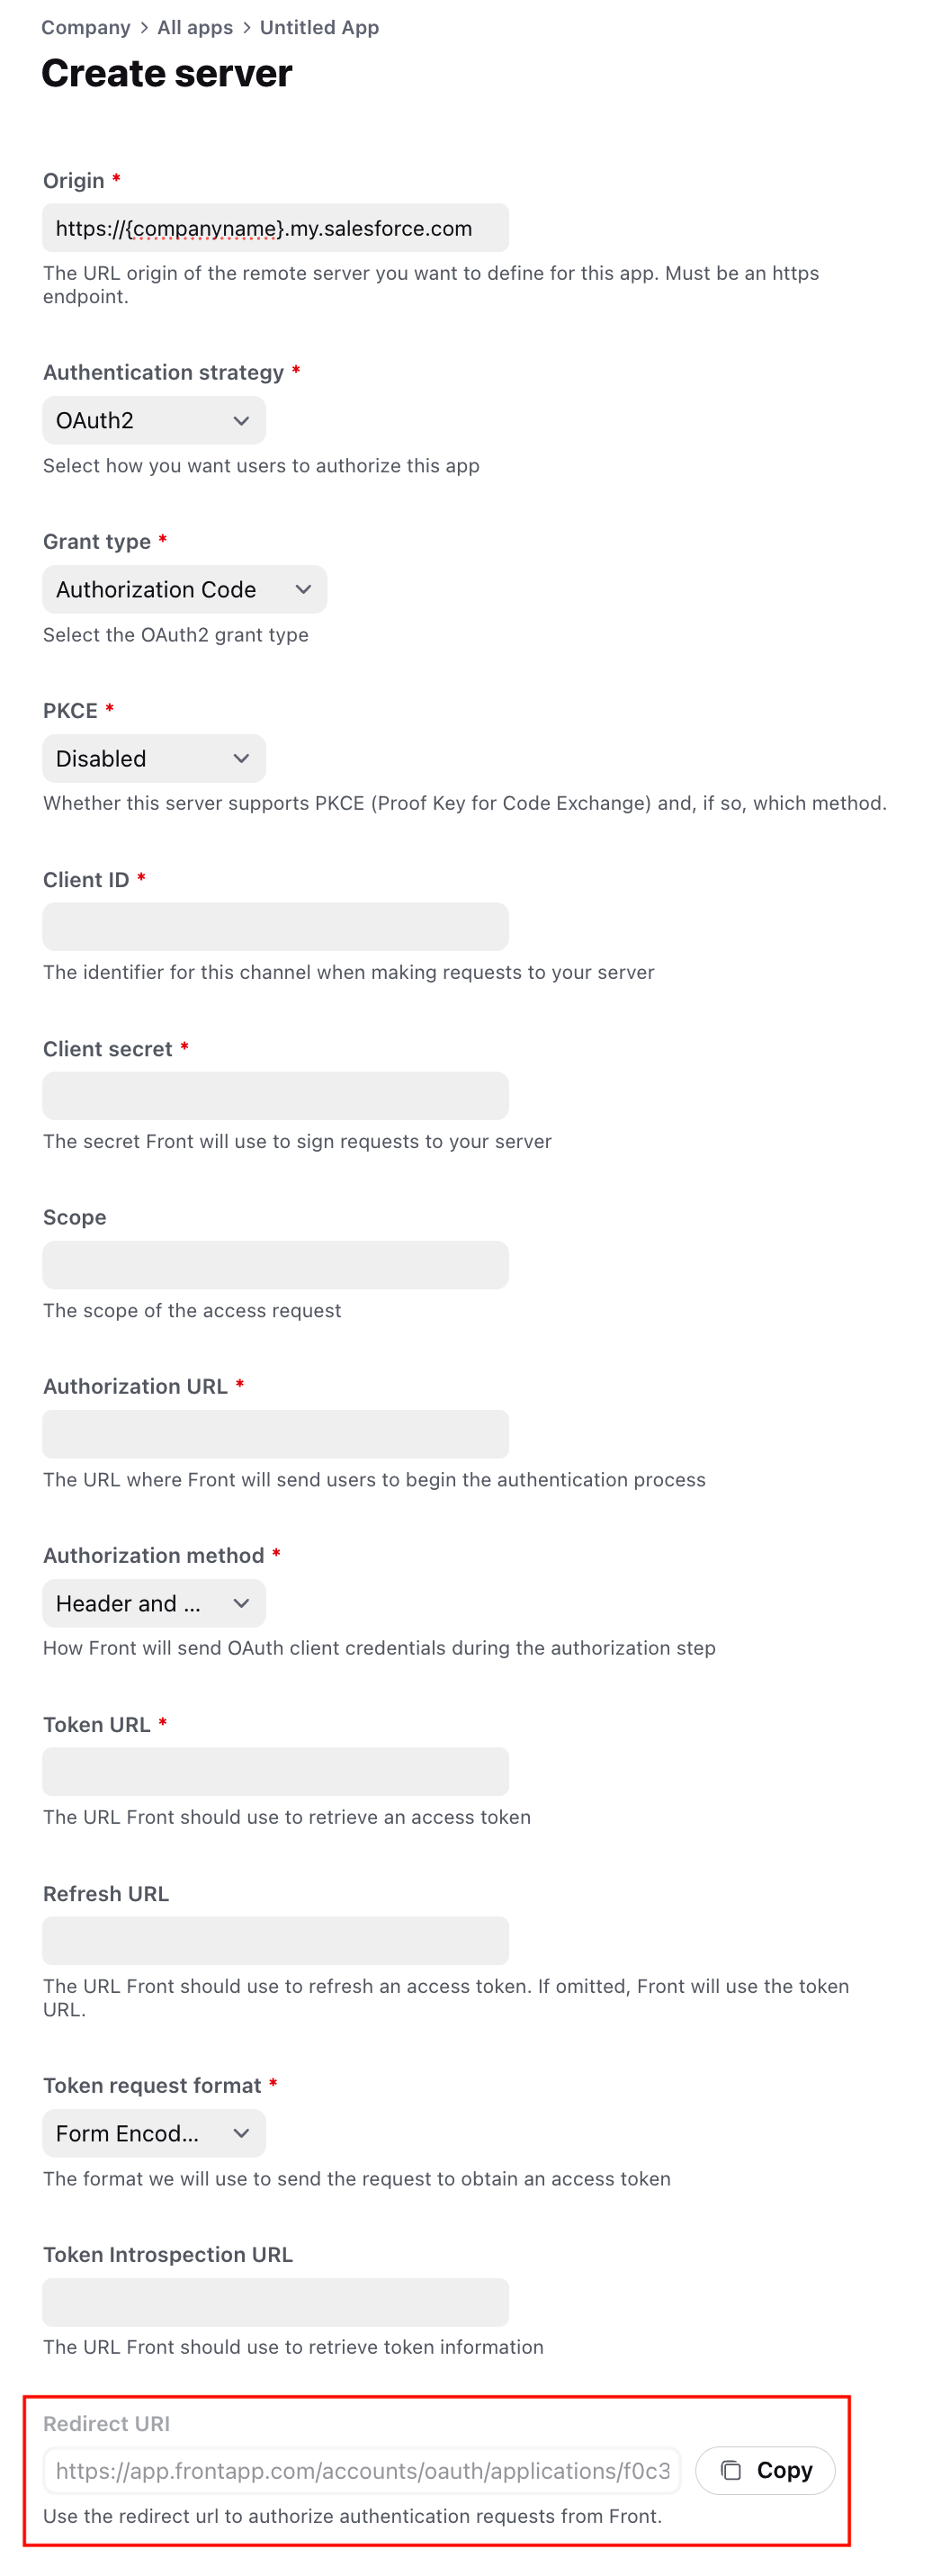
Fill in the following fields:
Origin: Enter the base URL of your Salesforce instance. It will typically follow the format https://{your company name}.my.salesforce.com
Authentication strategy: Select OAuth2
Step 4
Copy the redirect URL value to your clipboard.
Step 5
In Salesforce, create an app for Front using the steps here. Paste the redirect URL from Front in your app configuration in Salesforce. We'll need this for Front to authenticate with your Salesforce account.
Step 6
In the Salesforce app you just created, locate your client ID and client secret details.
Step 7
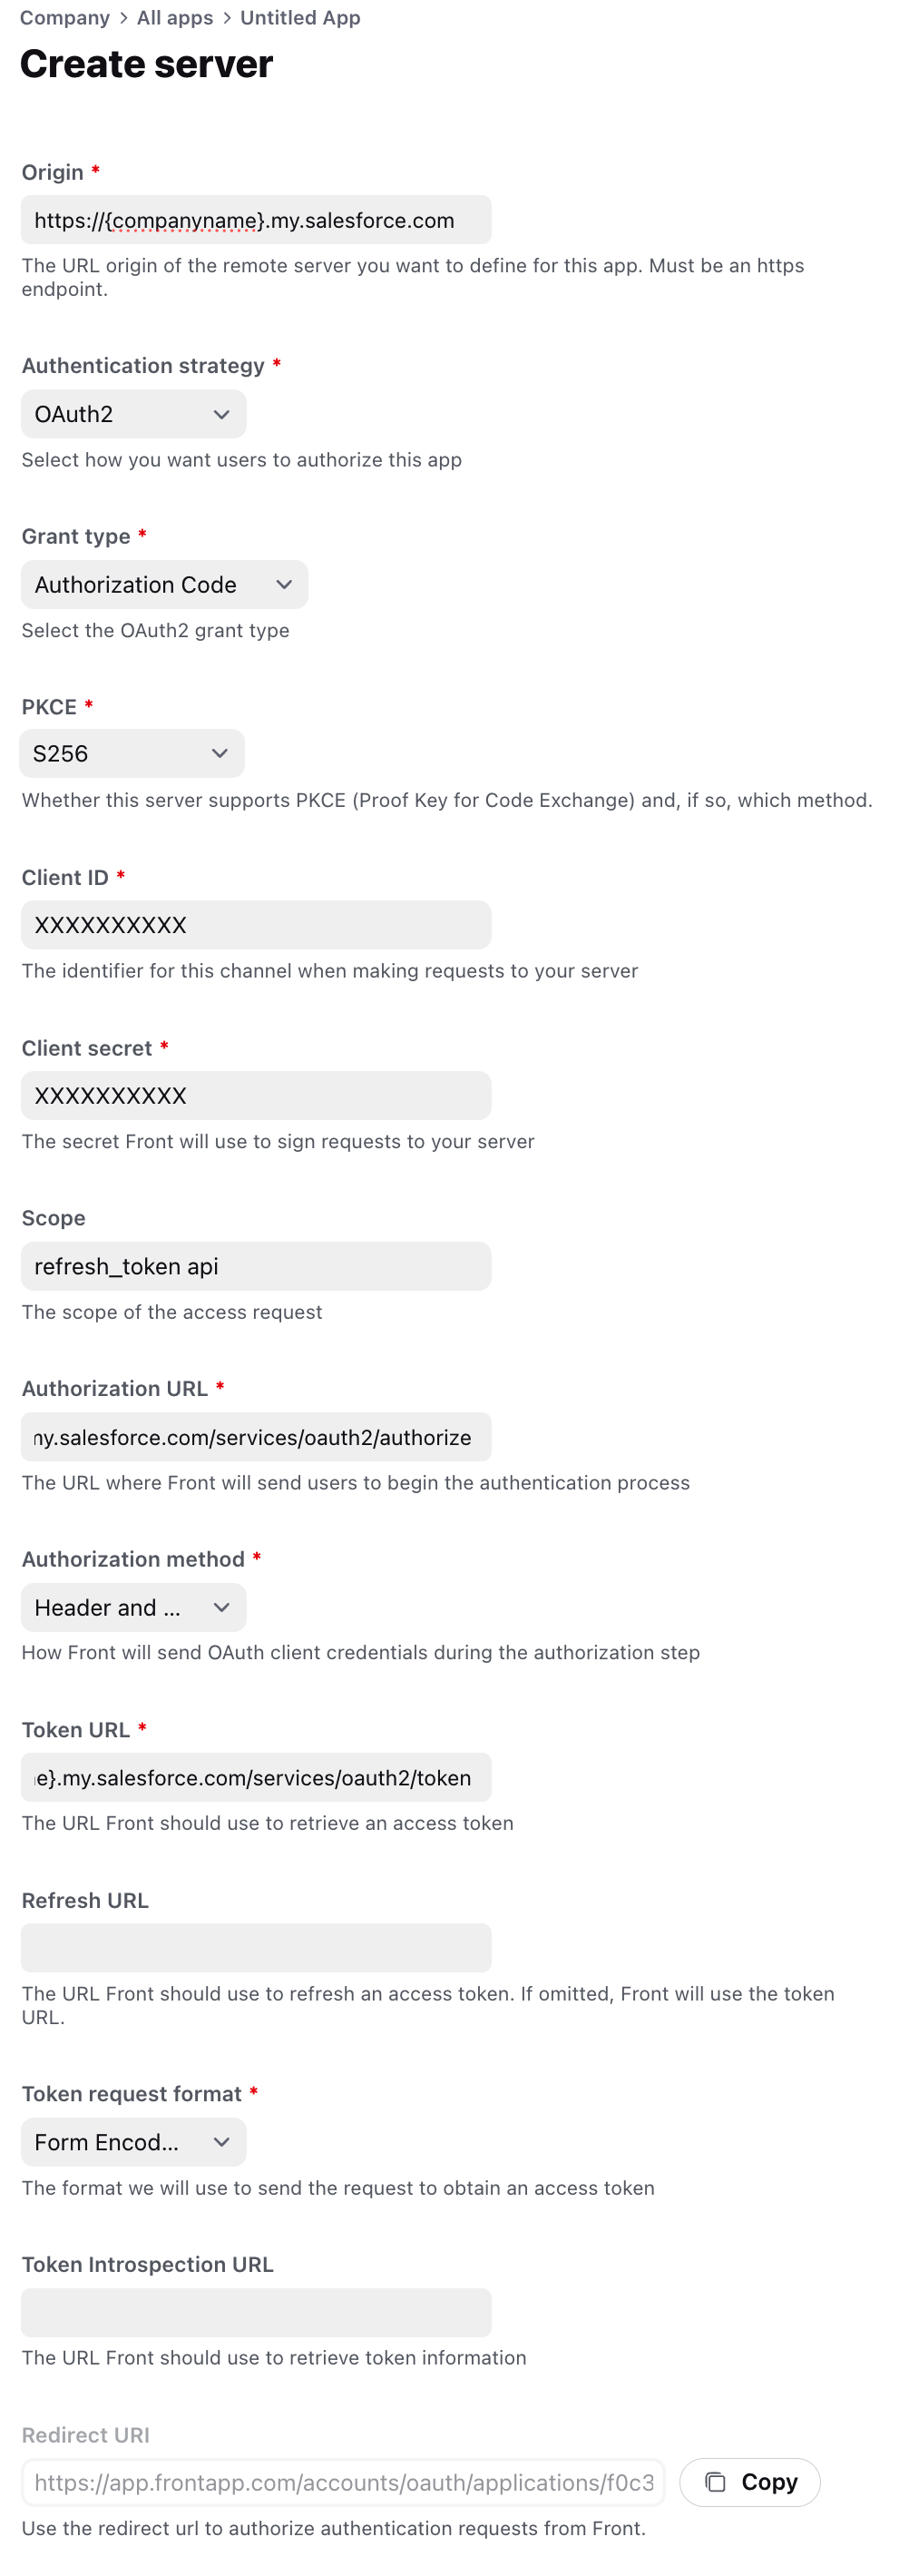
Navigate back to Front, then fill in the following fields on the server setup page:
Grant type: Select Authorization Code
PKCE: Select S256
Client ID: Paste client ID value from Salesforce
Client secret: Paste client secret value from Salesforce
Scope: Enter refresh_token api
Authorization URL: Enter the URL where Front will send users to begin the authentication process. Typically in the format https://{your company name}.my.salesforce.com/services/oauth2/authorize
Authorization method: Select Header and body
Token URL: Enter the URL Front should use to retrieve an access token. Typically in the format https://{your company name}.my.salesforce.com/services/oauth2/token
Refresh URL: Leave blank
Token request format: Select Form Encoded
Token Introspection URL: Leave blank
Step 8
Click Create to finish.
Adding Salesforce opportunities as objects in Front
Step 1
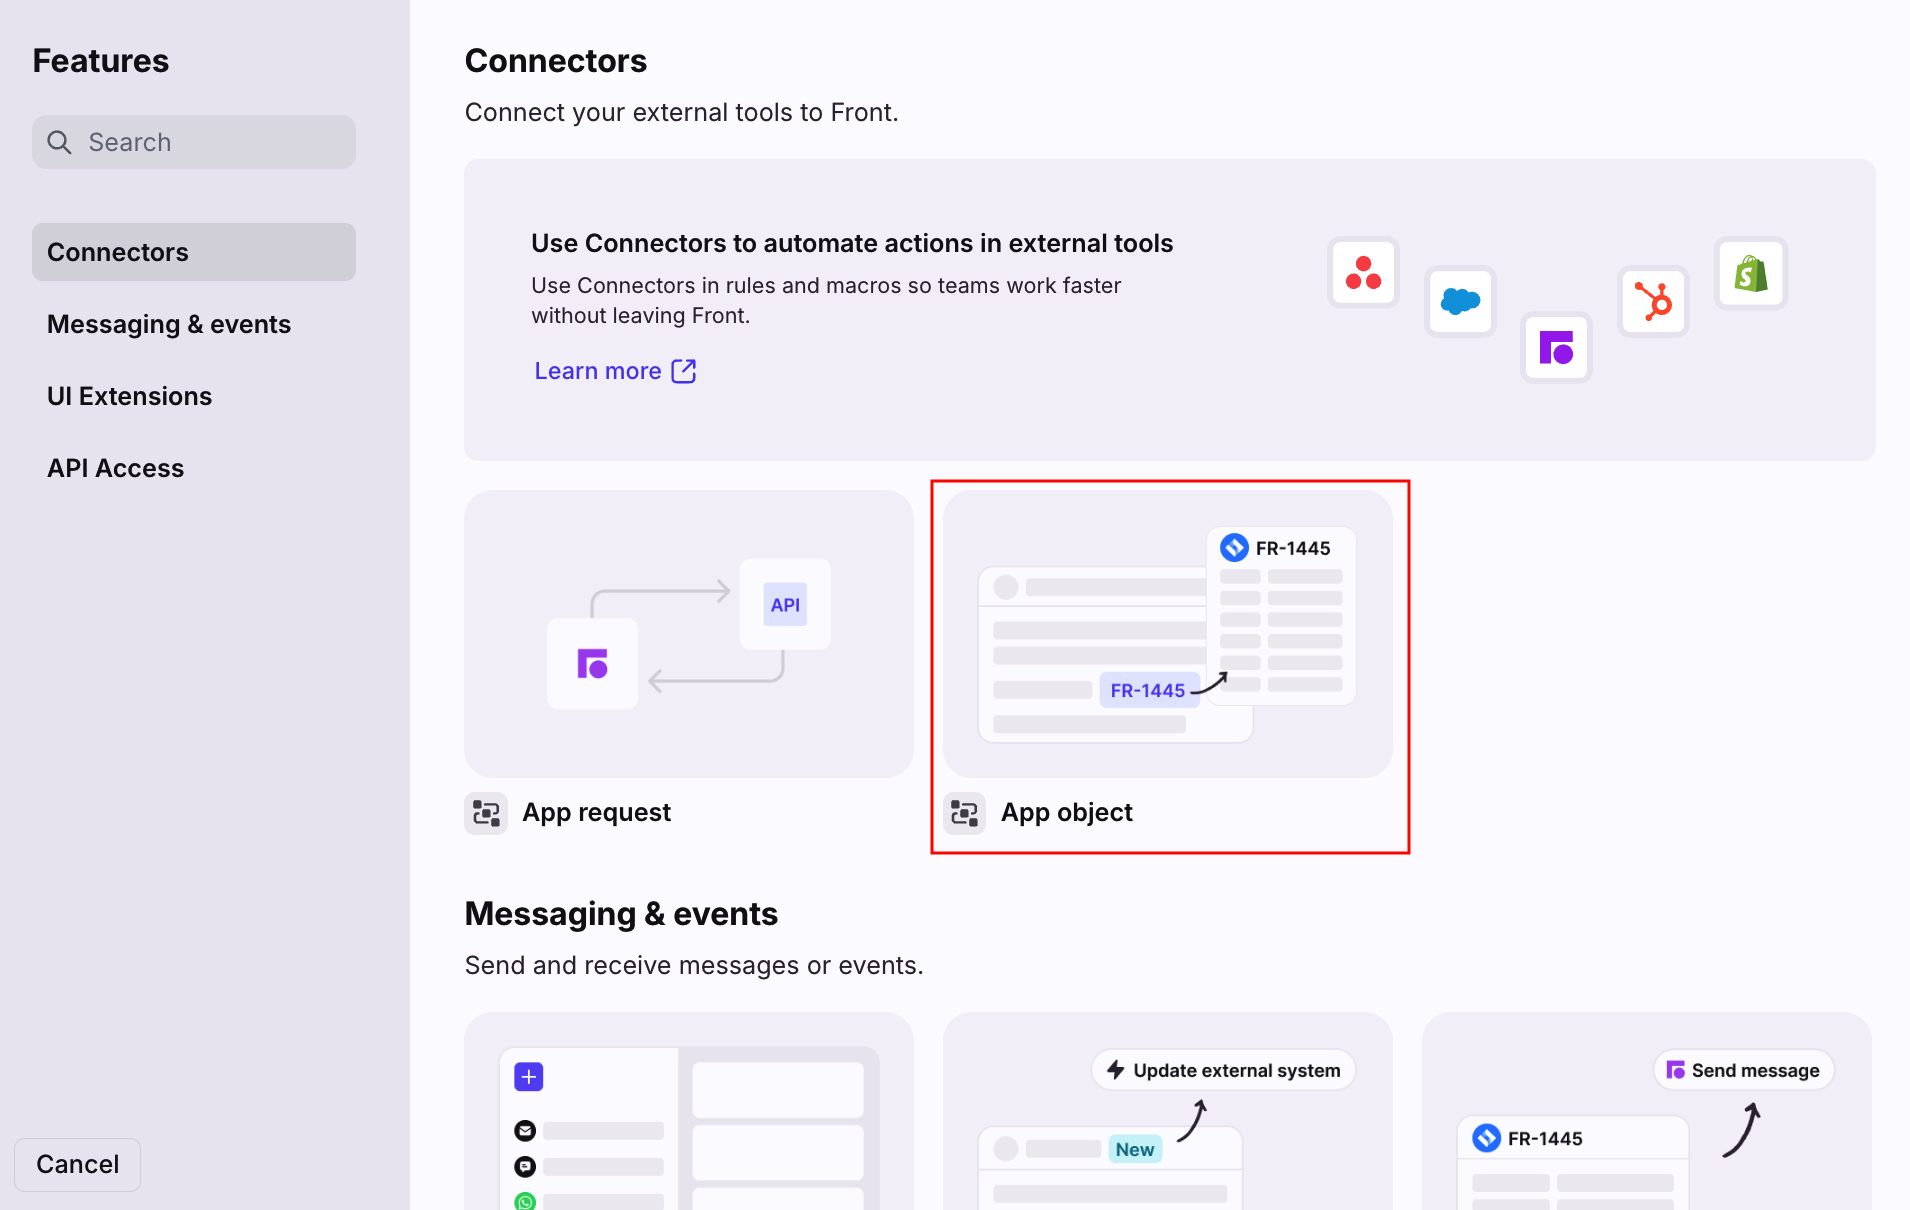
Navigate to the Features tab of your Salesforce application, then click Add feature.
Step 2
In the pop-up, select App object.
Step 3
Add a name for your object. In this case you might want to call it ‘Salesforce Opportunity’. Click Next.
Step 4
In the flow builder, select Add reference.
Step 5
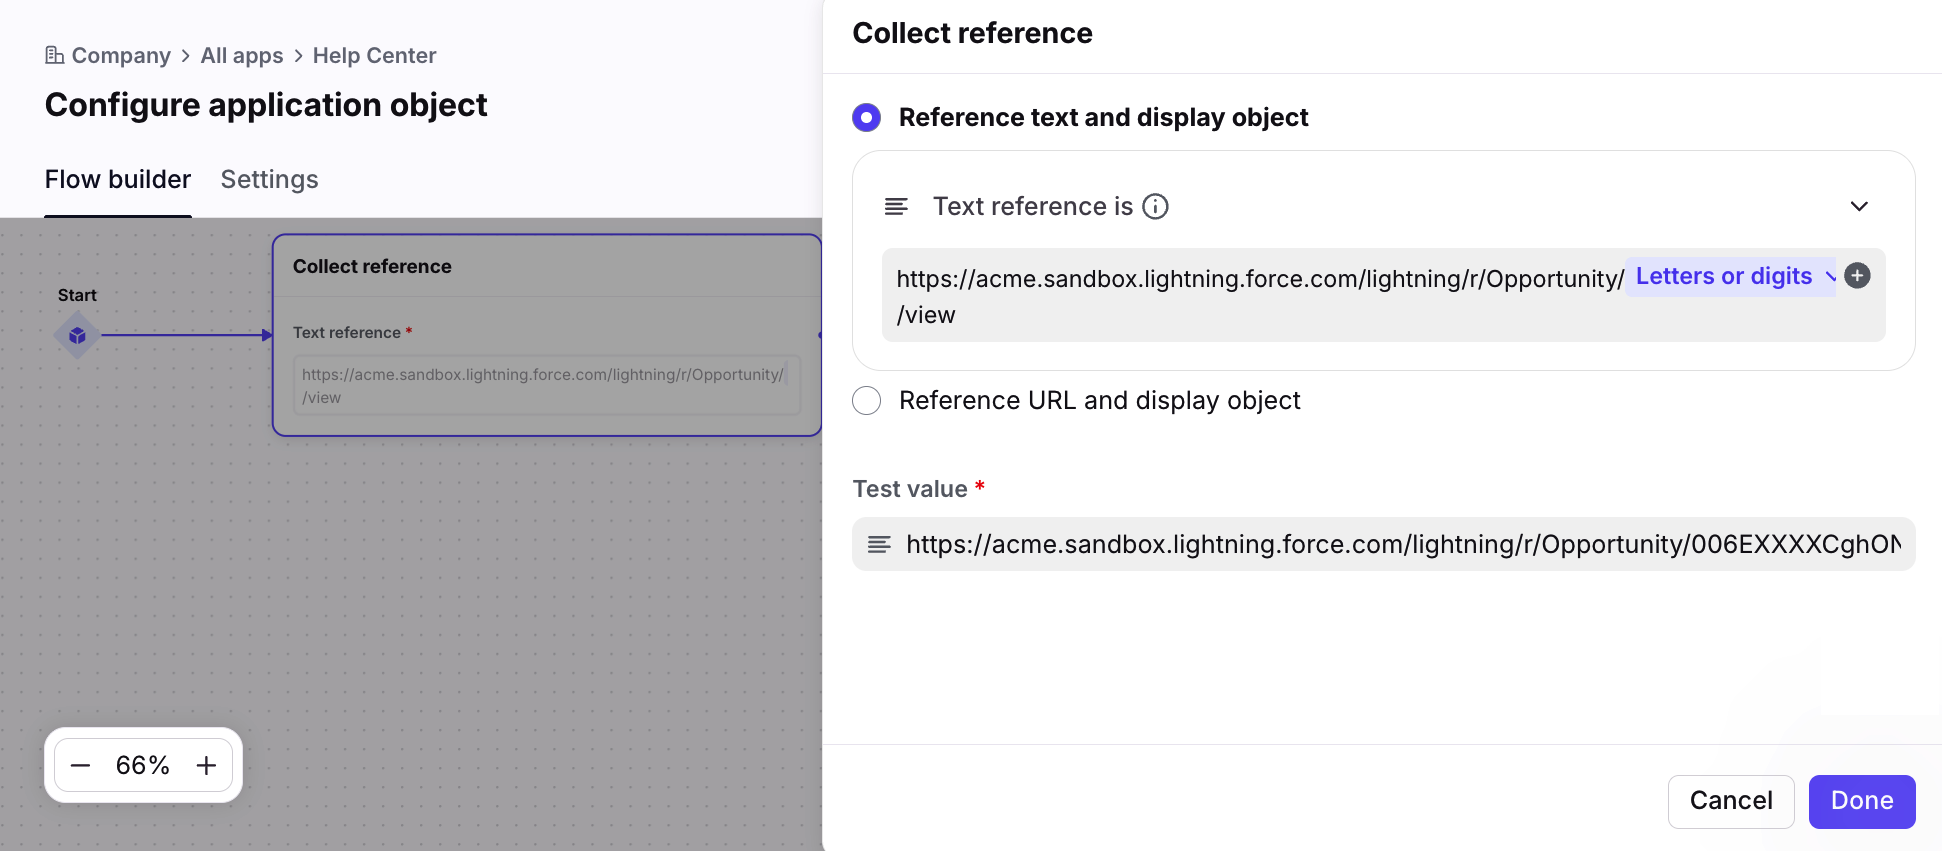
In the side panel, select Reference URL and display object, then paste a Salesforce opportunity URL from your Salesforce instance.
It should look something like https://acme.sandbox.lightning.force.com/lightning/r/Opportunity/006EXXXXCghONIAZ/view
Step 6
Replace the opportunity ID (notated in green in Step 5) with a placeholder. To do this, delete the reference, click the ‘+’ sign, then select the Letters or digits option.
In the Test value field, paste a Salesforce opportunity URL from your Salesforce instance.
Click Done.
Step 7
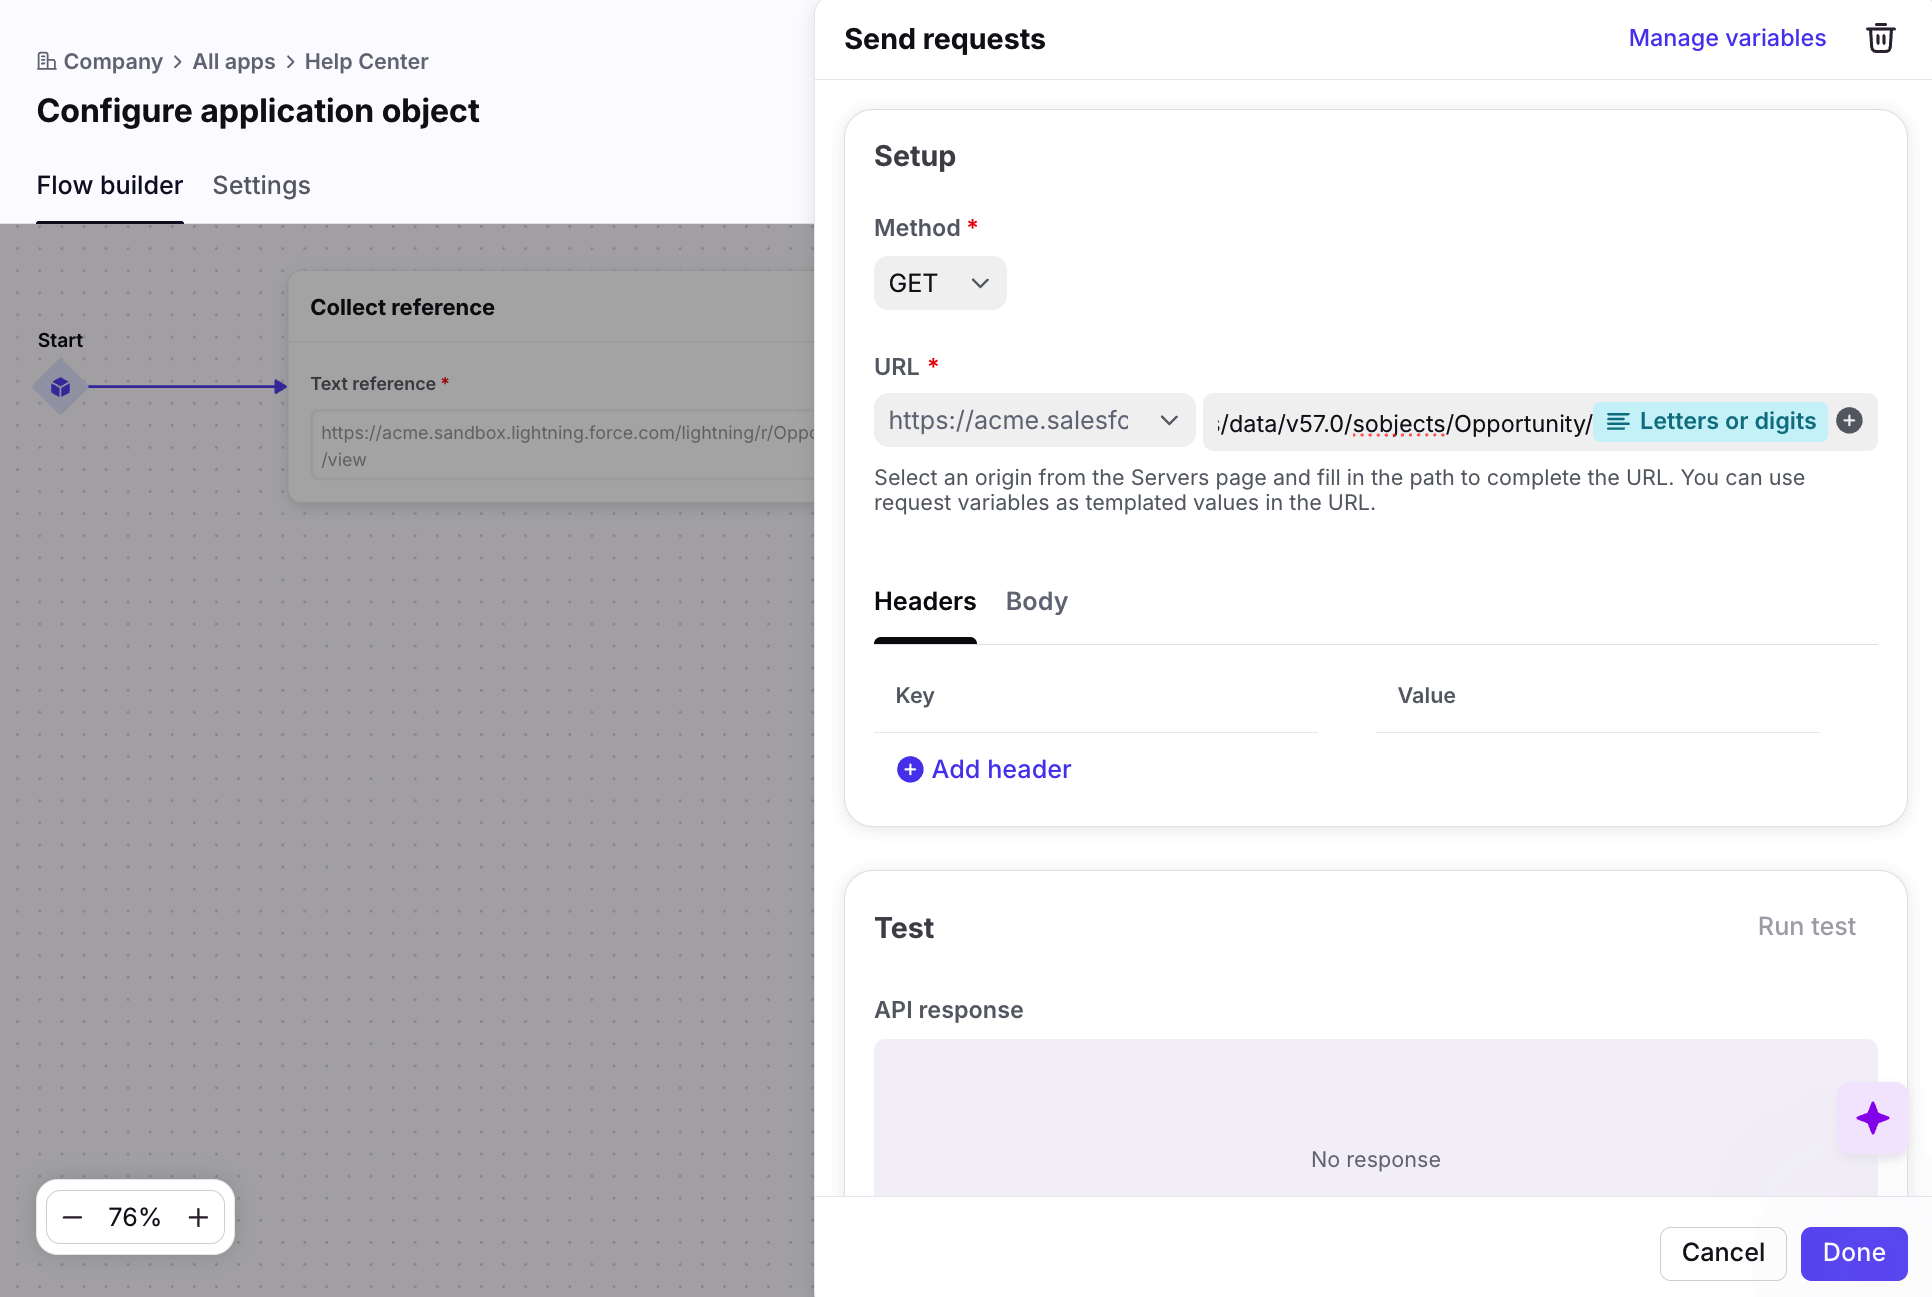
In the flow builder, select Add request.
Step 8
You’ll notice the base URL is already showing up from the information previously used to set up the server. You’ll need to then add the second part of your URL to complete the API request to your opportunity in Salesforce.
It should look something like this:
/services/data/v57.0/sobjects/Opportunity/{your opportunity ID}
For your opportunity ID, you’ll need to use Letters or digits as a placeholder (similar to Step 6).
Step 9
Test your request and confirm it works. Continue through the application object setup steps to save your object.
For more information on how to select fields to display in Front from the output returned, see this article.
If you're interested in using Connectors to display or update other objects in Salesforce, see their REST API documentation.
Using the Salesforce connector
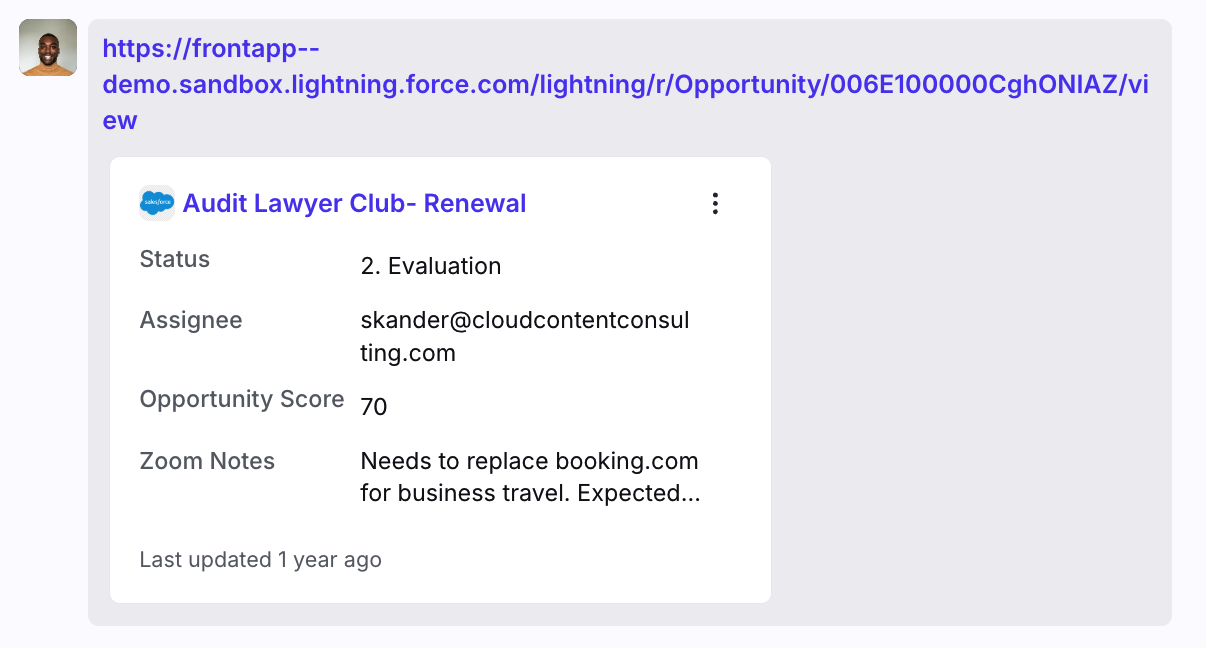
Every time you paste a link to an opportunity in a conversation in Front, the final result should look something like this:
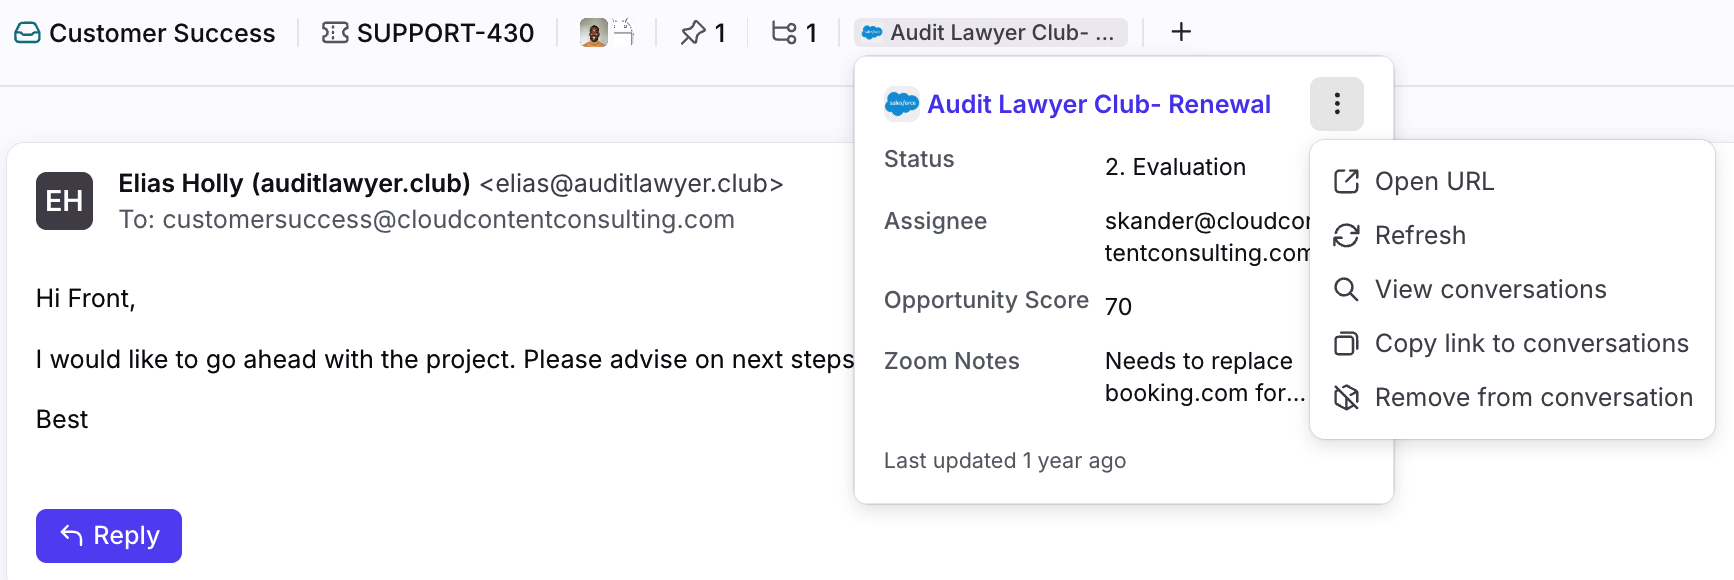
To view all conversations tagged with a given opportunity, you can click the link at the top of the conversation in Front, select the three-dot menu, then select View conversations.
Pricing
Application requests are available to build from scratch on the latest Enterprise plan. You can access pre-built requests on the Professional and Enterprise plans by visiting the App Store.

