Create a ticket number experience in Front
Overview
If you're transitioning from a traditional help desk solution to Front, your customers may be accustomed to using Ticket IDs as references. In this article, we'll review how you can create similar experiences for your customers using Front's Conversation ID.
🎥 Check out this video walkthrough to learn more.
Search a conversation ID
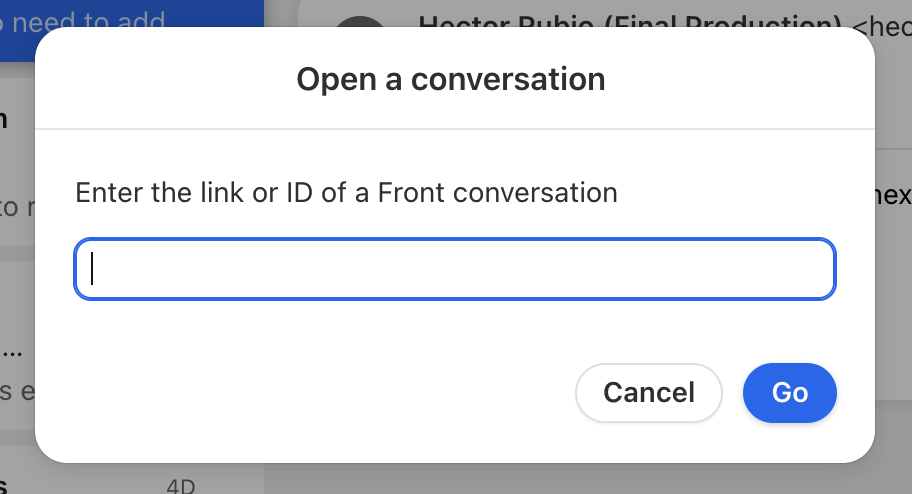
Teammates can hold down and type Shift + O to open Front's conversation search box, where they can easily drop any conversation ID to navigate to it quickly.
You can also search for a conversation ID using the search bar at the top of the Front interface.
Option #1: Set up an auto-reply
With this option, you will create a rule to send an automatic reply whenever a new conversation is created. The automatic reply will include Front's Conversation ID, which is similar in concept to the Ticket # offered through traditional help desk solutions.
Step 1
Click the gear icon on the top right of Front and into the Company settings tab, then select Message templates.
Step 2
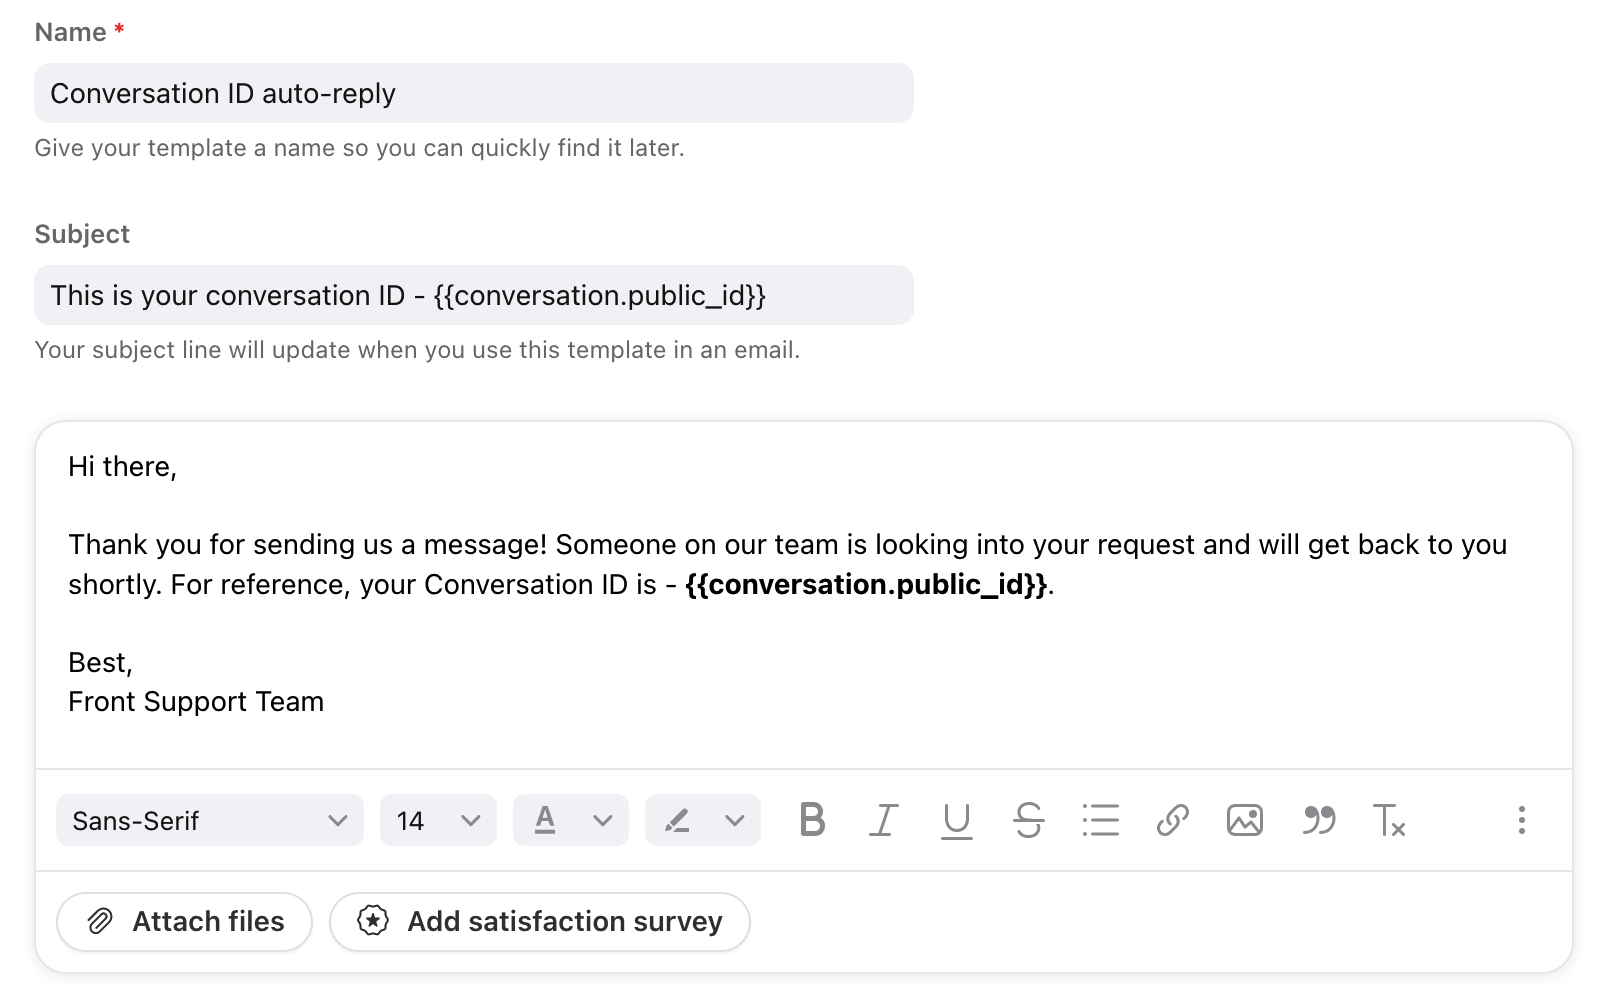
Write your auto-response message and use Front's dynamic variable to include the Conversation ID. You can include the Conversation ID in both the body and the subject line of the message. Note: The subject line in the message template will replace the original email subject line.
To use the dynamic variable type {{ and select {{conversation.public_id}}. Here's an example of an auto-reply.
Option #2: Include in your signature
With this option, you can update your signature to include a short sentence referencing the Conversation ID.
Step 1
Click the gear icon on the top right of Front and into the Company or Personal settings tab, depending on which space you are working with, and select Signatures.
Step 2
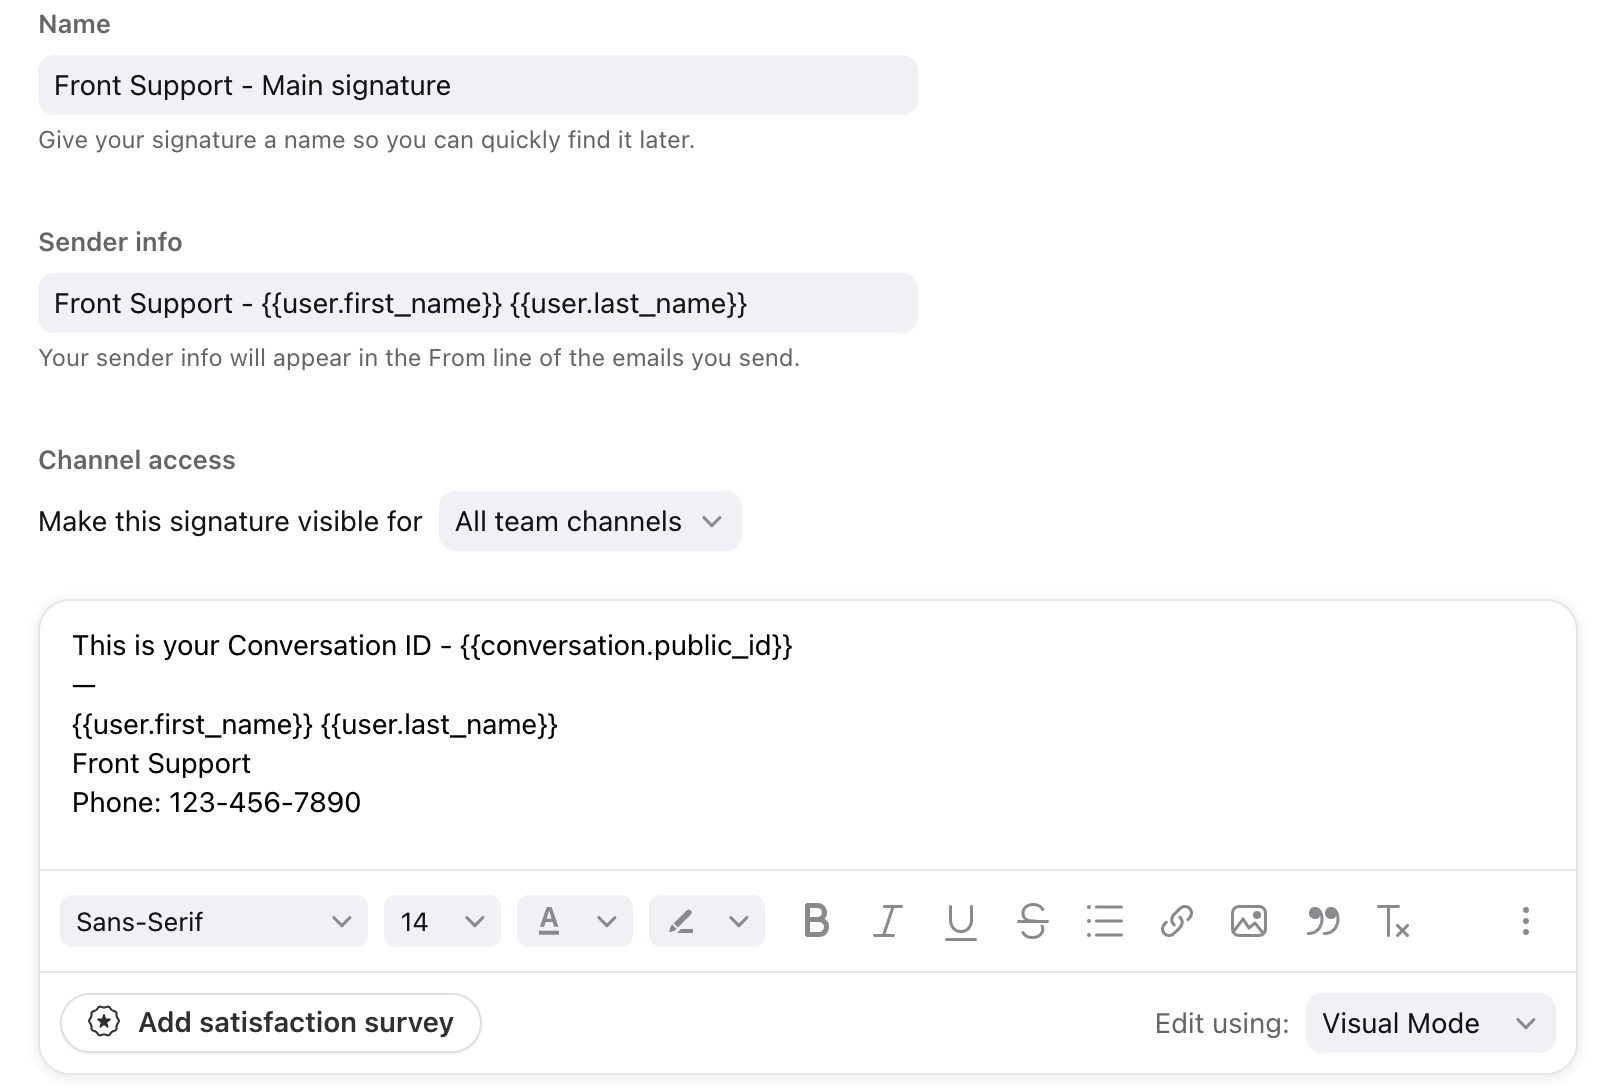
Update your signature to include the Conversation ID. To use the dynamic variable type {{ and select {{conversation.public_id}}. Here's an example of a signature:
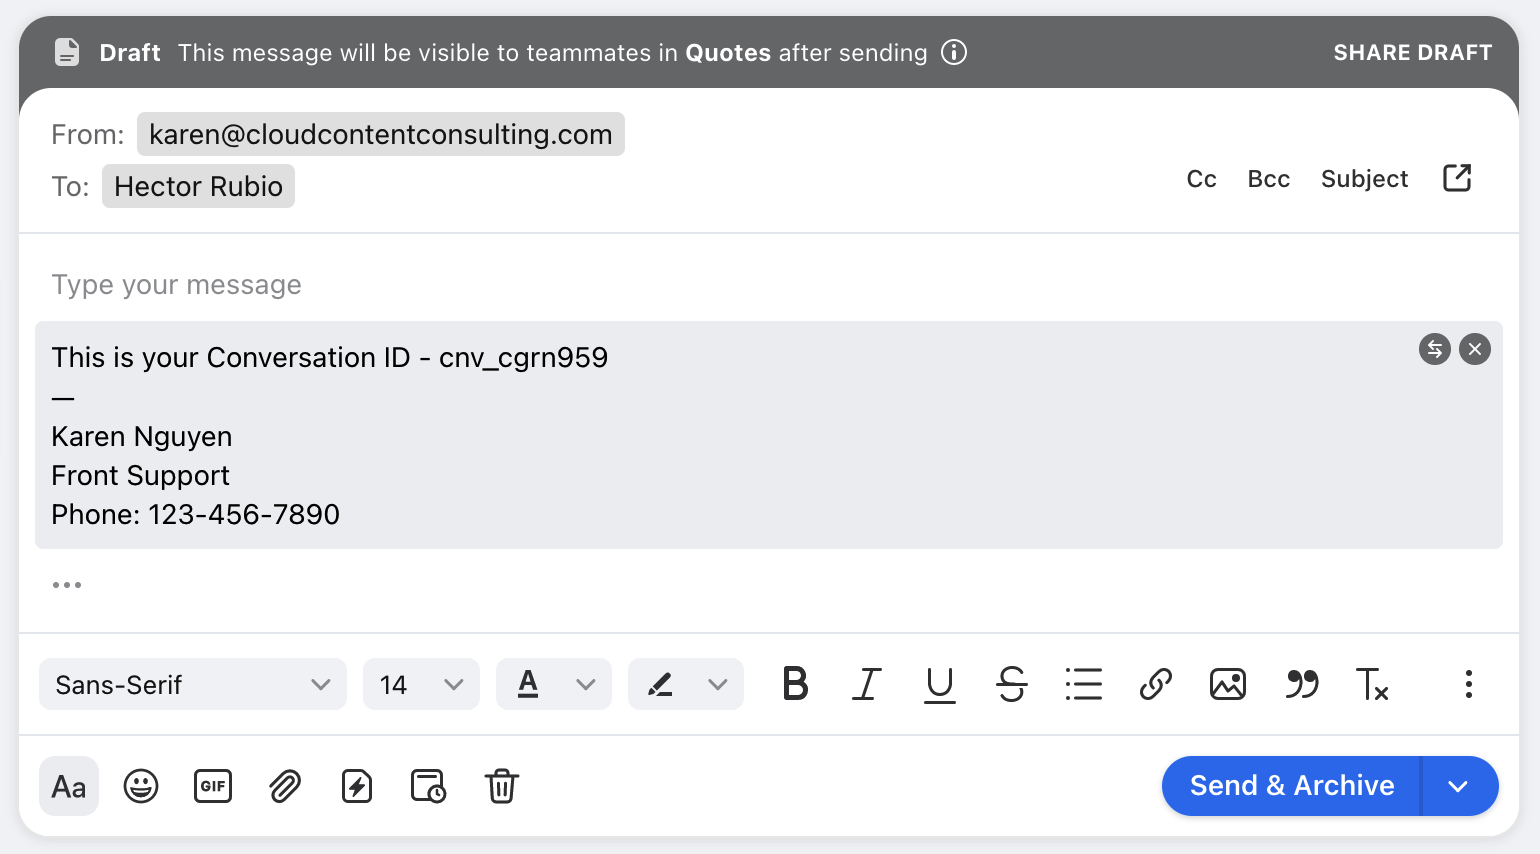
This is how it will display in your composer:
Option #3: Build a custom reply through API/Zapier
With this option, you will leverage Front's API to create a ticket number experience for your users by creating a shared rule to send all new inbound messages to a webhook, or external endpoint to be processed. This webhook will be created by your development team or Zapier, depending on the direction you go down. We'll also want to ensure the rule only applies to every conversation once when the first message is received. I will be using Zapier to demonstrate how you can accomplish this.
Step 1
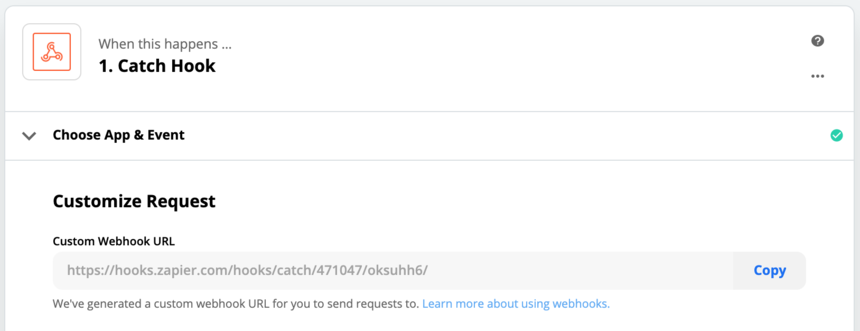
Create a webhook in Zapier: Create a new Zap > select Webhooks from Zapier and set the Trigger Event to Catch Hook. Copy the produced custom webhook URL.
Step 2
Create a tag that we can use to identify conversations that have received a Conversation ID. You can create a tag by going to your Settings > Tag > Create new tag. I've created a sample tag called "Convo ID".
Step 3
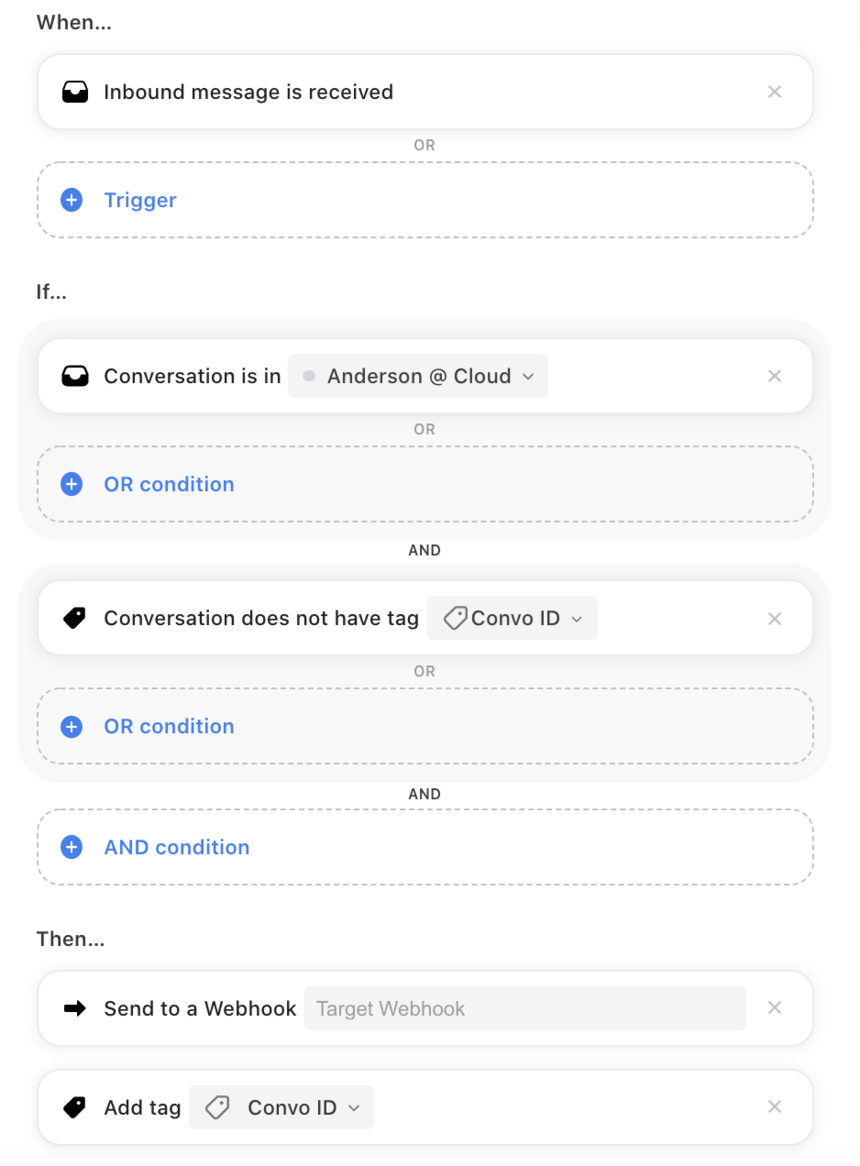
Create a shared rule by going to your Settings > Rules > Create a new rule. You'll want to update the WHEN to just include Inbound message. In the IF section, this is where you should select the inboxes you want to apply the ticket experience to, as well as add a condition that states the conversation does not have tag "Convo ID" or whatever tag name you created in Step 2. In the THEN section, you'll want to select Send to webhook and paste the webhook URL you copied from Step 1, and include a step to add the "Convo ID" tag to the conversation, ensuring this rule won't apply to this conversation again.
For example:
Step 4
At this point we should test this rule works; this will give us confidence we are catching the correct types of messages, and will give us some sample data to work with in Zapier.
To do this, create a message which will trigger your rule. In the example above, we will send a new email to our "Andersen @ Cloud" inbox.
Step 5
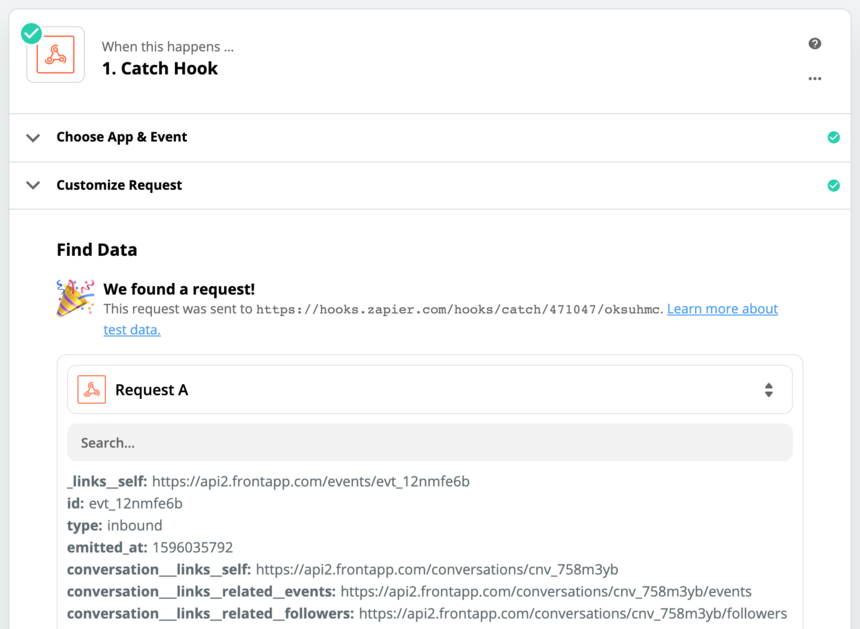
Back in Zapier, hit "Test Trigger" in the Webhook step setup, and you should see the data you received from your Front rule appear:
Step 6Now we have some sample data to work with in Zapier, we can create our Zap action. This step will use Front's API to append the Conversation ID to the existing subject line and send an auto-response back to the recipient.
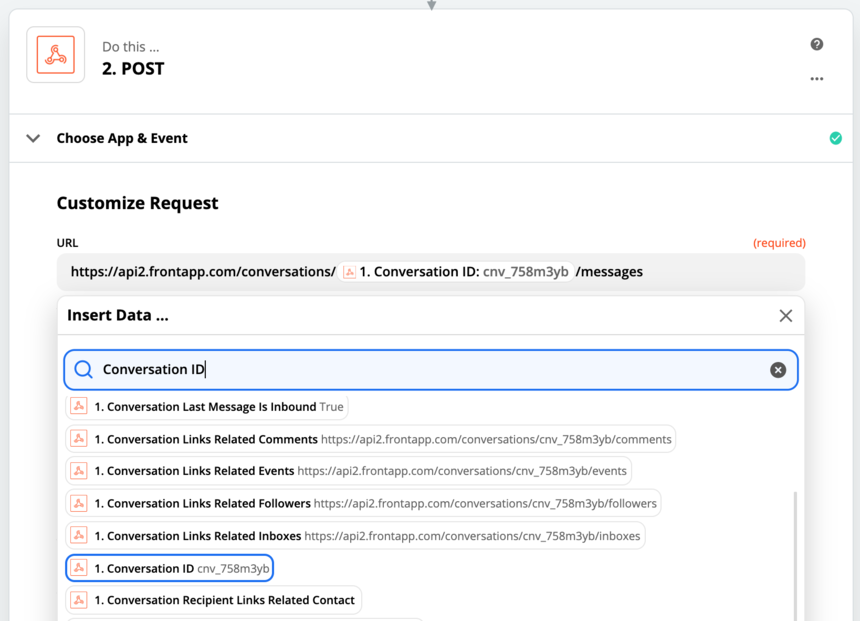
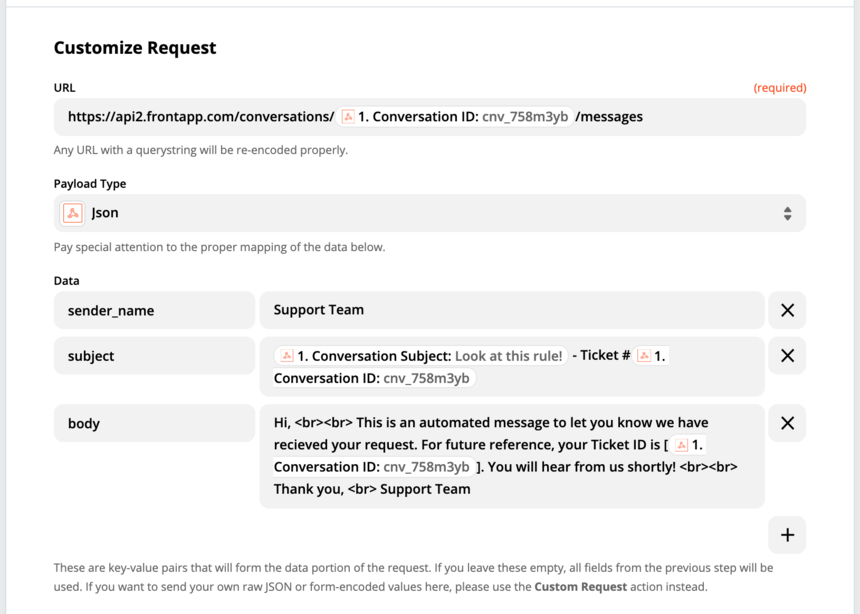
Again, choose Webhooks by Zapier and select the Custom Request action event. You'll want to set the method to POST and the URL to https://api2.frontapp.com/conversations/{{conversation_ID}}/messages. Make sure the {{conversation_ID}} is set up as a dynamic variable, pulling from the initial Catch hook step of the Zap. Click the URL field to select the dynamic variable you want to pull into your URL.
Set the Payload Type field to "JSON".
Next, you'll want to update the Data and Headers fields with the appropriate data.
We will start by setting the sender name, subject and message body;
To add any additional data to your auto-response, please reference Front's message API endpoint for a list of possible options.
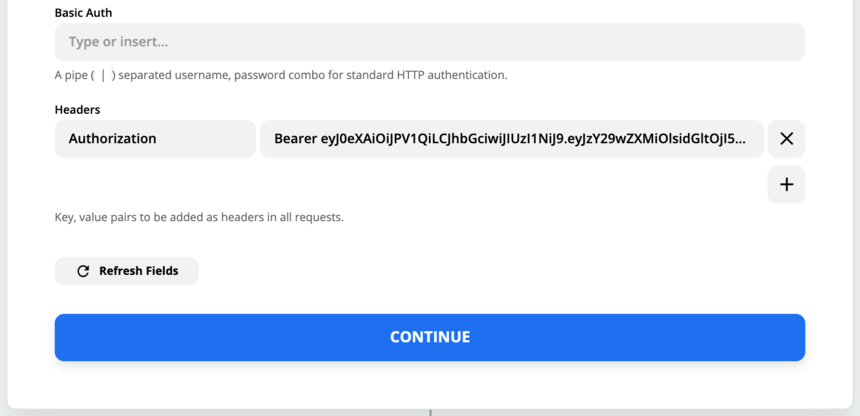
Finally, we need to create your Authorization token to authenticate the requests being made to Front. Follow the instructions in our How to create API tokens guide to create a new API token. Then, take your new token, and create a new Authorization header in your Zap:
Once you've created these two steps, save and enable your Zap and send a message to your inbox to test the ticket workflow you've created. You should experience the sender receiving an auto-response, with a ticket ID in the subject and auto-responder message body.If you have any questions, please contact us.

