How to manage changing your domain name or migrating email providers
Overview
There may be cases where you need to change email channel configuration details in Front but want to retain your conversation history. The reasons you might need this could be one of the following:
Changing your company's domain name, and thus making the corresponding change to your email channels and login address in Front.
Changing your email provider.
Changing a distribution list address to a real Gmail or Office 365 inbox.
Changing the primary email address for an account.
Changing your email accounts and domain through an acquisition.
Before you get started
To prepare for your migration, we recommend auditing your Front settings to identify any channels, rules, etc. that you need to update.
Channels
Shared channels: Admins should identify which shared channels need to be updated. These are email addresses connected to shared inboxes.
Individual channels: Non-admins should identify any individual channels that need to be updated. These are email addresses connected to individual (personal) inboxes.
Rules
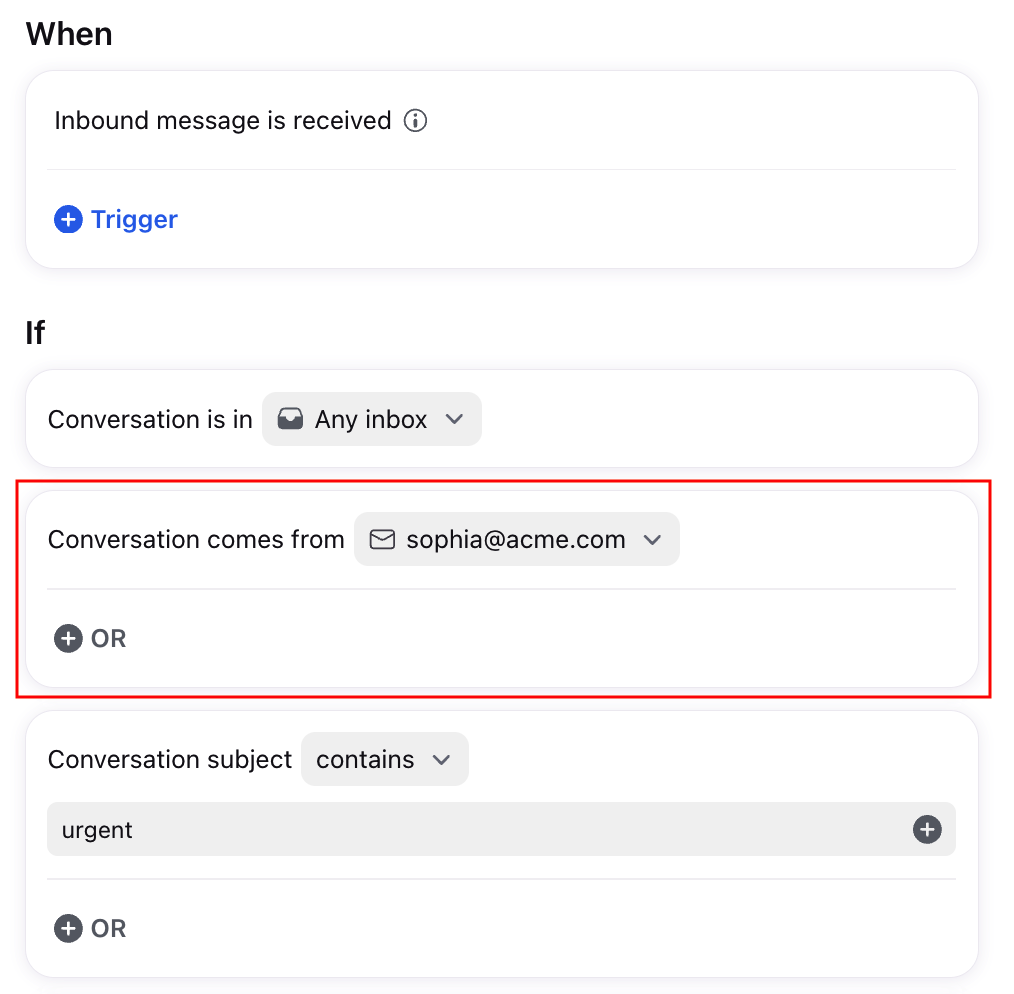
Shared (workspace) rules: Admins should identify any rules that use the Conversation comes from channels rule condition. These rules will need to reference your new channels.
Individual (personal) rules: Non-admins should identify any rules that use the Conversation comes from channels rule condition. These rules will need to reference your new channels
Drafts
Copy and paste any drafts you need to keep into an external document. When channels are deleted from Front, all associated drafts are also deleted.
Sign in method
If you’re changing your domain name (e.g. sophia@acmecorp.com to sophia@acme.com), please contact our Support team with a request to schedule a mass update for all your users.
If you’re using Sign in with Google/Office 365 (OAuth), you’ll also need to schedule a mass update with our Support team to break with the old OAuth connection.
If you previously used OAuth with your old email provider and want to continue using it with your new email provider, your users can select the new OAuth method after your migration.
If you previously used OAuth with your old email provider and no longer want to use it, your users can follow the Forgot password steps on the sign-in page to set up a password with their Front account after your migration.
Best practices
Prior to your migration, we recommend sending an internal email to all your Front users with information on:
How to audit personal channels, rules, and drafts
How to update personal channels, rules, and sign-in methods
The order of your instructions may vary based on which scenario you are following below.
Scenario 1: Domain migration
Follow these steps if your company is going through a domain migration (e.g. sophia@acmecorp.com to sophia@acme.com), or domain AND email provider migration (e.g. Gmail to Office 365).
You must have Front admin permissions to update shared channels and rules.
Part 1a: Add new channels
During a domain migration, both old and new channels can exist in Front at the same time.
Step 1
In Front, navigate to the Channels setting in your sidebar, then click Connect channel. Select a channel type and follow the prompts to add the new channel associated with your new domain.
See here for specific setup guides for common channel types.
Step 2
For Gmail and Office 365 channels, toggle off the Import email history and Import Labels/Folders as private tags settings.
If enabled, this will create duplicate conversations and tags in Front.
Part 1b: Migrate domain
Step 3
Outside of Front, admins will perform the domain migration. General instructions may vary so Front doesn’t have specific instructions.
Part 1c: Update login email address and sign in method
Step 4
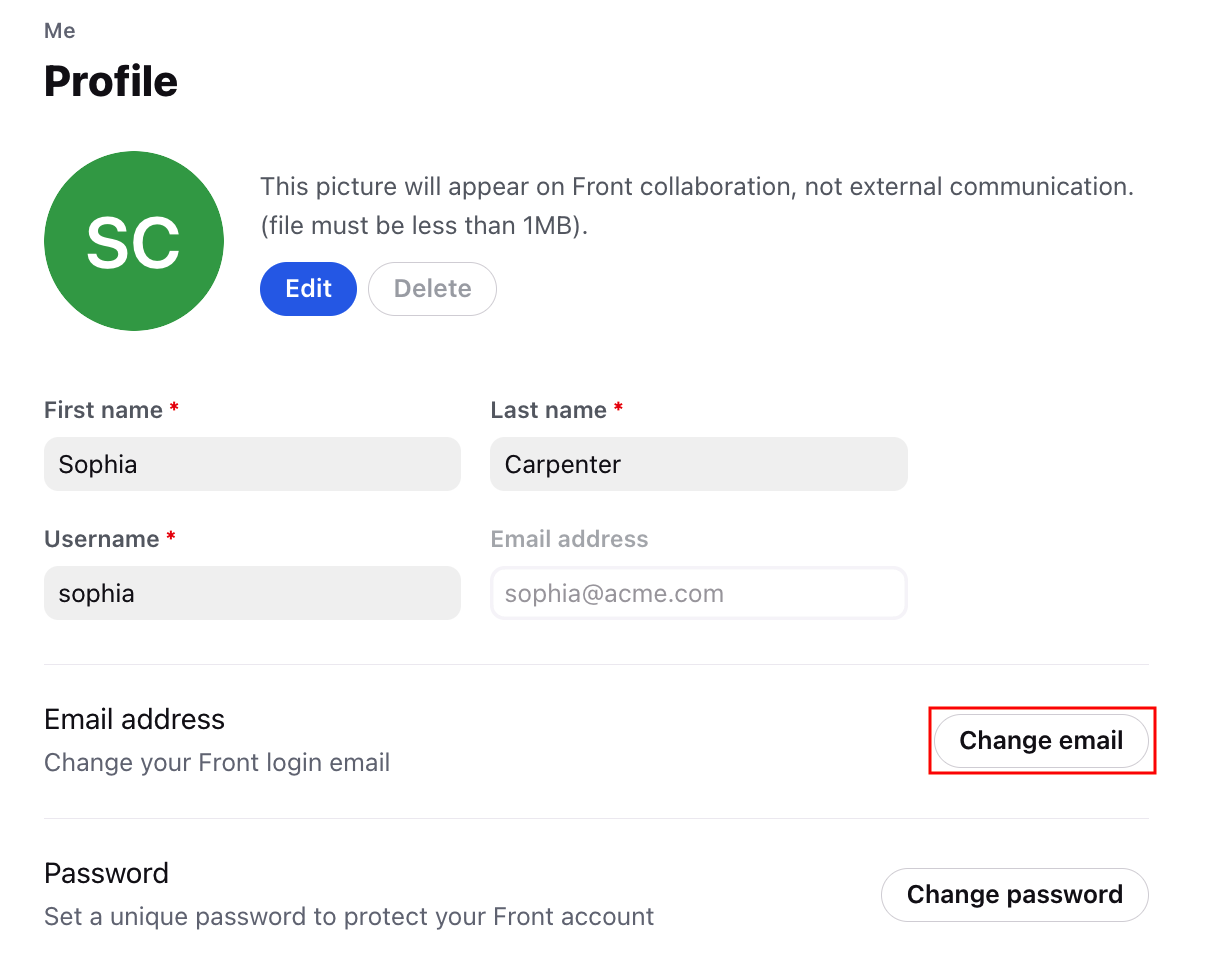
If your Front login also needs to be updated to a new email address, navigate to your personal settings (Me tab), and select Profile.
Step 5
Click Change email to update your login email address.
If you’re using the Sign in with Google/Microsoft login method, the Change email option will be disabled. An admin will need to contact Front’s Support team to turn off this login option for you first.
Once we've done that, you will then log out of Front and click the Forgot Password flow on our login page to set up a Front password for your original email login. After doing so, you'll be able to sign in using just your email and password, at which point you can update your login email. You can then leverage the Sign in with Google/Office 365 option using your new email address upon your next login.
Part 1d: Update rules or personal settings
Step 6
If you have any rules using the Conversation comes from channel condition, use the dropdown to select your new email channel.
Step 7
In your personal preferences, update any settings to use your new email channel. e.g. Default channel setting, Default video conference channel, etc.
Part 1e: Delete old channels
Step 8
Follow these steps to delete your old channels from your inboxes.
❗Important reminders:
Save your drafts: Save any drafts in an external document prior to removing the channel. When a channel is deleted, all drafts associated with the channel will be deleted and cannot be recovered.
Do not delete your inbox: Make sure you do not delete the inbox if you want to retain its message history in Front. By only deleting the channel you'll retain the inbox's conversation history, including comments, tags, assignments, etc. If you delete the inbox itself, then message history will be deleted and cannot be recovered.
Step 9
Once completed, all your Front settings should be using your new email channels.
Scenario 2: Email provider migration
Follow these steps if your company is going through an email provider migration where your domain stays the same (e.g. Gmail to Office 365, email is sophia@acme.com in both).
You must have Front admin permissions to update shared channels and rules.
Part 2a: Migrate email provider
Step 1
Outside of Front, admins will perform the email provider migration. This typically involves:
Creating accounts and email addresses in your new email provider (e.g., Office 365 or Google Workspace), but do not connect DNS yet.
Migrating email data from the old provider to the new one.
Updating DNS settings to begin routing email to the new provider. At this point, emails will reach the new email server but not yet appear in Front.
Part 2b: Delete old channels
During an email provider migration, both old and new channels cannot exist in Front at the same time. You must first delete the old channels then add the new ones.
Step 2
In Front, follow these steps to delete your old channels from your inboxes.
❗Important reminders:
Save your drafts: Save any drafts in an external document prior to removing the channel. When a channel is deleted, all drafts associated with the channel will be deleted and cannot be recovered.
Do not delete your inbox: Make sure you do not delete the inbox if you want to retain its message history in Front. By only deleting the channel you'll retain the inbox's conversation history, including comments, tags, assignments, etc. If you delete the inbox itself, then message history will be deleted and cannot be recovered.
Part 2c: Add new channels
Step 3
In Front, navigate to the Channels setting in your sidebar, then click Connect channel. Select a channel type and follow the prompts to add the new channel associated with your new domain.
See here for specific setup guides for common channel types.
Step 4
For Gmail and Office 365 channels, toggle off the Import email history and Import Labels/Folders as private tags settings.
If enabled, this will create duplicate conversations and tags in Front.
Part 2d: Update login email address and sign in method
Step 5
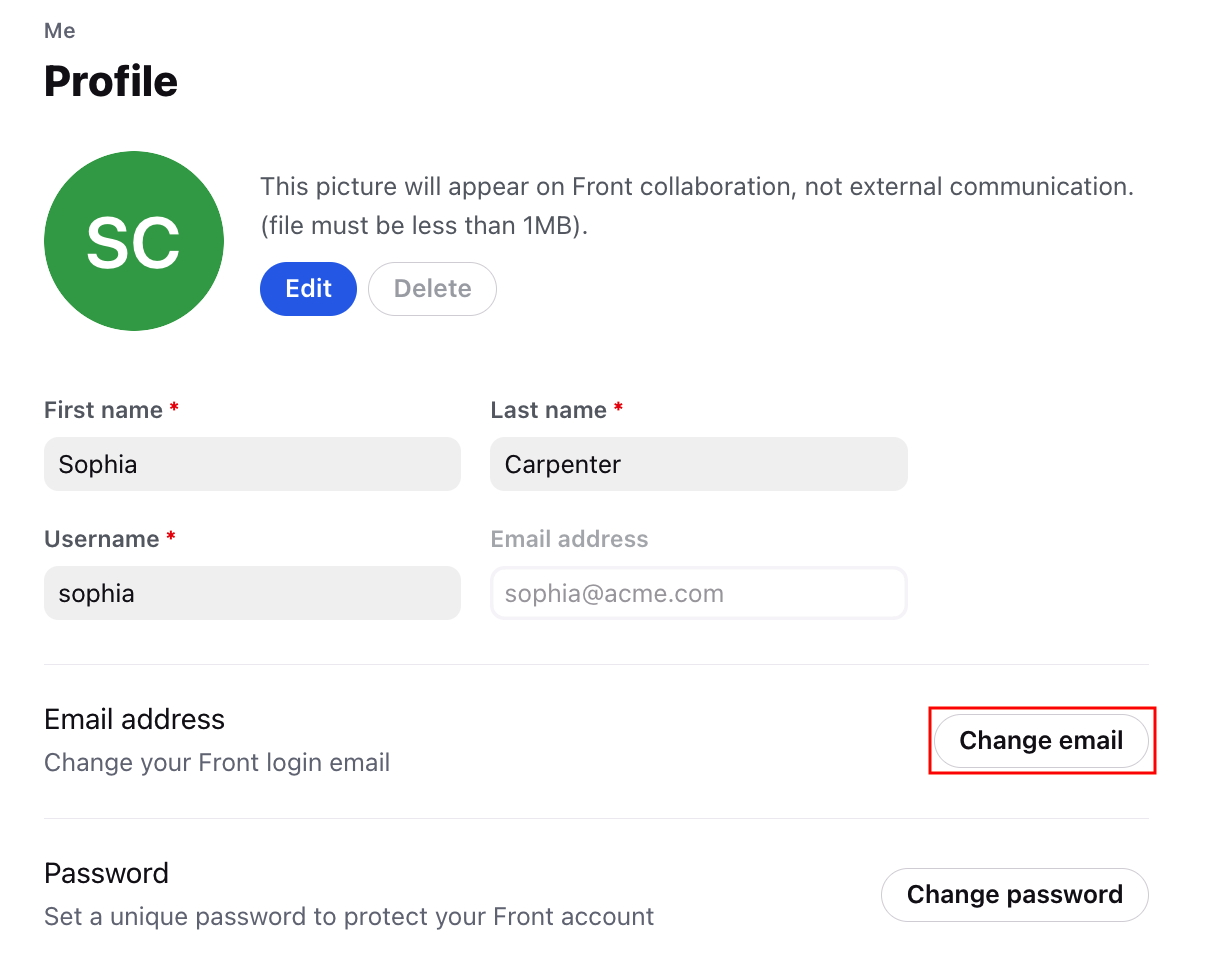
If your Front login also needs to be updated to a new email address, navigate to your personal settings (Me tab), and select Profile.
Step 6
Click Change email to update your login email address.
If you’re using the Sign in with Google/Microsoft login method, the Change email option will be disabled. An admin will need to contact Front’s Support team to turn off this login option for you first.
Once we've done that, you will then log out of Front and click the Forgot Password flow on our login page to set up a Front password for your original email login. After doing so, you'll be able to sign in using just your email and password, at which point you can update your login email. You can then leverage the Sign in with Google/Office 365 option using your new email address upon your next login.
Part 2e: Update rules or personal settings
Step 7
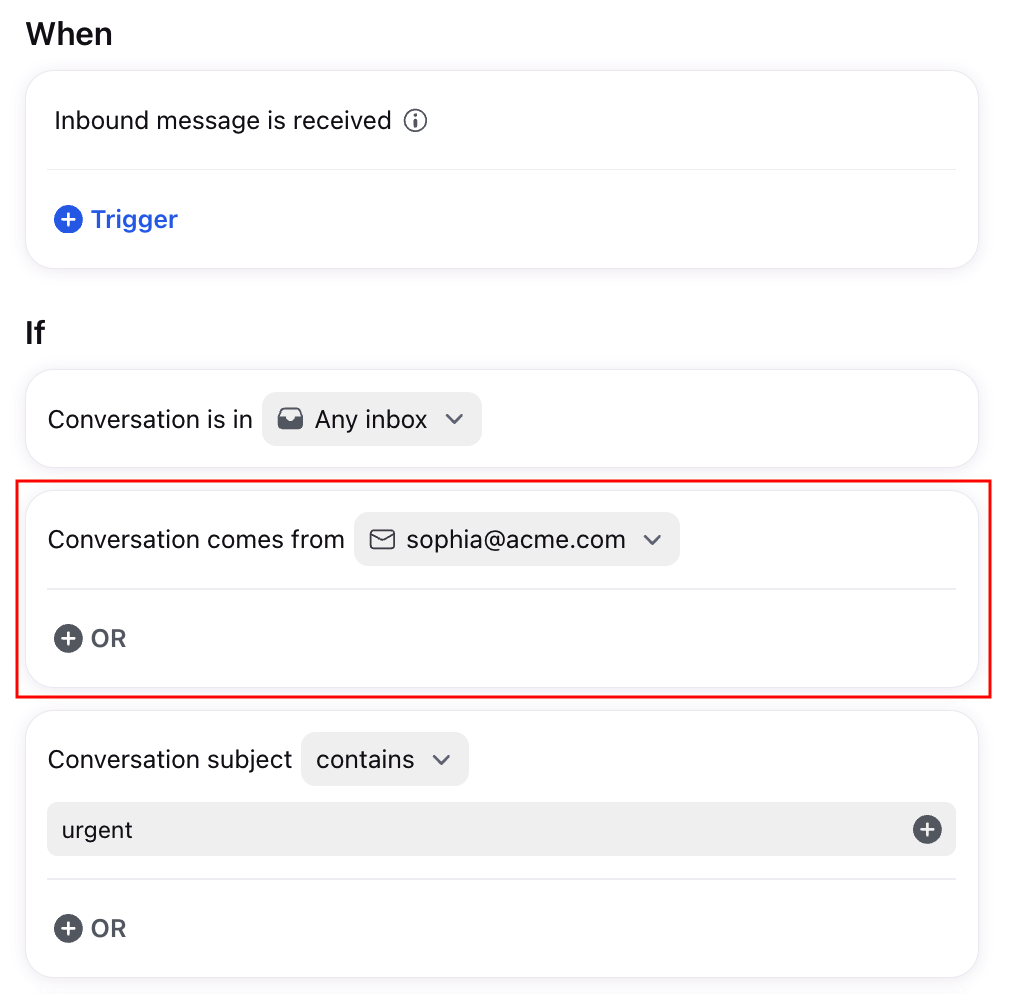
If you have any rules using the Conversation comes from channel condition, use the dropdown to select your new email channel.
Step 8
In your personal preferences, update any settings to use your new email channel. e.g. Default channel setting, Default video conference channel, etc.
Step 9
Once completed, all your Front settings should be using your new email channels.
FAQ
Can I connect both old and new email channels to Front if the addresses are the same?
No. You cannot connect two channels with the same email address in Front. If you're changing email providers and will be using the same email address after switching your domain to your new provider, you cannot preemptively have both the old and new email channels connected to an inbox.
For example, Sophia is migrating from Gmail to Office 365. She cannot connect her new sophia@acme.com Office 365 email to an inbox if the sophia@acme.com Gmail email is still connected to Front.


