
How to enable and use the Chatra integration
⚠️ Note: This integration no longer supports new registrations.
Overview
The Chatra integration allows you to live chat with your website visitors directly from Front, and view information about your customers as it's available in Chatra. You will need to have both a Front and a Chatra account to use the integration.
Like other integrations, you need to be an admin in order to set up the Chatra integration and plugin. The result will be both a channel in Front that will allow you to receive Chatra live chat messages, as well as a Chatra sidebar plugin.
Instructions
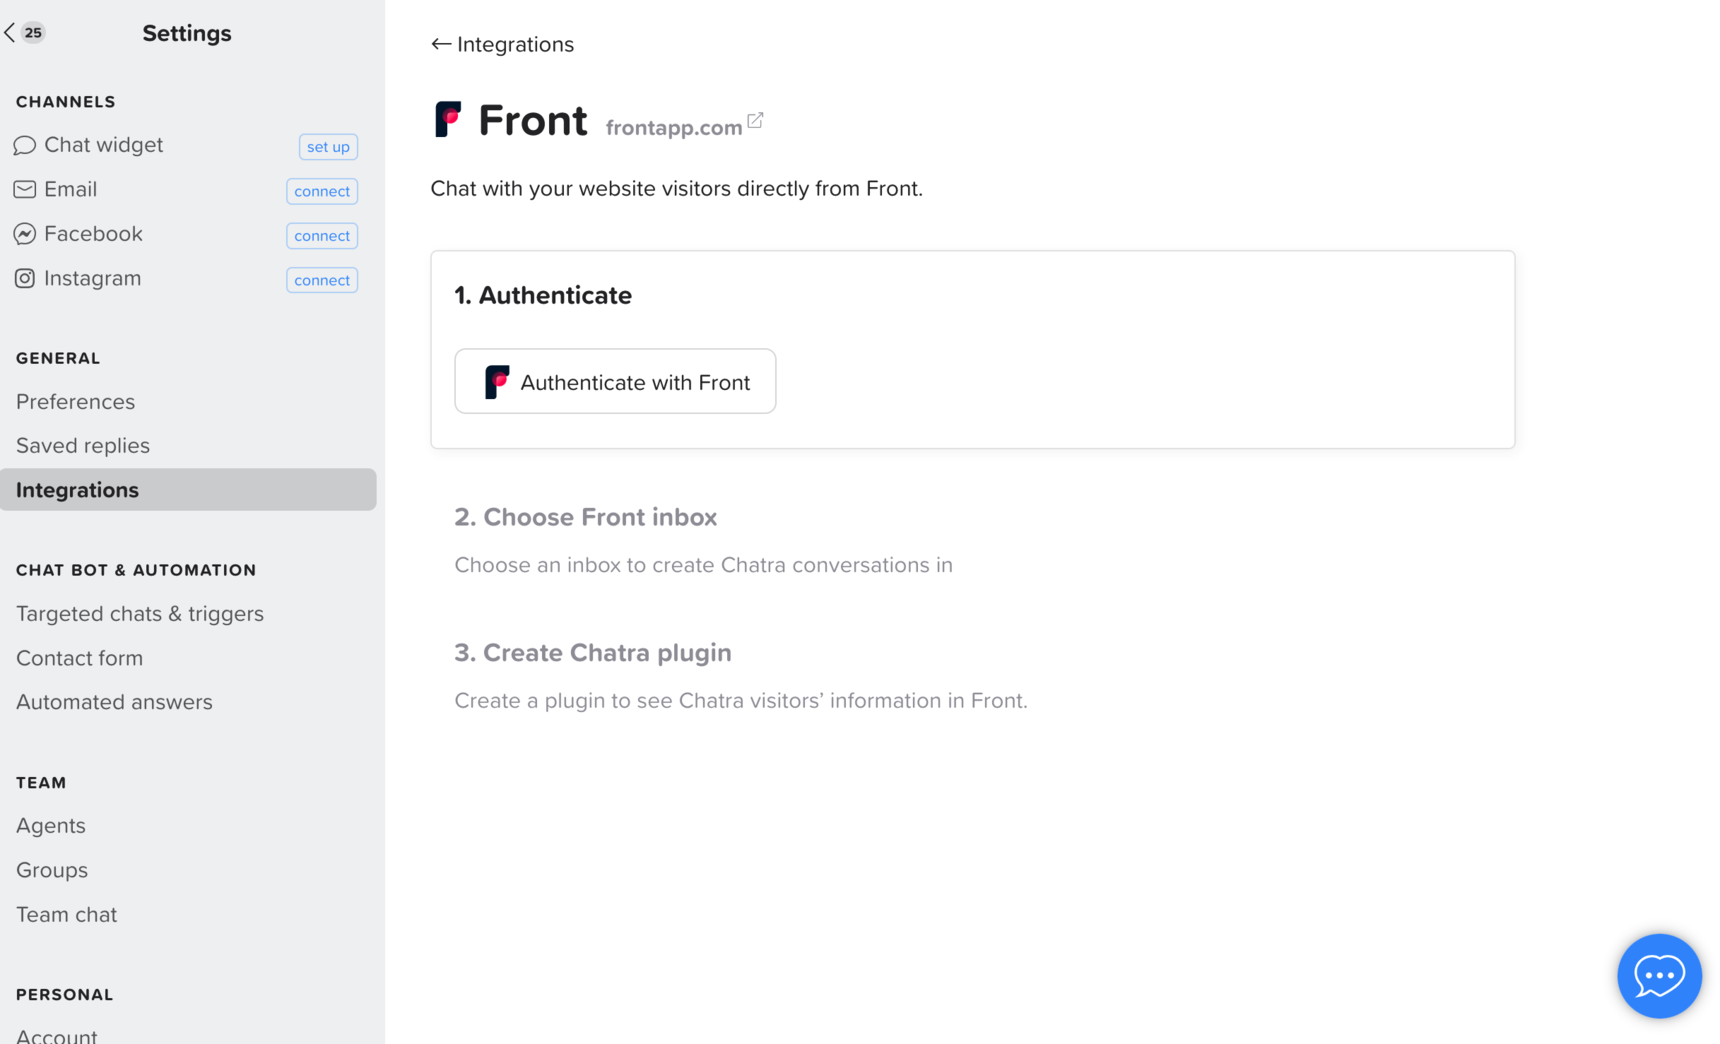
Step 1
Go to https://app.chatra.io/settings/integrations/front and log in to your Chatra account.
Step 2
Click on the Authenticate with Front button. You will be redirected to Front, and then click Authorize.
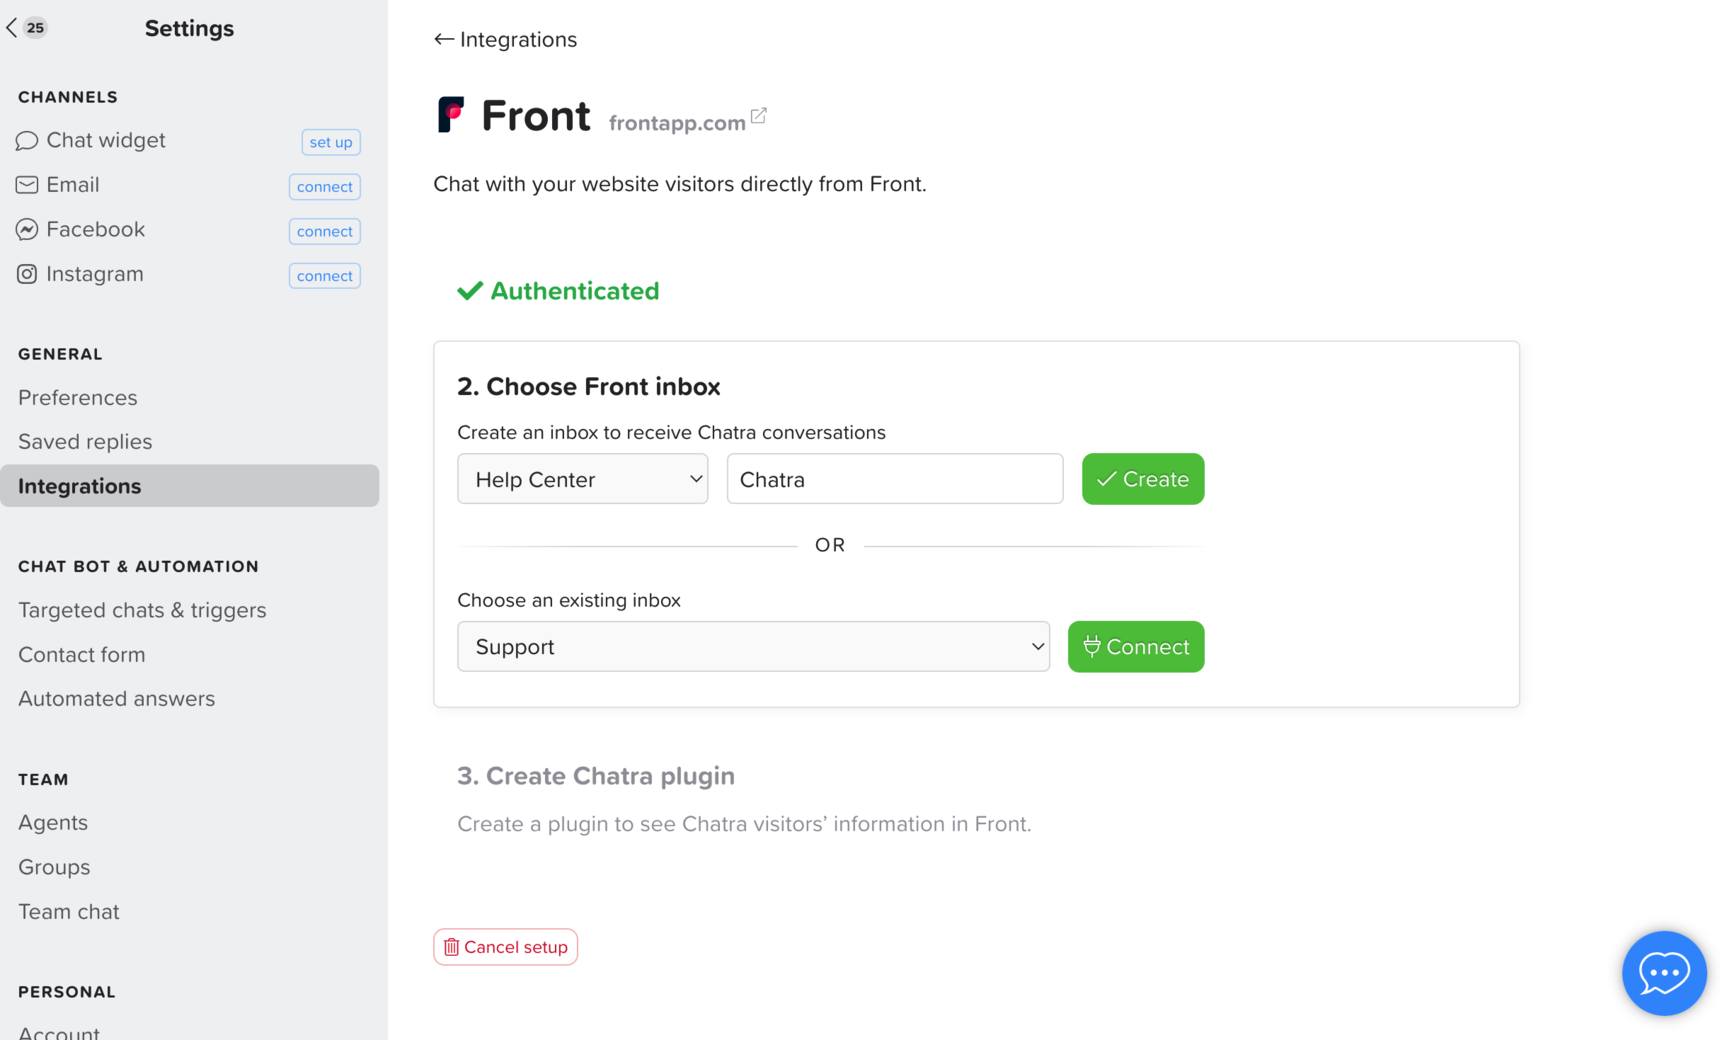
Step 3
You will be redirected back to Chatra. Create a new Front inbox where you’d like Chatra conversations to appear or choose an existing one and click Connect.
Step 4
Copy the Endpoint URL to your clipboard and go back to Front.
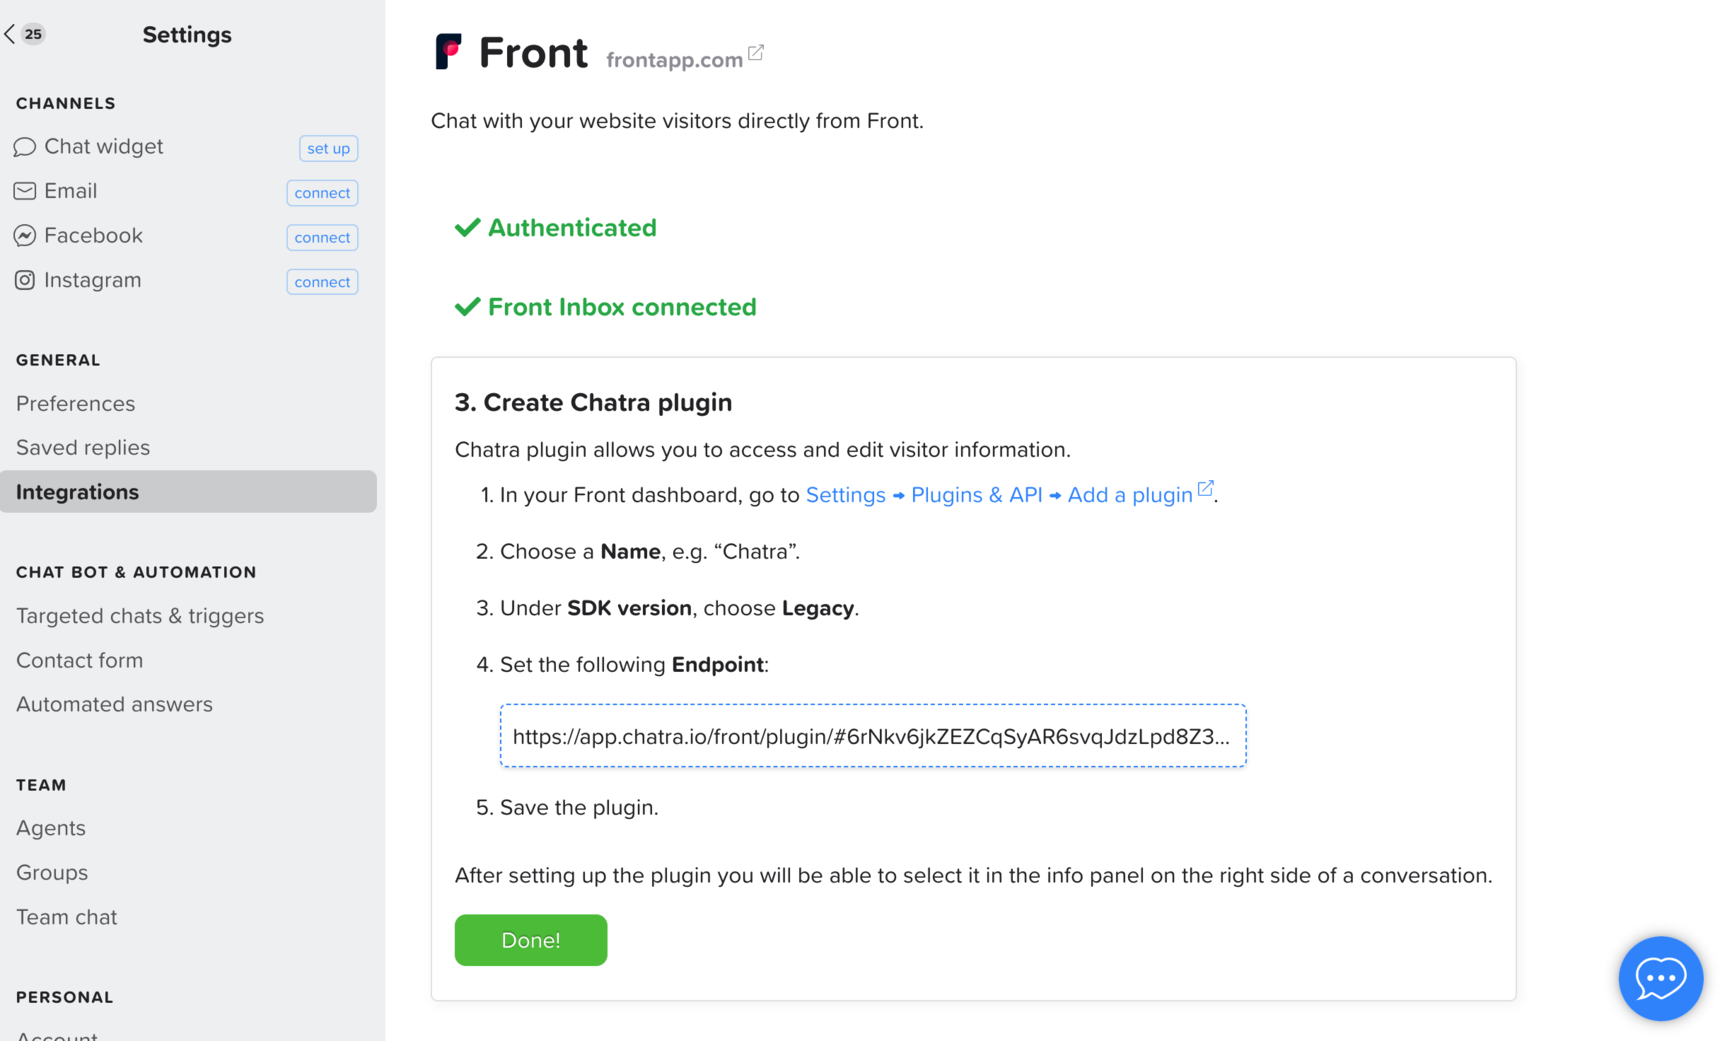
Step 5
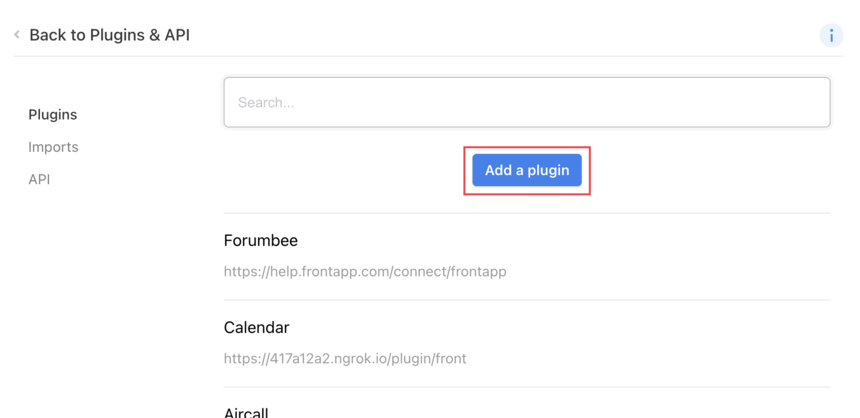
Click the gear icon, navigate to company settigns, and select Plugins & API from the left menu. Click Add a plugin.
Step 6
Enter the name of the plugin. In this case, we suggest Chatra. Then paste the Endpoint URL into the Endpoint field in Front.
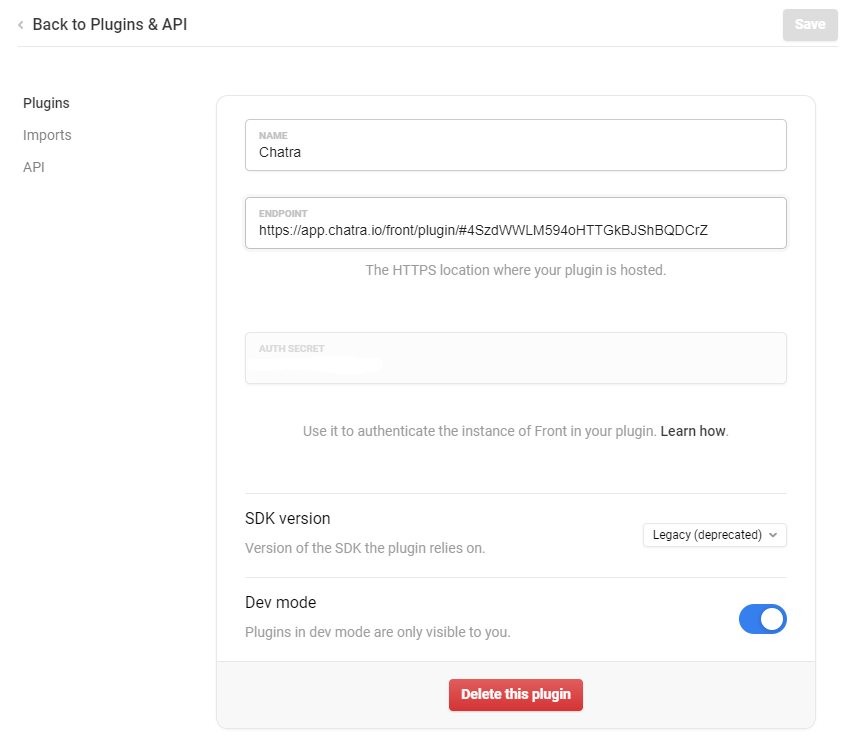
Step 7
Set the SDK version to Legacy (deprecated)
Step 8
Click Save to finish setting up the Chatra plugin.
Step 9
Go back to your inbox view, and go to the inbox you've chosen for Chatra conversations in Step 3.
Step 10
Now, navigate to the Chatra plugin in the plugin panel. You can now display information about your customers and where they're contacting you from directly in Front. As soon as a customer contacts you through Chatra you will receive it as a conversation in this inbox.