
Setting up SendGrid SPF/DKIM DNS records in AWS
Overview
SPF/DKIM records are industry-standard security mechanisms that authorize Front to send emails on our customers’ behalf. When you add a SMTP email channel, it’s critical to correctly configure SPF/DKIM records for your email domain because they reduce the risk messages you send from Front will be marked as spam in your recipients’ inbox. Here is how to set up the records if you use AWS as your DNS.
Don’t use AWS? Follow the instructions here instead.
Instructions
New AWS console experience
Step 1
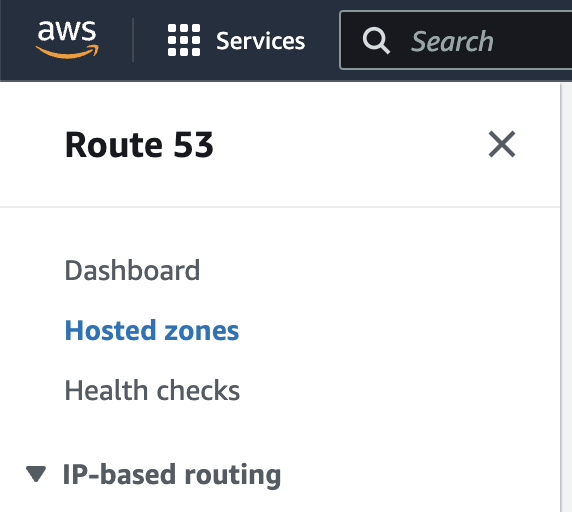
Log in to your AWS Route53 account.
Step 2
Click Hosted zones on the top left of the page.
Step 3
Click on the name of the domain you want to edit the DNS records for.

Step 4
You’ll add three records to your DNS configuration: MX, SPF, and DKIM. These records correspond to the values you see in the Deliverability settings panel for your domain in Front.
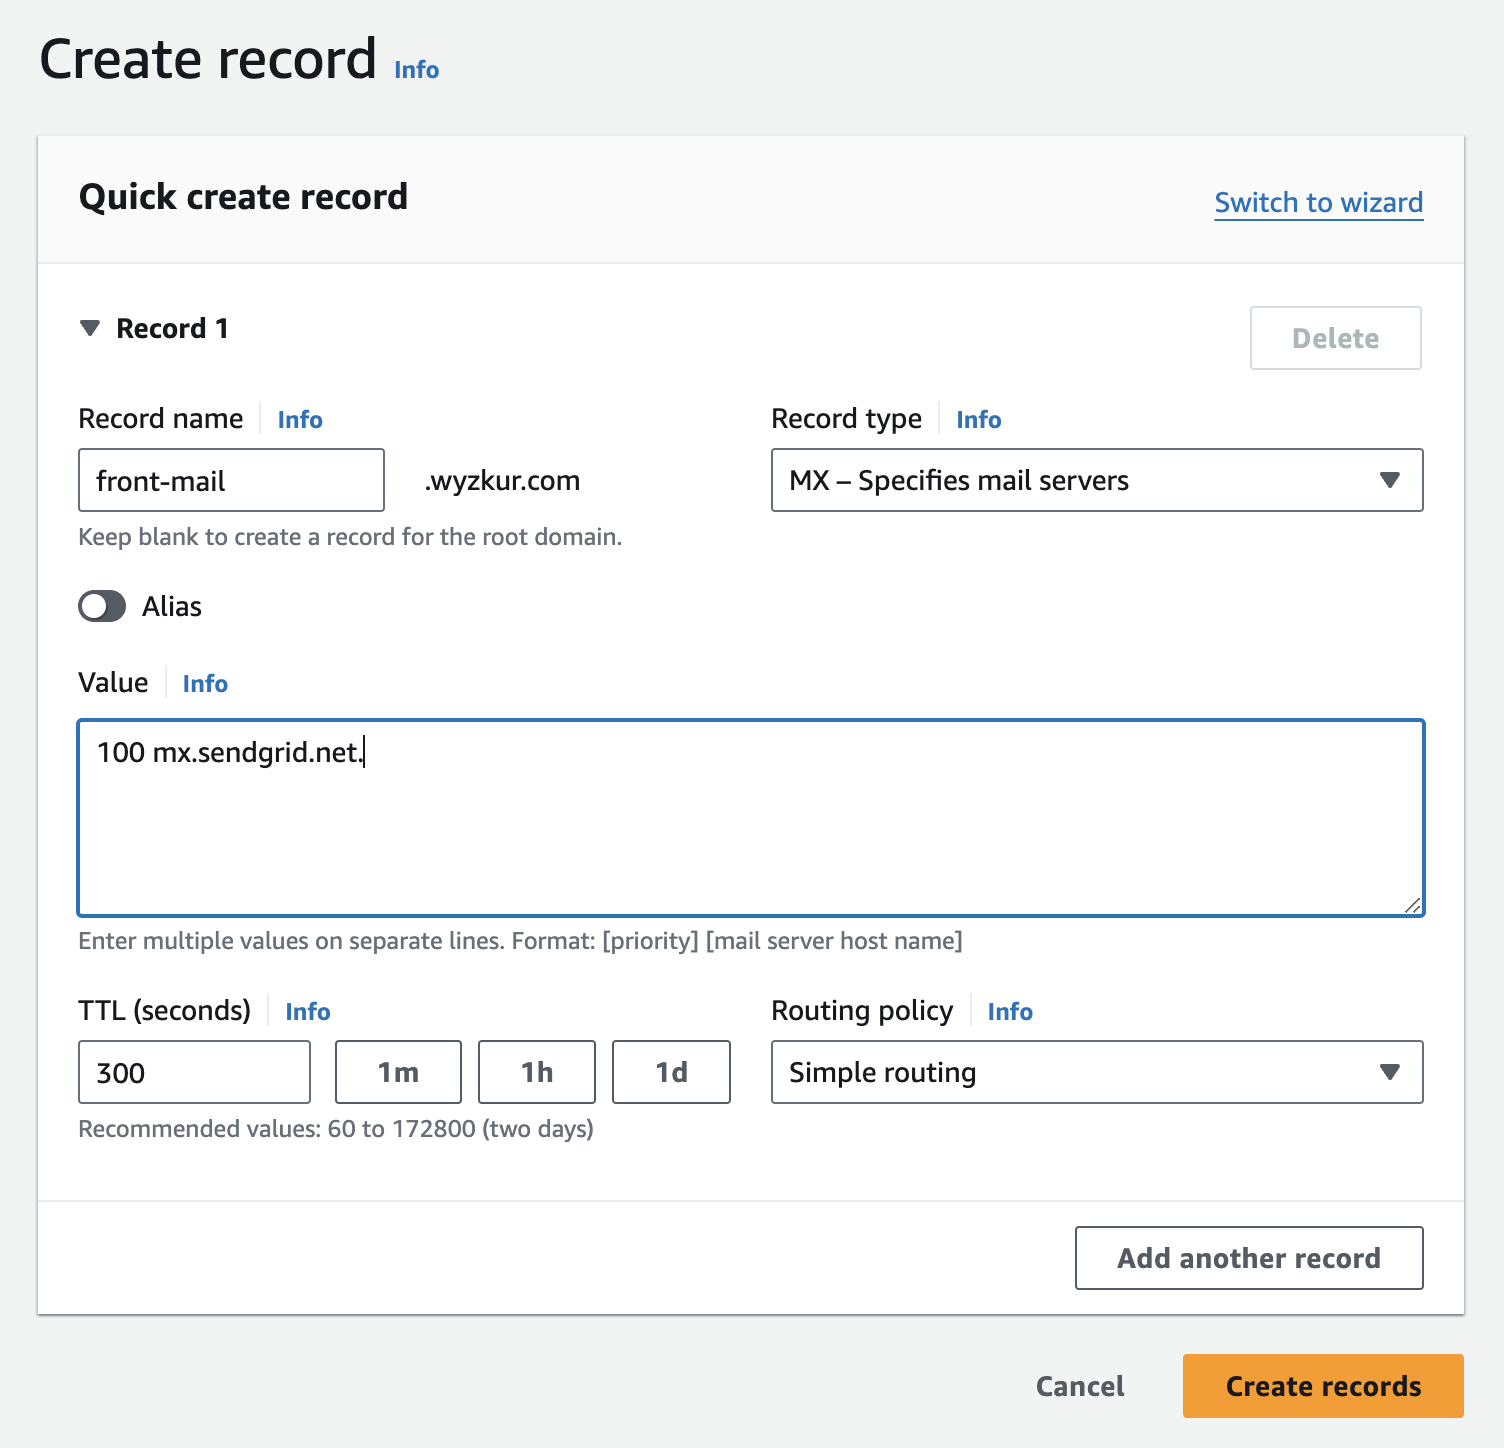
To create a new record, click the Create record button at the top.

Step 5: Add an MX record
For the MX record, select MX — Specifies mail servers as the Record type from the dropdown list, and populate the additional fields as shown in your DNS settings panel in Front.
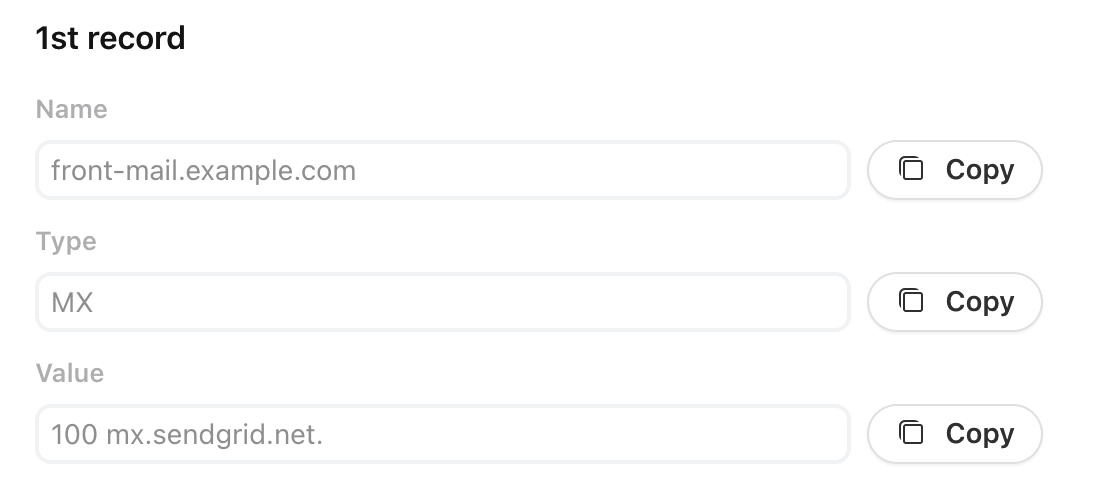
Note: The above values are examples only — the text you see in your Front settings will be different!
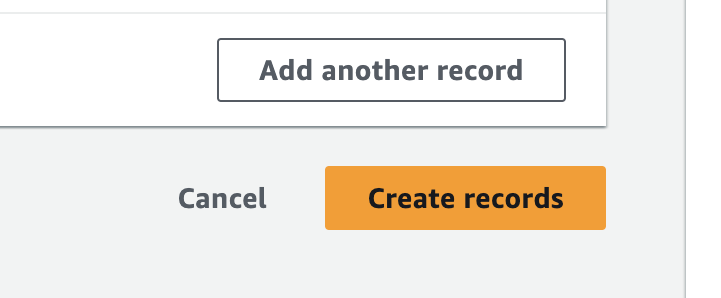
Once you’ve entered those values into the corresponding fields in AWS, click Add another record.
Step 6: Add an SPF record
For the SPF record, select TXT - Used to verify email senders and for... as the Record type from the dropdown list, and populate the additional fields as shown in your DNS settings panel in Front.
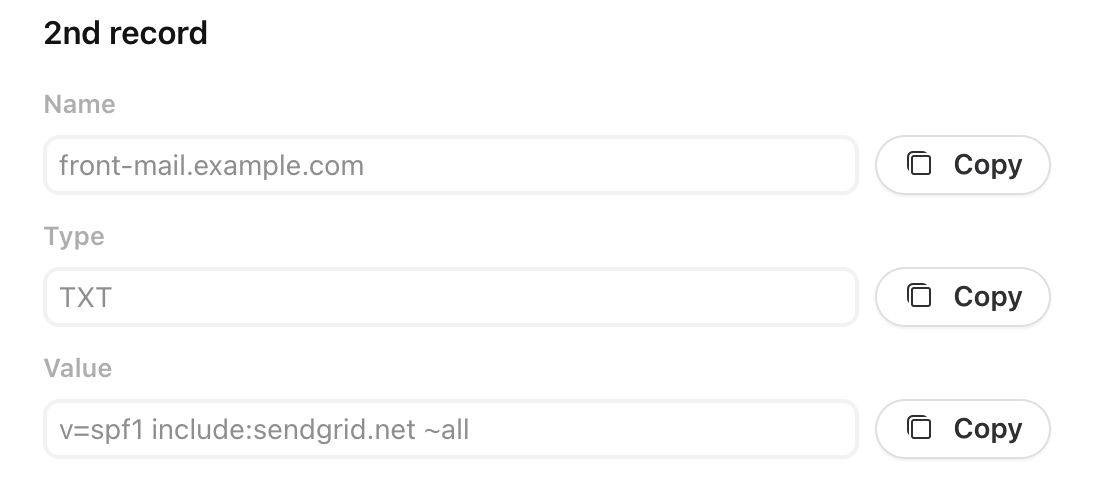
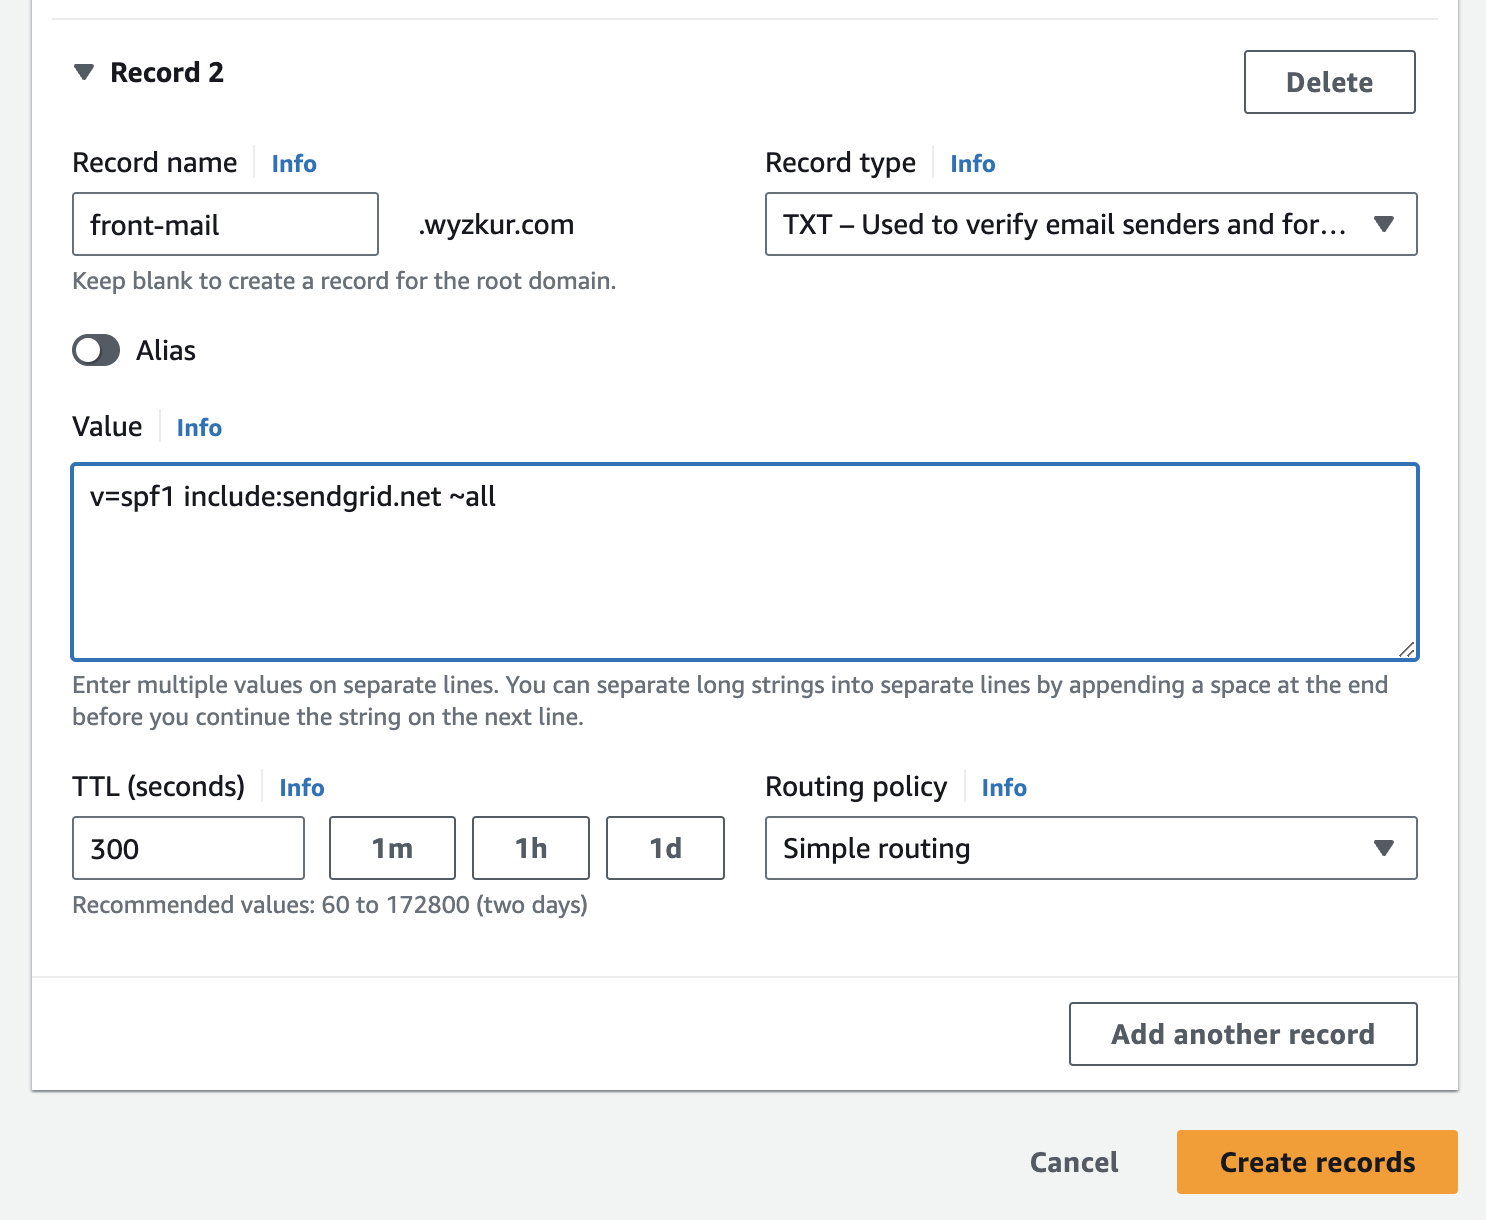
Once you’ve entered those values into the corresponding fields in AWS, click Add another record.
Step 7: Add a DKIM record
Lastly, for the DKIM record, select TXT - Used to verify email senders and for... as the Record type from the dropdown list, and populate the additional fields using the channel settings from Front, as shown below.


Note: The values above are examples only - the text you see in your DNS settings will be different.
Step 8
Once you’ve confirmed that all three records appear with the correct values, click Create records.
Note: For Steps 5-7, you should enter the subdomain as the host value only. For example, enter "front-mail", rather than "front-mail.mydomain.com"
Your domain has now authorized Front servers to send on its behalf! Read the article for more information about deliverability settings and SPF/DKIM records.
Old AWS console experience
Step 1
Log in to your AWS Route53 account.
Step 2
Click Hosted Zones under the DNS management section on the top left of the page.

Step 3
Click on the name of the domain you want to edit the DNS records for.
Step 4
You’ll add three records to your DNS configuration: MX, SPF, and DKIM. These records correspond to the values you see in the Deliverability settings panel for your domain in Front.
To create a new record, click on the Create Record Set button at the top.

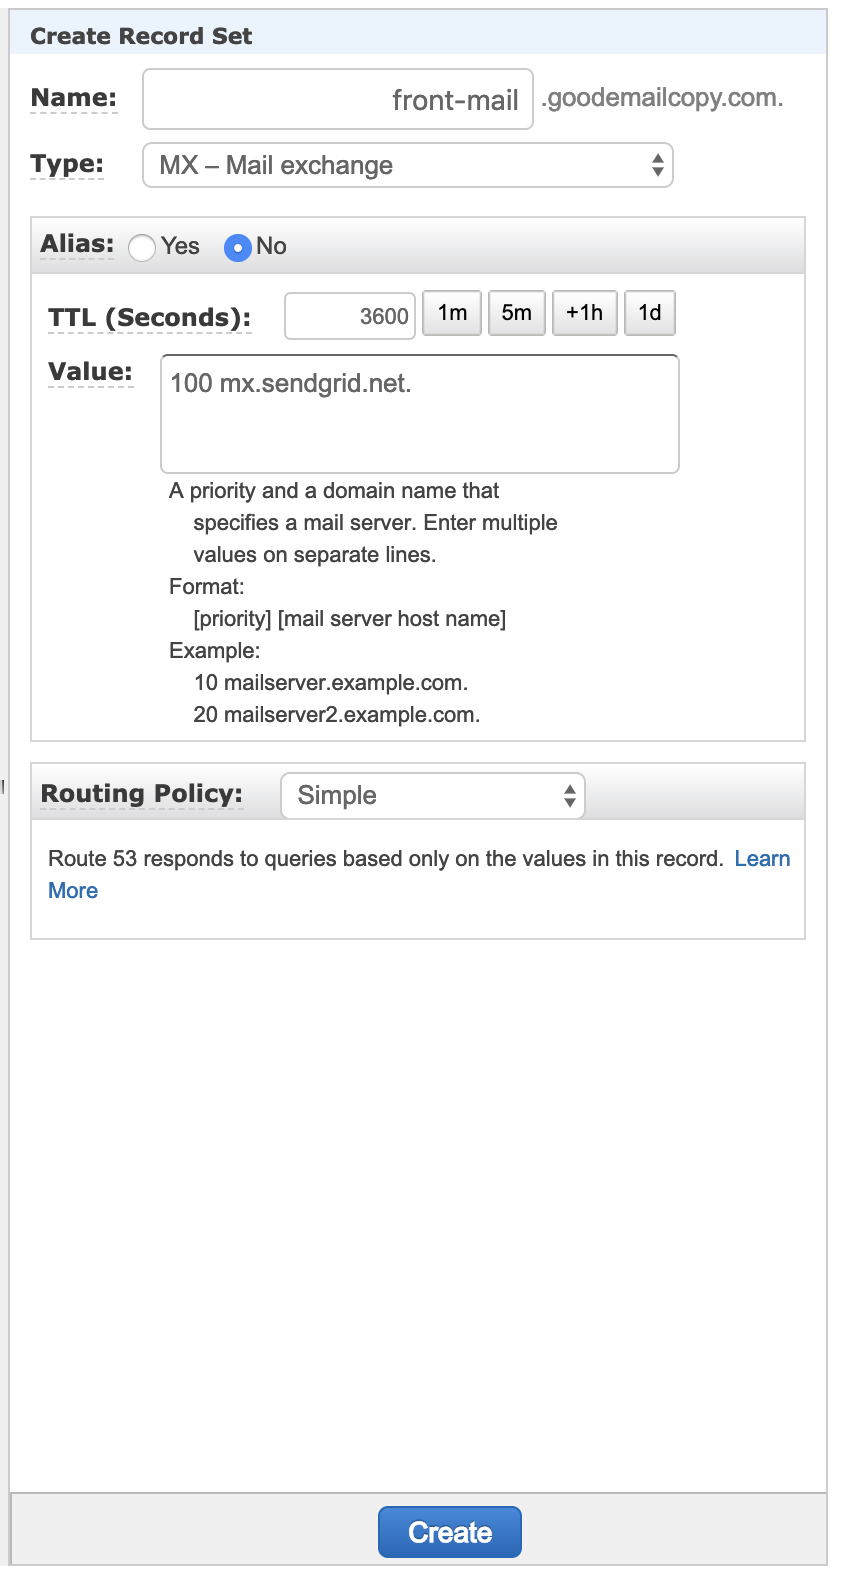
Step 5: Add an MX record
For the MX record, select MX — Mail exchange as the Type from the dropdown list, and populate the additional fields as shown in your DNS settings panel in Front.

Note: The above values are examples only — the text you see in your Front settings will be different!
Once you’ve entered those values into the corresponding fields on the right-hand side of the page, click Create.
Step 6: Add an SPF record
For the SPF record, select TXT — Text as the Type from the dropdown list, and populate the additional fields as shown in your DNS settings panel in Front.

Once you’ve entered those values into the corresponding fields on the right-hand side of the page, click Create.
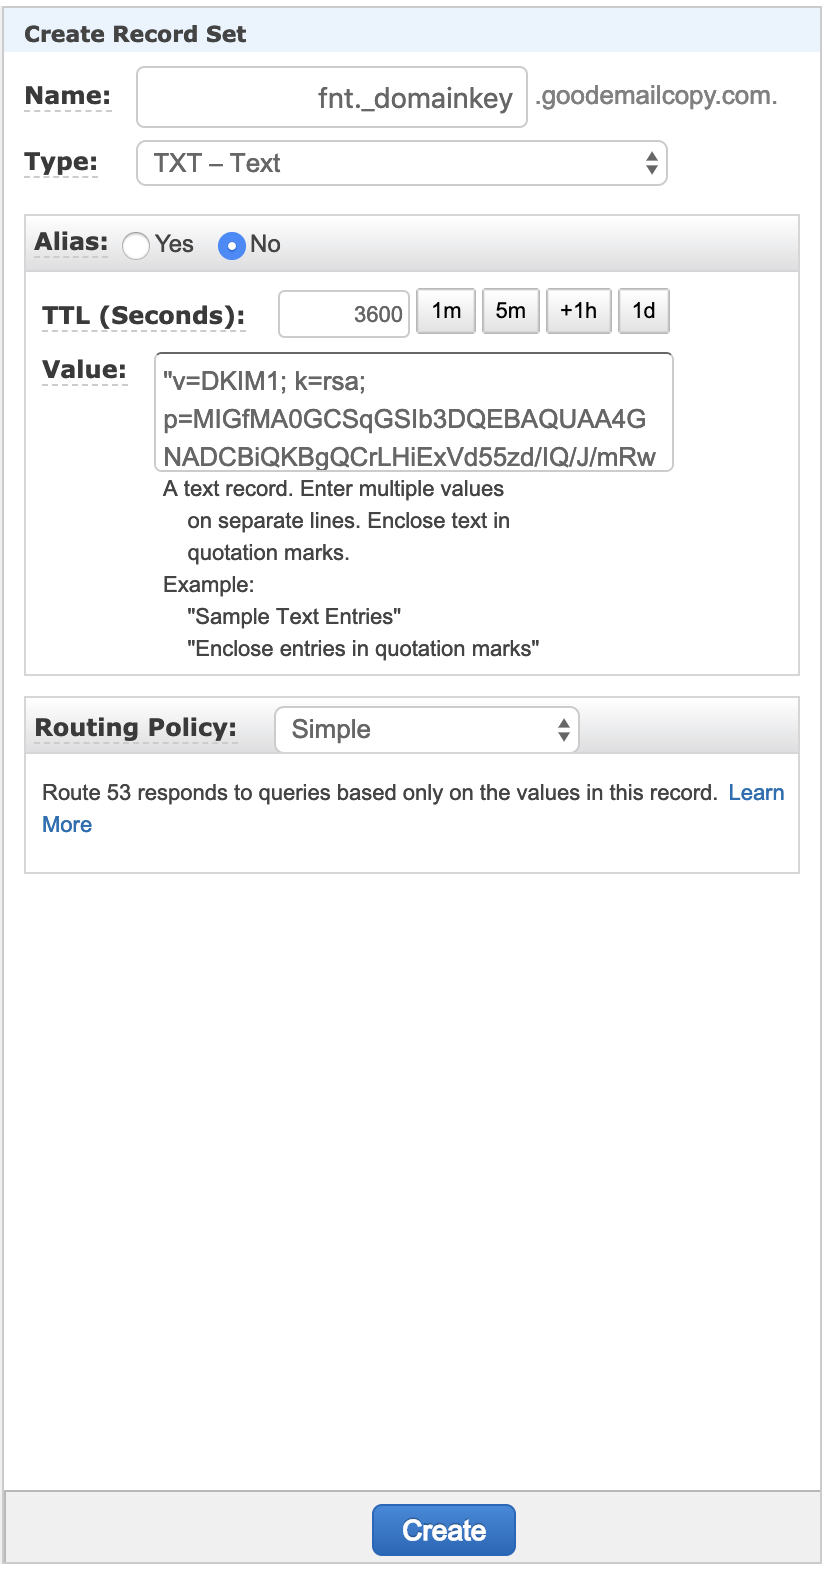
Step 7: Add a DKIM record
Lastly, for the DKIM record, select TXT — Text as the Type from the dropdown list, and populate the additional fields using the channel settings from Front, as shown below.

Note: The values above are examples only - the text you see in your DNS settings will be different.
Once you’ve entered those values into the corresponding fields on the right-hand side of the page, click Create.
Note: For these three previous steps, you should enter the subdomain as the host value only. For example, enter "front-mail", rather than "front-mail.mydomain.com"
Your domain has now authorized Front servers to send on its behalf! Read the article for more information about deliverability settings and SPF/DKIM records.