
Add a column to a custom rule set
Overview
As you create and use rule sets, you may need to edit existing rule sets to add additional columns. We recommend creating a brand new rule with the new column(s) to replace your existing rule set. This workflow quickly and automatically creates your new columns and dynamic variables for you. If you’d like to continue using an existing rule set, you’ll need to manually add your new columns and create your dynamic variables.
Instructions
In this example, we want to add an Assign to teammate action to the rule set created in the rule sets instructions.
Option 1: Create a brand new rule
Step 0 (optional)
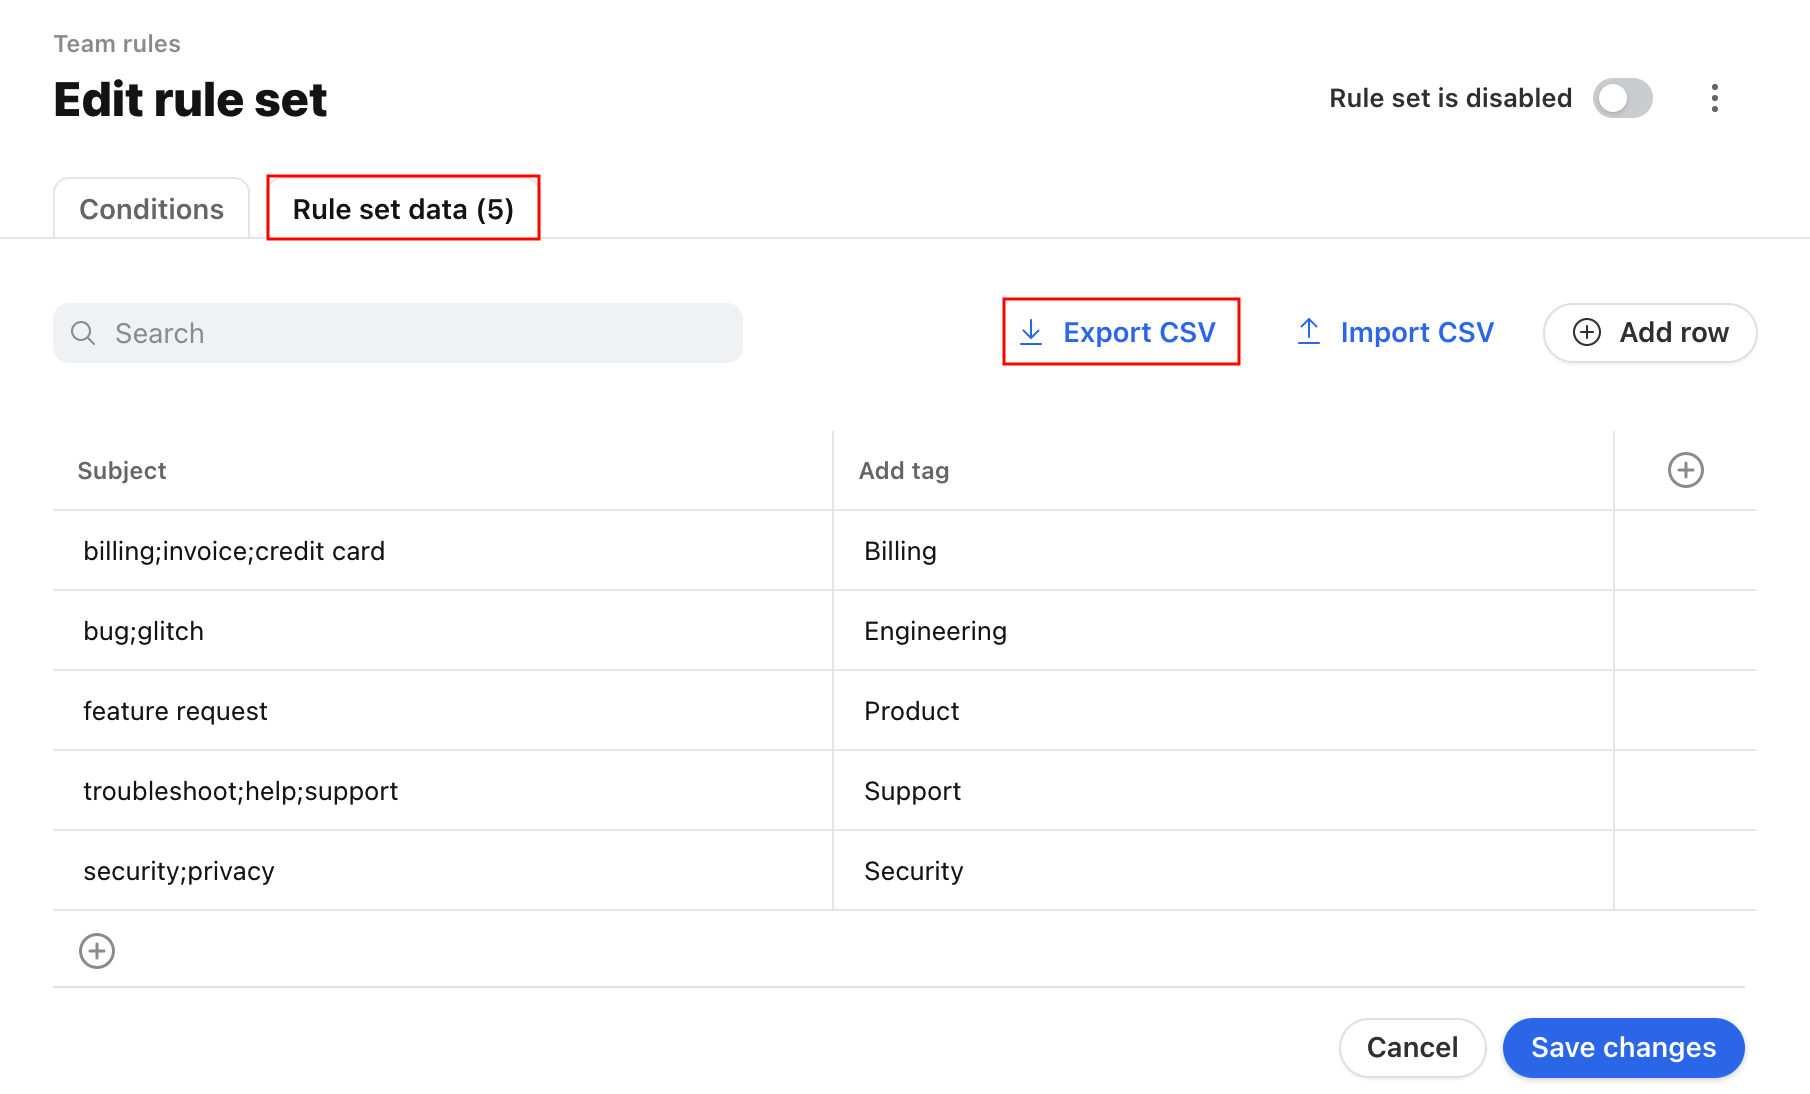
If you’d like to migrate your existing rule set table values into your new rule, use the Export CSV option in the Rule set data tab in your rule. Add your new column and values to the file so it’s ready to import in Step 3.
Step 1
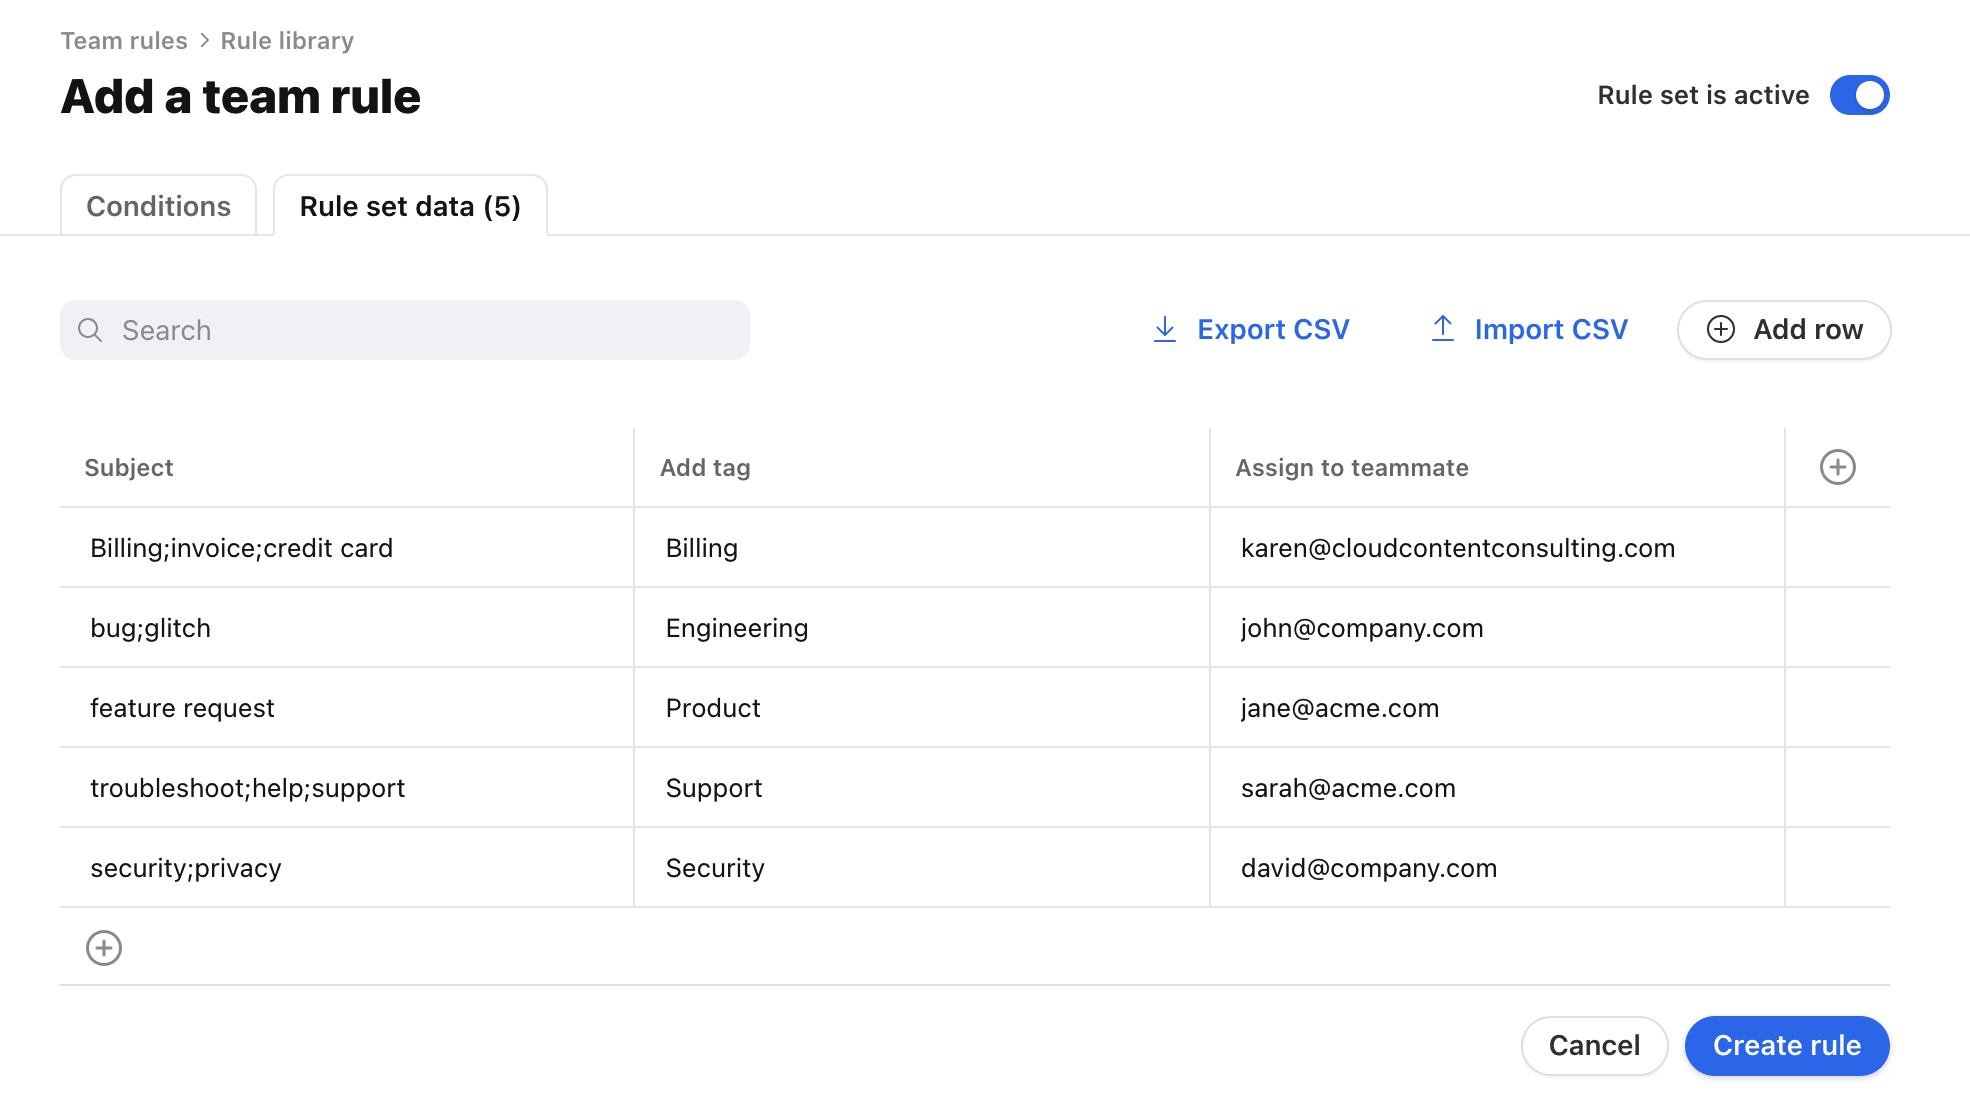
Create a new rule set. In this example, we will add a new Assign to teammate action. See here if you’d like to review the full instructions for creating a rule set.

Step 2
Click Convert to rule set at the top. Your initial rule values will automatically convert into dynamic variables.
Step 3
Click the Rule set data tab, then fill in the table with your values. You can also click Import CSV to import existing table values.
Step 4
Click Create rule to create your new rule set. You can check the rule order for your new rule set and deactivate or delete the old version of the rule set.
Option 2: Create a new column in existing rule
Step 1
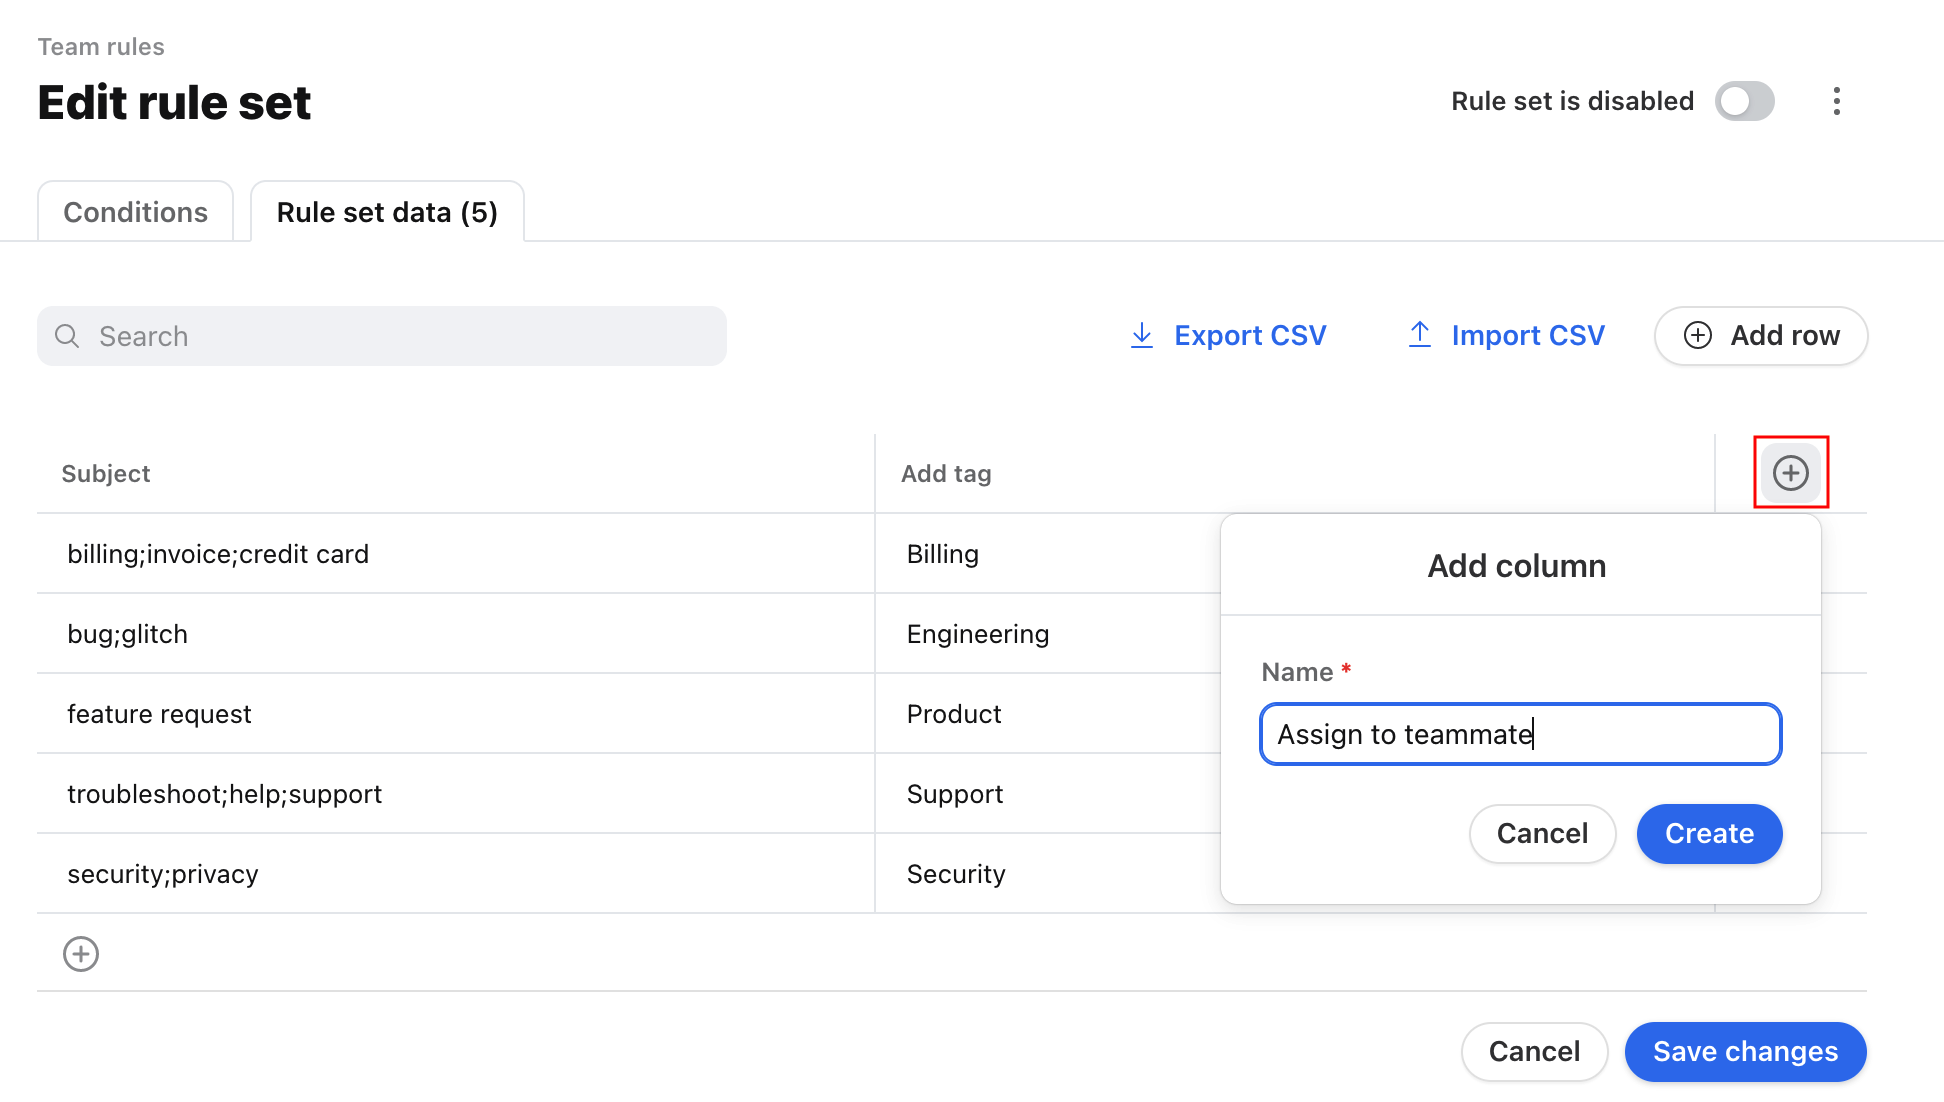
Open the rule set you’d like to edit and click the Rule set data tab.
Step 2
Click the plus (+) icon to the right of the table to add a new column. Fill in the Name field and click Create.
Step 3
Fill in the blank columns with your values manually or via the Import CSV option.

Step 4
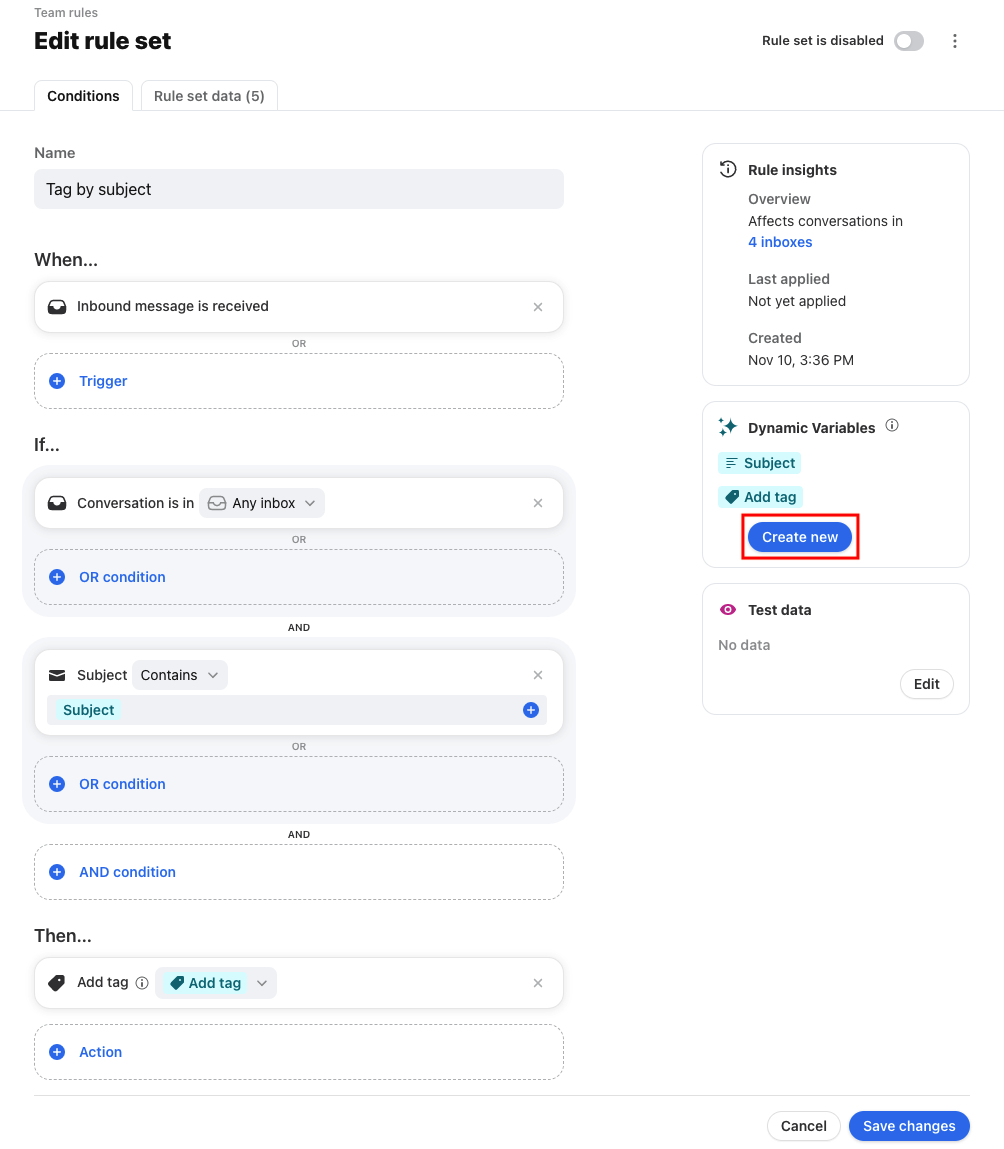
To create the dynamic variable, click the Conditions tab at the top.
Step 5
Click Create new in the Dynamic Variables section, then click Start dynamic variable path.
Step 6
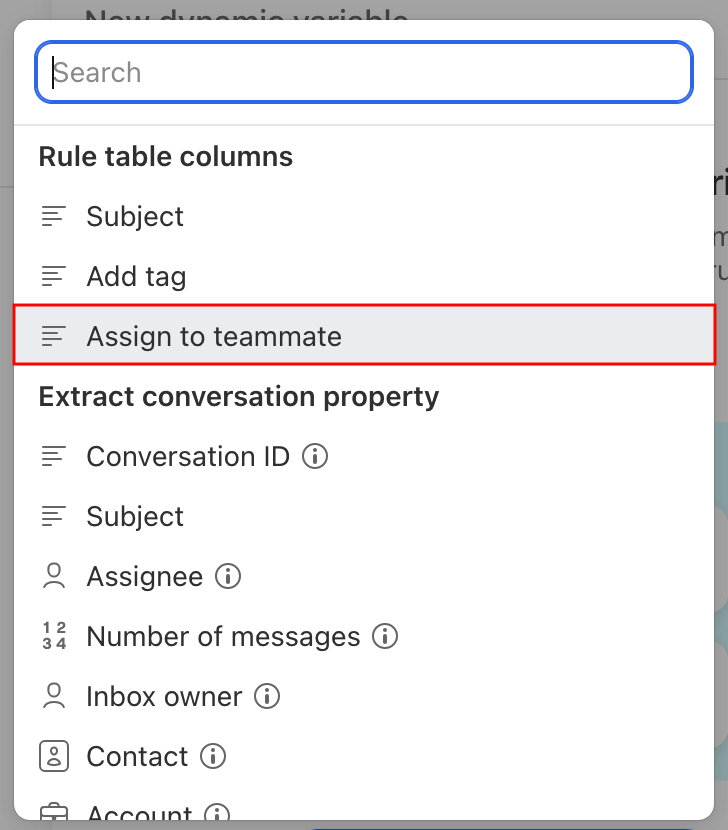
Select the new table column in the Rule table columns section.
Step 7
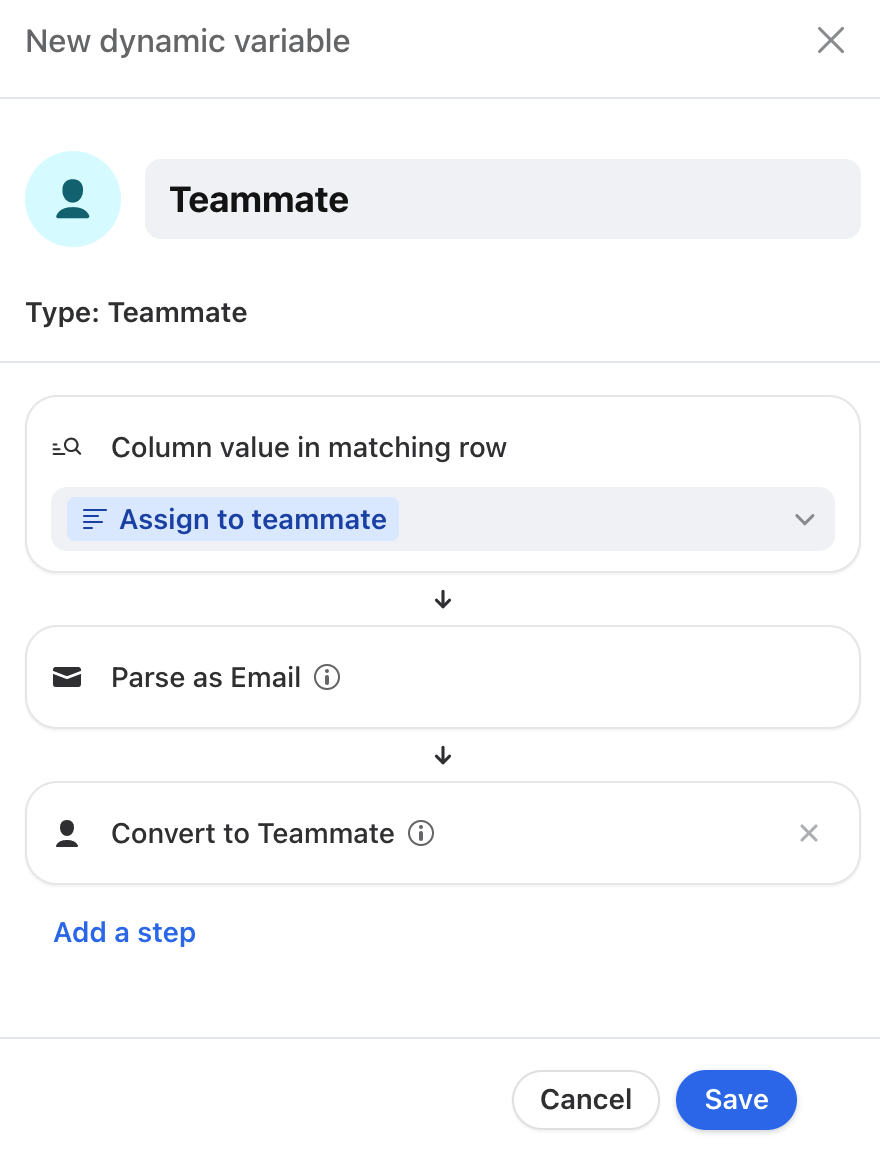
Click Add a step to select additional elements to build your dynamic variable. In this example, we want to convert the email addresses in our new column to teammates in Front, so the dynamic variable will look like the screenshot below.
Step 8
Click Save to finish creating the dynamic variable.
Step 9
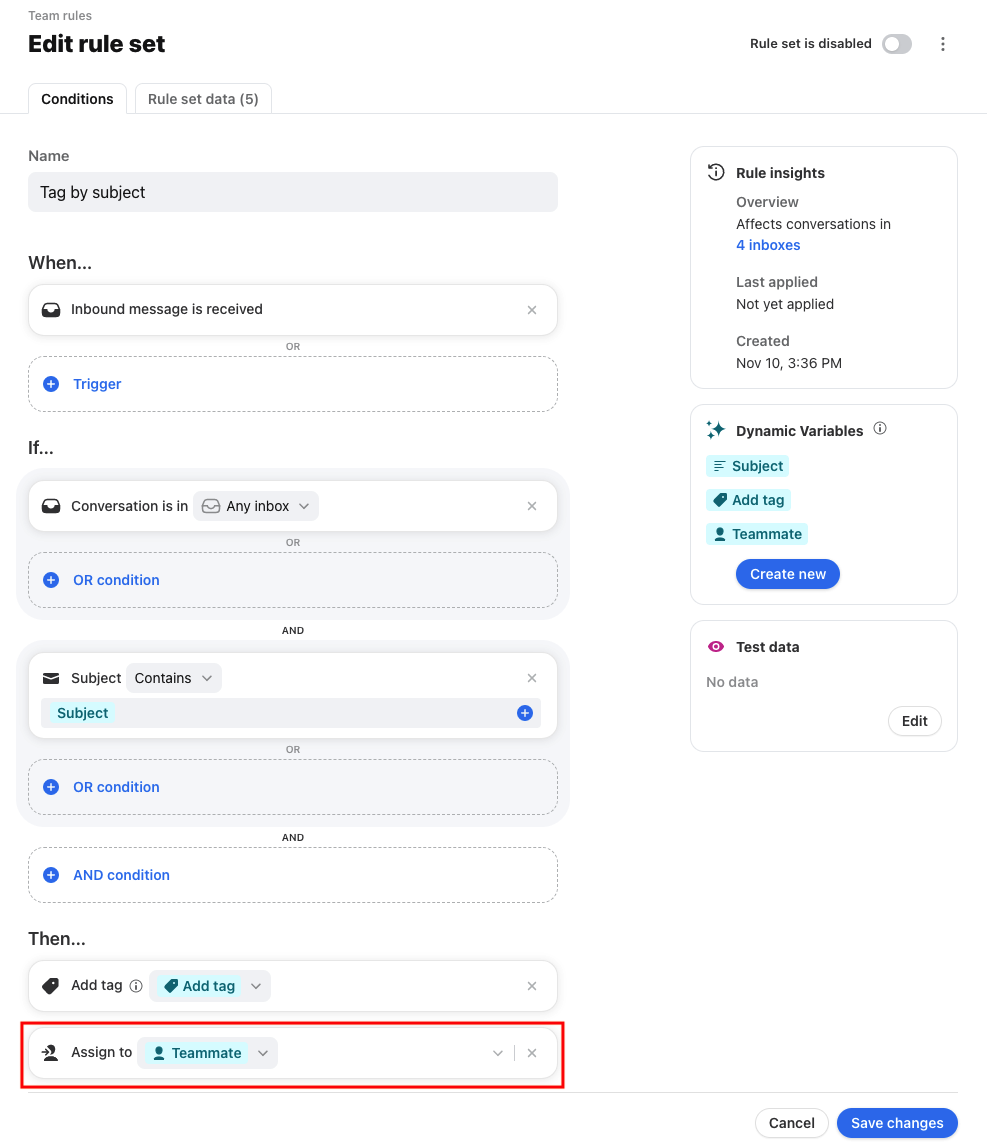
In the Then section of the rule, select the Assign to teammate action. Select the new dynamic variable you created.
Step 10
Click Save changes to finish updating your rule.
Pricing
Rules are available on all plans. See this article to review triggers, conditions, and actions included in each plan.