
Outlook Directory contacts sync
Overview
The Outlook Directory sync imports internal contacts from Microsoft Entra (previously Azure Active Directory) to Front's contact manager under Shared Contacts. After the sync, Front users in your company will be able to:
See the email addresses of all internal teammates and distribution lists (including teammates not on Front) in auto-suggest when using Front’s composer
See all teammates’ information (e.g. job title, department, phone number) in Contact Details and Contact Cards, depending on what information you choose to sync
How it works
Only enabled users, distribution lists, and groups under Microsoft Entra's Users and Groups will be synced
Contacts are synced one-way from Microsoft Entra to Front
Synced teammates will appear under Shared contacts in the Contacts manager
Contacts are automatically synced every 24 hours to keep data up to date, but you can manually trigger a re-sync at any time by opening the sync page in Front
Field mapping allows you to control which fields will be synced. Custom fields are not currently supported
You must be a workspace or company admin in Front to set up the sync
Microsoft 365 admin privileges are required to grant read-only permissions
Instructions
Step 1
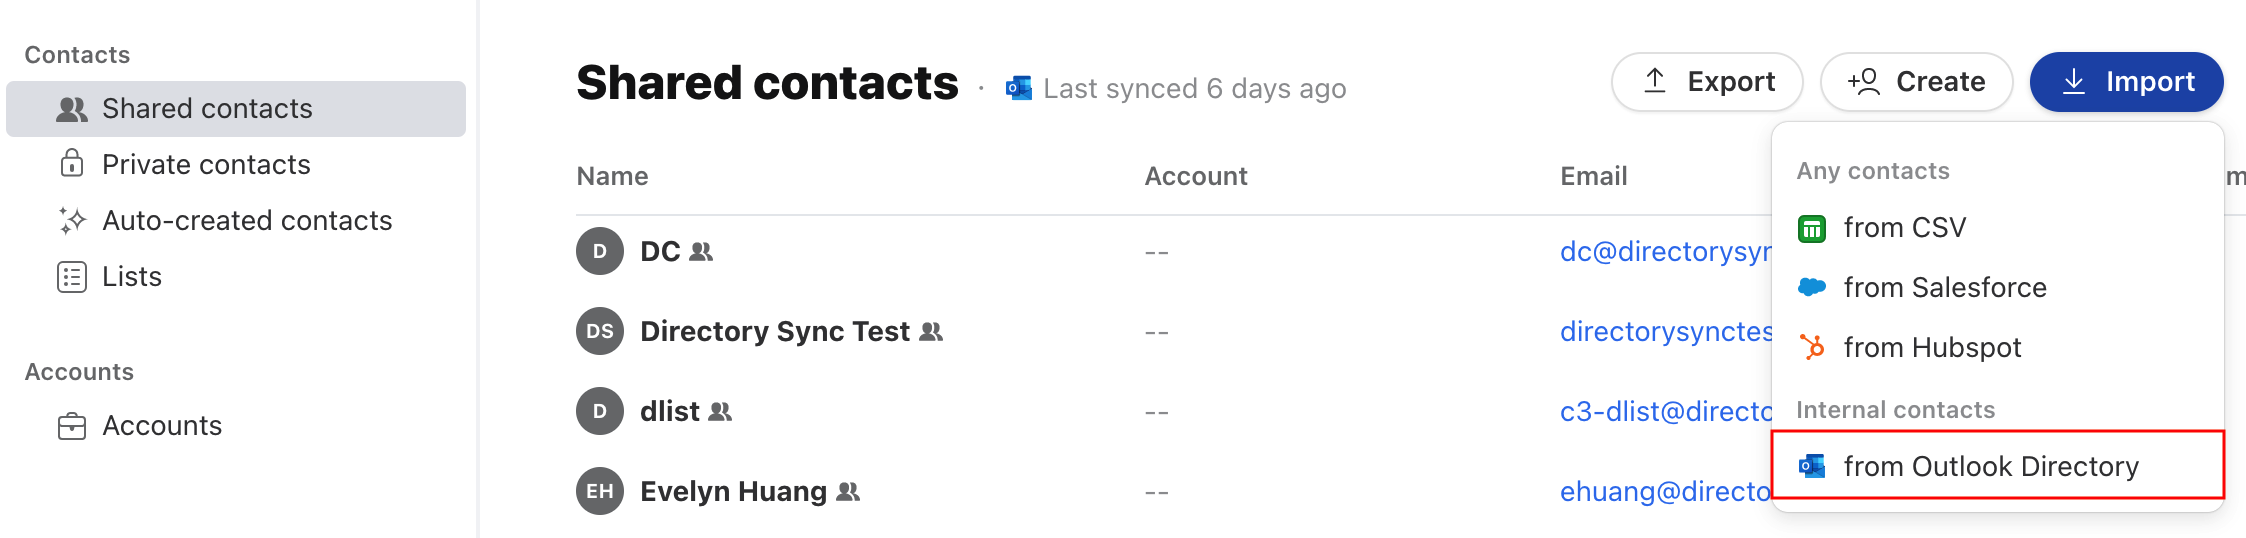
In the navigation menu, select Contacts to access the Contact Manager in Front.
Step 2
In your shared contacts, click the Import button, then select from Outlook Directory to open the sync page.
Step 3
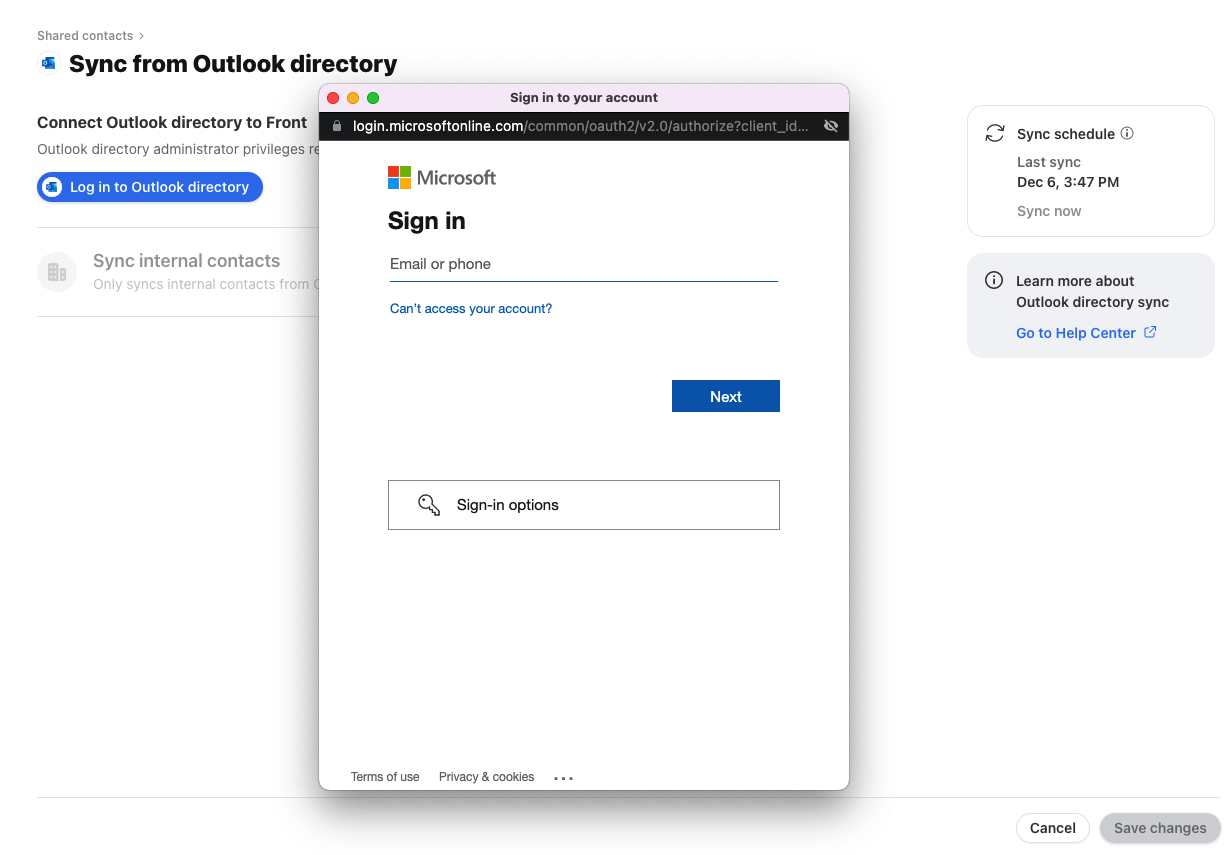
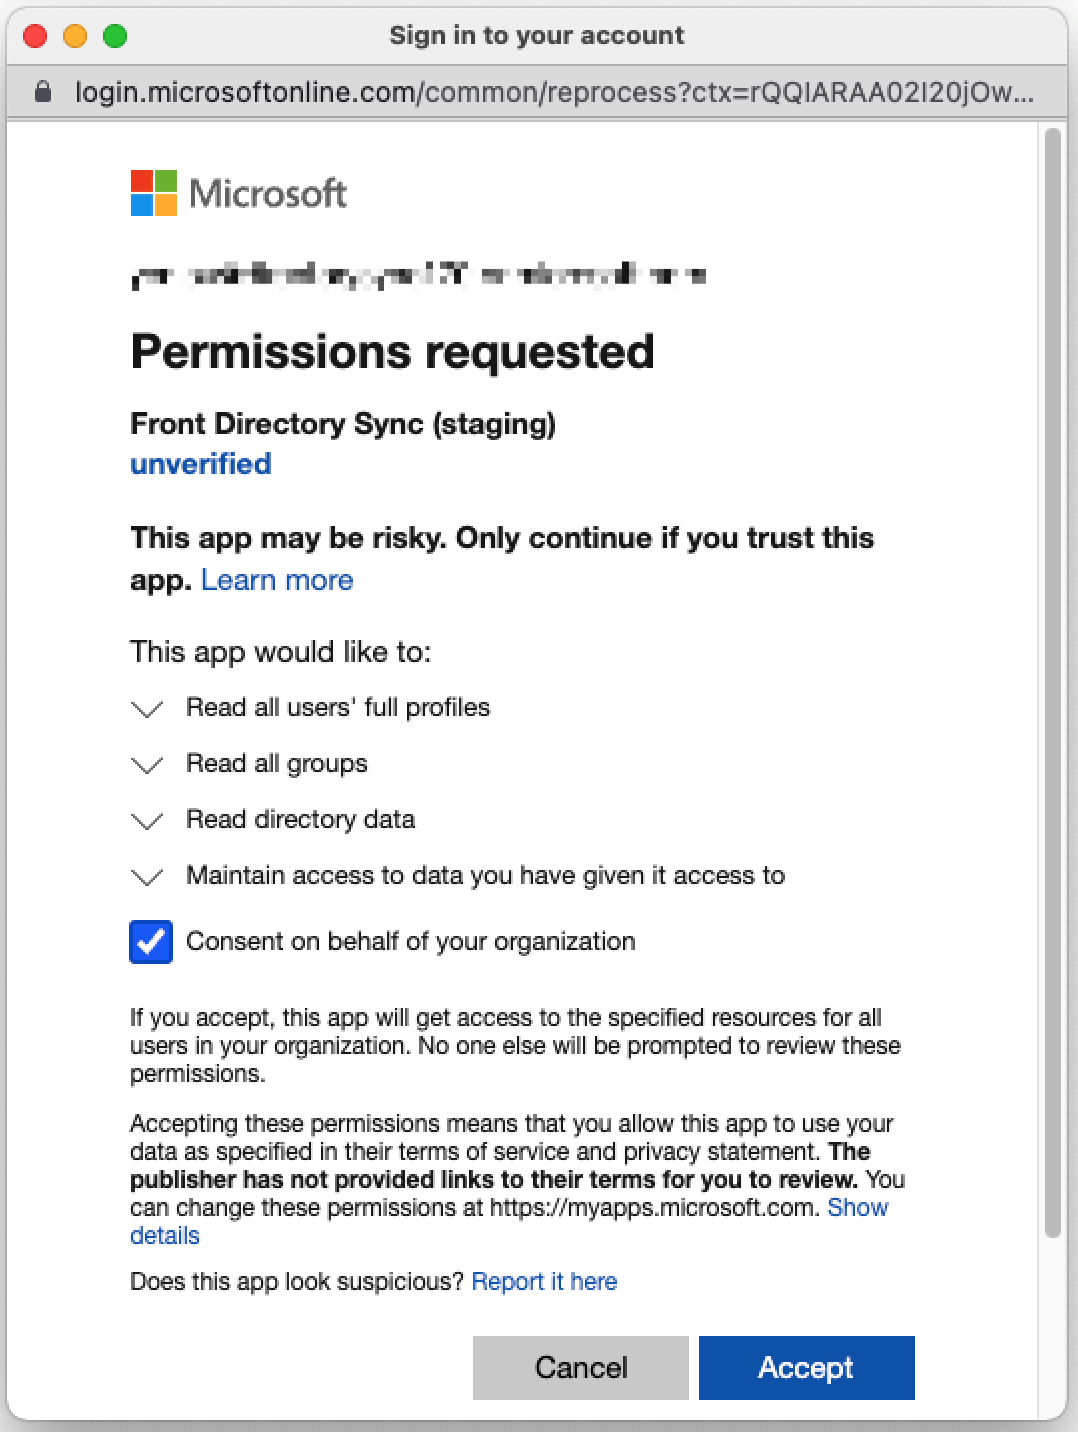
Click Log in to Outlook directory to connect Microsoft 365 to Front and authorize.
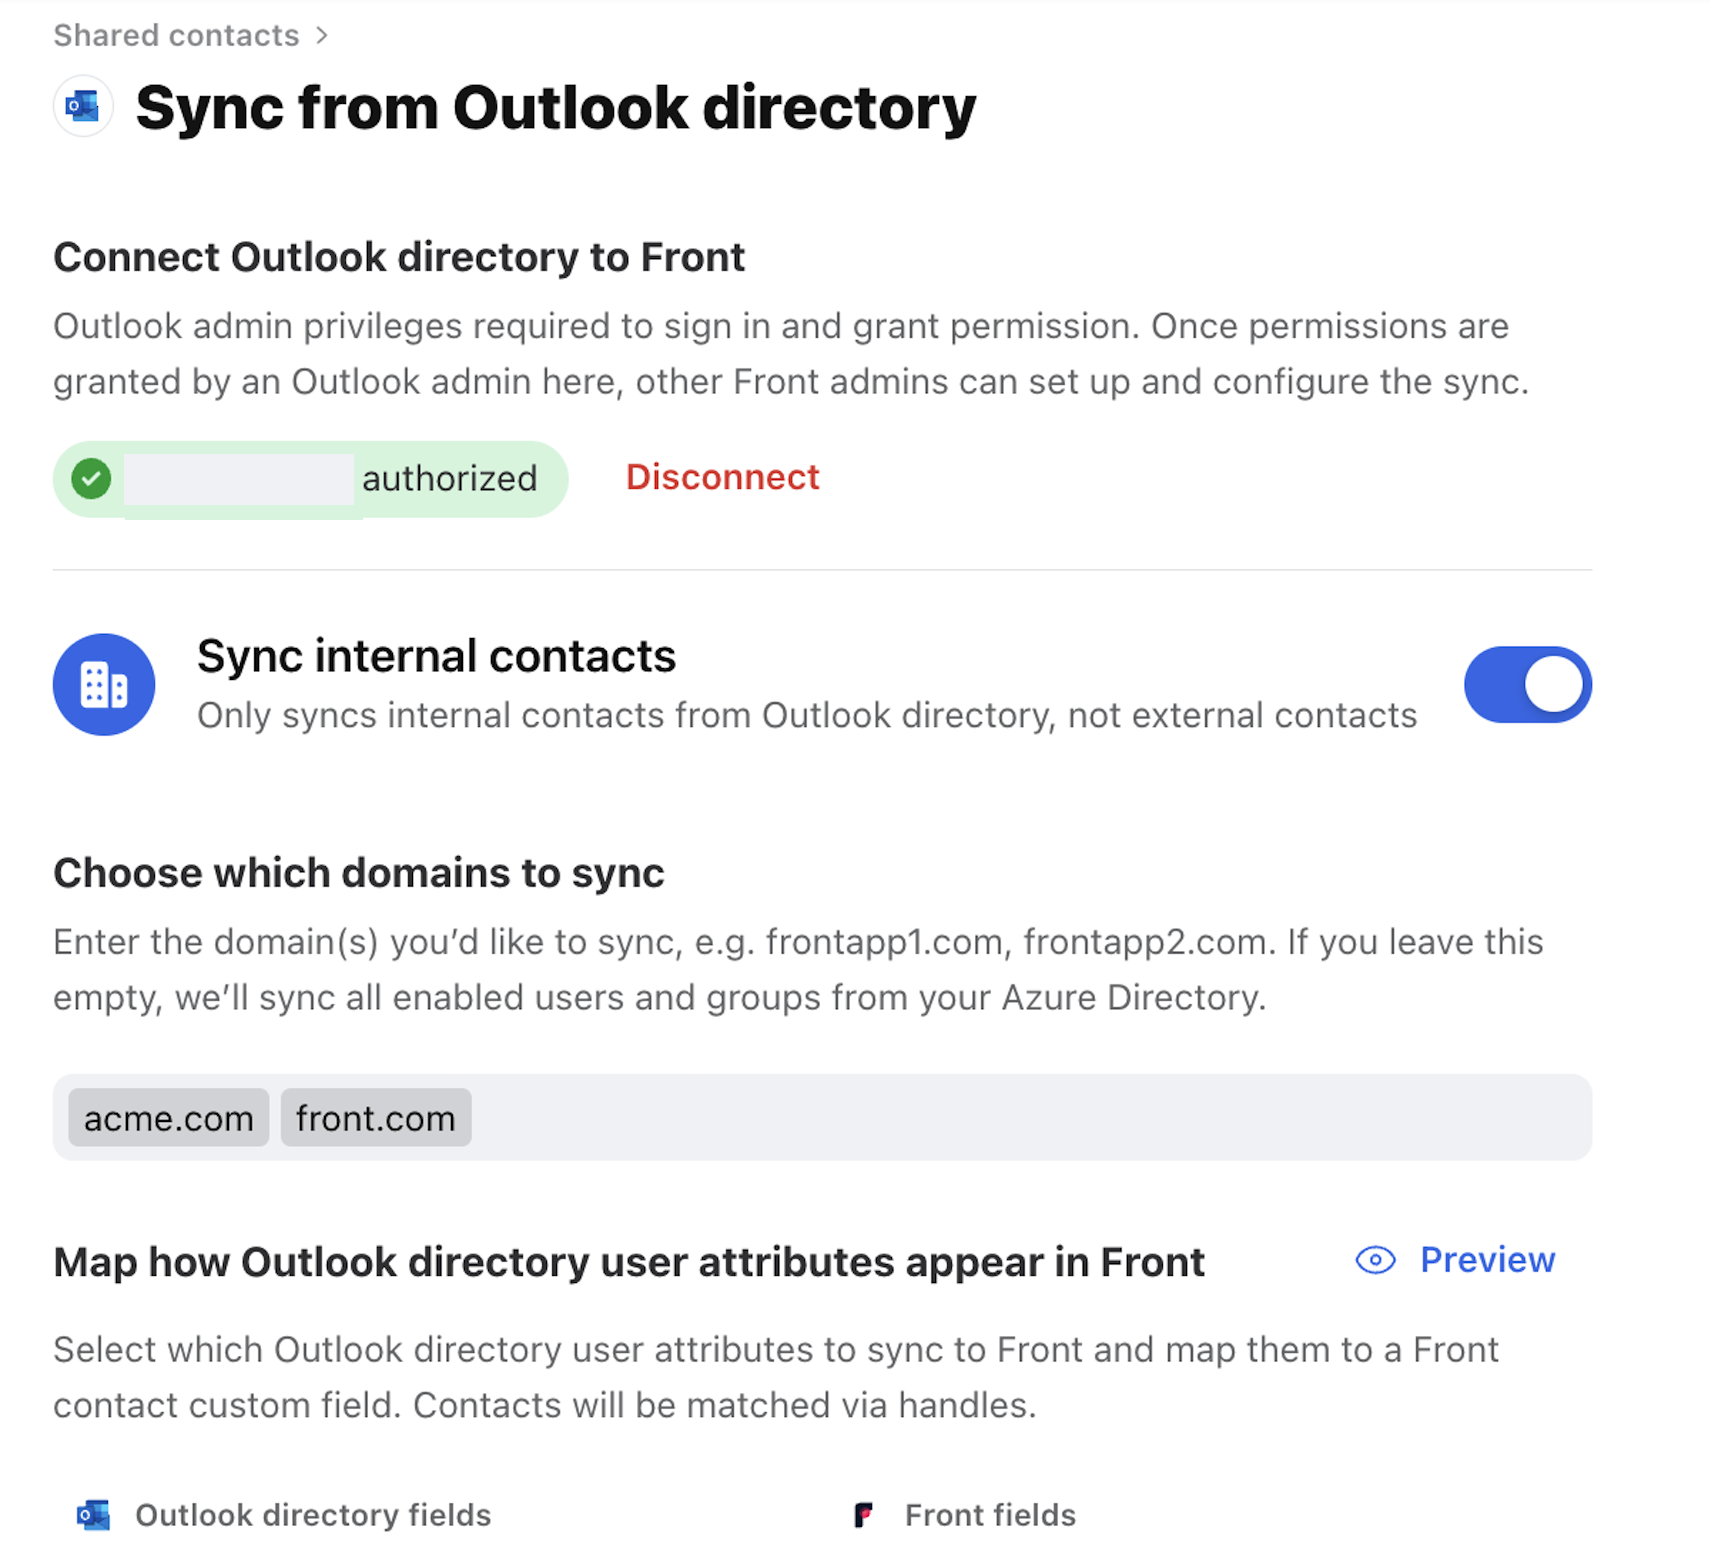
Note: Microsoft 365 admin privileges are required at this step. Once the admin checks the box for Consent on behalf of your organization, any Front admins can set up and update the Outlook directory sync.
Step 4
Enable Sync internal contacts by clicking on the toggle. Sections to set up the sync will be displayed.
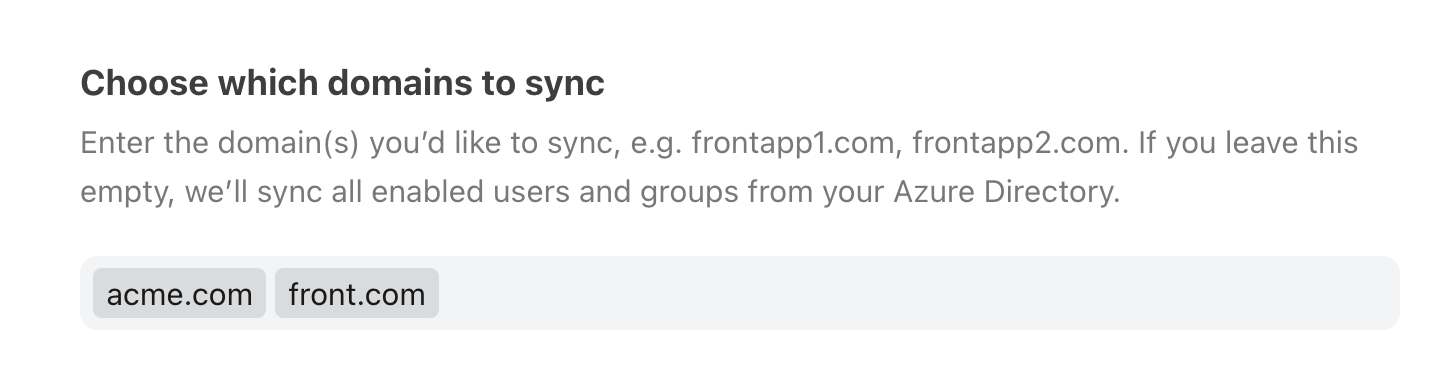
Step 5
You have the option to choose which domains to sync. If you leave this empty, we will sync all enabled users and groups from Microsoft Entra.
Step 6
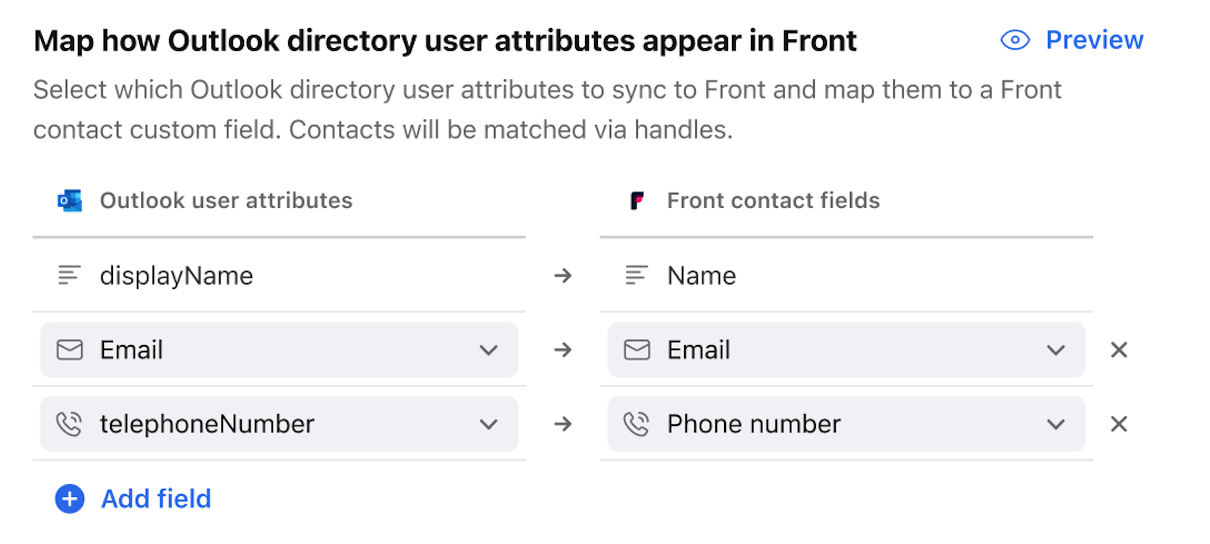
Select the fields you’d like to sync. Then choose the Front fields they should be mapped to. You can create new Front fields here if they do not currently exist.
Step 7
Click Sync to start the contacts sync. You can edit or pause the sync at any time from the sync settings.
Step 8
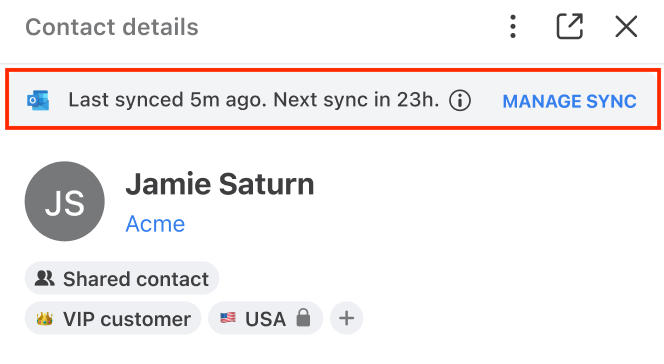
After you’ve set up the sync, you’ll see contacts from Outlook appear under Shared contacts in the Contacts Manager. If you click on a contact you’ve synced from Outlook, you’ll see a banner indicating when the last sync occurred.
Contact sync logic
When a contact from Outlook Directory is synced to Front, a link is established between the externalId property on the Front contact and the Active Directory user id.
When an internal contact is being synced to Front, we first try to see if the same contact already exist in Front by the following logic:
If an existing Front contact is found with the externalId property equal to this Outlook contact’s ID, the existing Front contact is updated
If the Outlook contact has not yet been linked to an existing contact in Front, Front will search for an existing contact with at least one of the same handles (e.g. email domains, phone) as the Outlook contact. This search is only performed if the user has mapped a handle field in the sync settings.
If an existing Front contact is found and that contact is not already linked to a Outlook contact, the Front contact is updated and linked to the Outlook contact
If an existing Front contact is found but it’s already linked to an existing Outlook contact A, we skip syncing Outlook contact B and log an error.
If no existing contact is found, Front will create a new contact and link it to the Outlook contact
Note that if a contact is deleted in Microsoft Entra, the contact will stop syncing to Front but the Front contact will not be deleted.
Pricing
This feature is available on the Professional plan or above.