
Import your Zendesk history into Front
Overview
If you previously used Zendesk, we recommend using one of our migration partners Help Desk Migration or ClonePartner to import your history into Front. Alternatively, you can use Front's importer (steps listed below) at no additional cost, but it is not actively maintained.
How it works
We will import:
Inboxes
Contacts
Conversations and messages
Attachments
Comments
Conversation assignments
We will not import:
Tags
Teammates
Rules
Instructions
Part 1: Input your API key
Step 1
Log into your Zendesk account and navigate to the Admin Center. Select Apps and integrations in the sidebar.
Step 2
Under APIs, select API configuration in the sidebar, and ensure API token access is enabled. Click Save.

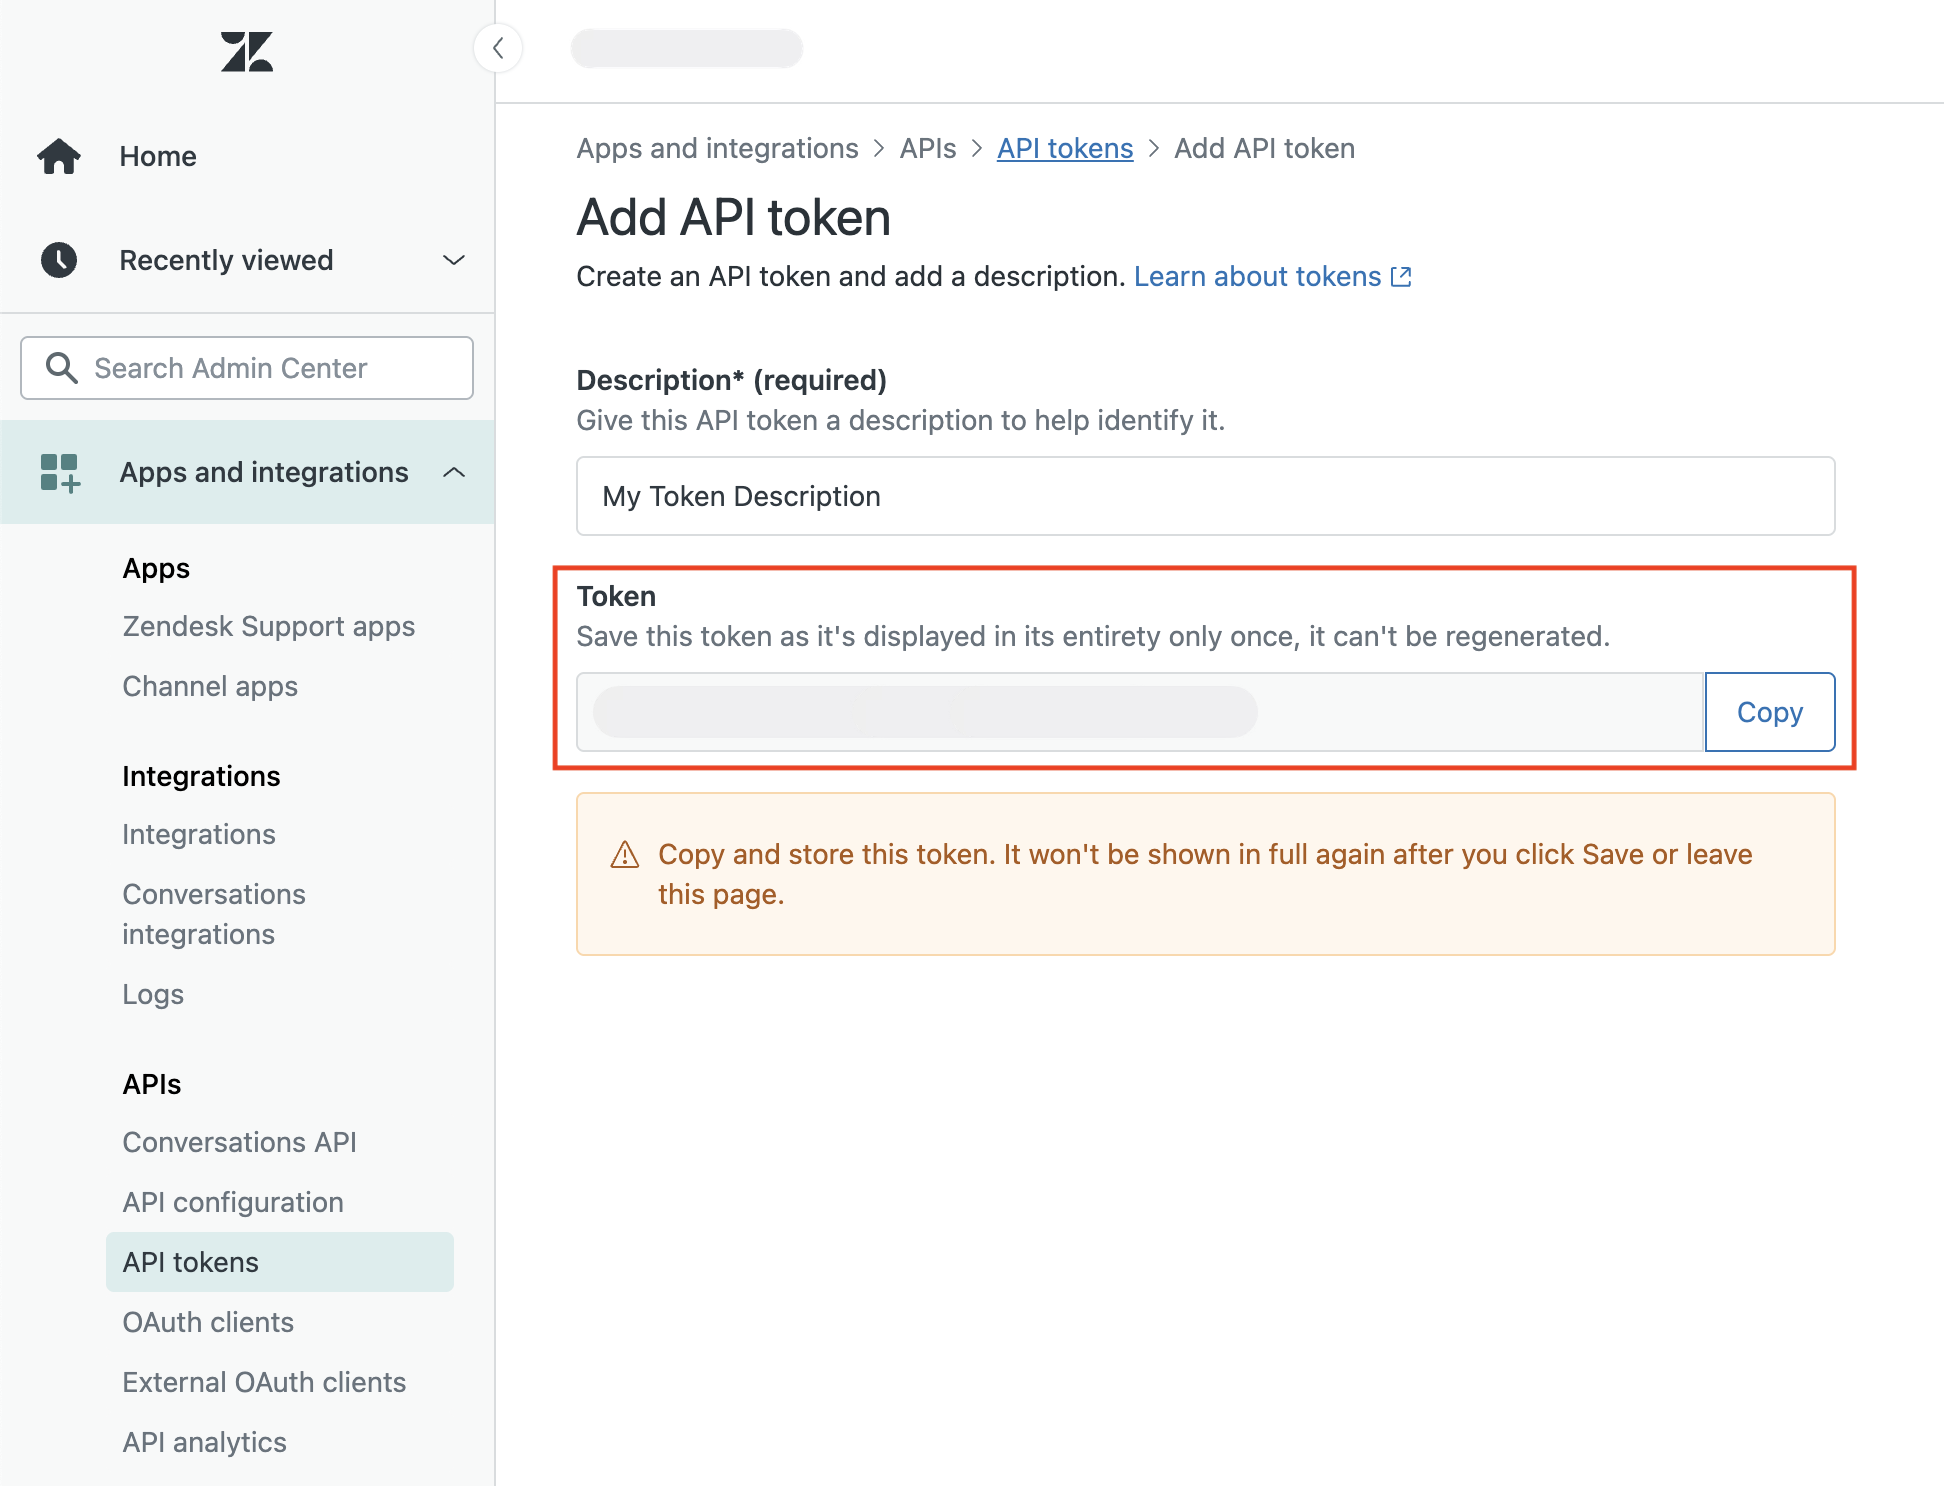
Step 3
To generate an API token, select API tokens in the sidebar. Add a token, enter a description (e.g. companyname_export), and copy the Token value. Click Save.
Note: Once you close this window, the full token will never be displayed again. If you ever forget it, you can create a new token.
Step 4
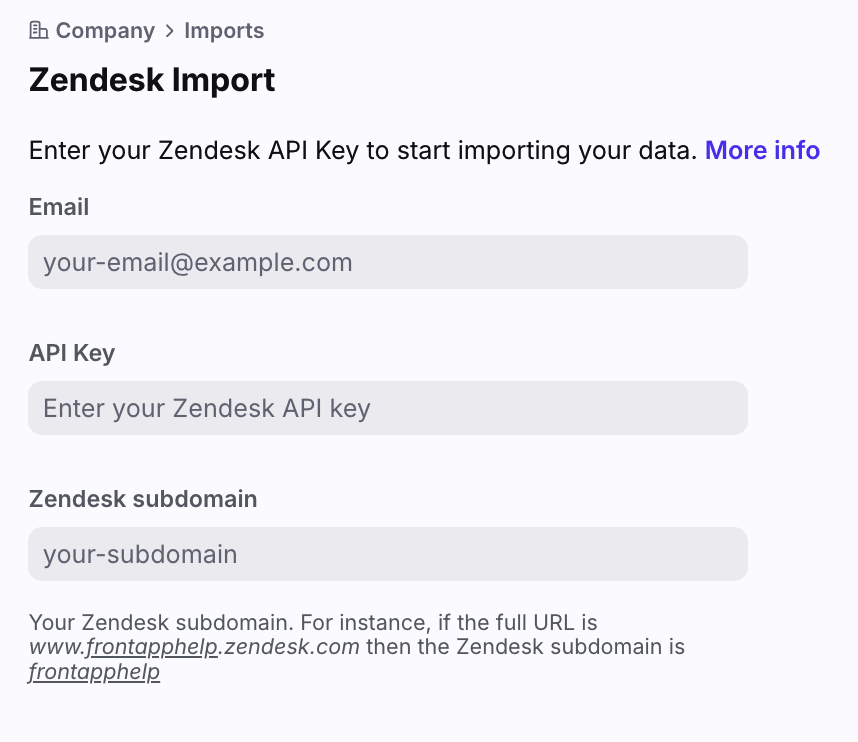
In Front, click the gear icon, navigate to company settings, then select Imports from the left menu.
Step 5
Select Zendesk from the list.
Step 6
Fill in the following fields (all required):
Email: Enter the email address that corresponds to the token you generated in Zendesk.
API key: Paste the token copied from Zendesk.
Zendesk subdomain: Enter your subdomain. e.g. If the full URL is www.frontapphelp.zendesk.com, the Zendesk subdomain is frontapphelp.
Step 7
Click Continue.
Part 2: Configure your import

Step 8
Configure import section: Select a workspace to import your Zendesk history to, select a default teammate, and select your import time frame.
The teammate you choose under Select Default Teammate is the Front teammate to which messages and comments will be attributed to, in the case there is no matching Front teammate for the Zendesk Agent.
We need to do this because comments and messages need to have an author in Front. In case the Zendesk Agent does not exist in Front, we will fallback on the teammate you selected in this step.
Step 9
Match Zendesk Agents to your Front teammates section:
If Use default is selected in Match Zendesk Agents to Front Teammates, the teammate specified in Select Default Teammate will be used.
Ensure all teammates are members of the team used for Select Workspace, otherwise the import will not start.
If the Zendesk Agent does not exist in Front, there is an option to invite them to Front and all tickets/conversations authored or assigned by them will be imported under their name.
Step 10
Match Zendesk Groups to your Front inboxes section: You will have a few different options in how to map over the Zendesk Groups:
Match to an existing Front inbox: Ensure the inbox is part of the workspace you selected in the Select Workspace dropdown. The import will not start if the existing inboxes do not belong to the selected workspace.
Skip Group: All tickets for that group will be ignored.
Create new Inbox: A new shared inbox will be created in the workspace selected.
Note: If you have multiple workspaces in Front, and inboxes are in different workspaces, you can repeat the steps above for each workspace.
Step 11
Click Start Import and the import will begin.
You'll see a page displaying the status of the import. The different statuses are:
Searching: The importer is determining the total number of groups and tickets to be imported.
Importing Groups as Inboxes: We are importing groups from Zendesk and creating inboxes for them.
Importing Teammates: We are creating new Front teammates, using the Zendesk Agent’s email and name.
Importing Tickets as Conversations: We are importing tickets and conversations from Zendesk and creating conversations, messages and comments for them. The assignee, status, and attachments will be respected when ported over to Front. Note: We will try to import as much history possible. There is no hard limit.
Done: All done importing!
Important to know
Do not delete inboxes related to this import in Front while the import is running or else the import will stop.
Zendesk unassigns deactivated Zendesk Agents from any tickets they were assigned to, so when Front imports a Zendesk ticket where the historical agent is deactivated, in a majority of cases they are imported as unassigned.
Zendesk tickets with a status of Pending, Hold, Solved or Closed at the time they were imported should be imported into Front as "Archived" conversations. Zendesk tickets with New or Open statuses should have an "Open" conversation status in Front.
We do hit edge cases since some of Zendesk’s data is not consistent with the docs. There may be cases where there’s still an assignee but no matching Zendesk Agent, or the agent was deactivated. In this case the ticket gets assigned to the default assignee, which is a value you will configure when running an import.