
How to enable and use the Vyte scheduling integration
Overview
Vyte's automatic scheduling tool makes scheduling one-on-one and even group meetings simple. Choose your attendees and a few times that work well based on your calendar, and everyone can vote for the times that work well for them. Once you’ve found a time, finalize the meeting, and Vyte will automatically send the calendar details to everyone.
The Vyte app for Front makes it easy to set up meetings directly from your inbox. Create a meeting invite for everyone on the email thread in Front’s integrations panel, and Vyte will automatically kick off the scheduling process. Once in the Vyte meeting creation flow, you can add or remove attendees to make sure everyone is in the loop.
Instructions
Enable the integration
Step 1
Click the gear icon, navigate to company settings, then select App store from the left menu.
Step 2
Select Vyte.in from the list of integrations. Click See details, then click Enable app.
Step 3
Click Start using this app to navigate to the app switcher in your sidebar.
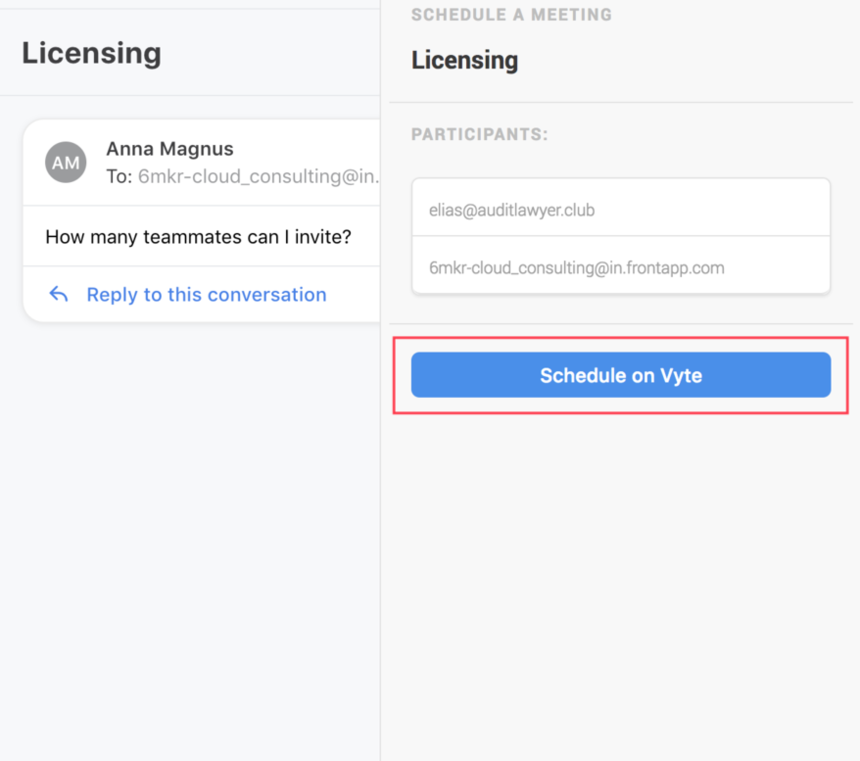
Step 4
Click Schedule on Vyte.
Step 5
You will be redirected to the Vyte website. Click Login with Google. Currently, you need a Google account to use Vyte. If you don't have a Google account, click Not using Google to tell them what mail and calendar provider you are using. They will let you know when Vyte expands.
Step 6
Select the Google account you want to use, and click Allow.
Create an event
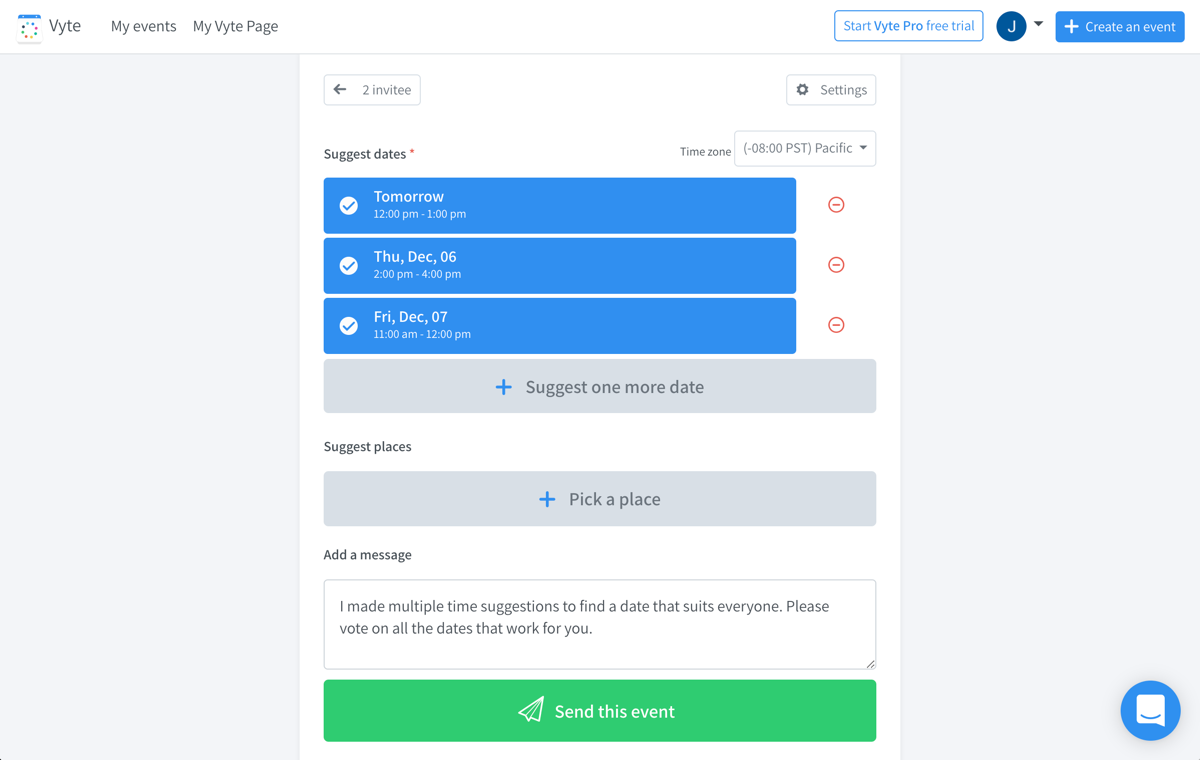
Step 7
Create your event from the plugin. Suggest a time and place, add a message, and click Send this event.
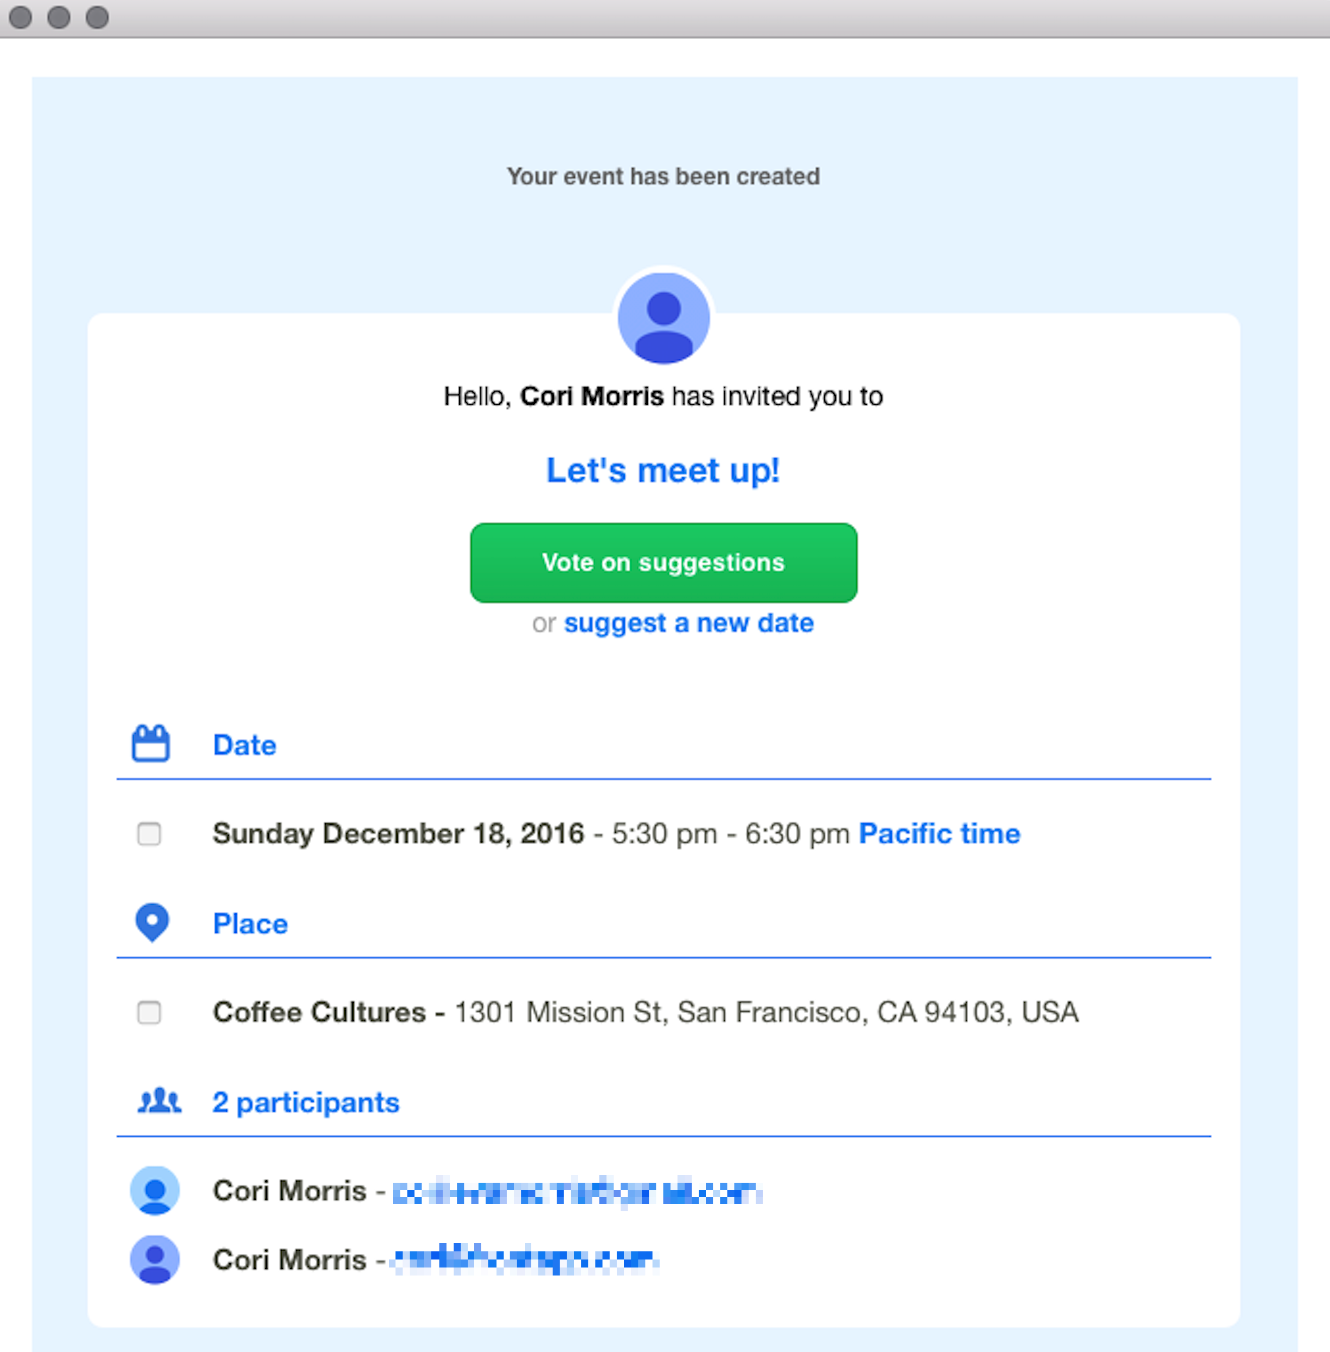
Step 8
You will then receive an email with the invite. Click Vote on suggestions, and confirm the event! The meeting should now appear on your calendar.
Troubleshooting
Vyte developed and maintains this integration, so if you have any questions please reach out to their team via chat on their website: https://www.vyte.in/
Pricing
This feature is available on all plans.