
Setting up SendGrid SPF/DKIM DNS records in Namecheap
Overview
SPF/DKIM records are industry-standard security mechanisms that authorize Front to send emails on our customers’ behalf. When you add a SMTP email channel, it’s critical to correctly configure SPF/DKIM records for your email domain because they reduce the risk messages you send from Front will be marked as spam in your recipients’ inbox. Here is how to set up the records if you use Namecheap as your DNS.
Don’t use Namecheap? Follow the instructions here instead.
Instructions
⚠️ Note that during this process you should add three new DNS records only. It is important that you do not modify any of your existing DNS records, as doing so may result in deliverability problems.
Step 1
Log in to your Namecheap account.
Step 2
From your home dashboard, click the Manage button on the domain name you'd like to configure.
Step 3
Click the Advanced DNS tab for this domain.

Step 4
You'll add three records to your DNS configuration: MX, SPF, and DKIM. These records correspond to the values you see in the Deliverability settings panel for your domain.
Step 5
For the MX record, scroll down to the Mail Settings section and select the Custom MX option.

Click Add new record, and add the record as described in your Front Deliverability Settings page, and hit the check mark to add this record to your existing MX records.
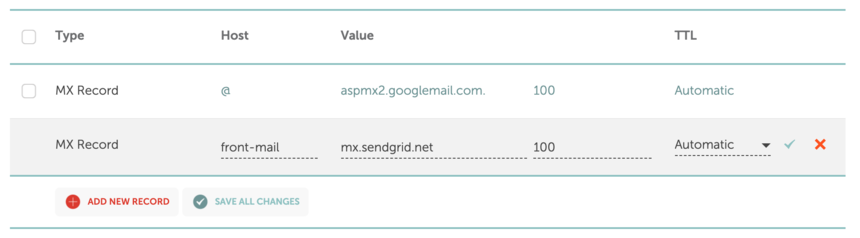
⚠️ Note that the Host field value here should be front-mail only - do not add your full domain (i.e. front-mail.example.com)
Step 7
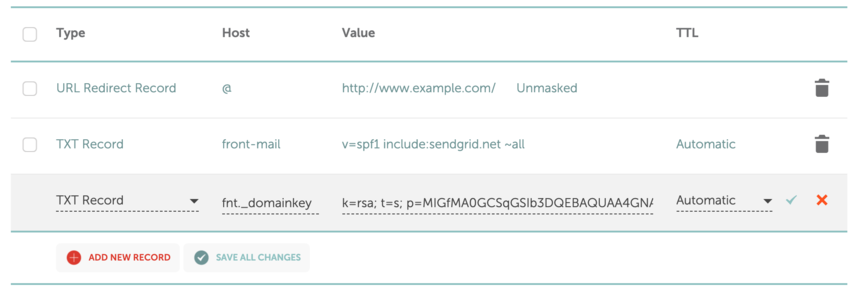
For the SPF record, scroll up to the Host records section, and click Add new record.
Add the record as described in your Front Deliverability Settings, and click the check to add this new record.
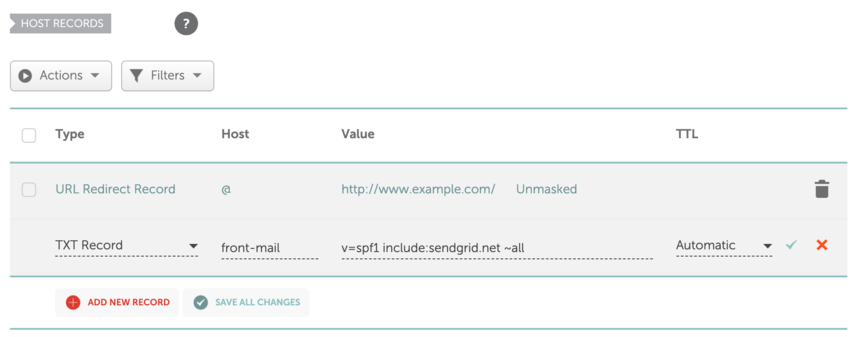
Similar to the SPF record, the DKIM record must also be a TXT record, added in this Host records section.
You should now have successfully configured your DNS records for your domain. If you plan to use multiple domains in Front, you may need to repeat this process for each domain.
Step 10
After configuring these records, head into your Front deliverability settings, and click Check DNS Settings to have Front confirm your records have been configured as expected.
As always, please contact us if you have any trouble configuring these records.