
Automatically associate contacts with accounts
Overview
Front uses the Email domains field in an account to automatically match contacts to accounts. This allows you to streamline contact management, save time on manual organization, and automatically organize customer interactions across your team. By linking email domains to specific accounts, Front ensures that all existing and future contacts with matching email addresses are seamlessly grouped under their corresponding account, giving you instant context for incoming conversations.
How it works
Each account has an Email domains field that allows you to specify email domains that should be matched to this account, which we highly recommend using. For example, after adding the acme.com email domain to an account, all existing and future contacts with email addresses matching that domain will be automatically associated with that account.
Users can still manually disassociate contacts from an account even if they were automatically associated based on the email domain. See this article to review how to edit the account associated with a contact.
Contacts that have been manually associated with an account will not be automatically associated with any other account based on the email domain.
Add domains to an account
Via the Relationships plugin
Step 1
Navigate to a conversation, then open the Relationships plugin in your right-hand sidebar.
Step 2
If a domain has not been added, click Add, then select the Email domains field.
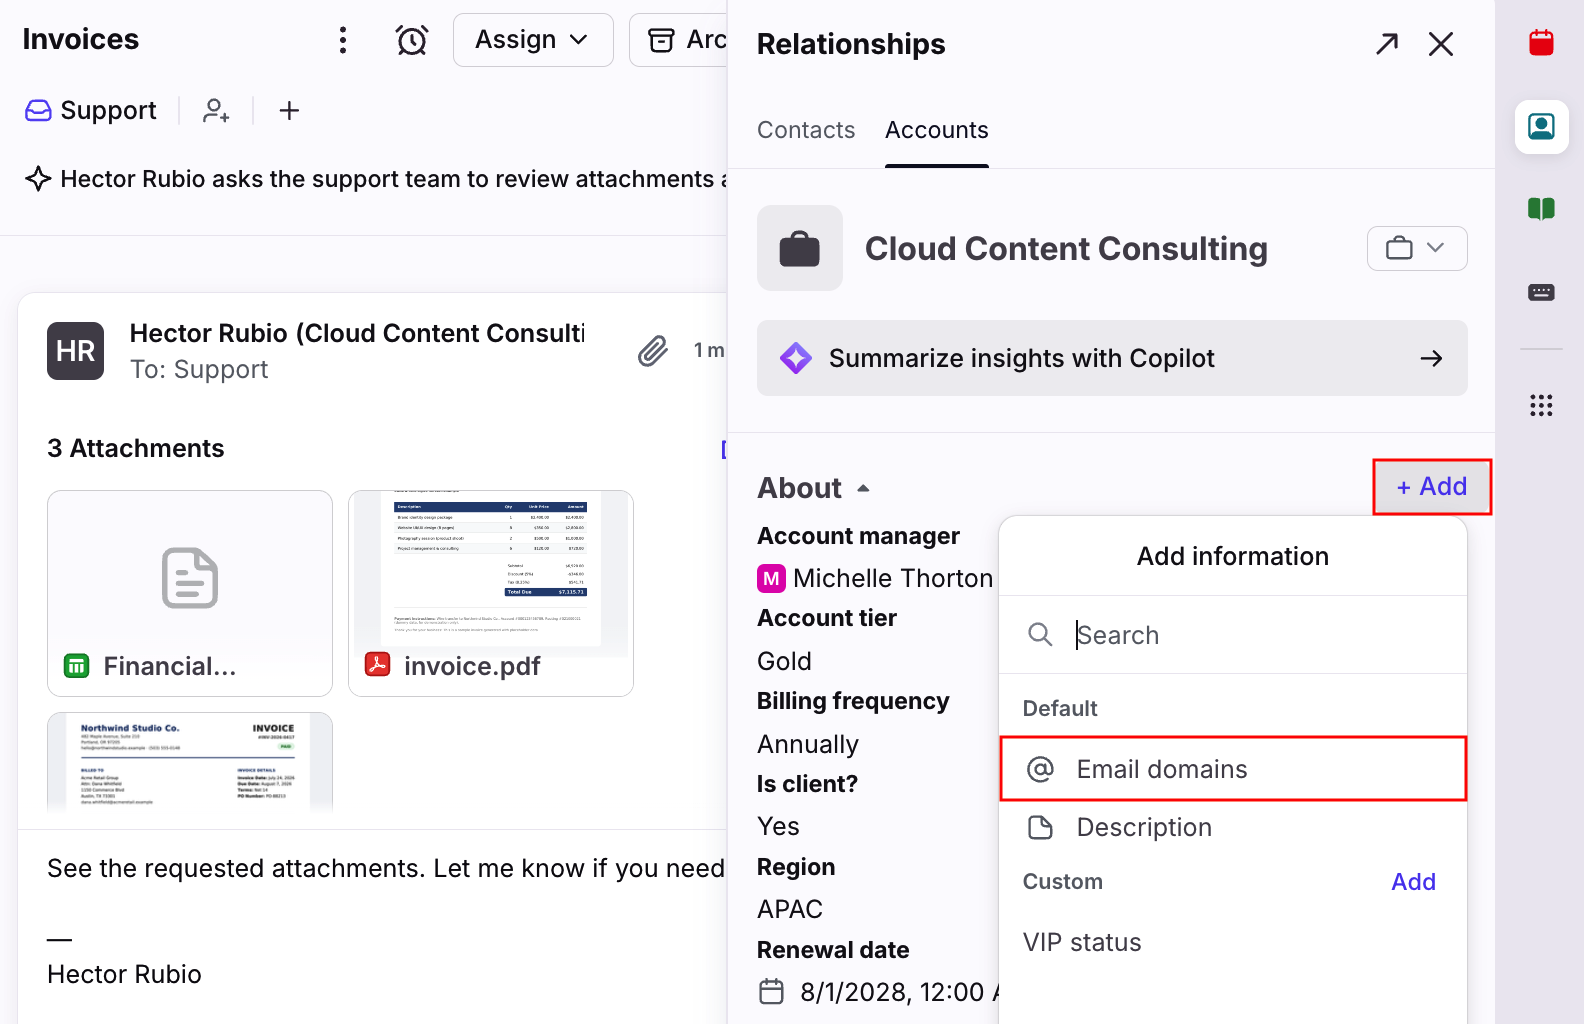
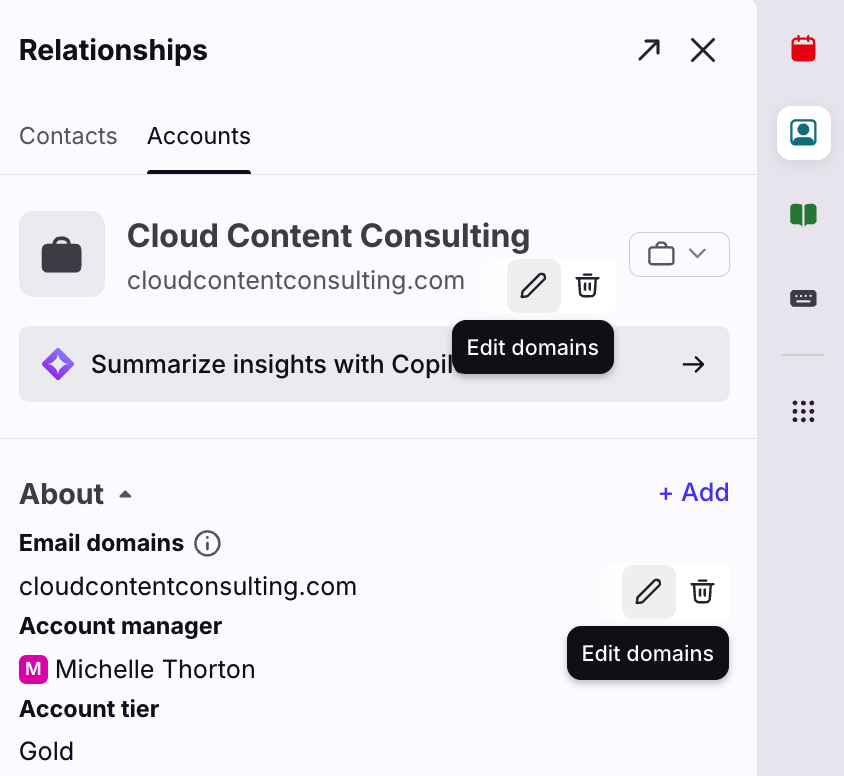
If domains have already been added to the account, hover over an Email domains field, and click the pencil icon to make changes.
Step 3
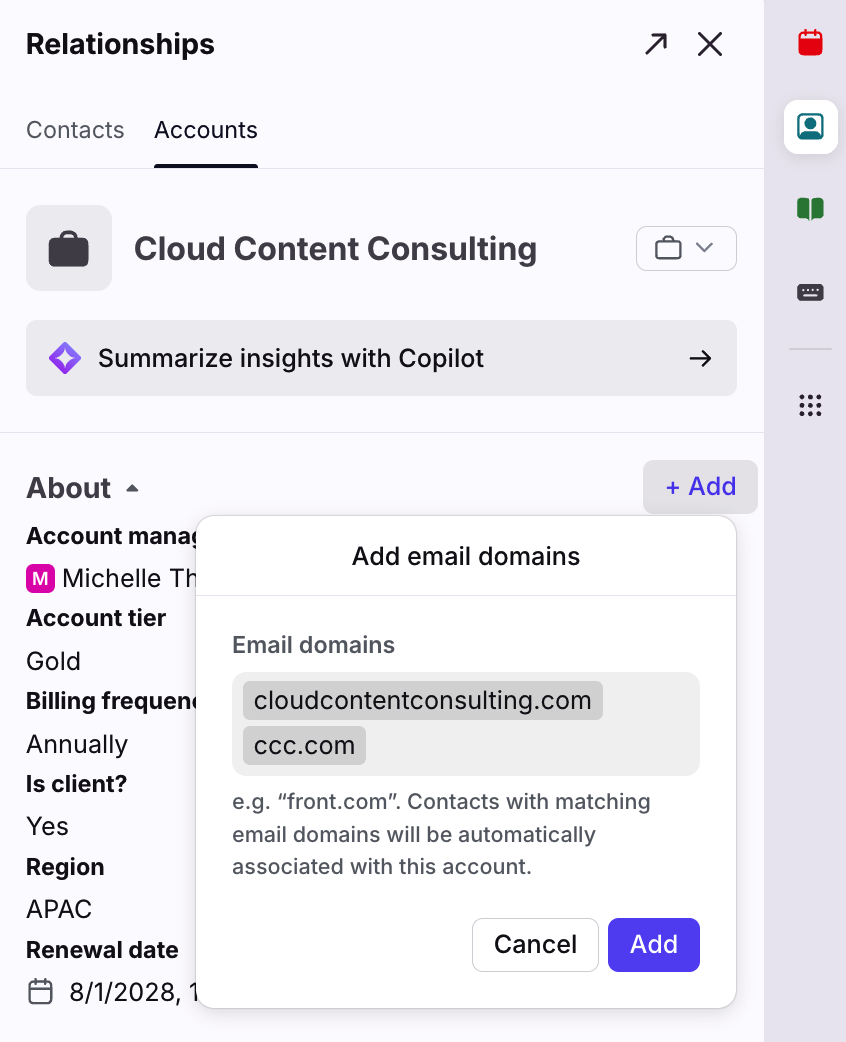
Enter the email domains associated with the account, then click Add to finish.
Step 4
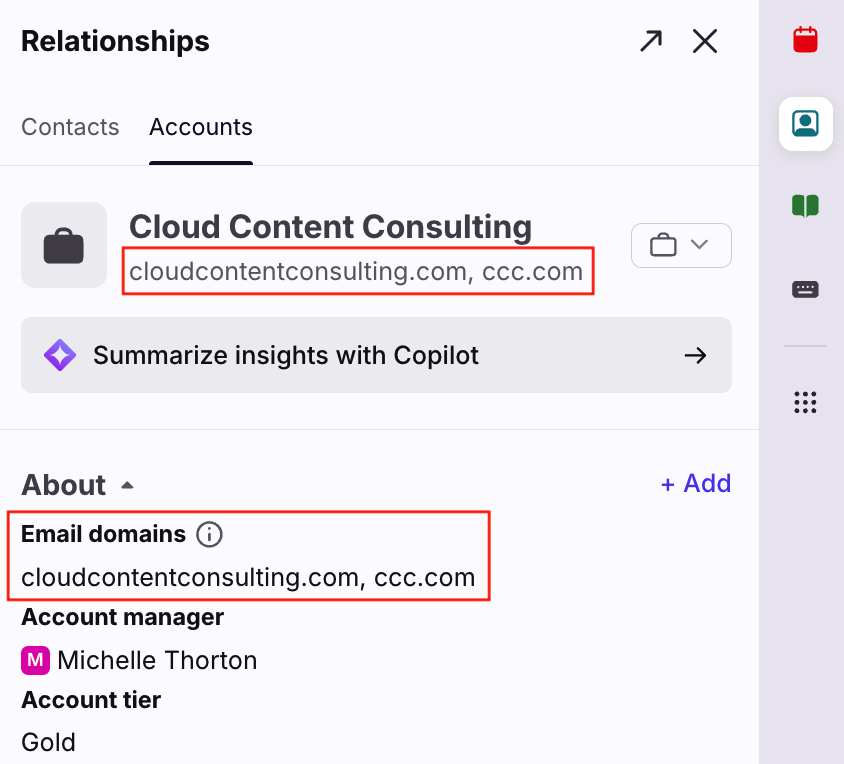
You’ll see the domains listed on the account, and contacts with matching email domains will be automatically associated with the account.
Via the account details page
Step 1
In the navigation menu, select Relationships.
Step 2
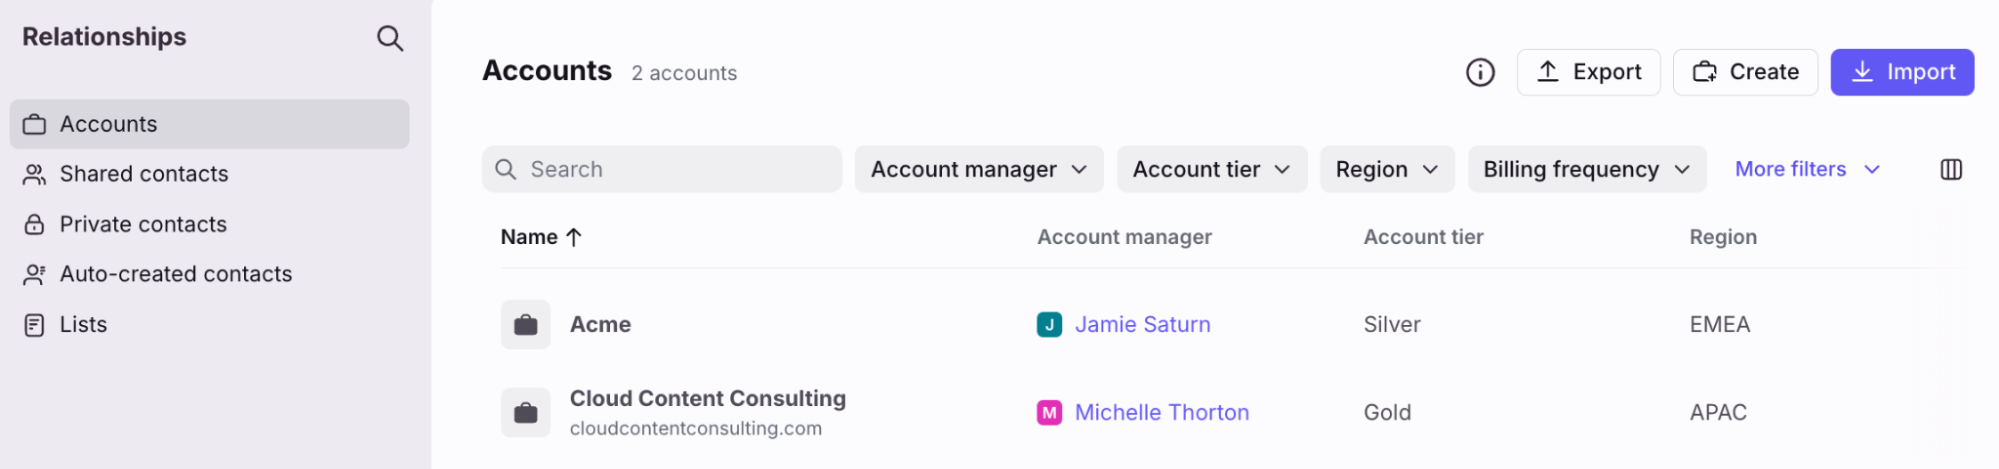
In the Accounts list, select the account you’d like to edit.
Step 3
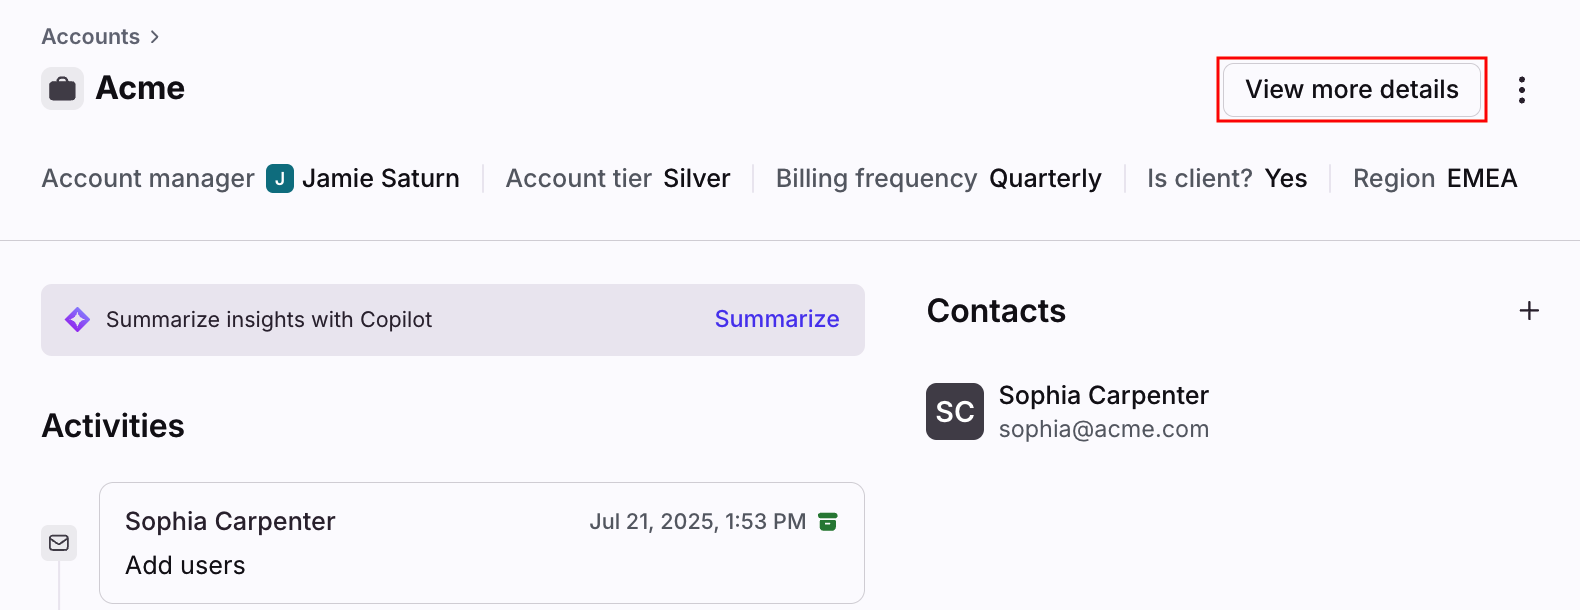
Click View more details.
Step 4
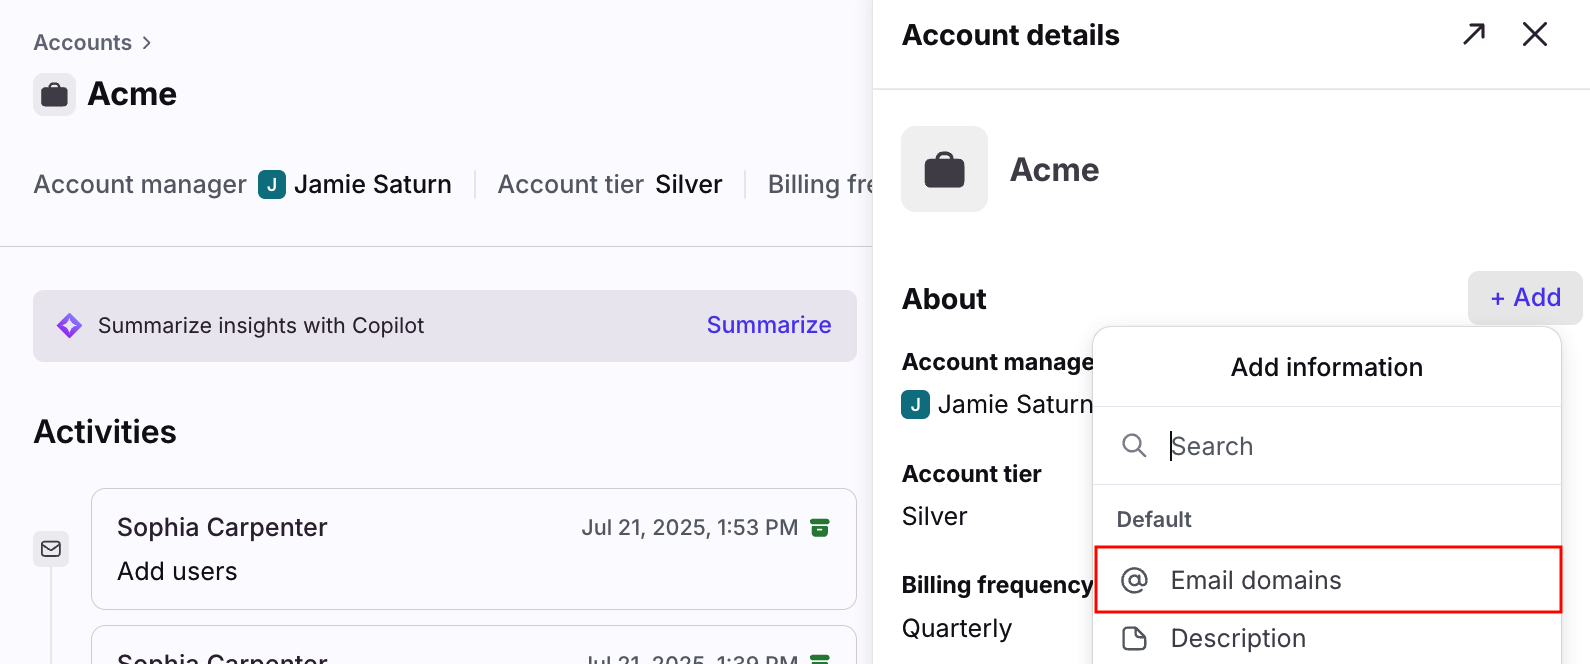
A panel will appear. If a domain has not been added, click Add, then select the Email domains field.
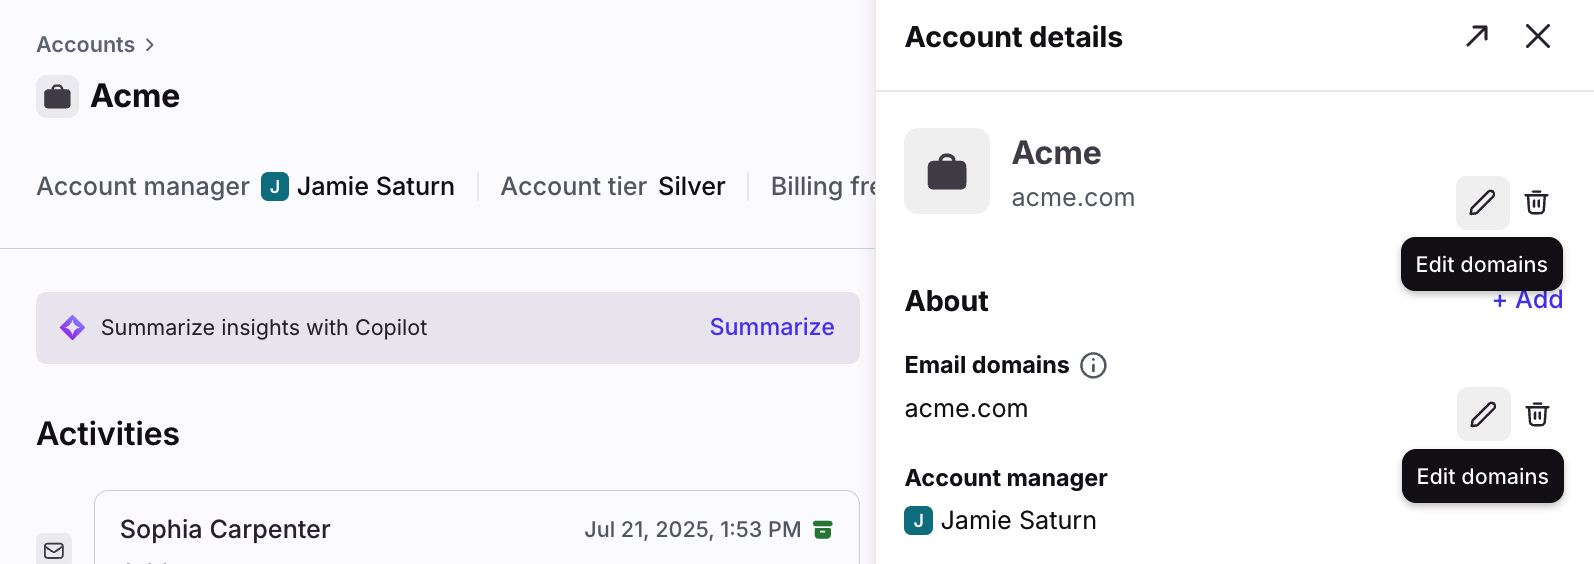
If domains have already been added to the account, hover over an Email domains field, and click the pencil icon to make changes.
Step 5
Enter the email domains associated with the account, then click Add to finish.
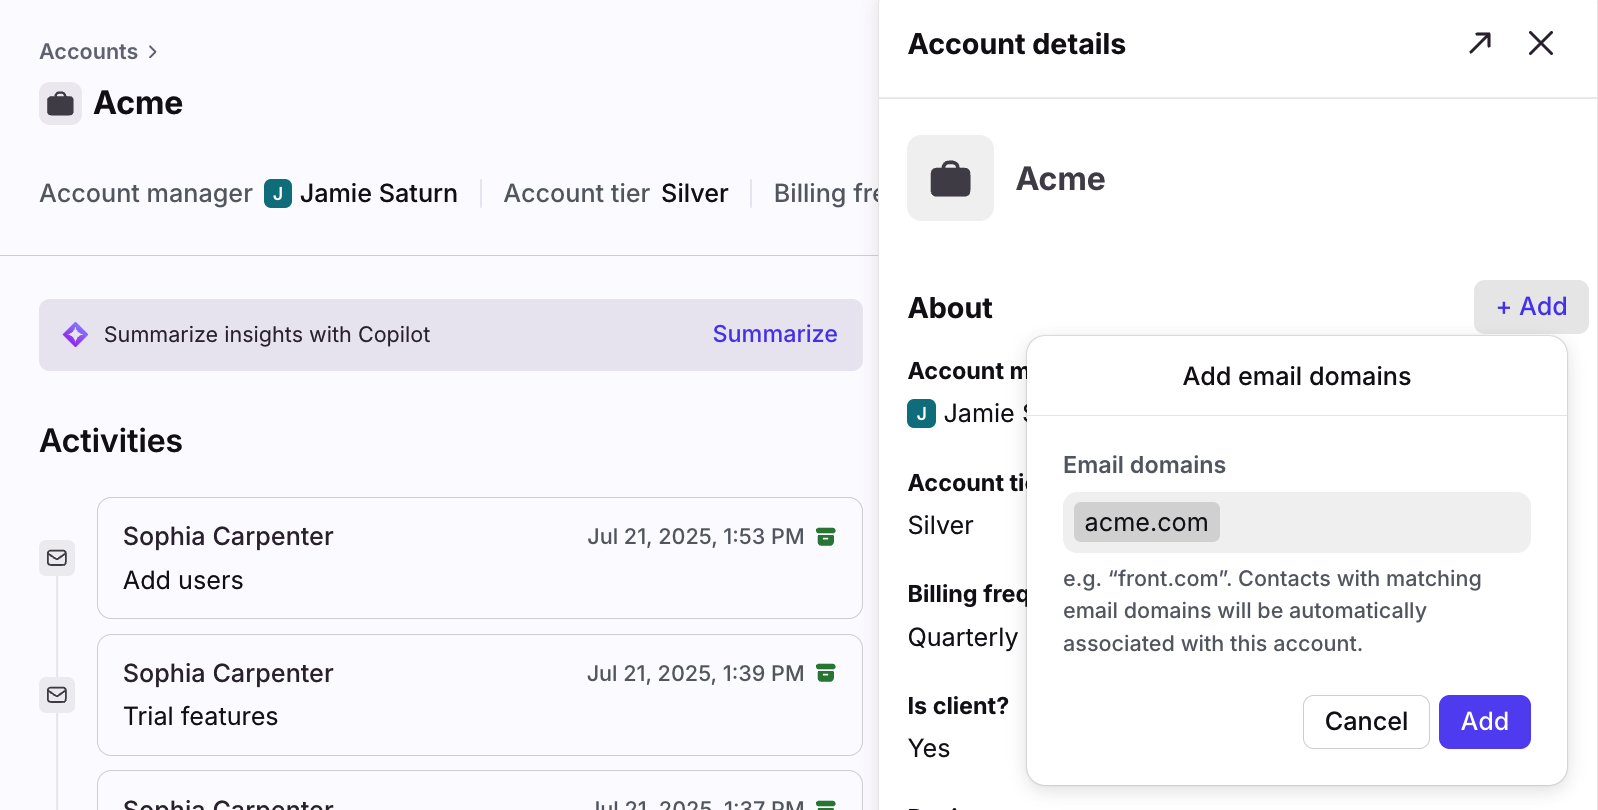
Step 6
You’ll see the domains listed on the account, and contacts with matching email domains will be automatically associated with the account.
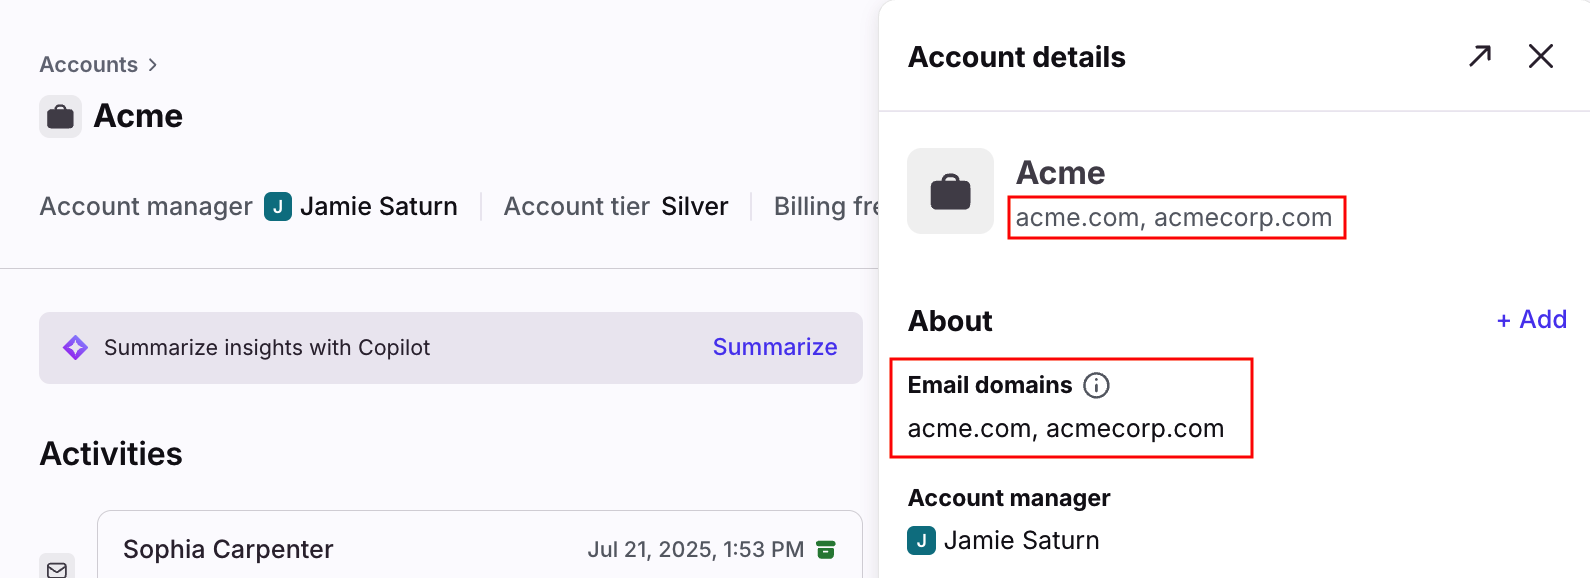
Via CSV upload or CRM sync
When uploading accounts to Front via a CSV file or syncing from a CRM, make sure a Domains field is included in your file or sync. See this article to review how to create and manage Front accounts.
Edit domains on an account
Step 1
Navigate to the Relationships plugin or the account details page for an account.
Step 2
Hover over an Email domains field, and click the pencil icon to edit the domains, or click the trash can icon to remove all the domains from the account.
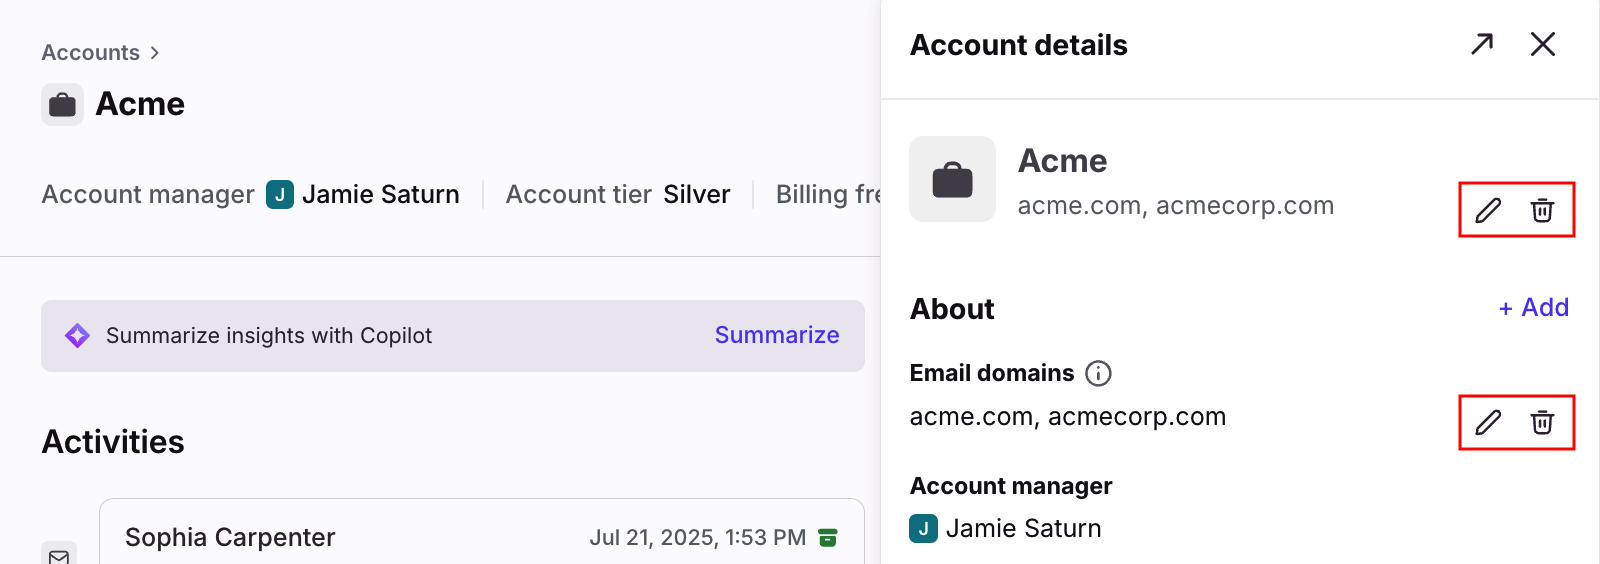
Step 3
If removing a domain, you’ll see a warning that contacts will be disassociated from the account. Click Save to confirm.
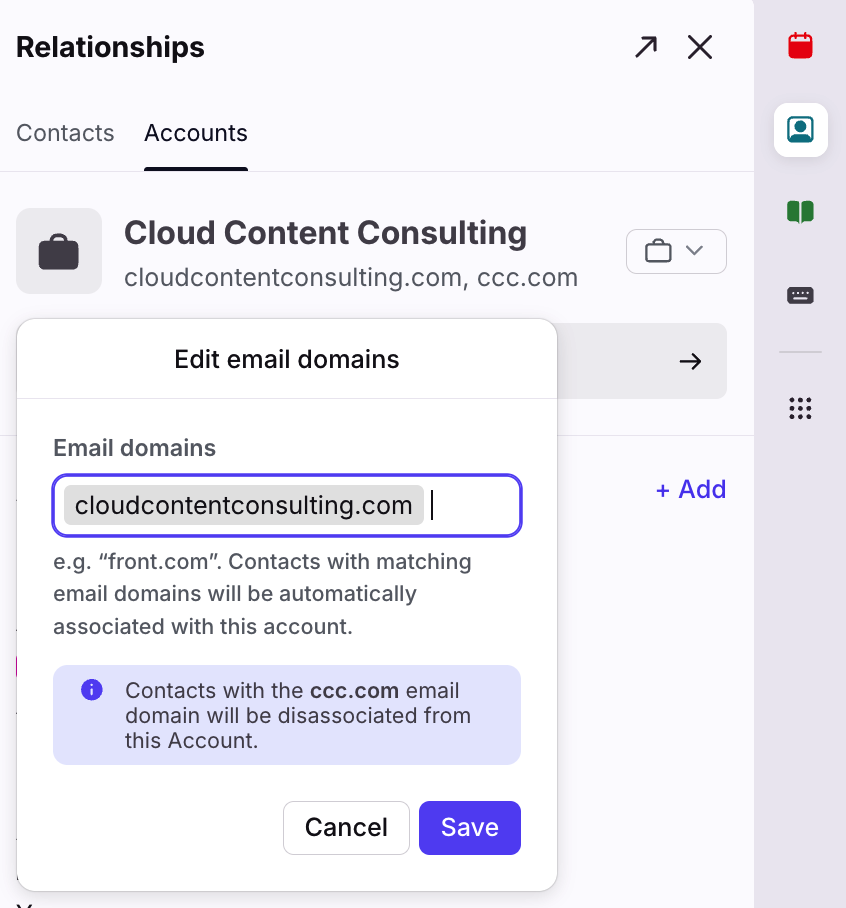
Step 4
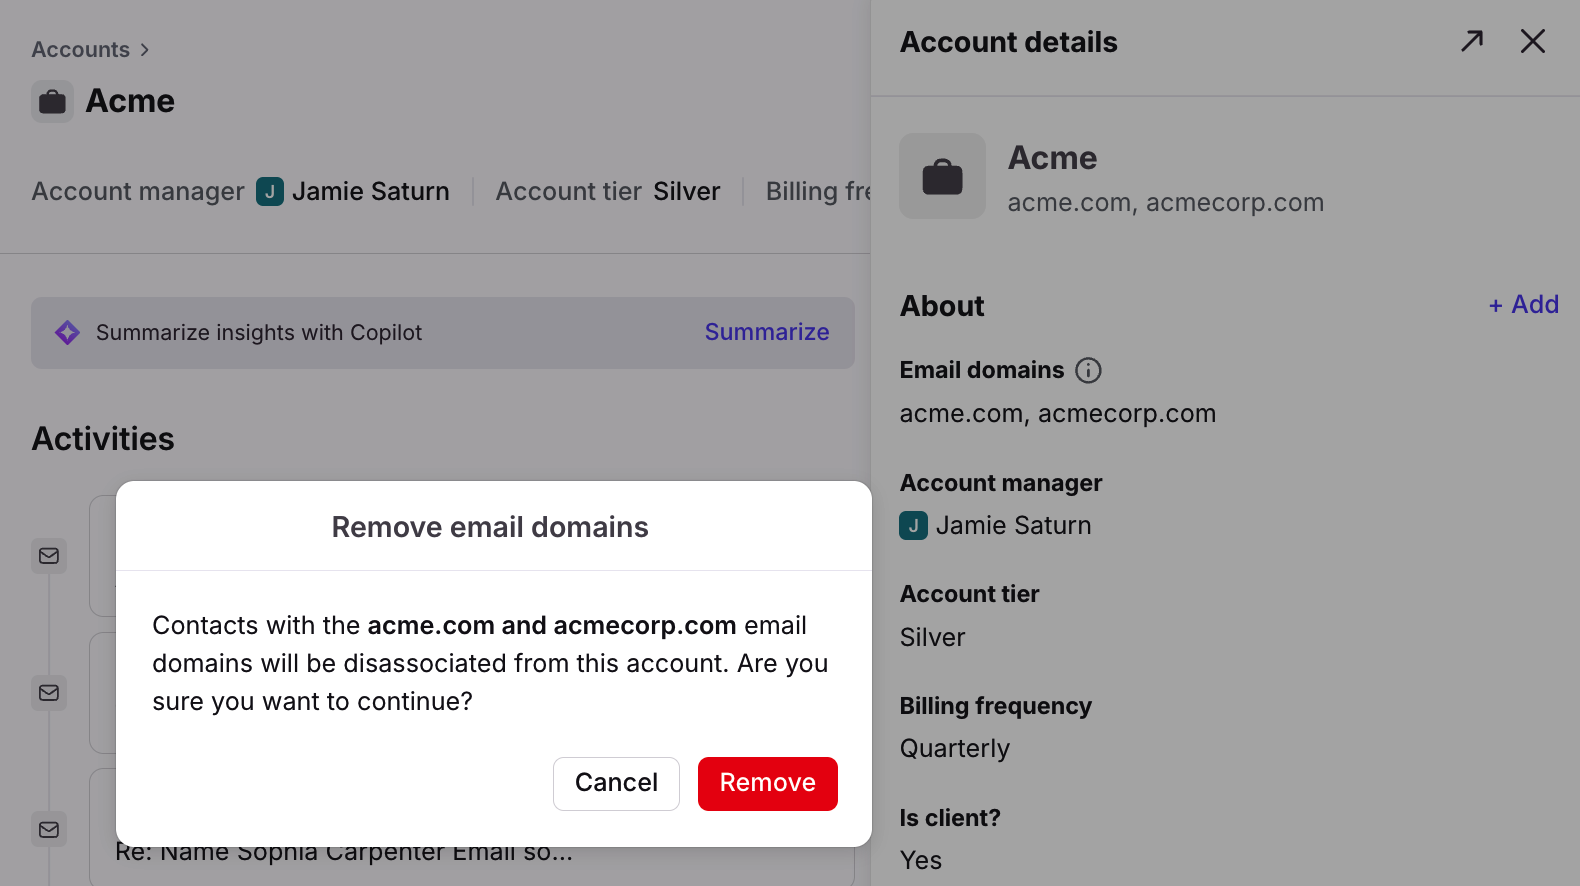
If removing all domains, you’ll see a pop-up with a warning that contacts with the domains will be disassociated from the account. Click Remove to confirm.
FAQ
See this FAQ section for common questions regarding Front accounts.
Pricing
This feature is available on all plans.