
Microsoft Dynamics 365 contacts sync
Overview
Front’s Microsoft Dynamics 365 contacts sync feature is a one-way sync of contacts from Dynamics 365 into Front. After you’ve synced contacts into Front, your team will be able to:
Automatically tag, assign and route conversations in Front using contacts data from Dynamics 365
Access helpful contact information in your inboxes
Associate contacts with accounts inside Front
Leverage contact auto-suggestion when composing in your inboxes
If you’d like to sync Dynamics 365 accounts to Front, see the instructions here.
How it works
Contacts are synced one-way from Dynamics 365 to Front
Front supports syncing a maximum of 1M contacts
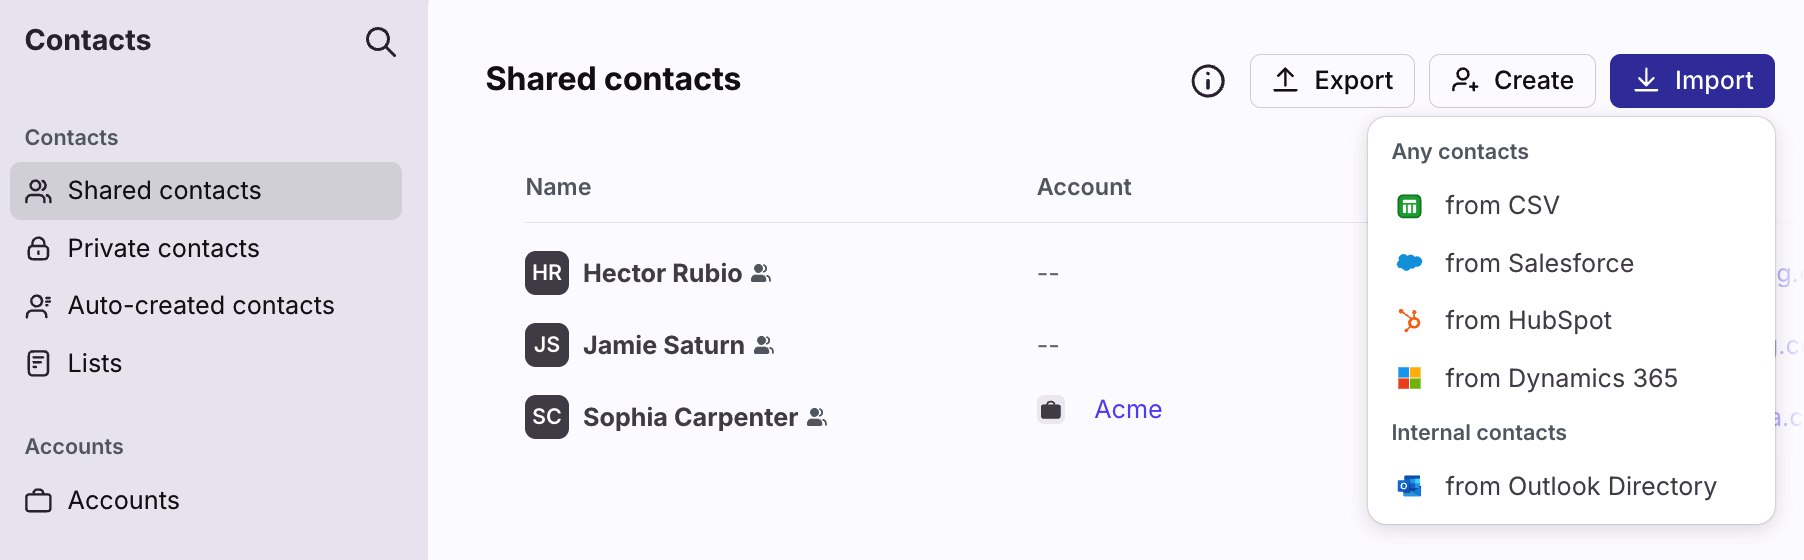
Synced contacts will appear under “Shared contacts” in the “Contacts” section
You can sync contacts from the Dynamics 365 accounts you’ve synced, or pick a list view from Dynamics 365 that contains the contacts you want to sync
Field mapping allows you to control which contact fields will be synced from Dynamics 365 to Front
Front only supports syncing from personal views (vs. system views or public views)
How your data stays up to date
When a contact is created or updated in Dynamics 365, Front picks up the change and updates the synced contact, usually within seconds.
A full sync of everything in scope runs every 24 hours as a backstop.
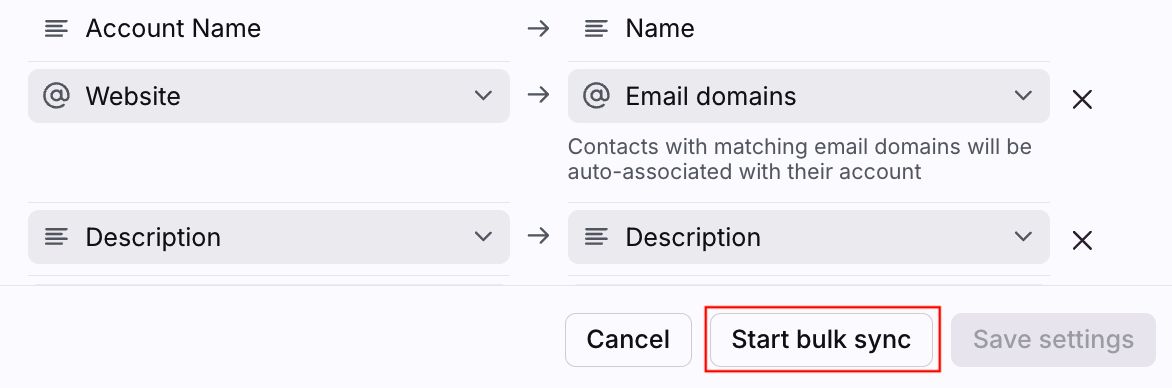
Admins can start a full sync at any time from the sync settings page with Start bulk sync.
Instructions
You must be a workspace or company admin in Front to set up the contacts sync.
Step 1
In the navigation menu, select Contacts to access the Contact Manager in Front.
Step 2
Click the Import button at the top right, then select from Dynamics 365.
Step 3
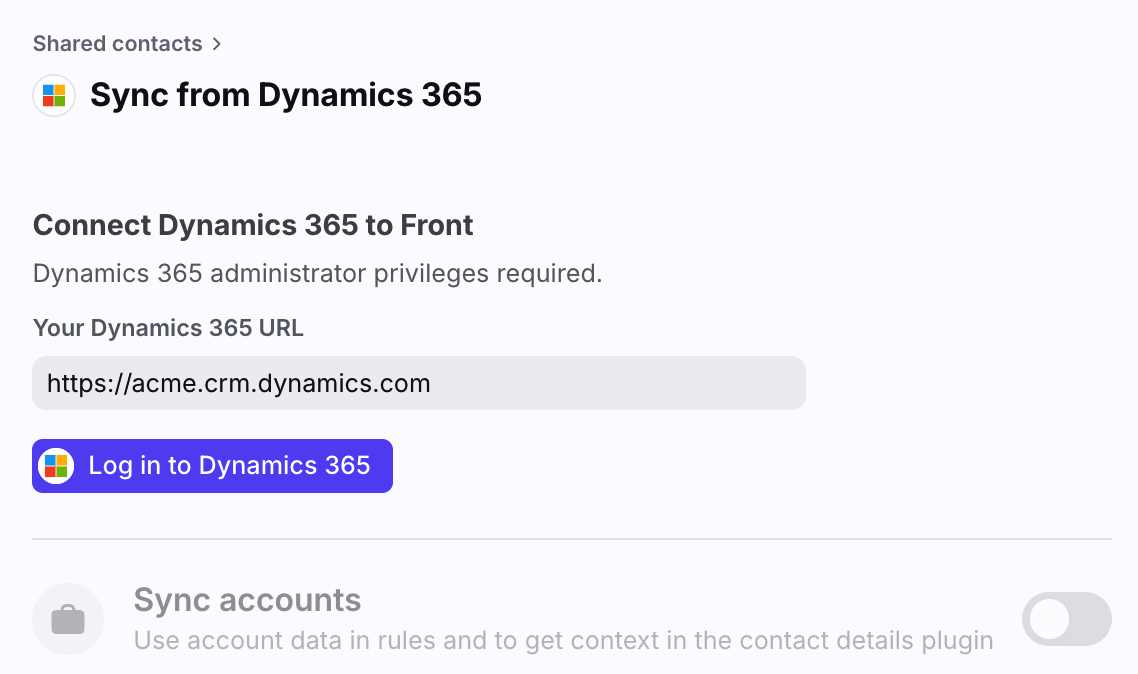
In the Your Dynamics 365 URL field, paste the web browser URL provided when you are logged into Dynamics 365. Click Log in to Dynamics 365 to connect your Dynamics 365 account. Dynamics 365 administrator permissions are required.
Step 4
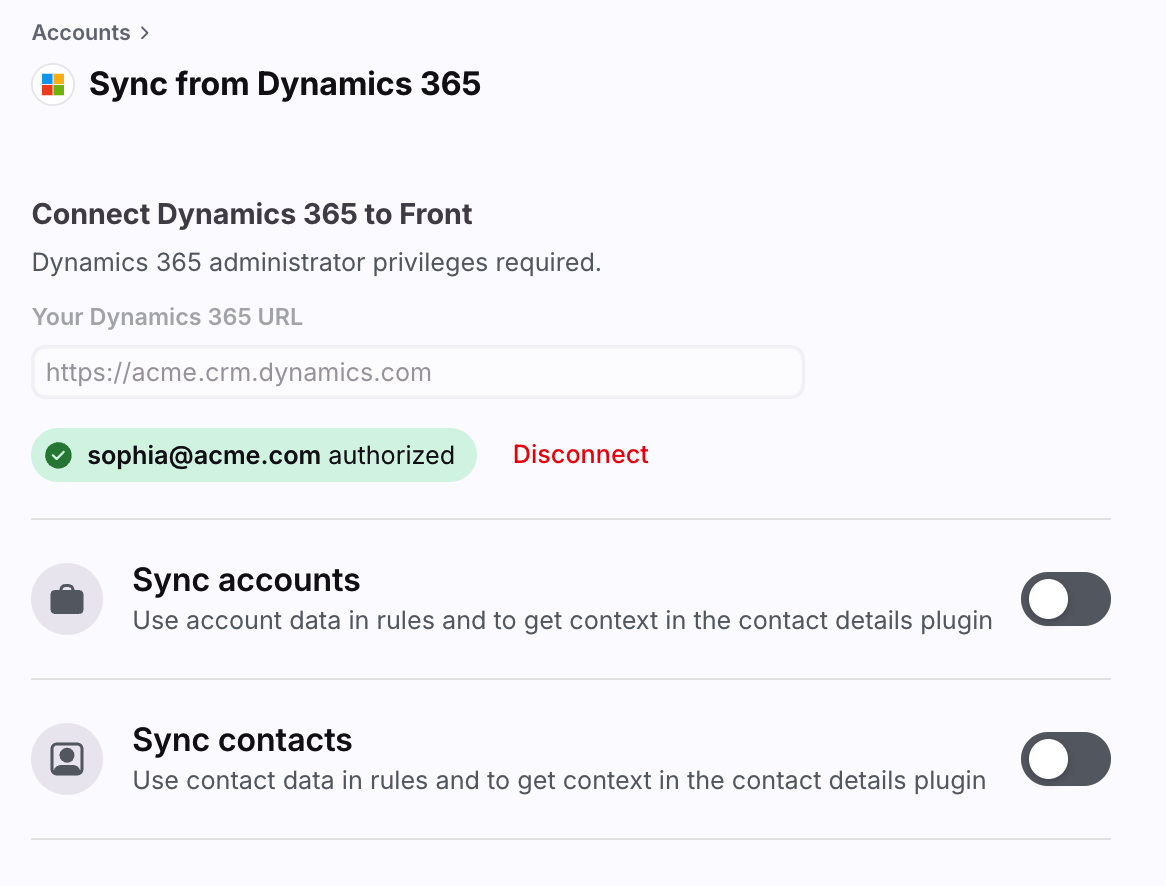
You can choose to enable either accounts sync, contacts sync, or both by clicking on the toggles. Sections to set up the sync will be displayed.
Step 5
For the accounts sync, see here for details about the Dynamics 365 accounts sync.
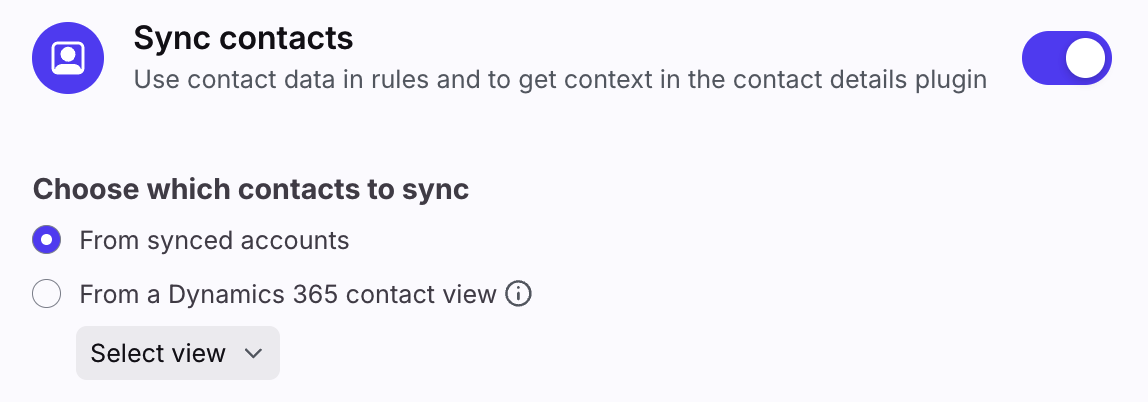
For the contacts sync, you can first choose which contacts to sync from two options:
From synced accounts: this will sync contacts belonging to Dynamics 365 accounts that have been synced to Front. Contacts will be automatically associated with their respective accounts. You can only select this option if you have enabled the Dynamics 365 accounts sync.
From a list: you can select a Dynamics 365 contact view to sync.
Note: Front supports syncing a maximum of 1M contacts.
Step 6
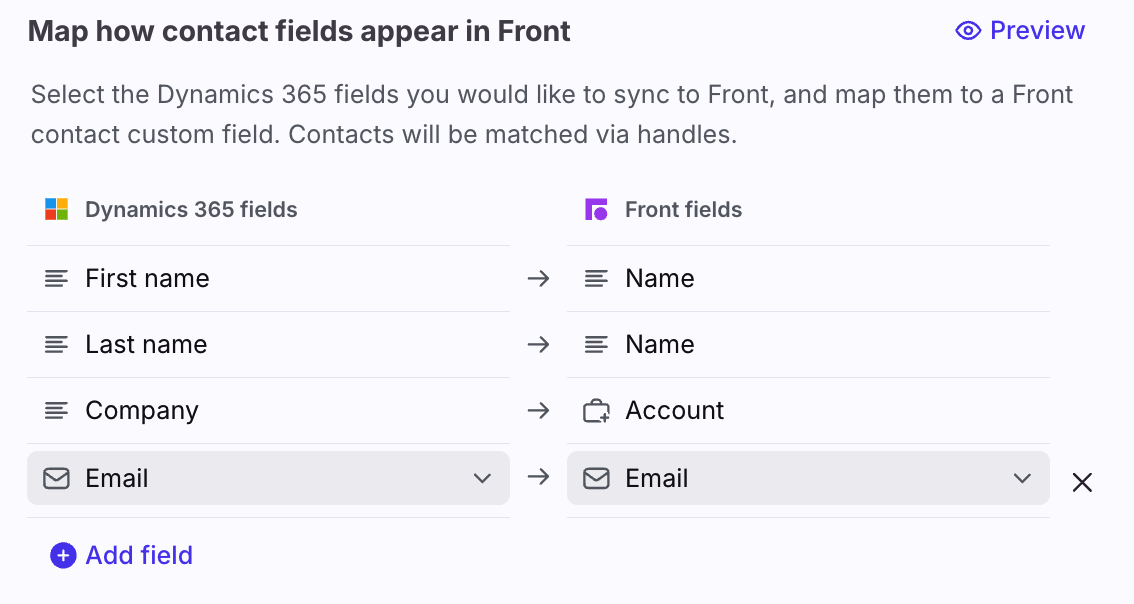
Select the contact fields you’d like to sync from Dynamics 365. Then choose the Front fields they should be mapped to. Front will automatically merge the First name and Last name fields into Name inside Front.
Step 7
Click Sync to start the contacts sync. You can edit or pause the sync at any time from the sync settings.
Viewing and editing data
After you’ve set up the sync, you’ll see contacts from Dynamics 365 appear under Shared contacts in the Contacts Manager.
If you click on a synced contact in Front, you'll see a Live sync indicator with the Dynamics 365 logo.
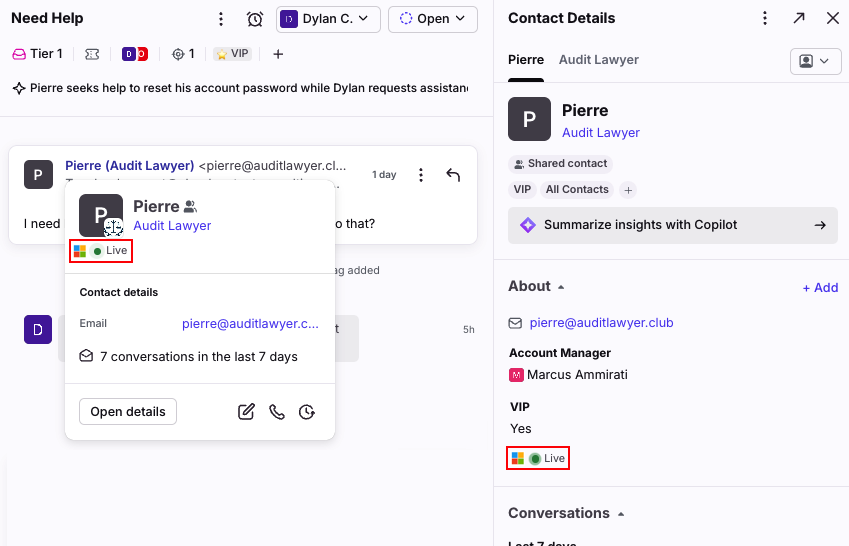
If you hover over contact fields synced from Dynamics 365, you’ll see an option to Edit in Dynamics 365. This ensures your data remains consistent between Front and Dynamics 365.
In the contact sync setup page, admins can manually trigger the sync using the Start bulk sync button.
Contact sync logic
When a contact from Dynamics 365 is synced to a contact in Front, a link is established between the externalId property on the Front contact and the Dynamics 365 contact ID.
When a contact from Dynamics 365 is being synced to Front, we first try to find a matching contact by the following logic:
If an existing Front contact is found with the externalId property equal to this Dynamics 365 contact’s ID, the existing Front contact is updated
If the Dynamics 365 contact has not yet been linked to an existing contact in Front, Front will search for an existing contact with at least one of the same handles (e.g. email domains, phone) as the Dynamics 365 contact. This search is only performed if the user has mapped a handle field in the sync settings.
If an existing Front contact is found and that contact is not already linked to a Dynamics 365 contact, the Front contact is updated and linked to the Dynamics 365 contact
If an existing Front contact is found but it’s already linked to an existing Dynamics 365 contact A, we skip syncing Dynamics 365 contact B and log an error.
If no existing contact is found, Front will create a new contact and link it to the Dynamics 365 contact
Note that if a contact is deleted in Dynamics 365, the contact will stop syncing to Front but the Front contact will not be deleted.
Handling sync errors
If Front encounters errors while syncing contact data, the user that triggered the sync will receive an email notification. Errors can be viewed from the Dynamics 365 sync settings page.
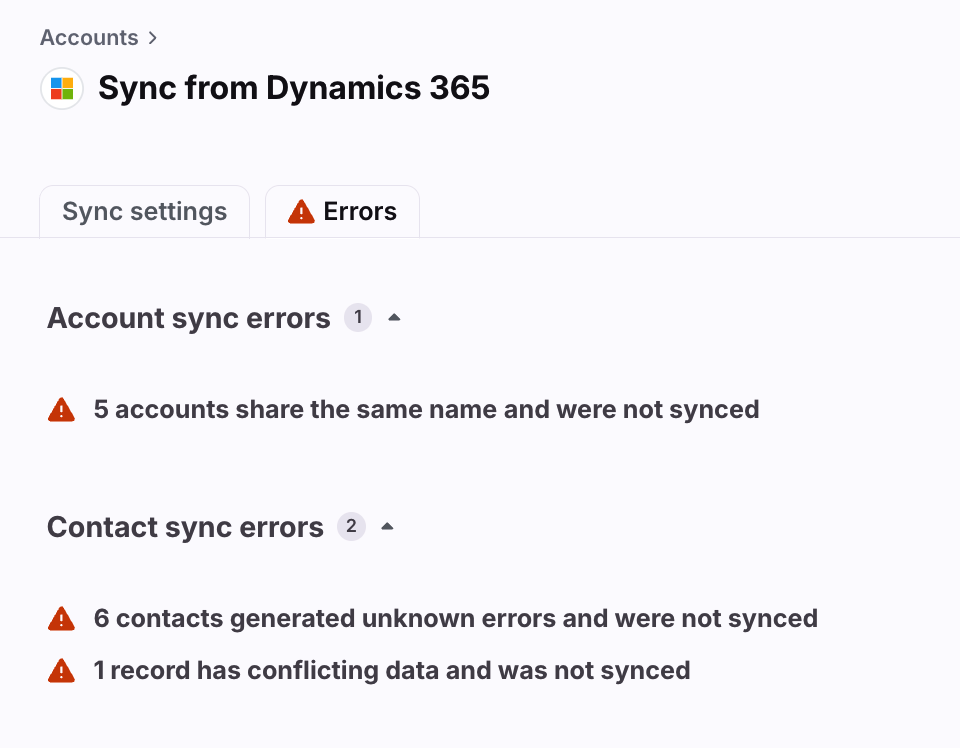
Common error types and how to resolve them:
Error type | How to resolve |
Contacts do not include an email | For each affected contact, include at least one handle (e.g. email or phone) to sync to Front |
Emails were already taken by | For each affected contact, check the email property in Dynamics 365 and replace it with a unique email. |
Phone numbers were already taken | For each affected contact, check the phone property in Dynamics 365 and replace it with a unique phone. |
Contacts were not synced because | View and fix account sync errors and restart the contact sync. |
Dynamics 365 field not found If one of the fields you mapped from Dynamics 365 is deleted in Dynamics 365, Front will stop syncing that field and you’ll have to choose a new field from Dynamics 365. | In sync settings in Front, choose a new Dynamics 365 field to sync to Front. |
Dynamics 365 list view not found If the list view you were syncing from Dynamics 365 is deleted, Front will stop syncing all contacts and you’ll have to choose a new list view to restart the sync. | In sync settings in Front, choose a new Dynamics 365 list view to sync to |
Using Dynamics 365 sync alongside the API
Contacts synced through the Dynamics 365 sync in Front are accessible through the Front API. Each synced contact will have the externalId property set to the ID of the Dynamics 365 contact it’s linked to.
FAQ
What if I encountered an error while connecting a Dynamics 365 account?
Check that API Permissions are enabled for your account
The Dynamics 365 user account you're connecting to Front must have the API Enabled permission. To enable API permissions as an admin:
Open the Dynamics 365 Business Central Administration tool.
Expand the OData Services tab, and select the Enable OData Services checkbox.
Select the Enable API Services checkbox.
Ensure that the Front connected app is not blocked
As a Dynamics 365 admin, you'll need to ensure that the Front connected app isn't being blocked by your settings in Dynamics 365.
Are self-hosted instances supported?
No. Front only supports cloud-based instances of Dynamics 365. Self-hosted instances of Dynamics 365 are not currently supported.
Pricing
This feature is available on the Professional plan or above.